
It’s important to make regular backups of your iPhone—that way, if you lose your iPhone or break it, you can restore your valuable data. This article explains how to back up an iPhone to a Mac or to iCloud.
Contents:
- What is a backup and should I back up my phone?
- How to back up iPhone to Mac
- How to back up iPhone to iCloud
Before we start
Disk Space Analyzer helps you find the biggest files and folders and free up space on your Mac from unneeded content. It provides a free trial.
Disk Space Analyzer
What is a backup, and should I back up my iPhone?
A backup is an exact copy of all the important data on your iPhone. You can use a backup to restore your data in the event your iPhone is lost or broken. If you don’t have a backup, your photos, contacts, and message history may be lost forever.
Backing up your iPhone is simple. You can transfer the data to your Mac, to iCloud or to any external storage. This article provides a step-by-step guide on how to do this.
How to back up iPhone to Mac
On older versions of macOS, you’ll use iTunes to back up your iPhone to your Mac. In macOS 10.15 and later, Apple has removed iTunes and the backup feature is now available right in Finder. Note that if you have a Windows PC, you will still use the most recent version of iTunes.
Here’s how to back up iPhone to Mac using Finder:
- Connect your iPhone to your Mac with a USB cable.
- Open Finder and select iPhone in the sidebar.
- Provide your passcode on your iPhone and select “Trust Computer.”
- If you ever used iTunes to back up your iPhone, the next screen you see will look familiar. Switch to the General tab and select “Back up all the data on your iPhone to this Mac.” If you want to encrypt your data, check the encryption box now.
- Click the Back Up Now button.
- The backup process will start. Be sure to wait until the process is finished, and don’t disconnect the USB cable until then. How long it takes will depend on the volume of data that has to be backed up.

Once you create a backup, you can use it to restore your data in case your iPhone is lost or damaged. You can also use it to easily move your data to a new iPhone.
How to enable iPhone wireless backup
To set up an iPhone or iPad for Wi-Fi backup, follow these steps:
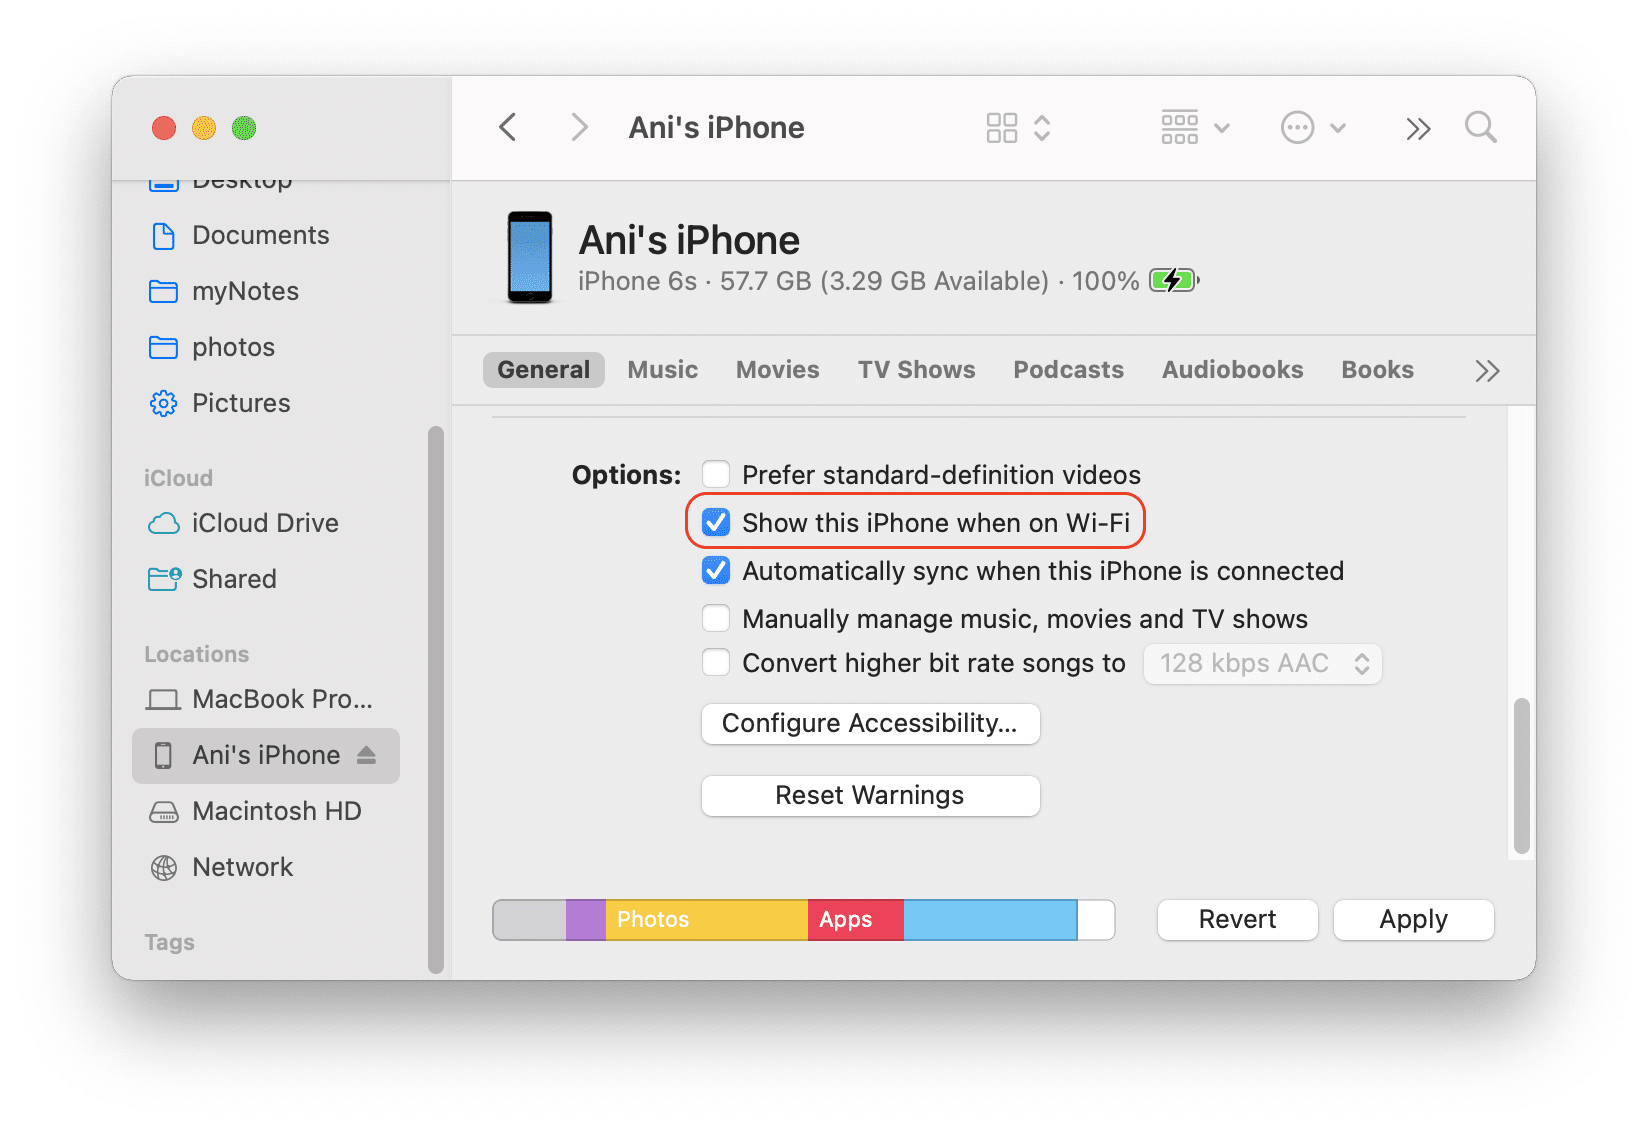
- Connect your iPhone to your Mac via the USB cable.
- Click iPhone in the Finder’s sidebar.
- Check Show this iPhone when on Wi-Fi.
- Click Apply at the bottom of the window.
- Now you can disconnect your iPhone from the USB cable.
- Make sure your iPhone is connected to the same Wi-Fi network as your Mac. If so, the iPhone should still be available in the Finder sidebar.
- Click Back Up Now in Finder and the backup will start over Wi-Fi.
How to back up iPhone to iCloud
You can also use iCloud to back up your iPhone data. This option allows you to make a backup directly from your phone, but if you prefer, you can also do it using Finder on your Mac.
Steps to back up your iPhone’s data to iCloud:
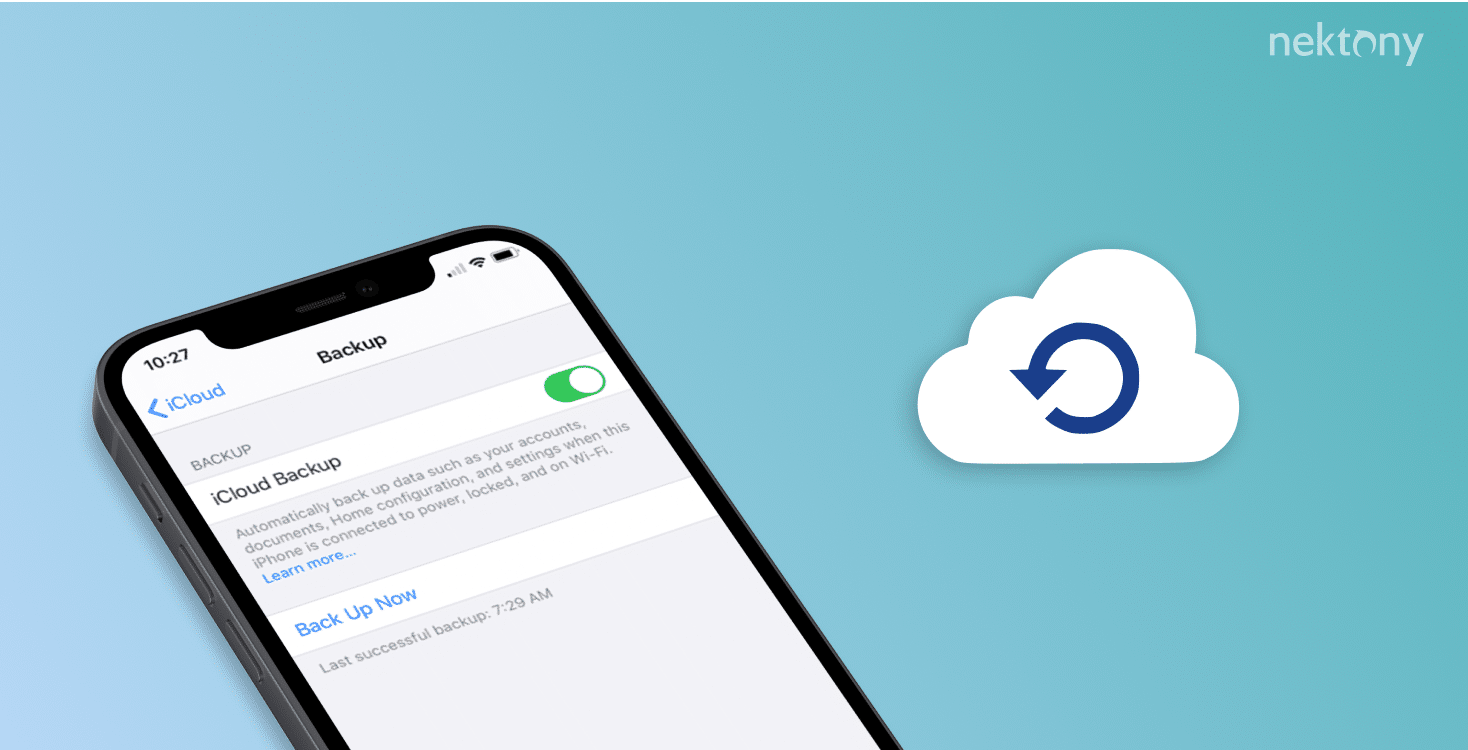
- On your iPhone, go to Settings.
- Tap your name at the very top of the screen.
- Choose iCloud → iCloud Backup.
- Tap Back Up Now.

Note that iCloud provides only 5 GB of free storage space. You have to pay a monthly fee if you want to back up more data. However, on iOS 15 and later, if you need to create a backup to move to a new device, you can use unlimited cloud storage for free. This kind of backup will be kept for 21 days from the date of creation, which should be enough time to sell your old iPhone and buy a new one; after that, the data will be permanently deleted.
This option is available to owners of any iCloud plan, including the free one. Here’s how to make a free transfer backup on an iPhone with iOS 15:
- Go to Settings → General → Transfer or reset iPhone.
- Tap Get Started.
- On the next screen, the system will ask you whether to back up data from all applications or only programs that are currently enabled. Since Apple offers unlimited space for this backup, you can choose to transfer all your data.
- Confirm the action and wait until the process is finished.

Just remember that this backup will be deleted after 21 days from the date it was created.
Conclusion
Don’t forget to make periodic backups of your iPhone’s data. If for some reason you don’t want to use iCloud or your Mac to store the backups, you can choose any other cloud service or use a portable hard drive. Whatever method you use, the safety of your photos and other data will be worth your time and any money you have to spend on cloud storage.


