
Have you noticed that, while you are surfing the net, you sometimes stumble on advertisements matching your recent search queries? That happens because your Internet Service Provider (ISP) can sell your Internet history to advertisers. In this article, we will share the tips how to keep your Internet history private.

What is the incognito browser?
The incognito window of the browser allows you to surf the Internet without saving information about the websites you visit, files you downloaded, search queries, logins etc. The only tracks you leave are saved by your bookmarks and browser settings. Please note: the private web browser does not make you anonymous in online mode. All the pages you visited can be seen by your internet service provider (ISP) and your IP address can be seen by website owners. If you want to be completely anonymous on the internet, you should use a VPN.
Is private browsing important?
While you use the Internet, your browser stores information about your steps and activity. This data is stored in the browsing history, cache files and cookies as well as the downloaded files’ history. On the one hand, this is convenient since you do not need to enter all your data (login, password, email address, etc.) every time you visit a site. On the other hand, this data can be hacked by malefactors; in fact, anyone who uses your computer can see your history and all your online activity. If you want to browse incognito and keep all your history private, you can use a private browser.
An advertisement is usually annoying but sometimes it can be helpful, saving you time and offering the service or product you are looking for. It sounds like advertisers want to be more friendly and useful. But it can also be scary when you understand that all your personal information is being collected by the ISP every time you go online.
Here are just 3 things about browser history to be concerned about:
- It is insecure to use passwords on websites which don’t encrypt them. This data could be hacked into the databases of information your ISP collects.
- Your medical history and financial history may be at risk. When you are googling a medical condition or symptom, your searches are potentially public. When you check your bank balances and credit card statements, it is easy for hackers to identify which bank you use.
- Your location is not private. All flight, bus/train tickets queries are in your browser history. If you get directions online or look up traffic, you reveal your location, including your home address. In our previous article, you can learn how to save on travel tickets.
How to clear my Internet history
As you surf on the net, most website data are cached locally on your computer to help sites load faster and cut the amount of data you would need to pass over to your Internet connection.
To keep your browsing history private and to free up disk space on your computer, you should clear your Internet activity history. Here are some steps on how to view and clear the Internet history in Safari:
- Open the Safari browser.
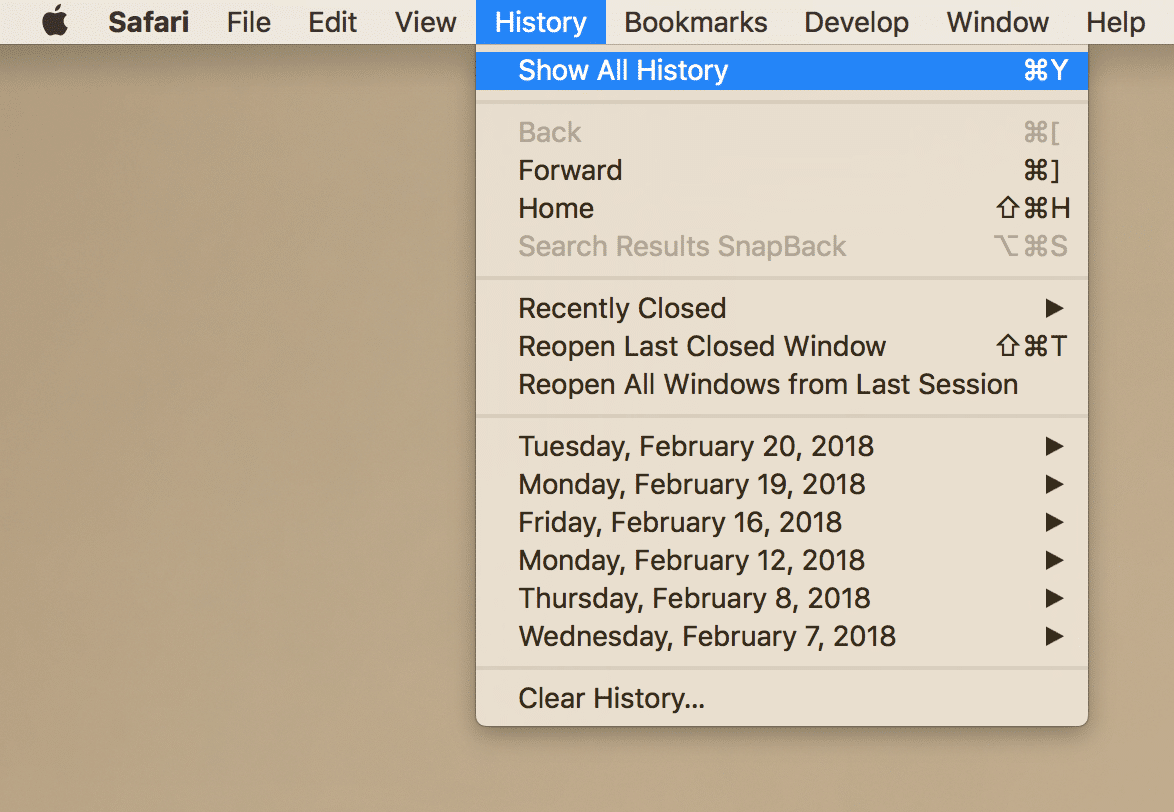
- Click the History menu at the top of the screen. Select Show All History in the drop-down menu to edit or view your browser history in detail. You can also use the Command+Y shortcut to enable quick access to Show All History.

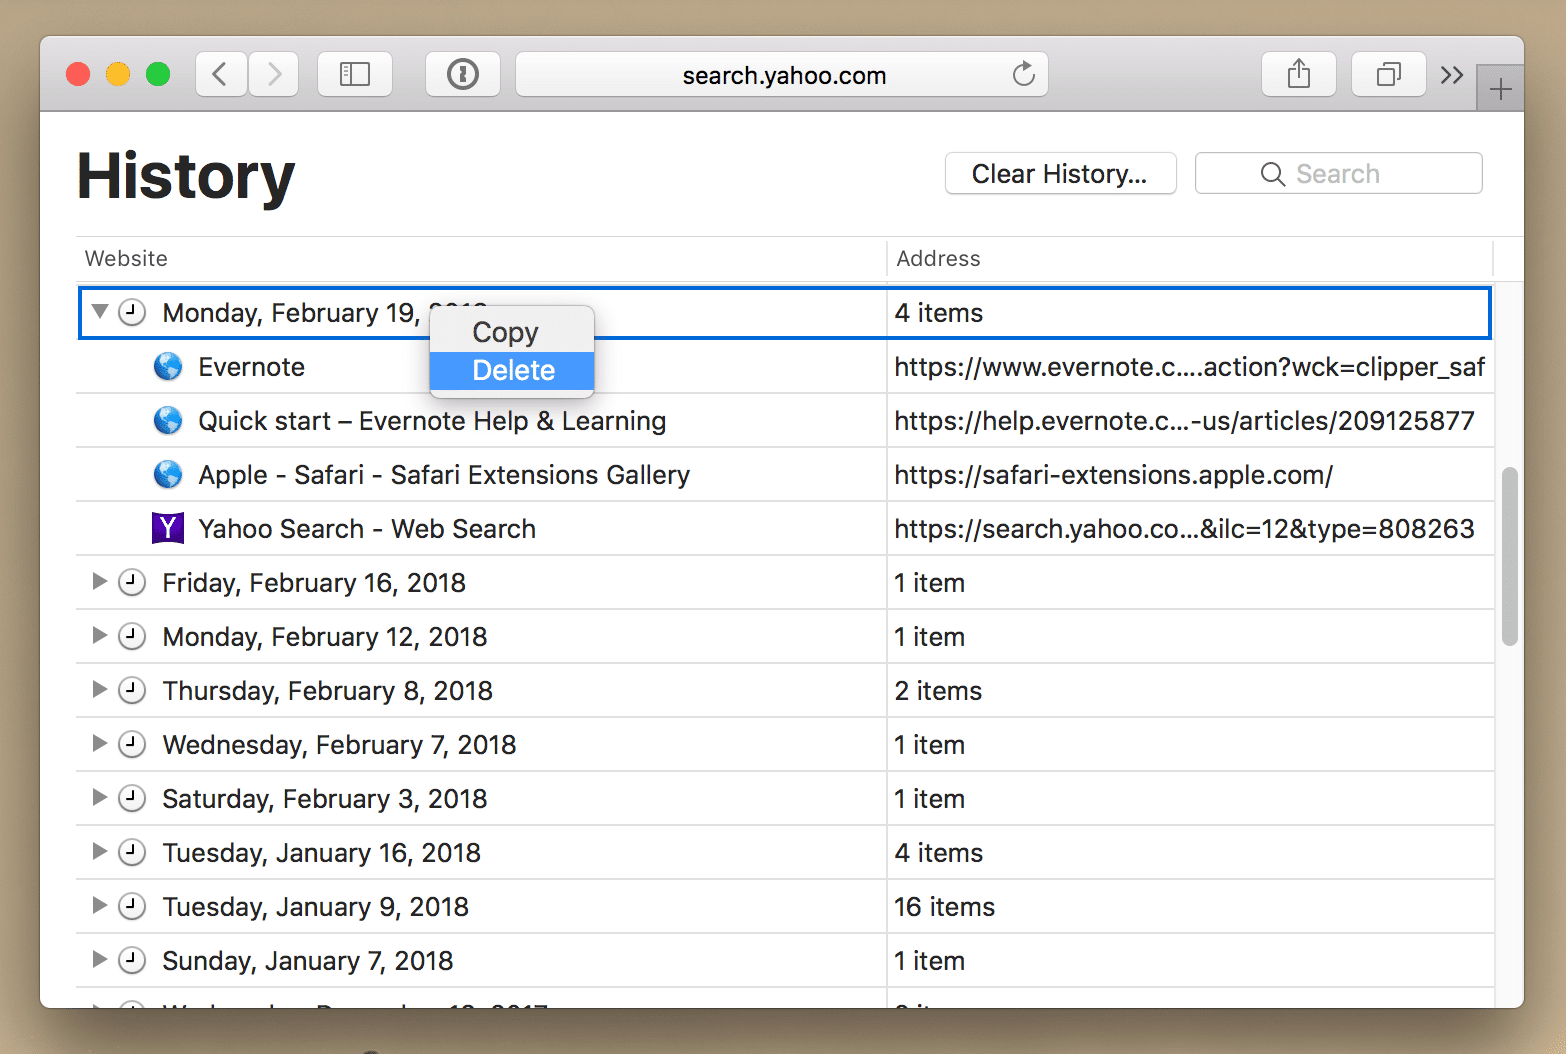
- Then click Show All History. In a new window, you will see a list of websites visited. To delete an item from the list, make a right-click and select Delete.

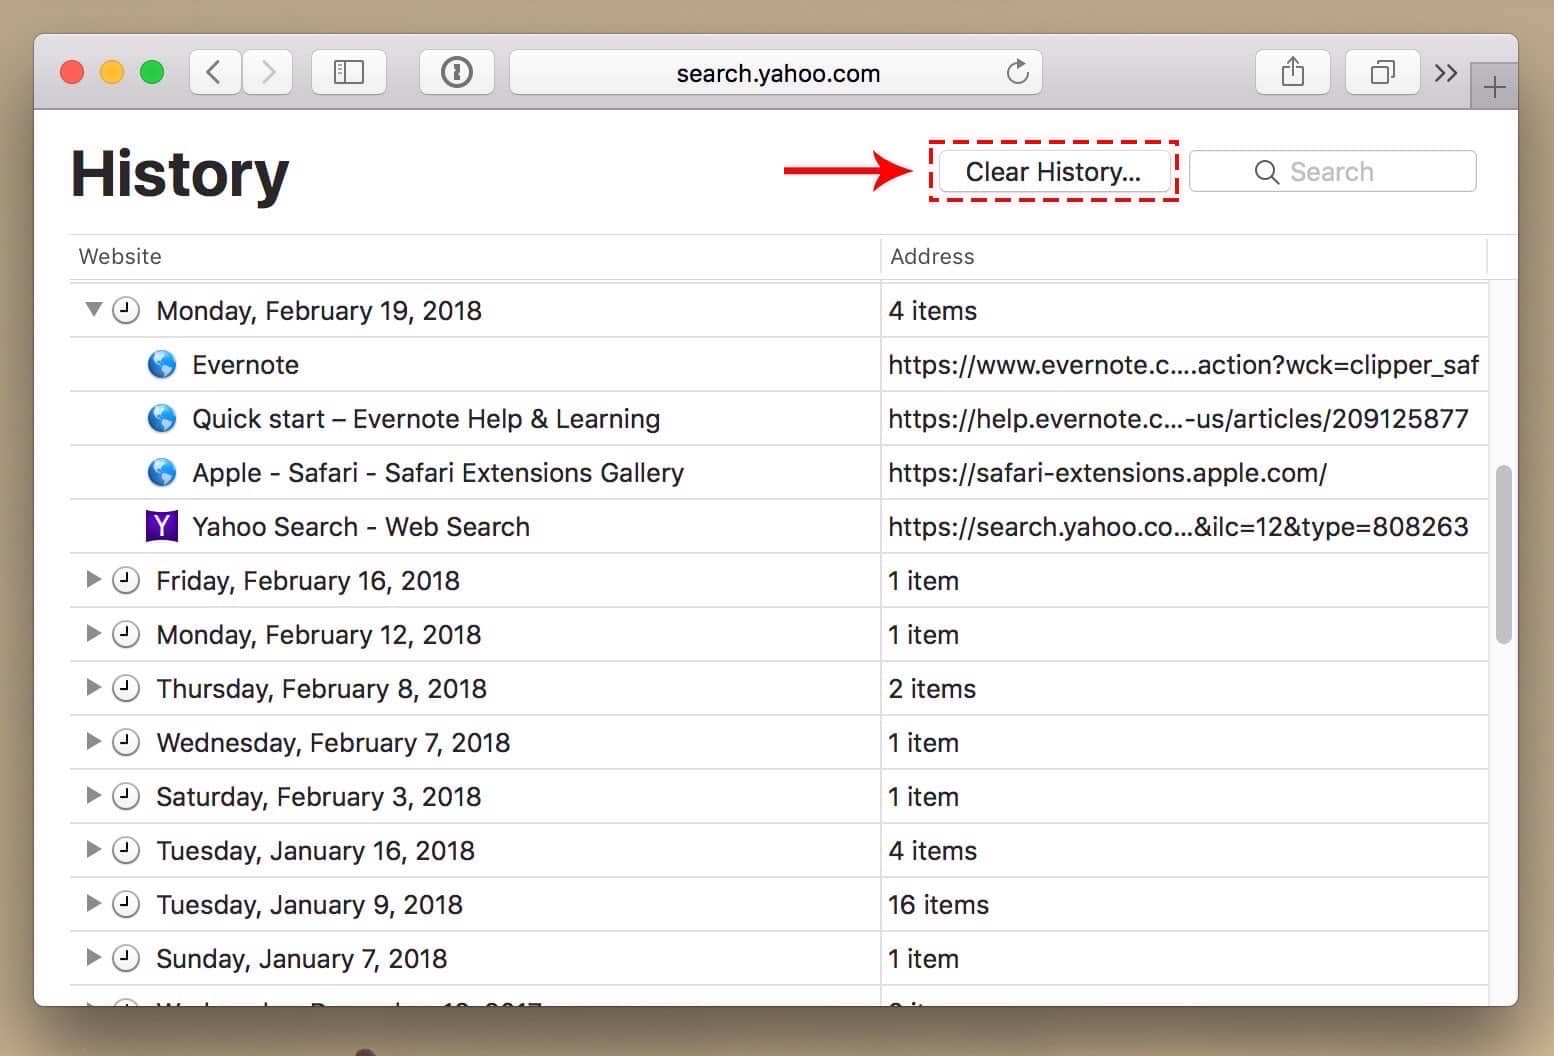
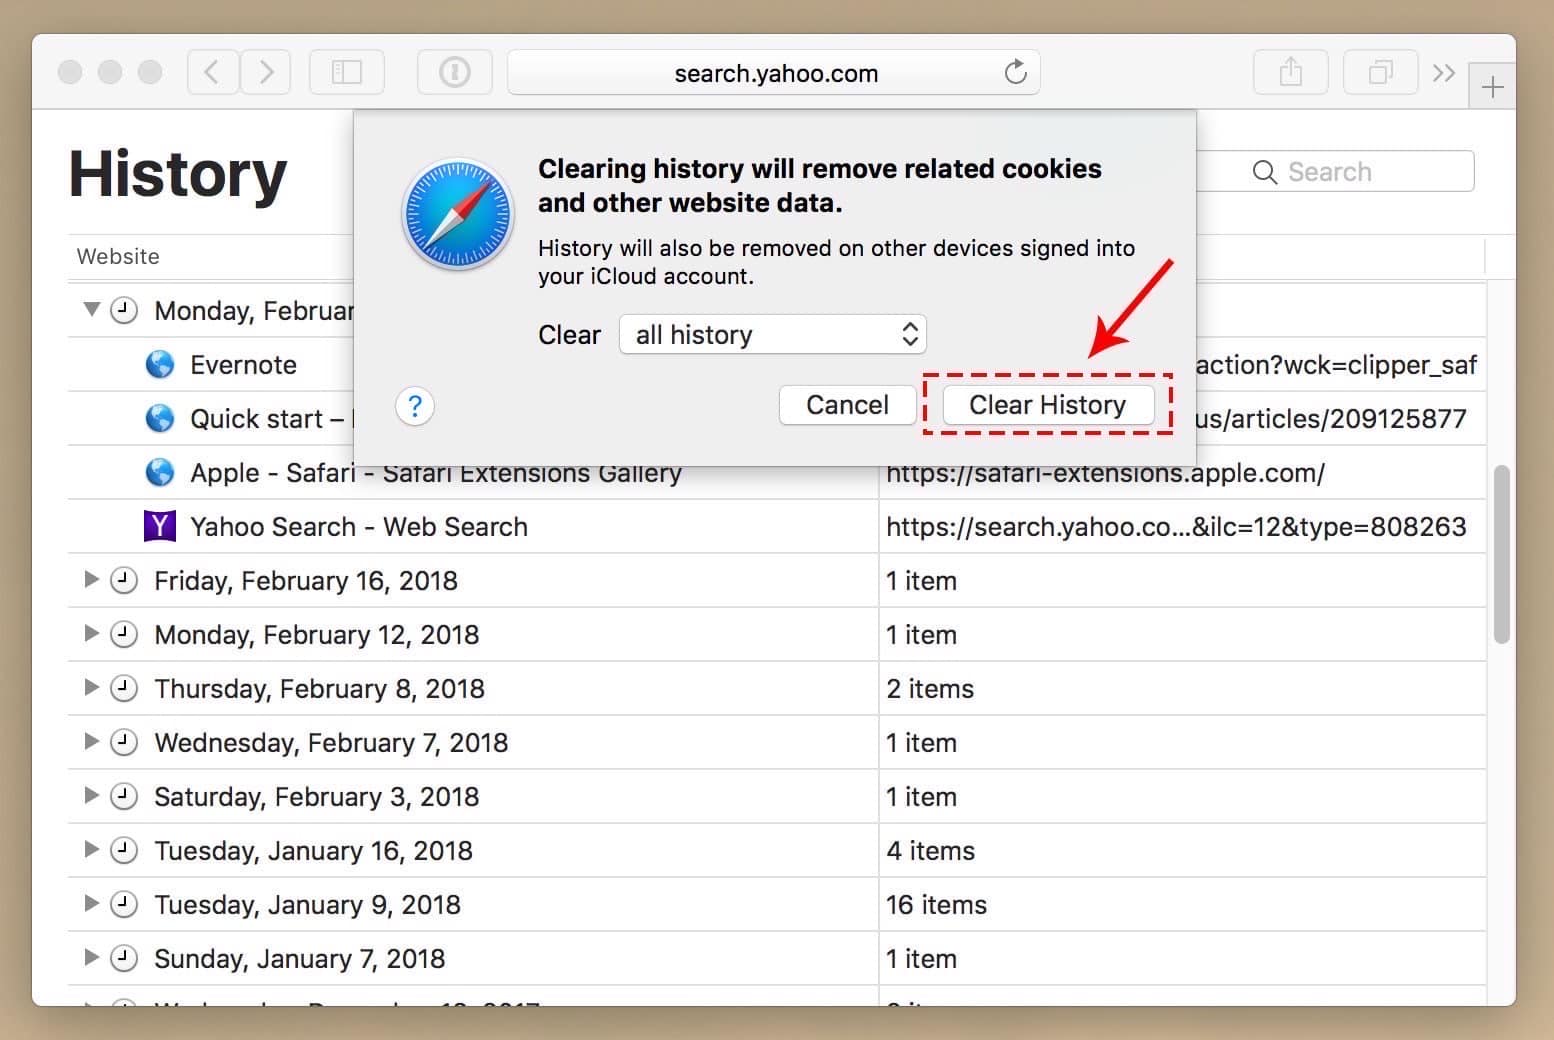
- Click Clear History … button to delete the list of all websites you visited.

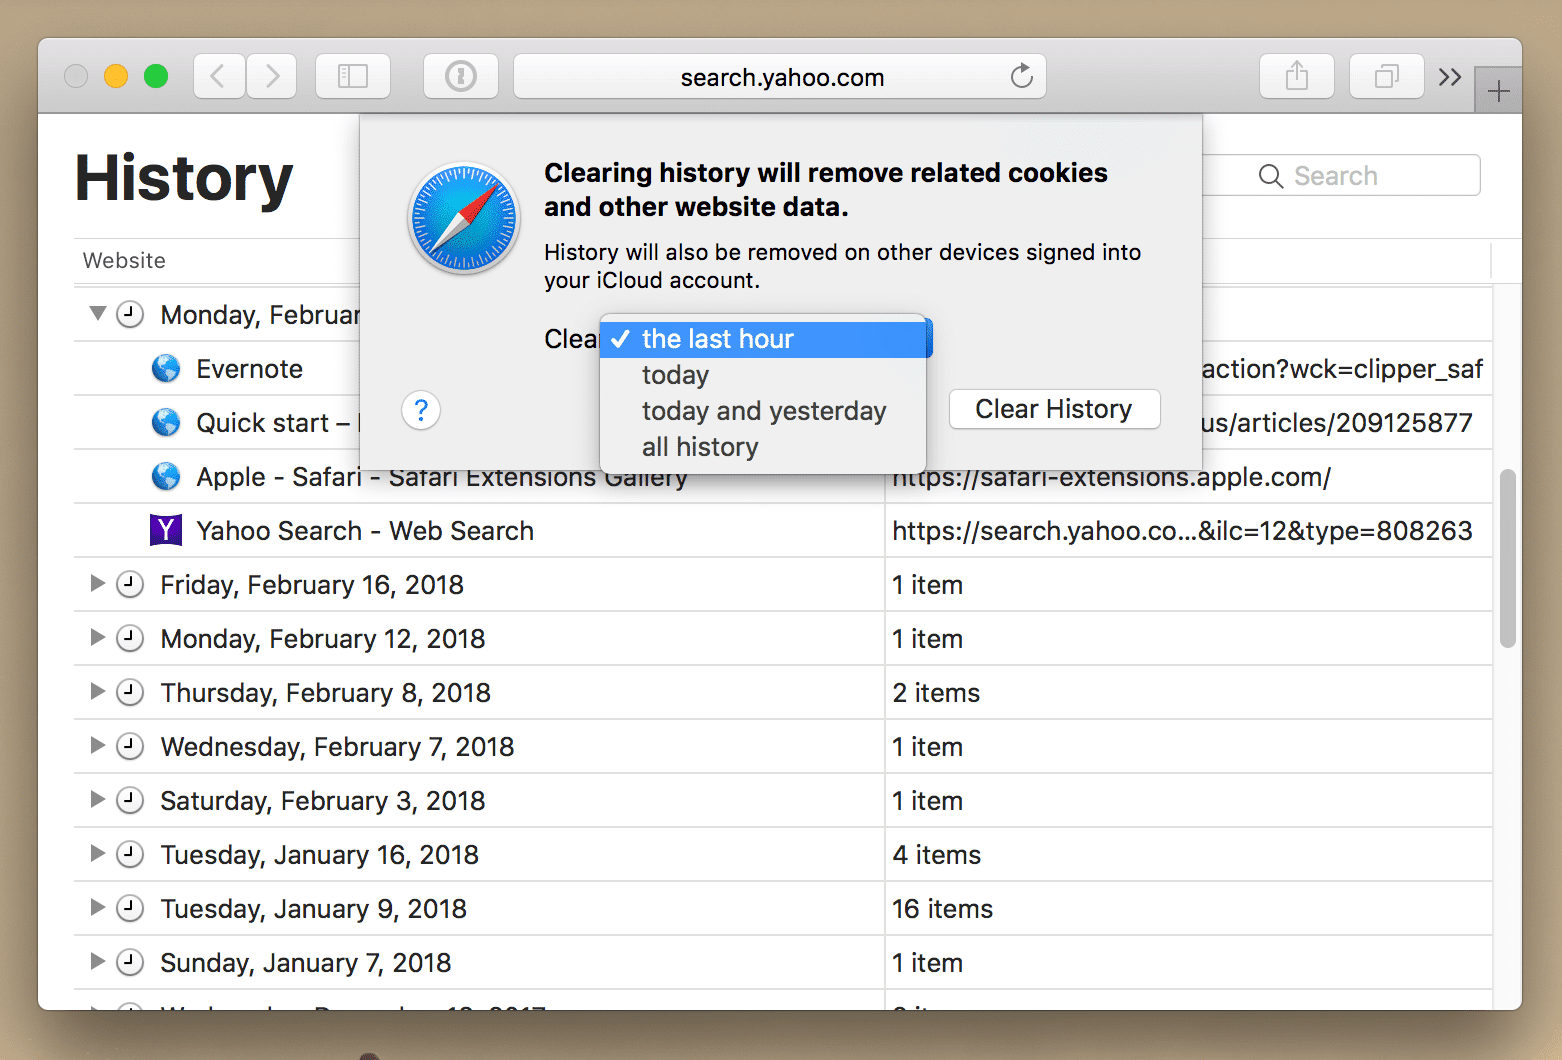
- In the drop-down menu, select the period of time you want to delete the history for.

- Then click the Clear History button again.

How to turn on private browsing
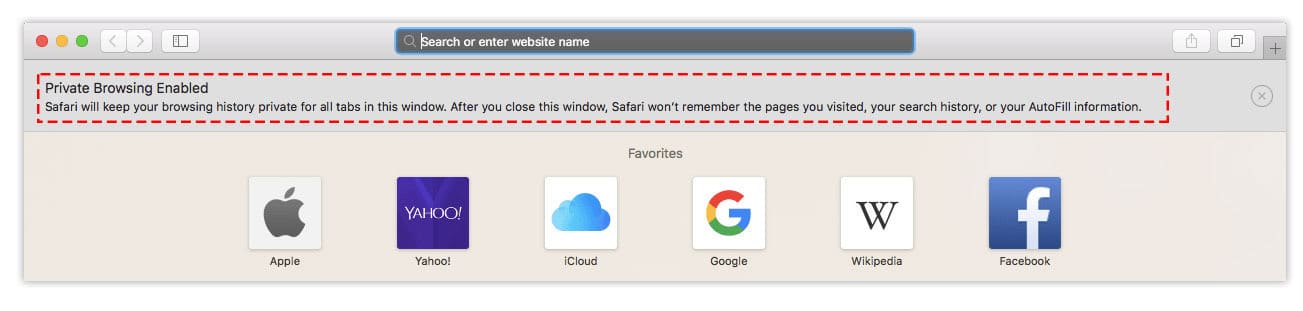
Safari private browsing
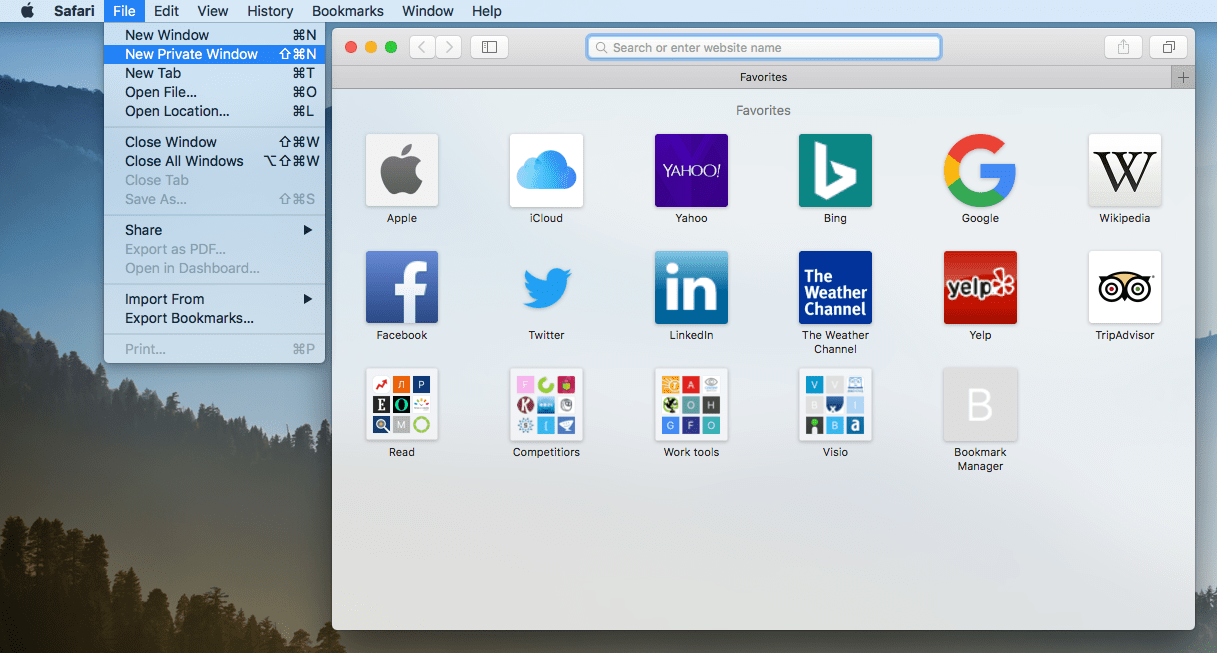
- Open the Safari browser.
- Go to the Menu → File → select New Private Window or use the key shortcut Command+Shift+N.
Chrome incognito browsing
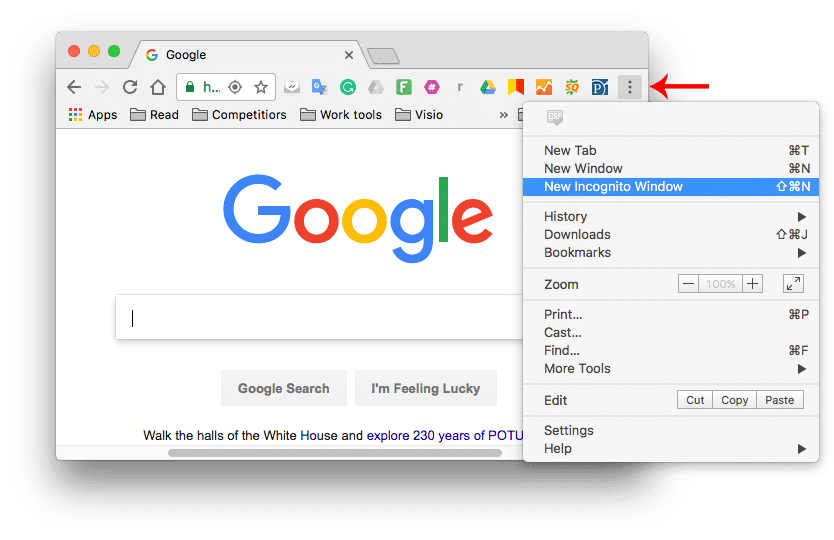
- Open the Google Chrome browser.
- Go to the Menu → File → New Incognito Window or click the “3 dots” icon in the right top corner and select the private window from there.
Firefox private browsing
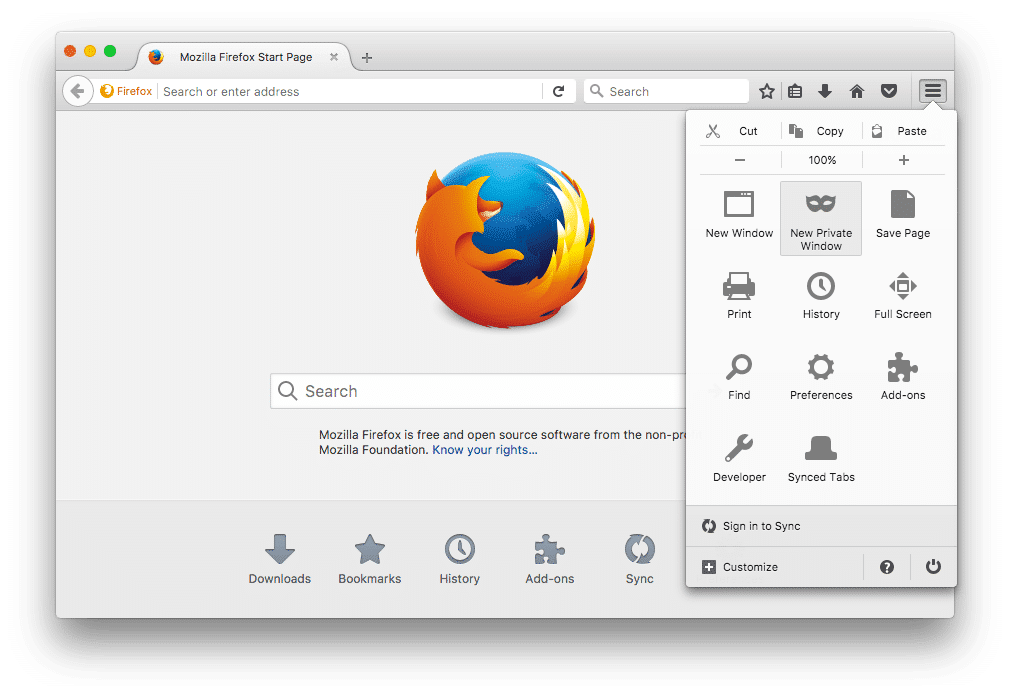
- Open the Firefox browser.
- Click the 3-bar icon in the top right corner of the window and select New Private Window. You can also use the shortcut Command+Shift+P.
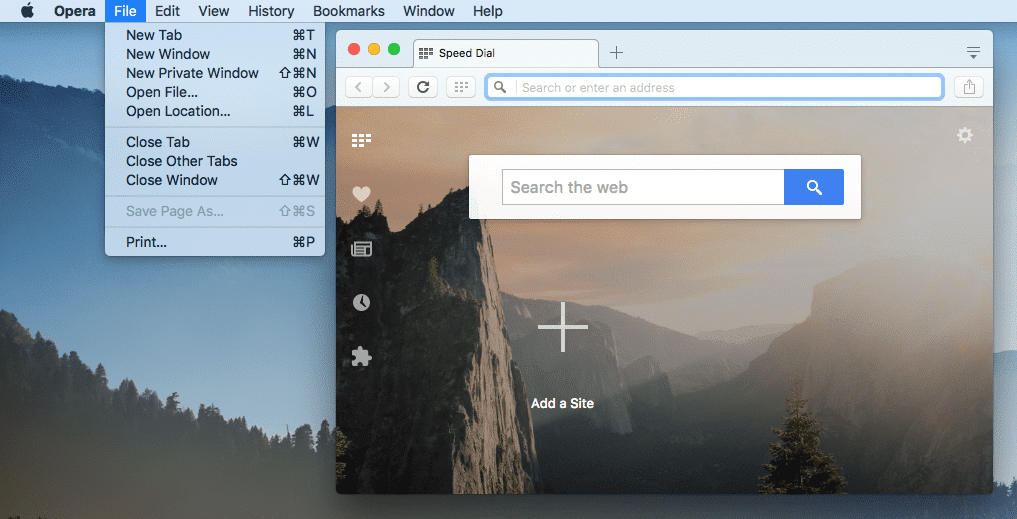
Opera incognito tab
- Open the Opera Browser.
- Go to the Menu → File → select New Private Window or use the shortcut Command+Shift+New.
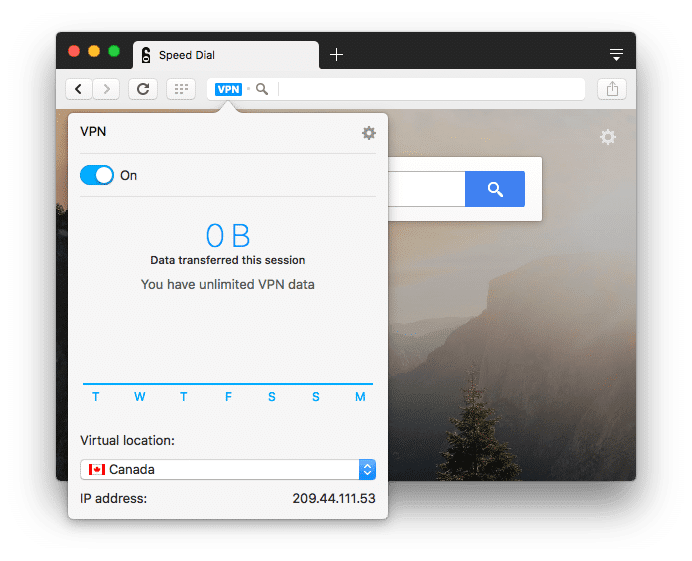
Opera also provides a built-in VPN. In a private window click the VPN button → Enable VPN. The blue VPN icon will show that you are visiting websites through the VPN tunnel. You can choose the VPN server of any one of five countries: Germany, Netherlands, Canada, the United States and Singapore.
Several tips about a private search
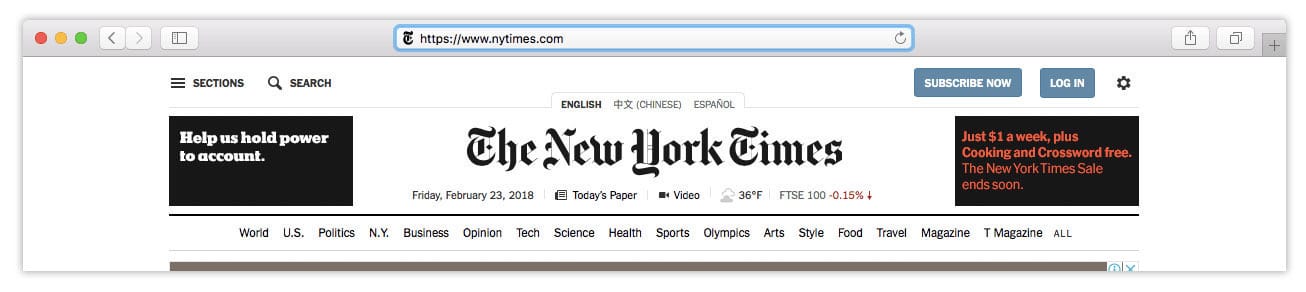
HTTP
Each address of the website starts either with “HTTP” (or just “www”) or “HTTPS.” The last letter “s” means that the website is secured, so nobody between you and the site can read data you are entering, like passwords or credit card numbers. Your ISP can still see the addresses of websites you were visiting, but not see exactly what pages you view.
Privacy Mode
All major internet browsers provide a privacy/incognito mode. This blocks your browser from saving your internet history and its cache. When you use an incognito search, websites can see your privacy mode and ask you to turn it off to provide access to all their information. Besides, your ISP can still track your online activity.
Is private browsing possible?
There are several ways of keeping your Internet history anonymous. You can use a proxy, anonymizer, Tor browser and so on. But a VPN (Virtual Private Network) seems to be the easiest way for an incognito search today. This smart application creates a secure tunnel, which encrypts all data on the way from your computer to the Internet and back. Here is a short explanation of how it works:
- You launch VPN software on your computer.
- Then you choose a VPN server in another location to connect with.
- When the connection is established, you can open your browser, and from that moment every internet query goes to your ISP through a secure tunnel.
- The data goes from ISP server to VPN server, where your data is encrypted.
- Then it goes from VPN server to the website.
- The way back is the same.
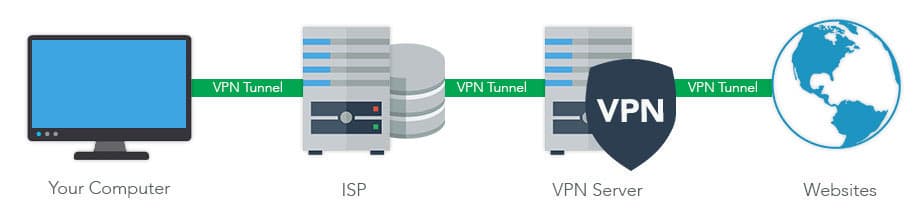
Since a VPN encrypts all your traffic, your ISP will only see indecipherable content between your computer and websites. That means that your Internet history is unreadable to your ISP as well as for any third parties and hackers.
There are dozens of VPN services and it is important to select the one which provides safe browsing. You will, of course, have to pay attention to a log policy and Advanced Encryption Standards (AES). Trusted VPN services do not collect the user’s private data. AES is normally used worldwide to encrypt data. Most VPNs use AES 256-bit, where 256 means the number of possible combinations, which includes 2256 (or 1.1579 × 1077) possible keys.
Conclusion
Once again, if you use the private mode, it does not hide your internet activity. Your Internet service provider and the system administrator can see what websites you’ve visited, and all your logs and passwords will be saved. If you are looking for a completely private and safe way of browsing on the internet, you should use a VPN.
VPN is a safe internet browsing software, which should meet the requirements of the average internet user. Trusted VPNs provide safe, stable and speedy connections. It is better to use a paid VPN version because free VPNs may want to monetize your information and sell it. We recommend that you try VPN Client for Mac, which has no logging policy and safe data encryption. You can try its free trial for 7 days and then purchase the plan, that best suits your needs.


