Do you want to take professional photographs using your iPhone? If so, the iPhone camera is equipped with great features that allow you to take professional photos with no special tricks or skills. If you are tired of taking poor photos and want to use all capabilities of your iPhone camera, this article is for you. We will describe the main iPhone camera settings and explain how to use them to achieve amazing an output in your shots.
Contents:
- Where are the camera settings on iPhone?
- How do I change camera settings on iPhone?
- iPhone camera features.
- How do I improve iPhone camera quality?
Tip – Clean up your iPhone from similar photos
With Phone Cleaner, you can easily find and remove similar photos, as well as detect and delete large unused media files in your Photo library.
Phone Cleaner for Media Files
Where are the camera settings on iPhone?
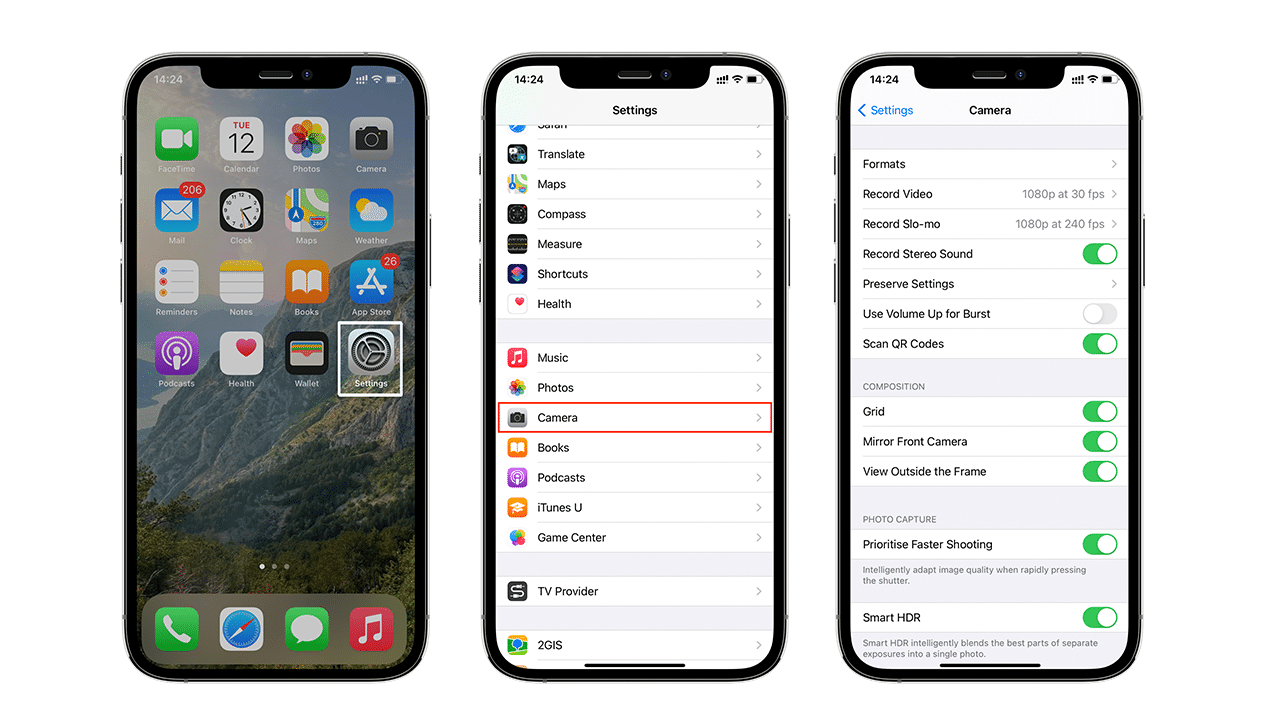
By default, the camera on the iPhone has been already configured. To change iPhone camera settings as you want, do the following:
- Open Settings on your iPhone.
- Scroll down, find Camera, and tap on it.
- Find Advanced settings. In this section, you can adjust general camera settings to suit your needs.
How do I change camera settings on iPhone?
In the advanced camera settings of your iPhone, you will find a wide range of features that you can easily change:
- Formats
- Record Video
- Record Slo-mo
- Record Stereo sound
- Use volume up for burst
- Scan QR Codes
- Grid
- Mirror Front Camera
- View Outside the Frame
- Prioritize Faster Shooting
- Smart HDR
Most of these features can be enabled or disabled with a simple toggle button. Some other features can be changed according to your preferences by selecting the best format or resolution. Below, we will show you the benefits of the main iPhone camera settings.
iPhone camera features
Ultra-wide camera
The ultra-wide camera on iPhone 11 or the newest iPhone models allows you to expand your visual field. With this option, you can catch great landscapes or take photos of entire buildings. You can also snap selfies with your friends without worrying about everyone fitting into the picture. Just expand the picture by tapping the arrows above the button when taking photos.

Live photos on iPhone
Live photos on iPhone is an incredible feature that allows you to shoot short three seconds videos with sound. You can capture exciting emotions, funny movements, and fascinating moments by using live photos. This feature is available for most iPhone users, starting with the 6S model.
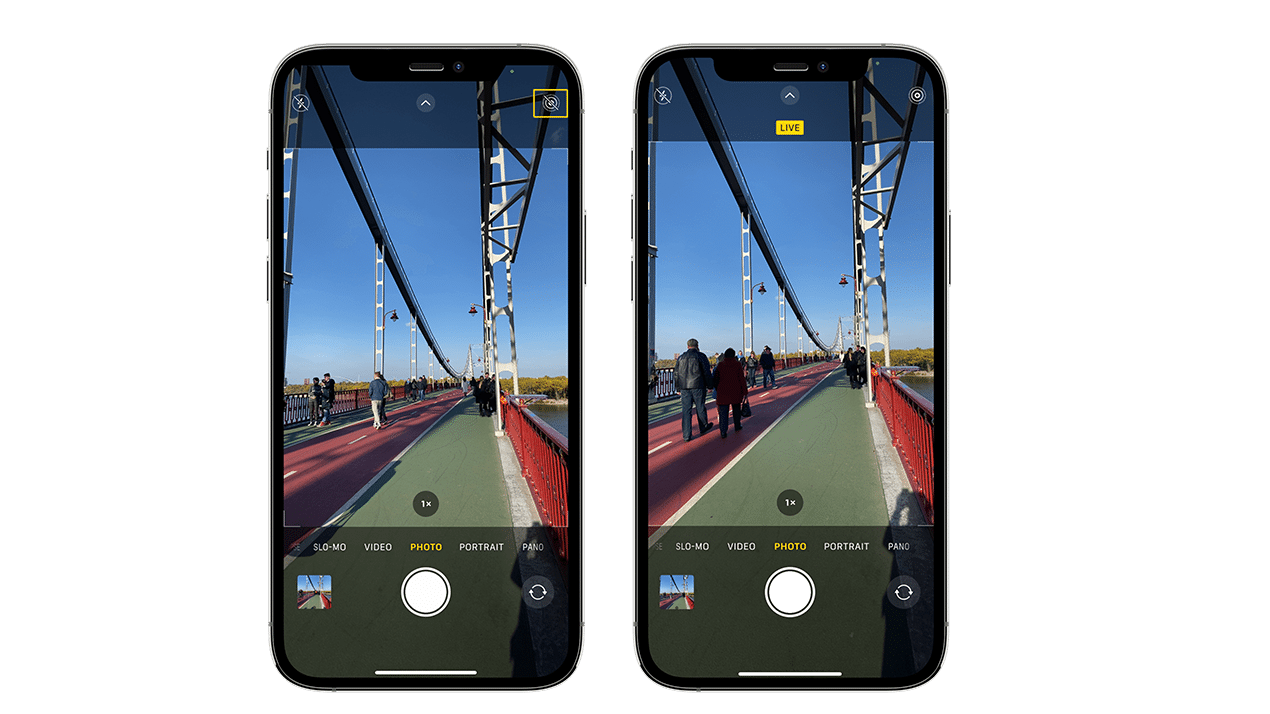
To turn on live photos on your iPhone, just tap the icon in the upper-right corner of your camera that looks like several circles within a circle.
The live photo feature brings your special moments to life. However, live photos usually take up significantly more space than a standard photo. If you have a lack of storage space on your iPhone, you should turn off this feature and take photos in normal mode only.
So how can you turn off live photos, if you don’t want to use it every time? It’s easy. You just need to tap the Live Photo icon in the upper-right corner of your camera screen and the live photos mode on your iPhone will be disabled.
HDR photos on iPhone
The HDR (high dynamic range) feature helps you get perfect photos by balancing shadows and contrast.
The Smart HDR feature is available on iPhone 11 or later models. Smart HDR mode allows you to take photos with the most realistic color rendering. To turn on HDR, do the following:
- Open Settings on your iPhone.
- Go to the Camera section.
- Find Advanced camera settings and turn on “Smart HDR” with a toggle button.
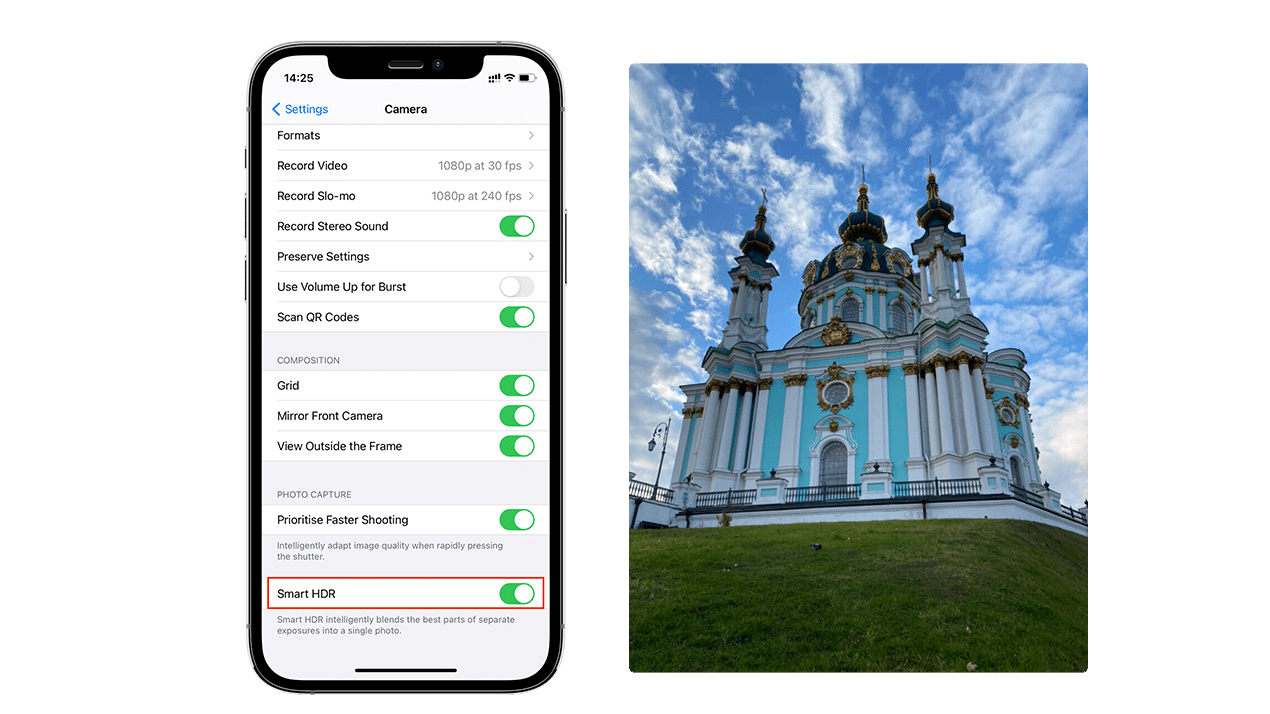
The Camera application will automatically use this function in bad light conditions, to avoid overexposed or underexposed footage.
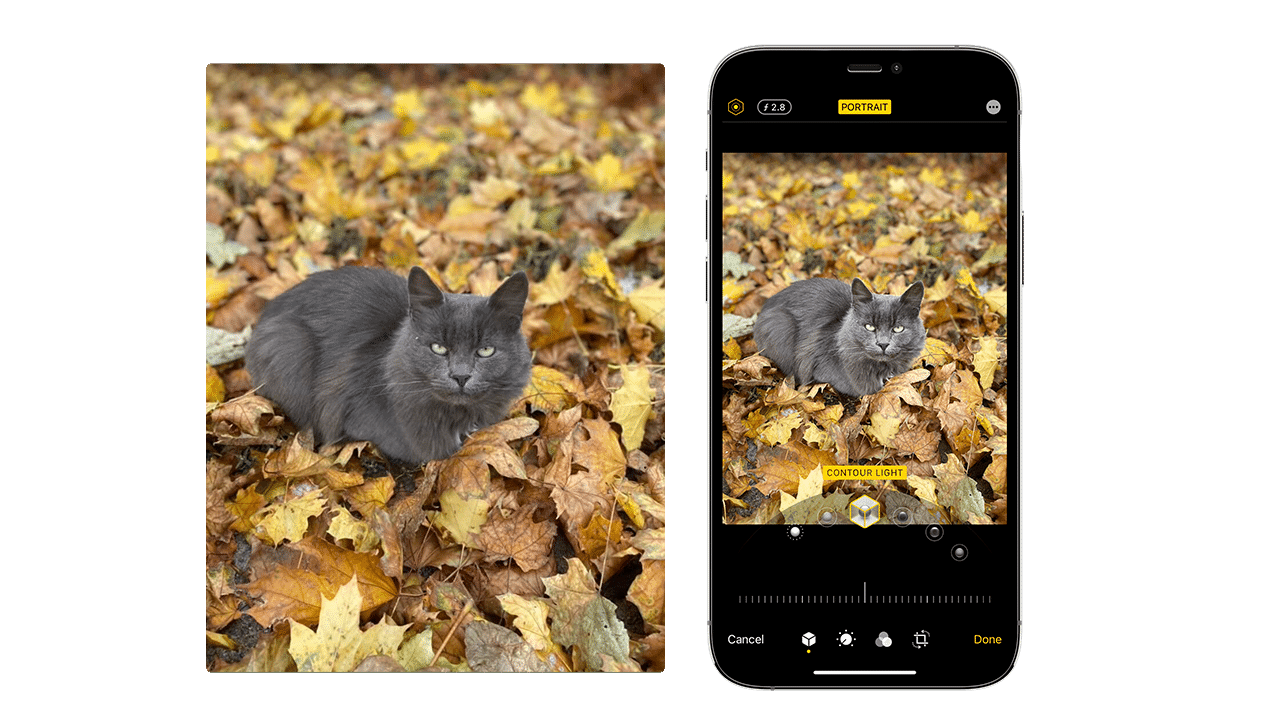
Portrait mode on iPhone
Portrait mode can be used to take portraits, selfies, or capture objects that stand out from the background. It gently blurs the background and focuses on the face or selected object by keeping it clear. With this feature,pictures look like professional photography.
To turn on portrait mode on your iPhone, open the camera and swipe left to change the mode to Portrait.
Night mode
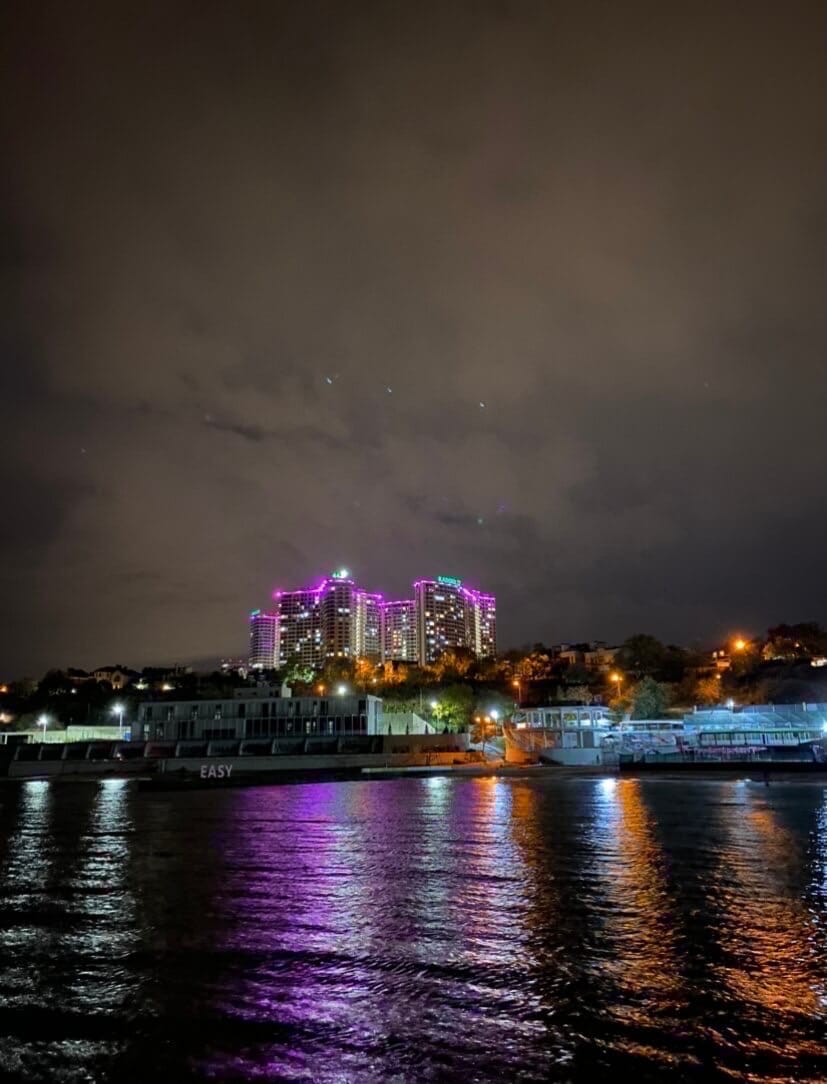
Night mode is a new, great feature on iPhone 11 and newer models that allows you to capture well-lit photos at night. It is an automatic feature that will turn on when you try to take a photo in low light conditions, so you can get colorful and more detailed pictures even at the darker times of the day.
Burst mode
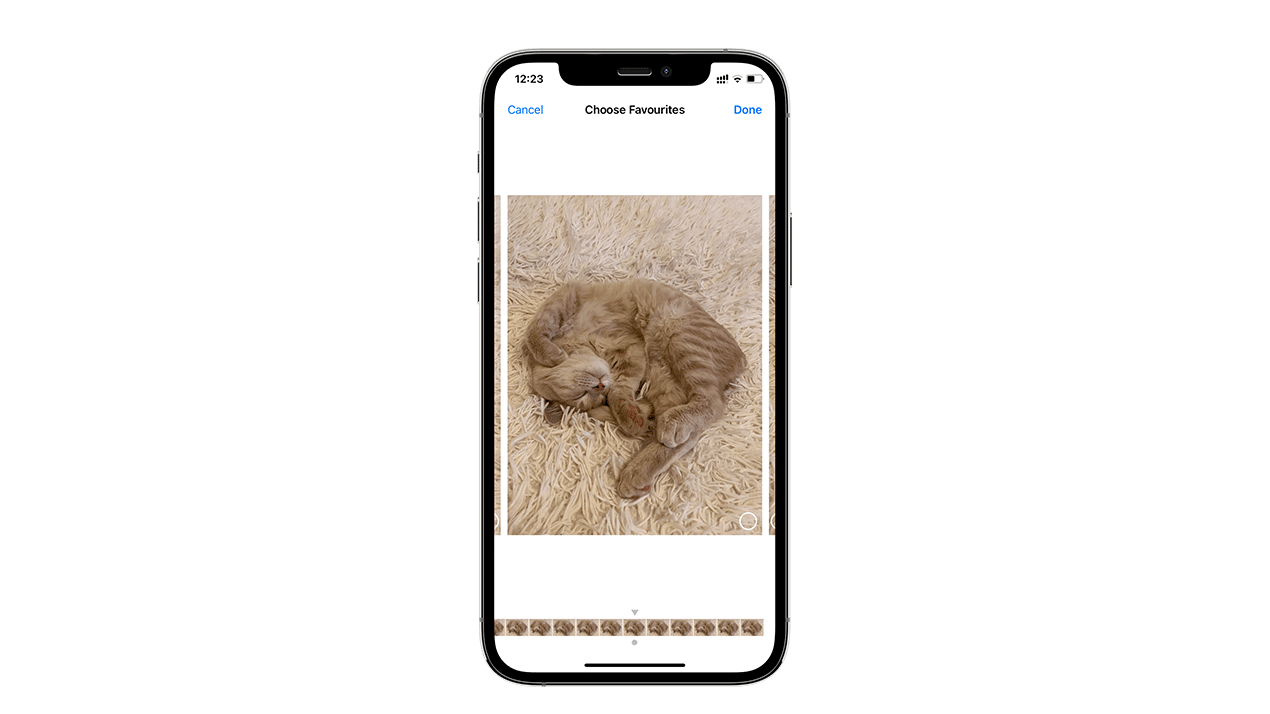
Burst photos allow you to capture movement or a series of random footage. In Burst mode, your camera will take 10 pictures per second. Then in the Photo gallery, you can select the best picture from the series and either keep or discard the rest. Burst mode can also work with a camera timer.
To take burst photos, just move the button in the left part of the screen, and hold it until you want to finish your series.
Exposure adjust
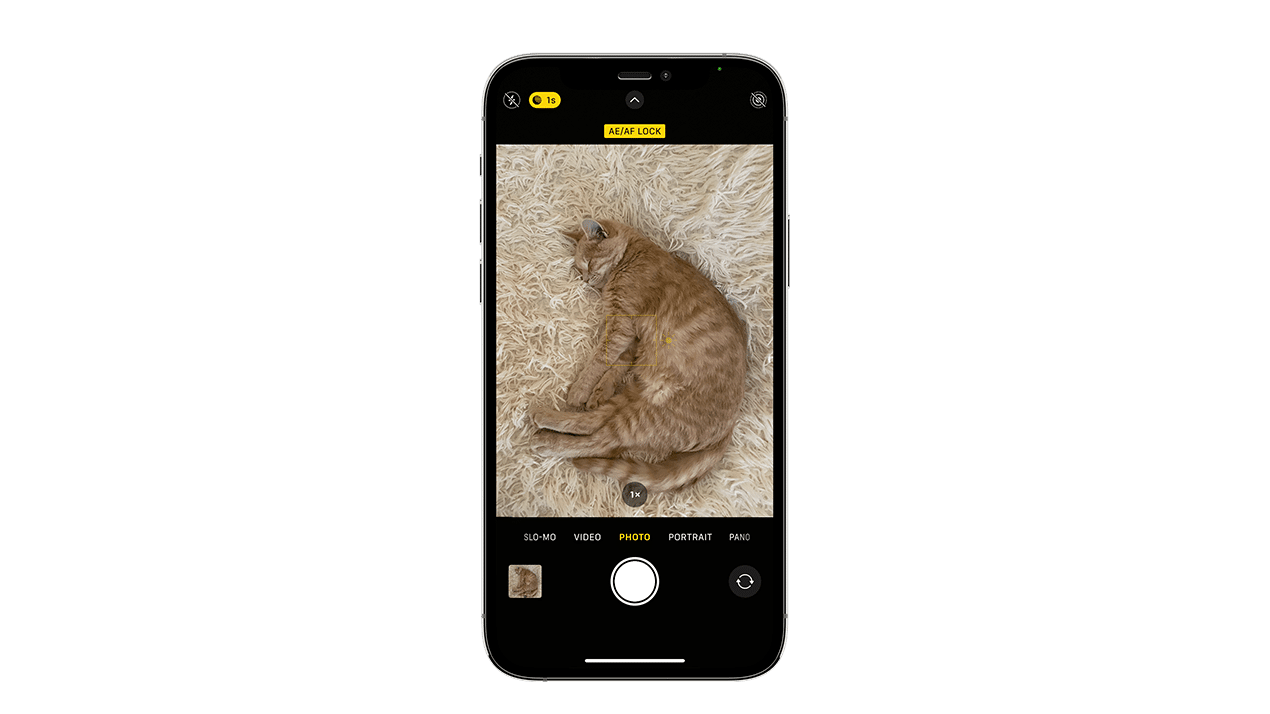
Exposure adjust is a great feature that allows you to take photos even in poor light conditions. To prevent too bright, overexposed pictures you can make the exposure lower or higher to avoid underexposed photos.
The interesting thing is that you can lock the adjusted exposure for the current photo. To do this, you have to find the area that you want to change exposure, slide your finger up or down to lighten or darken the photo, then hold your finger down on the yellow square on your screen.
Camera grid
The camera grid will help you to keep all lines on your picture placed well, including horizon level or architecture lines. The camera grid will help you to take well-composed photography as well.
Turn on the gridlines in the advanced camera settings by moving the toggle button.
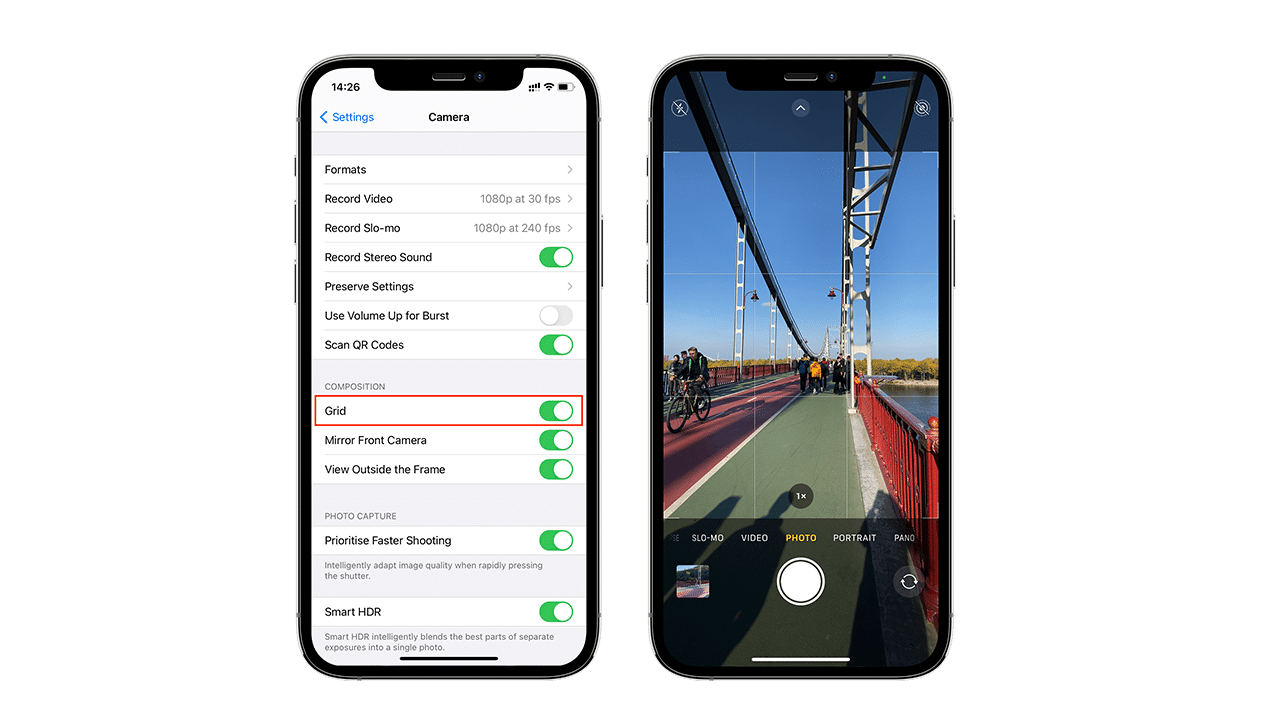
The grid uses the rule of thirds, dividing the image into nine pieces. Thus, you can place all the objects in the right way to achieve stunning output while taking landscape or flat lay photos.
Camera timer
The Camera timer is a useful feature for taking hands-free photos. You can take a picture of yourself even if you are traveling or walking alone. By setting a timer on your iPhone, you have the ability to take a photo with your friends. The camera will automatically take ten photos when this feature is enabled.
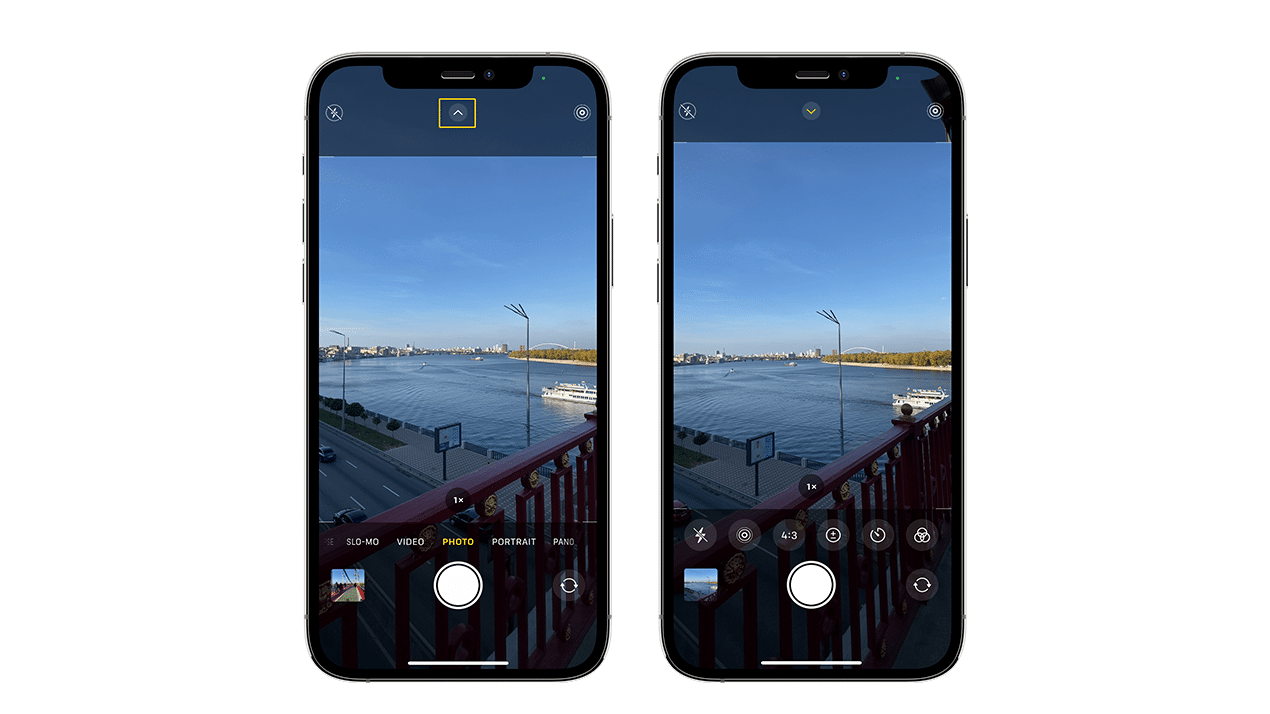
To turn on the iPhone camera timer, do the following:
- Open iPhone camera.
- Tap on the arrow in the middle-upper part of the screen.
- Tap on the Clock icon and select the time after which your iPhone automatically will take a photo.
How can I improve my iPhone camera quality?
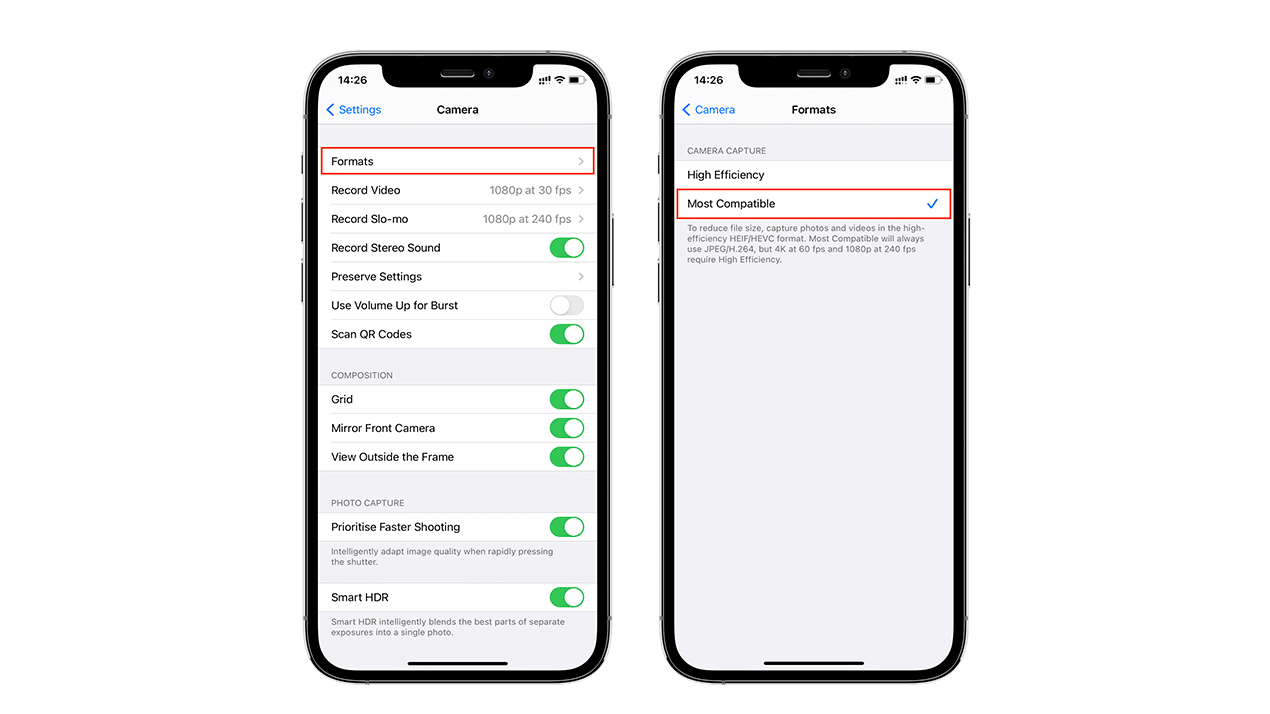
On your iPhone, you can change the quality and format of the photos you take. You will find this option in the iPhone camera settings. Here, you can select one of the proposed extensions for your photos:
- High-Efficiency format. This saves photos and videos as HEIF (High-Efficiency Image File) and HEVC (High-Efficiency Video Coding) files. These formats reduce file size thus saving your iPhone storage.
- Most Compatible format. This saves photos and videos as JPEG and H.264 files. That allows you to take higher-quality images than HEIF and HEVC, but your iPhone disk space will decrease faster as the images will take more disk space.
Conclusion
In this article, we explained iPhone camera settings and how you can use them to create incredible photos. The iPhone camera allows you to take a lot of amazing pictures without any special skills or equipment. But don’t forget to clean up your iPhone from unneeded similar and duplicate photos. You can use a free application Phone Cleaner for Media Files to get rid of similar files and the biggest media files on your iPhone.
