Before writing this article, we checked the official TeamViewer’s macOS uninstall instruction and discovered that this method does not remove TeamViewer completely and leaves some support files on Mac’s hard drive.
In this article, we will share how to uninstall TeamViewer completely and correctly.
Contents:
- What is TeamViewer and why remove it?
- How to manually remove TeamViewer
- How to remove TeamViewer using Terminal
- How to remove TeamViewer using App Cleaner & Uninstaller
What is TeamViewer and why remove it?
TeamViewer is an application for remote control, desktop sharing, and web conferencing between iOS and macOS devices. It’s widely used for technical support, remote work, and file transfers — with over 600,000 users online at any given moment and more than 2.5 billion devices connected globally.
However, while TeamViewer is powerful, many users may need uninstall it. Here’s why:
- High CPU usage. Some users have reported that the TeamViewer_Service process consumes over 100% of CPU resources, causing system slowdowns and overheating (TeamViewer community).
- Potential security risks. Back in 2016, there was a wave of reports of unauthorized access due to weak passwords and reused credentials. The idea of an always-on remote access app still feels risky to many.
- Being rarely used. While TeamViewer boasts over 600,000 downloads per day, the majority of individual users install it for a one-time support session — and then forget about it. Leaving it installed can mean unnecessary background processes running without your knowledge.
How to manually remove TeamViewer from Mac
To completely uninstall TeamViewer from your Mac, first you need to uninstall it using the appropriate option in its Settings and then manually remove the applications’ support files.
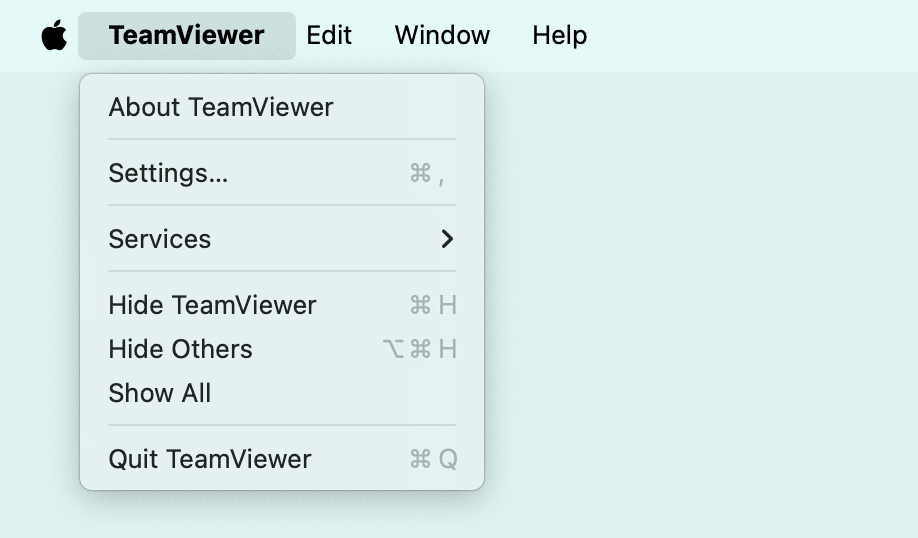
- Open TeamViewer.
- In the app’s menu, click File and select Settings.
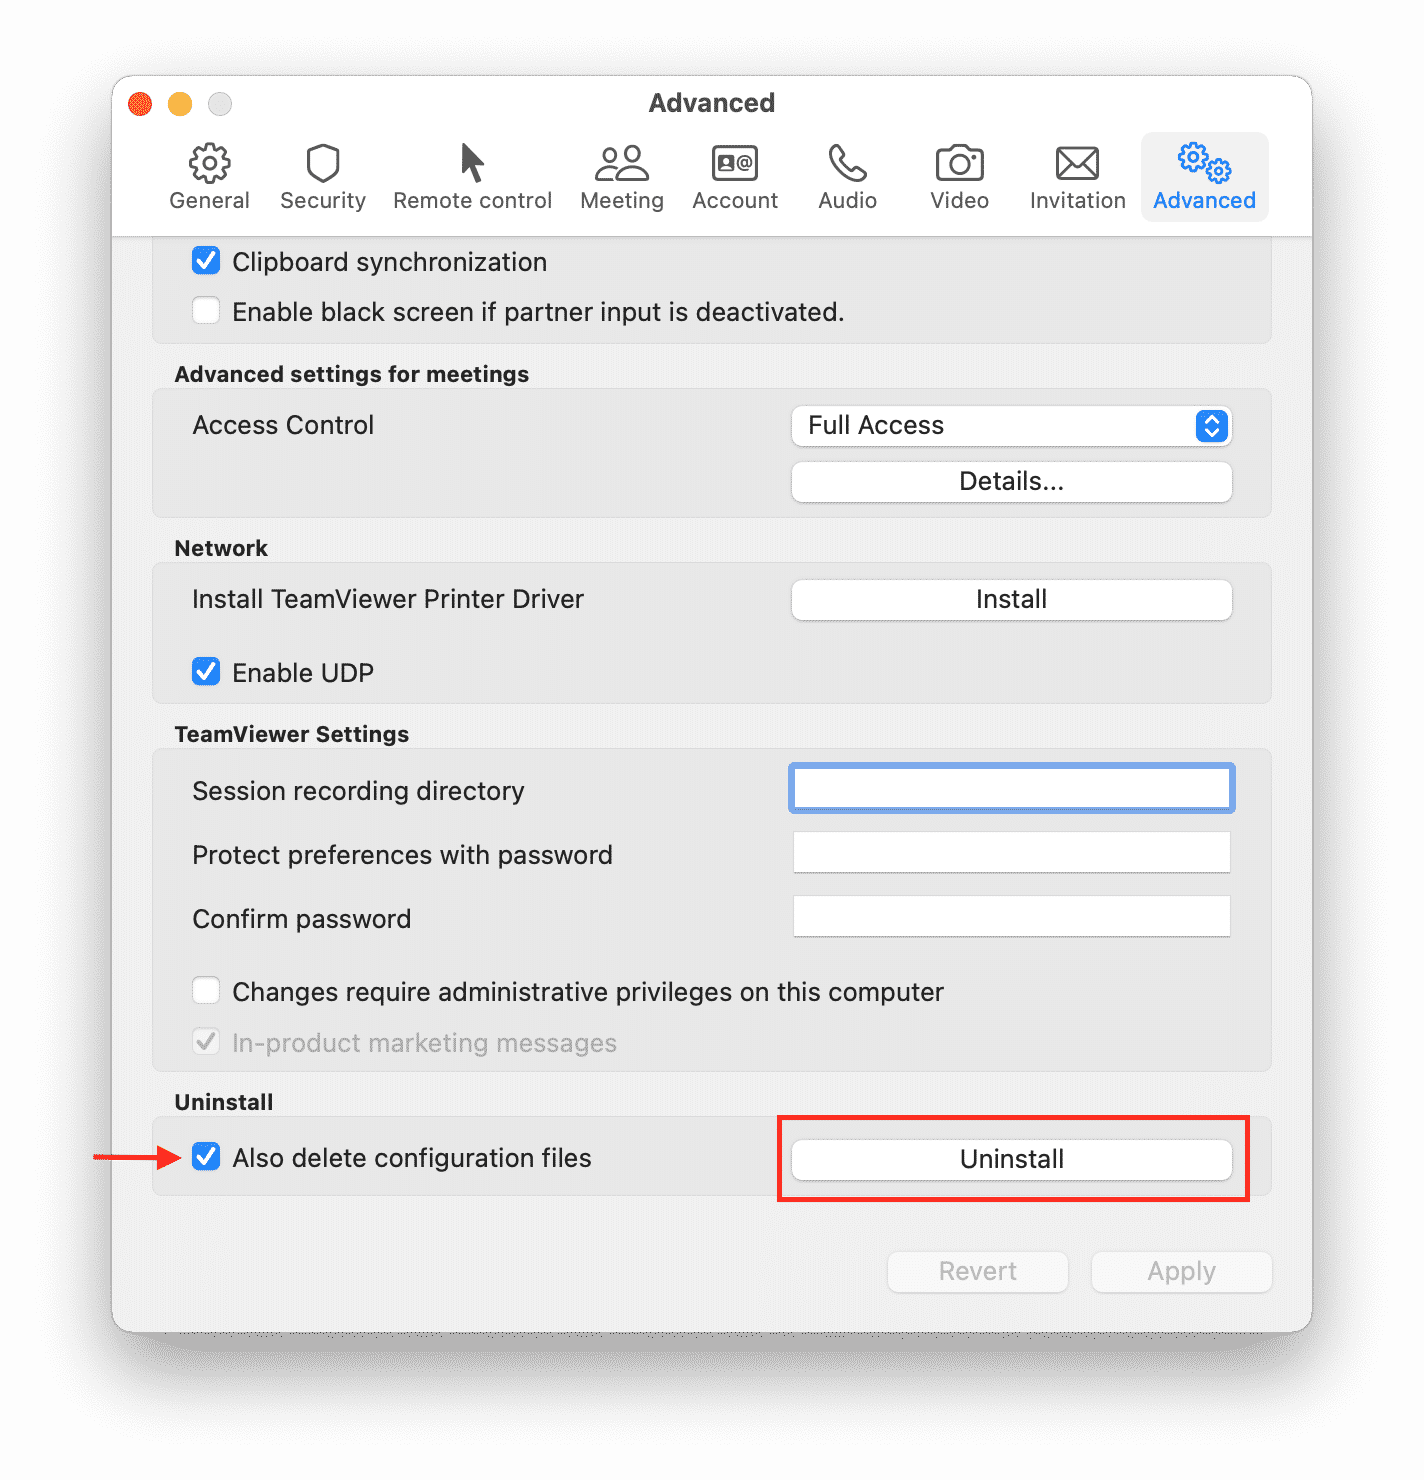
- In the Settings window switch to the Advanced tab.
- Scroll down, and find the Uninstall option.
- Enable deleting configuration files.
- Click the Uninstall button.
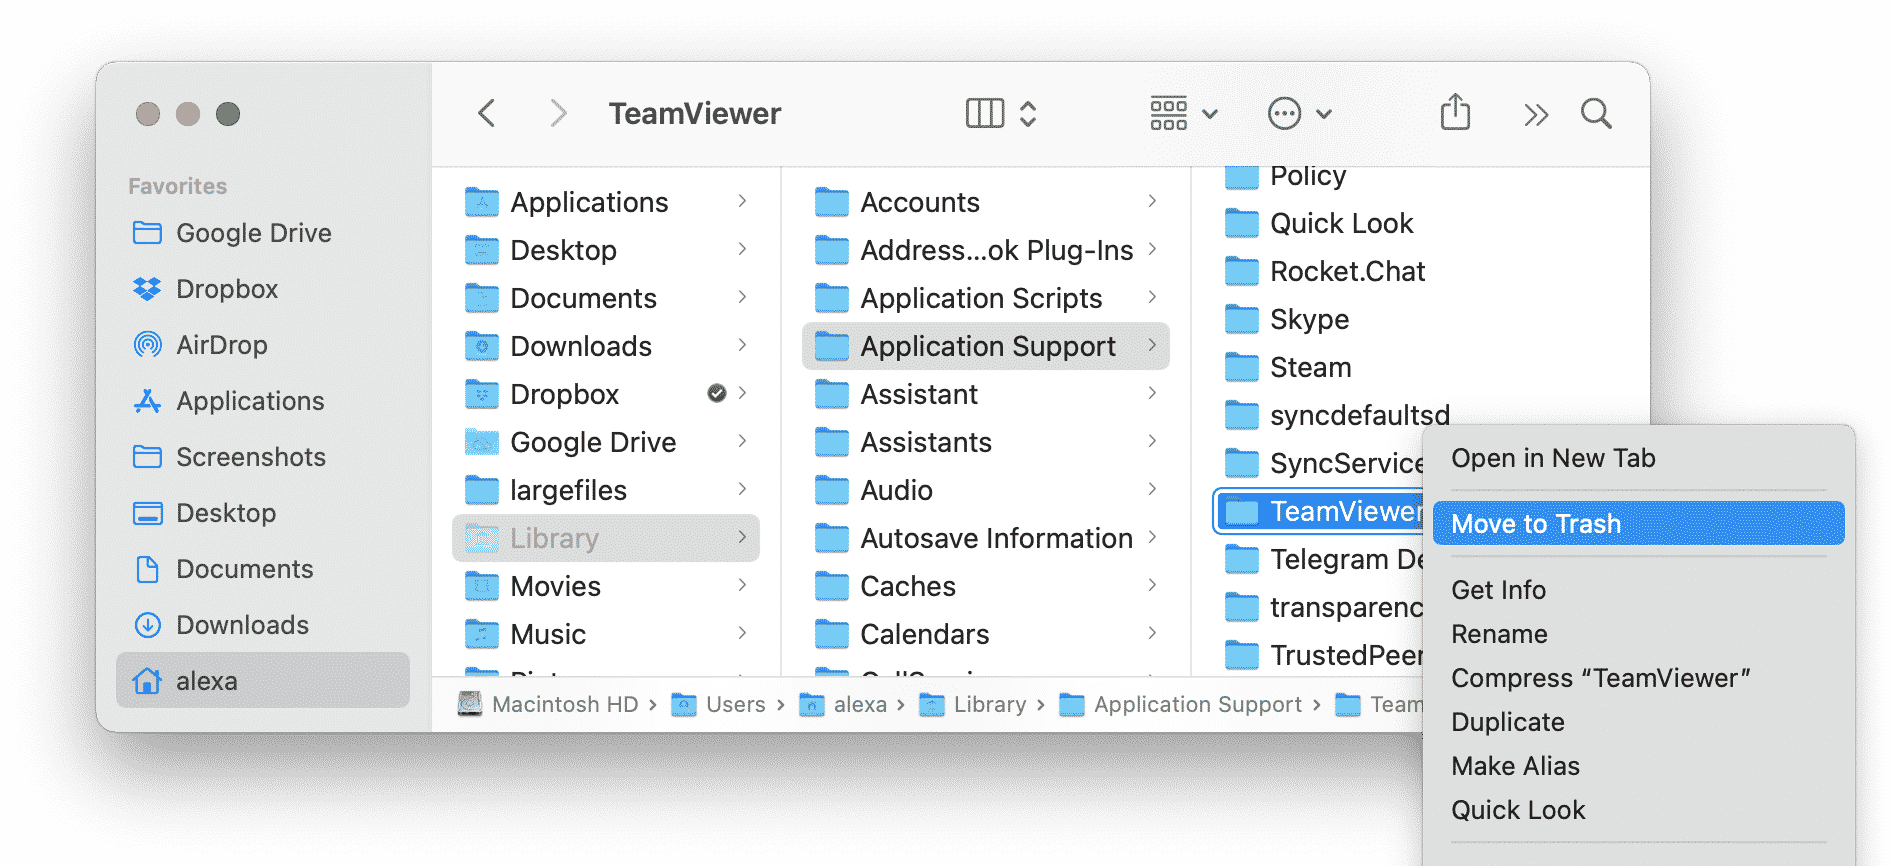
- Open Finder and press the Command+Shift+G shortcut.
- In the appeared search field type ~/Library and press Return.
-
Check each subfolder inside the Library and remove from there all files associated with TeamViewer. In our case we found the following files:
- ~/Library/Application Support/TeamViewer
- ~/Library/Caches/ com.teamviewer.TeamViewer
- ~/Library/Preferences/com.teamviewer10.plist
- ~/Library/Preferences/com.teamviewer.TeamViewer.plist
- ~/Library/Logs/TeamViewer
- After removing all TeamViewer’s support files don’t forget to empty the Trash bin.
TeamViewer will be uninstalled from Mac, however, this is not the last step. Now you need to find TeamViewer’s remaining files. By default, applications store their support files in the ~/Library folder.

How to uninstall TeamViewer using Terminal
If you’re comfortable using the command line you can use Terminal to remove TeamViewer from your Mac. Here’s how:
- Open Terminal.
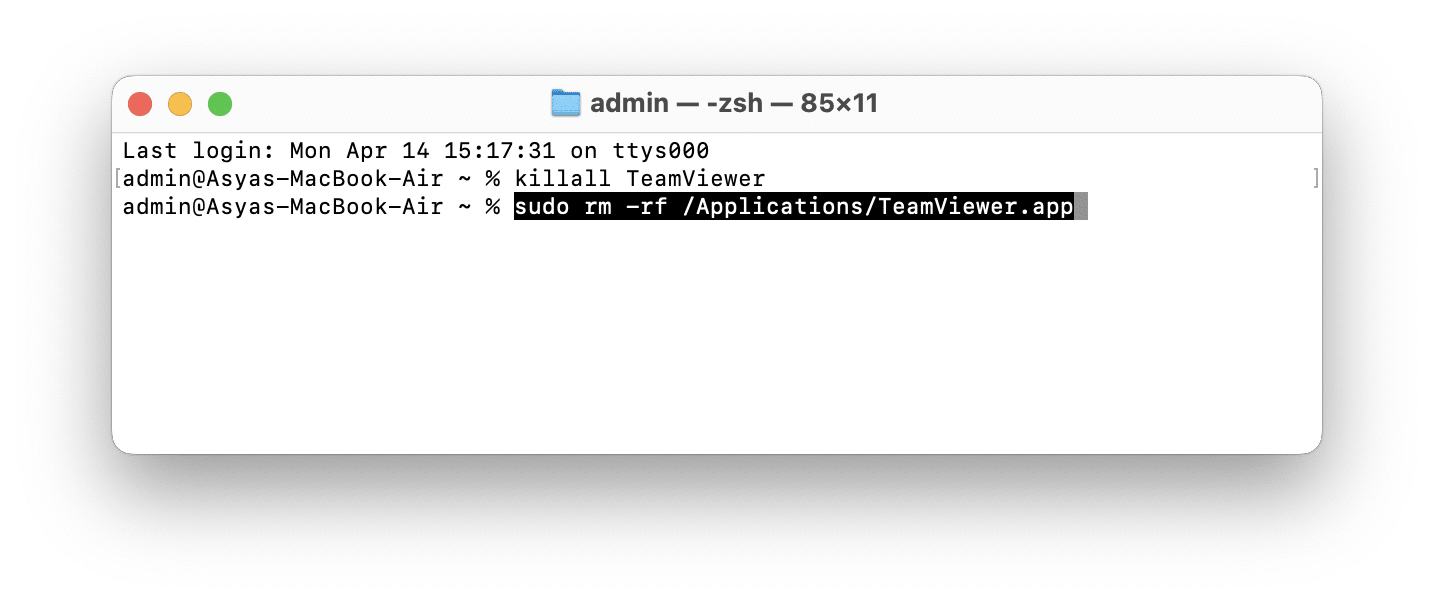
- Quit TeamViewer and all related processes. For this type the following command and press Return:
- Remove the TeamViewer application using this command:
- Delete TeamViewer support files. Copy and paste the following commands into the Terminal window. After each command you need to press Return:
- sudo rm -rf ~/Library/Application\ Support/TeamViewer
- sudo rm -rf /Library/Application\ Support/TeamViewer
- sudo rm -rf ~/Library/Preferences/com.teamviewer.TeamViewer.plist
- sudo rm -rf ~/Library/Preferences/com.teamviewer.teamviewer.preferences.plist
- sudo rm -rf ~/Library/Logs/TeamViewer
- sudo rm -rf /Library/Logs/TeamViewer
- sudo rm -f /Library/LaunchAgents/com.teamviewer.teamviewer
- sudo rm -f /Library/LaunchDaemons/com.teamviewer
- sudo rm -rf ~/Library/Caches/com.teamviewer
- Restart your Mac.
killall TeamViewer
sudo rm -rf /Applications/TeamViewer.app
How to uninstall TeamViewer using App Cleaner & Uninstaller
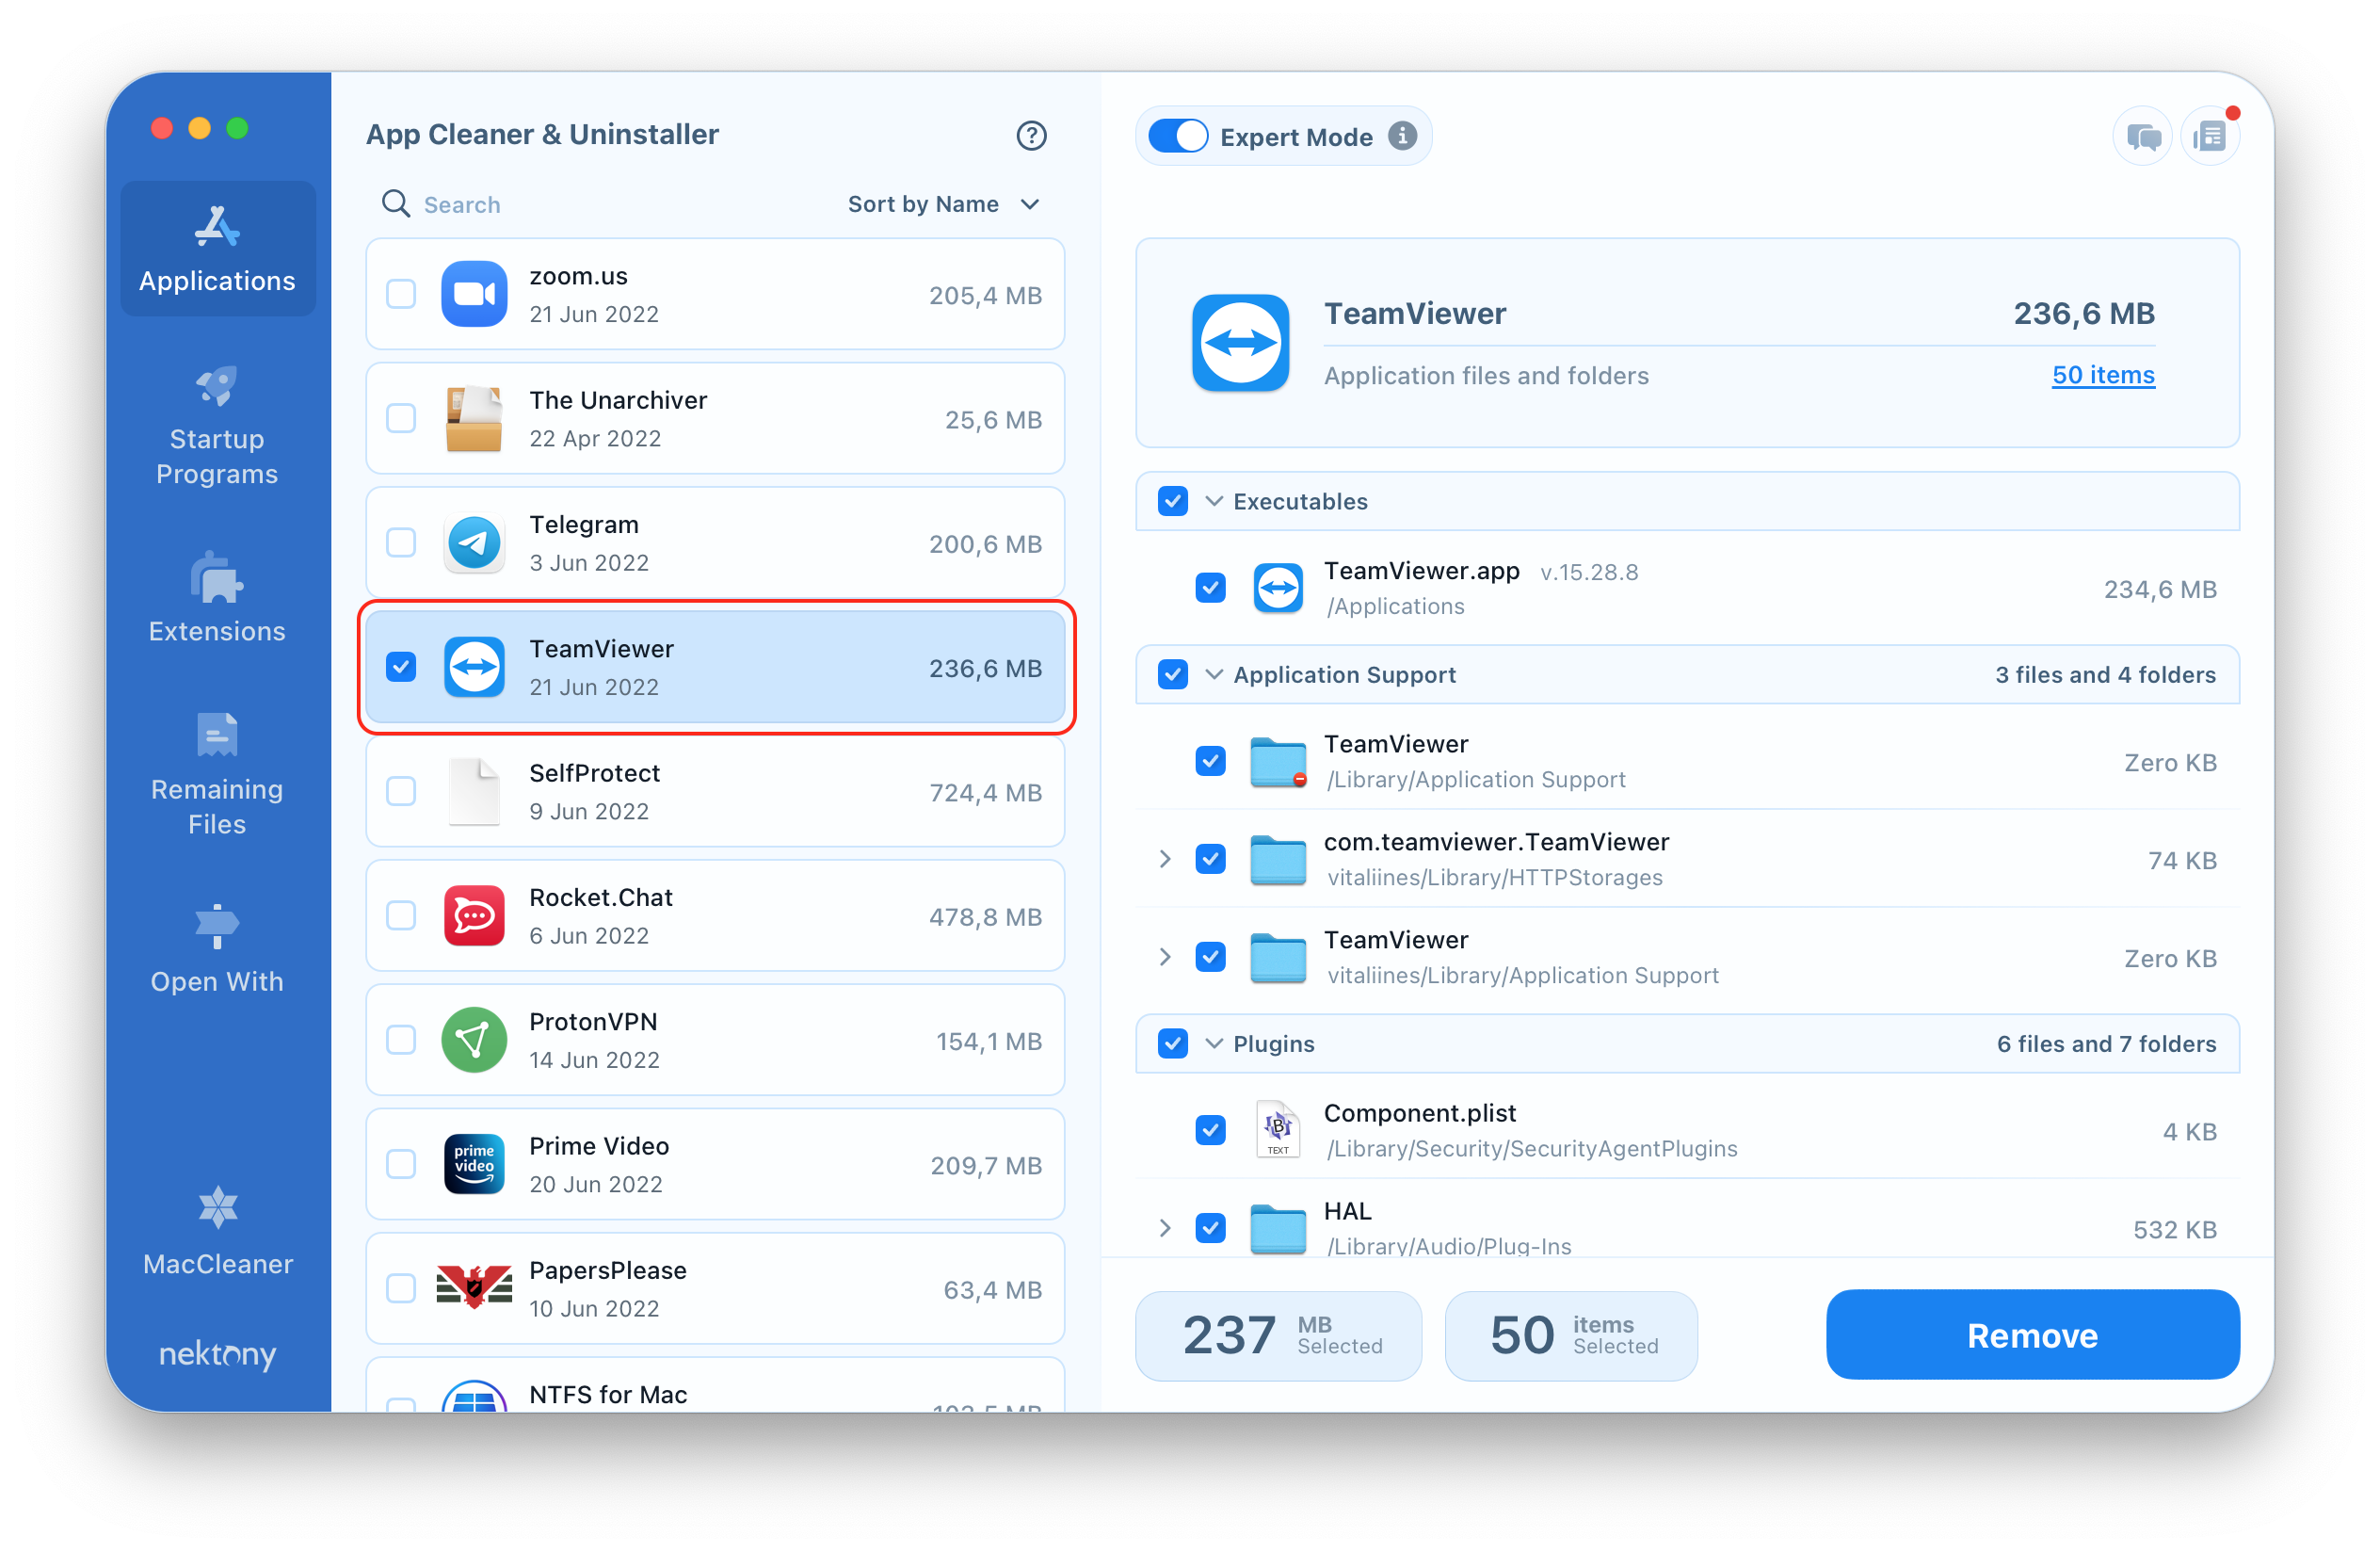
App Cleaner & Uninstaller is a special utility that allows you to delete apps completely and safely in just a few clicks. Even if you have already manually uninstalled an application, it will find all of its remaining files.
- Launch App Cleaner & Uninstaller.
- Select TeamViewer from the list of apps.
- Click the Remove button and confirm the uninstallation.
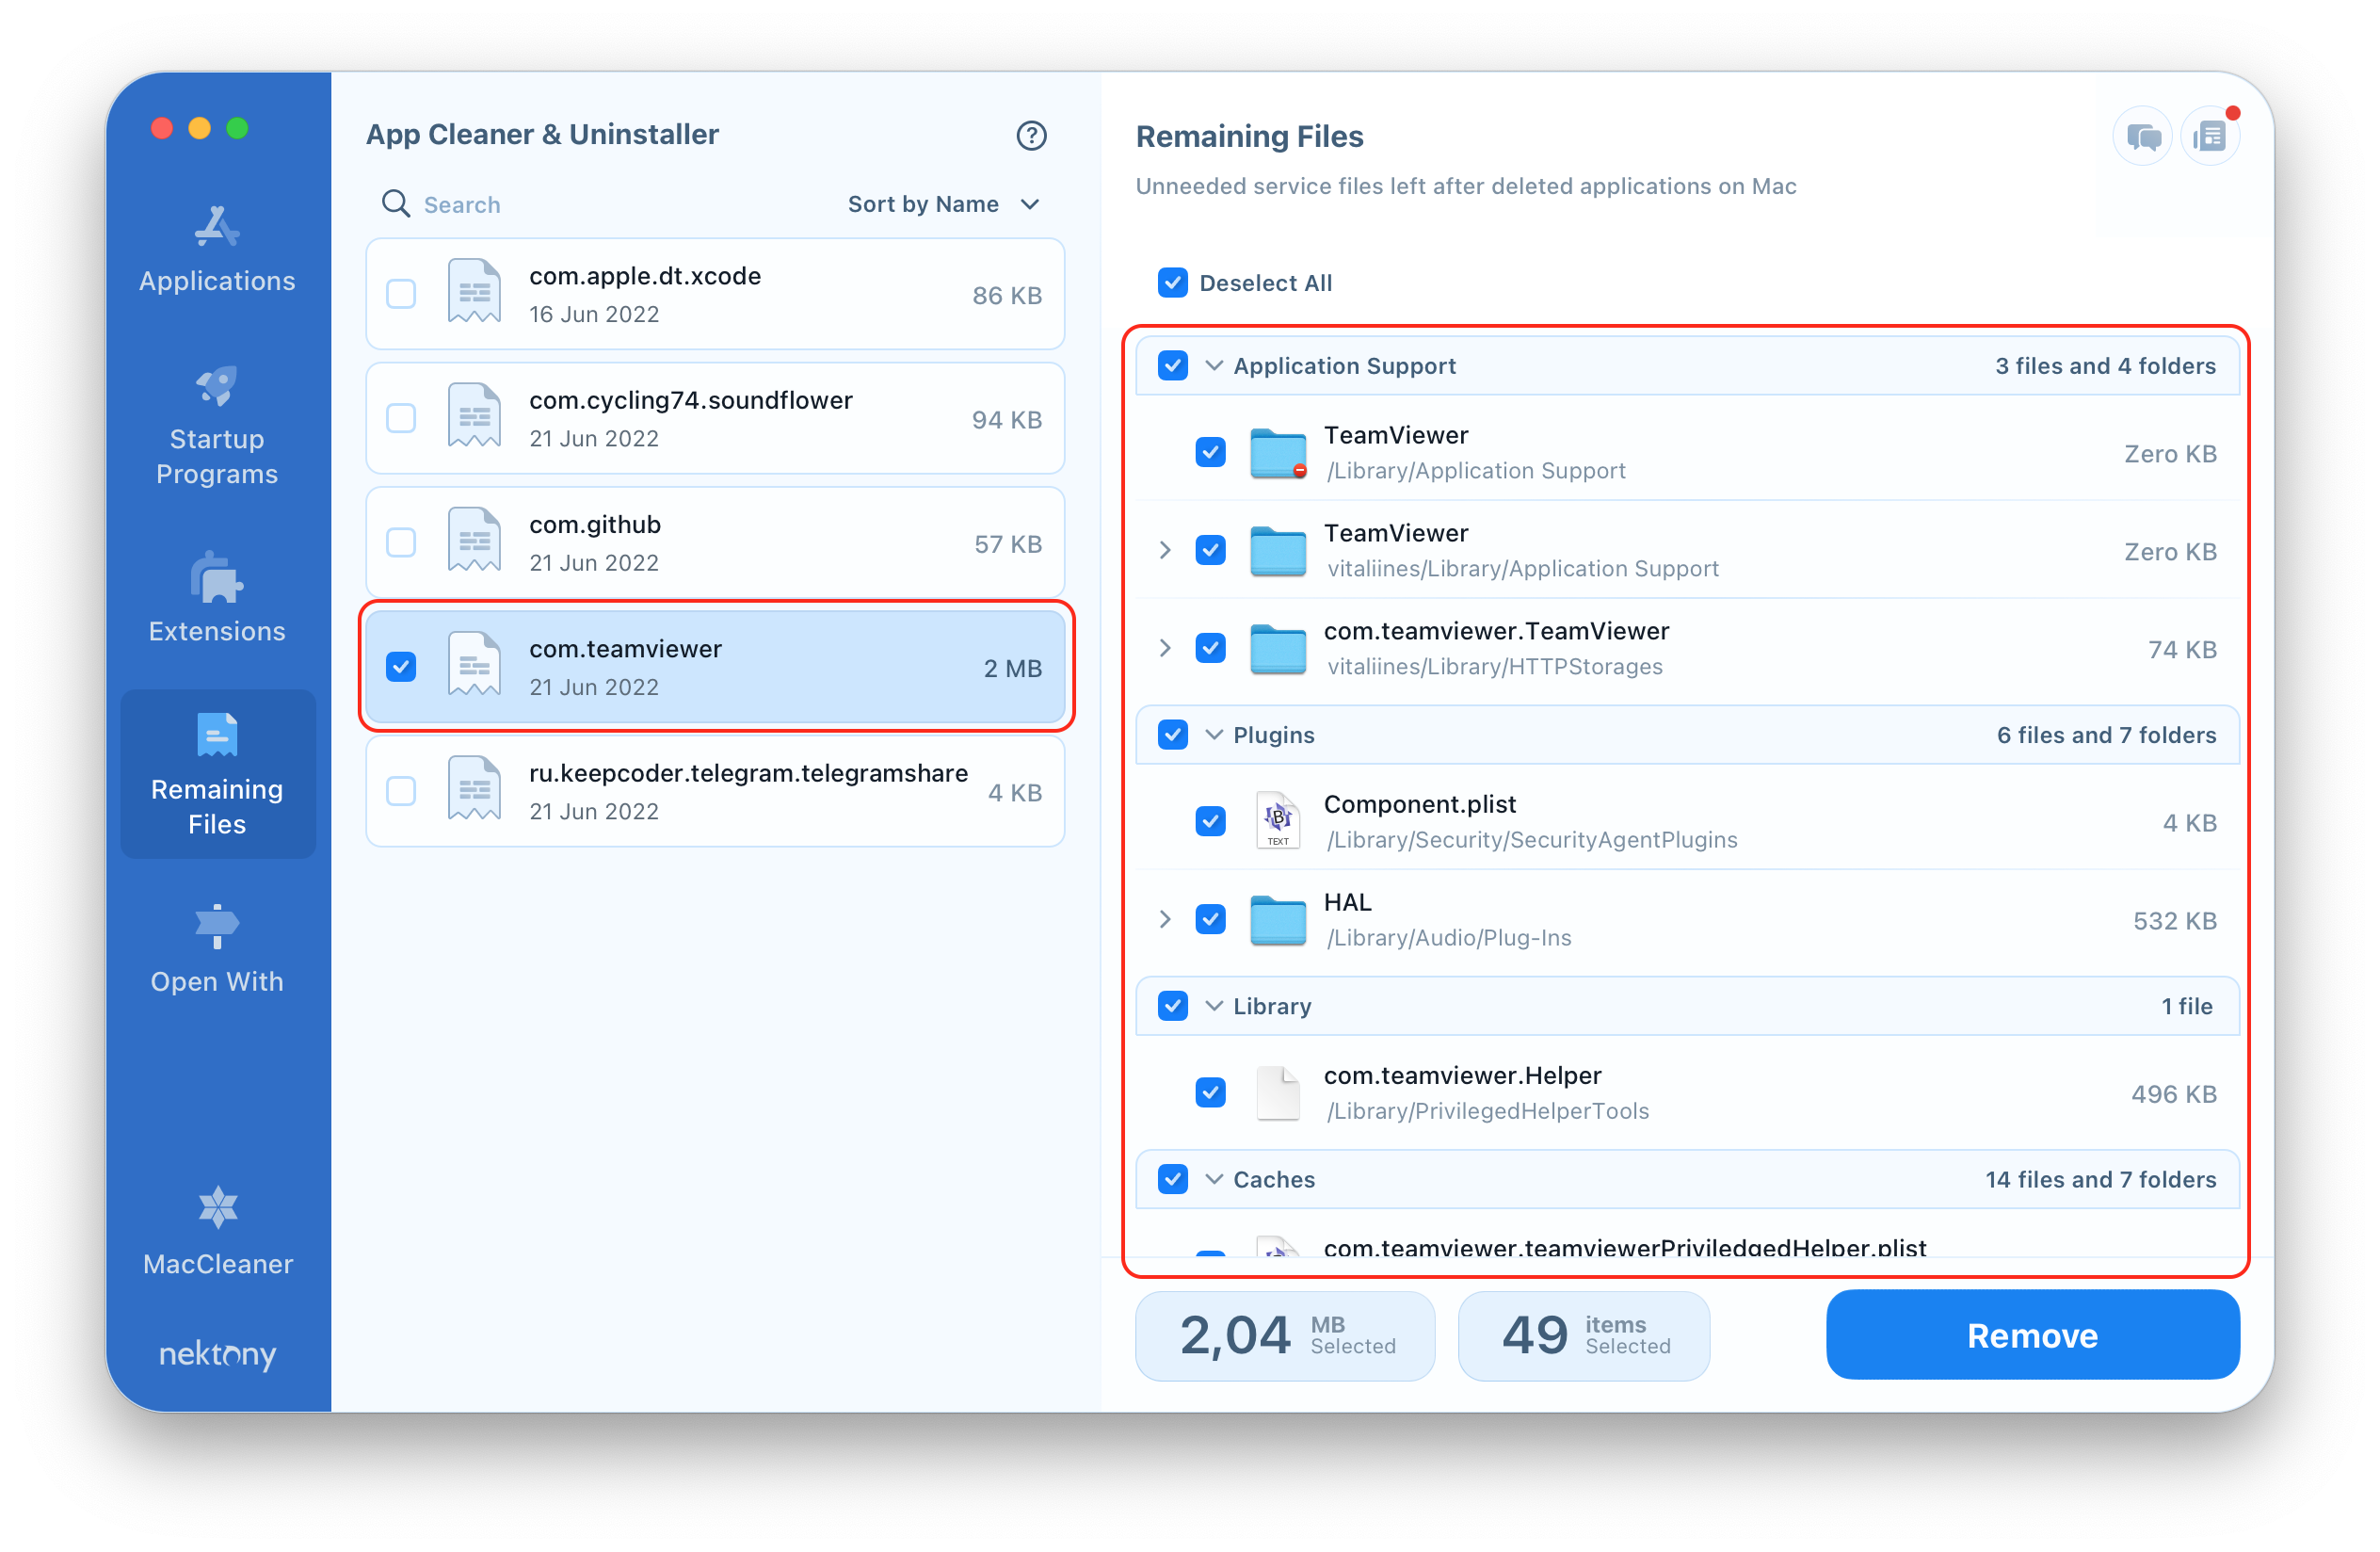
If you have already uninstalled TeamViewer using another removal method, switch to the Remaining Files tab and remove its leftover files. In our case, we found 2,04 MB of files left after TeamViewer.
The best thing about App Cleaner & Uninstaller is that you can try it out absolutely for free!
