May 23, 2025
What is Other on Mac Storage
When you check your Mac’s storage, you might notice a category labeled Other taking up a surprising amount of space. But what exactly is Other on Mac storage? According to Apple, this category includes all files that don’t fit into the main types like Documents, Apps, Photos, Audio, or Movies.
In this article, we’ll break down what’s actually hiding in the Other storage category, where to find these files, and, most importantly, how to safely clear them to free up valuable disk space on your Mac.
This Article Contains
Before we start
If you do not have time to explore what “Other” storage is, but you need to quickly clear Other Data and recover valuable disk space on your disk, use the special software tool, MacCleaner Pro.
This all-in-one solution will help you to remove tons of useless files, such as user cache, unneeded extensions, deleted apps’ support files, duplicates, and other items stored on your disk.
What is Other in Mac Storage
The “Other” storage contains all the data that do not match the specified categories displayed on the disk usage chart in System Settings.
“Other” on Mac includes the following types of files:
- System temporary files
- macOS system folders
- Archives and disk images (.zip, .iso, etc.)
- Personal user data
- Files from the user’s library (Application Support, iCloud data, screensavers, etc.)
- Caches
- Fonts, plugins, extensions
- Hidden files
- Other files that are not recognized by a Spotlight search
Note:
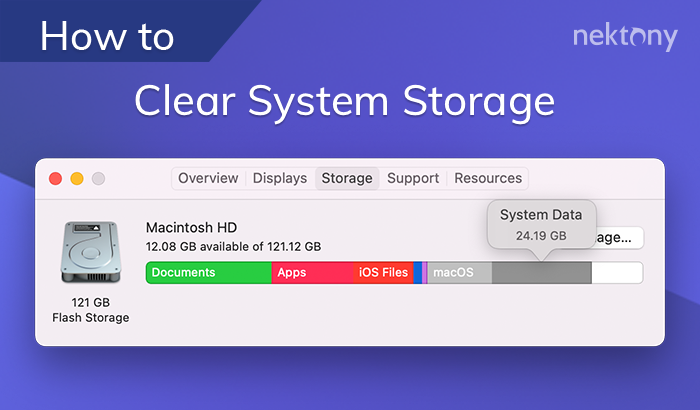
In macOS Monterey and earlier system versions, the “Other” is called System Data. Learn more about System storage on Mac.
How to check Other storage volume on Mac
To check how much space each type of data takes up on your Mac follow these steps:
- Open System Settings from the Apple menu.
- Click General in the sidebar.
- Click Storage in the right panel.
- You will see the barchart of what’s taking space on your disk.
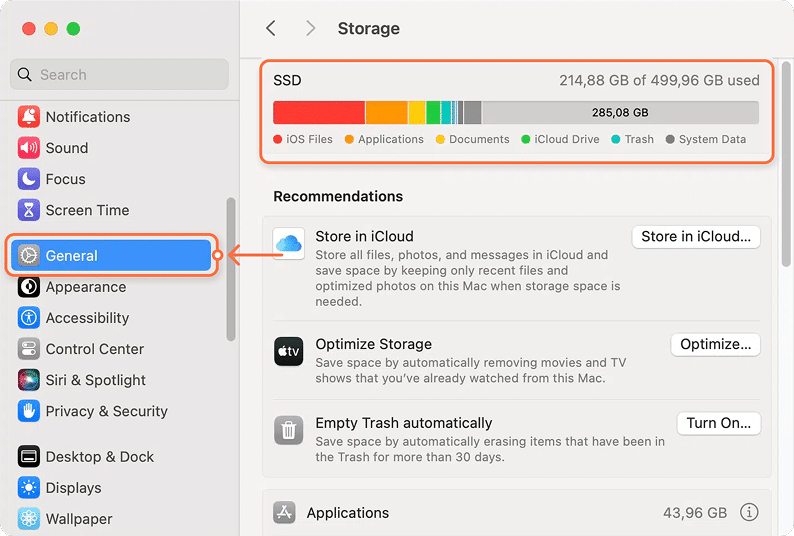
For old versions of macOS follow these steps:
- Click the Apple icon in the menu bar.
- Select About this Mac.
- Switch to the Storage bar.
- Here, you can see how much space standard categories take up on your disk.

In our case, the Other Storage category takes up the most space in comparison to the rest of the file categories. If you find you have the same situation, don’t worry! We’re going to simplify your life and show you how to delete the Other storage on your computer.
Why is my Other Storage so huge?
If you have many applications and haven’t cleared their cached data for a long time, if you keep all iCloud data on your computer, if you save a lot of mail attachments, then over time all these files can take up a significant amount of space in your Other Storage.
All applications create tons of temporary files, and not only caches. Applications have their own fonts, plugins, app extensions and other service data. That’s why, if you have a big number of applications, your Other Storage might be huge.
Now let’s see where to find those files and how to clean up Other storage.
Where is Other Storage on a Mac
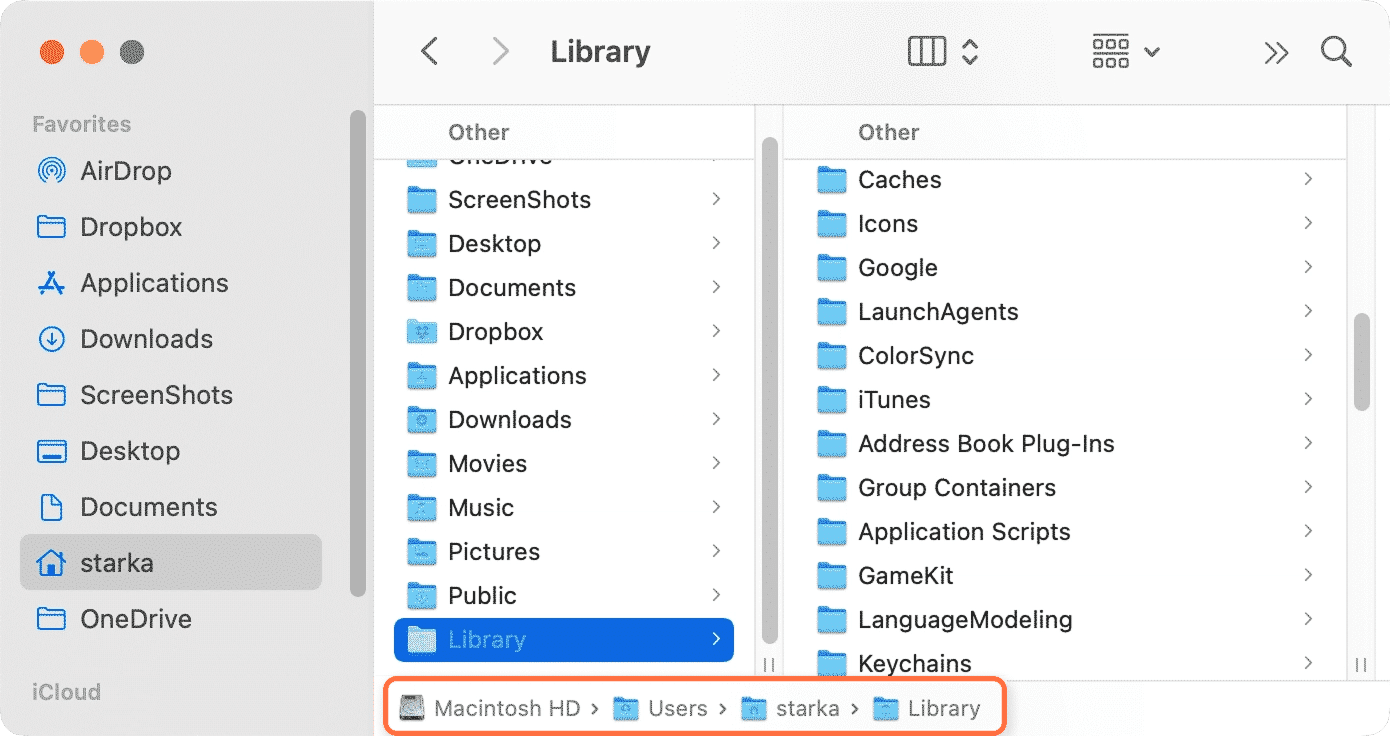
Most files in “Other” are located in the system Library. Apple hides service files to prevent the deletion of important files that could cause problems with applications or system operations. So please, when clearing out the Library folder, resist touching any files if you don’t understand what they are used for, as it could be disastrous.
We also recommend you perform a complete system backup before beginning.
Steps on how to find files from “Other” in the Library folder
- Open Finder.
- Click Go in the Menu bar.
- Select Go to Folder. Also, you can use the ⌘Cmd + ⇧Shift + G shortcut for this option.
- Type in the search field and press Return.
~/LibraryCopy
Here you will find all the system and app-related items. As we mentioned above, system temporary files, caches and other service files are included in the Other data.
How to delete Other Storage
Most files in the “Other” content are not wasteful in nature. They support apps or system processes to help them run more efficiently. Over time, however, they can clog up your drive and make your system run slowly.
To clear them out and speed things up once more, you can choose either the manual processes outlined below, or if that seems a bit arduous then you can simplify things by using the special software tool. Take a look at our comparison article to find the best Mac cleaning software for yourself.
Steps on how to reduce Other Storage on Mac
1. Clear cache
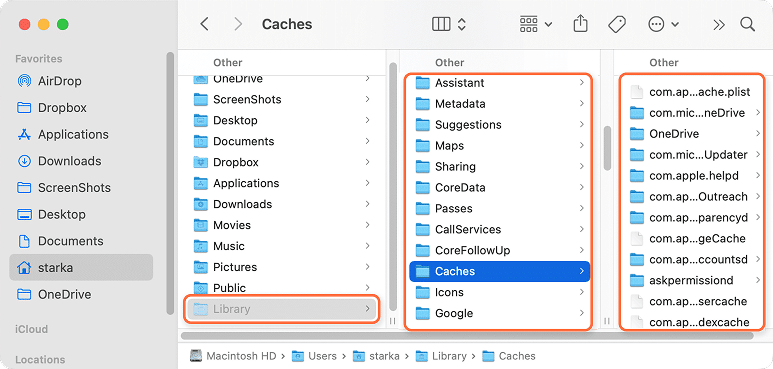
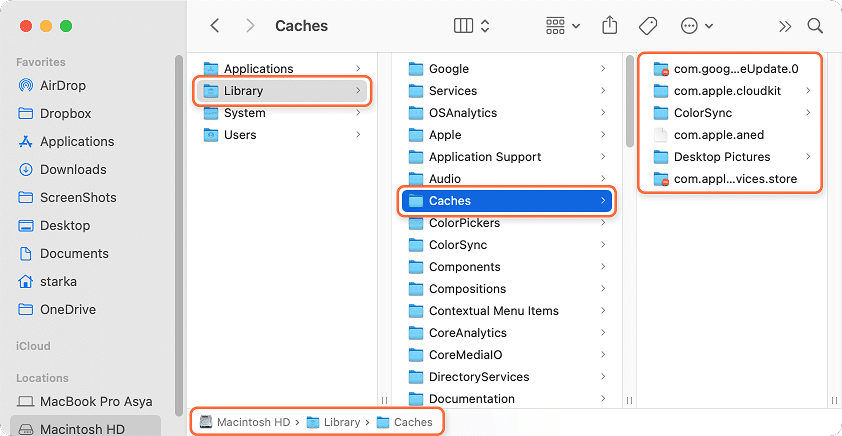
As we mentioned above, the many “Other” files are located in the Library folder. So, let’s navigate to this folder, find the cache and remove it manually.
- Open the Finder.
- Press ⌘Cmd + ⇧Shift + G.
- Copy and paste the directory:
~/Library/CachesCopy
- Press Return.
- Go inside each subfolder and remove caches from your apps.
- Also check the following folder for caches: .
/Library/CachesCopy
2. Remove installation files
By default, all files downloaded from the Internet are stored in the Downloads folder. Looking in here you’ll find installations, .pkg and .dmg files that are no longer needed and can be deleted. So, to save space, explore Downloads and remove all unnecessary files.
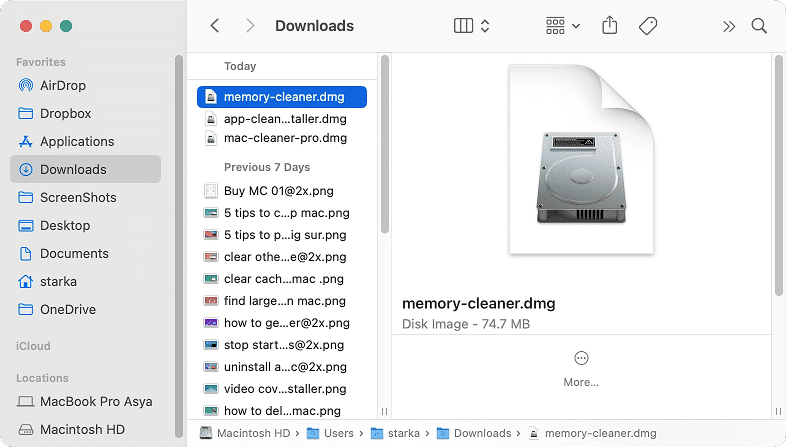
Note that the two tips above can be achieved more quickly and easily if you use MacCleaner Pro.
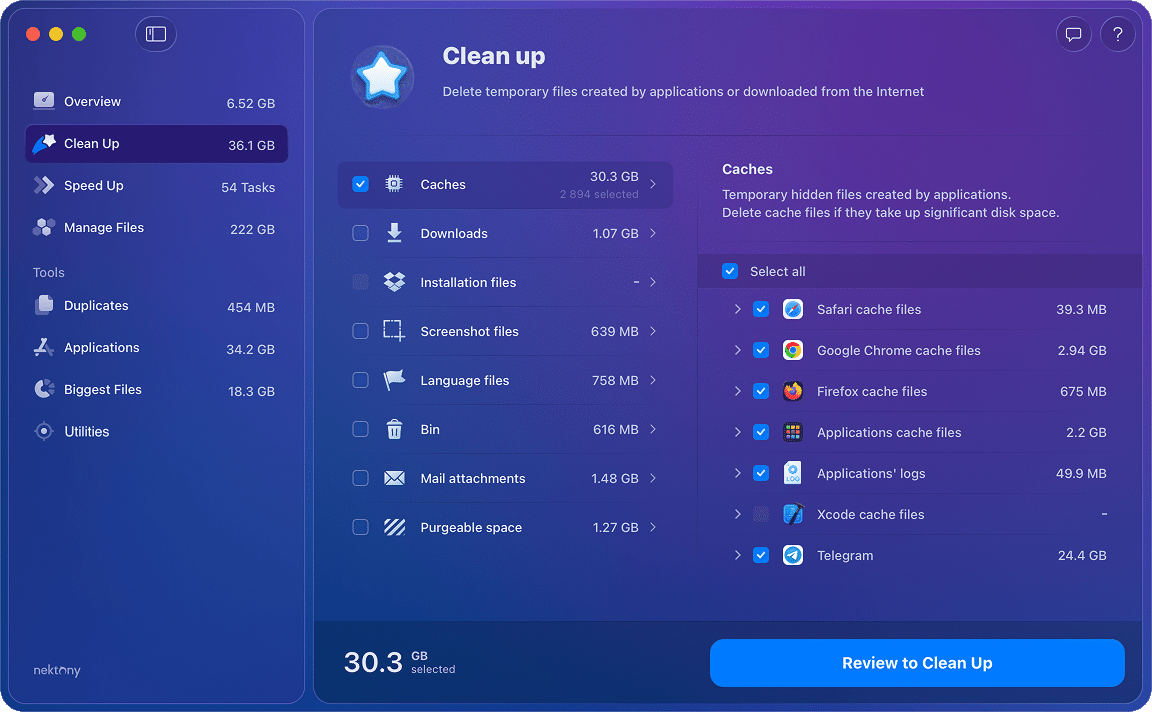
Here’s how to quickly clean up caches and downloads with MacCleaner Pro:
- Download and launch MacCleaner Pro.
- Switch to the Clean Up section.
- Select Caches, Installation files and other types of junk files you would like to remove.
- Click on Review to Clean Up to remove selected files.
3. Remove extensions
Extension files, such as plugins, installation files, screensavers and web browser extensions, can take up unnecessary disk storage. There’s also the factor that some extensions may have a negative effect on your system, noticeably slowing things down. If you can live without the features they offer, we recommend finding and getting rid of them.
Remove web browser extensions
Usually, each web browser provides its own individual steps to install and remove extensions. To see what these are for the most popular browsers on Mac – including Chrome, Firefox, and Safari – please read how to delete browser extensions on your computer.
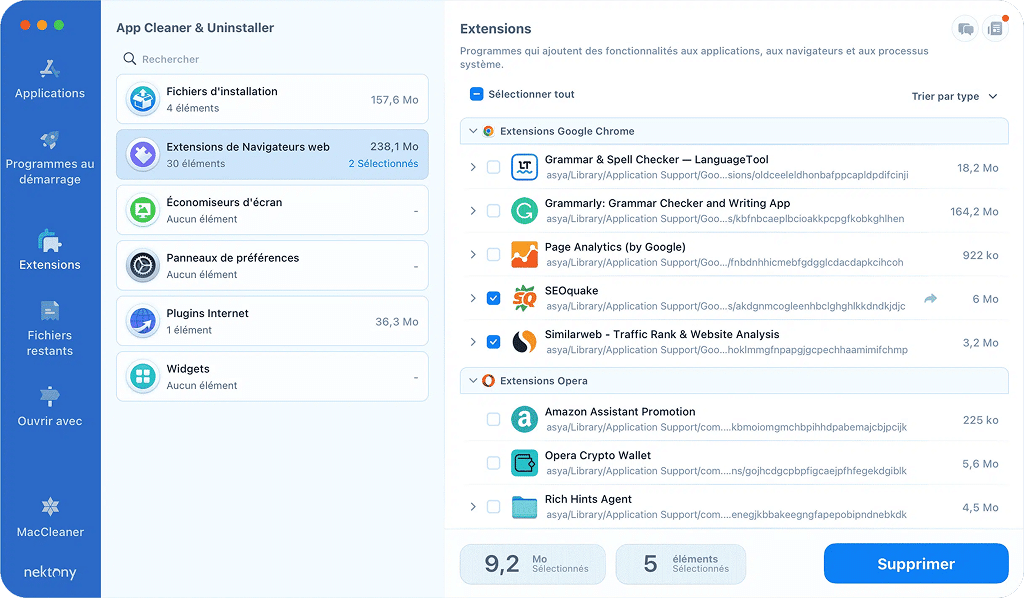
Here is how to remove Safari extensions:
- Launch Safari.
- Go to the Safari Settings.
- Switch to the Extensions tab.
- Click the Uninstall button for each extension you don’t need.
Remove screensavers
Screensavers usually don’t take up much room on your Mac. However, it’s important to clear every unnecessary file if you’re running low on space.
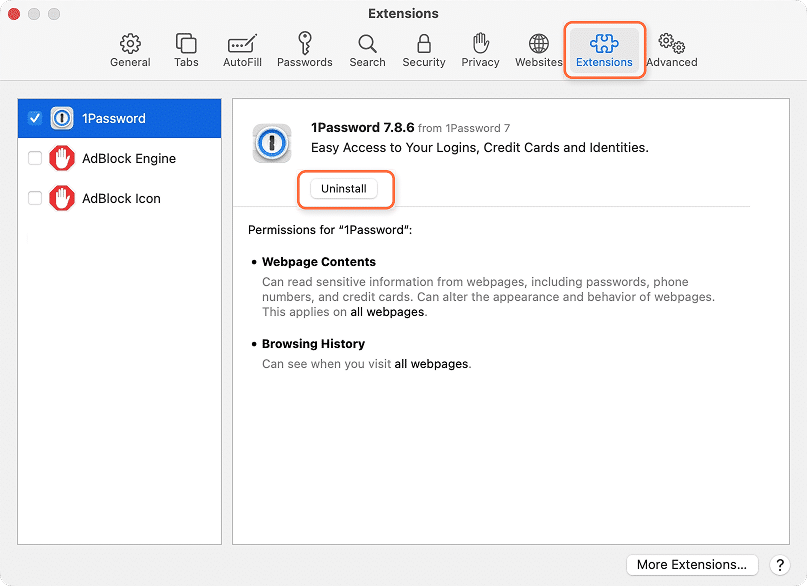
Here’s where you can find and delete screensavers:
- Open Finder.
- Press ⌘Cmd + ⇧Shift + G.
- Navigate to the subfolder . In this folder, you will see the screensavers.
~/Library/Screen SaversCopy
- Remove unneeded screensavers to the Trash.
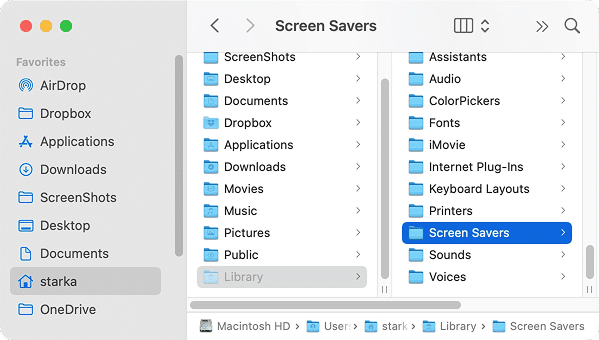
Here is how to find and delete Internet plugins:
- Open Finder.
- Press ⌘Cmd + ⇧Shift + G on your keyboard.
- In the search field, type and press Return.
~/Library/Internet Plug-InsCopy
- Skim your plugins and remove unneeded ones.
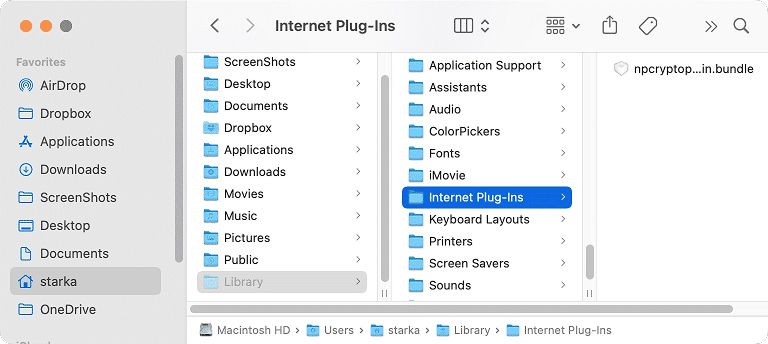
Again, instead of manually searching for extension files, we recommend using MacCleaner Pro. With this solution, you can automatically find all extensions and remove them.
- Launch App Cleaner & Uninstaller from MacCleaner Pro. The app will automatically scan your apps and extensions.
- Switch to the Extension tab.
- Select unneeded extensions.
- Click to remove them.
4. Remove application support files
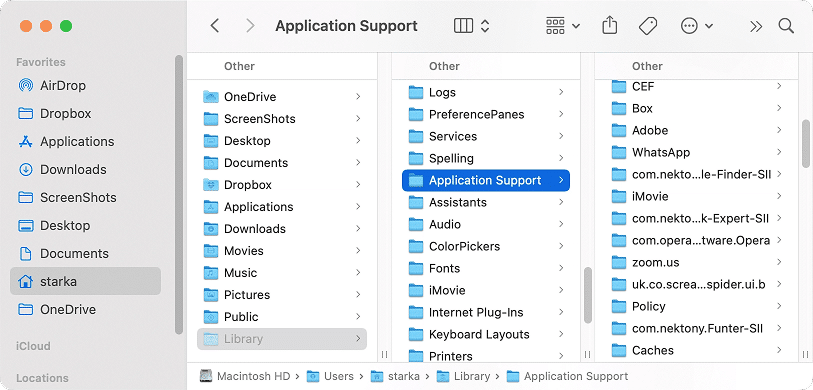
Besides caches, each application creates and stores other service files on your Mac, such as logs and preferences. The steps to find them are similar to finding cache files.
- Open Finder.
- Press the ⌘Cmd + ⇧Shift + G shortcut.
- Navigate the following folders:
~/Library/Application supportCopy
~/Library/LogsCopy
~/Library/ContainersCopy
/Library/Application supportCopy
/Library/LogsCopy
/Library/ContainersCopy
- Remove files you don’t need.
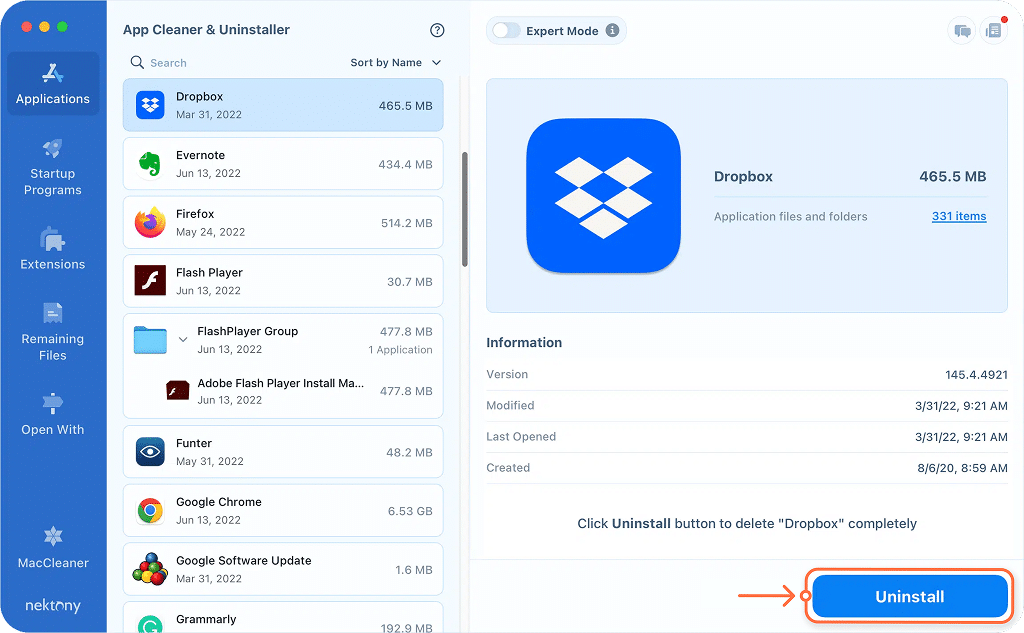
Note that with the App Cleaner & Uninstaller solution we mentioned above, you can reduce the process to just a few clicks. The application automatically locates all temporary files for your programs and helps you to quickly remove caches, logs, preferences and even leftovers of previously-removed apps.
To remove support files by using MacCleaner Pro, follow these steps:
- Launch App Cleaner & Uninstaller from MacCleaner Pro.
- Switch to Expert mode.
- Select any app from the list on the left.
- You will see support files in the pane on the right.
- Select all files except the executables.
- Click on Remove and confirm the deletion.
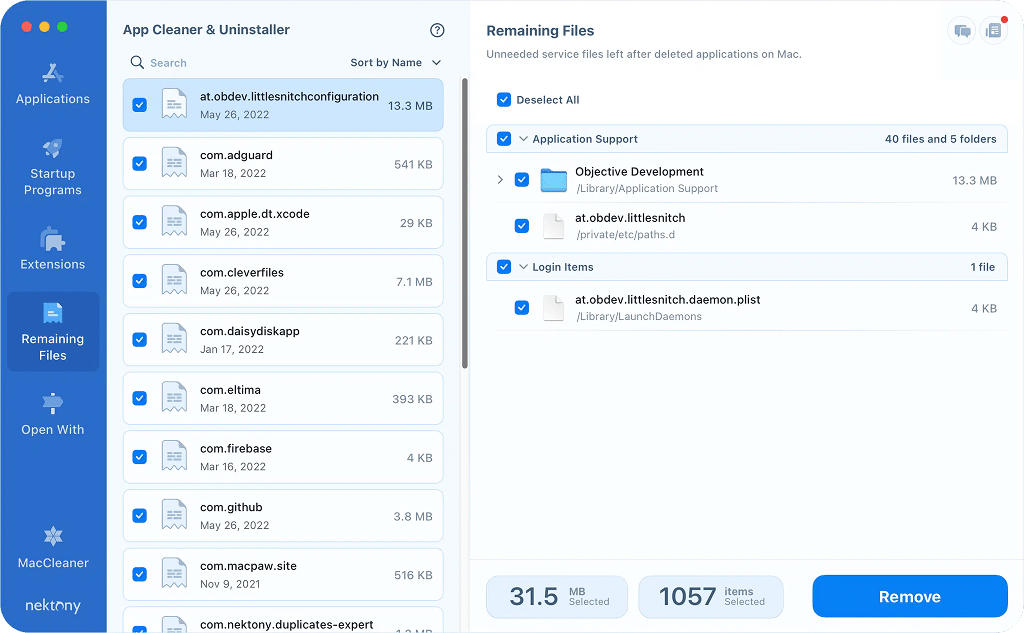
If you want to find and remove the leftovers of previously deleted apps, switch to the Remaining Files section.
5. Remove useless documents
Removing documents from Other storage can be done through a Smart Folder Finder:
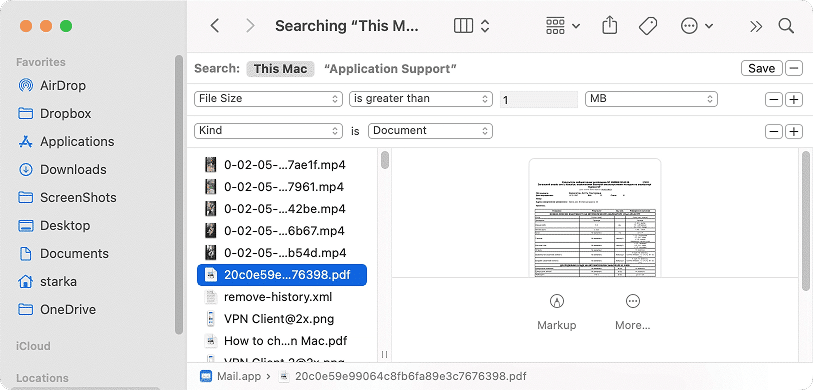
- Open Finder and press the ⌘Cmd + F shortcut. The search should be carried out in “This Mac”.
- Choose “Other” in the first dropdown menu.
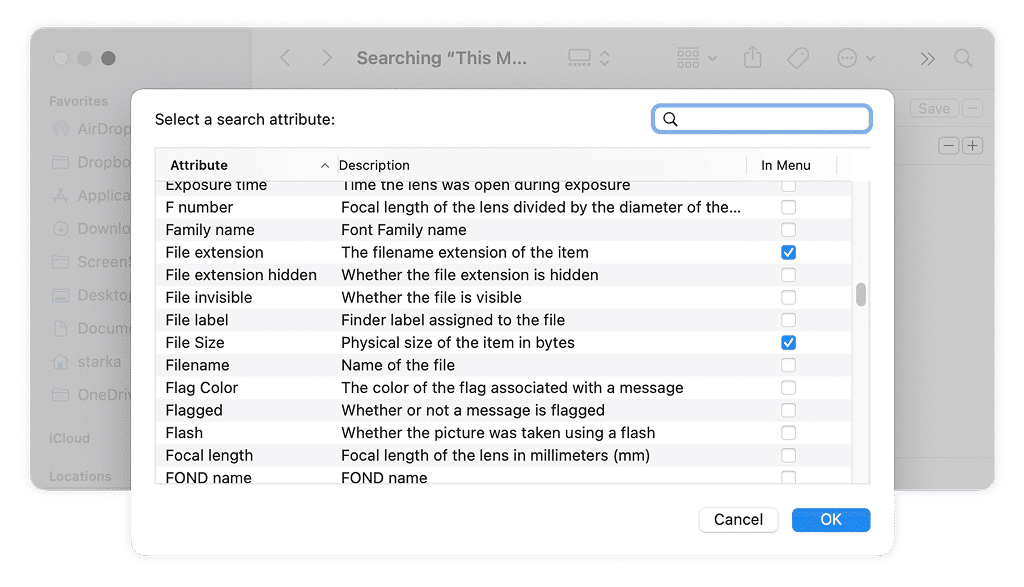
- From the Attributes list, select File Size and File Extension.
- Click Ok.
- Specify the file size and type of extensions you want to find.
- You will see a list of files matching the filter.
- Delete the large and unneeded documents or store files on external storage to free up more space on your Mac’s hard drive.
Fortunately, even in this case, you don’t have to waste hours finding the redundant documents on your Mac. Why use the manual method when there is a much easier option?
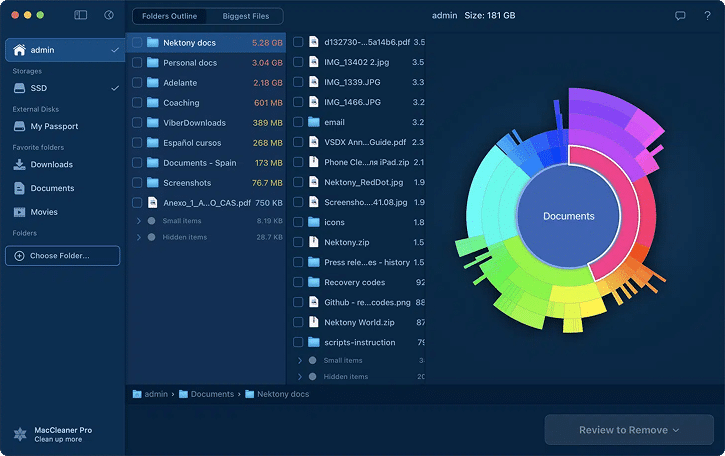
With the help of MacCleaner Pro tools, you can explore your hard drive in a convenient and efficient way.
- Launch the Disk Space Analyzer tool from MacCleaner Pro.
- Scan your Mac for the largest files and folders.
- It will visually display the storage usage as a sunburst diagram and show the bulkiest content, including hidden and system files
- Find files that take up the most space on your drive. Remove them or move to external storage
There you have it, several ways to clean up Other storage on Mac and get more free space on your hard drive. You can either delete files manually or download MacCleaner Pro to save time. If you want the fastest method, then we recommend the latter. Let us know your clean-up results in the comments below.


fantastic post, very informative. I wonder why the other specialists of this sector don’t notice this. You must continue your writing. I’m sure, you’ve a great readers’ base already!