May 16, 2025
How to clear System Data on Mac storage
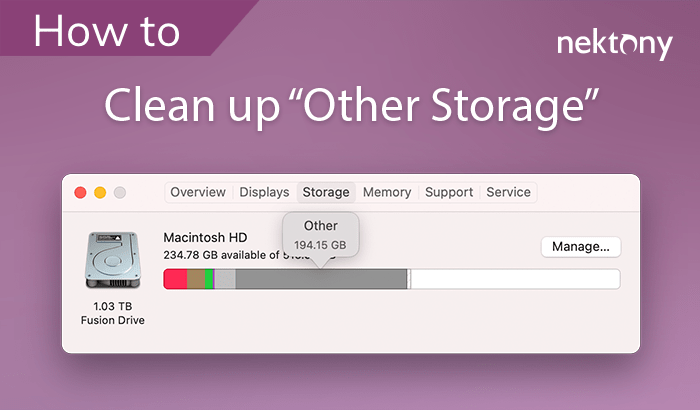
Most users think that the System Data (Other) category on a Mac includes caches and other temporary files that help the system to work properly. Actually, besides the service files, system storage on Mac includes other types of files.
This article will explain what types of files are included in system data and how you can reduce system storage on your Mac.
What is system data on a Mac?
Sometimes, system storage can take up a huge space on a Mac disk. It includes the following types of files:
| Mac action | Effect of large System Storage |
|---|---|
| Boot time | Increased by 20–30%, especially if cache or swap files are oversized |
| App launch speed | Slower due to reduced available RAM |
| Spotlight indexing | May fail or take longer to update |
| Time Machine | Larger backups take longer and consume more space |
| System updates | May fail due to insufficient free disk space |
Should you clean up the system data?
By default, Apple hides system data because removing some important files can damage the system; however, some of the system storage data is unneeded and can be safely removed. Moreover, it is recommended to periodically clean up your system storage from unneeded files, because a low free disk space can cause your Mac performance to slow down.
Safe to clean:
- Caches and logs (user and system)
- Old Time Machine local snapshots
- App leftovers after uninstallation
- Old archives or installers (e.g., .zip, .dmg, .pkg)
- iOS backups you no longer need
- Unused plugins, extensions, and fonts
Be careful with:
- Files in /System or /Library (used by macOS)
- Sleep image and swap files (auto-managed by macOS)
- Manual deletion of anything in ~/Library if you’re unsure
Note:
In macOS storage settings, you may see a separate category called “Purgeable.” Please note that Purgeable space is not included in System Data. Read more about Purgeable space in this article.
How System Storage can impact Mac’s performance
When System Data grows too large, it can have a noticeable impact on system’s performance. A bloated system can slow down key operations, cause errors, and even prevent critical updates.
Here’s how excessive system storage can affect your Mac’s performance:
| Category | Approx. size range |
|---|---|
| Caches, logs, fonts, plugins, extensions | 2 – 10 GB |
| System and applications temporary files | 1 – 8 GB |
| Time Machine backups | 5 – 30+ GB |
| Archives and disk images (.zip, .iso, etc.) | 1 – 15 GB |
| All files from the user’s Library | 5 – 20 GB |
| Other hidden files | 2 – 10+ GB |
How to check system data volume
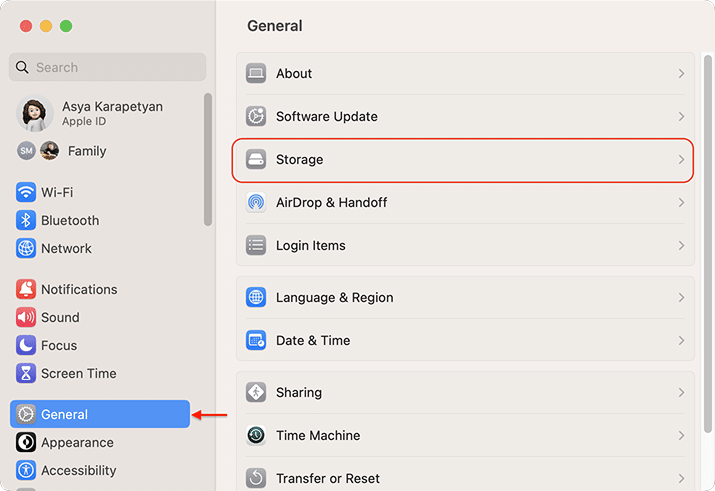
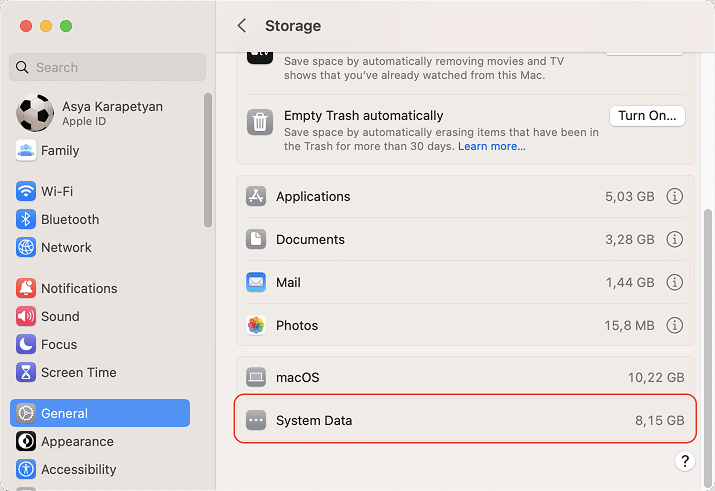
To see your system data volume on macOS, do the following:
- Open System Settings.
- Click General in the sidebar.
- Click Storage in the right panel.
- Scroll down and you will see System Data volume on your Mac.
How to find system data on a Mac
Most of the files from the system storage category are located in the System and Library folders. By default, Apple keeps these folders hidden to protect them from being accidentally deleted or removed. However, you can get access to them via Finder’s menu.
How to find system files in the Library:
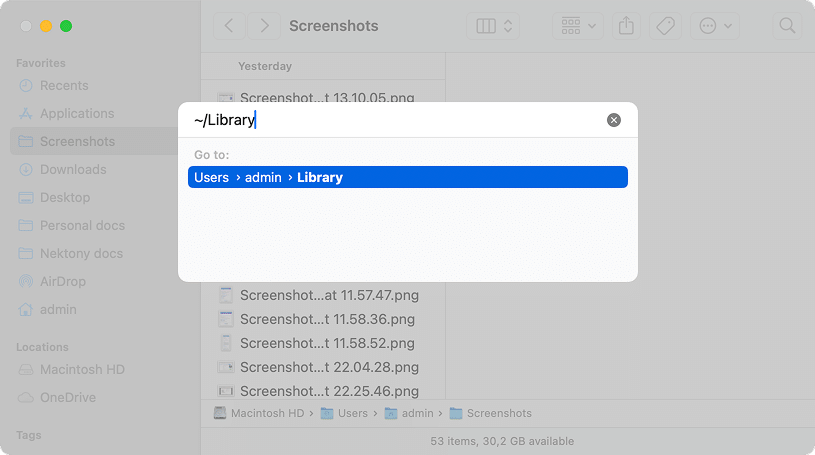
- Open Finder.
- Press Command+Shift+G.
- In the search panel, type and press Return.
~/LibraryCopy
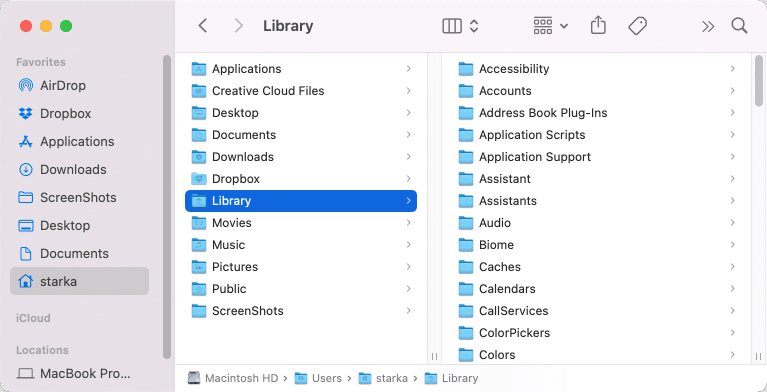
- You will see the Library folder containing many subfolders with applications and system service files.
How to easily access Library for system data cleanup:
- Open Finder.
- Go to your Home folder from the sidebar. You can also press Command+Shift+H.
- Right-click in the Finder window’s free space
- From the context menu, select Show View Options.
- In the window that appears, enable the Show Library Folder option.
How to clean up system storage on Mac
While macOS categorizes a wide variety of files as “System Data,” not all of them can or should be deleted. Much of this data consists of essential operating system files required for your Mac to function.
Furthermore, System Data is dynamic – it may increase again shortly after cleaning as macOS automatically recreates necessary caches or swap files to keep your system running smoothly.
MacCleaner Pro is designed to intelligently scan System Data and extract only the “expendable” items – the files that take up space but aren’t necessary for your system’s health. This includes:
- User and system caches
- Broken login items
- Application traces
- Download and launch MacCleaner Pro.
- Go to the Clean up section.
- Select the junk files you don’t need.
- Click Review and Clean Up and confirm the action.
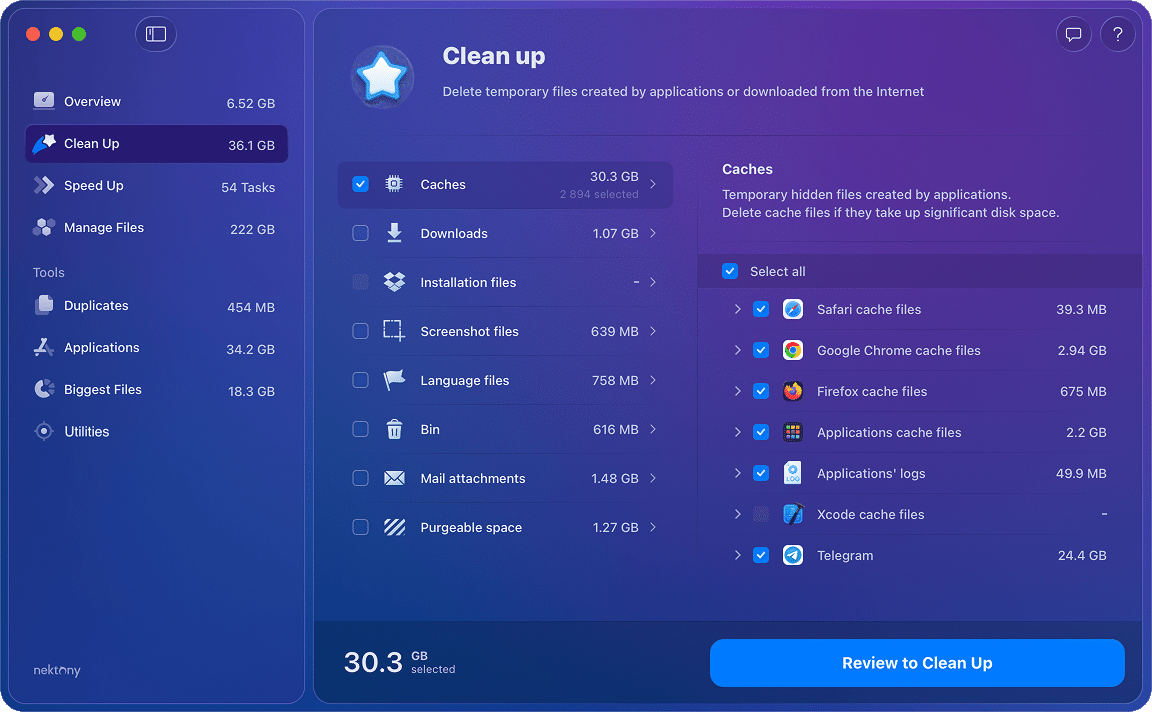
With additional tools from the MacCleaner Pro bundle, you can also reduce system data on Mac like support files of already removed applications, extensions, logs, and other unneeded service files.
Note:
MacCleaner Pro will never delete core macOS files or protected system data. This ensures your Mac remains stable and fast while reclaiming every gigabyte of safely removable space.
Free up Mac storage space: The manual way
Step 1. Remove caches
Both system caches and application caches are located in the Library. To get to the Library and remove cache files, do the following:
- Open a Finder window.
- Go to the Finder menu, click Go → select Go to Folder.
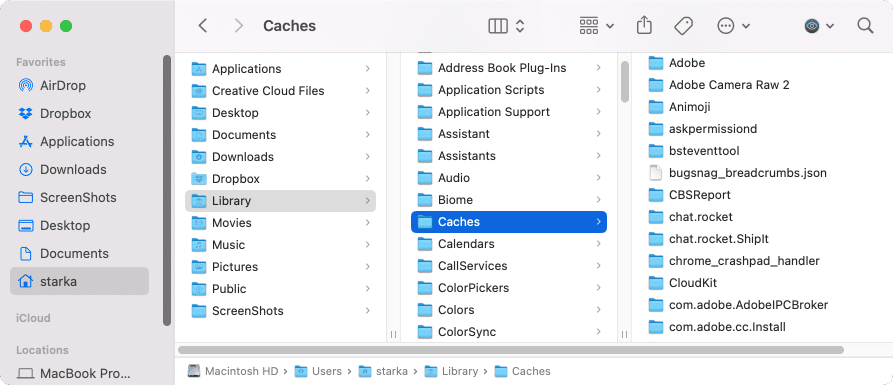
- In the window that appears, type and press Return.
~/Library/CachesCopy
- You will see the Caches folder. Remove the subfolders containing cache files of your applications.
- Go to folders (without the “~”) and remove unneeded caches from there.
/Library/CachesCopy
Step 2. Remove service files
Besides caches, there are lots of other service file applications stored on your Mac. Extensions, logs, cookies, plugins: all of them are the files that macOS recognizes as system data storage. Moreover, some extensions and plugins may negatively affect your system, such as making your Mac run slowly, so you should remove them.
Steps to manually remove applications support files:
- Open Finder.
- Go to Finder’s menu, select Go → Go to Folder.
- Navigate the ~/Library folder.
- In Library, check the following folders:
~/Library/Application supportCopy
~/Library/LogsCopy
~/Library/ContainersCopy
/Library/Application supportCopy
/Library/LogsCopy
/Library/ContainersCopy
- Select and remove all unneeded service files.
Important!
Be careful not to remove the subfolders with the name starting with com.apple… This can damage your system.
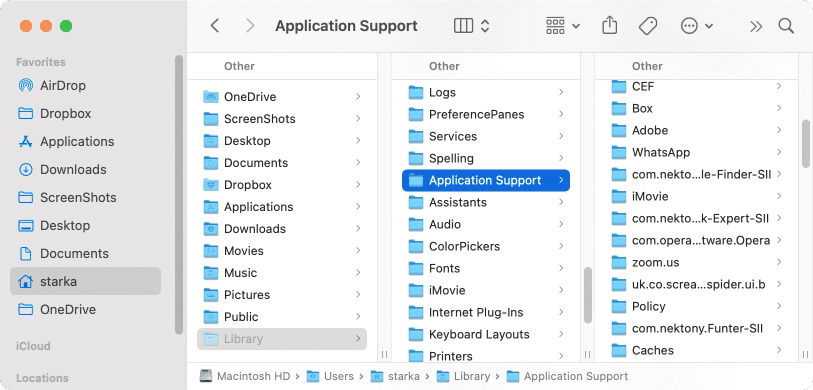
Here, you may find the remaining files of already removed applications. Usually, the third-party applications’ support folders have names of the applications or developers.
Instead of manually searching for apps’ support files and leftovers of uninstalled programs, you can use one of the tools from the MacCleaner Pro bundle.
- Launch App Cleaner & Uninstaller from MacCleaner Pro.
- Switch to the Remaining Files section.
- Select all leftovers.
- Click Remove and confirm the action.
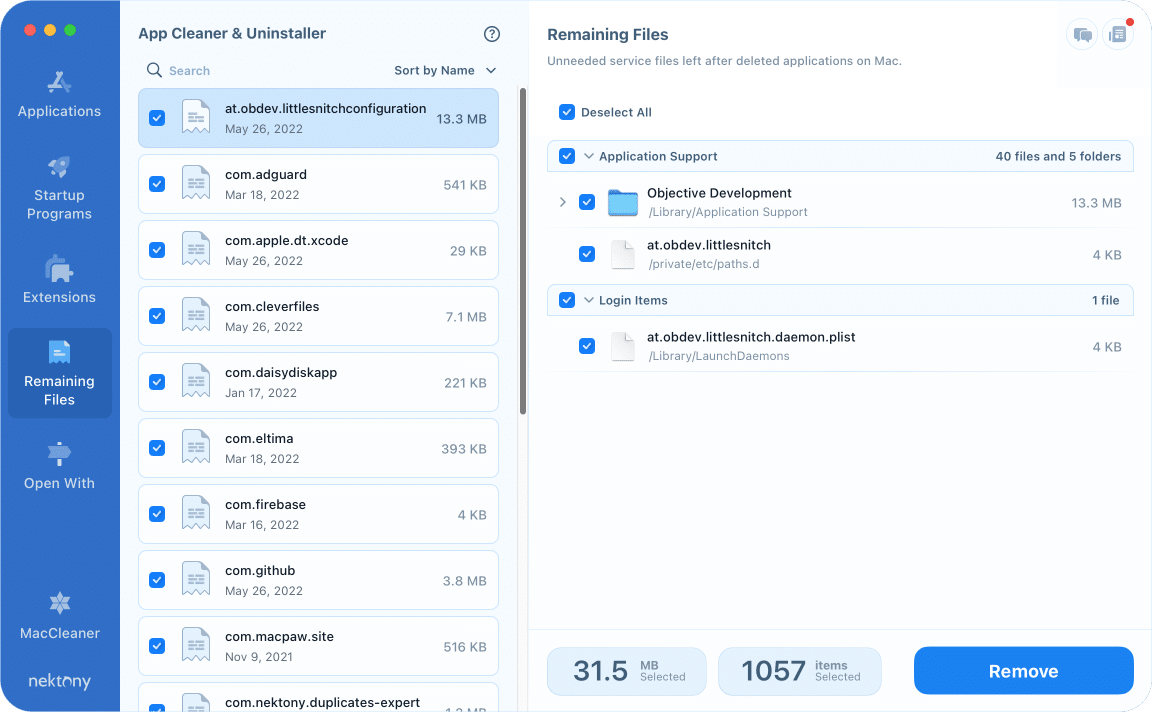
You can also use this software tool to reset applications, get rid of their support files, or completely uninstall programs on your Mac.
Step 3. Remove Time Machine backup snapshots
Backing up your Mac with a Time Machine is a great idea. However, despite saving your data on external storage, macOS also creates snapshots of those backups every day and stores them on your Mac startup disk.
By default, these snapshots are only saved if you have enough free space on your disk. Also, the system automatically removes old snapshots when new ones are created. This is great when you have to restore some files, but these items take up significant space on your Mac.
To stop Time Machine from clogging your system storage, you can turn off this feature, which will automatically remove old backup snapshots.
Here’s how to do this:
- Open Settings.
- Go to the General section from the sidebar.
- Locate and click Time Machine.
- If backups and turned on, click to disable the option.
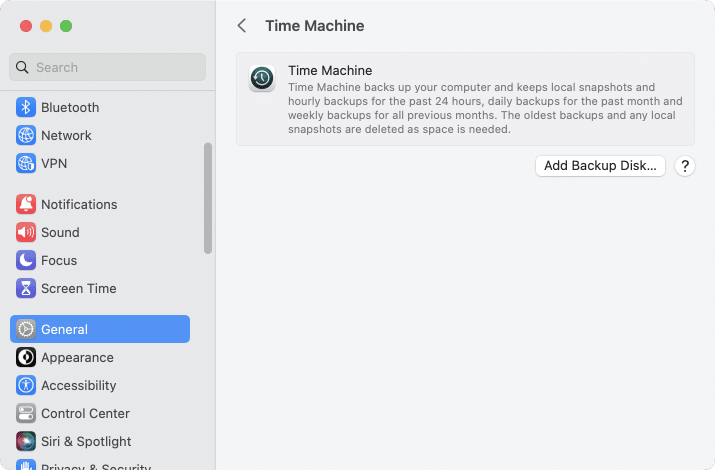
Also, you can remove old backup snapshots with a Terminal command line.
- Open Terminal.
- Copy and paste the following command and press Return.
tmutil listlocalsnapshotdatesCopy
- You will see the list of backups on your Mac.
- To delete any of the backups, use the following command and press Return:
The “<name of the backup>” should be changed to the name Terminal displayed above.
tmutil deletelocalsnapshots <name of the backup>Copy
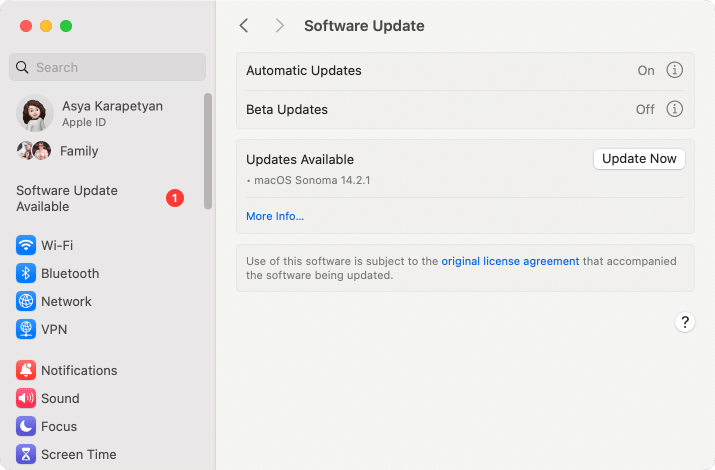
Step 4. Update macOS
When you download a new macOS update but don’t update your Mac, its installation file takes up space in your system storage. Once you update your Mac, this file gets cleared from your disk.
To update your Mac, do the following:
- Open System Settings.
- Click General in the left panel.
- Click Software Update in the right panel.
- If any update is available, you will see the appropriate button to start the updating process.
Why does system data take up so much space?
You may notice in the storage usage bar that system data is high and takes so much space on your Mac. By default, the average size of a macOS system is 12-16 GB. Therefore, if your Mac system storage (macOS + system data) takes around 40-50 GB, then that’s okay.
Common reasons why System Data becomes huge
- You may have lots of applications whose caches have never been cleared.
- You may have many remaining files of already removed applications. If you delete applications by just dragging and dropping them into the Trash bin, read our article “How to completely uninstall applications on Mac.” In fact, the applications’ leftovers might remain on your Mac and occupy valuable space in your system storage.
- It might be a system error.
Even after cleanup, System Data is still huge?
If you have cleaned up your system storage by deleting caches and other system junk but it continues taking up a lot of space, it might be macOS reporting error. Try the following to check and fix this issue:
Use Safe mode
- Reboot your Mac in a Safe mode. For this, hold the Shift key when pressing the Power button.
- Open System Settings and go to General → Storage.
- Check your System Data volume.
- In Safe mode, it should display accurate system usage.
- Restart your Mac in a normal mode and check your system storage again. The issue should be fixed.
Use Disk Space Analyzer for a visual breakdown
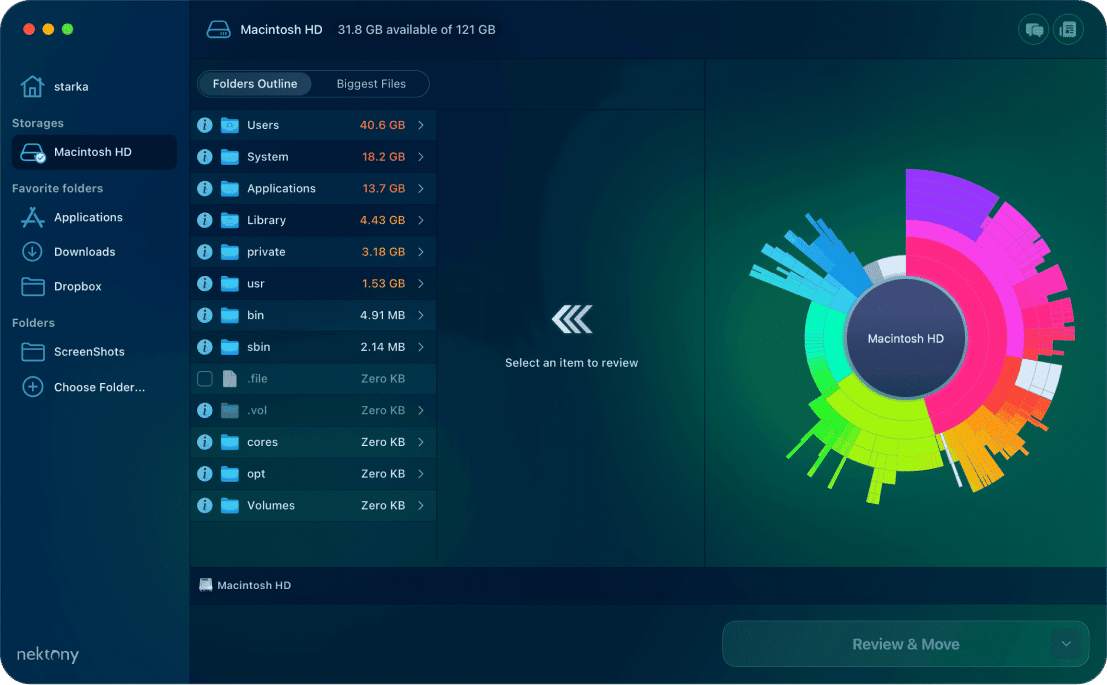
You can also check how much space your system data is taking on your drive with Disk Space Analyzer from Nektony, which is included in the MacCleaner Pro bundle.
- Open Disk Space Analyzer.
- Click to scan your Macintosh HD.
- The application will scan your hard drive and provide a convenient sunburn diagram of your disk usage.
- Navigate through folders; for example, check the Library folder and see what system files are taking the most space.
To sum up
Before you start clearing system storage on your Mac, check which files are taking up the most space. Caches and applications’ leftovers may take up huge space in your system storage. You can easily analyze what’s taking space on your Mac and safely remove all unneeded system files with MacCleaner Pro.
