Time Machine is a default Apple utility that is intended to prevent the loss of files and system damage. When you use Time Machine by default, you will be able to restore the state of your system that you had an hour ago – files, data and settings.
Contents:
- How to back up a Mac with Time Machine
- Tips for creating a backup
- How to recover permanently deleted files using Time Machine
Before we start
To quickly remove useless files and boost the speed of your computer you can use MacCleaner Pro.
MacCleaner Pro
How to use Time Machine on a Mac
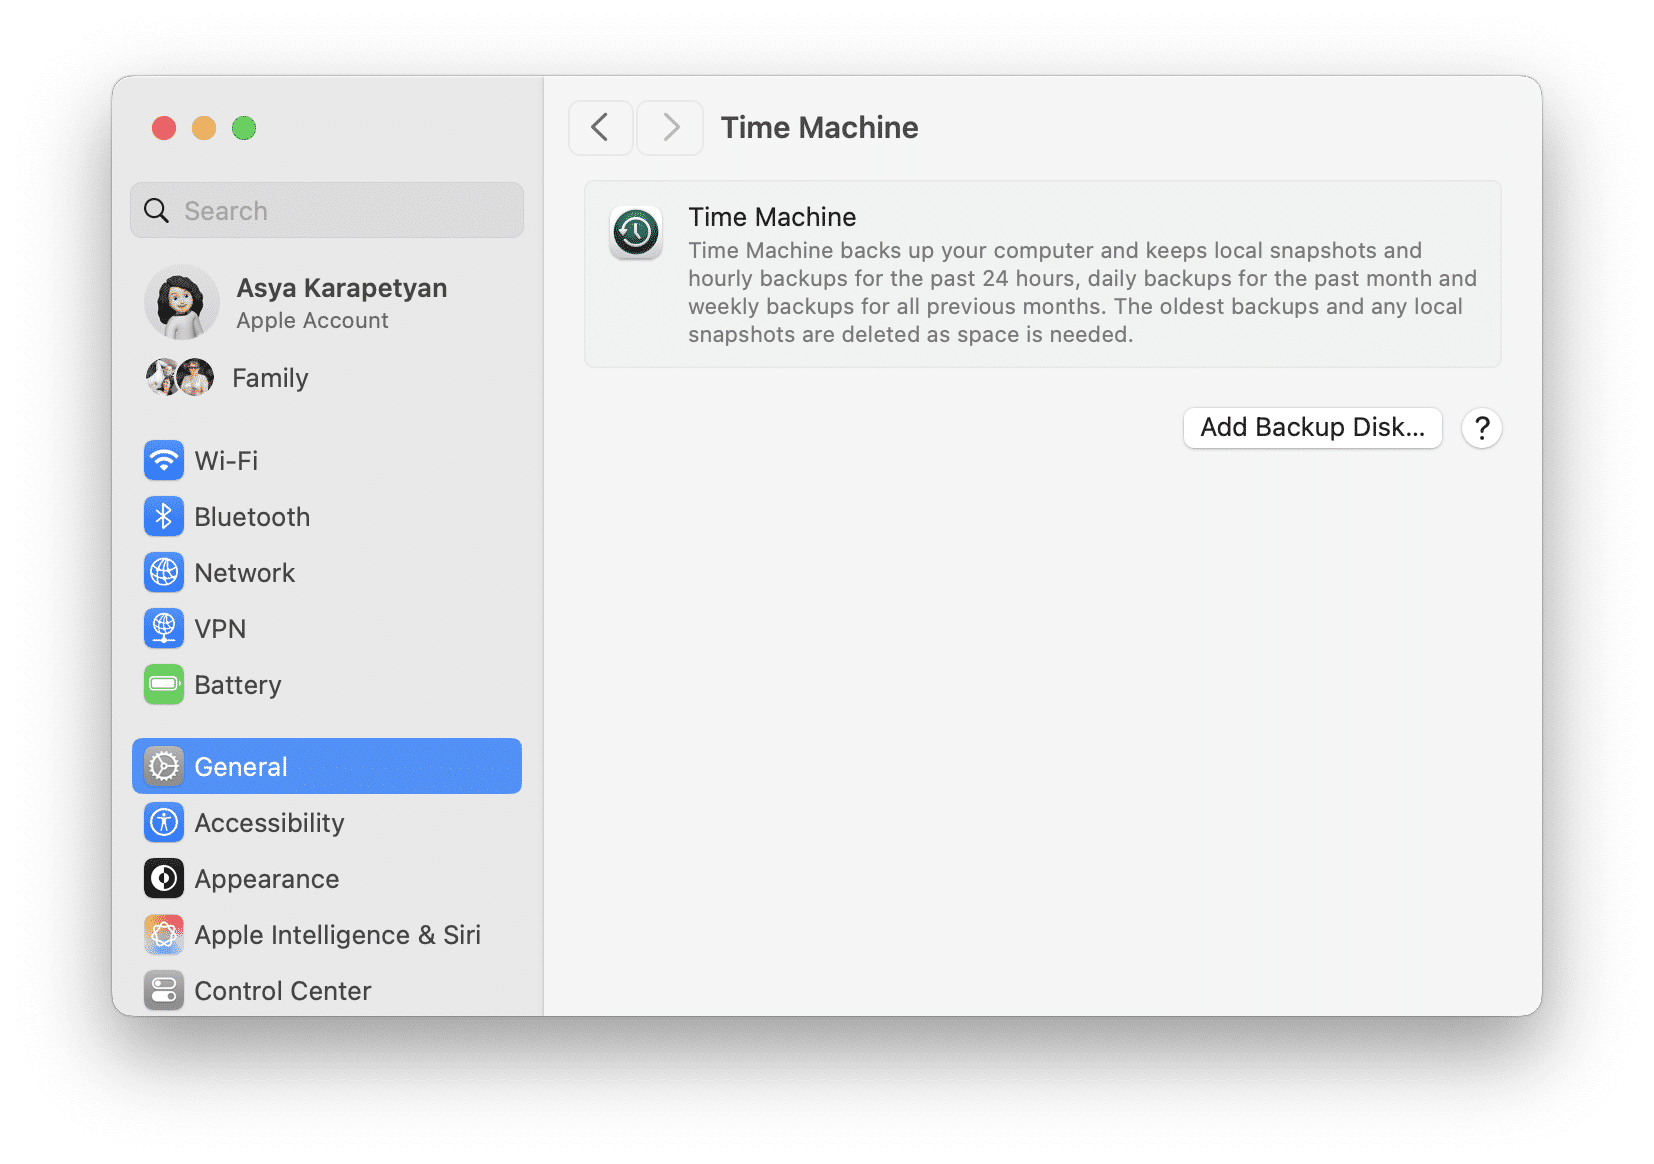
Through Time Machine, you can create regular backups on an external drive, and then look through previous version of the files. Follow the steps below to set up Time Machine for keeping your files:
- Open System Settings.
- Click General in the sidebar.
- Scroll down and click Time Machine in the left panel of the window.
- Click Add Backup Disk.
- Select external drive and click Set Up Disk.

Now you can rest assured about the safety of your data. However, there are a couple of important points that you should take into consideration for a proper and convenient easy work with Time Machine. Keep reading to get useful tips when backing up your Mac.
Tips for Backups
When you make a backup for the first time, it will take a significant amount of time, as it will scan absolutely all the files on your hard drive. The subsequent backups will take much less time as they only scan and store new files and the changes in some files.
If the allocated space for backups is over, the system deletes old backups replacing them with new ones.
In view of the above, you can use a few tricks to save space on Mac disk:
- Keep backups on an external hard drive.
- Limit space for Time Machine. Let’s say, you have an external hard drive with 500 GB of space and you want to occupy up to 100 GB of TM. To do this, divide your drive into sections one of which will be 100 GB and it will be configuring TM. So as soon as the size of backups reaches 100GB, the system will start deleting old backups.
- There is an option in Time Machine to exclude files and folders from backups. It is a useful feature, for example, if you know that the “Downloads” folder is full of temporary files, it weighs a lot, but the content is not very important. In this case, there is a sense to exclude the Downloads folder from backups.
- Set up the required frequency of backups. By default, backups are created every hour. You can change the settings depending on your needs.
How to recover permanently deleted files from Mac using Time Machine
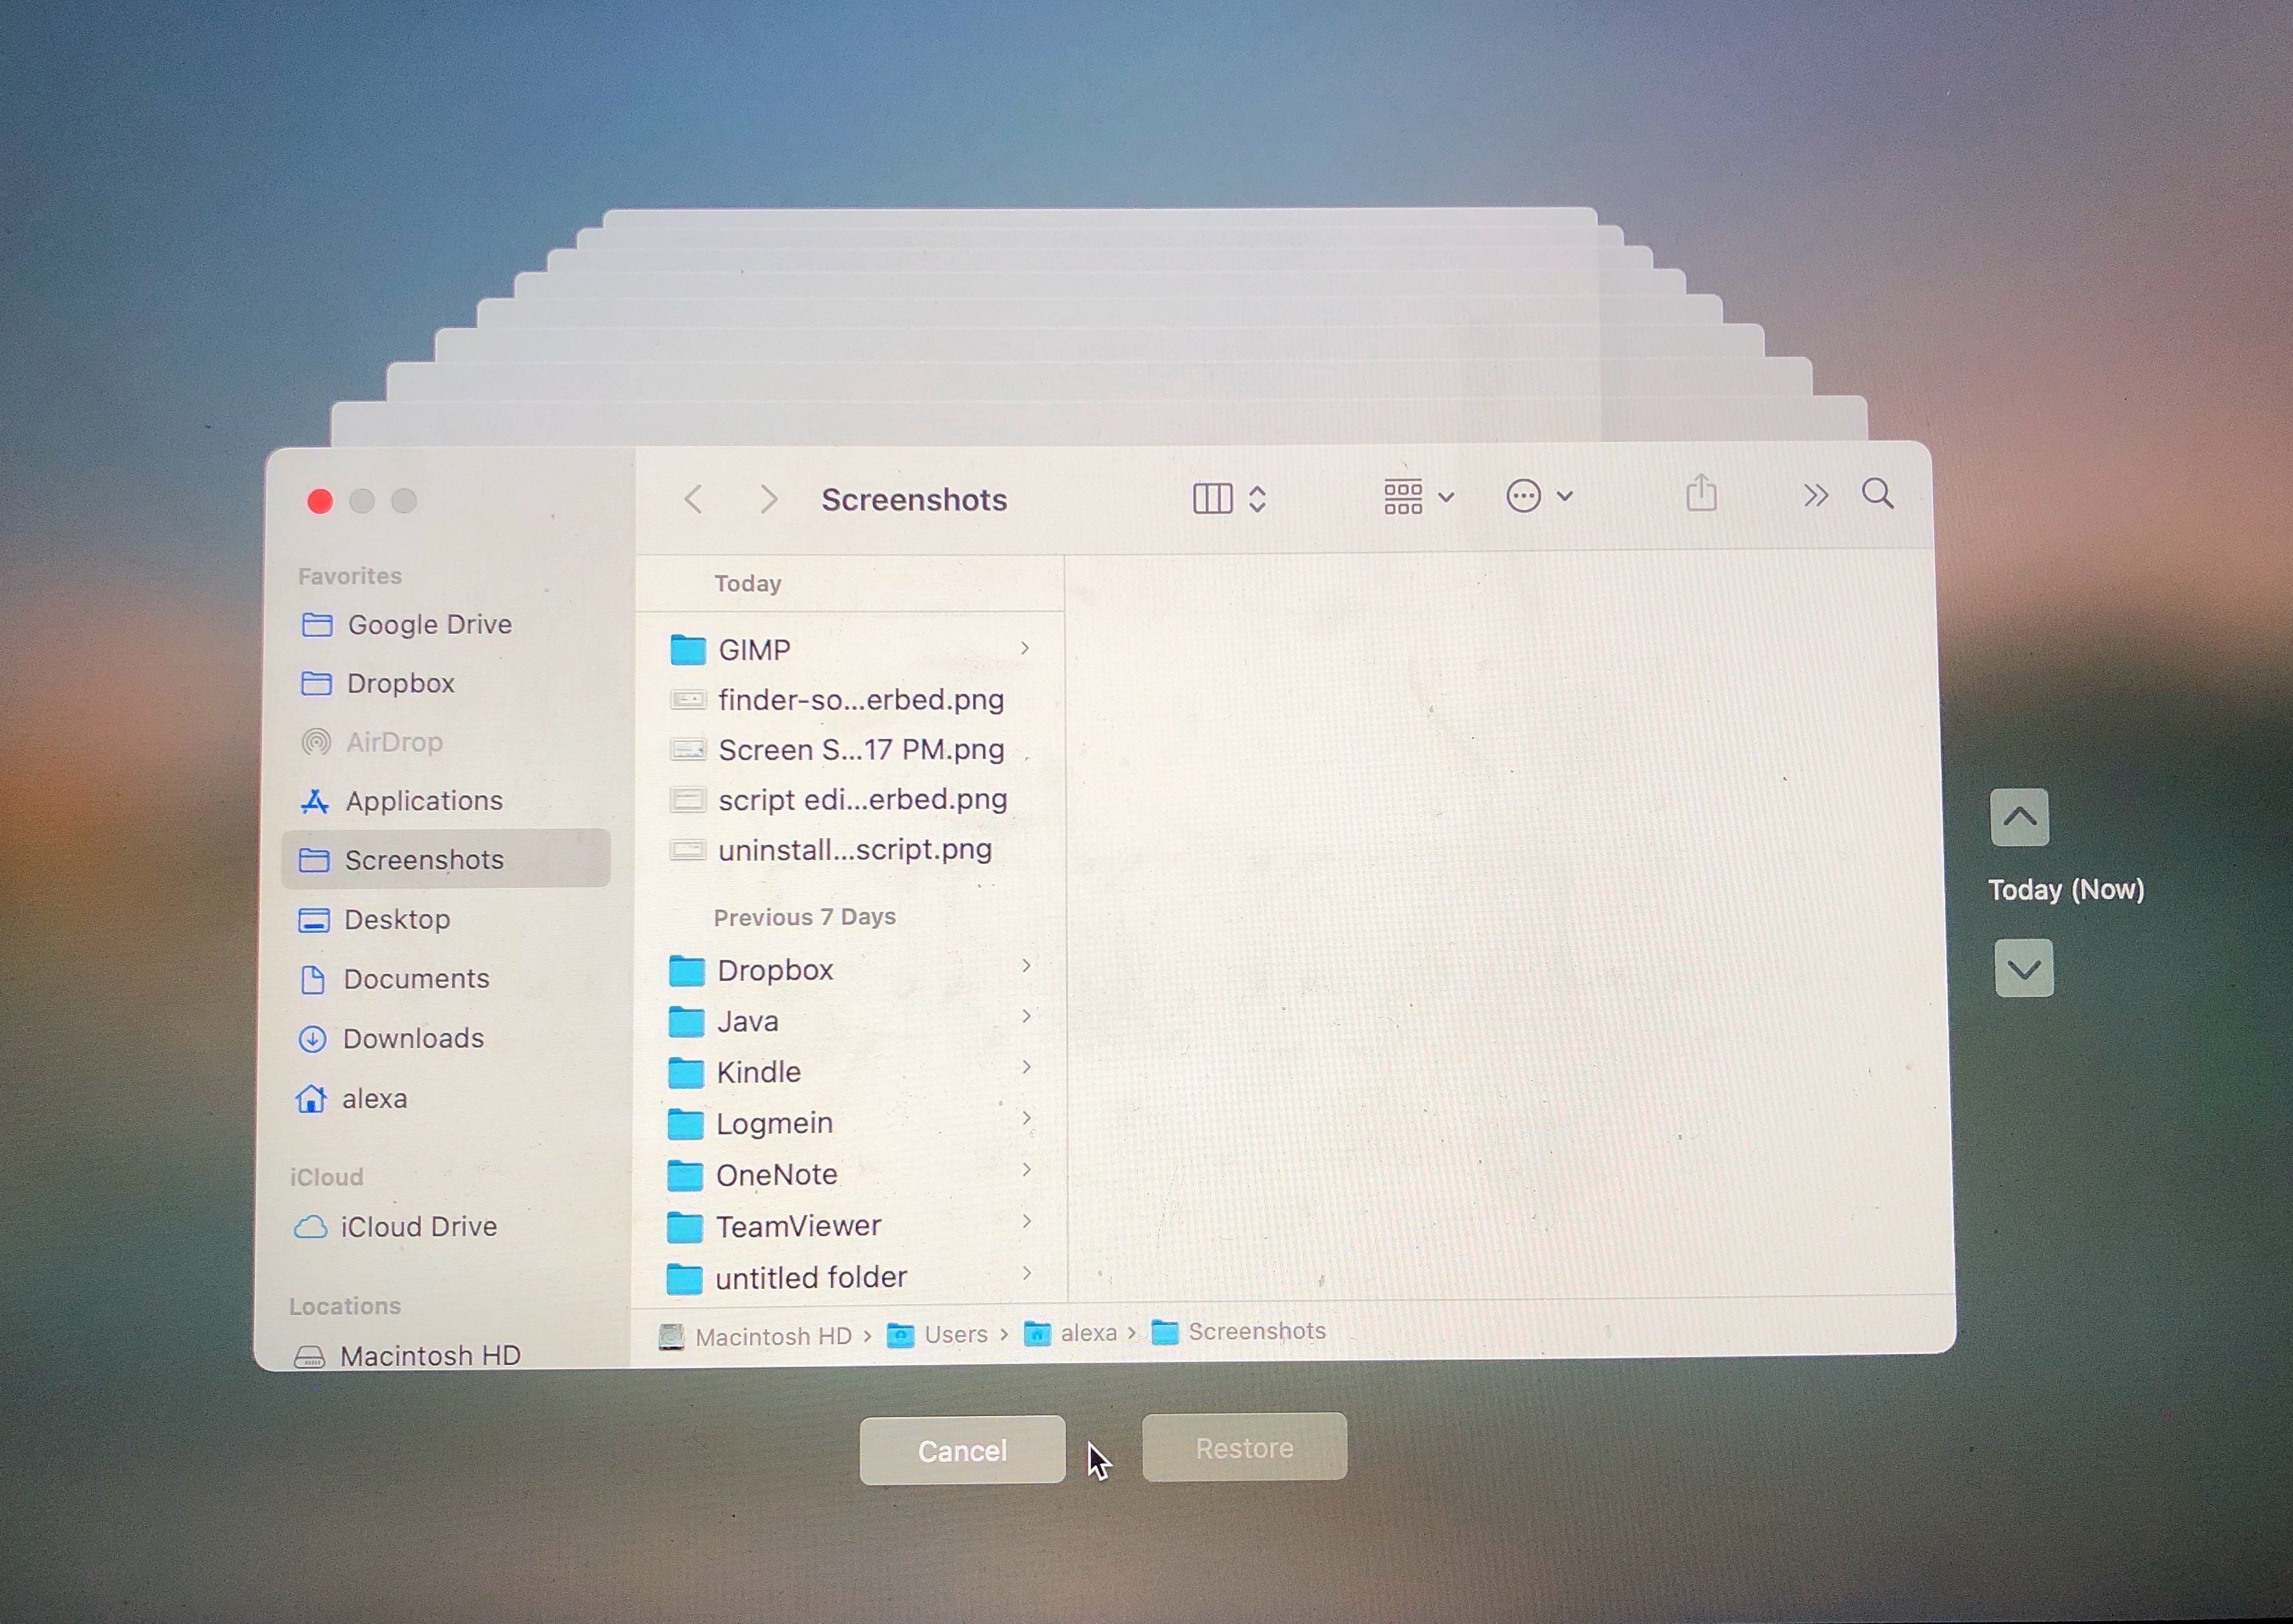
If you use Time Machine by default you can recover deleted files on Mac without additional software. Here is how to do this:
- Launch Time Machine. Use Spotlight search to open it.
- You will see a list of all your backups like on the screenshot below. Find the deleted files you want to restore.
- Click the Restore button.
- You will see the deleted file again in the original location.
That’s all. As you can see, using Time Machine is not difficult. Even if you don’t use Time Machine by default, we recommend that you make a backup before updating your Mac to a new macOS system or when making a deep Startup Disk cleanup.


