September 23, 2025
How to Get Started with Funter
When you launch Funter for the first time, you’ll see a prompt asking you to grant Full Disk Access. This is an important step – it allows the app to scan your entire Mac, including hidden files and system folders. Without this permission, Funter won’t be able to show all hidden items or perform a complete disk search.
Why Full Disk Access is needed
macOS restricts apps from accessing certain directories by default (like Mail, Messages, Safari data, system files, and others). Granting Full Disk Access ensures Funter can search through all folders and locate every hidden file on your Mac.
How to enable Full Disk Access:
- Launch Funter.
- On the window that appears, click Open System Settings.
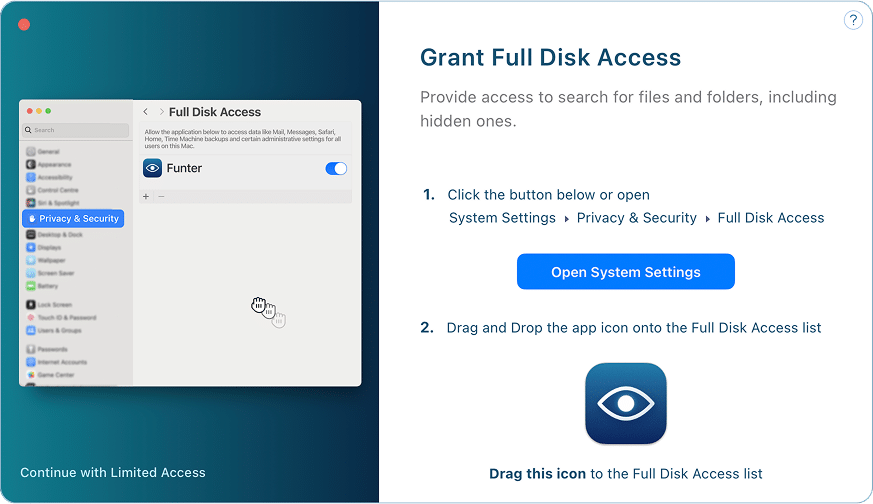
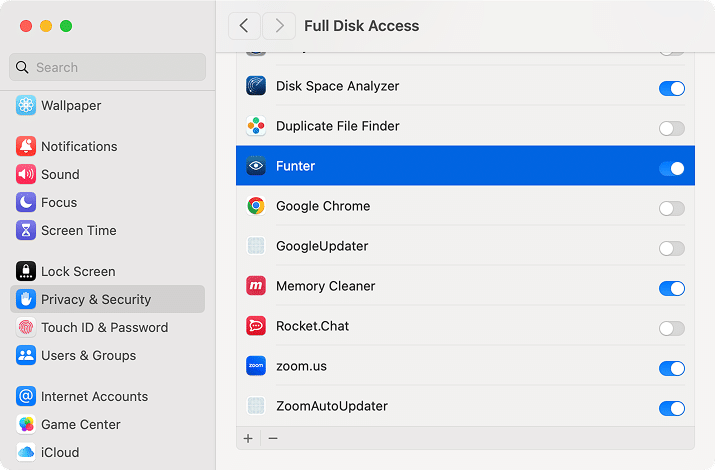
- It will open the System Settings window in the Privacy & Security → Full Disk Access section.
- Toggle the switch on for Funter.
- If you don’t see Funter in the list of apps, click the plus (+) button, add the app to the list, and then toggle it on.
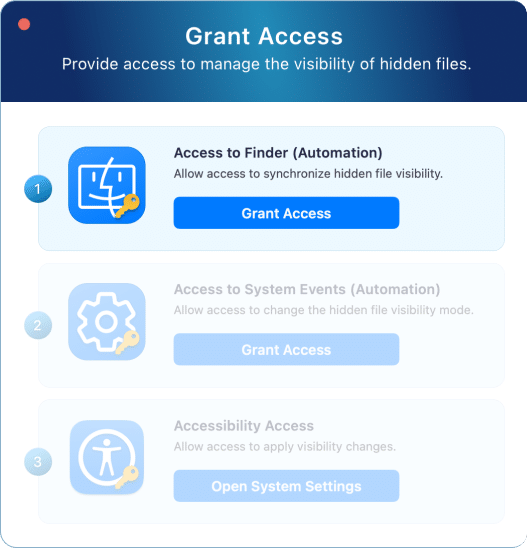
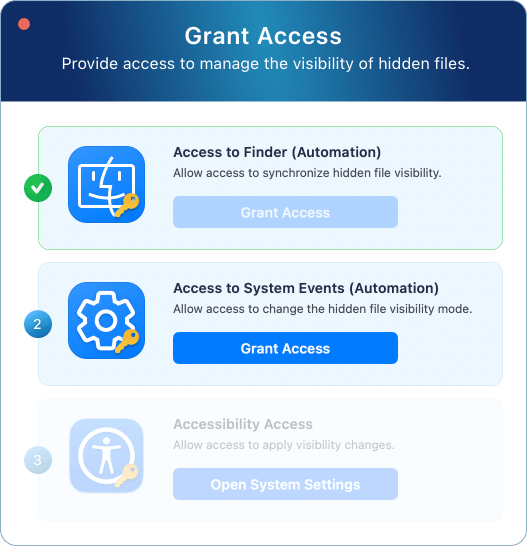
To manage the visibility of hidden files with the switch button, you need to allow Funter the following permissions in System Settings:
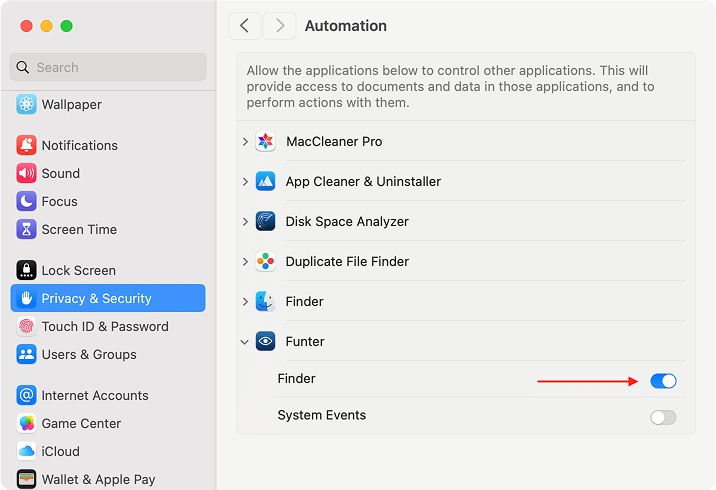
- Access to Finder
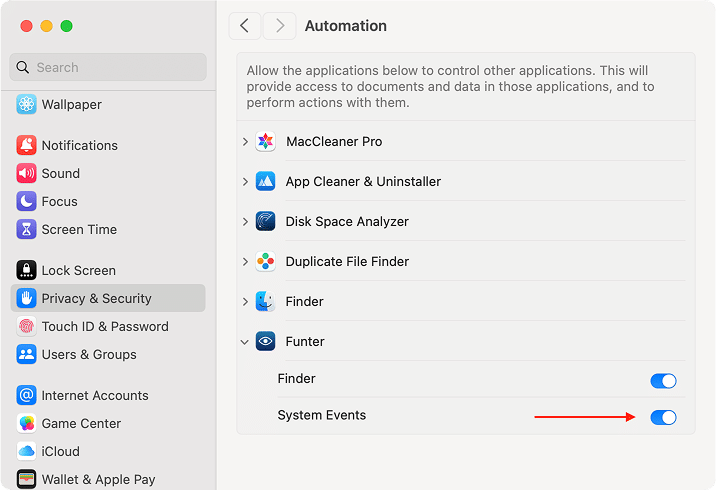
- Access to System Events
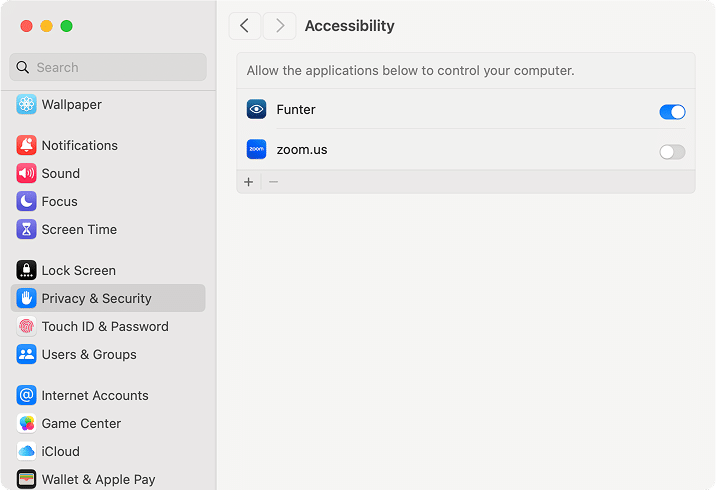
- Accessibility Access
Access to control Finder
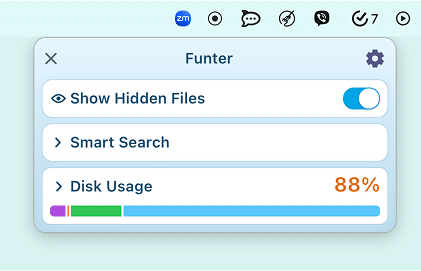
- Open Funter → switch the toggle button to show hidden files.
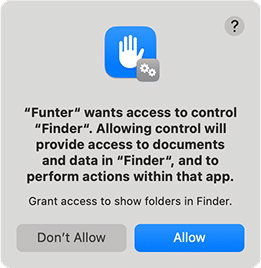
- You will see a pop-up window with the steps to all necessary access. Click Grant Access.
- Click Allow in the confirmation window.
If you clicked “Don’t Allow” by mistake, go to System Settings → Privacy & Security → scroll down and click Automation → enable the option “Finder” for Funter.
Access to System Events
This is important to allow Funter to interact with hidden files and operate them.
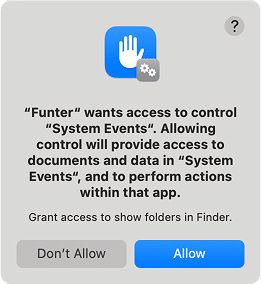
- Click again Grant Access for the second step in Funter’s window.
- In the same Automation section, allow Funter to control System Events.
If, for some reason, you clicked “Don’t Allow,” give Funter the permission manually. For this, go to System Settings → Privacy & Security → scroll down and click Automation → enable System Events for Funter.
Accessibility Access
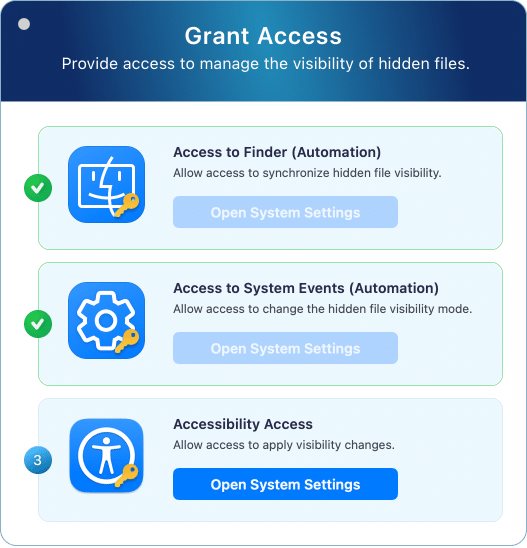
The last step is to give Accessibility access to allow
- Click Open System Settings in this window:
- Enable Funter in the Accessibility list to apply visibility changes.
If, for some reason, you don’t see Funter in the list, then add the app manually. Click the Plus button under the list of apps → locate Funter in the Applications folder → click Open.
All set! You can now use Funter with full functionality.
