Duplicate File Finder’s Auto Select option is a feature that allows you to automatically select multiple duplicate files for removal.
You can configure Auto Select rules so that when you use it, the program automatically marks unnecessary duplicates for deletion, depending on factors such as their names, location, modification date, and more.
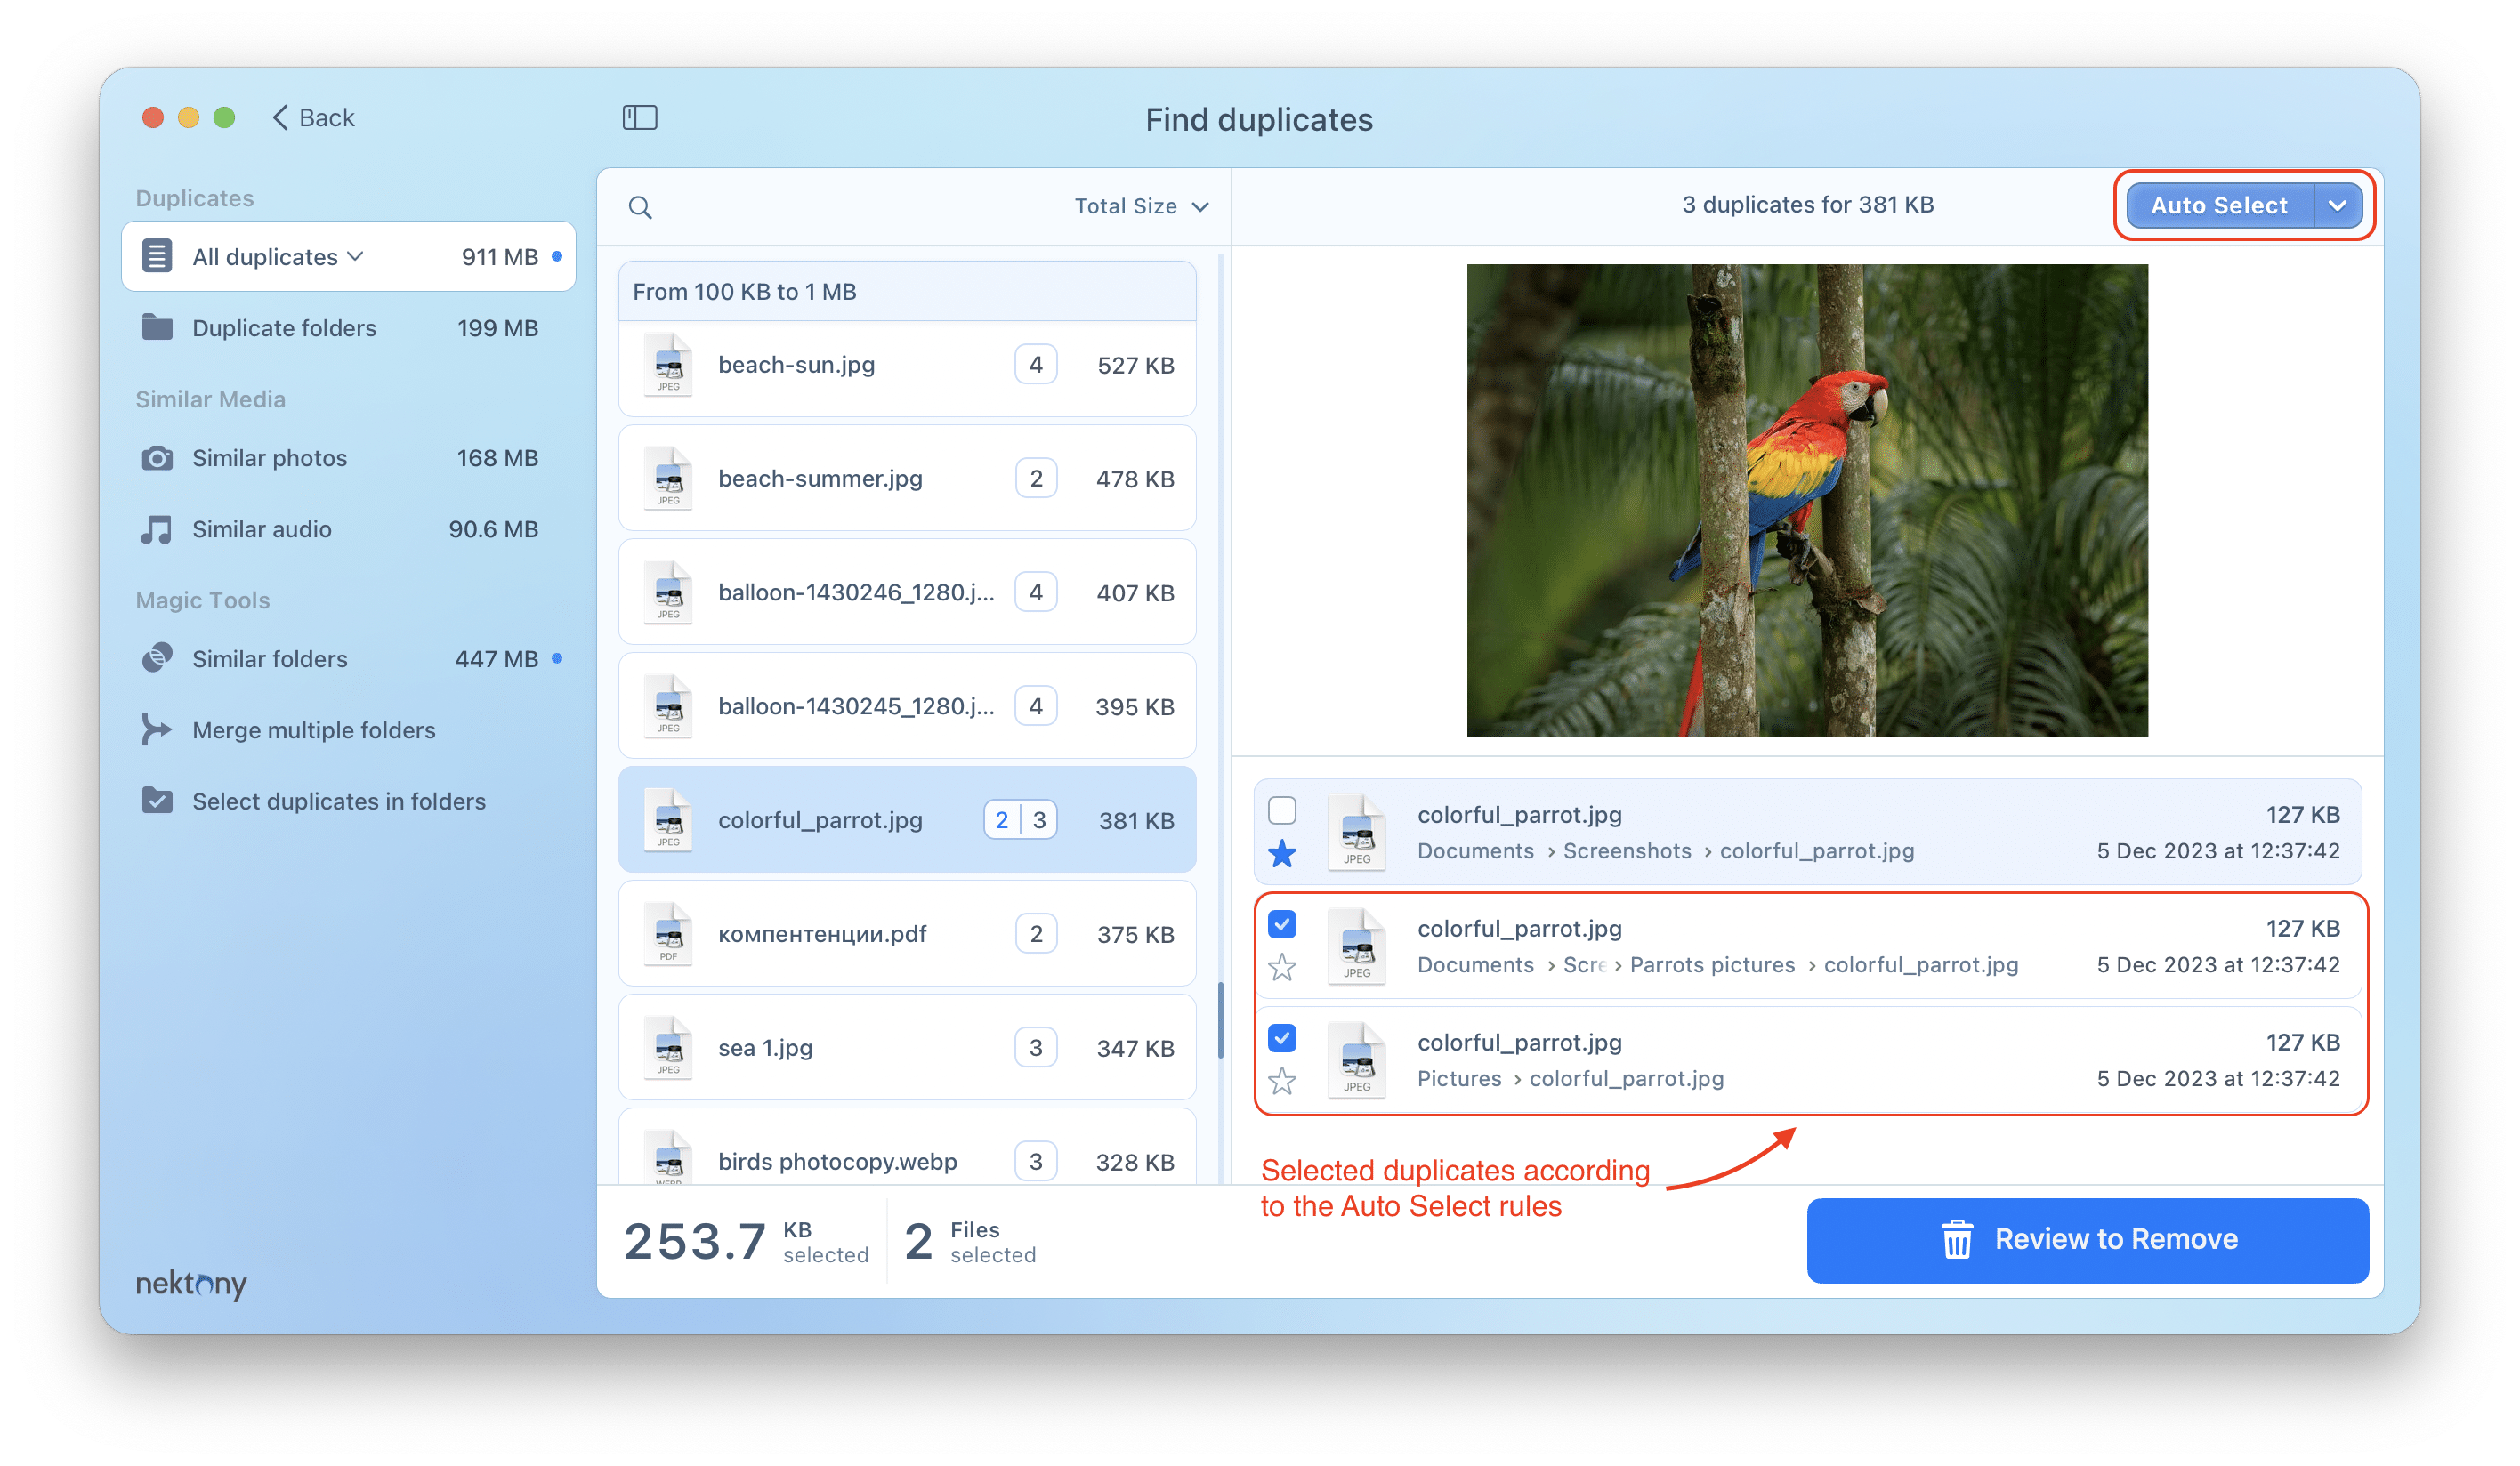
The application provides numerous Auto Select rules that can be used all together or one at a time to help you choose unnecessary duplicates for removal. Let’s see how the Auto Select rules work and how you can configure them for yourself.
Contents:
- Always select in the specified folders rule
- Never select in the specified folders rule
- Never select in Photos library Projects rule
- Never select in Photos Library Albums
- Extra rules for similar photos
- Extra rules for similar audio files
- Select with suffixes contained in the name rule
- Select with prefixes contained in the name rule
- Select in Photos Library rule
- Select in Music Library rule
- Select by full path rule
- Select by name rule
- Select by parent folder rule
- Select by full path length rule
- Select by name length rule
- Select by parent folder name length rule
- Select by modification date rule
- Select by creation date rule
- Select by nesting level rule
- Select photos with the same name by photo ID
The Always select in specified folder rule
According to this rule, when you click Auto Select, the app will select duplicates from the specified folders. If there are subfolders within the specified folders, duplicates inside them will also be selected.
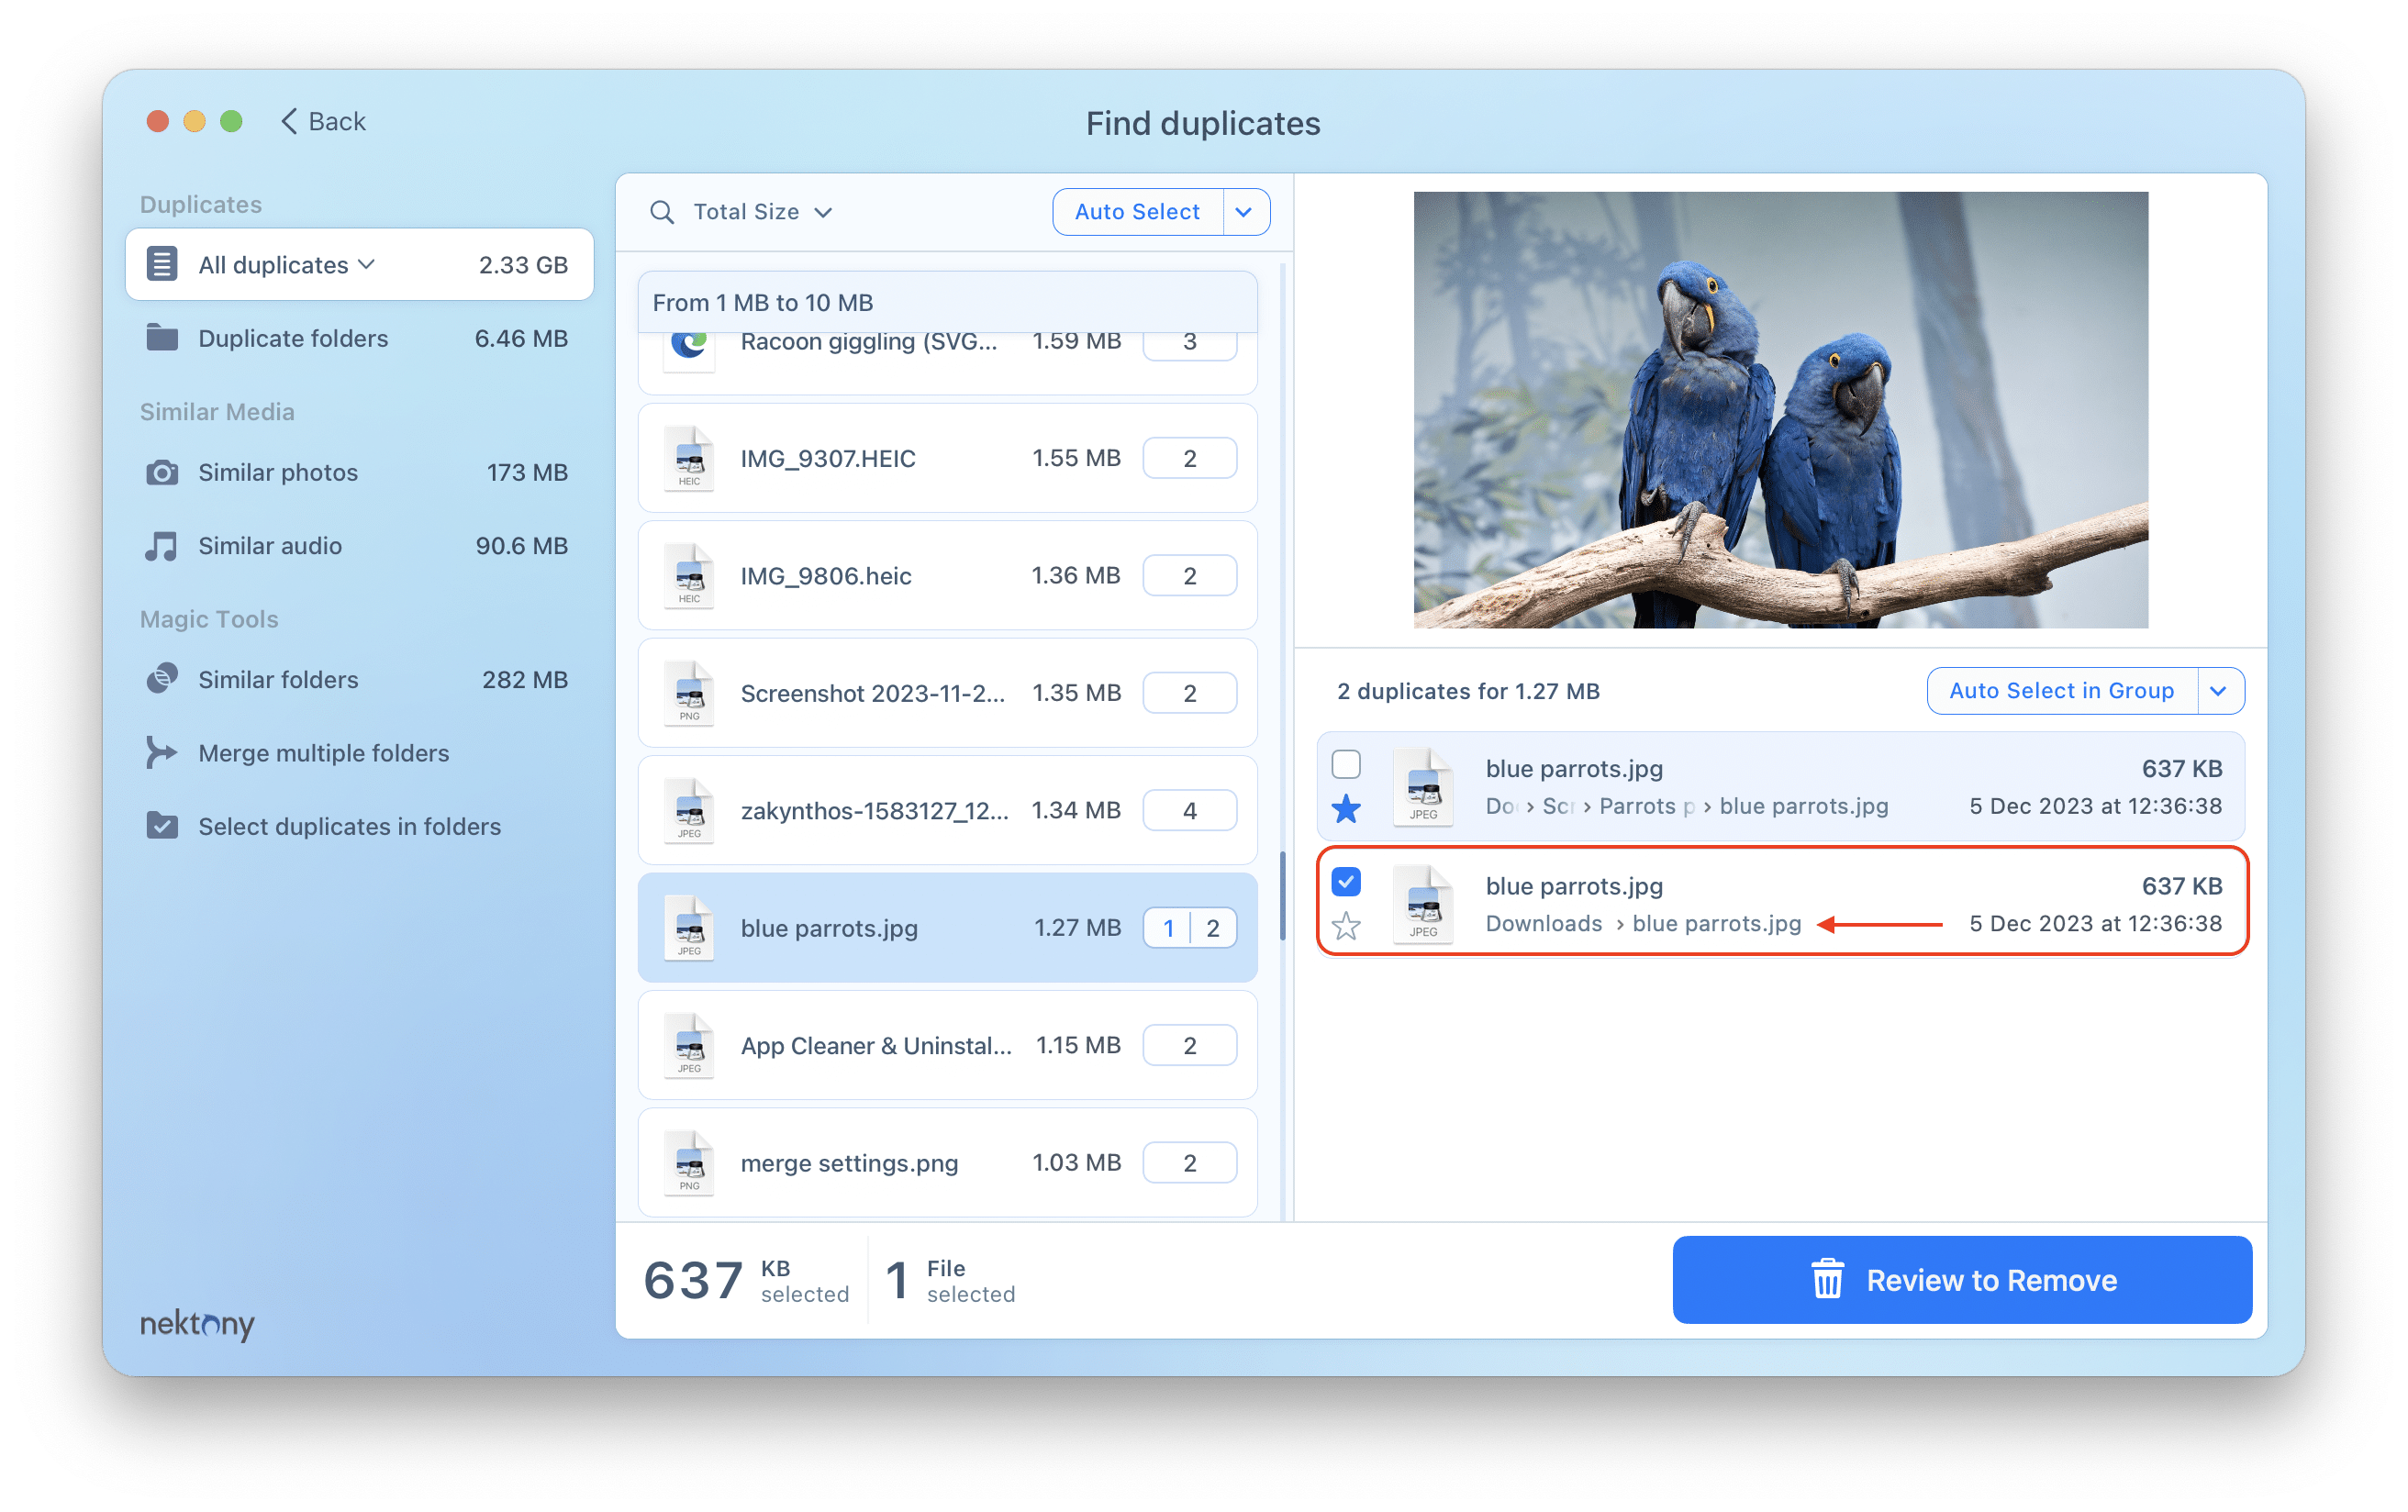
By default, the Downloads folder is included in the list. You can click on the plus button to add any other folder or click on the minus button to exclude them. Tick the checkboxes next to the added folders or uncheck them to enable or disable removing from these folders.
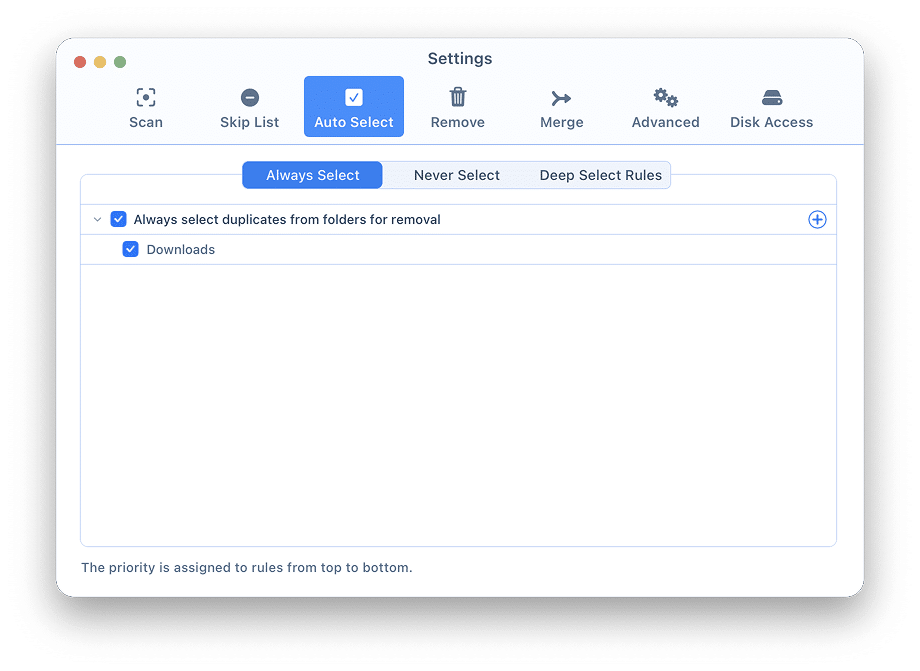
For example, let’s say there are two duplicate files in the group. One file is located in the Downloads folder, and the second is in the Screenshots folder. Following the Always select in the Downloads folder rule, Auto Select marks the duplicate file in the Downloads folder for removal and not in Screenshots.
The Never select in specified folders rule
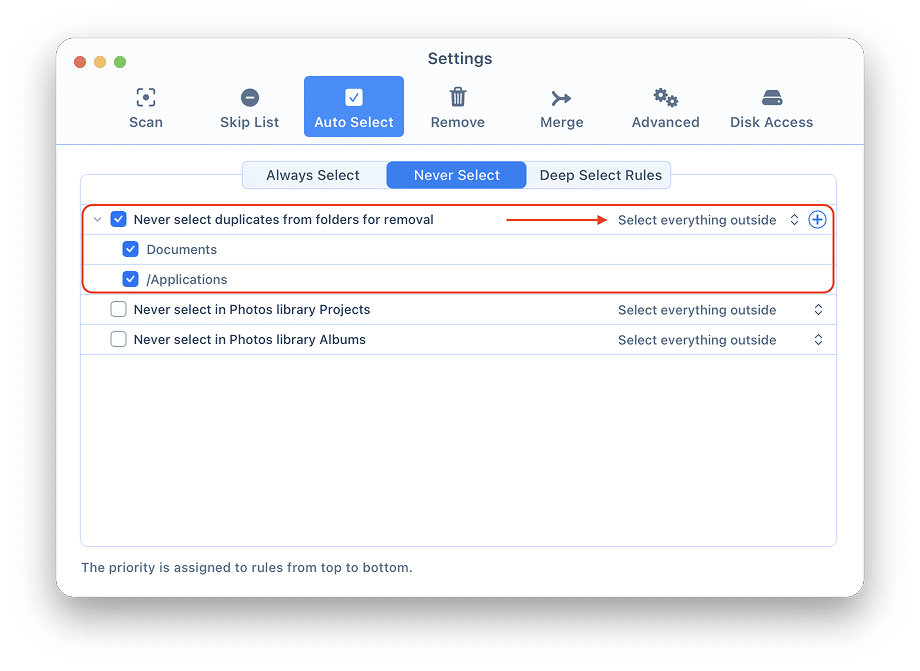
According to this rule, when you click Auto Select, the app shows all duplicates, but it suggests files from other folders for removal (never the specified folders).
You can click on the plus button to add any folders to this list or click on the minus “-” button to exclude them.
Also, you can select one of the options for this rule:
Select everything outside – this will select all duplicates outside the specified folders.
Apply auto-selection rules to everything outside – this will apply the following rule to all unselected files in other folders.
For example, imagine you have two duplicate files. These files have the same name, type, size, content, and date of creation. But one file is located in the Documents folder, and another one is in the Music folder.
According to the Never select in the Music folder rule, Auto Select keeps the file in the Music folder and marks the duplicate file in the Documents folder for removal.
You can exclude all the folders from the Always select and Never select rules. However, if any folder is specified in these rules and the checkboxes are marked, the app will always apply these two rules first of all.
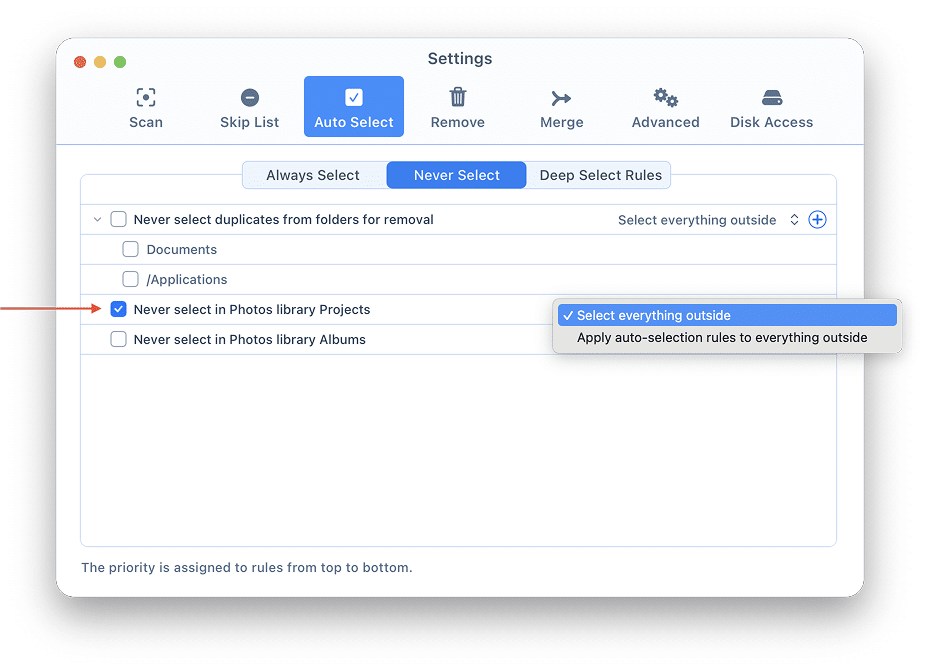
The Never Select in Photos library Projects rule
For this rule, you have two options:
- Select everything outside
When you enable this rule and click the Auto Select button, Duplicate File Finder will not select any files inside the Photos library Projects. It will select all file copies detected in other folders.
- Apply auto-selection rules for everything outside
With this option, Duplicate File Finder will not select files inside Photos library Projects. For the rest of the files outside the projects, the application will apply other auto-selection rules configured in Preferences.
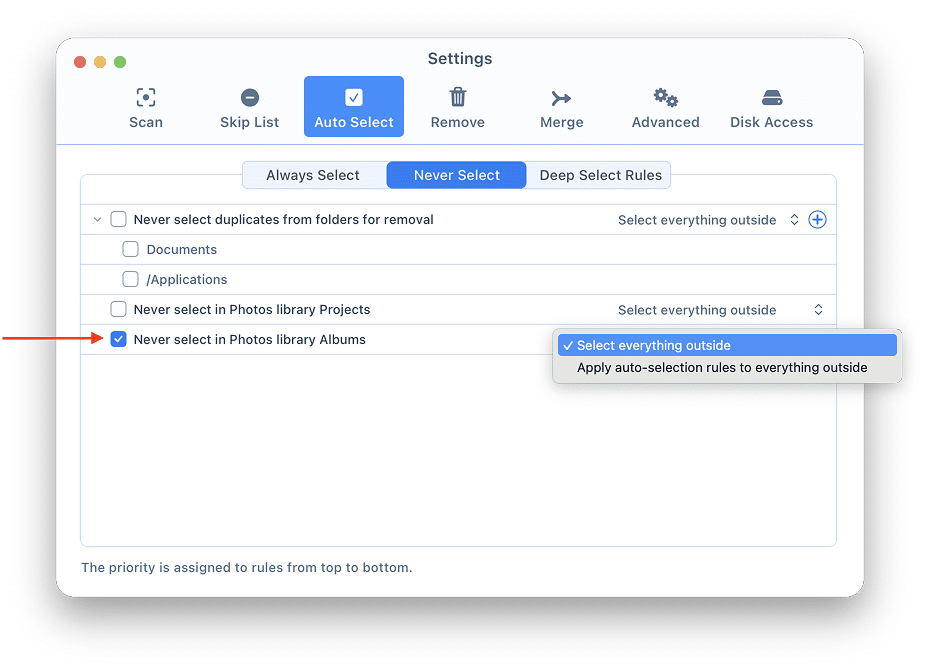
The Never select in Photos Library Albums rule
You have two options for this rule:
- Select everything outside
This means that when you enable the rule and use the Auto Select button, Duplicate File Finder will not select any files inside the Photos Llibrary albums. It will automatically select all duplicates in other folders.
- Apply auto-selection rules for everything outside
If you select this option, Duplicate File Finder will not select files inside Photos Library albums. For the rest of the files outside the albums, the application will apply other auto-selection rules.
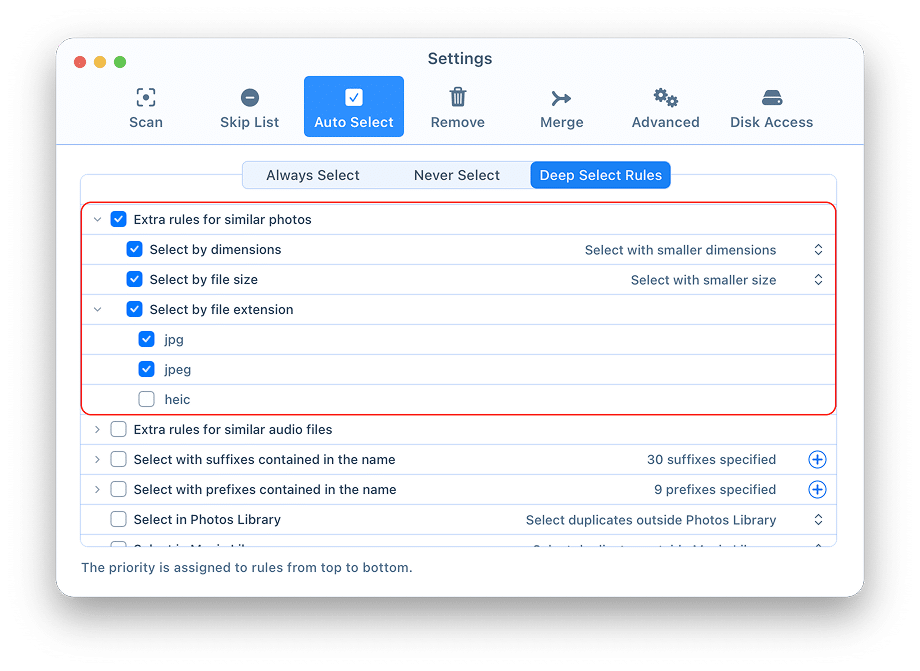
Extra rules for similar photos
For example, if you apply “Select with smaller dimension”, all similar photos with smaller dimensions will be automatically selected once you click on the Auto Select button and the photo with the biggest dimension will be kept.
If you apply “Select by file size”, you can set up to auto select the photos of smaller size or bigger size. Note that Duplicate File Finder compares the exact sizes in bytes. Even if the rounded file sizes may appear as equal.
Another example is that if you uncheck the checkbox for the .heic extension, then with the Auto Select button the .heic photos will be kept and all other photos will be selected for removal.
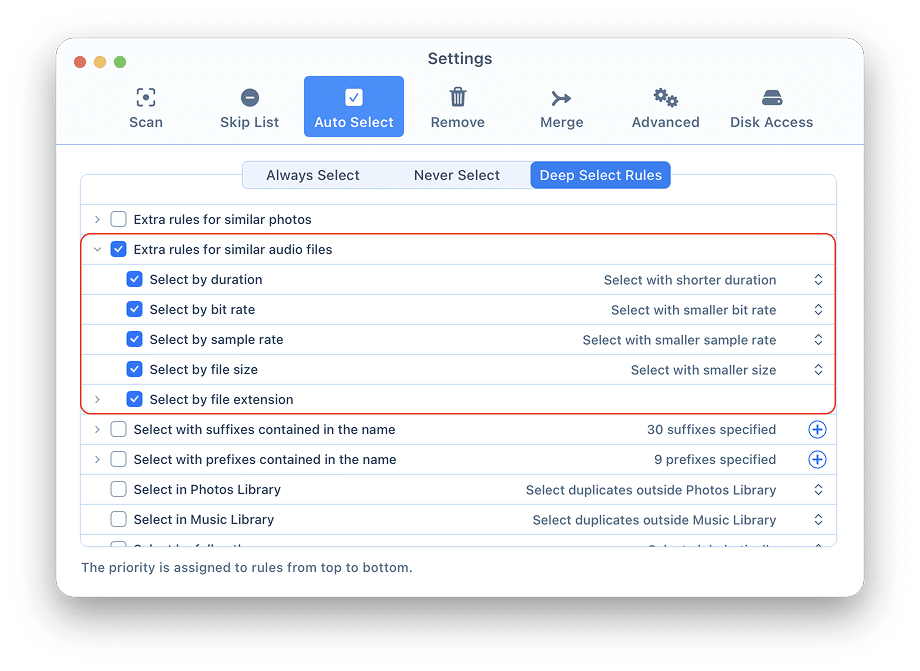
Extra rules for similar audio files
You can enable or disable each rule by checking or unchecking the checkboxes next to the appropriate rules.
For example, if you want to auto select audio files by duration, tick the checkbox for this rule and select one of the proposed options: Select with shorter duration or Select with longer duration. The same approach works for other rules.
The Select with suffixes contained in the file name rule
When you create a duplicate file in Finder, a suffix is added to its name. Usually the suffix is a number or additional word, like filename copy.png or filename 2.png with space in between.
According to this rule, Auto Select marks all duplicate files with the specified suffixes for deletion. By default, there are 31 variants of the word “copy” in various languages on the list.
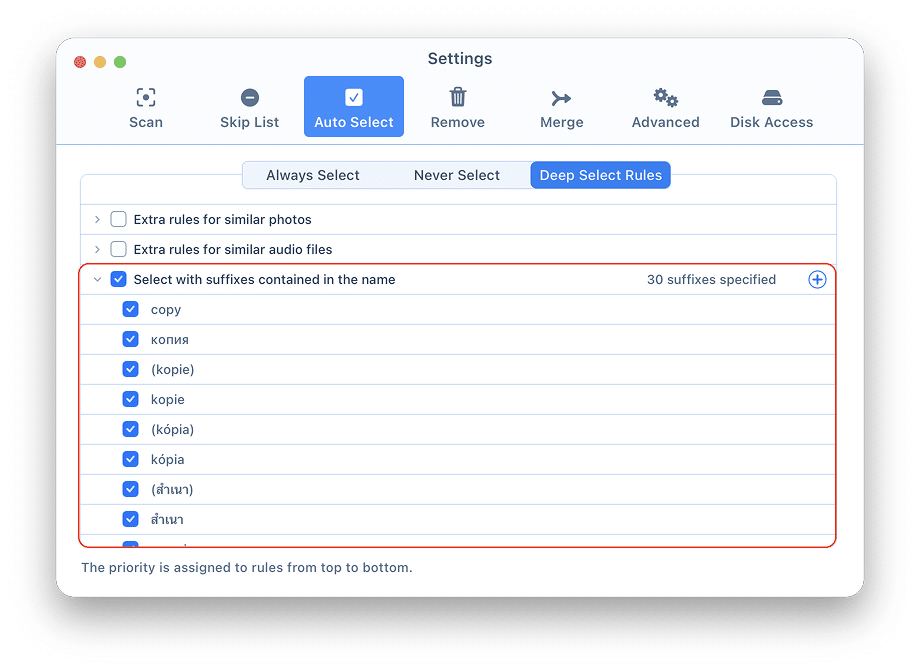
If you have a habit of renaming copies of files using another word, you can add it to the rule. Just click on the plus button and type the word. In this case, the application will choose to remove duplicate files based on your suffix as well.
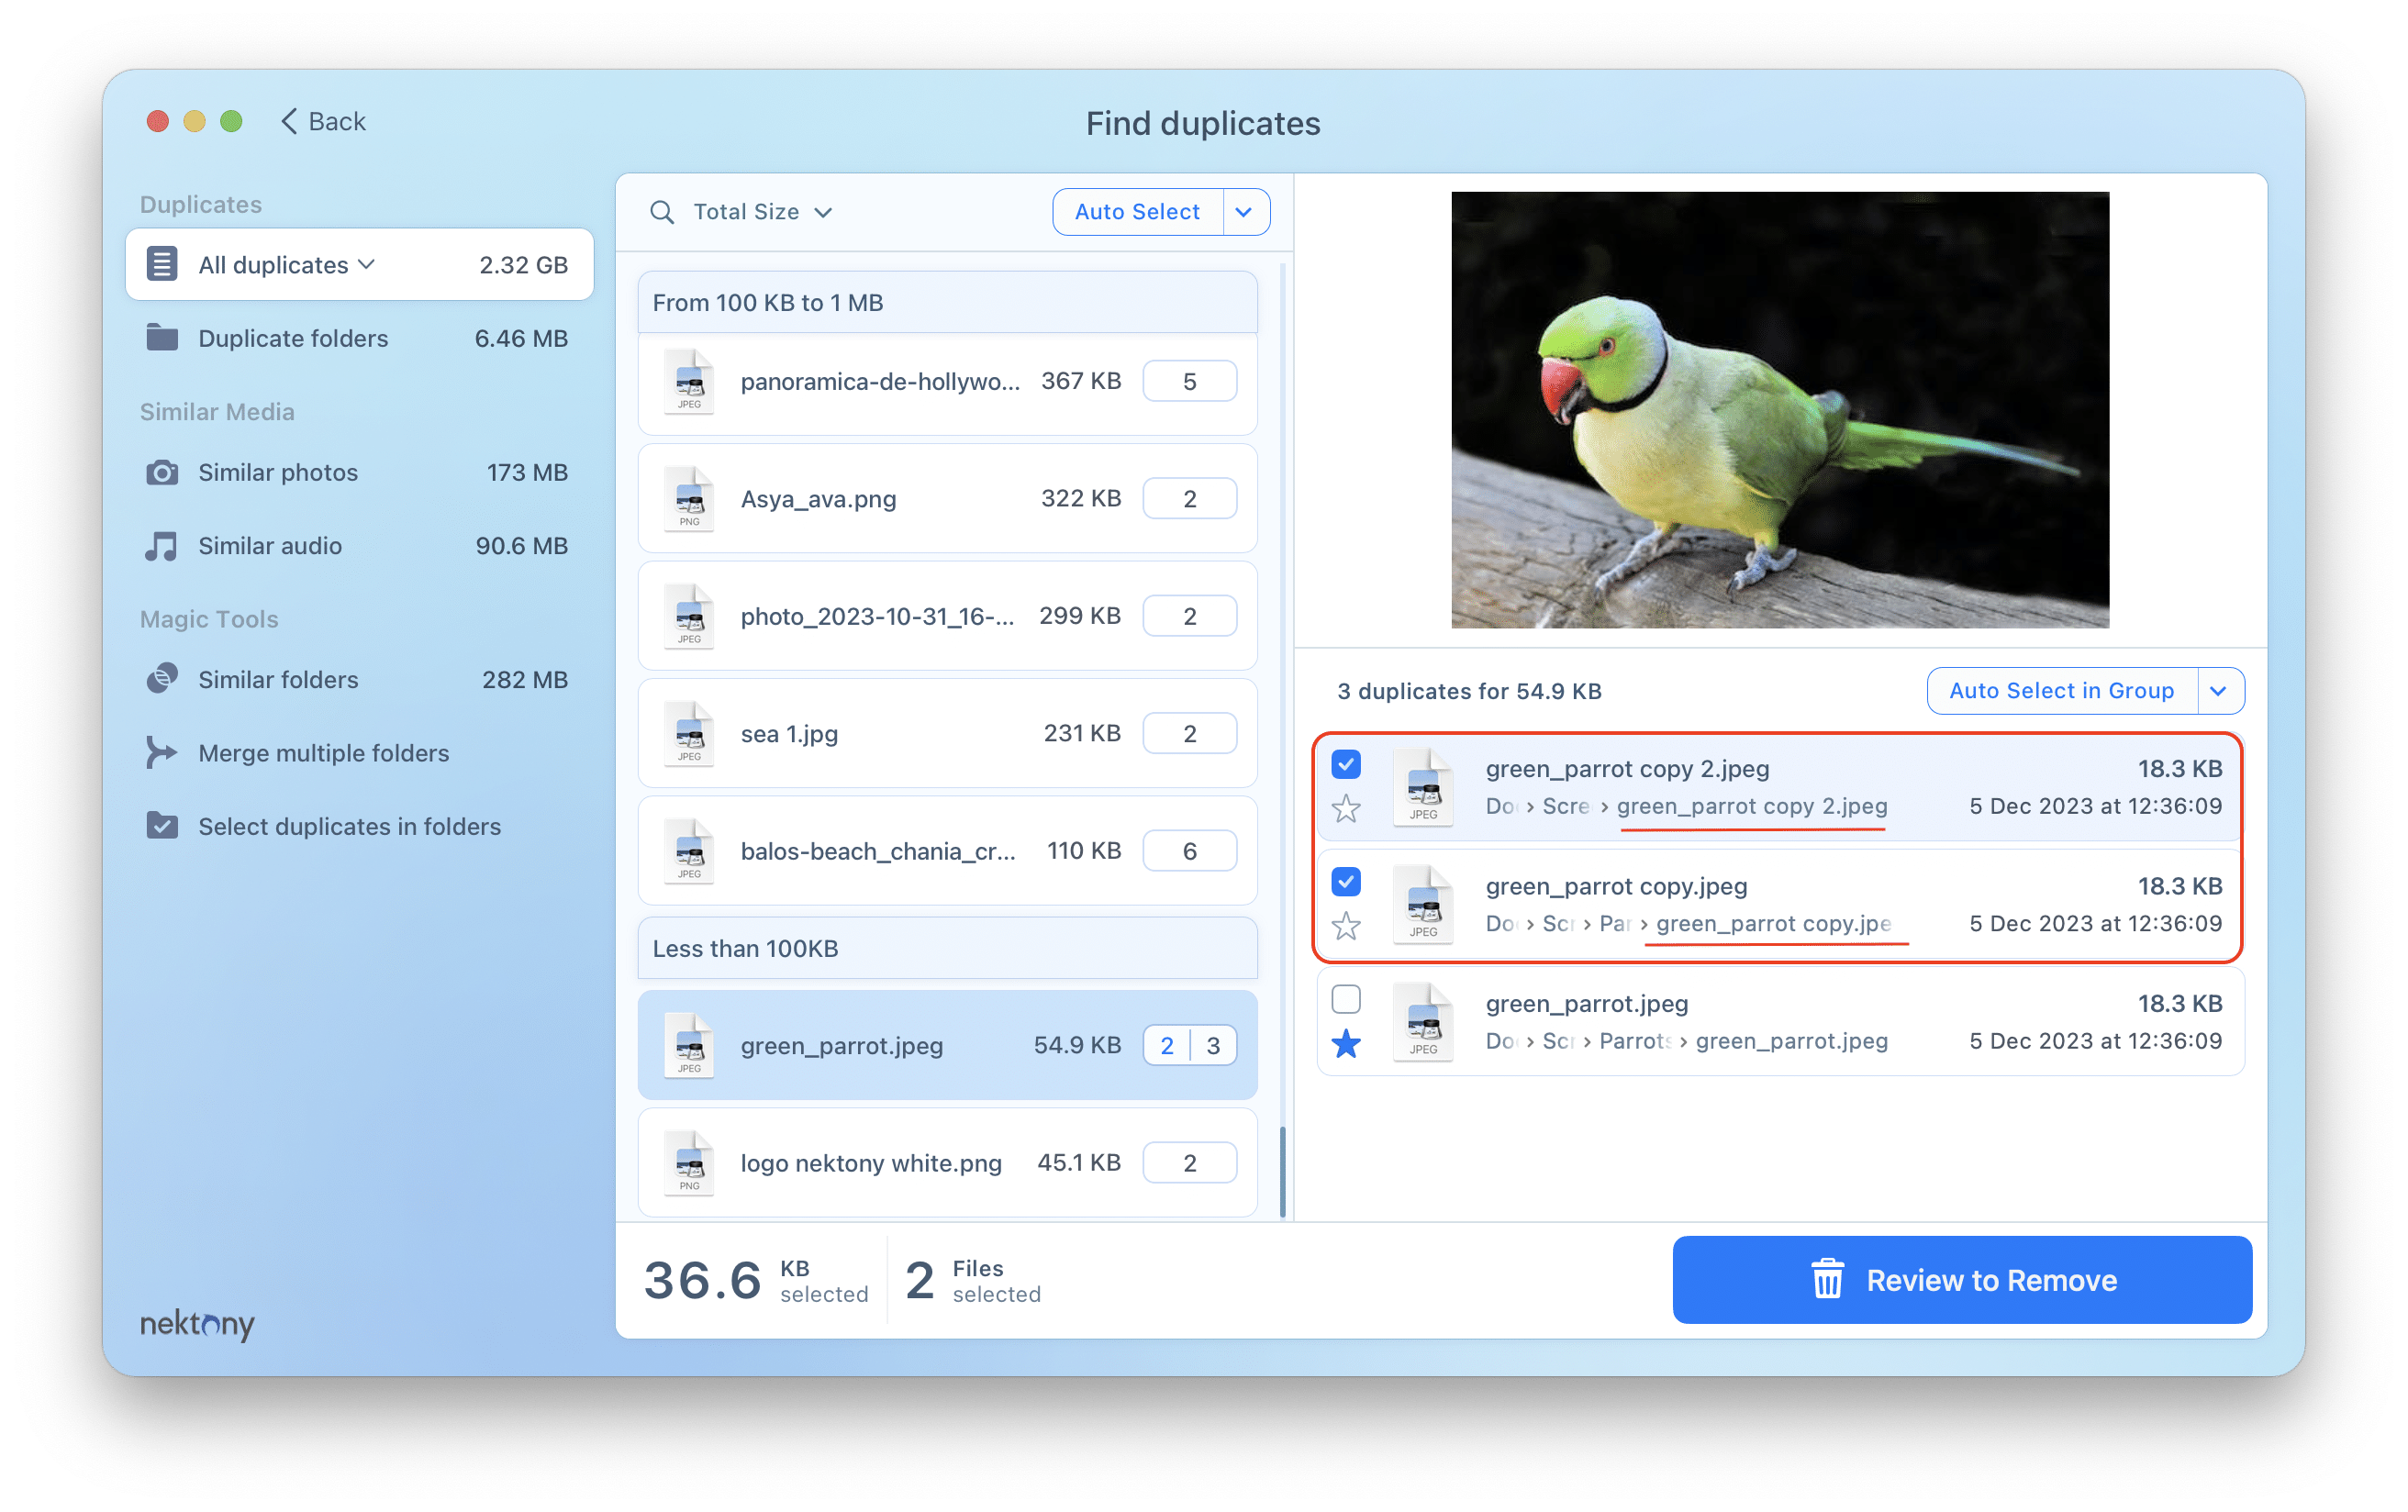
For example, there are three duplicate files in the group. These files have the same type, size, content, and date of creation. However, they have different names:
- “green_parrot.jpeg”
- “green_parrots_copy.jpeg”
- “green_parrots_copy 2.jpeg”
According to the Suffixes rule, Auto Select marks for removing the duplicate files that contain specified suffixes in their titles.
The Select with prefixes contained in the file name rule
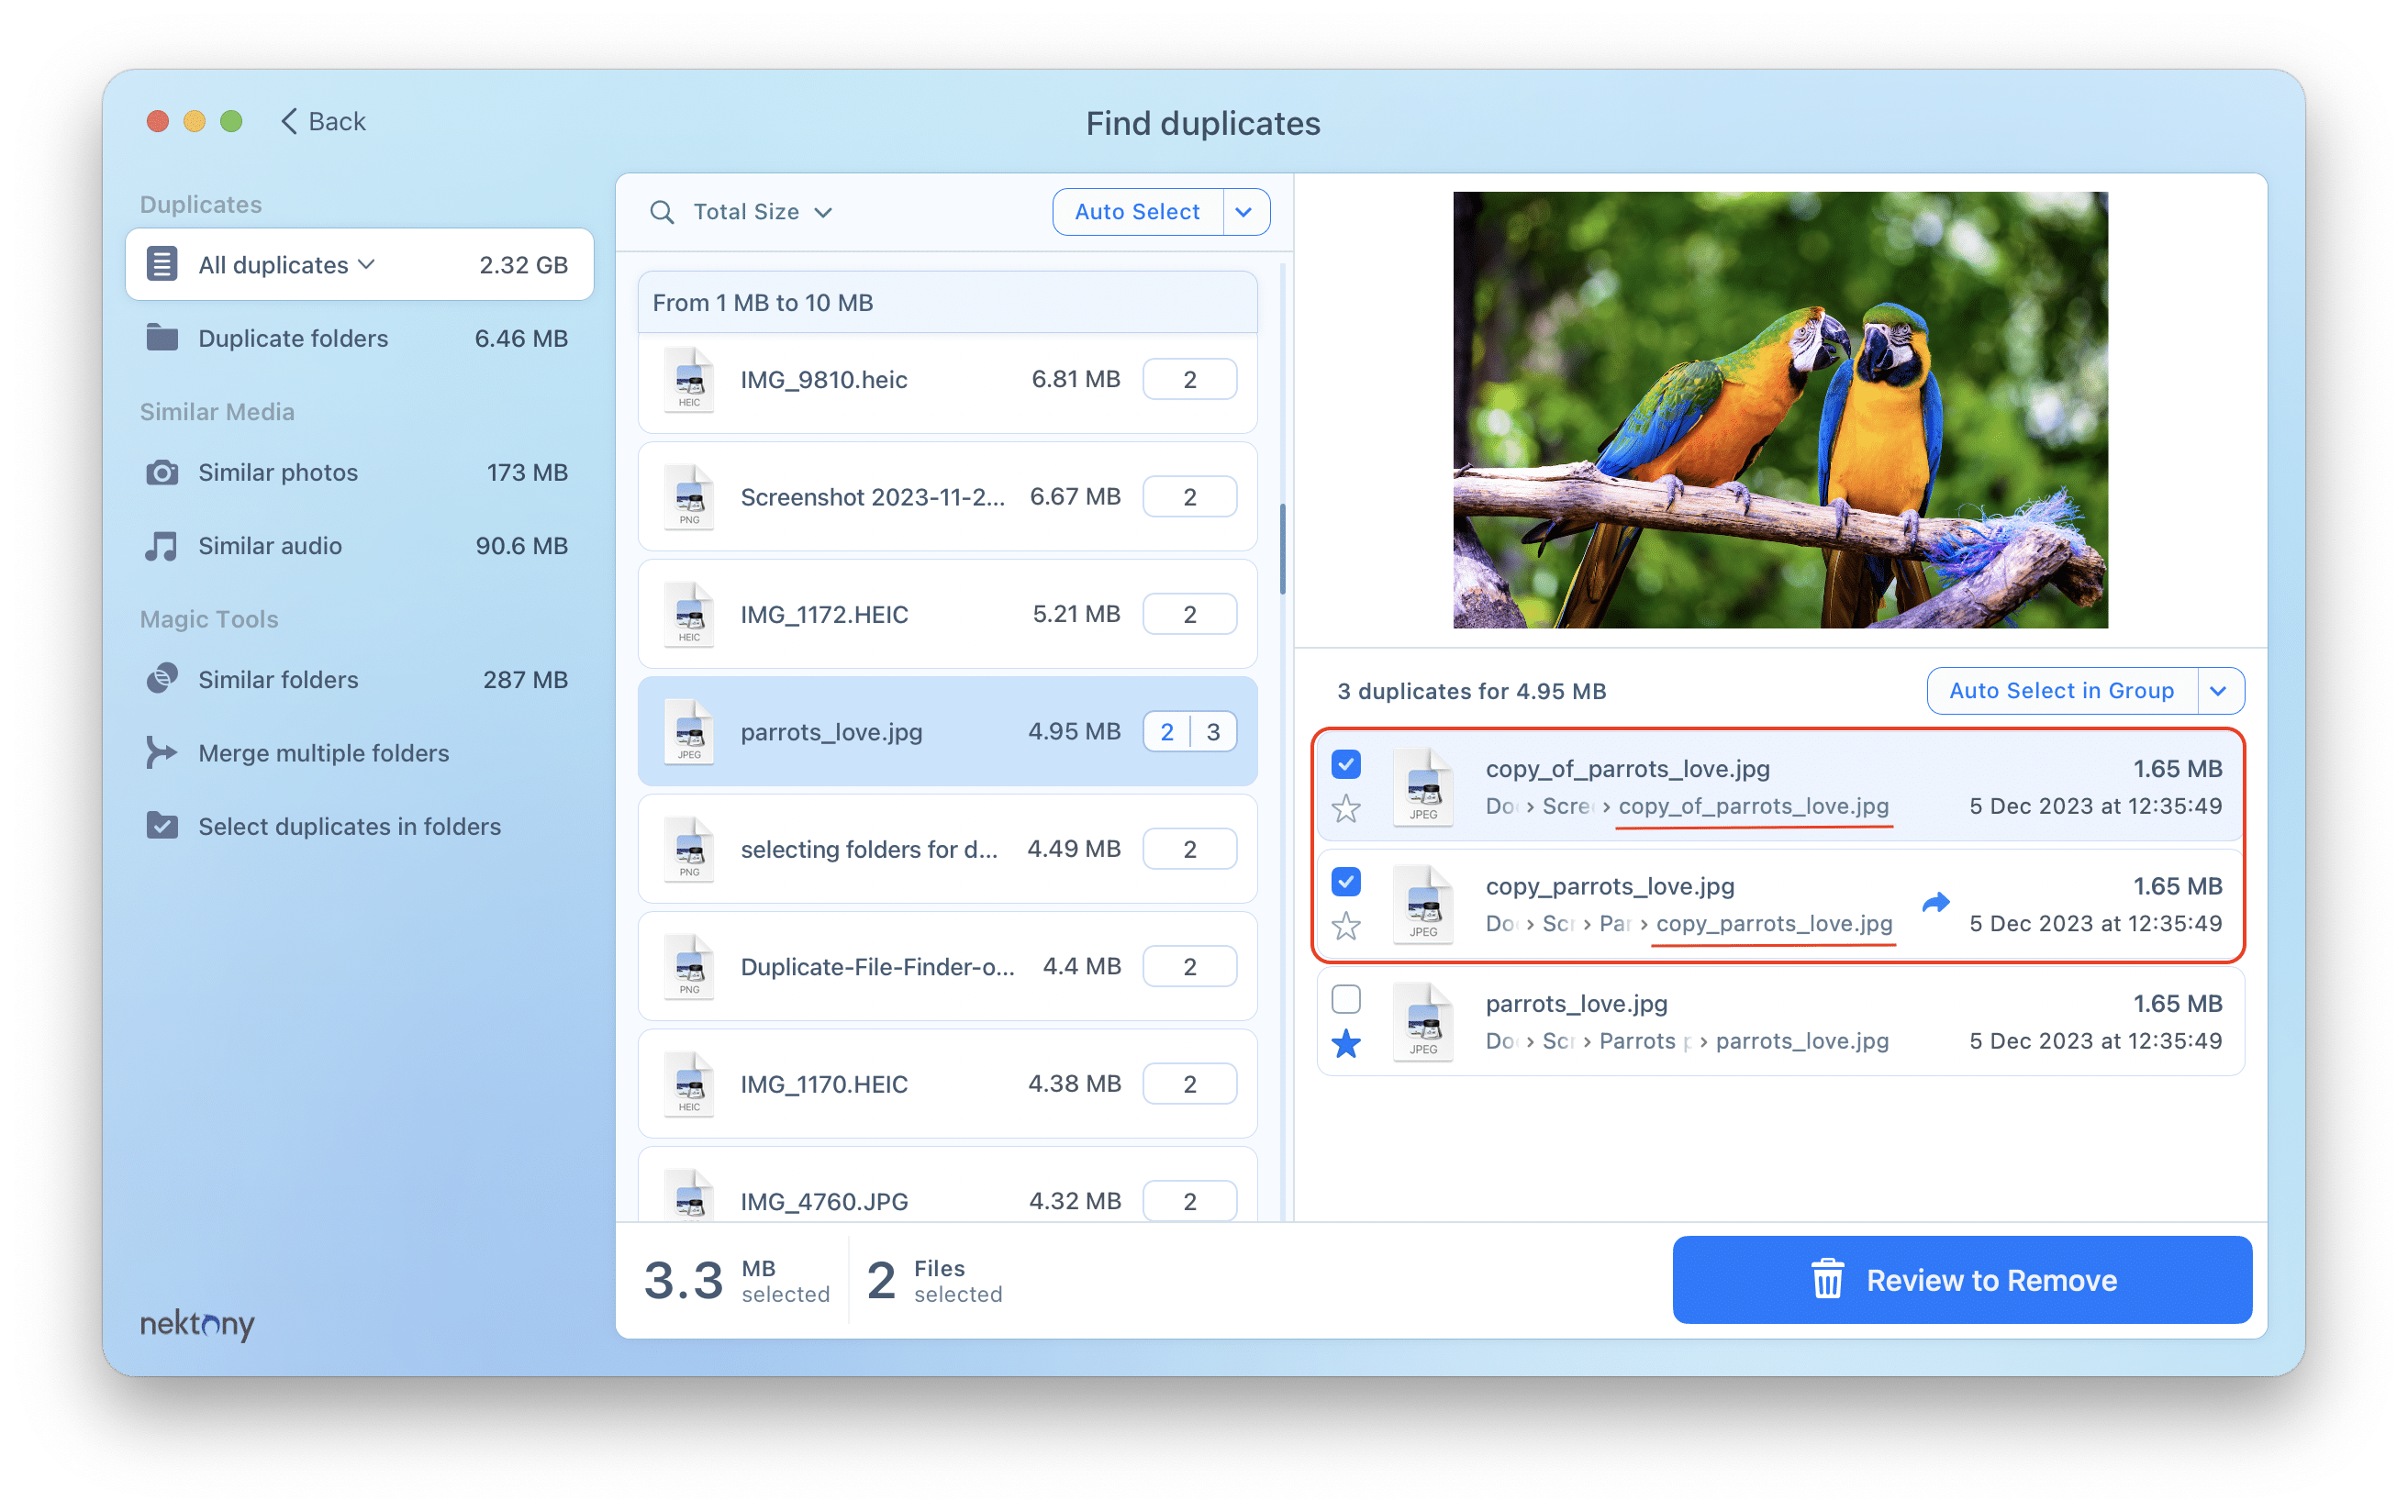
When you create a duplicate file, a prefix can be added to its file name, usually a number or additional word, like a copy of filename.png with space in between.
According to this rule, when you click Auto Select, all unnecessary duplicate files with the specified prefixes are selected for deletion. By default, variants of the word “copy” in different languages are added to the list.
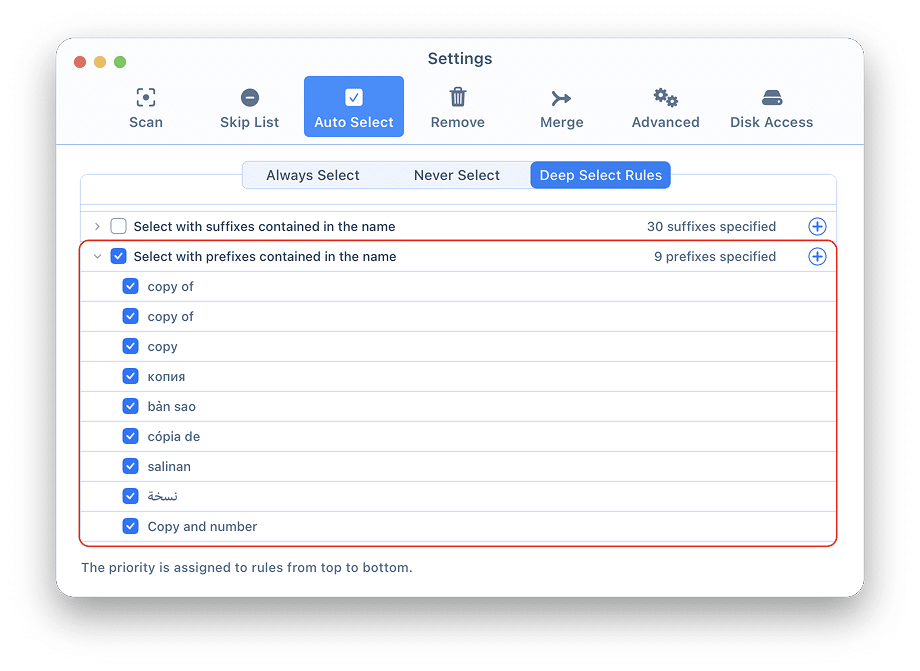
Again, if you usually rename copies of files according to a pattern, you can add the prefix to the list. For this, click on the plus button and type the word or phrase. Adding more search terms helps the app to find duplicate files based on the additional criteria.
For this example, let’s say there are three duplicate files in the group. These files all have the same type, size, content, and date of creation, but different names:
- “parrots_love.jpg”
- “copy_parrots_love.jpg”
- “copy_of_parrots_love.jpg”
Following the Prefixes rule, Auto Select marks duplicate files that contain specific prefixes in their titles for removal.
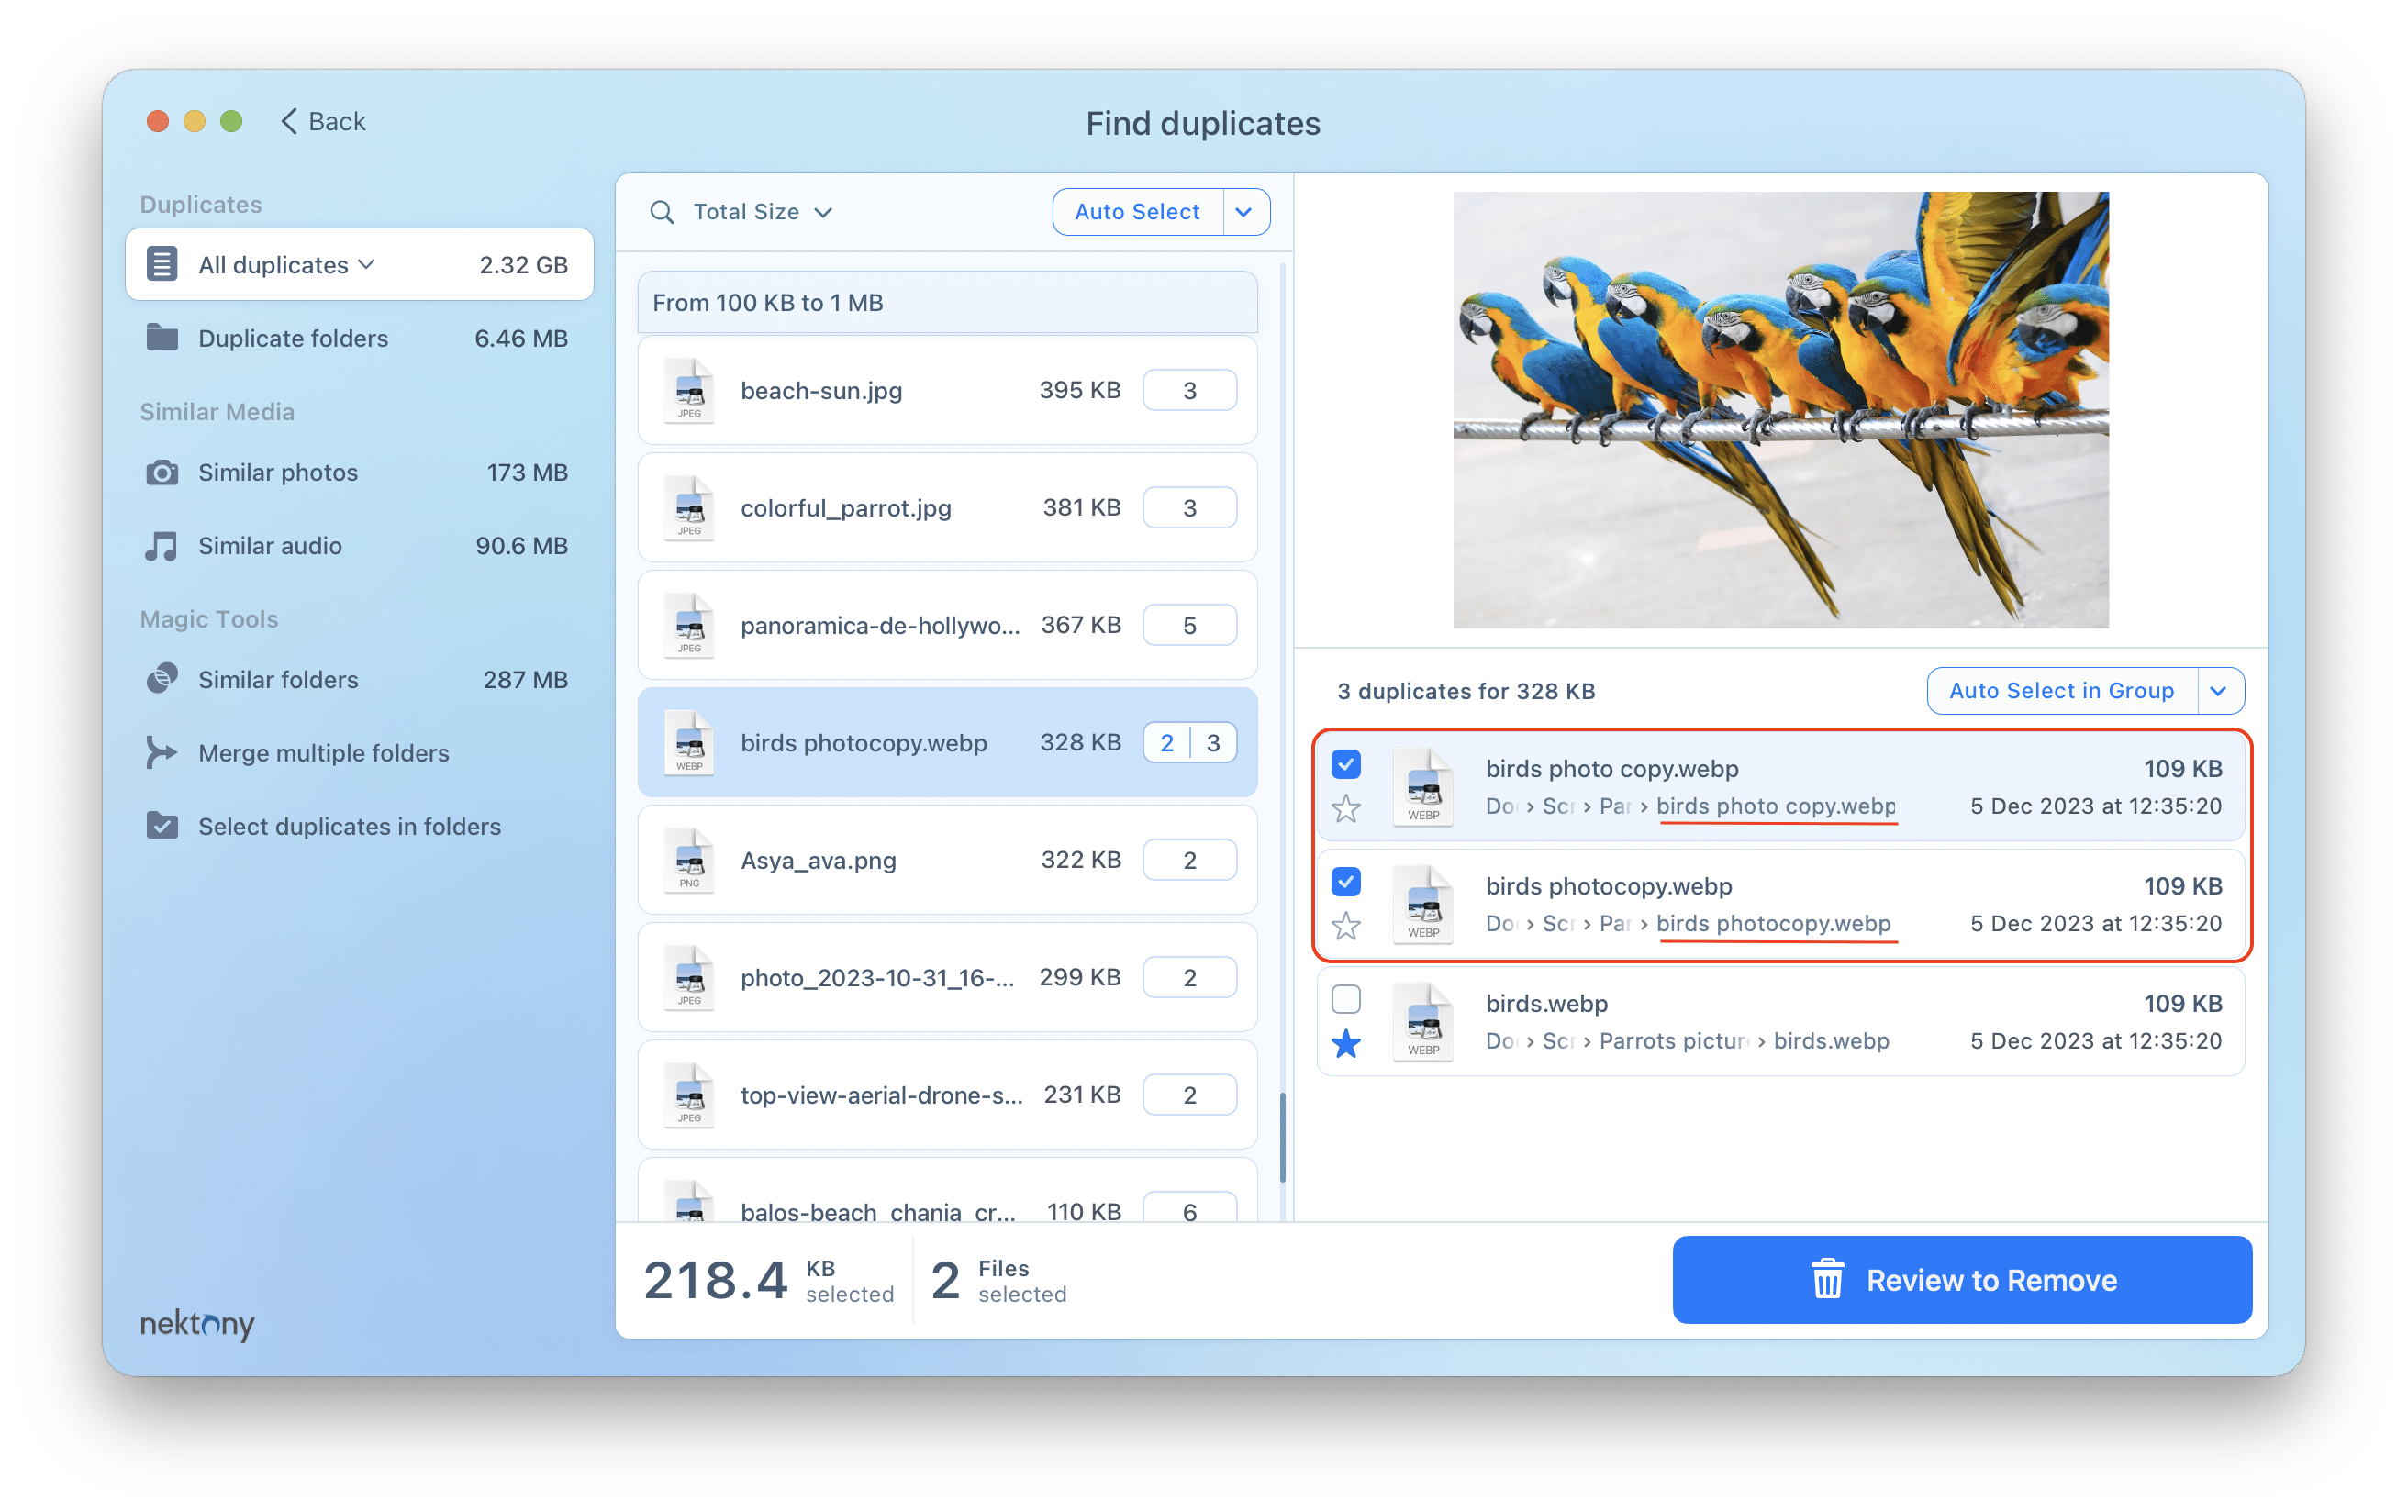
Now let’s look at another example. You have three identical files. Their names are
- “Birds”
- “Birds photocopy”
- “Birds photo copy”
According to the Auto Select rules, all files with the word “copy” and a space in their names are duplicate files, whereas files with “copy” in the name but without a space are not considered duplicates. That is why the Auto Select option marks only one duplicate file for removal, “Birds photo copy”, while another duplicate file, “Birds photocopy”, it kept as an original.
Because of this, we recommend caution when adding suffixes/prefixes to the rules lists to avoid misunderstandings.
If a duplicate is in the Never Select folder, it will not be selected by any rule. If the duplicate is in the Always Select folder, it will be selected first regardless of suffixes and other rules.
The Select in Photos Library rule
In this case, the app will compare files in your folders with the files in the Photos Library. If duplicates are found, unnecessary files inside or outside the Photos Library.
For example, if your iCloud storage is full, you may decide to download your photos and videos to your Mac and get rid of their copies in Photos. However, the content from the Photos Library would be duplicated on your Mac.
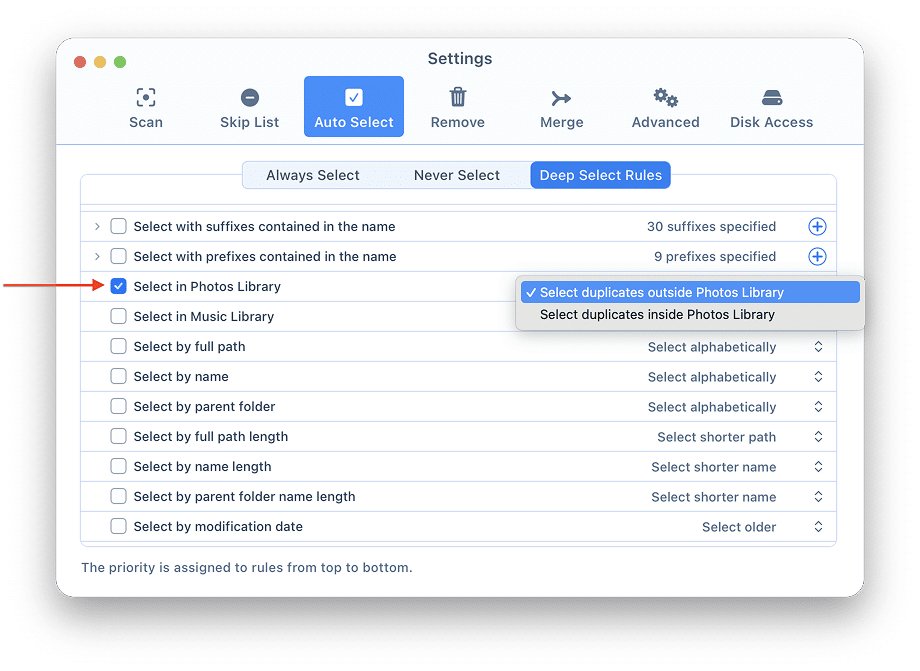
If you want to free up space in Photos using the Select in Photos Library rule, choose Select duplicates inside Photos Library. In this case, you will keep the files on your Mac, and Auto Select will mark the duplicates in Photos Library for removal.
If you want to keep some files in Photos and remove the same files from your Mac, choose the Select duplicates outside Photos Library option of this rule.
The Select in Music Library rule
If you want to automatically select duplicate audio files in Music Library, enable the appropriate rule Select in Music Library.
With this rule, Duplicate File Finder will compare audio files in your Mac folders with the files in the Music Library. If it finds duplicate music files, the files inside or outside the Libraries will automatically be selected depending on your preferences.
For example, if your iCloud storage is full, you may want to download your music to your Mac and remove their copies from the Music app. However, the content from the Library would be duplicated on your Mac.
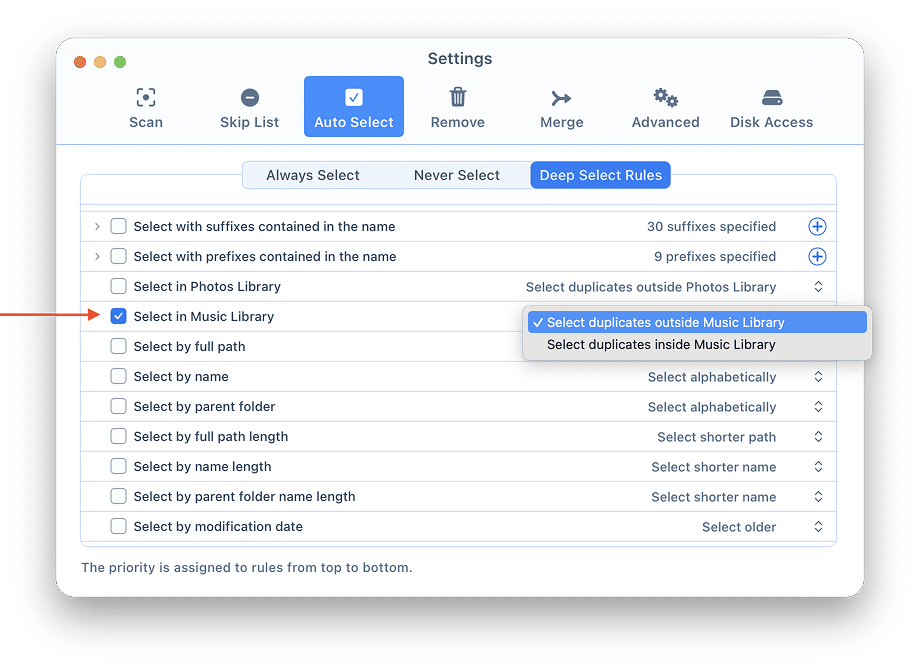
If you want to free up space in the Music app using the Select in Music Library rule, choose Select duplicates inside Music Library. In this case, by clicking the Auto Select button, you will keep your music on your Mac hard drive, and select the copies from Music Library for removal.
If you want to keep the files in the Music app and remove the duplicates from your Mac, choose Select duplicates outside Photos Library.
The Select by full path rule
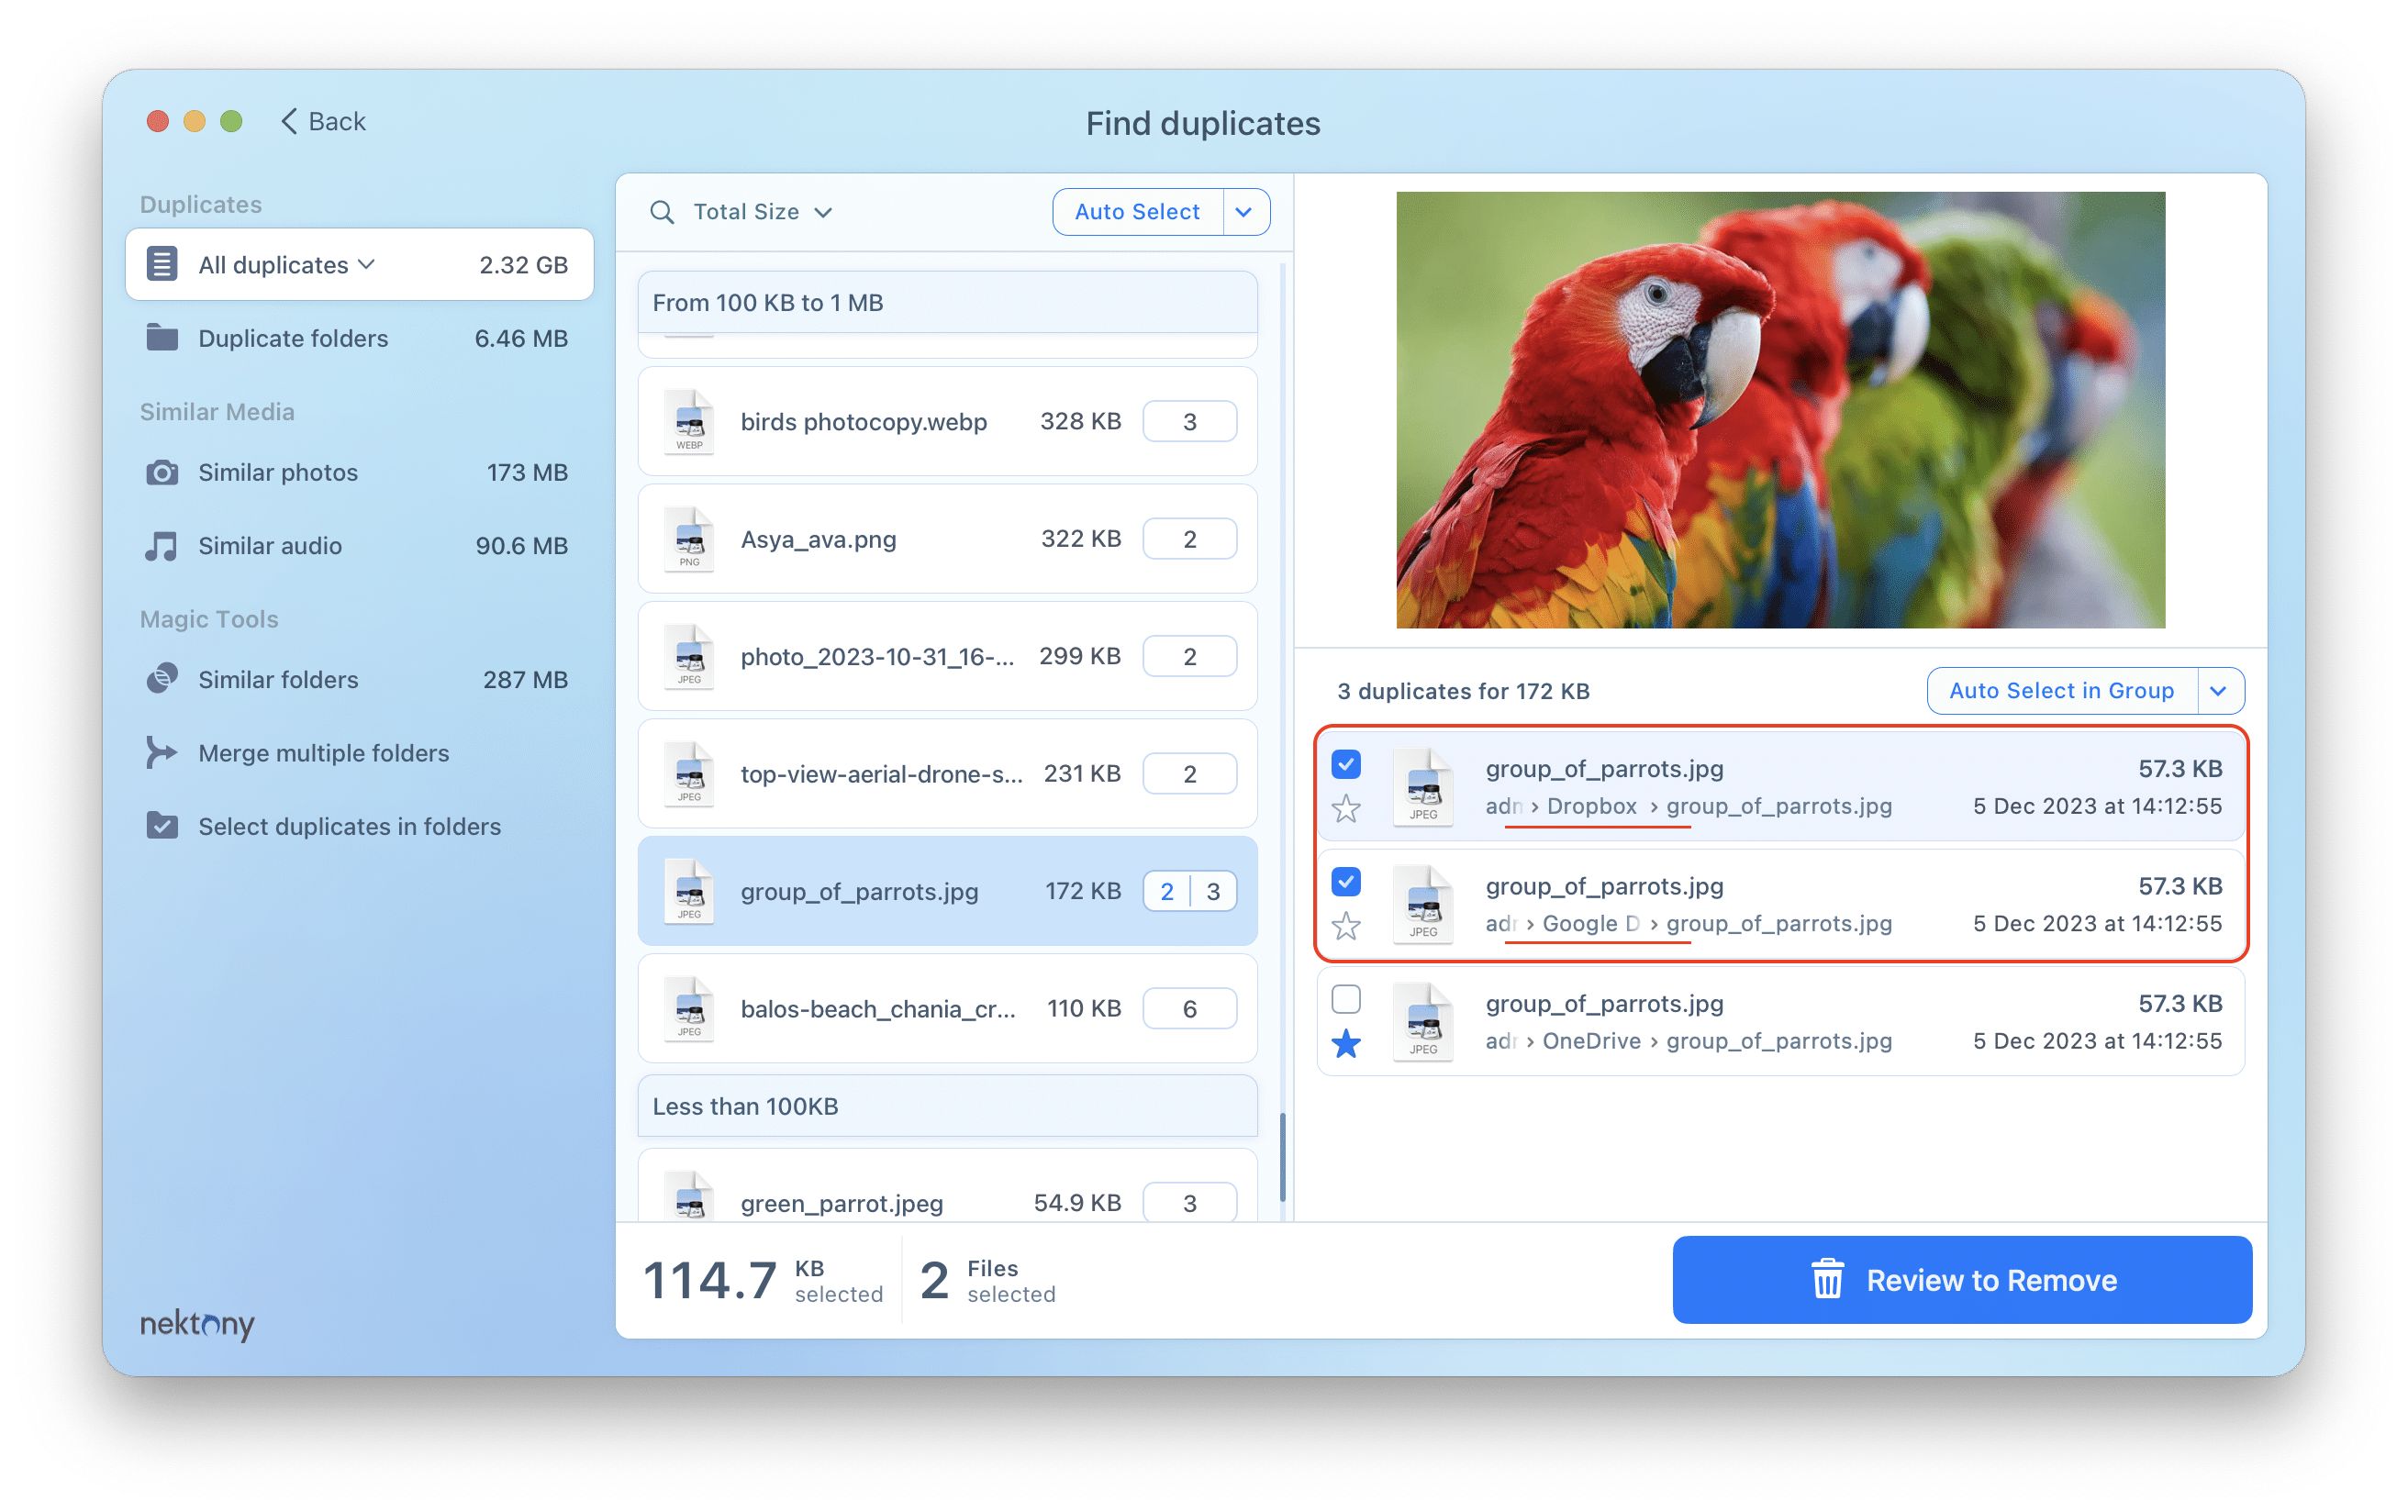
In this example, you have three duplicate files that have the same size, type, name, and content. They are stored in the following directories:
HD/Users/userName/Dropbox/Birds/group_of_parrots.jpg
HD/Users/userName/Google Drive/Pictures/group_of_parrots.jpg
HD/Users/userName/OneDrive/Summer/August/group_of_parrots.jpg
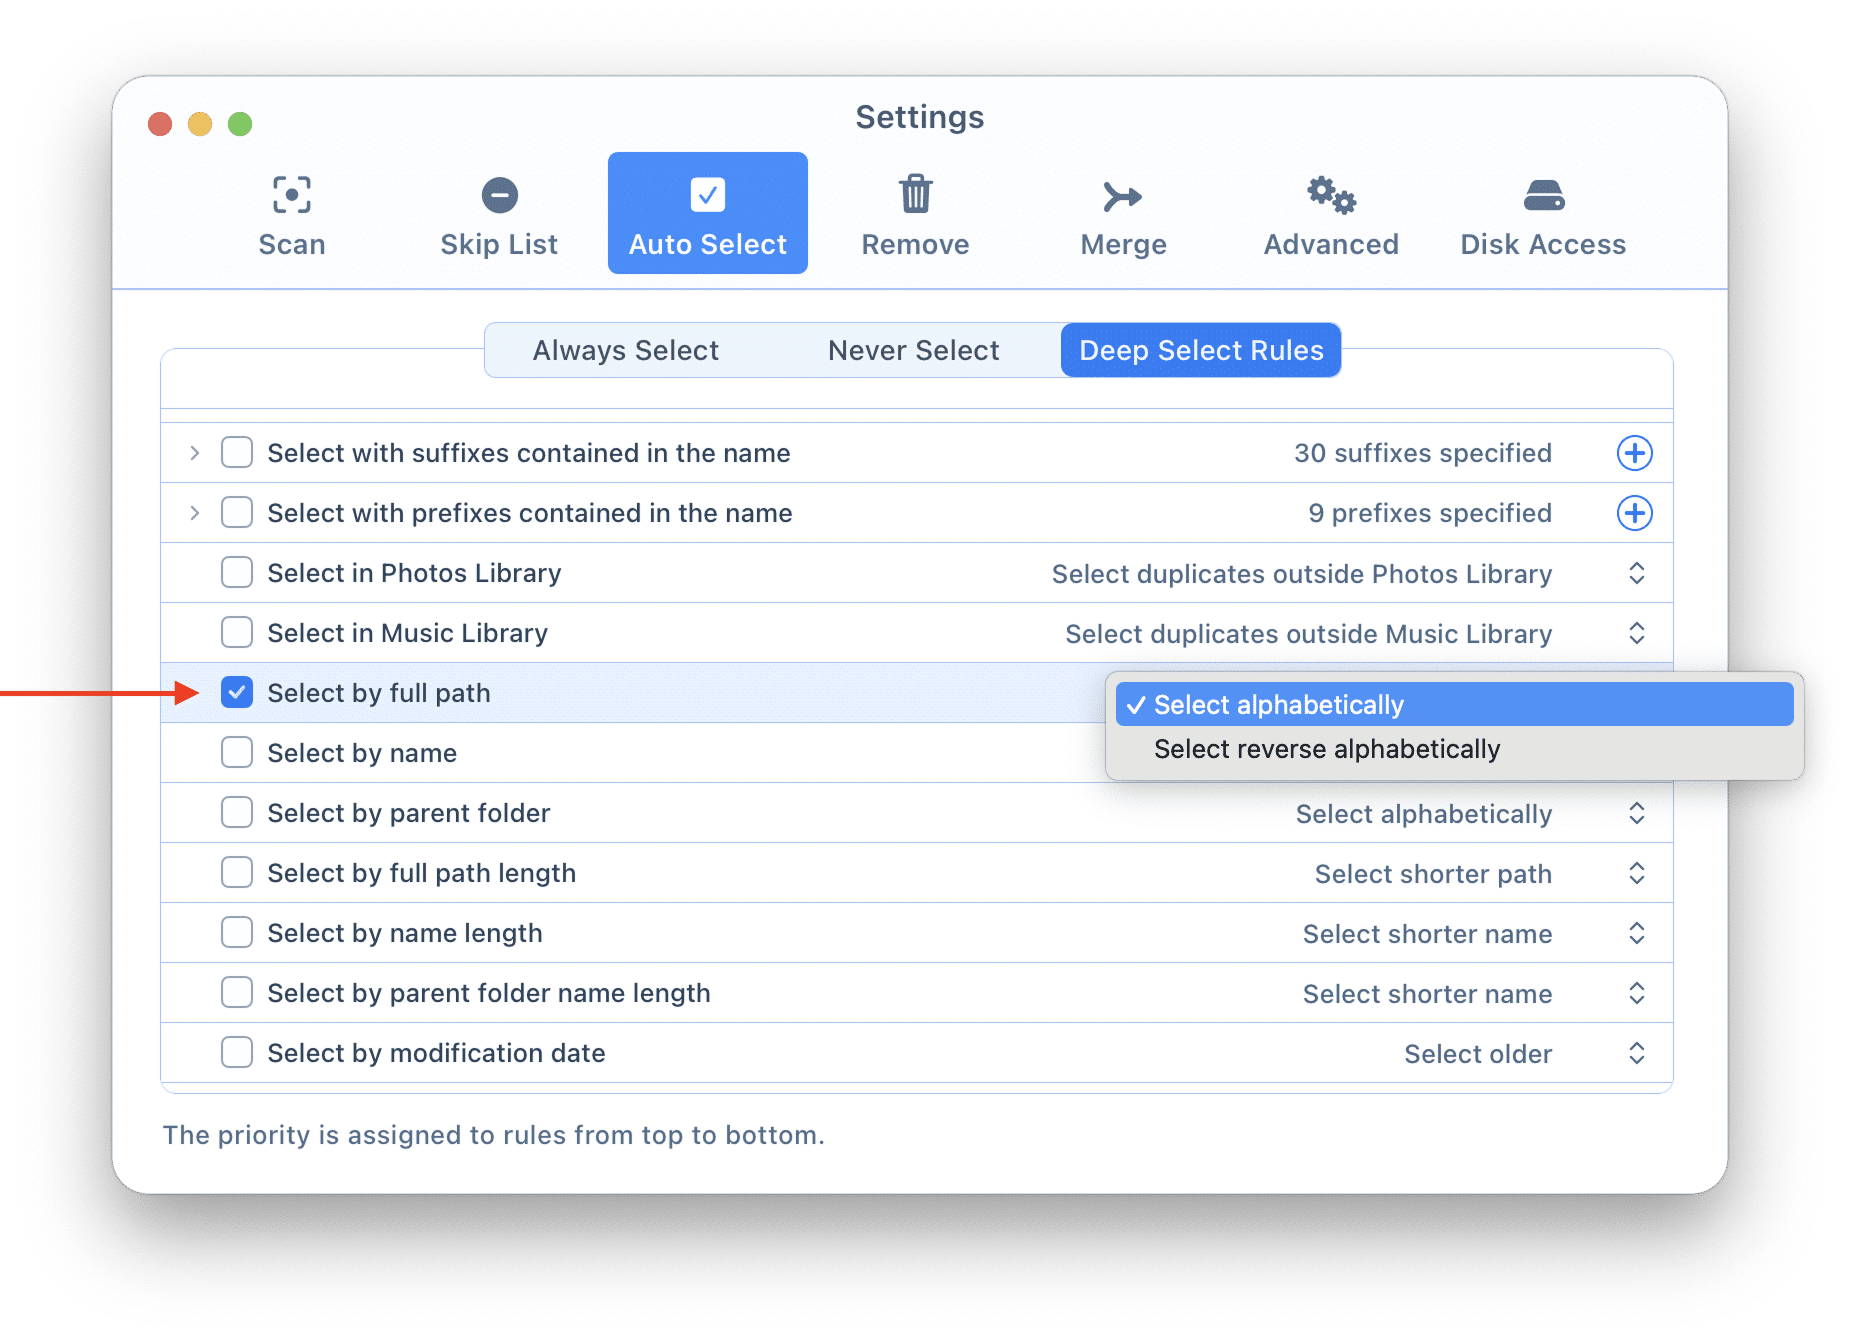
Auto Select analyzes the whole path, and where the differences begin. If you choose to select files by the full path in alphabetical order, Auto Select will mark files for removal in the Dropbox and Google Drive folders.
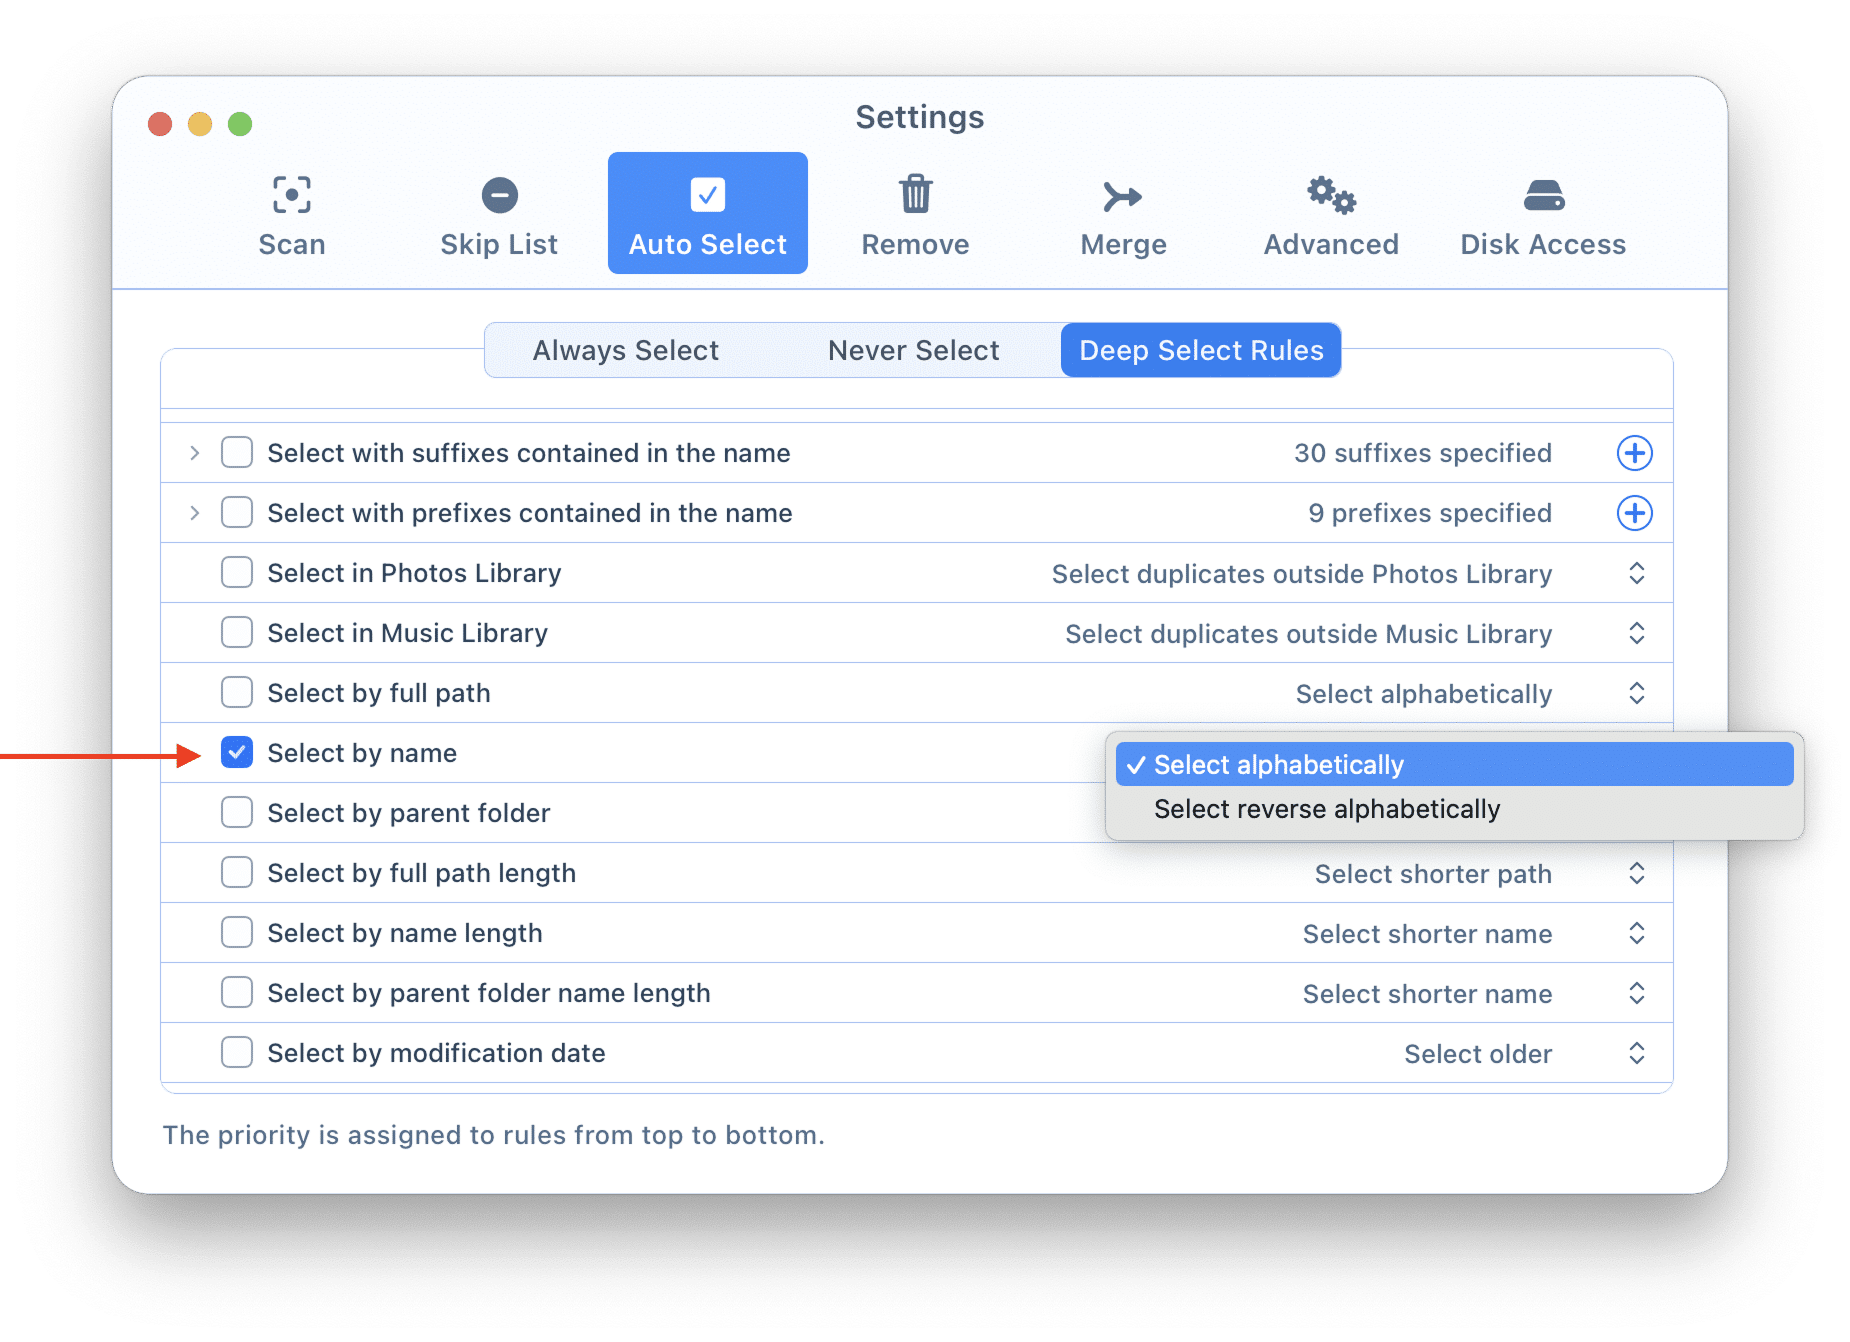
The Select by name rule
You can choose to select duplicate files for removal in alphabetical order or reverse, depending on their names.
For example, you have duplicate files with the following names:
- “blue and red birds.png”
- “red and blue birds.png”
If you set to select files by name in alphabetical order, Auto Select will mark for removal the “blue and red birds.png” duplicate file because its title starts with “b”.
The Select by parent folder rule
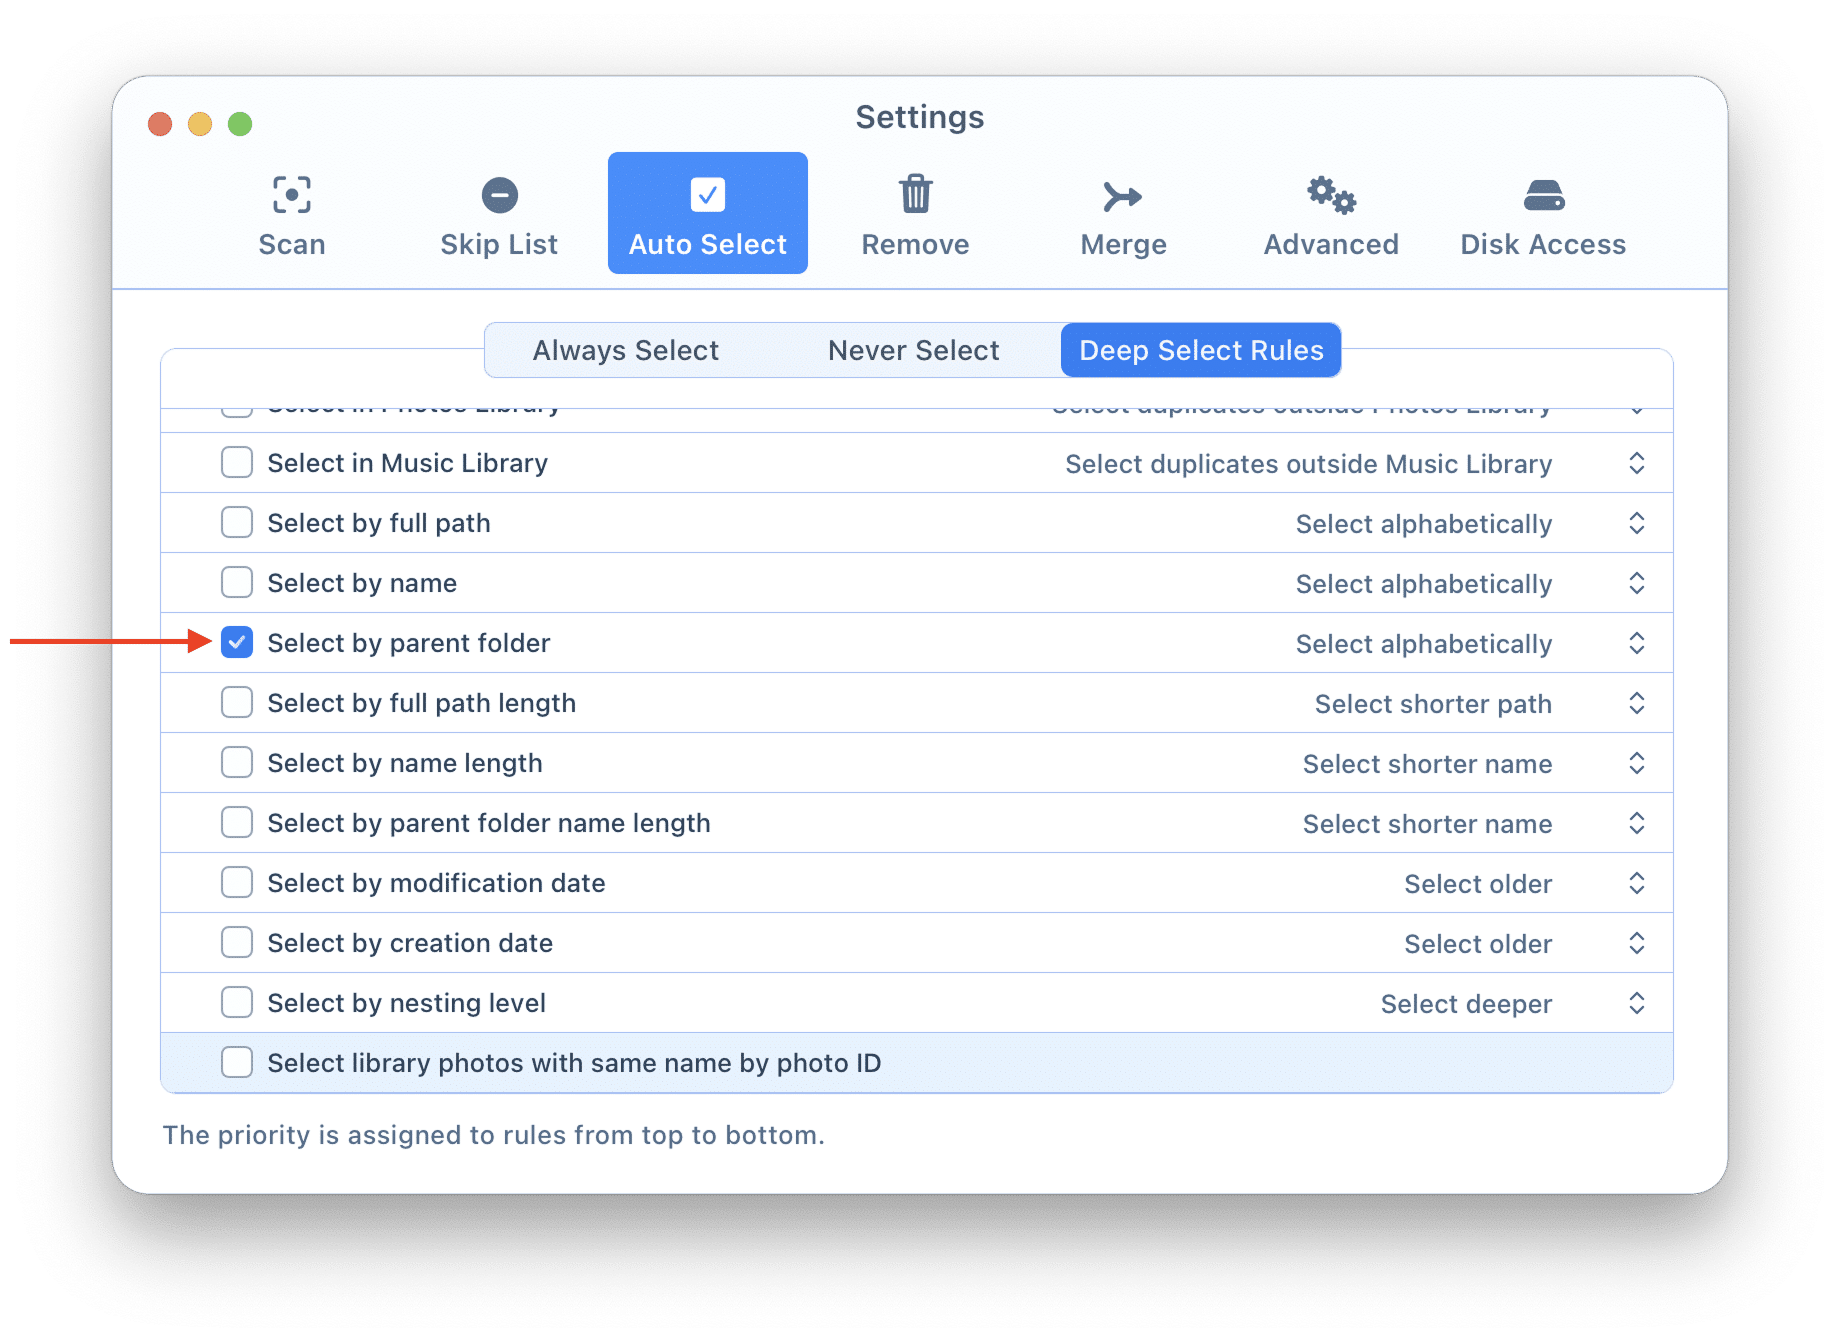
For example, you have duplicate files in two folders, and their paths are:
- Music/Summer/First/playlist.mp3
- Music/Summer/Second/playlist.mp3
The parent folders are named First and Second. If the Select by parent folder in alphabetic order rule is enabled, the Auto Select will mark for deletion the duplicate file in the First folder, as its name starts with “f”.
The Select by full path length rule
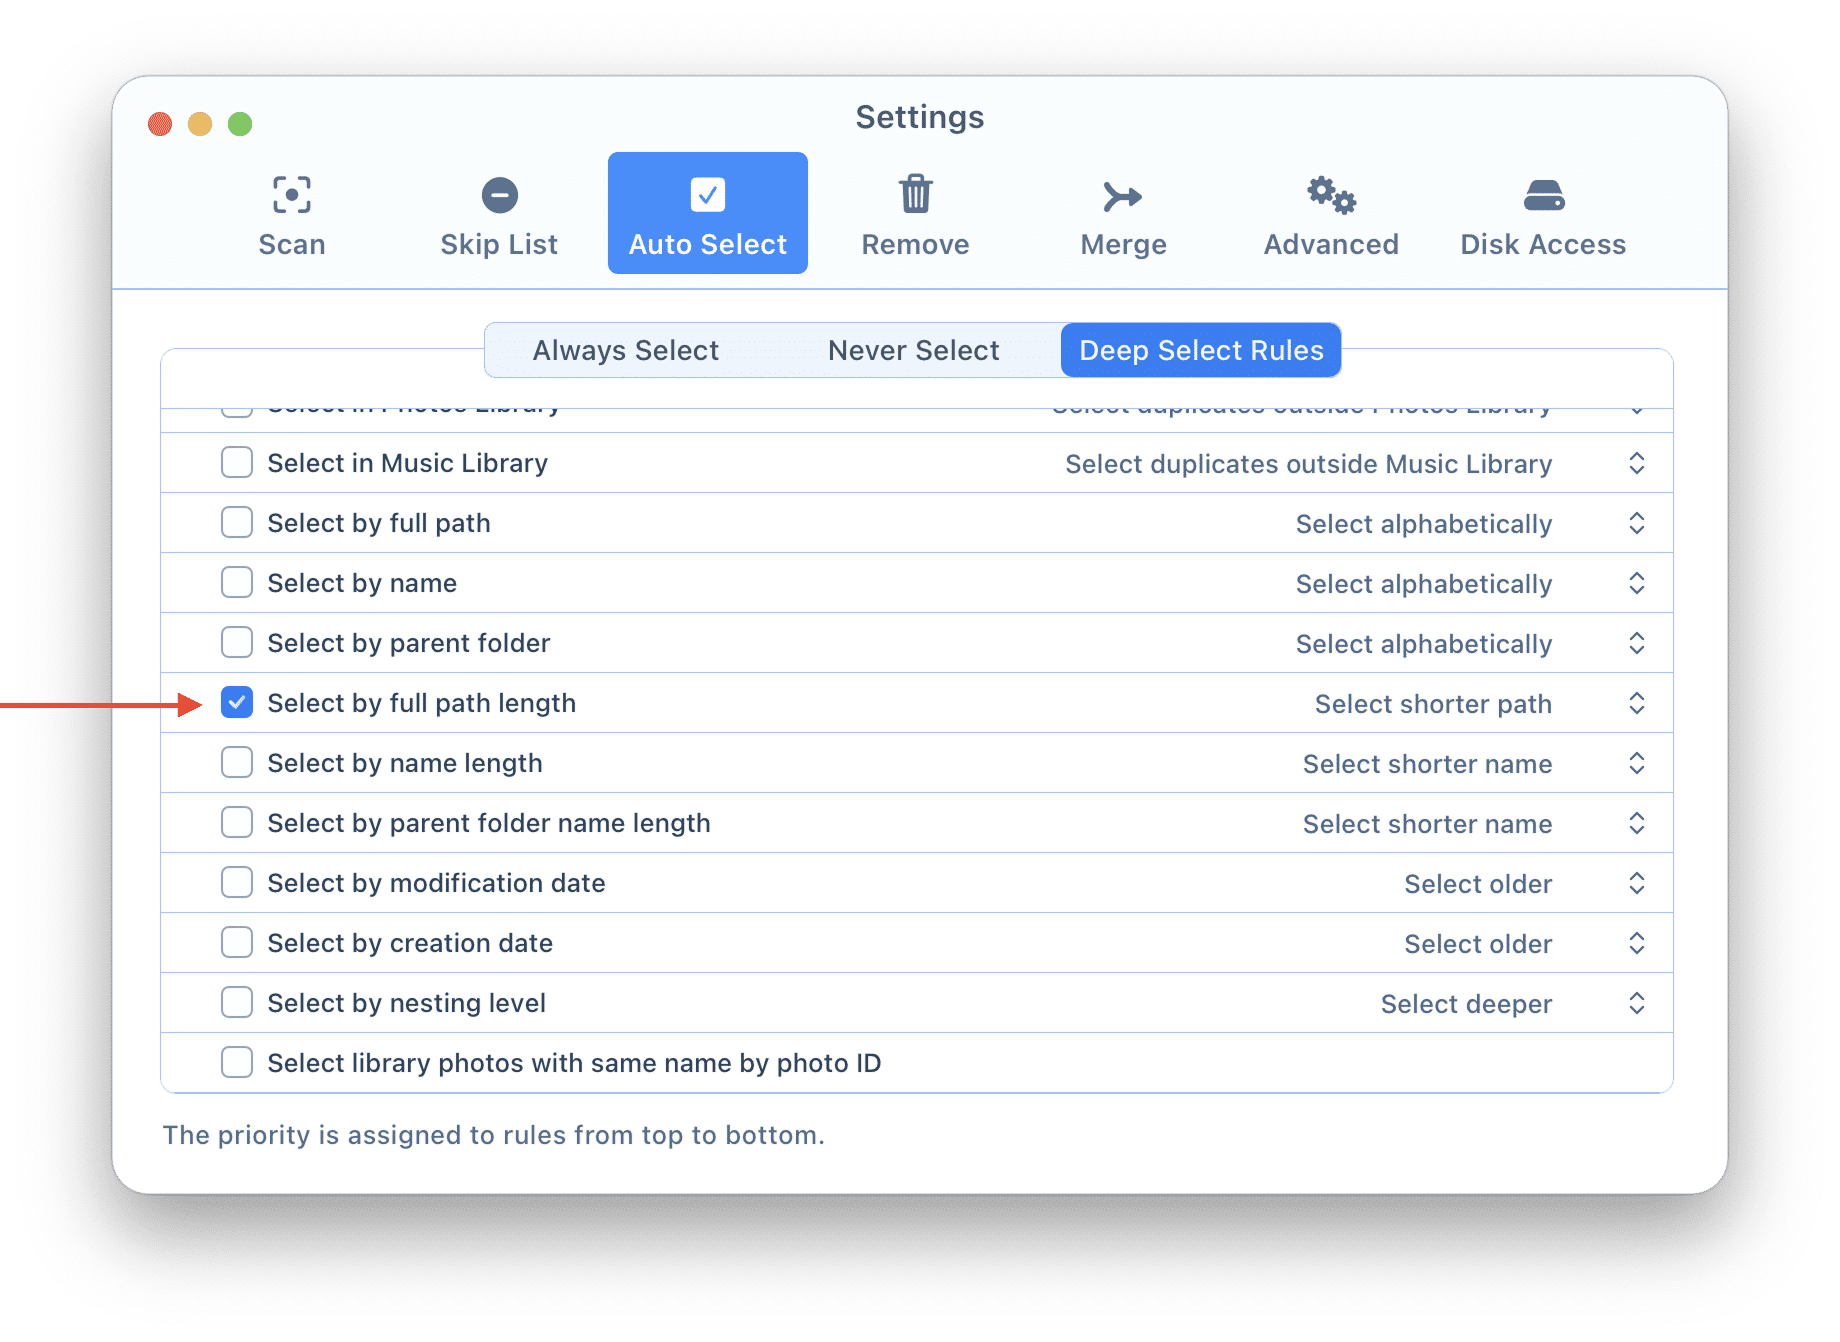
For example, you have two duplicate files with different paths:
- HD/Users/Bob/Pictures/LA 2019/IMG_101
- HD/Users/Bob/Unsorted Photos Summer 2019/IMG_101
The paths of files have a length of 37 and 48 characters. So if you enable the Select by full path length rule by longer path, the Auto Select will mark for removal the second duplicate file for removal as its path is longer.
The Select by name length rule
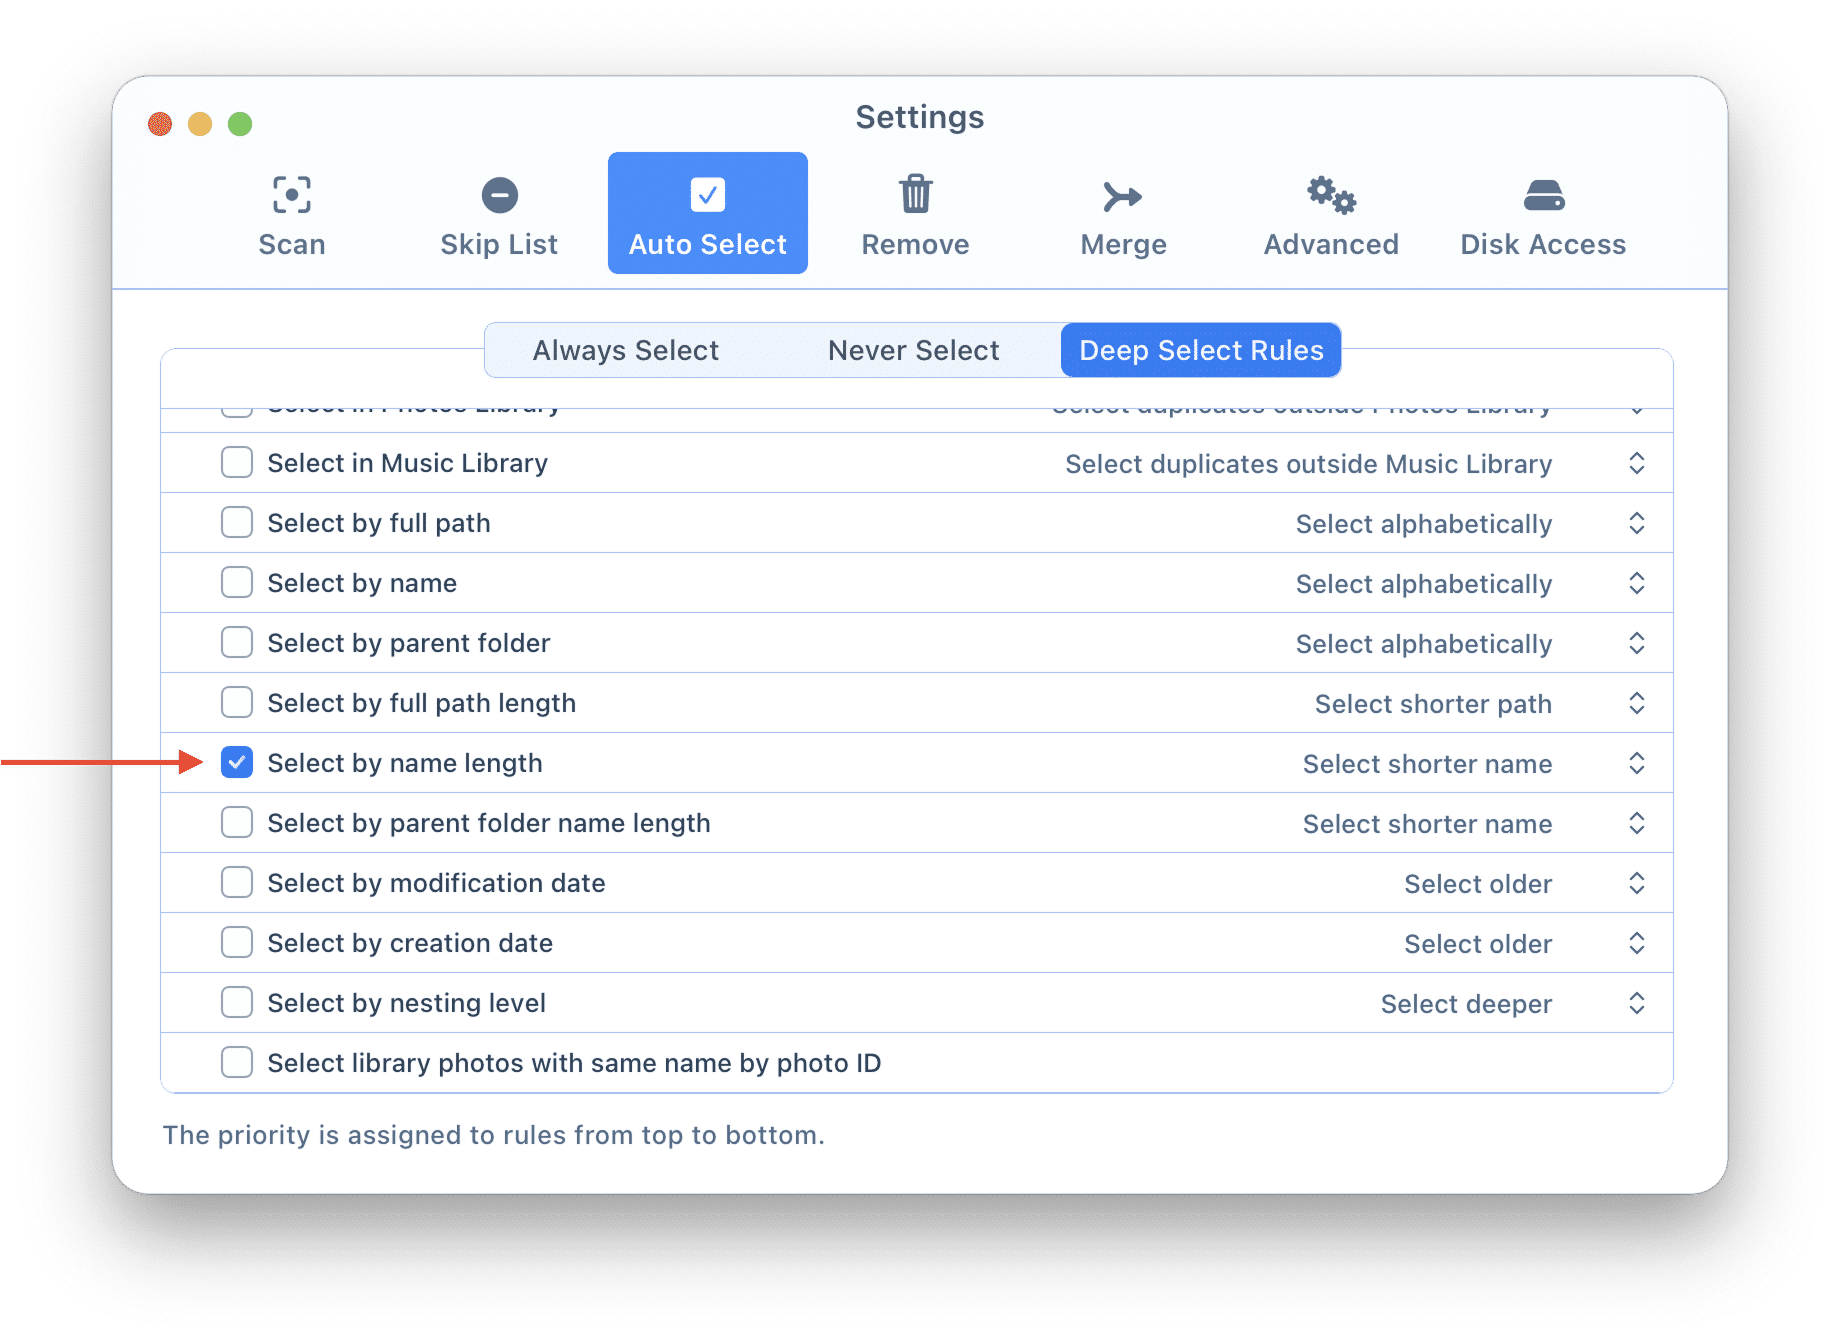
You can choose to select duplicate files for removal, depending on the shorter or longer name.
For example, you have two duplicate files with different names:
- “two birds.png”
- “blue and red birds.png”
If you set the rule to Select by the shorter name, the Auto Select will mark for removal the “two birds.png” duplicate file for removal because its name is shorter.
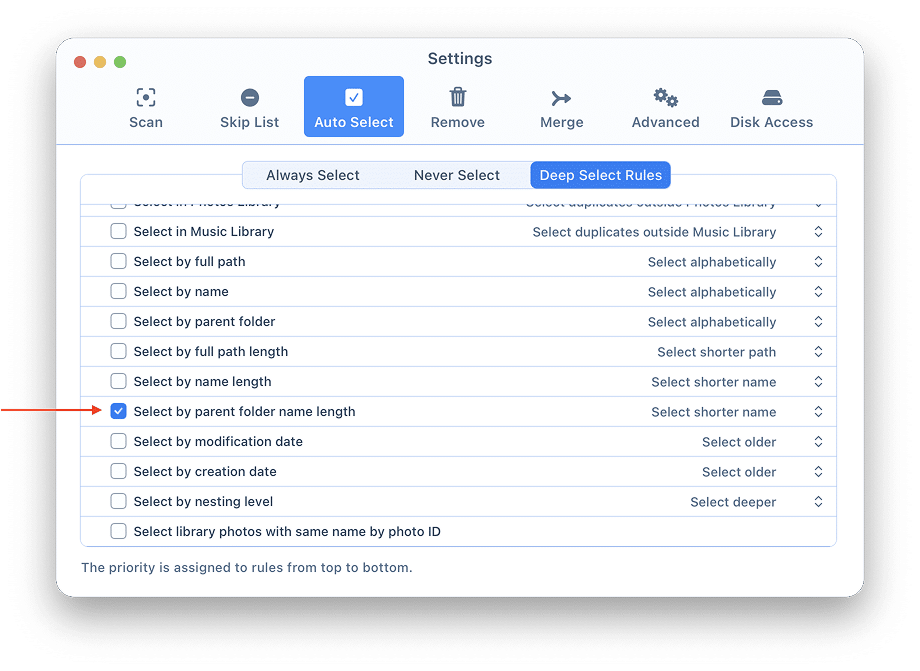
The Select by parent folder name length rule
In this example, you have two duplicate files, and they are located in different parent folders:
- HD/Users/Bob/Pictures/2019/IMG_101
- HD/Users/Bob/Pictures/Summer 2019/IMG_101
The parent folders are 2019 and Summer 2019. So if you enable the Select by parent folder name length rule by a shorter path, the Auto Select will mark the first duplicate file for removal.
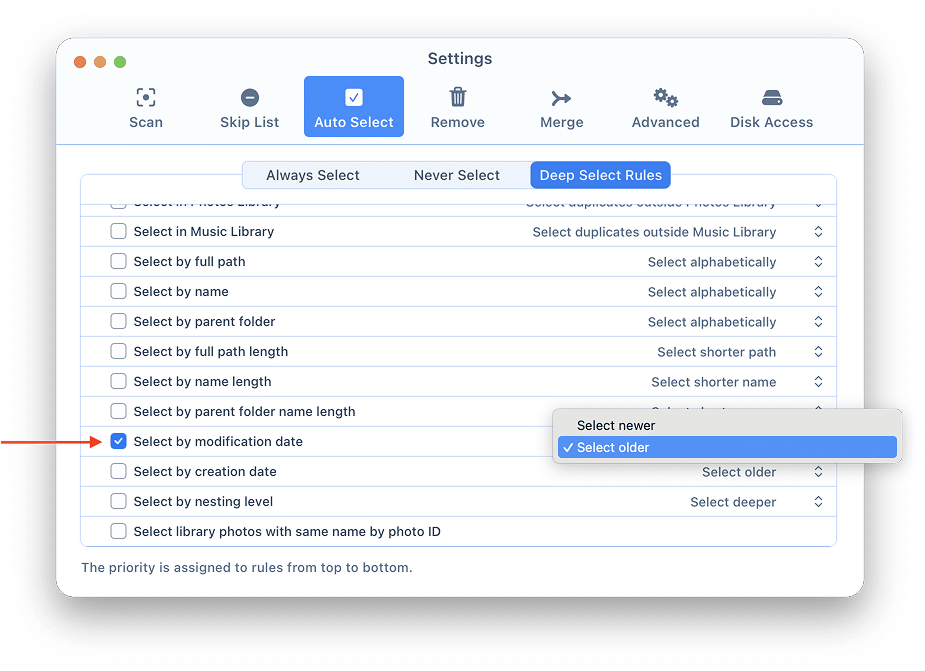
The Select by modification date rule
For example, let’s say you downloaded a picture and, after a few weeks, downloaded it again. Now you have two duplicate files with different modification dates.
When you enable the rule to select files for removal based on the oldest modification date, Auto Select will mark the file that you downloaded first.
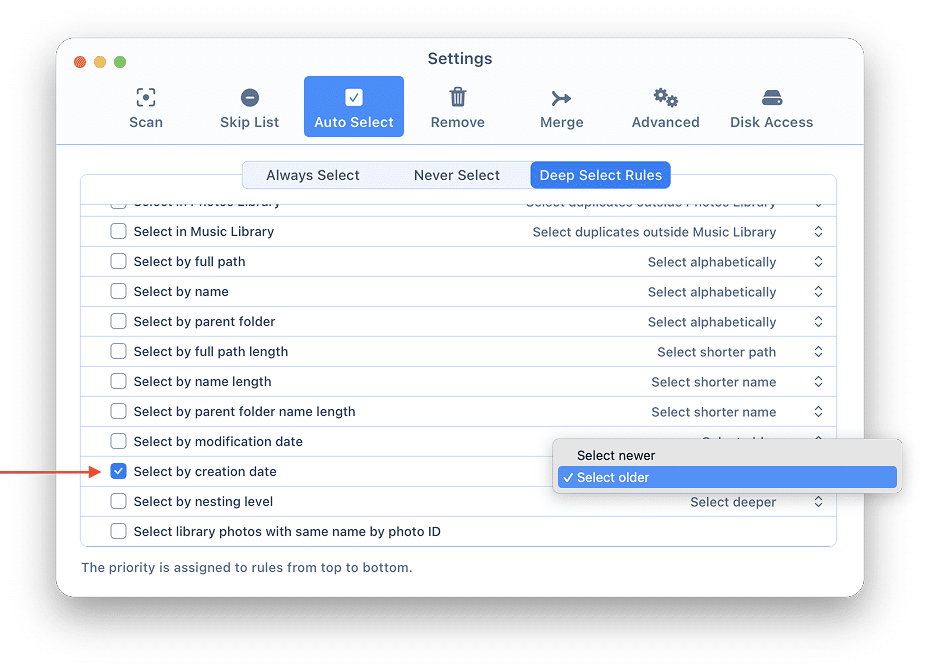
The Select by creation date rule
For example, imagine you three duplicate files. One of this files you created yesterday. Another duplicate copy you created today. If you enable the rule to select files for removal based on the newer creation date, Auto Select will first mark the file you created today.
The Select by nesting level rule
For example, let’s imagine that you have a Pictures folder with tons of images that you decide to sort. You create a new folder labeled Year 2019 inside it and copy desired images there. Then, you add a new folder Summer 2019 inside the Year 2019 folder and copy the relevant pictures there.
In this situation, you would have duplicate files among three folders from the same directory. To choose unneeded duplicate files, you can enable the Select by nesting level rule to pick the files located higher to be removed.
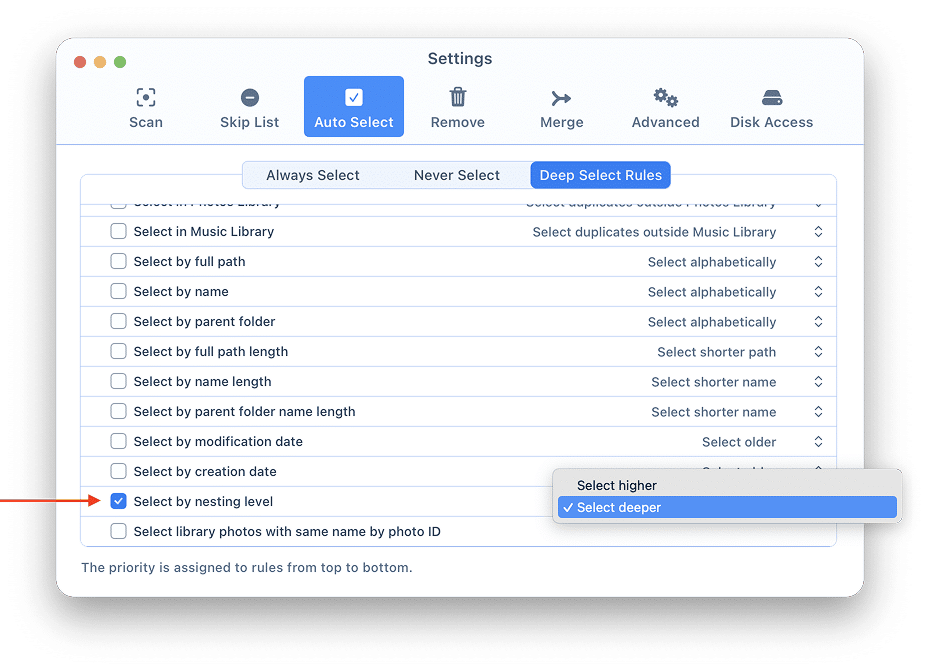
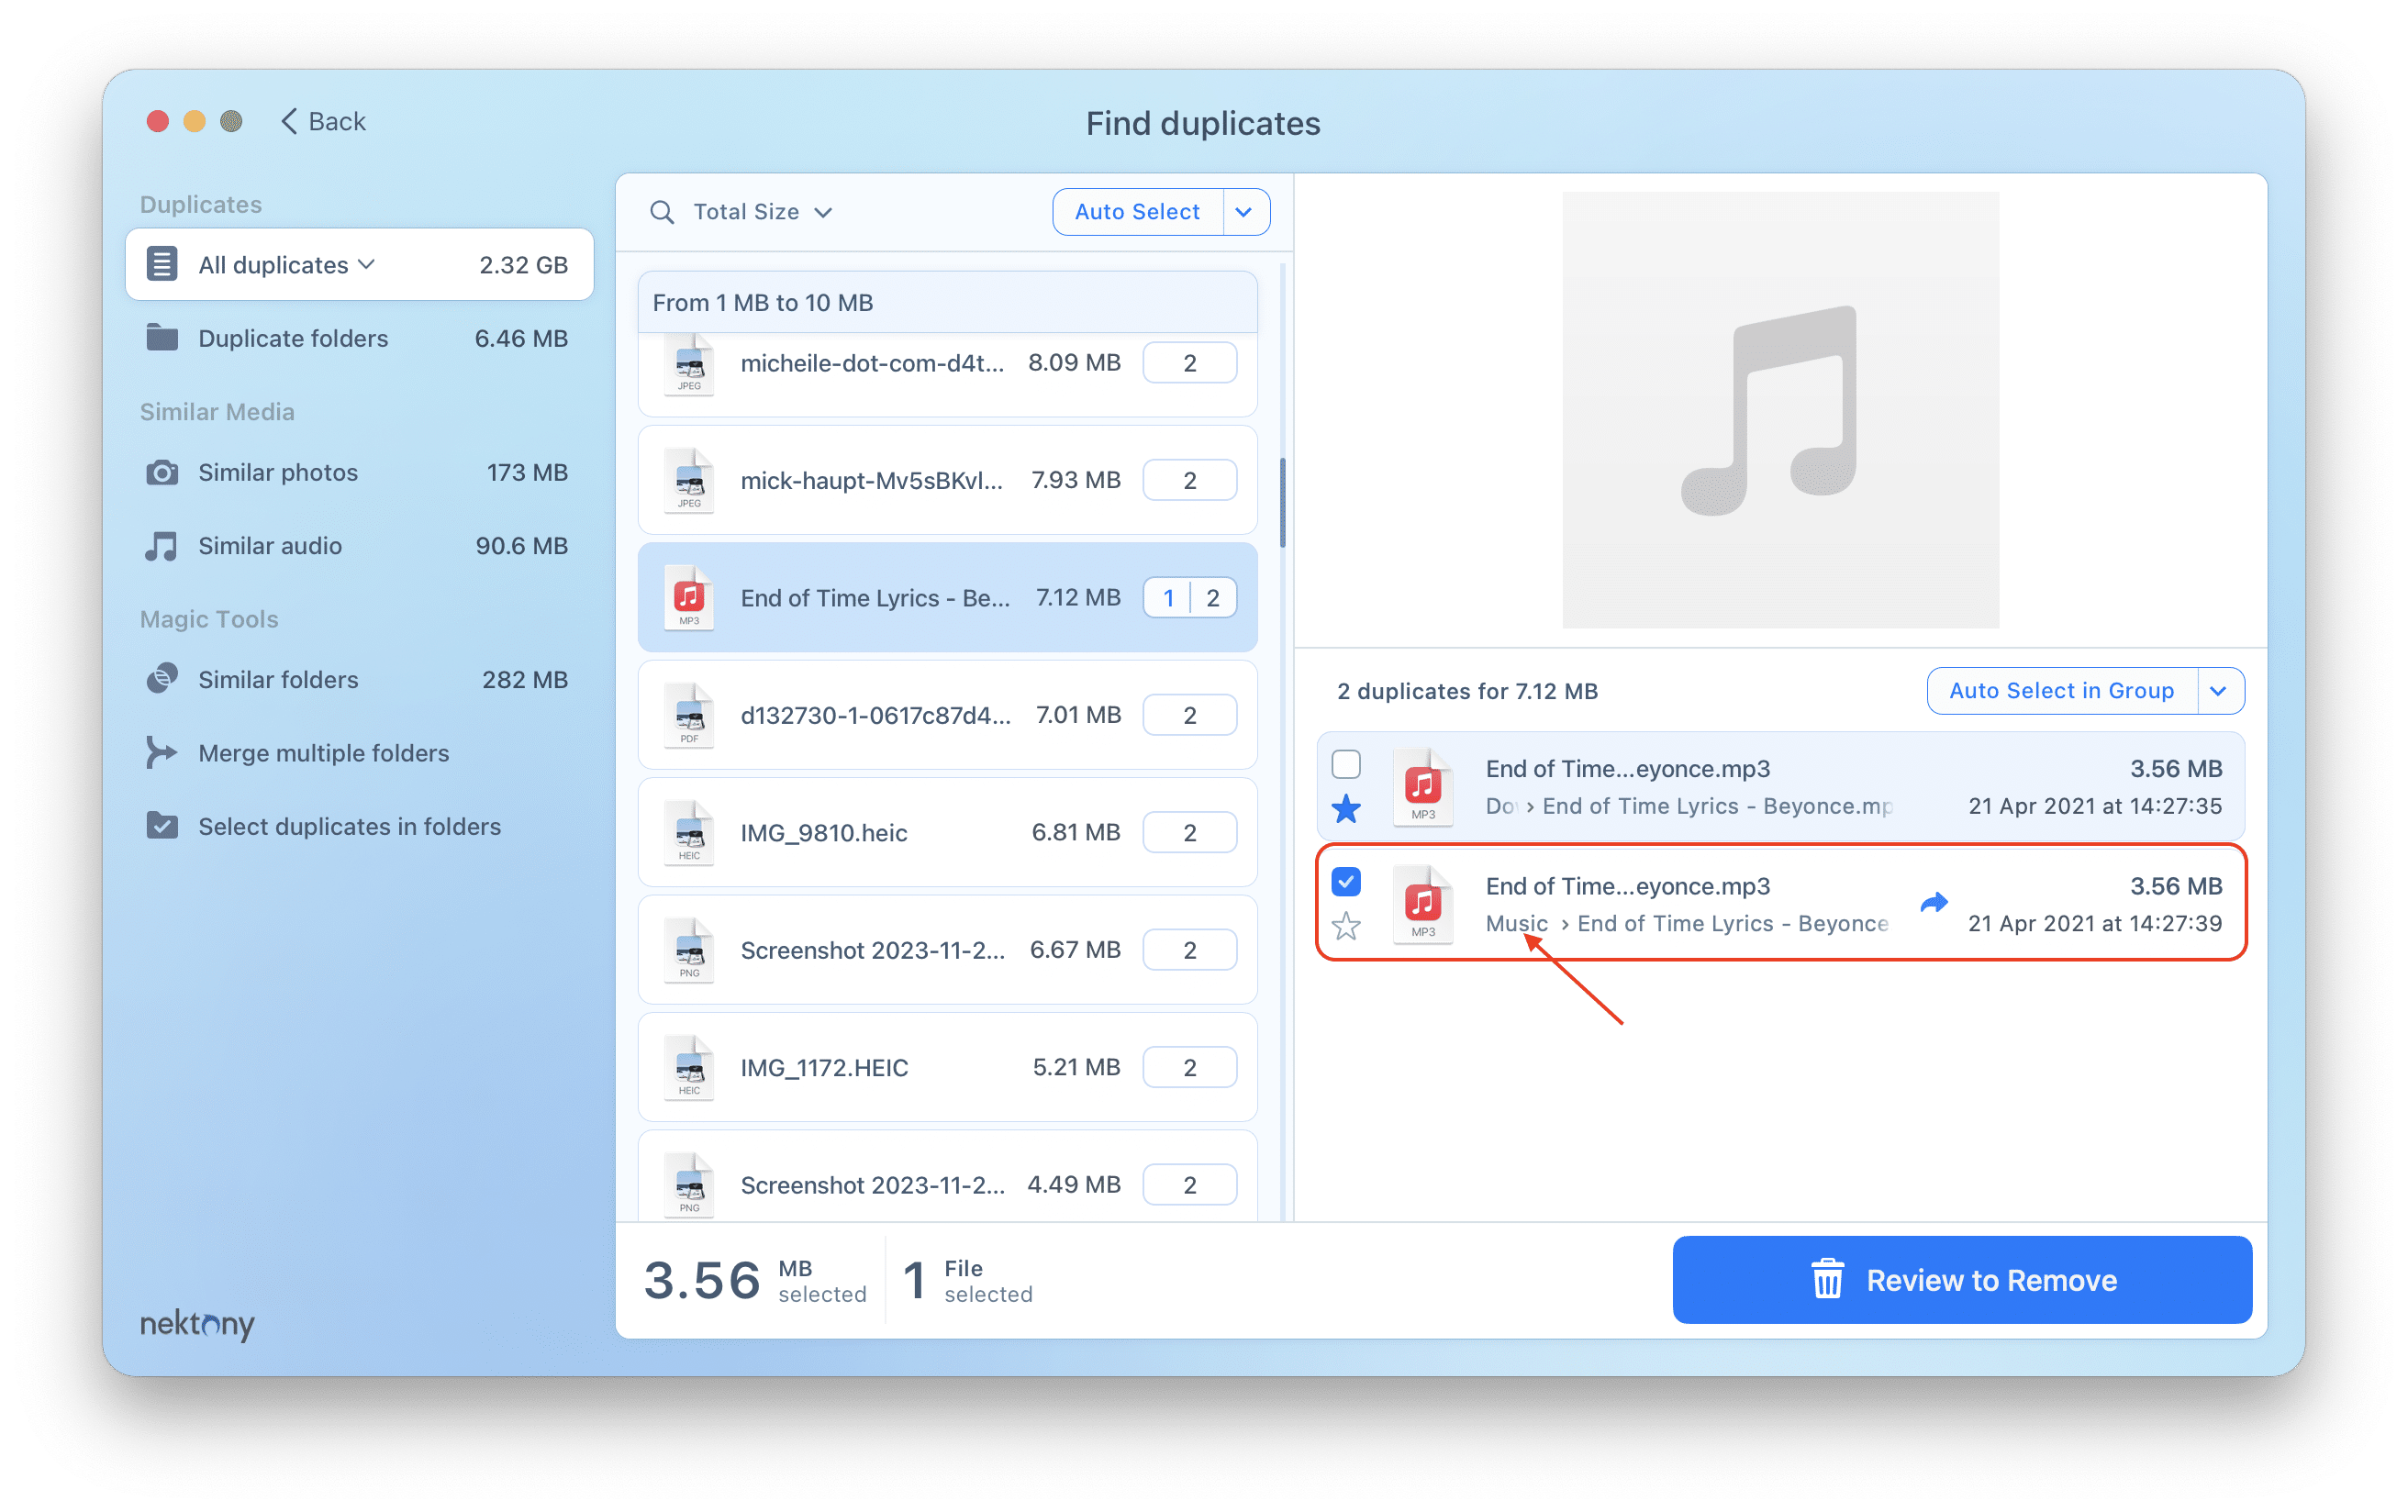
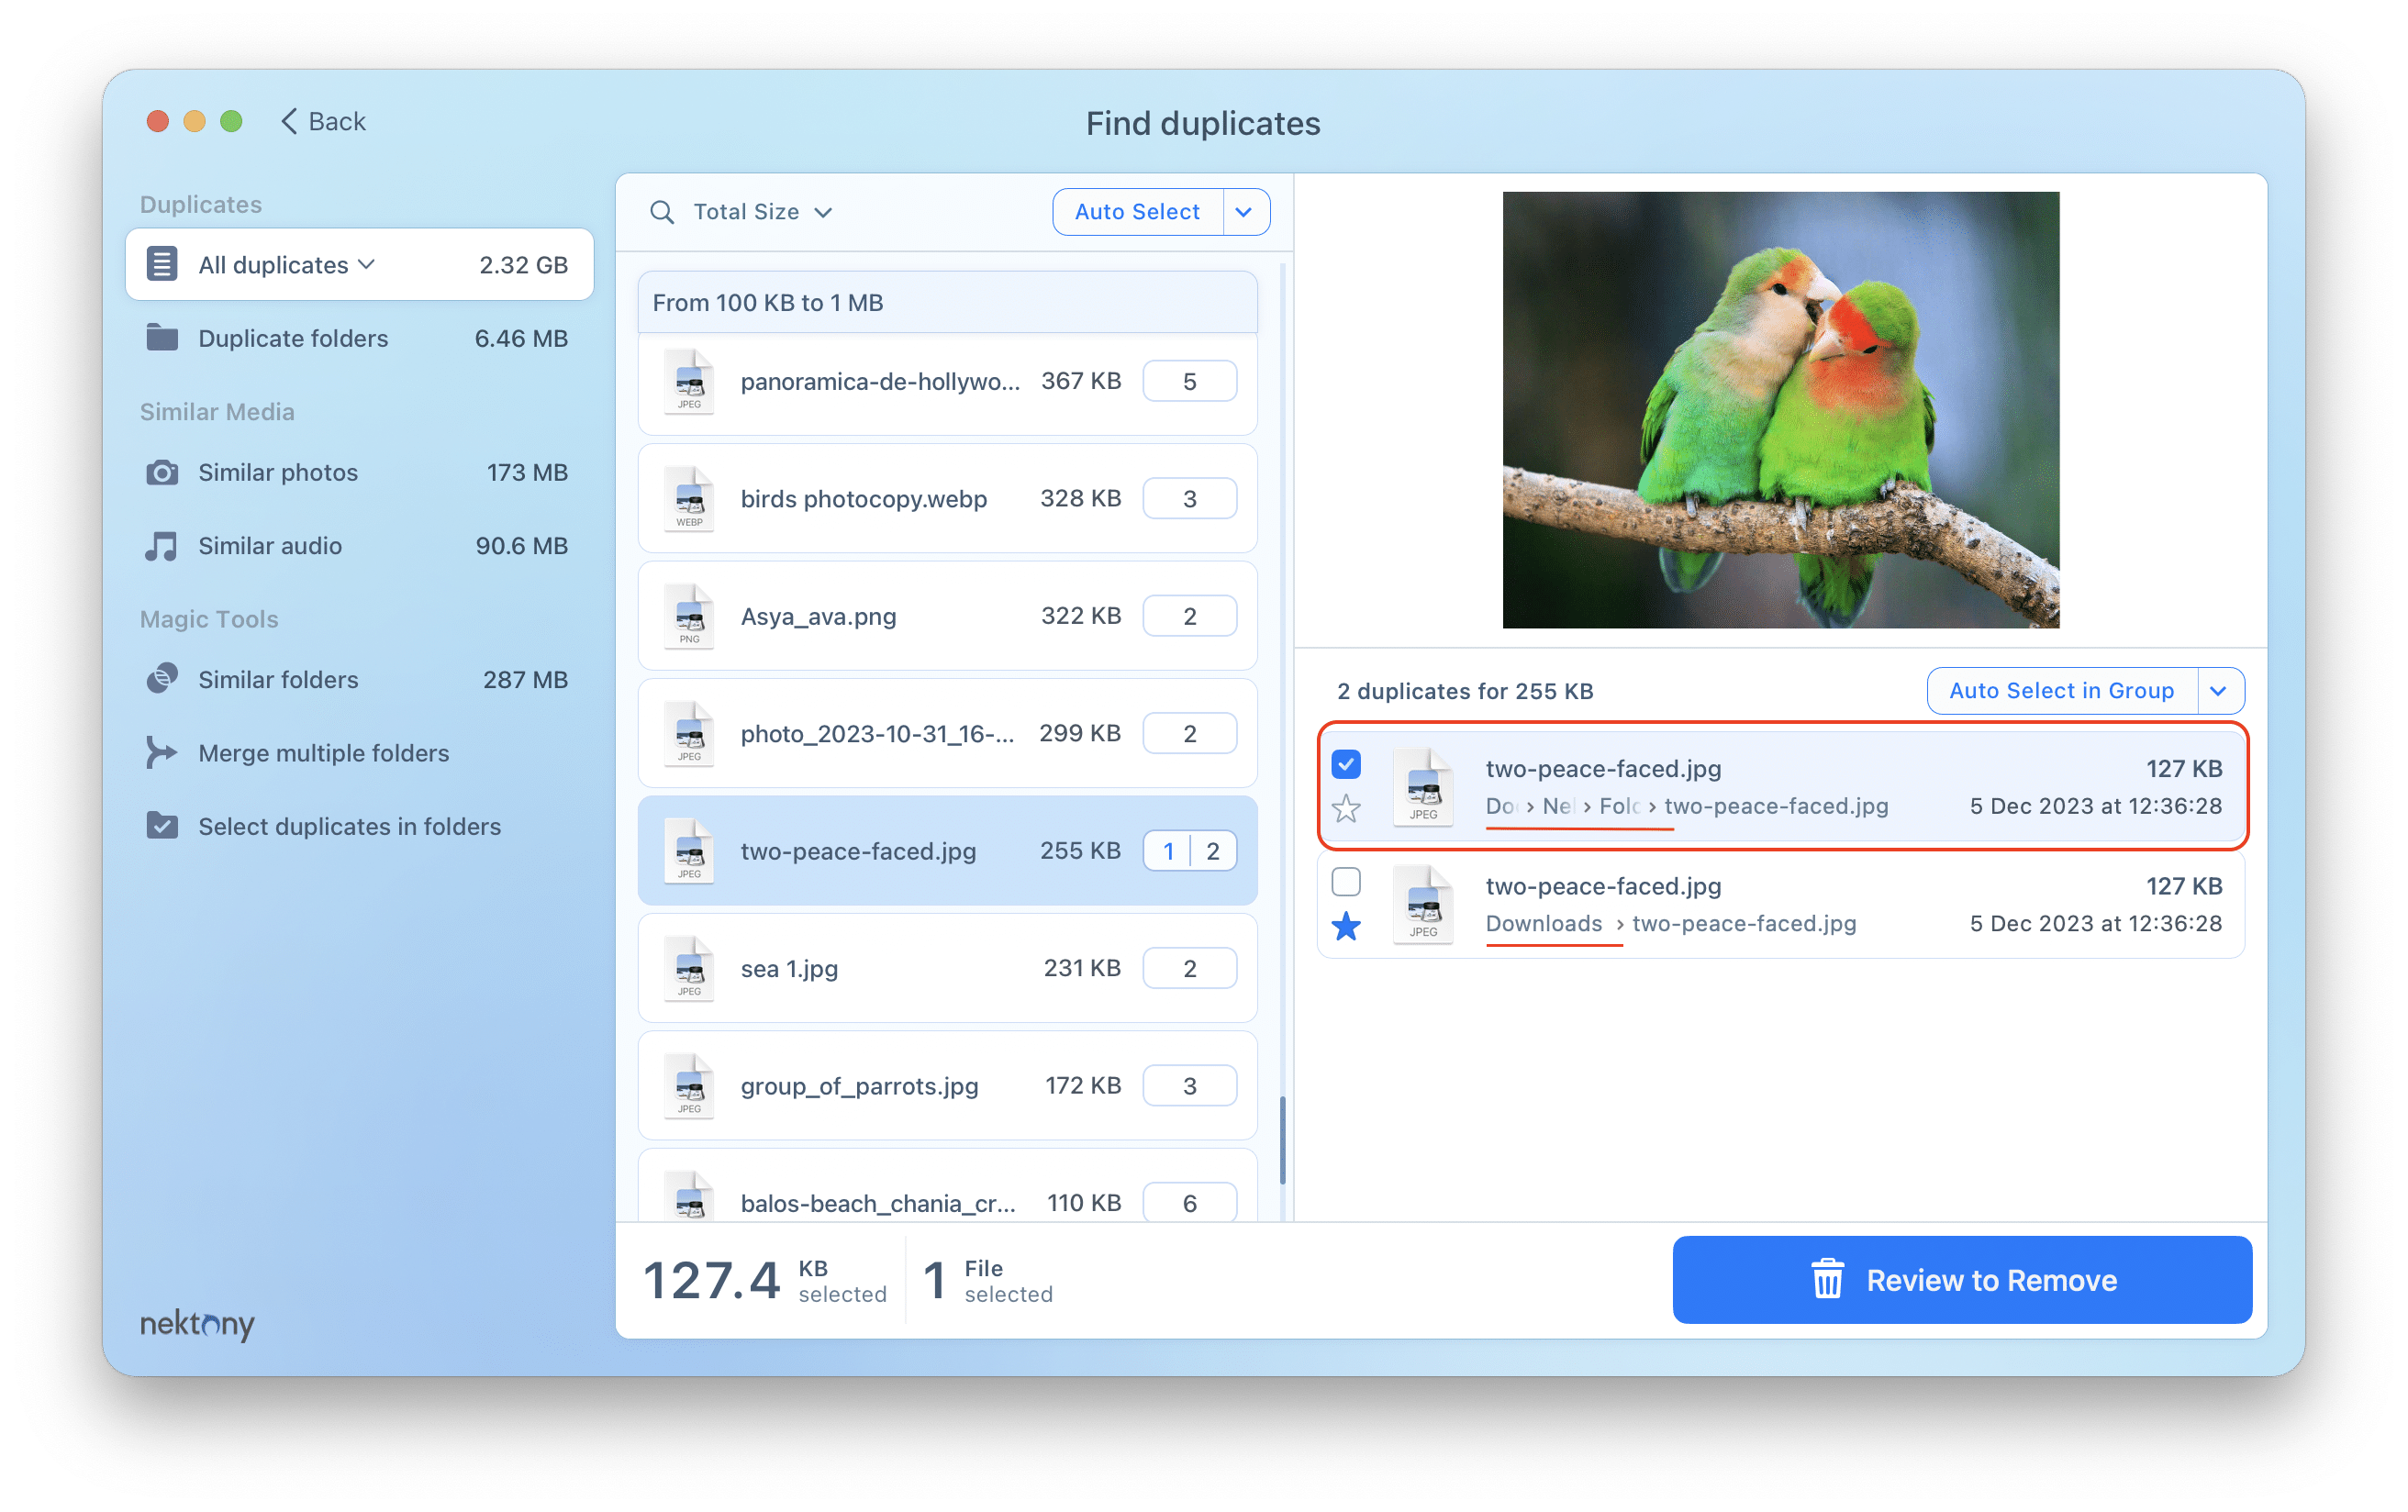
In the example below, we have two duplicate files in two folders in different directories. To choose unneeded duplicate files, you can enable the Select by nesting level rule to pick the files located deeper to be removed. So, when you click Auto Select, the app will mark duplicate files from the Documents/Nektony docs/Folder 1 directory and leave a file in the Downloads directory.
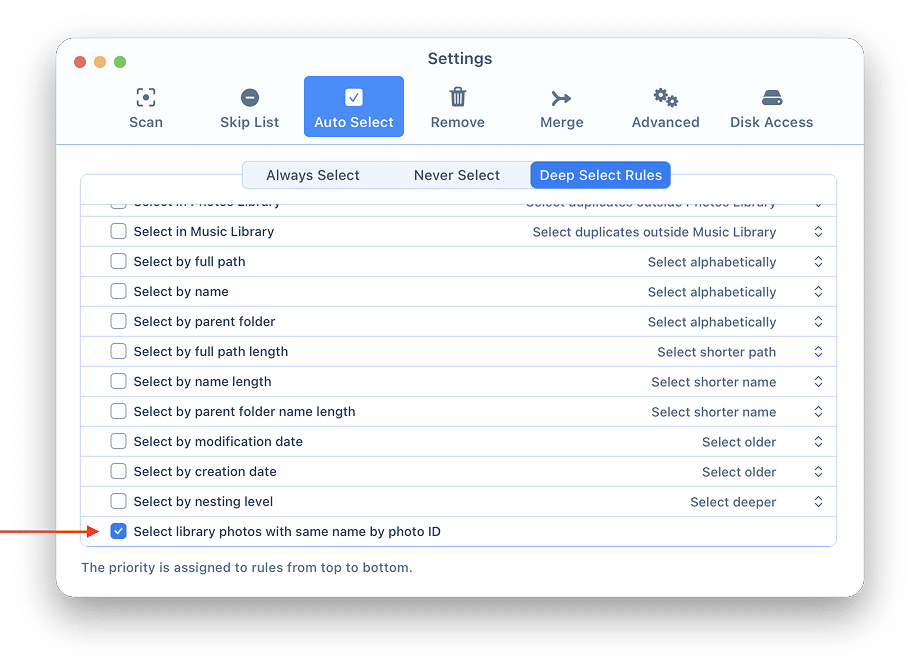
The Select photos with the same name by photo ID
How does Auto Select work
Now that you understand how each of the individual rules function, we want to share with you the general algorithm of Auto Select rules:
- The application will first take into account the Always Select, Never Select, and Suffixes/Prefixes rules. If these rules do not apply, then the next enabled rules are enabled.
- The application uses Auto Select rules according to their position in the list, from top to bottom. You can change the order of the rules by dragging them up or down in the Auto Select rules window.
- If there are no differences between the files for the chosen rules, none of the files will be selected by the Auto Select command. For example, if all duplicate files in a group are in the Always Select folder, none of them will be selected for deletion. If all duplicate files in a group have the suffix “copy”, then none of them will be marked for deletion. If the rule is set to select the newest files and the dates are the same, no file will be selected for removal.
- You can change the Auto Select rules whenever you want, but be sure to deselect all previously selected files before using a new rule.
- Use the Command+D shortcut to deselect files, change the Auto Select rules, and then you can use the Auto Select command.
- The Auto Select option will never select all duplicates in the same group. At least one file from a group always remains unselected. This is necessary to save your data.
You can disable and change these rules from scan to scan, depending on the specific data that you want to preserve.
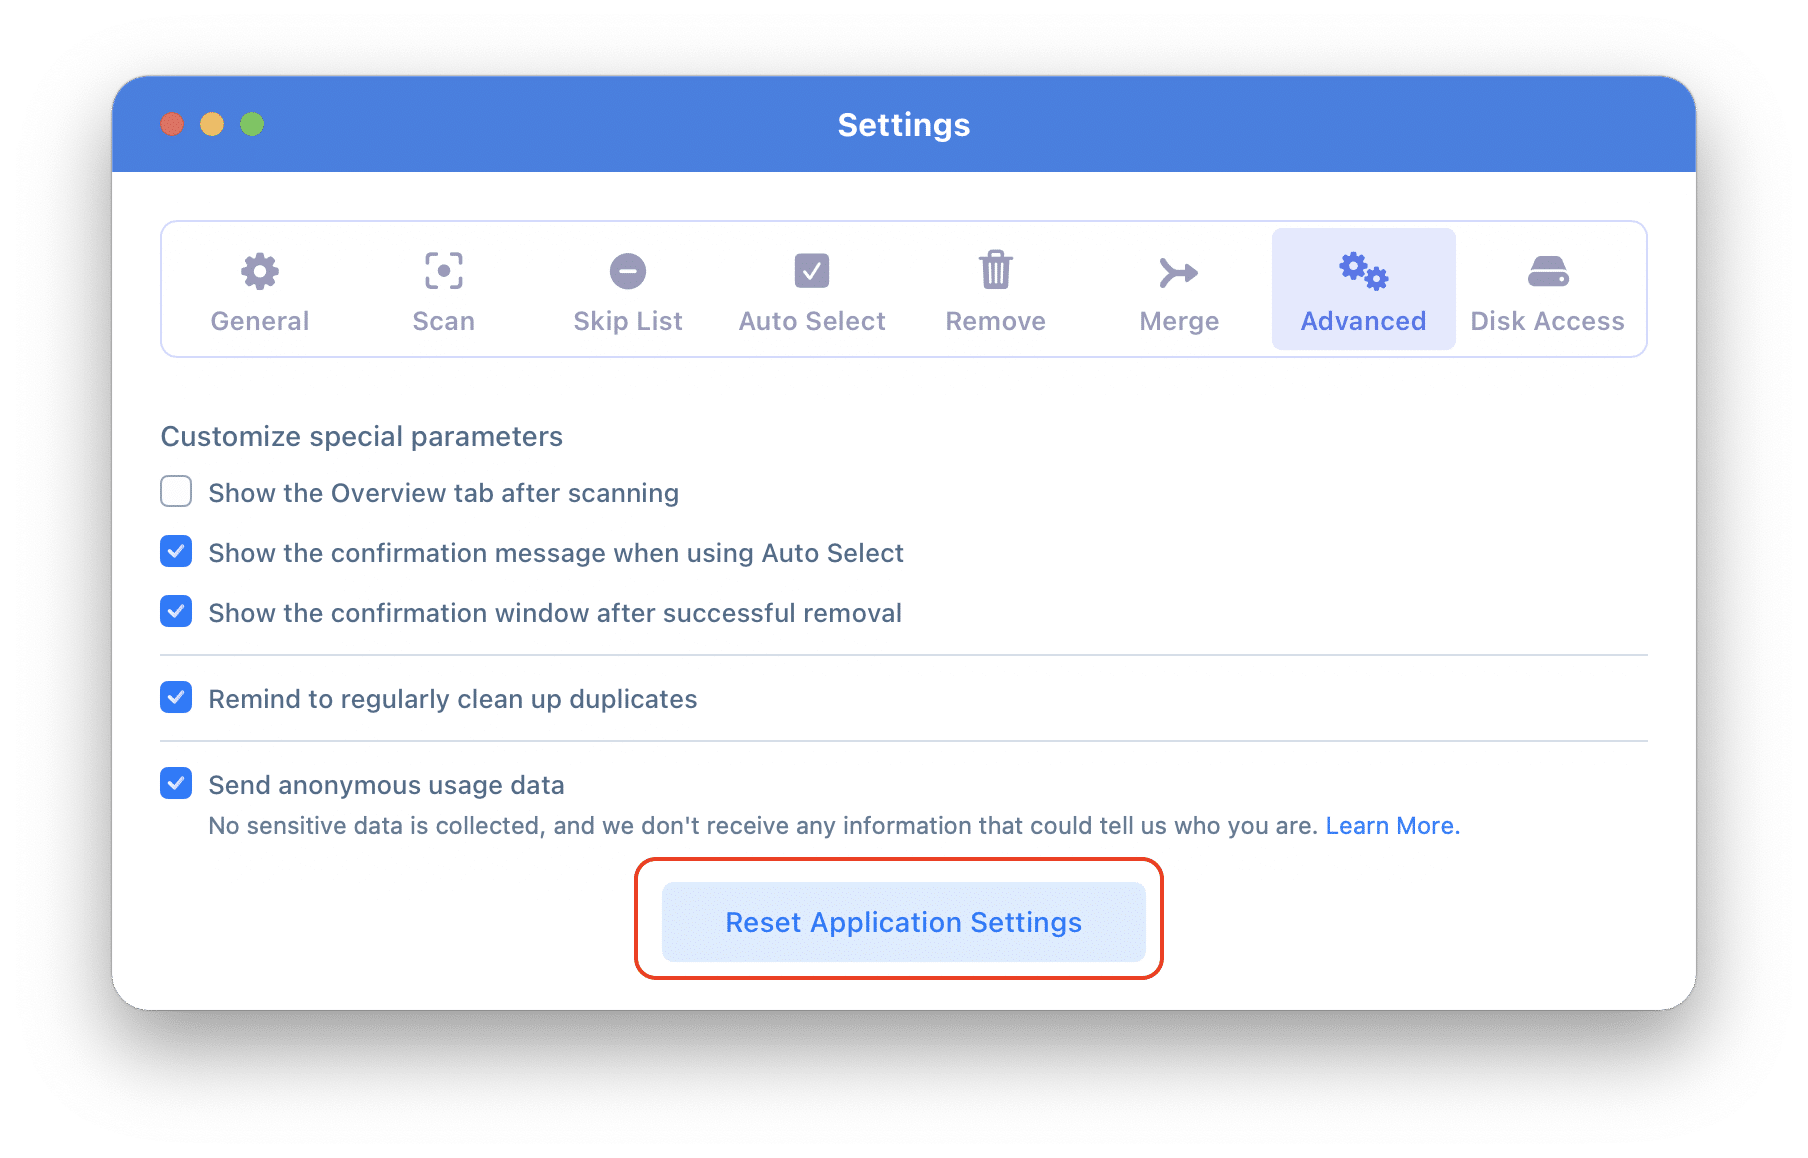
How to reset the Auto Select rules?
If you want to reset all the Auto Select rules you have added to the basic settings, follow these steps:
- Open Settings.
- Switch to the Advanced tab.
- Click the Reset Application Settings button.
