Contents
- Why you should clone your hard drive
- The difference between cloning and backing up with Time Machine
- How to prepare your external disk for storing a Mac clone
- How to clone Mac hard drive using Disk Utility
- FAQ
Tip 1 – Clean up junk files from your Mac before cloning the hard drive
MacCleaner Pro
Why you should clone a Mac hard drive
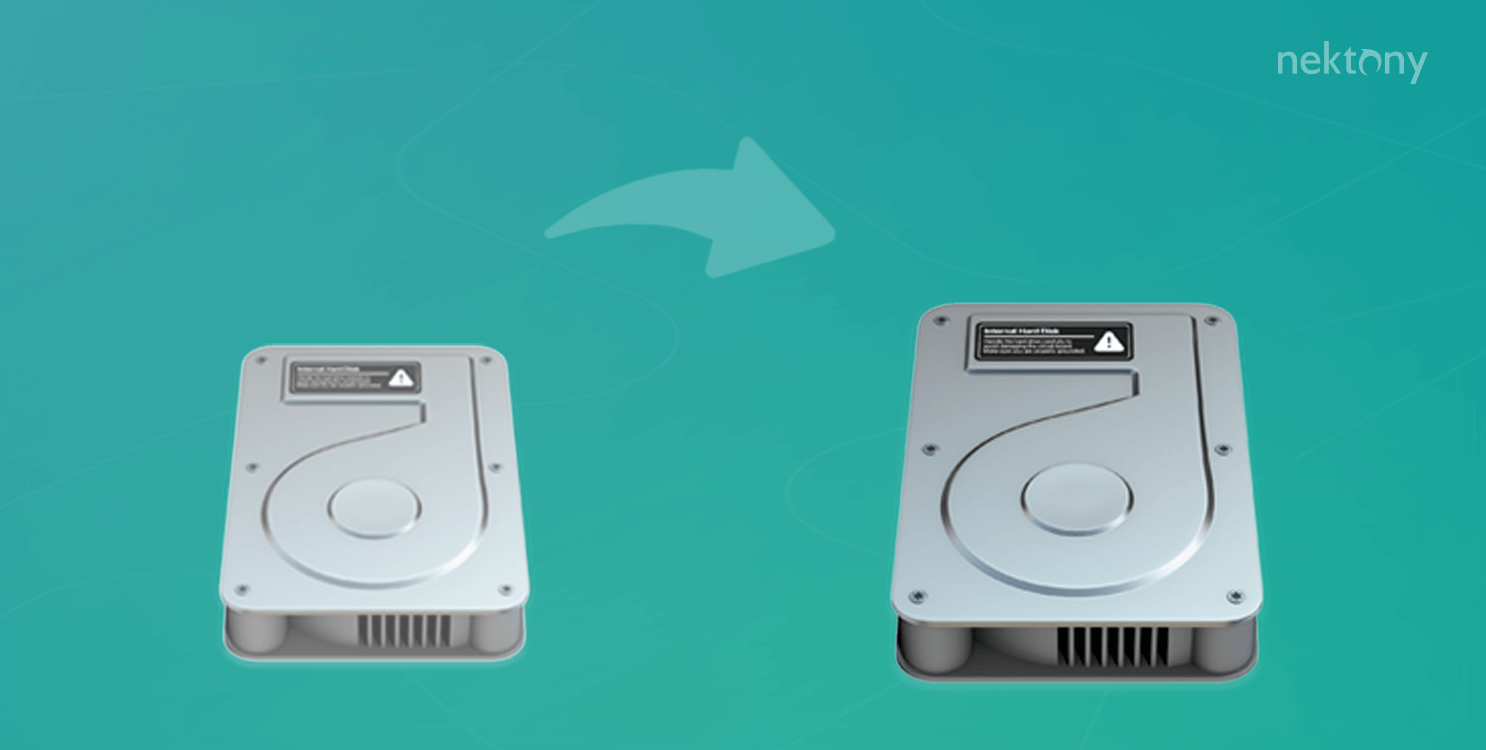
Despite using a Time Machine, you can clone your Mac hard drive if you want to create a backup. When you clone a Mac, you also copy your operating system, drivers, software, folders, and everything else stored on your drive. As a result, if your system crashes, you can recover your system from the cloned backup exactly from when you cloned it. It is a great way to keep your files safe. If you ever need to recover your hard drive, you can do it without wasting time or money.A clone is an exact copy of your Mac drive on an external drive. If you have a Mac hard drive clone, you can recover your important data in unexpected situations. For example:
- If your Mac accidentally breaks down and it needs to be repaired;
- If you have software issues after updating macOS (such as your Mac not booting up);
- If you lose your MacBook or it is stolen.
The difference between cloning and creating a backup with Time Machine
Both local Time Machine backups and disk clones are used to keep your data safe if something goes wrong with your Mac. The great thing about cloning is that you can create a bootable copy of your disk. This means that you can access any file on another Mac computer. To do this, just plug the drive with the clone into another Mac and then select the drive from the startup menu. HDD clones are great to be created when you need to give your Mac to professionals for repairs but still need to work. You can use the cloned copy on another Mac. Most third-party programs for cloning a Mac HDD provide additional features, including an option to create backups regularly. This is super helpful because if something happens to your Mac unexpectedly, a one-year backup won’t help you. However, you also can clone your hard drive with a default Mac software called Disk Utility.How to prepare your external disk for storing a Mac clone
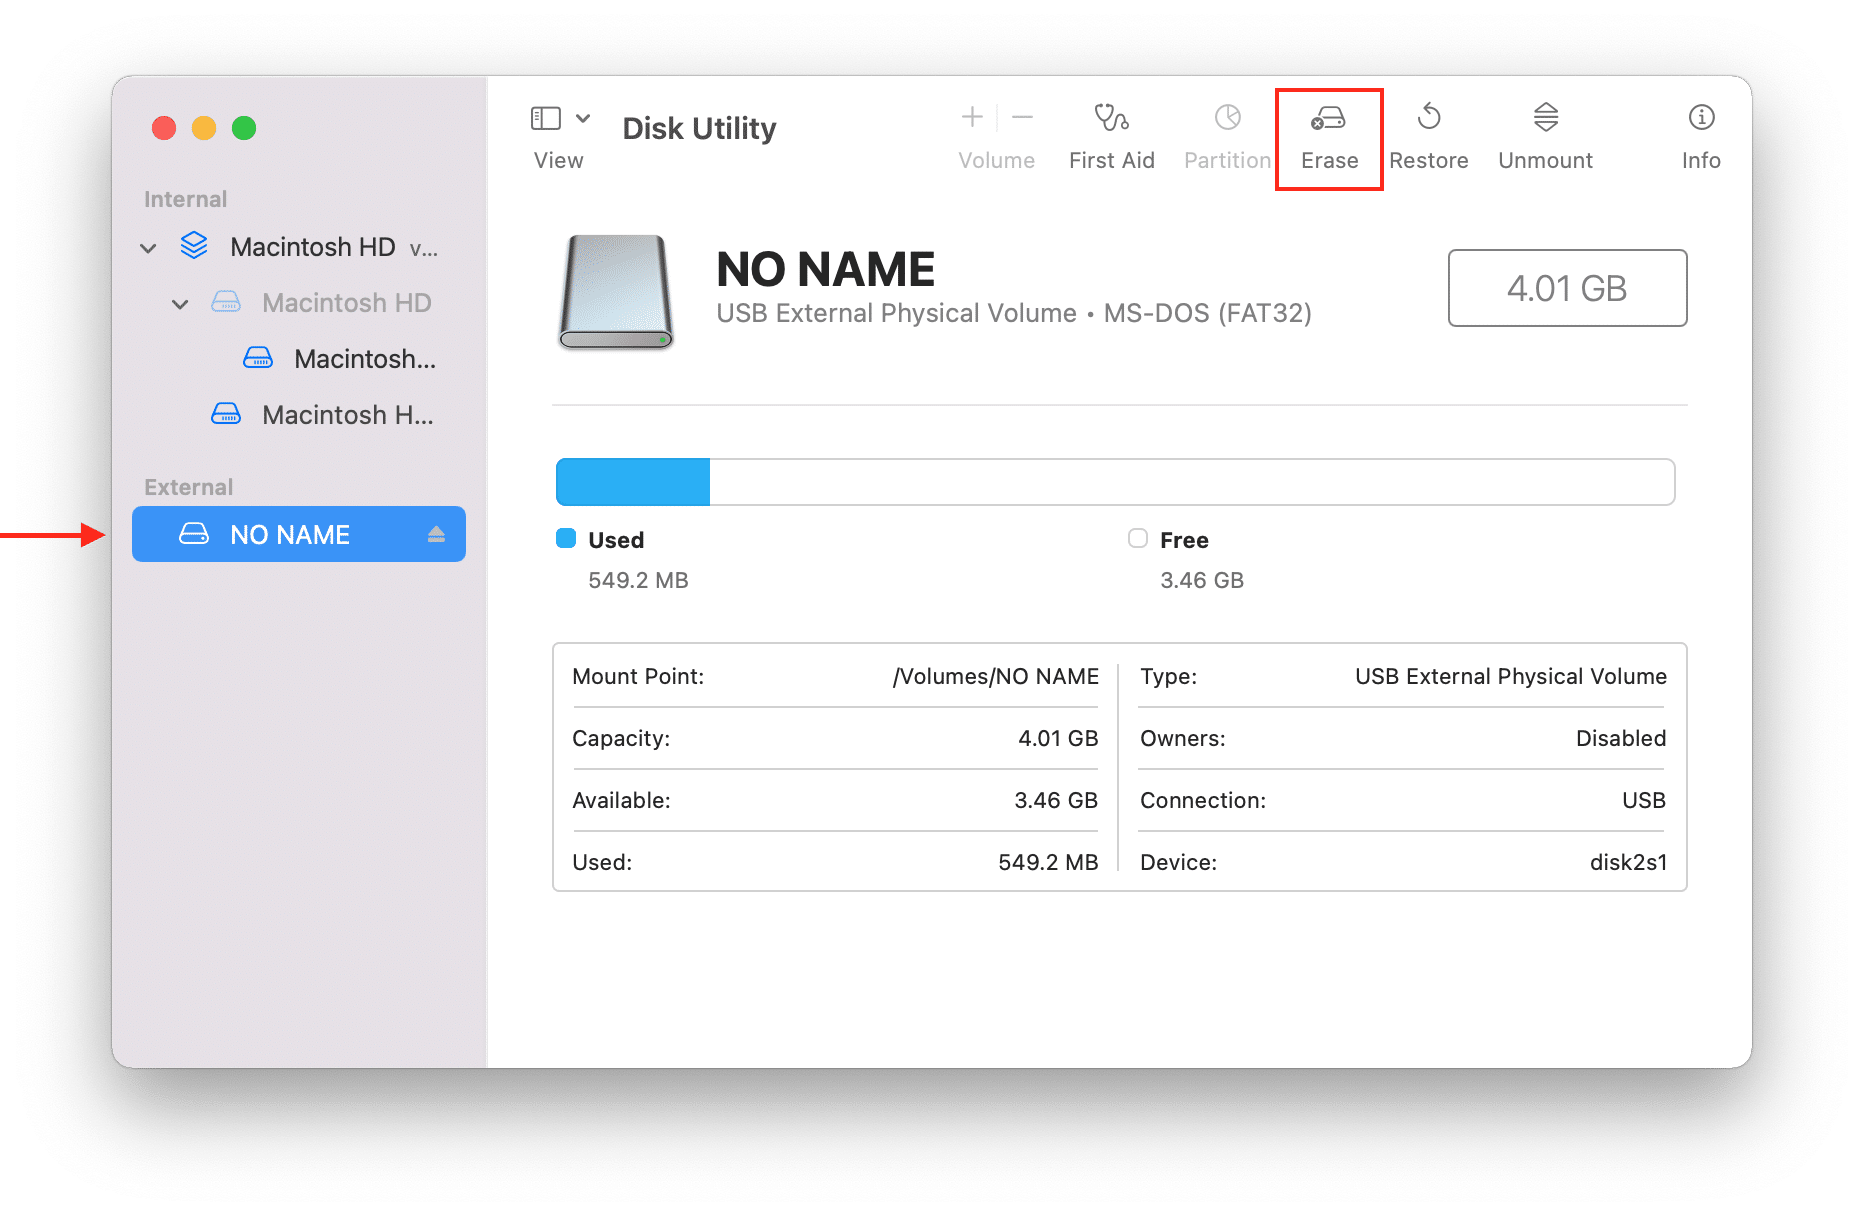
Before cloning your Mac, you need to prepare your external drive properly for storing this. You need to use an empty external hard drive to create a bootable disk for the cloned data. To do this, follow these steps:
- Connect your external drive to your Mac.
- Open the Disk Utility app from the Launchpad.
- Select your external drive in the left sidebar.
- Click on the Erase tab at the top of the window.
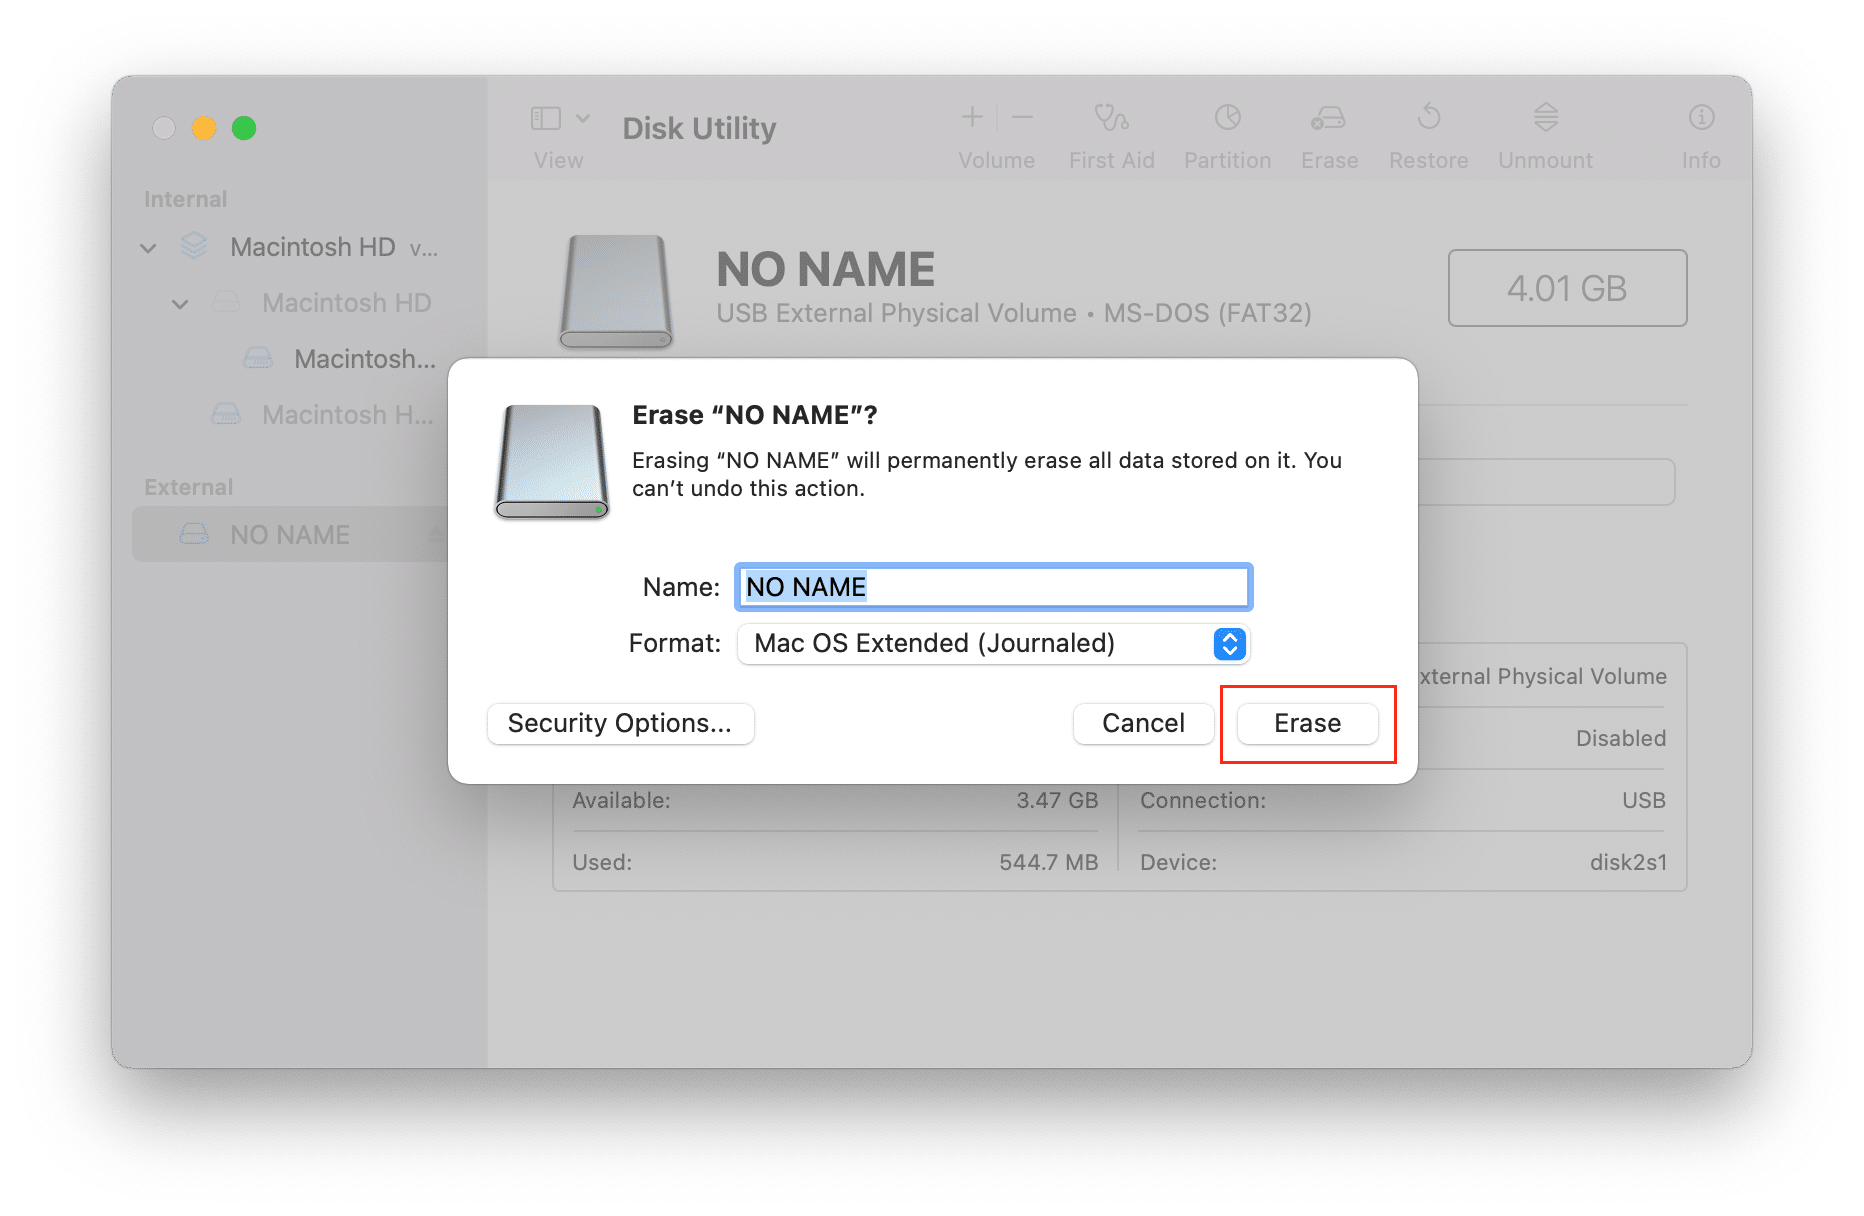
- Provide the name for your disk and select the format Mac OS Extended (Journaled).
- Click Erase.
- Click Finish once the process is complete.
How to clone your Mac hard drive using Disk Utility
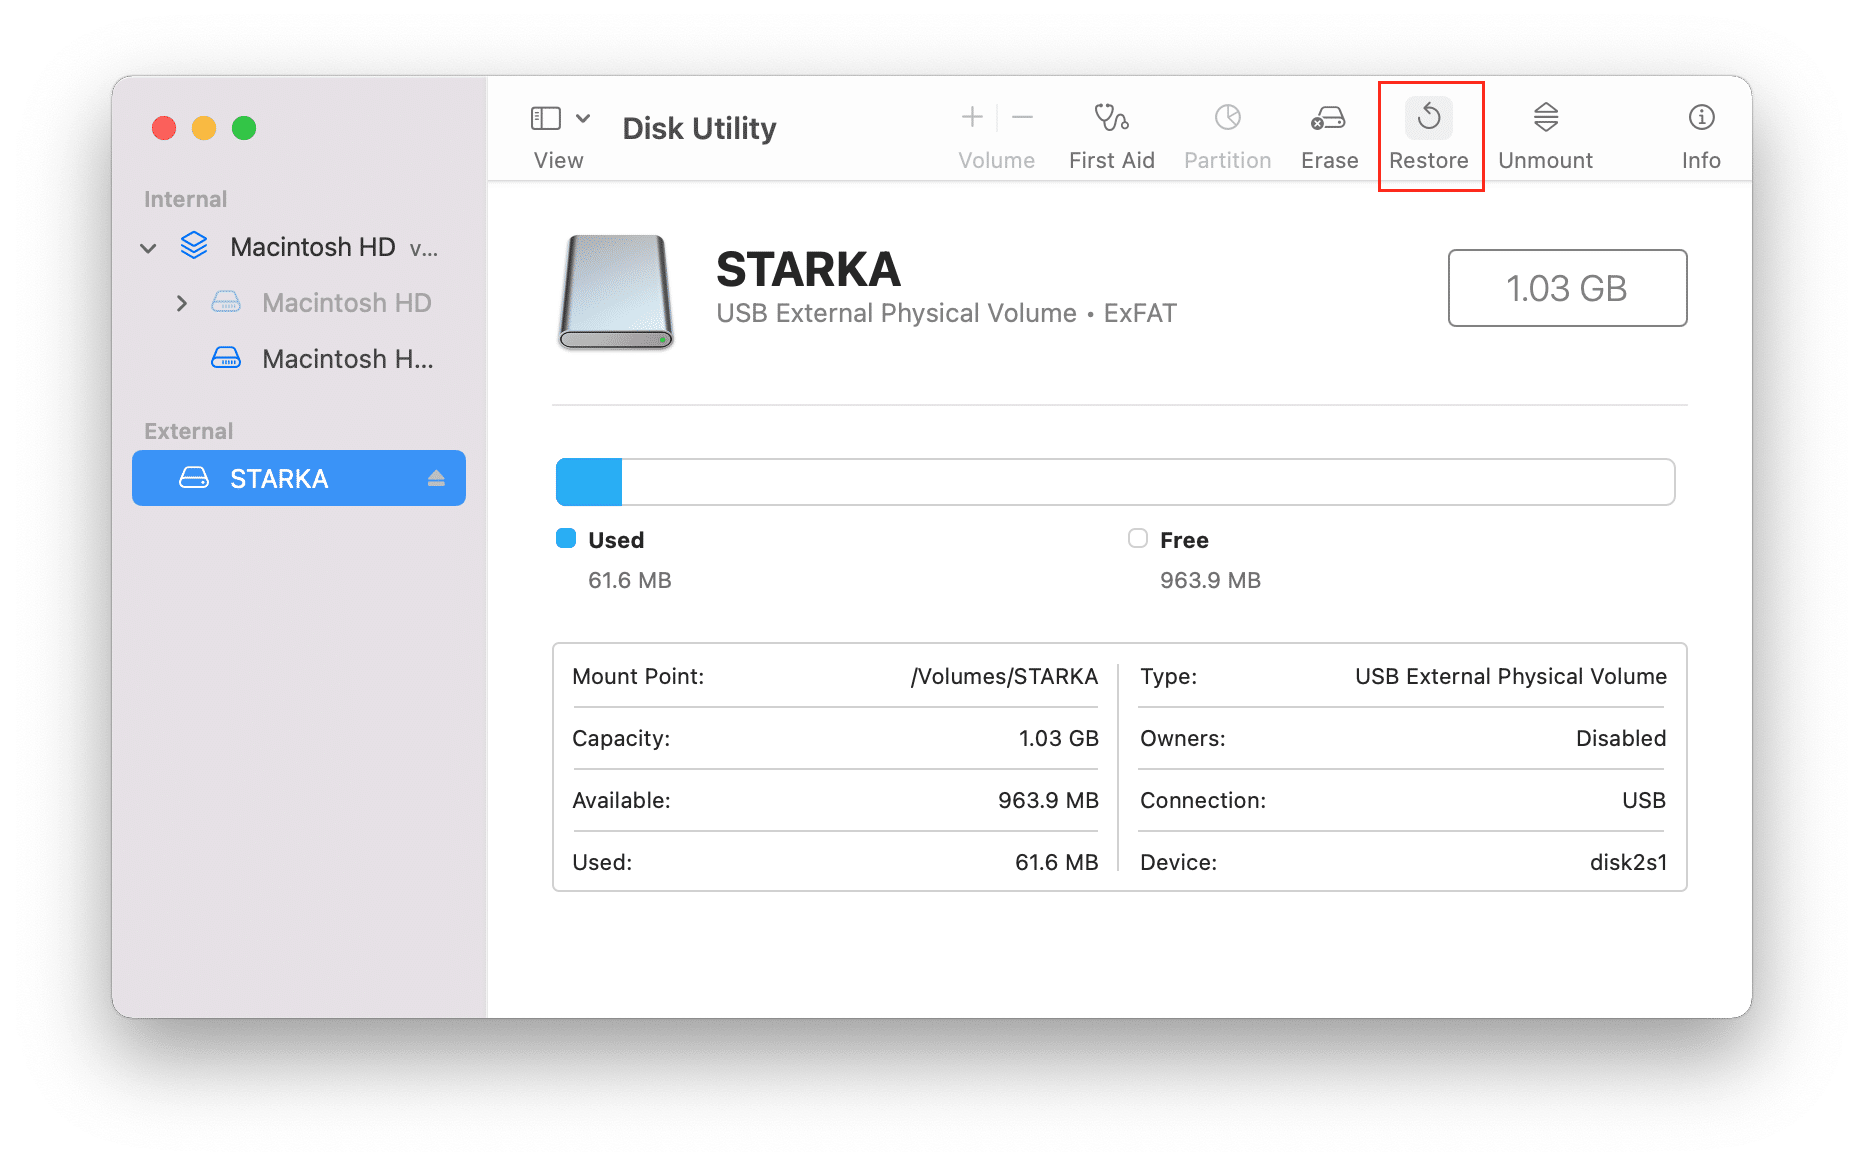
Disk Utility can be used to create Mac clones. In Disk Utility, this option is called “Restore,” just like recovering your data from a source disk to a target disk. Also, note that the “restore” feature works with any storage device that can be mounted on your Mac, including disk images, hard drives, SSD, and USB drives.Steps to clone your Mac with Disk Utility:
- Open Disk Utility.
- Connect your previously prepared external drive for cloning.
- In the top bar, click Restore.
- In the Source field, drag your Macintosh HD. In the destination field, drag your external disk where the clone will be stored.
Note: If you haven’t prepared your external drive before, Disk Utility will ask you to erase it to use the “Restore” option. When erasing a disk, all the data on it will be removed.
- Click Restore.
- Provide your administrator password to permit the action.
- Once the cloning is finished, you will see the clone of your system in the Disk Utility’s sidebar. The cloning time depends on your Mac hard drive’s volume.
FAQ
What is the fastest way to clone a hard drive?
There are many third-party applications designed to clone a Mac hard drive. All of them have their advantages; however, the fastest way to clone a hard drive is to use Disk Utility, the default built-in app on a Mac. With Disk Utility, you can clone your Mac to an internal SSD and any external disk, including a flash drive.
Does cloning a drive make it bootable?
Yes. When you clone a Mac drive with Disk Utility or any third-party application, you can boot this clone from an external drive. For this, when booting your Mac, press and hold the Option (Alt) key and choose the disk with the clone to boot.
Is cloning the same as copying?
Both cloning and copying files are used to store your data copy. However, there are slight differences between these processes:
- When you clone a Mac, it copies the complete layout of your disk, including the physical location of all directories and files.
- When cloning a Mac, the system copies hidden system files.
- Cloning is much faster.
- When you copy your Mac HD, many files are locked and cannot be copied.
- With a clone, you can boot your system on another computer. With copied files, you can’t do this.
