Mac image editor – How to edit photos on Mac

Asya Karapetyan
Content marketer, who specializes in Mac how-to guides
January 29, 2024

The Photos app, which is a Mac built-in image editor, is a convenient free photo editing software tool that helps you edit pictures easily. Most users jump straight to the conclusion that, in order to properly edit an image, you first have to purchase sophisticated third-party software. To make a point about this, we’ve decided to dedicate this article to show you what the native editor is capable of. Read on to learn how to edit photos on Mac without Photoshop or any other third-party software. Mac image editor

Contents:

1. How to edit photos on a Mac through the Photos app.
2. How to apply photo filters via the Photos app
3. How to crop a picture with the Photos app.
4. How to markup photos with the Photos app


How to edit photos on a Mac through the Photos app

Photos is an app that comes pre-installed on Mac computers and allows you to organize, edit, and share your photos and videos.Photos also has powerful editing tools that let you enhance, crop, rotate, filter, and adjust your photos. Follow the steps listed below to start editing photos on your Mac:

  1. Launch the Photos application.
  2. Navigate the photo you want to edit and double-click it.
  3. Click on Edit in the top right corner.

Photos application with Edit button highlighted
You will see various windows that you can use as a great Mac image editor.
Let’s first take a look at the Adjust feature.

Read also: “Text editor for Mac

How to edit pictures on Mac with the Adjust feature

The Adjust feature allows you to modify the light, color, and black and white settings of your photos.
Use the Adjust feature of the Photos app, to change the colors, increase or decrease balance, make the image both bigger and smaller as well as a few other useful functions.

Go through the tools on the right to modify and play with the light, brightness, curves, and others. You can use them to make significant changes to your photograph.
Adjust feature highlighted in Photos
Click Done when you are finished.

If you want to revert to the original photograph, click Reset Adjustments.


How to apply photo filters in the Photos app

With Filters, you can choose to apply various effects to the photo and compare the differences between them. If you don’t want to spend too much time editing pictures, photo filters come in very handy as you can change the tone of your picture in just a few clicks.

  1. Open the Photos app.
  2. Double-click the photo you want to edit.
  3. Click the Edit button in the top right corner.
  4. Go to the Filters section.
  5. On the right-hand side, you will see the list of all available filters.
  6. Click on the filter name and preview the result.
  7. If you like the new colors of your photo, just click Done.

Filters option highlighted in Photos app

If you change your mind about the filter, you can always revert to the original photograph by clicking on Revert to Original on the top or using the Cmd+Z shortcut.

Revert to Original button highlighted in Photos

Note

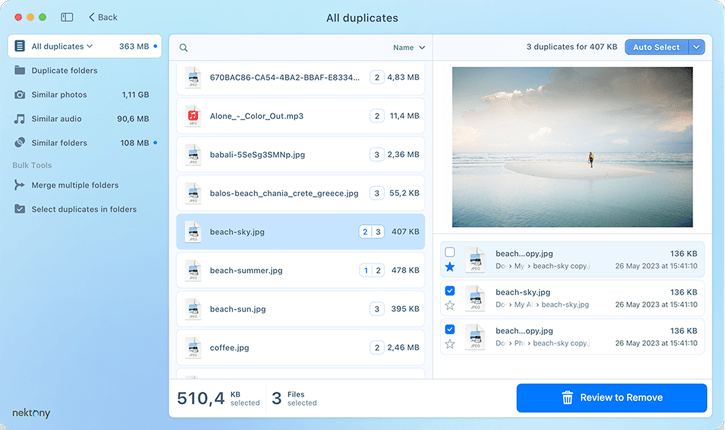
If you regularly edit photos and have a mass of copies, the application Duplicate File Finder will help you to easily delete unneeded ones.
The application finds duplicate and similar photos on your Mac as well as any other type of duplicate files.
Similar Photos section in Duplicate File Finder
“Duplicate

Duplicate File Finder

Free Download

How to crop a picture in the Photos app

Cropping is similar to applying photo filters. Keep in mind that you can always cancel any changes that you’ve made by clicking on the Reset button, or otherwise Revert to Original. Just see below how easy it is to crop images.

  1. Open the Photos app.
  2. Navigate the image you want to crop and double-click on it.
  3. Click the Edit button in the top right corner.
  4. Go to the Crop section.
  5. Adjust the photograph to the size you need by using the Aspect and Flip features. The
  6. Flip feature allows you to rotate the photo. The Aspect feature provides a wide range of automatic sizes or allows you to select custom size for your picture.Crop button highlighted in Photos app
  7. Finish your editing by clicking Done.

How to markup photos with the Photos app

If you wish to make some notes to your picture, add text and even draw whatever you want on the image, you can do it with the Markup feature.

  1. Click on the “Manage” icon on the top right corner.
  2. Select Markup.Markup option highlighted in Photos app
  3. The Mac image editor will switch you to the mode where you can apply all the above-mentioned effects.Markup mode in Photos app
  4. Once you have finished, click Save Changes.

Conclusion

Now you know how to use Photos on Mac as a quick and free image editor. Although there are numerous software solutions to learn how to edit pictures professionally, we still believe that the native editor is worth a shot. Why? Simply because of its simplicity and the fact that you don’t need to spend much time to get the hang of it.

Whether you are a photo filter type of person who wants to see instant changes with the click of a button, or you prefer to play with the editing features yourself, you can always give the Photos app a try at absolutely no charge. And, if you have created tons of similar looking or duplicate photos, use a free application Duplicate File Finder to remove unneeded copies.


FAQ about the Photos app on Mac

How to import pictures to the Photos app?
Where are imported photos stored on Mac?
Can I edit screenshots on Mac?
How to delete duplicates in Photos?


Scroll to Top