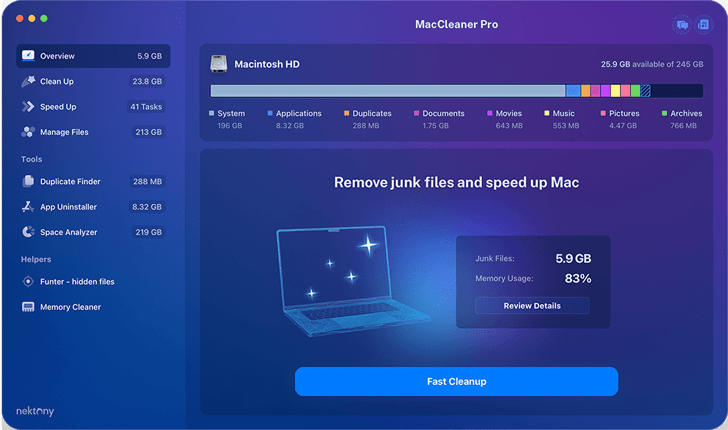
MacCleaner Pro
Clean up and speed up your Mac with a few clicks. Get an all-in-one professional software to take care of your Mac.

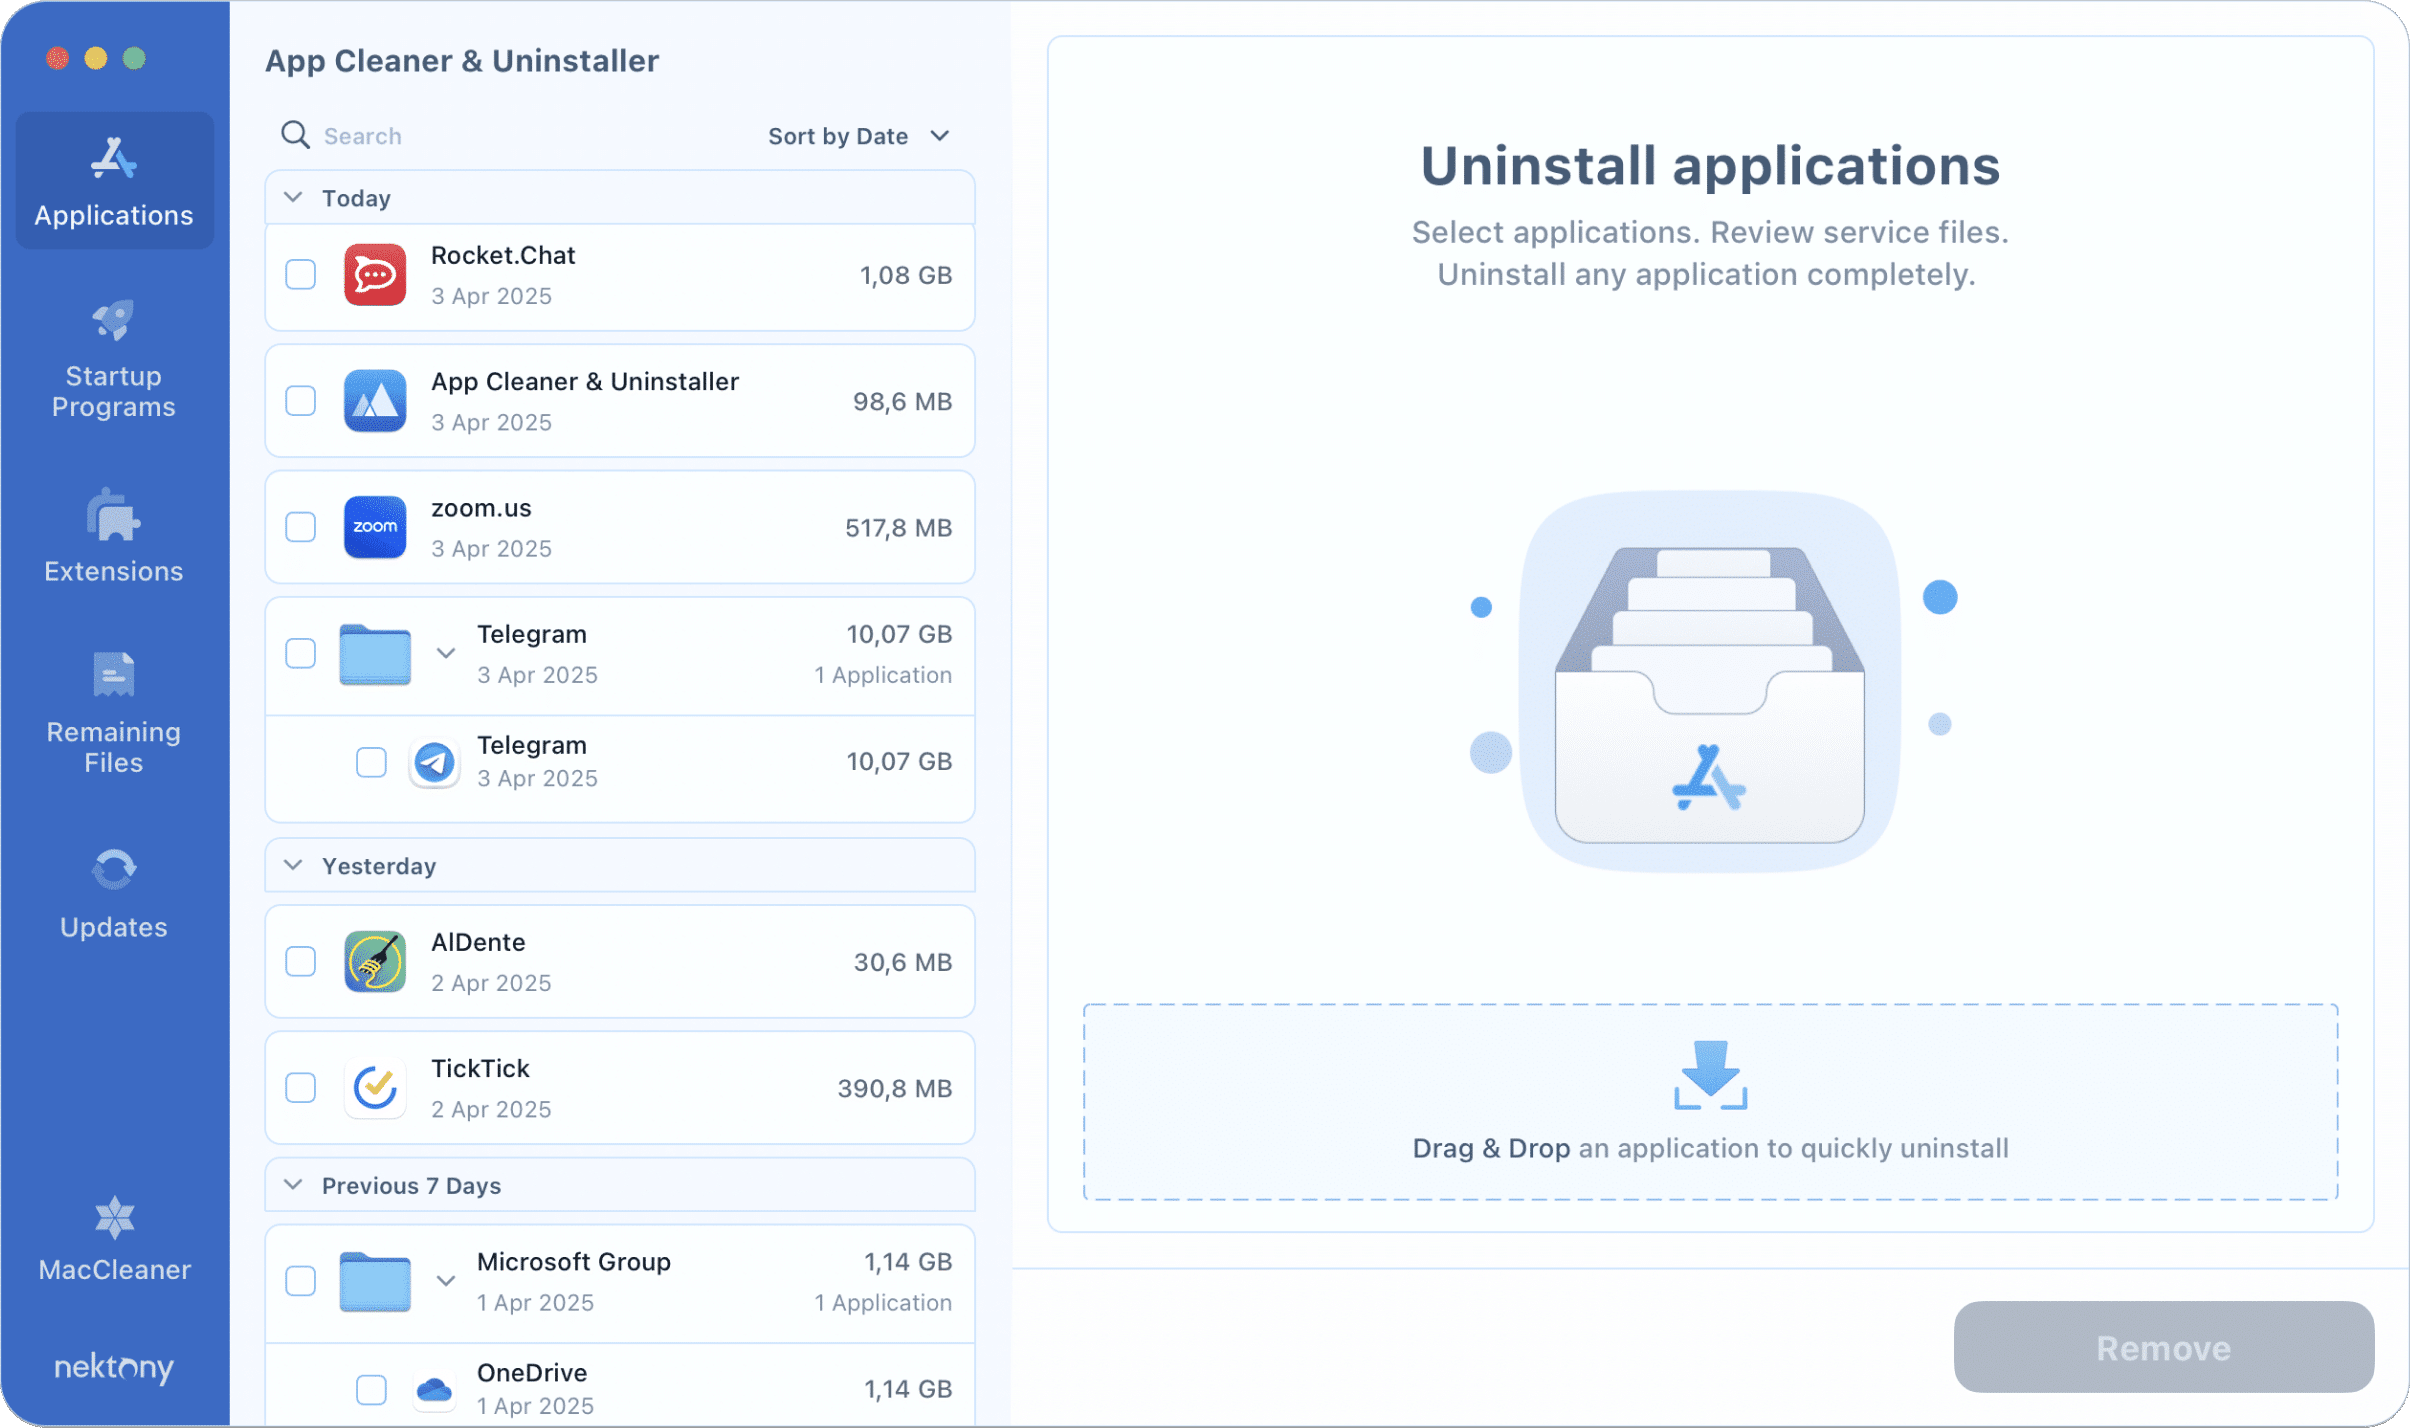
App Cleaner & Uninstaller
Delete programs on Mac entirely and safely, remove apps’ leftovers, manage extensions and startup programs.

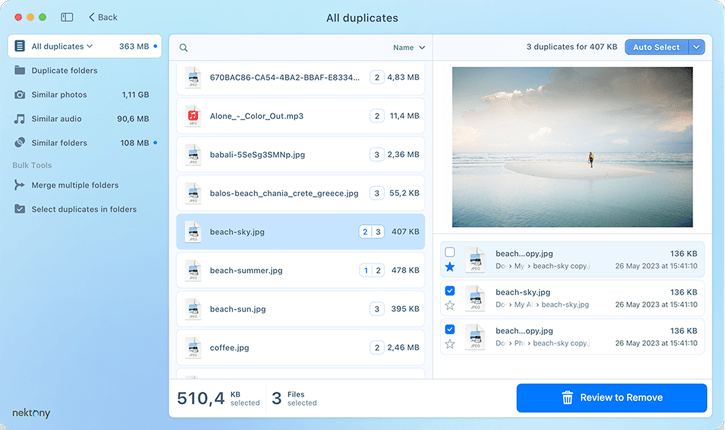
Duplicate File Finder
Remove useless duplicates on your Mac, find similar images and music, merge folders and organize your files.
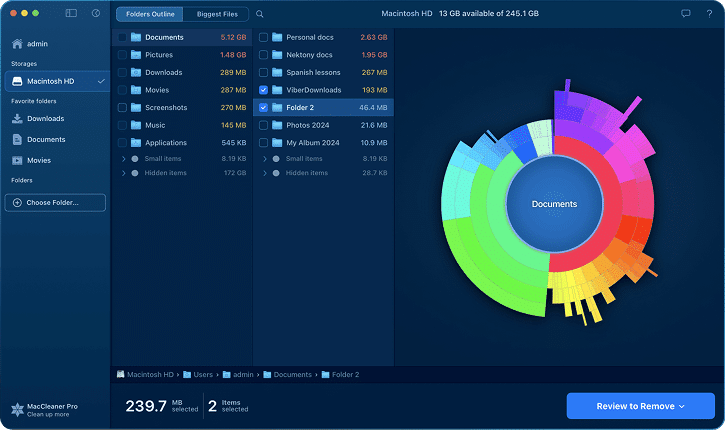
Disk Space Analyzer
Find the files taking up the most space on your Mac. Copy, move or remove bulky content to free up space.
Essential cleanup apps for Mac
MacCleaner Pro
Six cleanup tools in one bundle
- Remove cache, logs and other junk files
- Optimize RAM and speed up your Mac
- Get six cleanup tools to take care of your Mac
- Optimize disk space usage

MacCleaner Pro
App Cleaner & Uninstaller
Duplicate File Finder
Disk Space Analyzer
Memory Cleaner
Funter
App Cleaner & Uninstaller
- Completely uninstall apps
- Disable startup programs
- Remove browser extensions
- Find remaining files
Uninstall unused applications


Duplicate File Finder
- Find duplicates on any disk
- Clear duplicate and similar media
- Compare particular files
- Merge folders and organize your files

Optimize your disk space
Funter
- Get an easy hidden file manager
- Find any hidden files that Spotlight never shows
- Remove or move hidden files
- Hide any item on your Mac


Users’ voices
Thousands of satisfied users every day.
Join our community!
Safe.
Recommended.
Quality Guaranteed.
- All our apps are Apple-notarized that proves them to be safe and free from malware.
- We regularly optimize our apps for the latest macOS updates and check them for a smooth work.
Mentioned
by world popular tech press


Created by
Apple-certified professionals
Apple Certified Support Professionals (ACSP) specialists working in Nektony.
Apple notarized applications. Regular updates and optimization for OS.
A trusted company by millions of satisfied users since 2011.
Fast and personal customer support.
Essential apps
for macOS and iOS
Helping you keep your devices always
Fast, Clean & Safe