Duplicate File Finder is an application to find duplicate files of all types and extensions. The application can find and remove duplicate and similar photos in Photos Library. In our previous article, you can learn how to find duplicates in the Photos Library. In this guide, we are going to explain how to troubleshoot issues related to duplicates in Photos Library.
1. Photos Library cannot be scanned on macOS 10.14 or earlier
Sometimes, an error may occur when dragging and dropping a System Photos Library to the app for scanning. Such an issue may happen on macOS 10.14 or earlier due to the old format of the photos base. To resolve this issue, please relaunch Duplicate File Finder and try again to scan your System Photos Library for scanning. The issue should be solved.
2. Make sure the library you want to scan is not opened in the Photos app.
The Photos Library needs to be closed to be able to scan it with Duplicate File Finder.
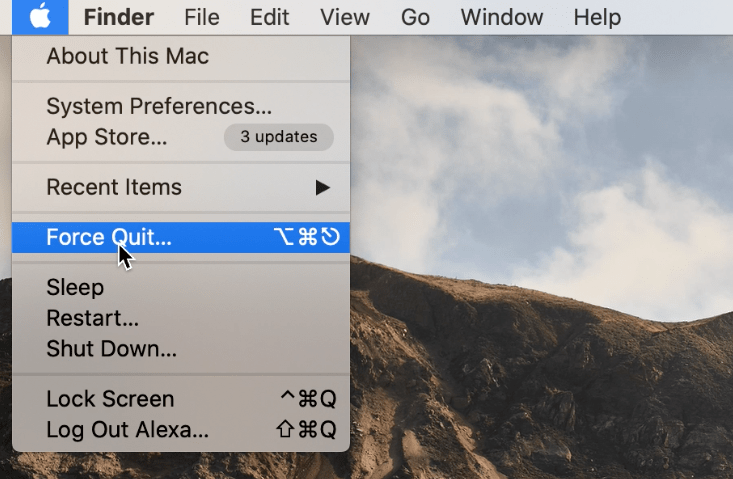
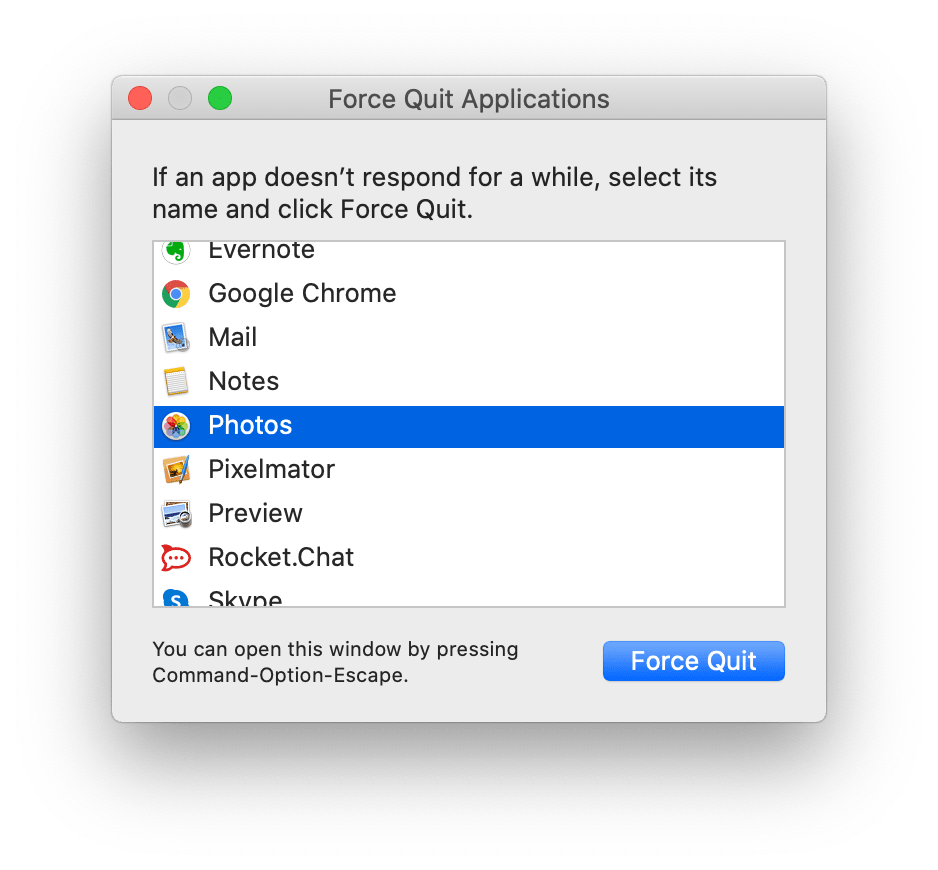
Follow these steps to force quit the Photos app and fix the issue:
- Go to the Apple menu and select Force Quit… (or press Option+Command+Esc).
- Select Photos in the list of apps and click on Force Quit.
- Then rescan Photos Library with Duplicate File Finder.
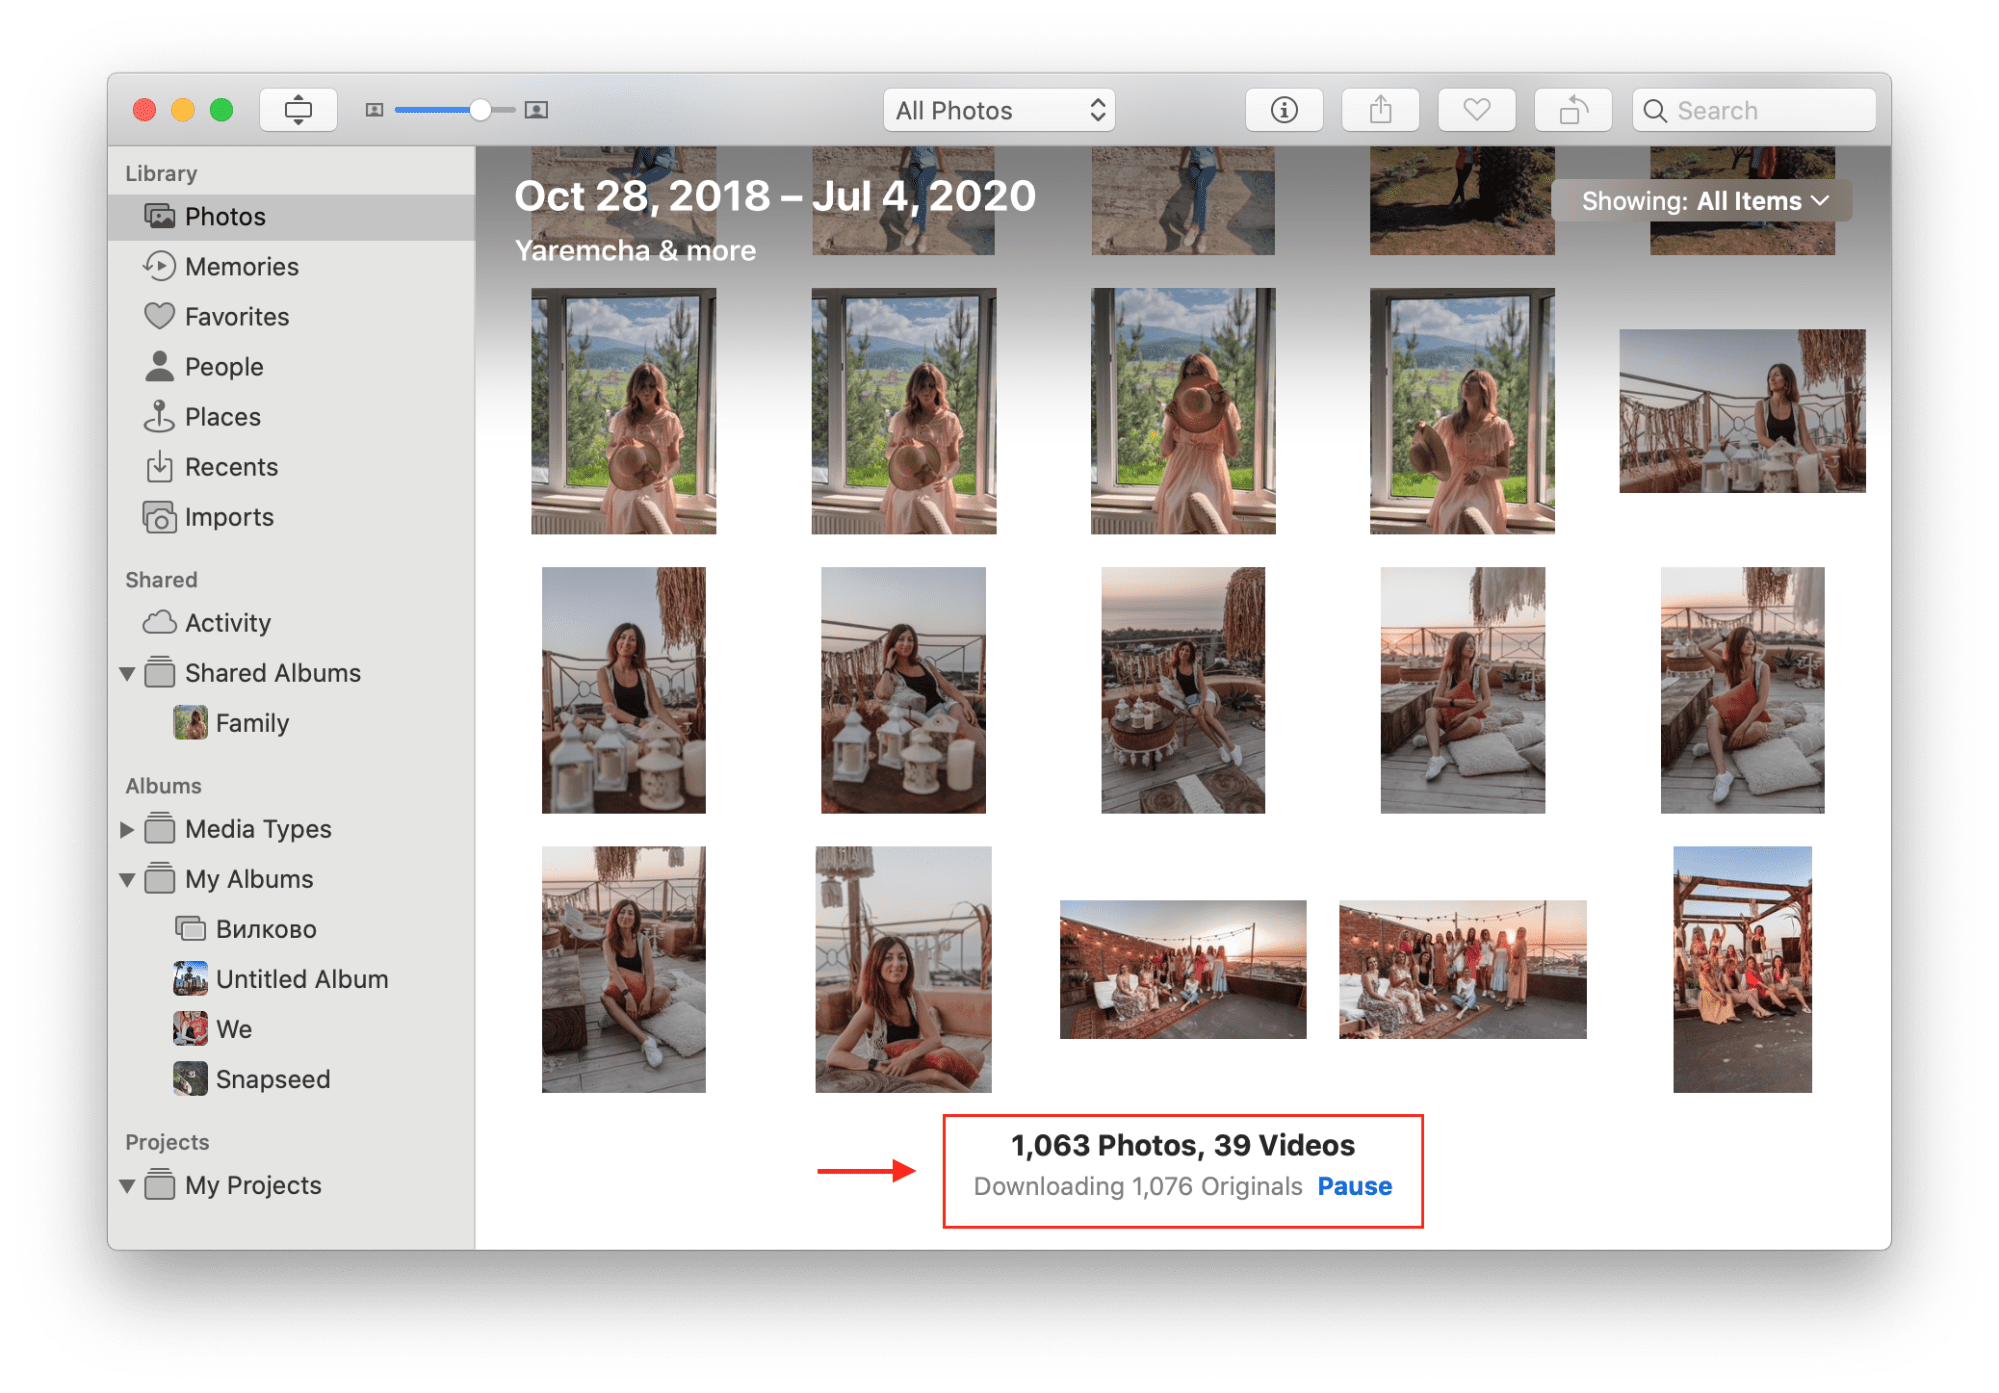
3. If you use iCloud, make sure that all photos are downloaded to your Mac hard drive.
When the iCloud synchronization and Optimise Mac Storage options are enabled on your system, your Mac may automatically send all your photos to iCloud and Duplicate File Finder will not be able to scan them.
To check if your photos are downloaded from iCloud to your Mac, follow these steps:
- Open the Photos app and go to its Preferences → iCloud tab.
- Enable the option Download Originals to this Mac.

- Wait until all photos are downloaded to your Mac. To see the status of the downloading process go to the Photos section of the Photos app and scroll down your photos.

- When all the photos are downloaded from iCloud, close the Photos app, launch Duplicate File Finder, and rescan your photos for duplicates.

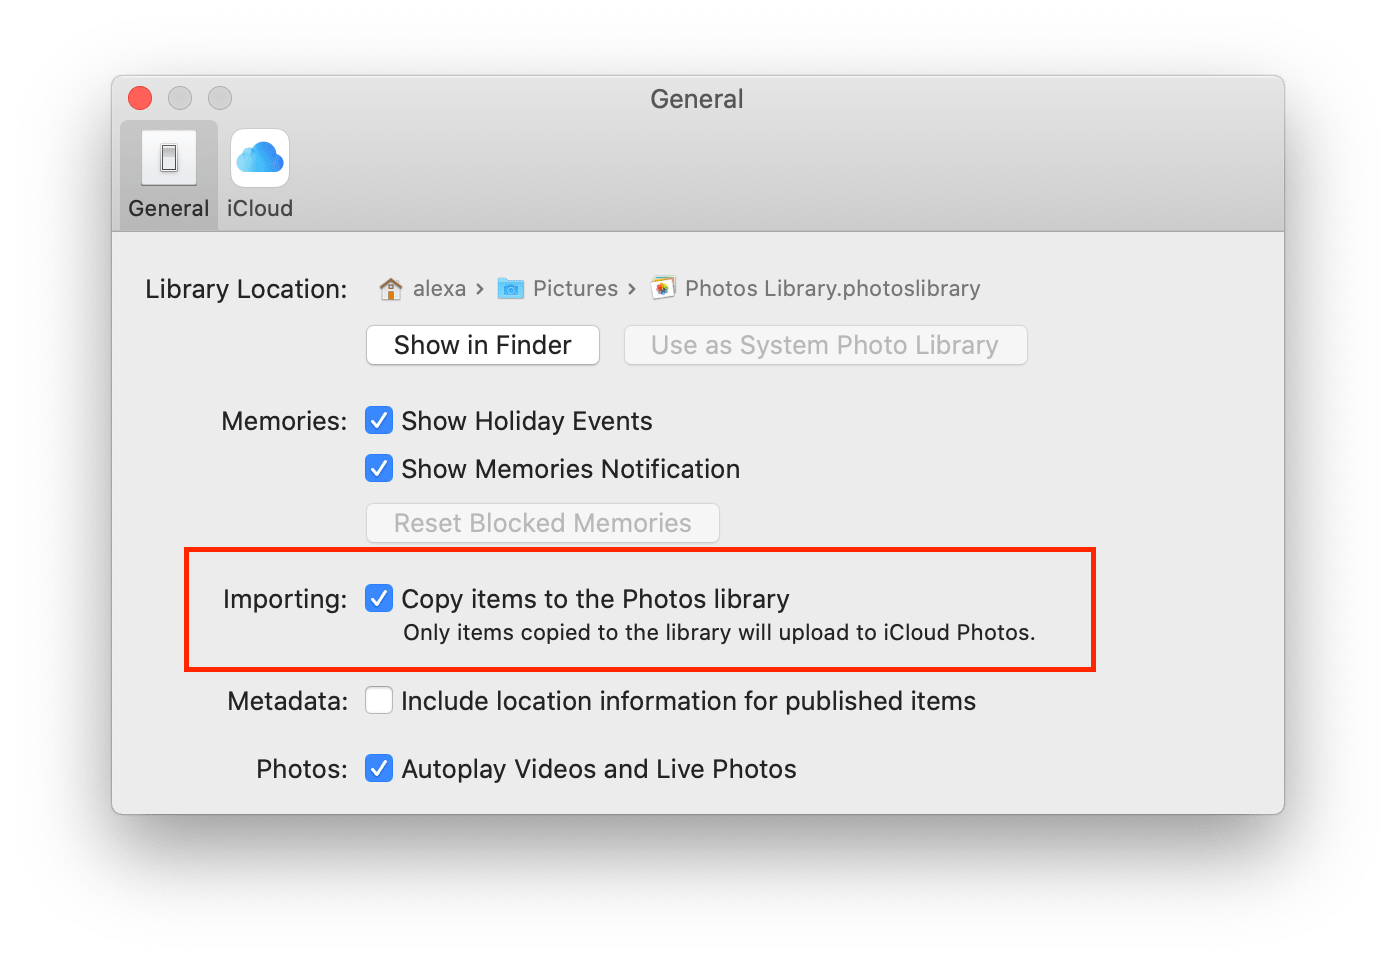
4. Make sure your photos are stored inside your Photos Library
If in the Photos Preferences the Importing option is disabled, Duplicate File Finder will not be able to scan photos and find duplicates. To fix this issue, follow these steps:
- Go to the Preferences of the Photos app → General tab.
- Enable the “Copy items to the Photos library” option.
- Wait until all files are downloaded inside the library.
- Rescan Photos Library with Duplicate File Finder.

5. Make sure Duplicate File Finder has access to your photos
Duplicate File Finder needs access to your Photos to be able to find all duplicates. Please grant Full Disk Access for the app. For this, do the following:
- Open System Settings → go to Privacy & Security section.
- Scroll down and find Full Disk Access. Click it.
- Enable Full Disk Access for Duplicate File Finder. Use the toggle button for this.
- Go to the Automation option. Make sure Duplicate File Finder has access to the Photos app.
- Go to the Photos option. Make sure Duplicate File Finder has access to your photos.
- Rescan your Photos Libraries with Duplicate File Finder.

Read more about why and how to grant Full Disk Access for Duplicate File Finder.


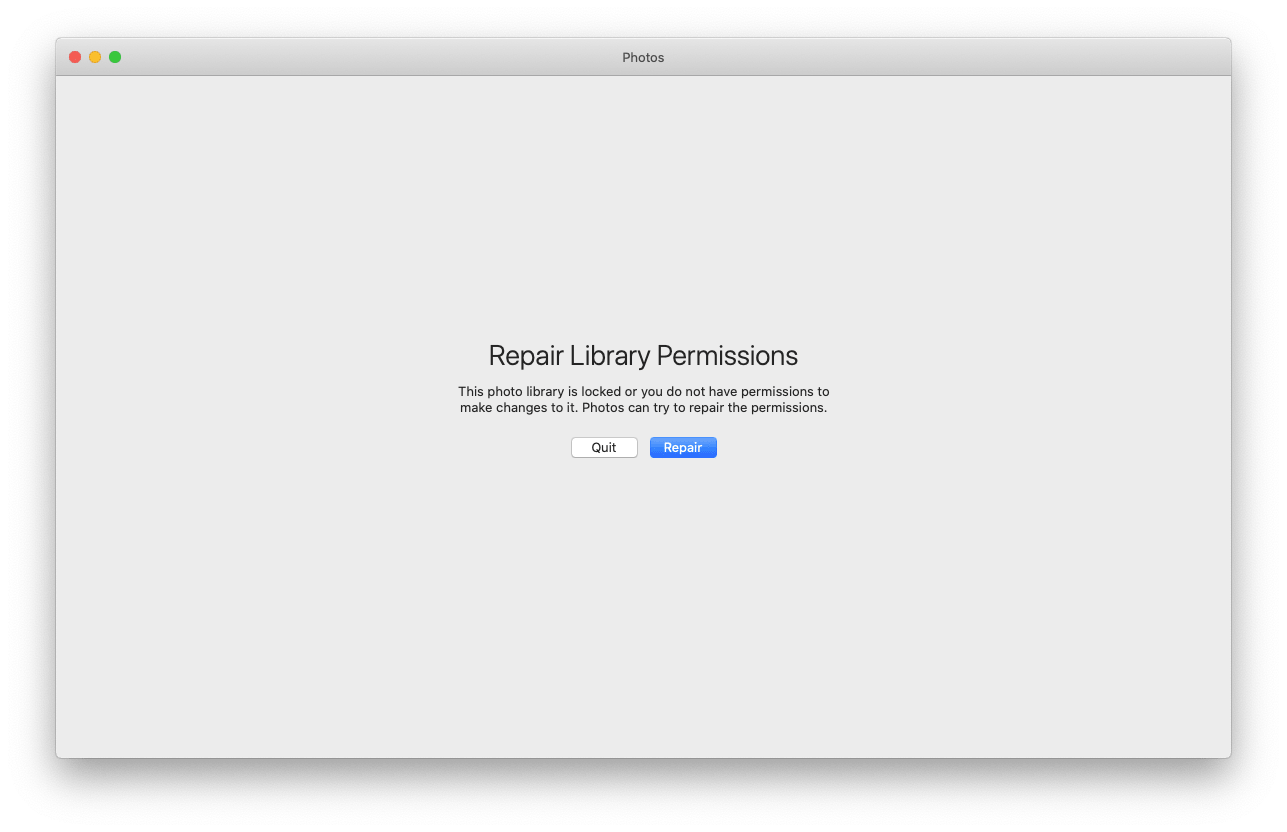
6. Make sure your Photos app is working correctly
It may happen when Duplicate File Finder finds duplicates but is unable to remove them. Here are the reasons why the files couldn’t be removed:
- There is an old format of Photos library on your Mac
- The Photos app is asking to Repair Library Permission
- This Photos Library structure is updating
- This Photos Library is broken
- This Photos Library is locked
To resolve this issue, please try the following:
- Force quit the Photo app. For this, right-click on the Photos icon in the Dock panel, press the Option key and select Force quit in the context menu.
- Find the Photos Library files that you were scanning in Finder. By default, these files are stored in the Pictures folder.
- Double-click on this file to open it in the Photos app. Allow the Photos app to complete the proposed tasks.

- Then rescan Photos Library with Duplicate File Finder.
7. Make sure Duplicate File Finder is up to date
If you use Duplicate File Finder version 6.8 or earlier, the library you want to scan needs to be set up as a system library. Please, update Duplicate File Finder to the latest version to be able to scan any Photos Library.
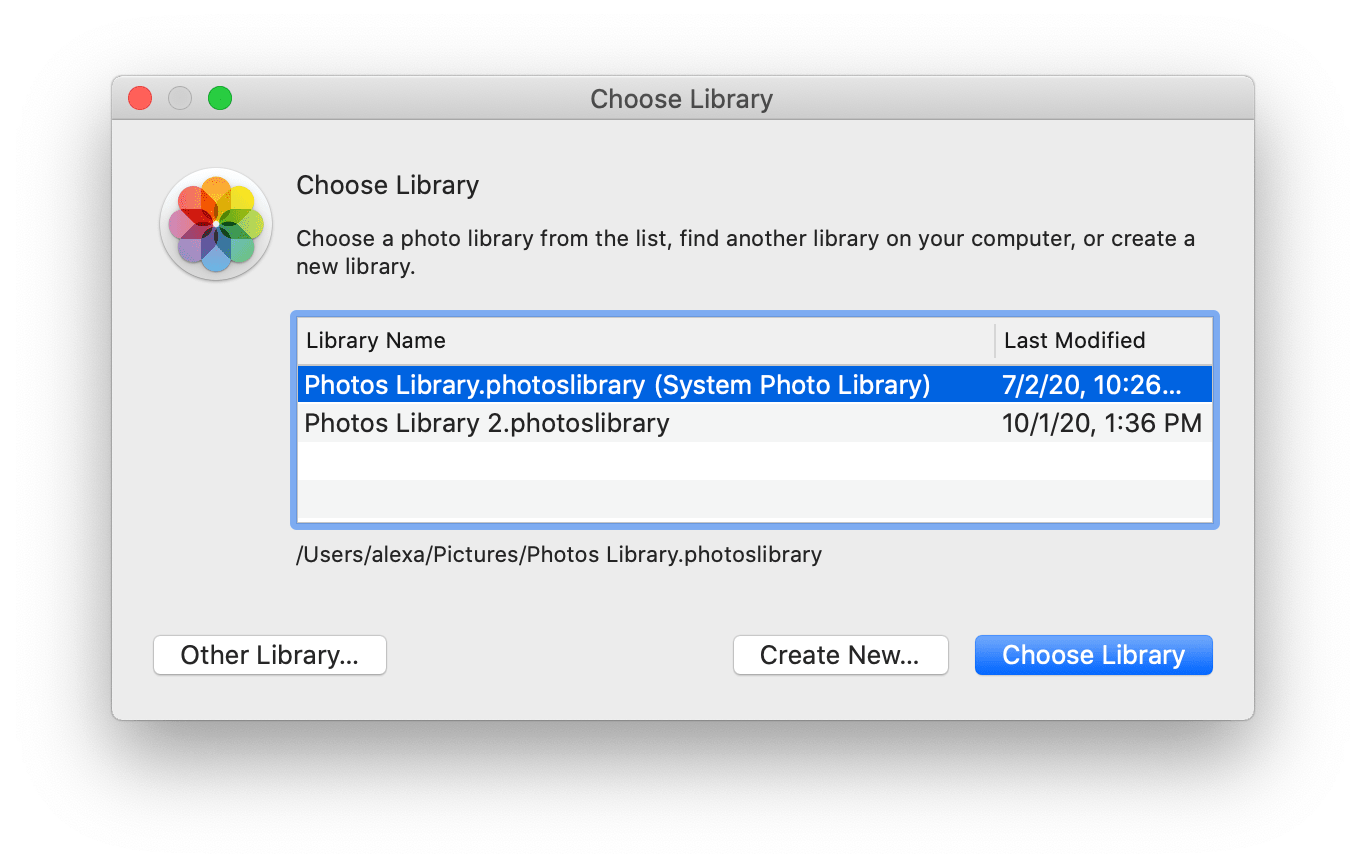
If you want to use the older versions of Duplicate File Finder, make the Photos Library you want to scan as system one on your Mac. For this, follow these steps:
- Close the Photos app.
- Press the Option key and open the Photos app.
- You will see the Choose Library window.
- Select the library you want to scan and click Choose Library.
- Then close the Photos app, launch Duplicate FIle Finder, and scan your Photos library.