AirDrop is one of the best features for Apple devices users, as it makes it super easy to transfer photos, videos, and other files between Mac computers or between a Mac and iPhone or iPad. If you are just getting familiar with AirDrop, our article will help you to figure out how to use AirDrop on Mac. Also, we will share some great tips to avoid transferring and keeping duplicate files on a Mac.
List of contents:
- How does AirDrop work.
- How to turn on AirDrop on Mac.
- How to AirDrop from iPhone to Mac.
- Where do AirDrop files go on Mac.
- How to find duplicate files transferred via AirDrop on Mac.
- How to change AirDrop’s name on Mac.
How does AirDrop work
AirDrop works over Bluetooth. So, before starting to send files from one device to the other, you need to turn the Bluetooth on them. Also, because of Bluetooth technology, keep in mind that the sending and receiving devices should be located not far from each other.
Thus, AirDrop is handy to use when you need to send files to your colleagues at the office, when you need to transfer photos from your iPhone to your Mac, or when you want to share a group selfie to your friends. You can’t use Airdrop to send photos from your travel adventures to your mom in another country.
How to turn on AirDrop on Mac
Airdrop allows you to quickly send files between Mac computers or between a Mac and iPhone or iPad. It’s super easy. Here is how to enable AirDrop on Mac.
- First, make sure that Bluetooth is turned on on both receiving and sending devices.
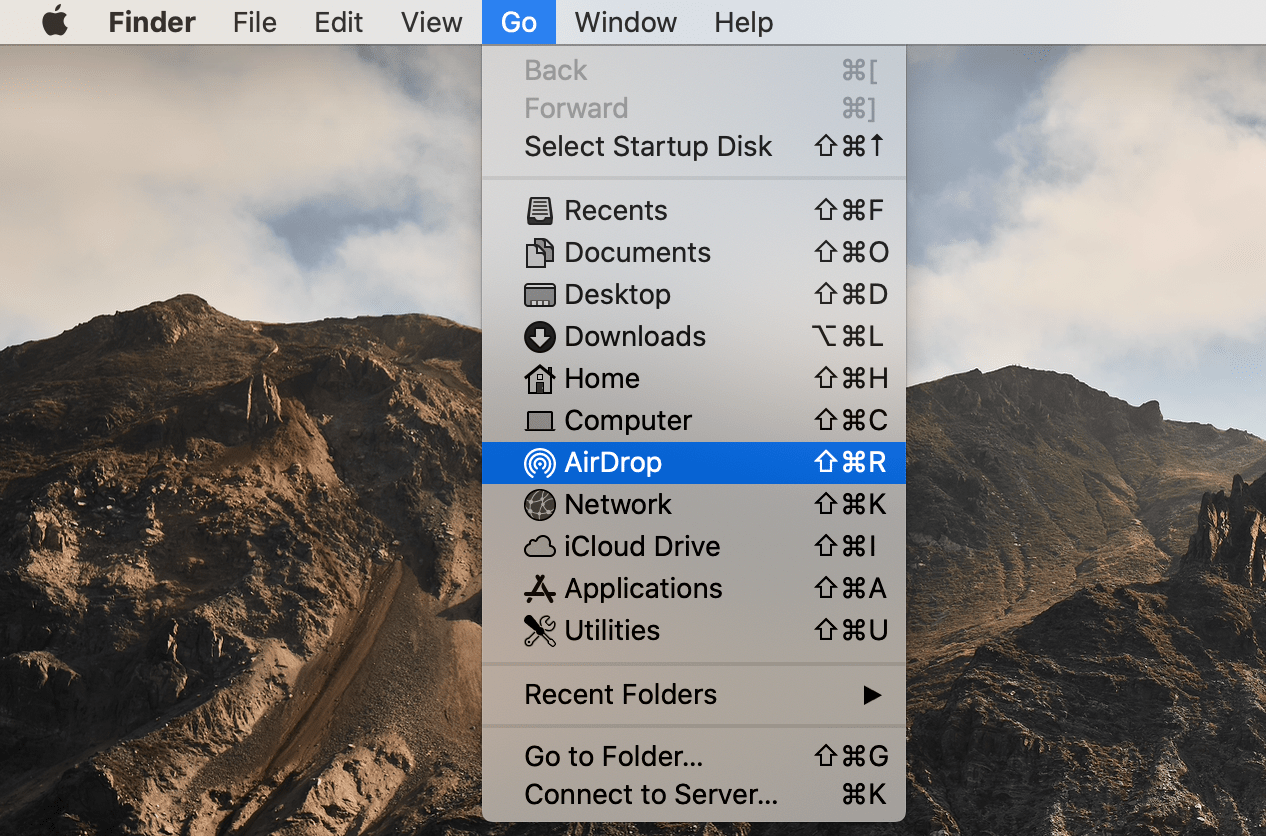
- Then open Finder. In the menu bar, click Go and select AirDrop or use the Shift+Command+R shortcut for this.
- At the bottom of your screen, you will find settings for allowing people to find your device for sharing files. Select the option that suits you:
- No one
- Contacts only
- Everyone
You can also add AirDrop to the list of Favorites in the sidebar in Finder for quick access.
Now you can receive files via AirDrop on your Mac.
How to AirDrop from iPhone to Mac
AirDrop is a simple and reliable way to send media and other files from iPhone to a Mac. Just keep both devices close to each other to be able to use AirDrop.
Here is how to AirDrop photos from iPhone to a Mac:
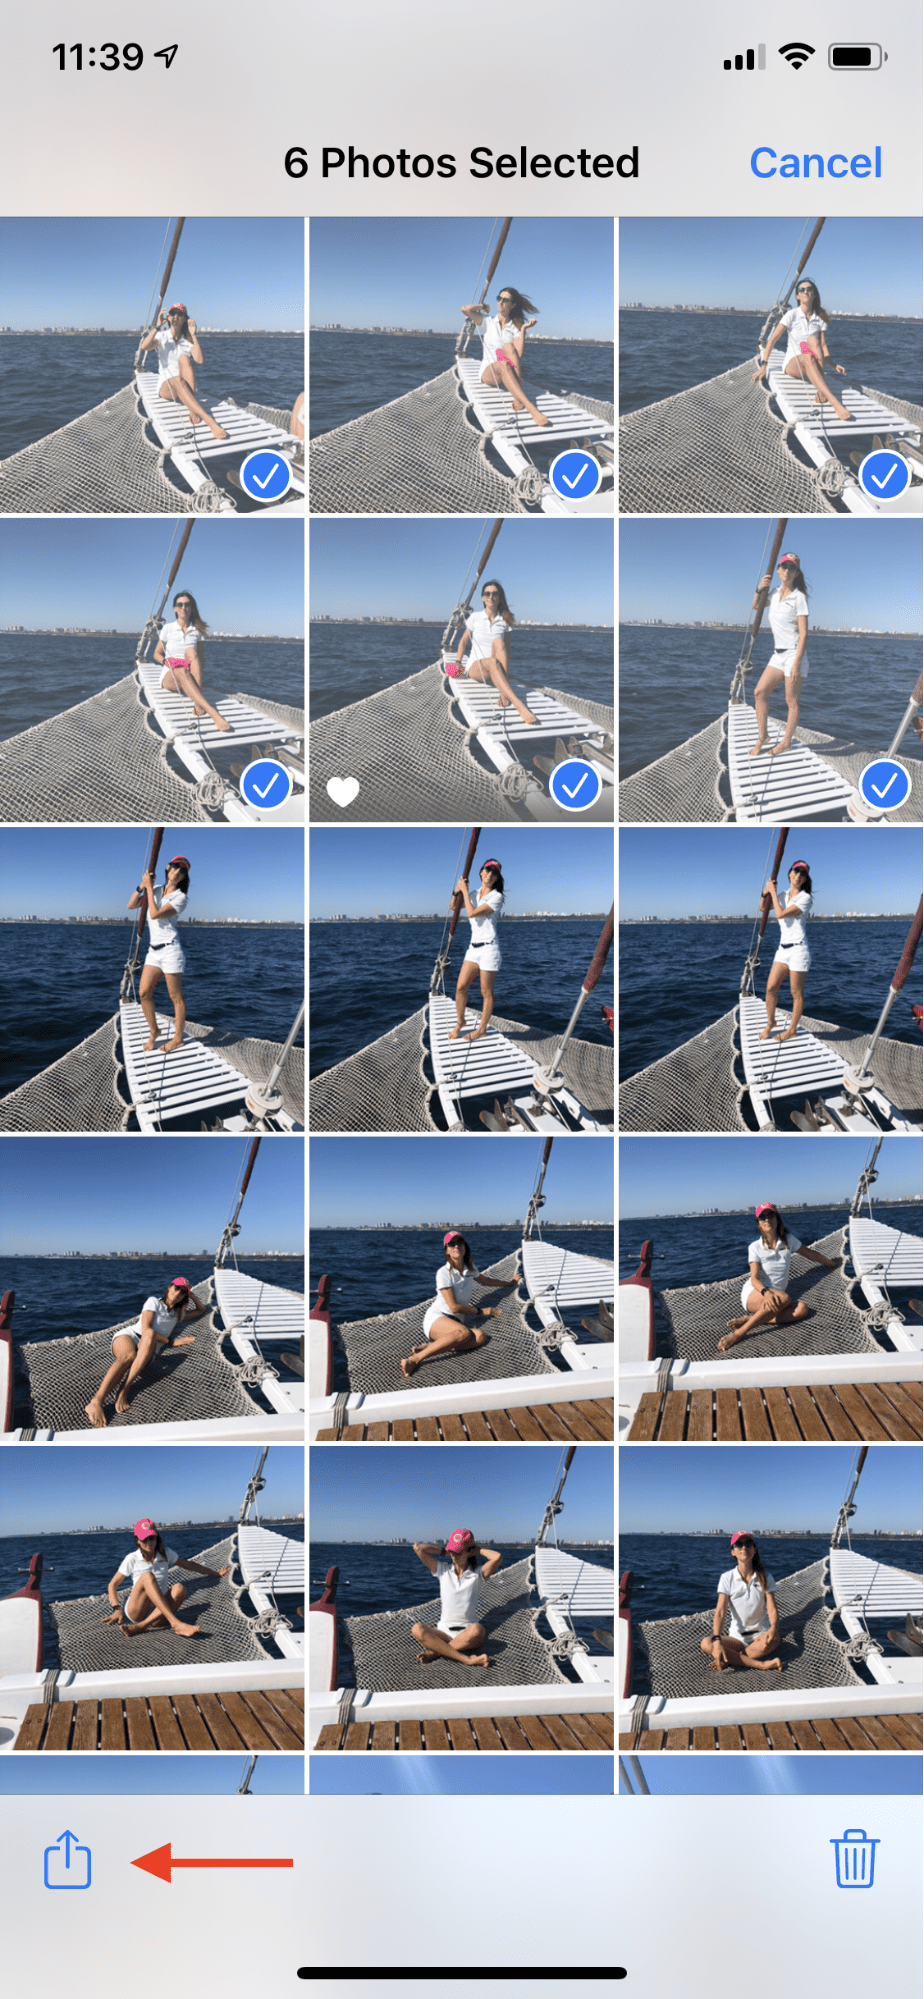
- Open the Photos app on your iPhone and select the photos you want to transfer to a Mac.
- Then tap on the arrow icon in the left bottom corner.
- Tap on the AirDrop icon.
- In a moment you will see the devices with AirDrop enabled.
- Tap on the Mac you want to send photos to. In our case, it’s a MacBook Pro.
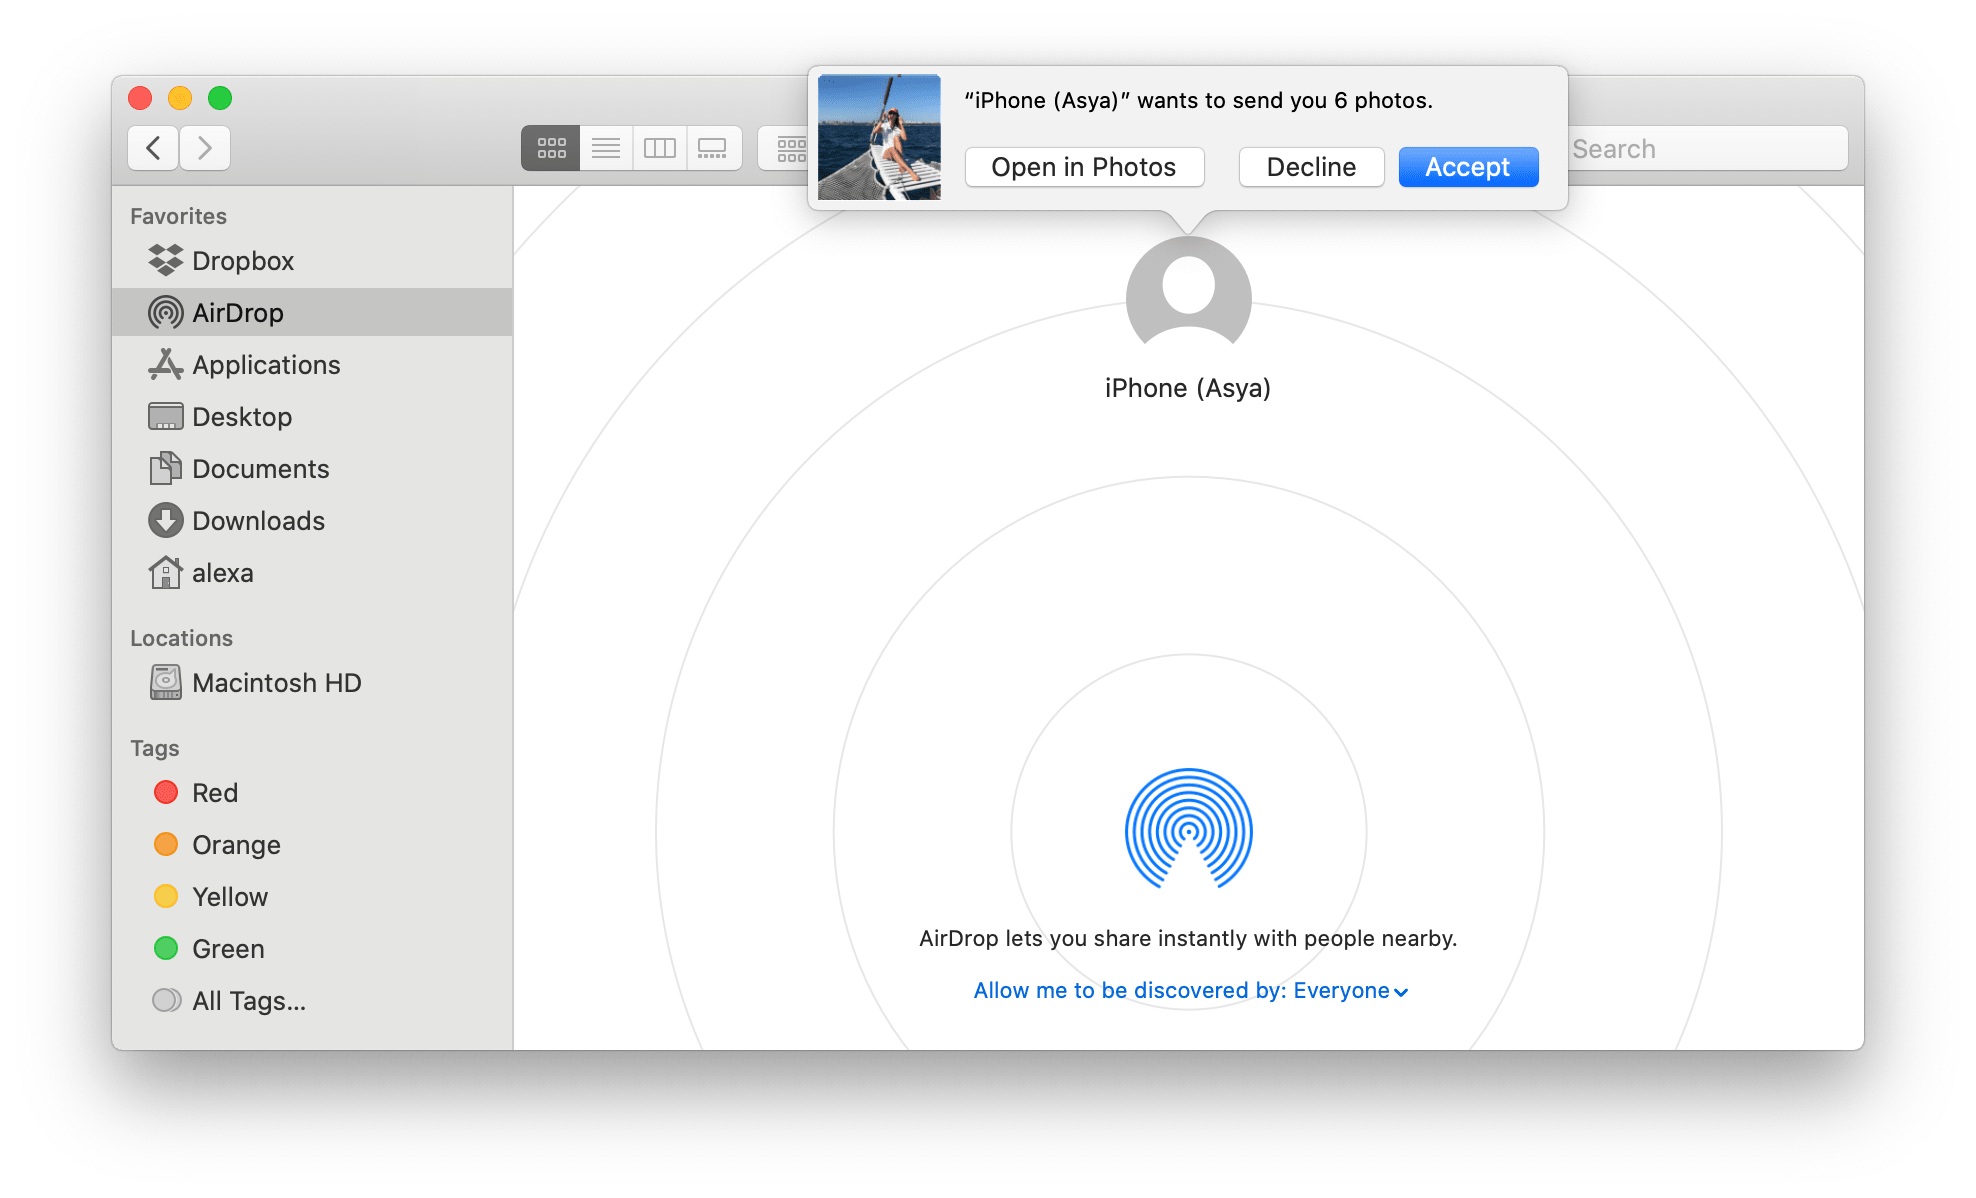
- You will get a notification on your Mac to accept files via AirDrop. Click to Accept them.



If AirDrop in Finder is opened, you will get this notification right in the Finder window.
Where do AirDrop files go on Mac
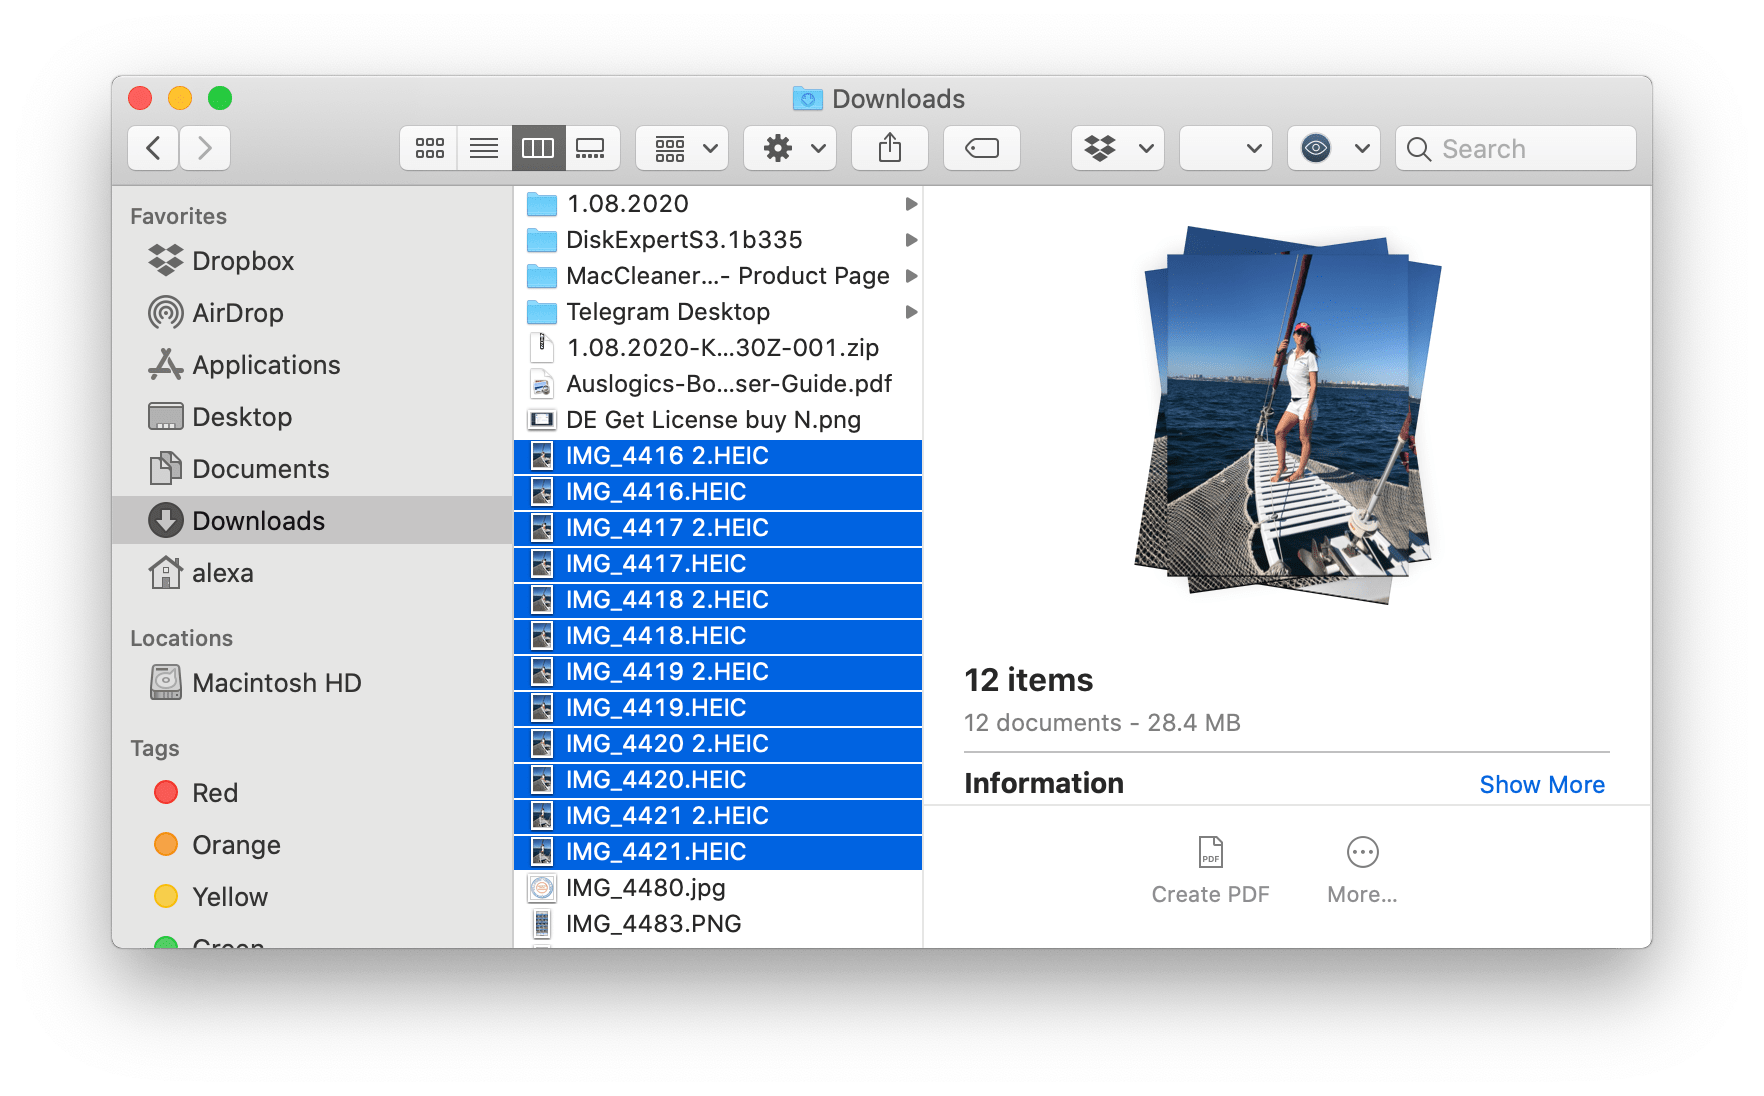
By default, files transferred to a Mac via AirDrop go to the Downloads folder. Here is the location where AirDrop goes on Mac:
Macintosh HD/users/“user name”/Downloads
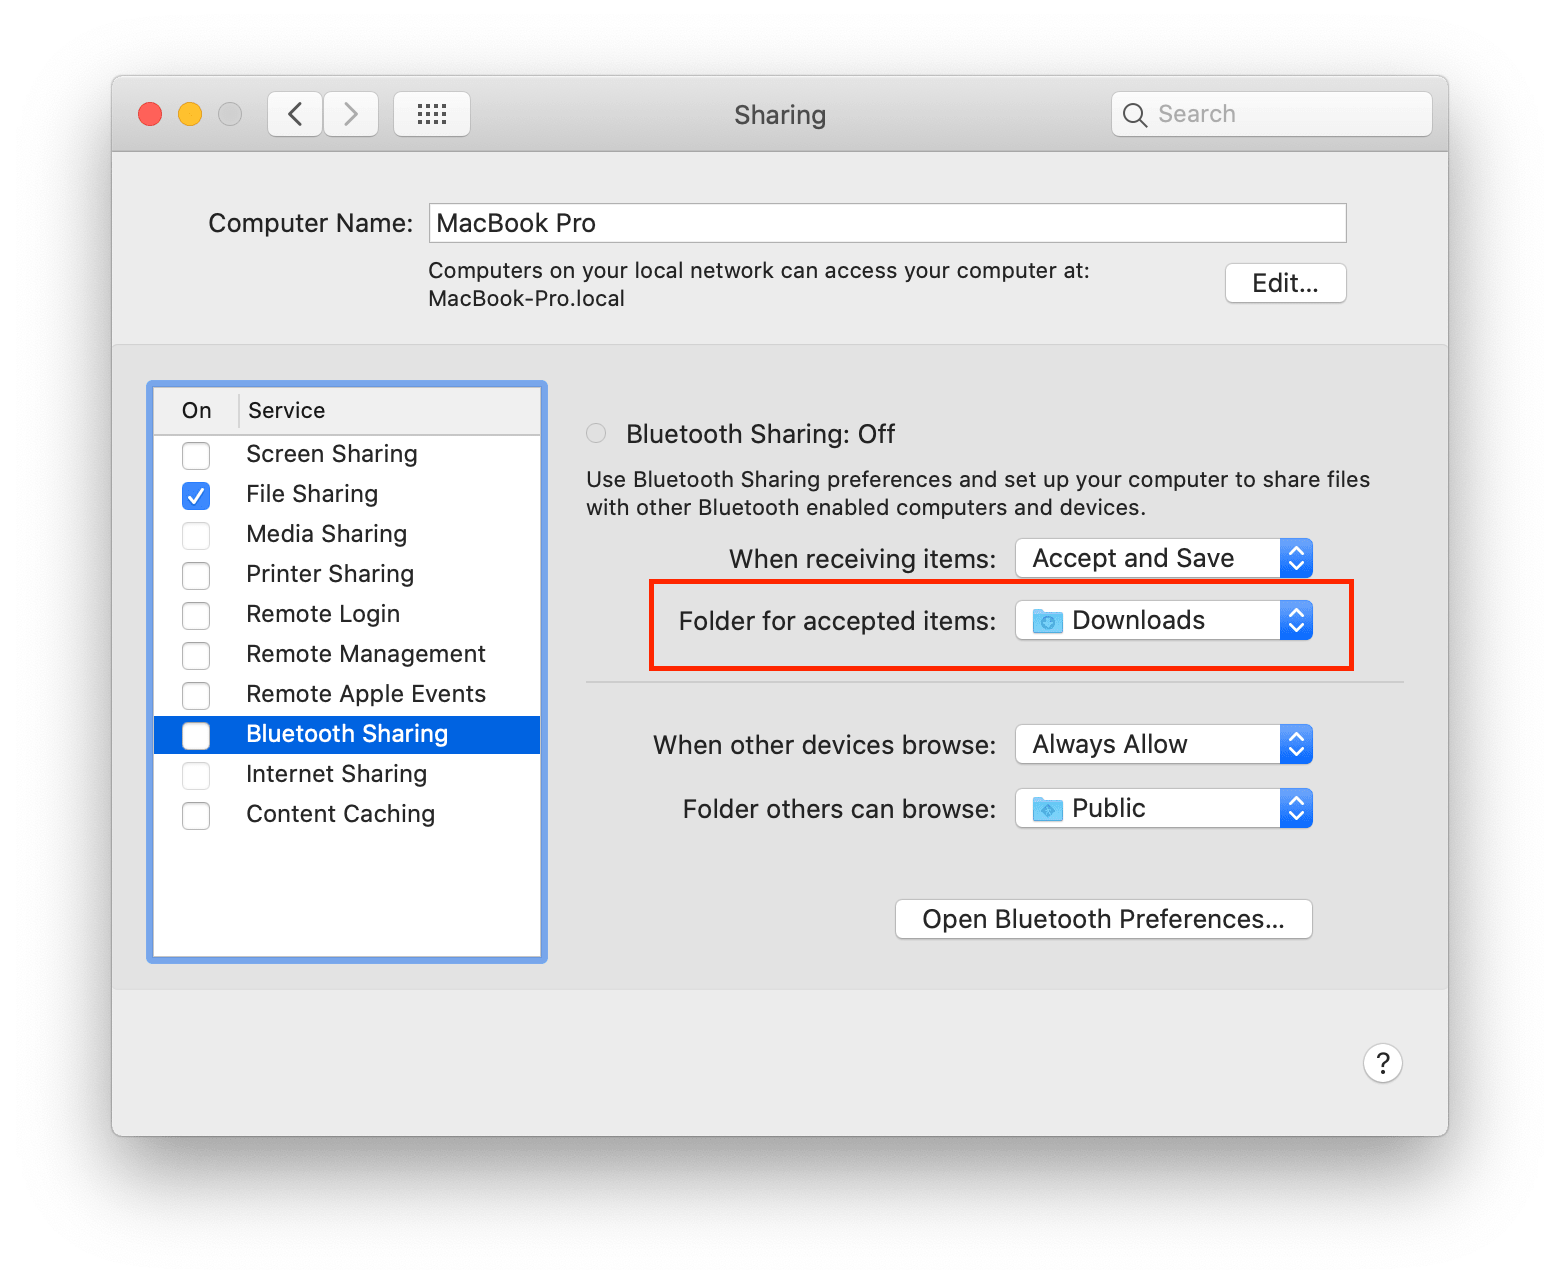
However, you can change the folder for files transferred via Bluetooth. For this Open System Preferences → go to Sharing → select Bluetooth settings. Here for the field “Folder for accepted items,” select another folder where you want AirDrop files to go.
Also note, when you get the notification about accepting AirDrop photos, you can select another location except the default one. For this, click on Accept options and select Open in Photos.
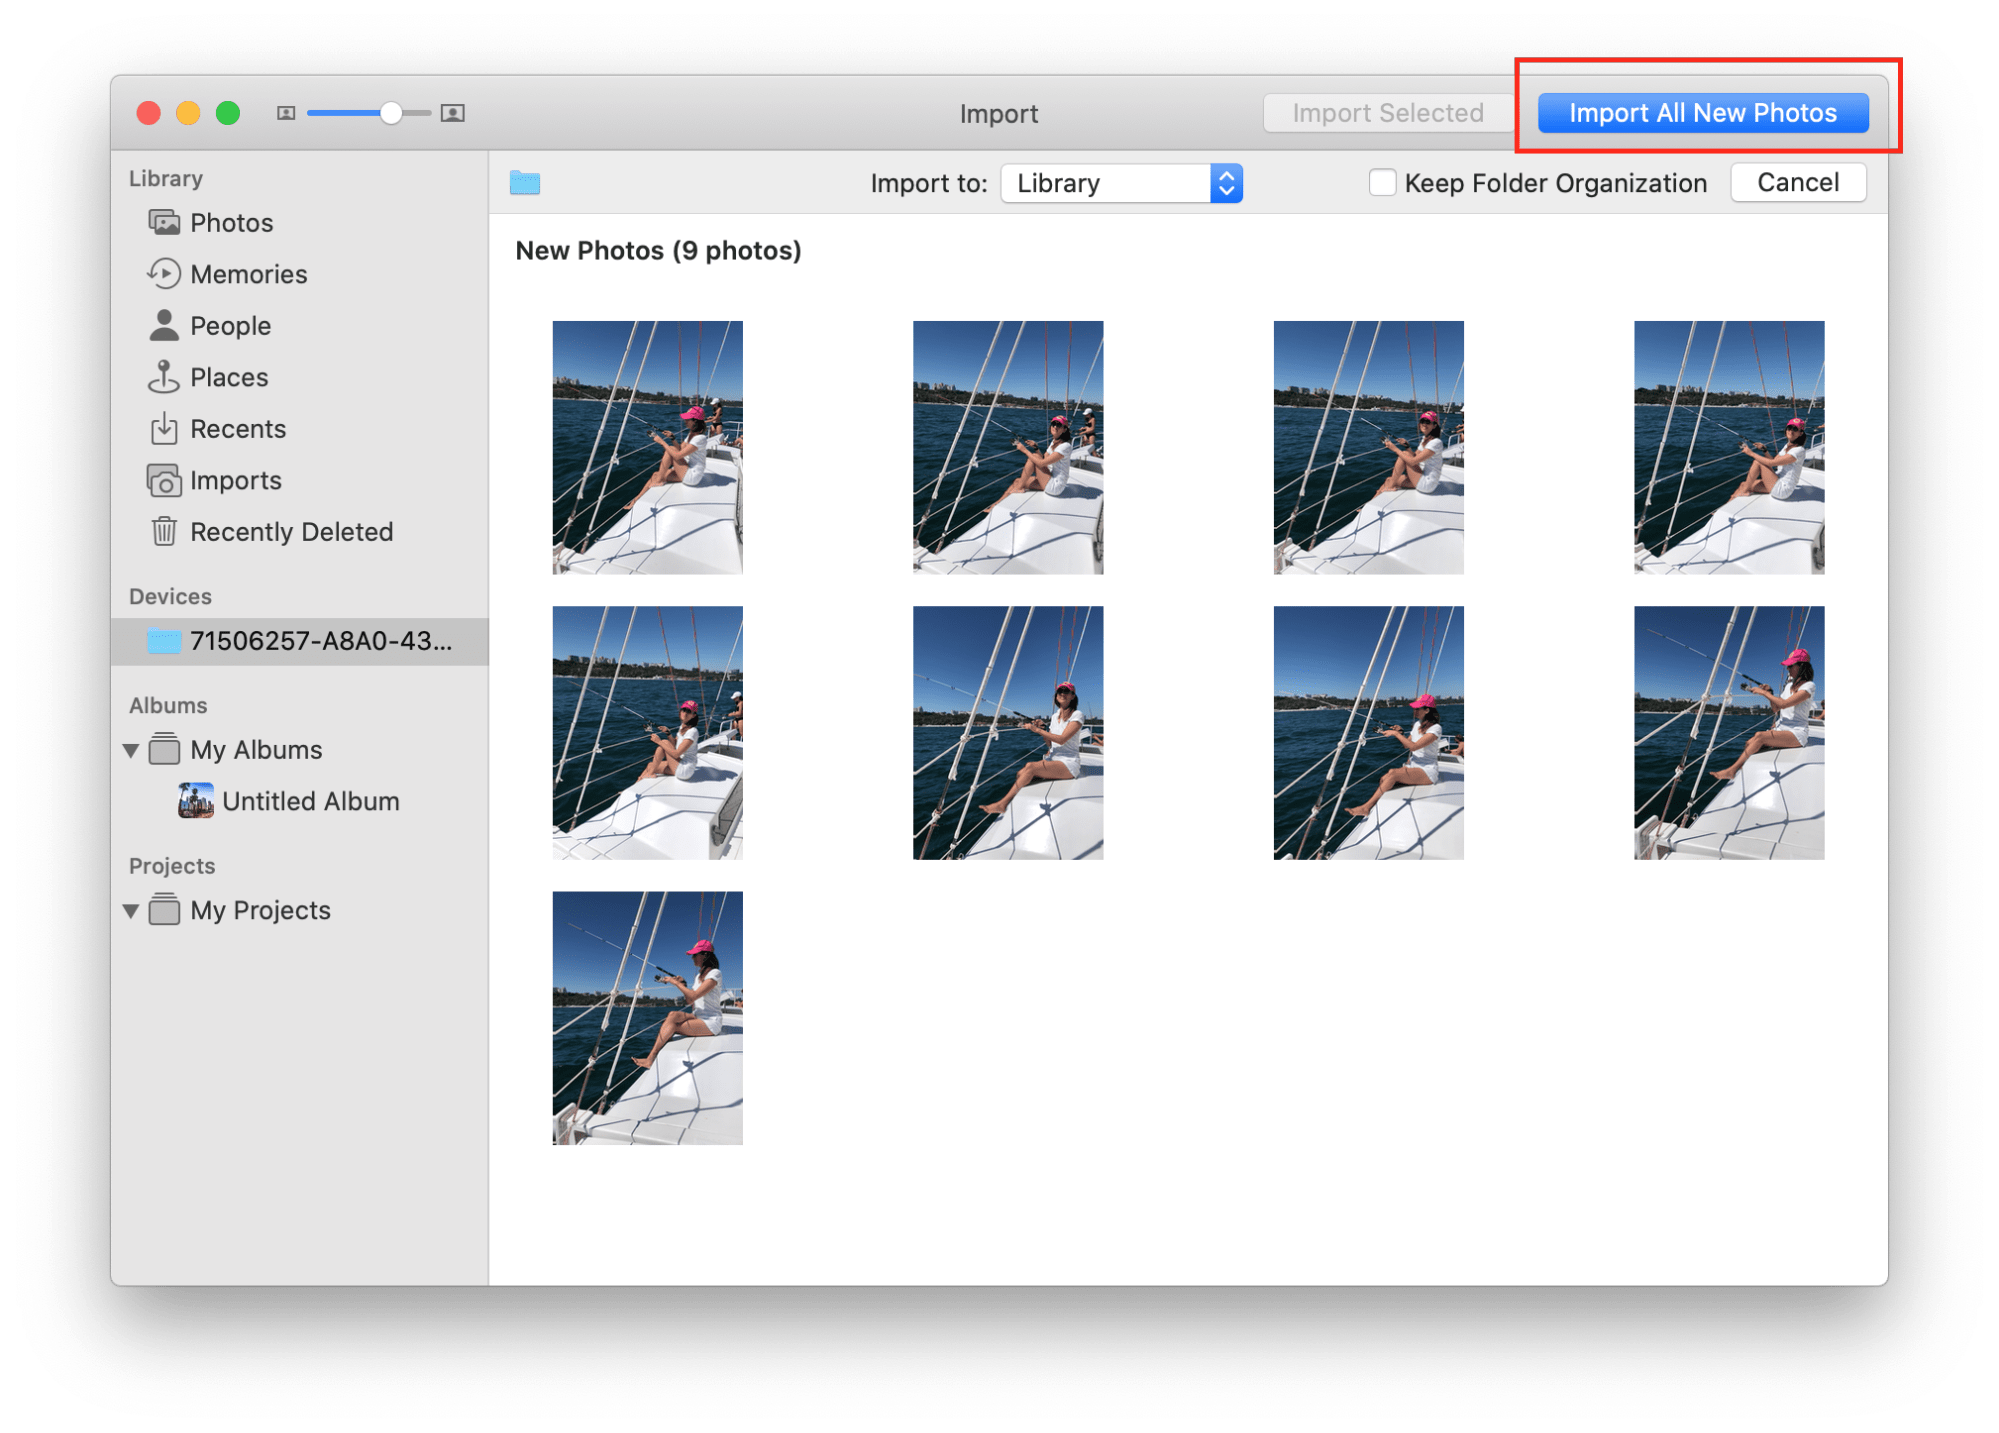
The Photos app will open. You will need to click on Import All New Photos to save the photos.
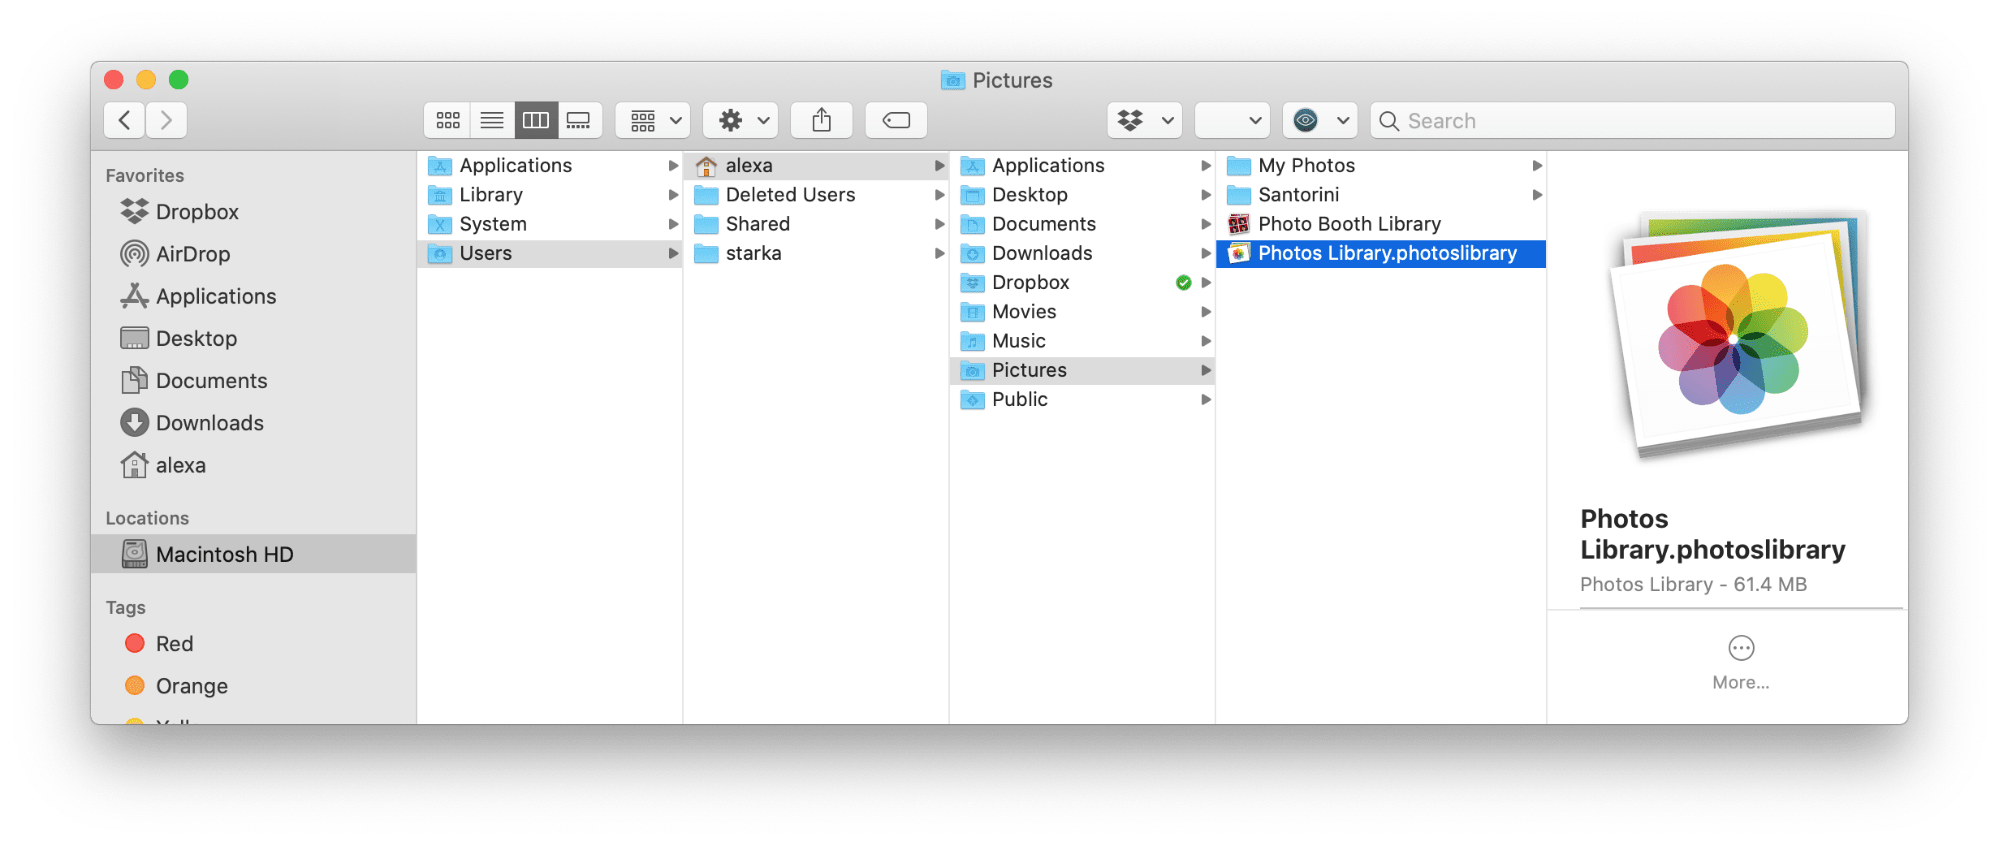
In this case, the AirDrop photos will go to the Photos Library. The Photos library is located in the following directory:
Macintosh HD/users/“user name”/Pictures/Photos Library.photoslibrary
How to find duplicate files transferred via AirDrop on Mac
When you regularly AirDrop photos or other files to your Mac, you may have sent the same files twice by mistake and, as a result, create duplicates. We recommend that you check your Photos Library, Downloads folder, or your whole Mac disk to find and remove duplicates and recover valuable disk space. For this, you can use a free application Duplicate, File Finder.
Duplicate File Finder detects any type of duplicate files on a Mac, duplicate folders, similar folders, and even allows you to merge folders to organize your duplicates.
We will show up how to find duplicates in the Downloads folder, but keep in mind that you can scan any folder for duplicates and even your Photos Library.
Here is how to find duplicates on a Mac with Duplicate File Finder:
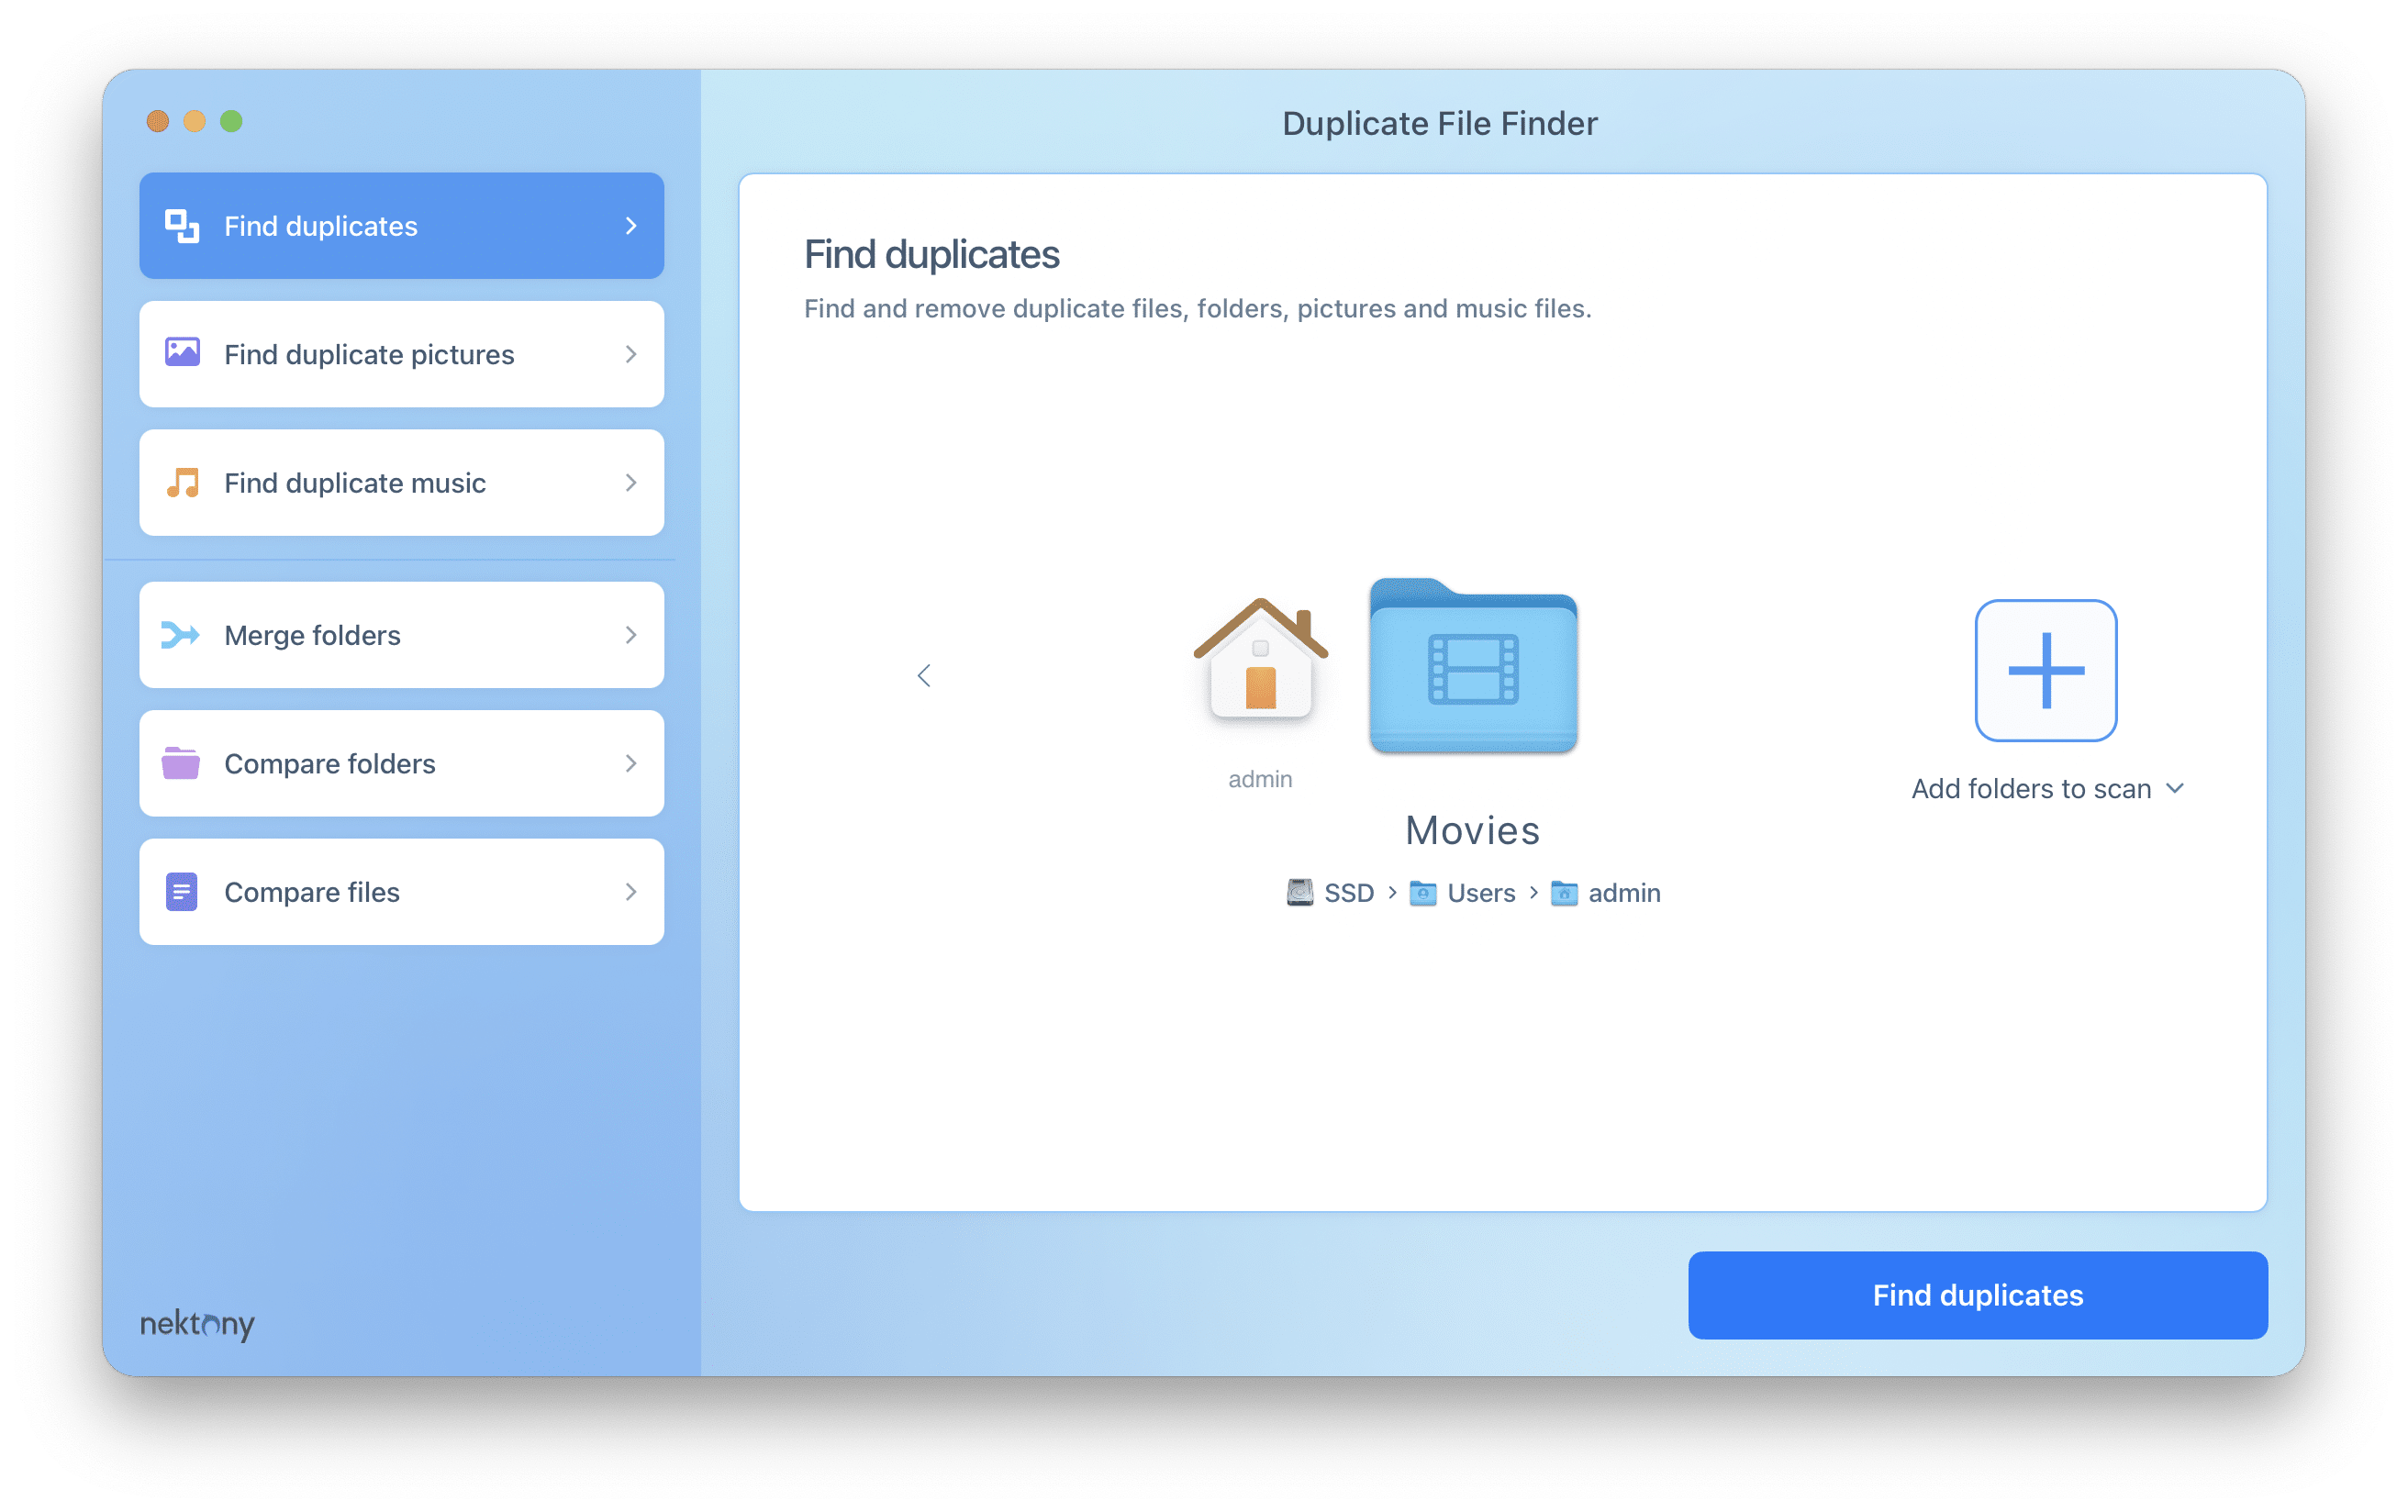
- Launch Duplicate Files Finder.
- Add folders for scanning and click to Find duplicates.
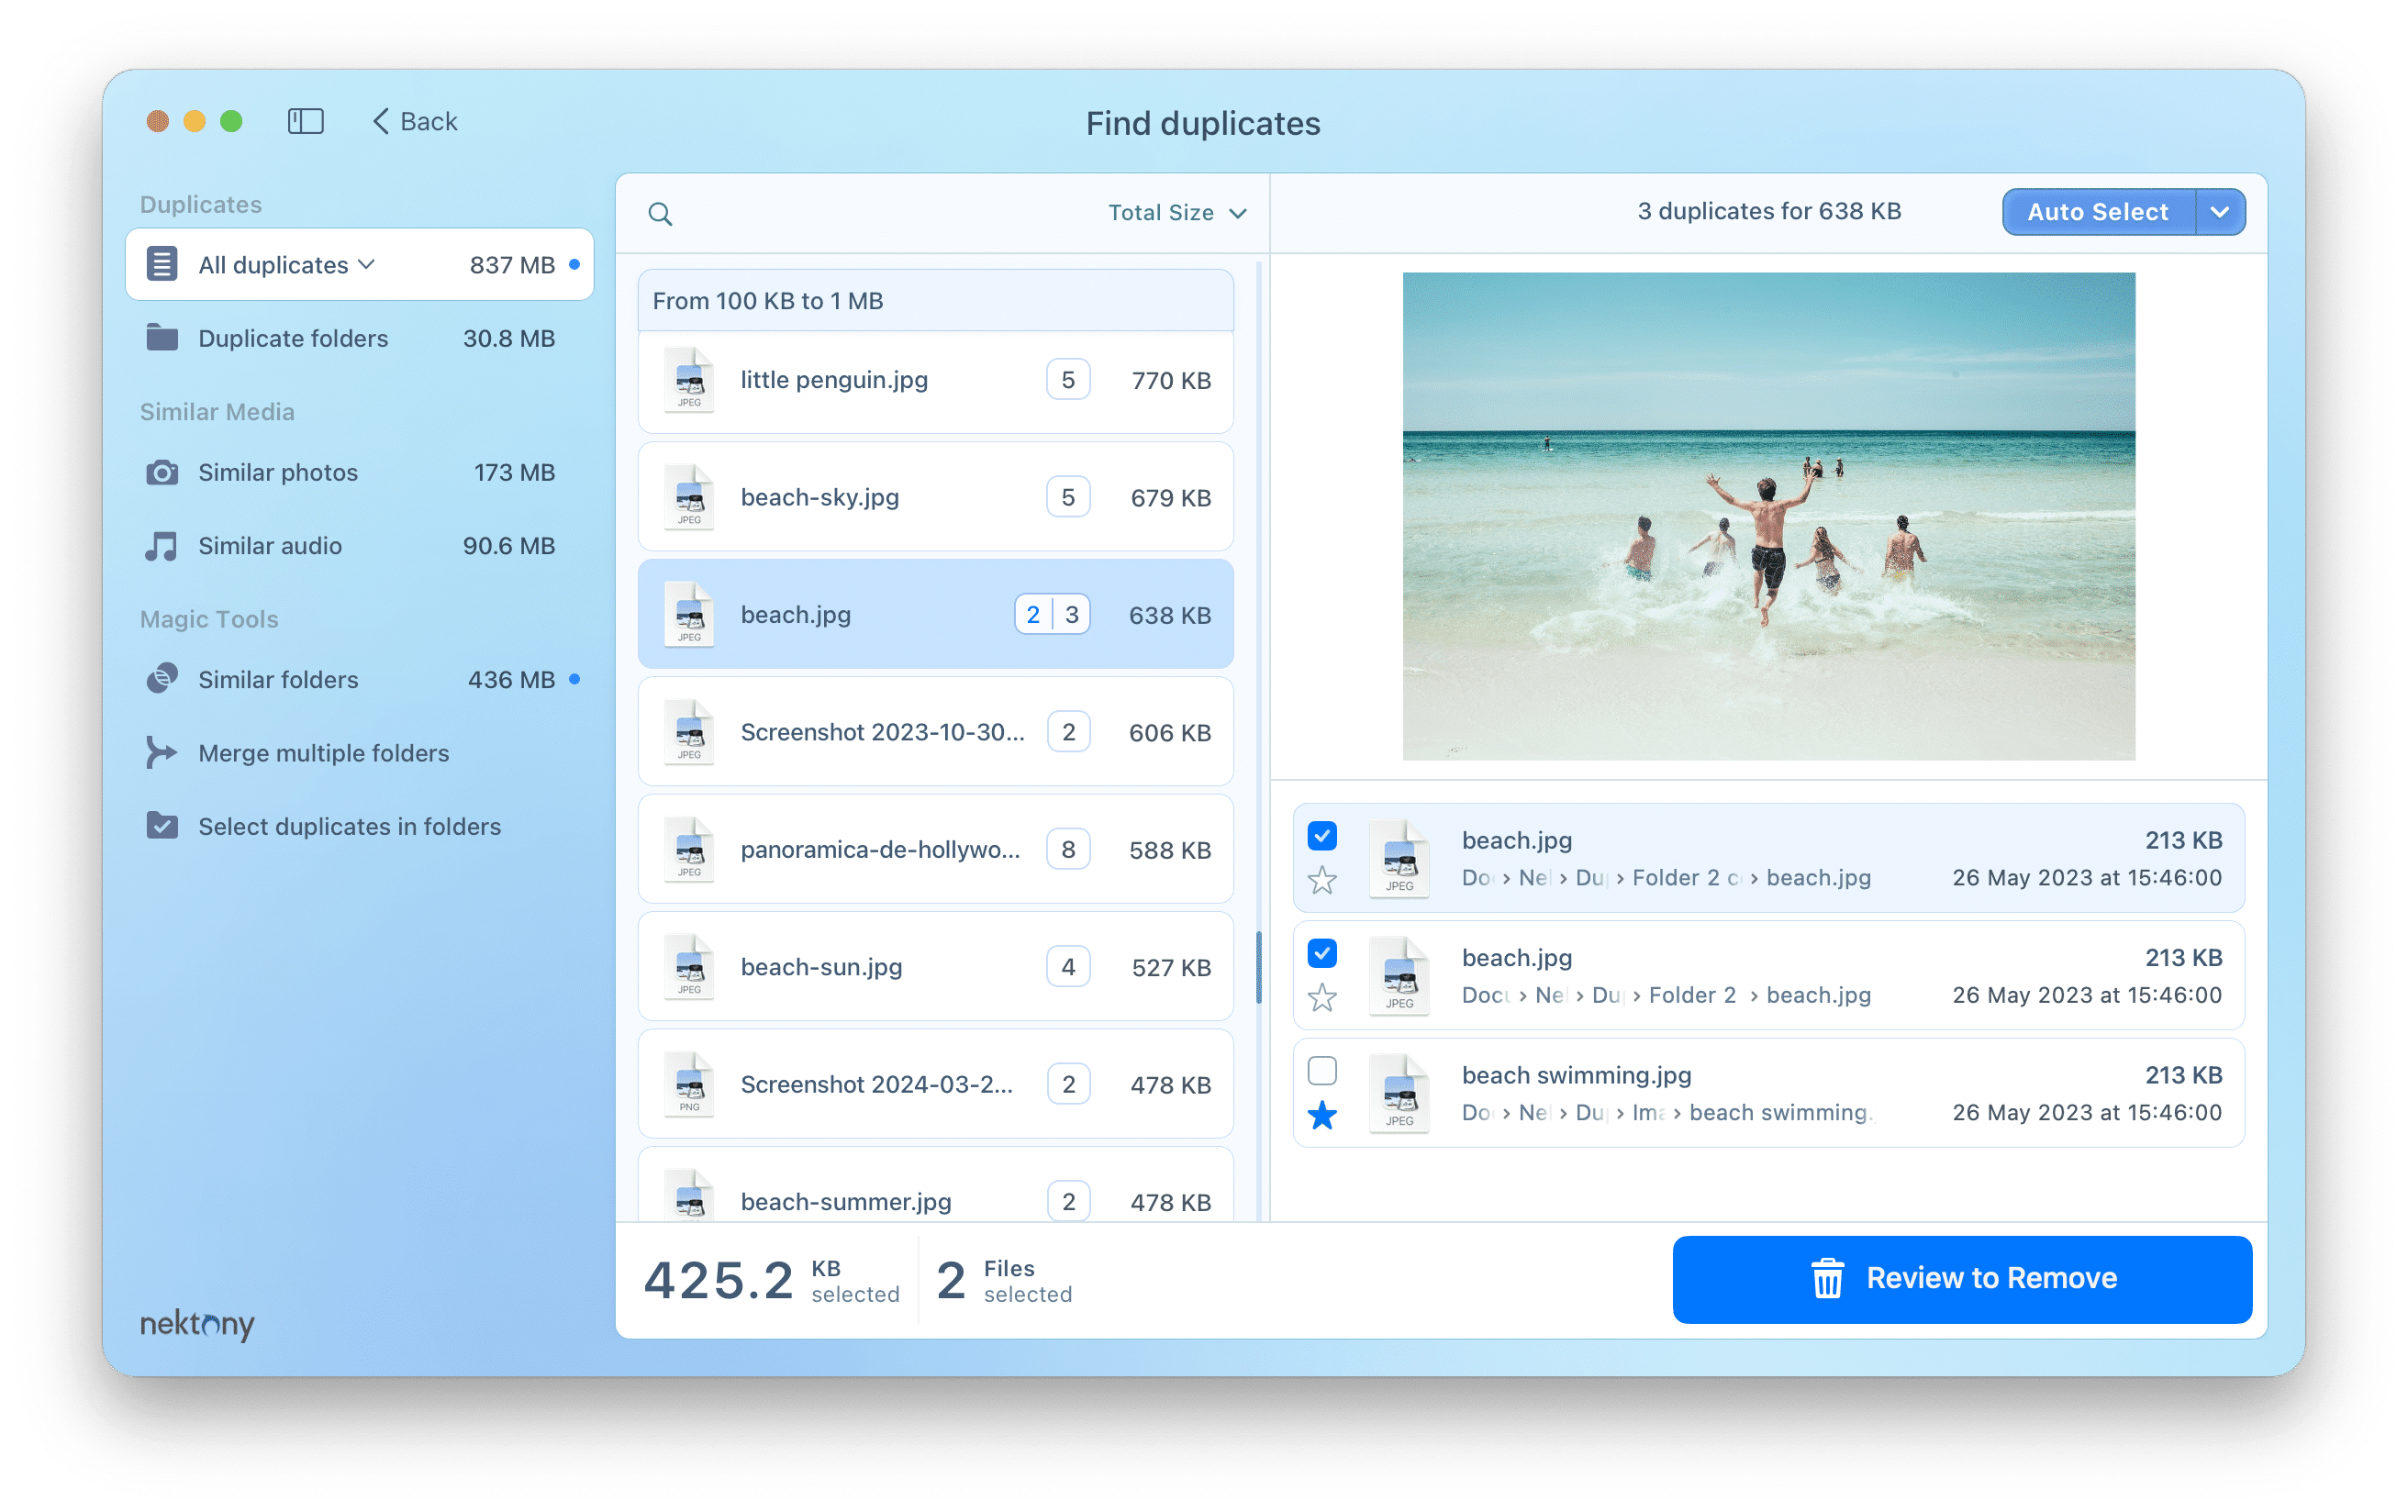
- In a moment the app will find and display the types of duplicate files you have in the Downloads folder.
- Select unneeded duplicates and click Review to Remove.
- Confirm the removal.
How to change AirDrop’s name on Mac
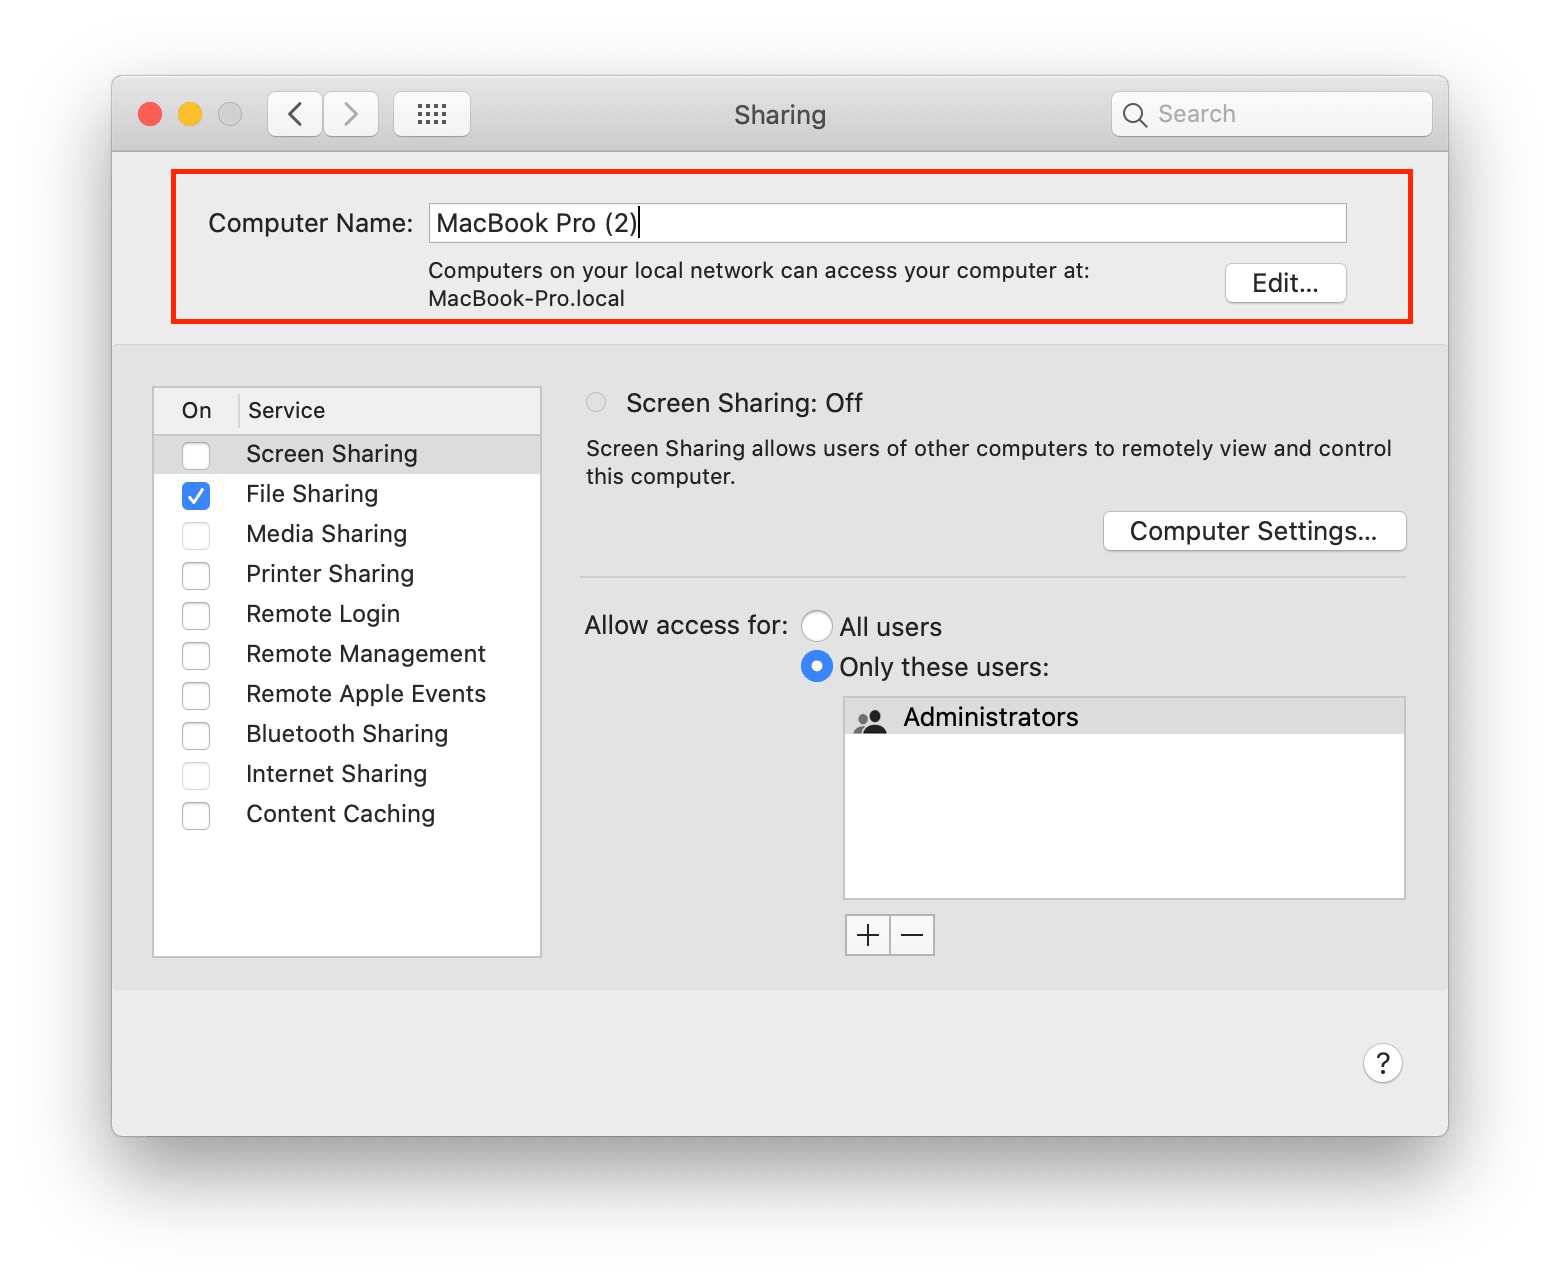
AirDrop’s name is your Mac computer’s name. So to change the AirDrop name, you need to change your Mac’s name.
Follow these steps to rename AirDrop:
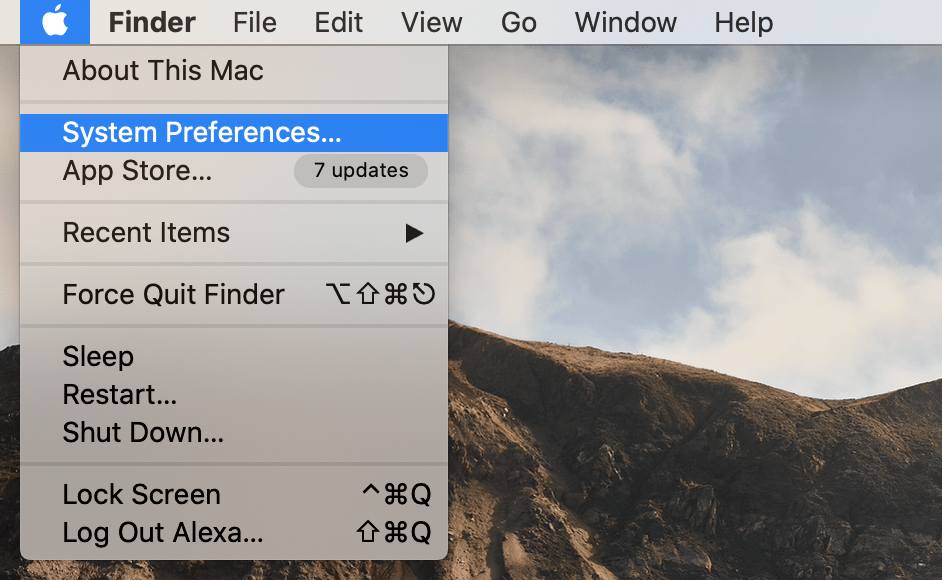
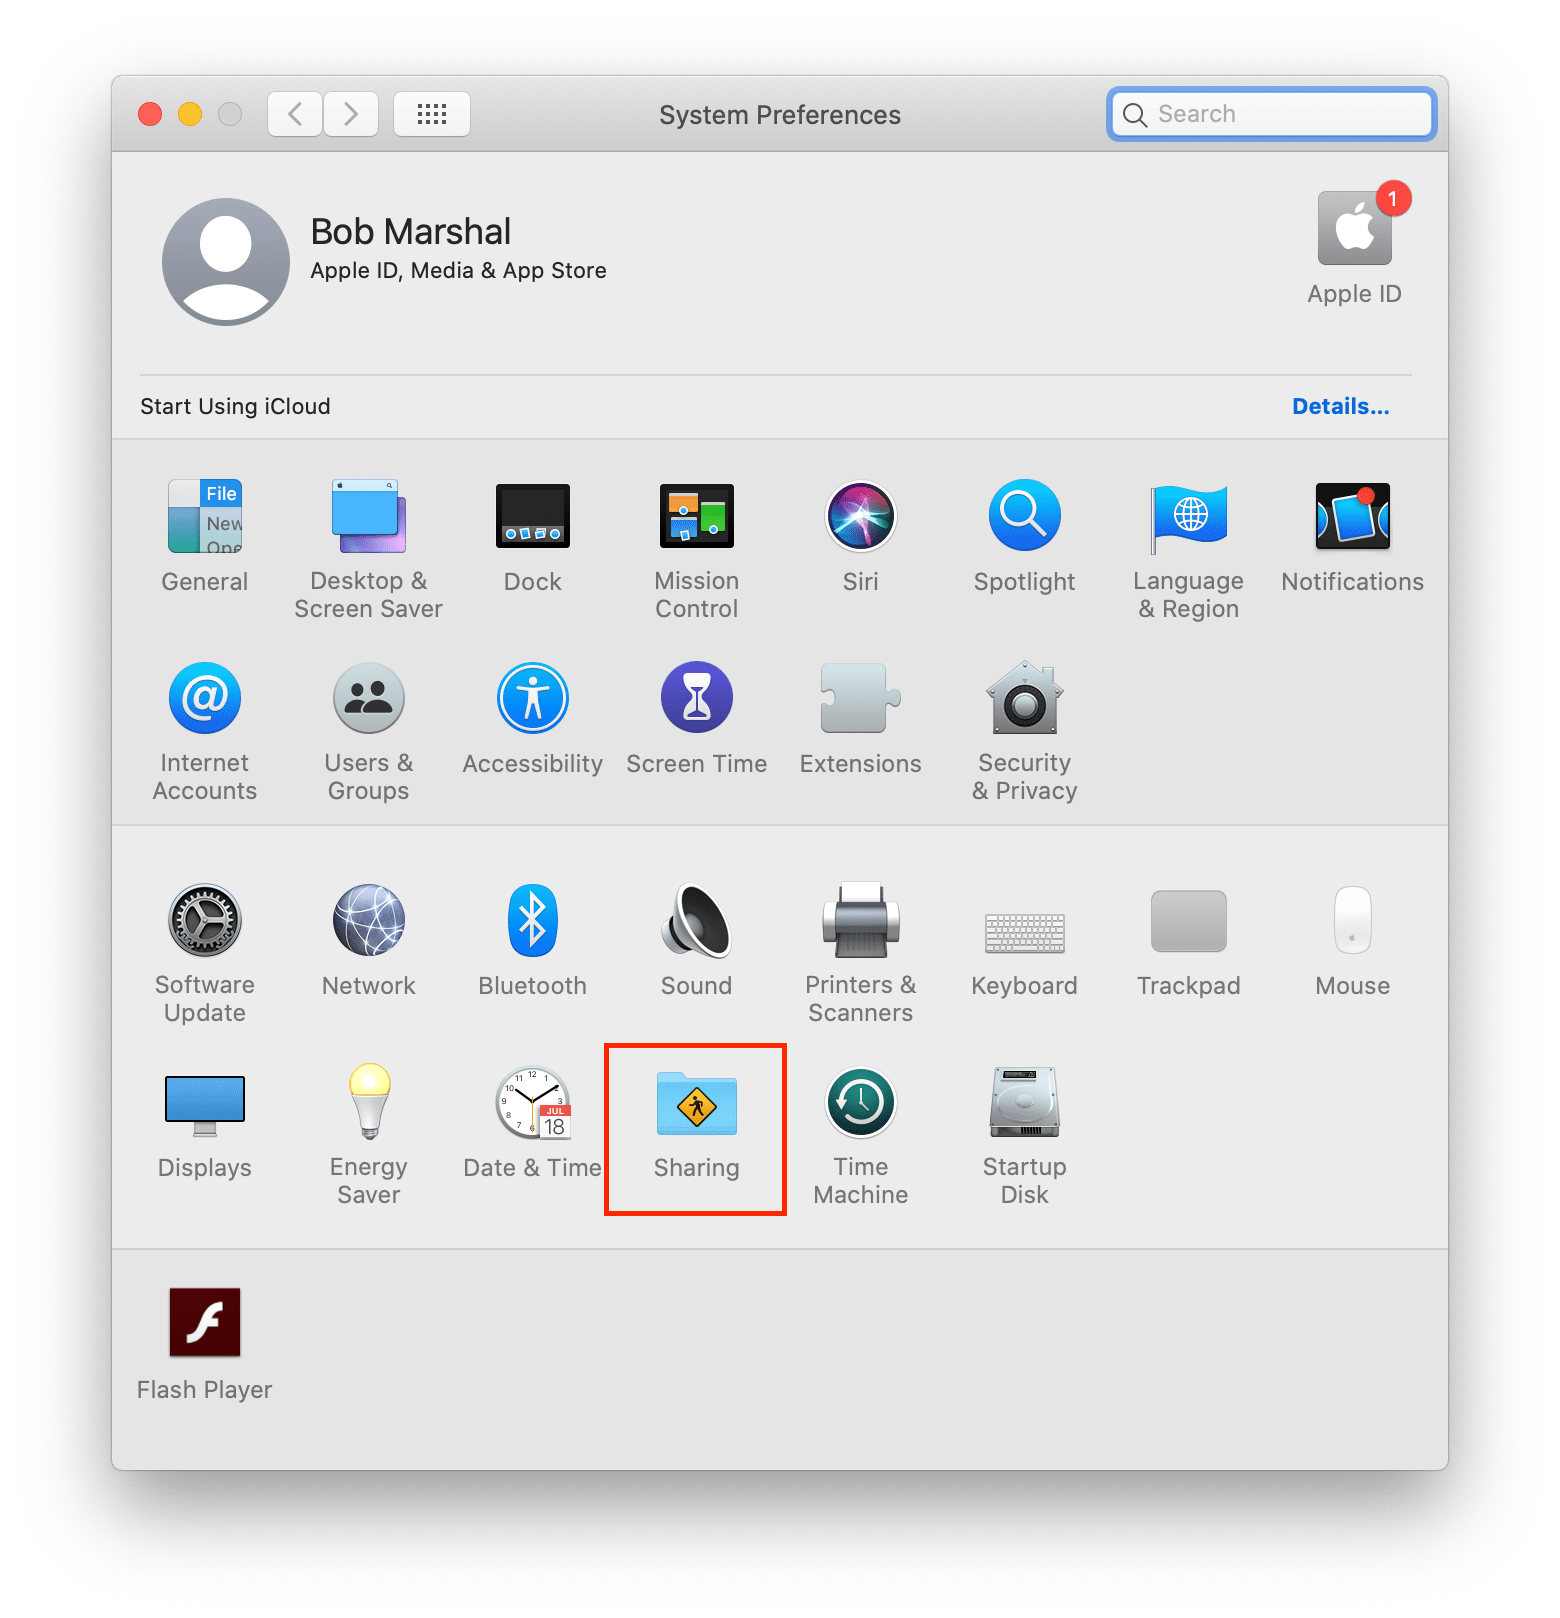
- Go to the Apple menu and open System Preferences.
- Go to the Sharing section.
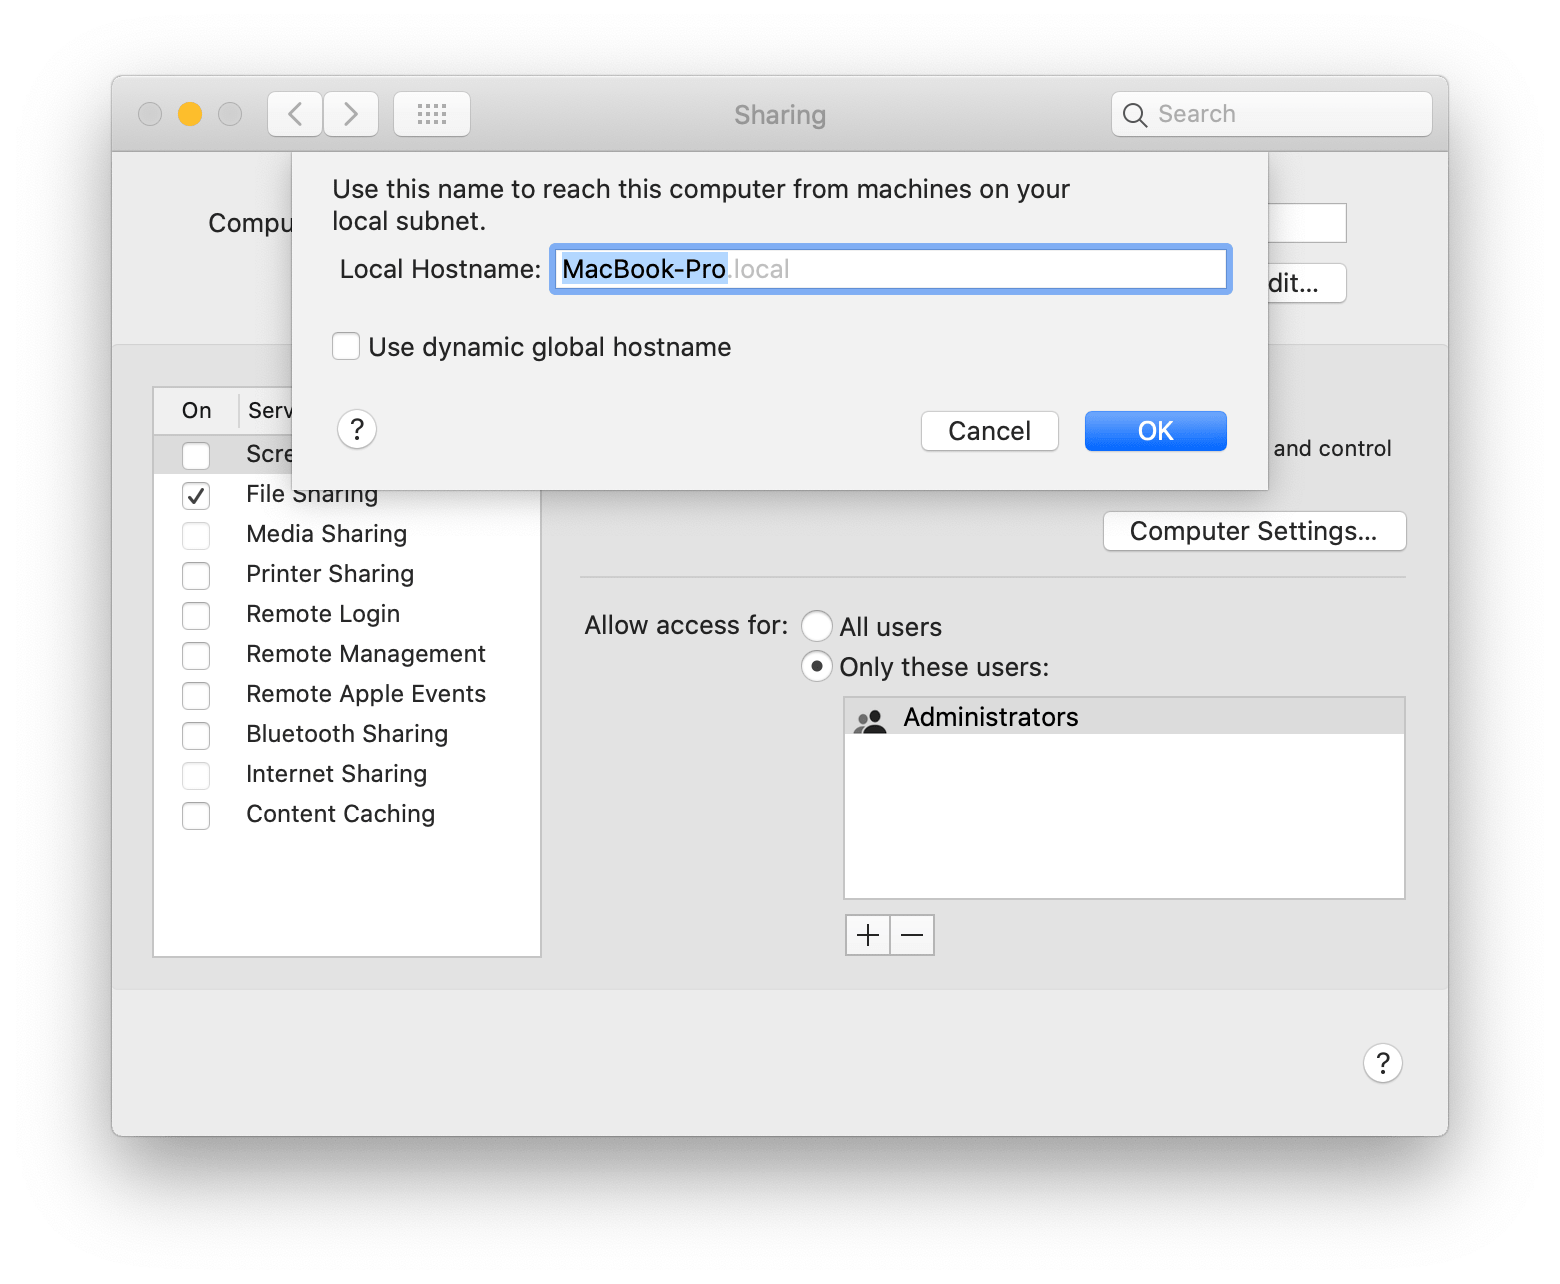
- Here on the top, you will see your computer’s name. Update the name and click on Edit.
- Confirm a new name by clicking the OK button. Now you have a new AirDrop name.
Conclusion
Now you know all about AirDrop on Mac. If you have more questions about how AirDrop works on a Mac, write in the comments below. We will cover it up in our next article. And once again, when you transfer your photos from your iPhone to your Mac, we recommend that then you check your Mac hard drive for duplicate photos with Duplicate File Finder.

