
Today, most people usually use cloud services to share files between Macs or Macs and Windows/Linux PCs. However, Apple provides a built-in Mac File Sharing option which is more convenient for regularly sharing files with your colleagues or even friends and relatives. If you don’t know about this feature, read this article to learn more. If you use File Sharing on your Mac but something goes wrong and now it no longer works, this article will also help you fix it.

Contents
- What is File Sharing on Mac
- How to enable File Sharing on Mac
- How to fix File Sharing on Mac
- Solution when File Sharing is not working
What is File Sharing on Mac
File Sharing is a kind of transfer tool that allows sharing files and folders between Mac computers, or even between Macs and Windows PCs, using one network. A Mac uses an SMB protocol to share data. This means that computers on your local network can access Mac shared folders.
In simple terms, file sharing is the ability to access your Mac files from another Mac over a computer network.
You can share as many folders as you wish and then decide which type of access to give to other users: Read Only, Write Only, or Read & Write permission. Additionally, you can add any user from your contacts who will then have access to your files.
Tip – How to Prevent Issues on Mac
- Download and launch MacCleaner Pro.
- Go to the Clean up section.
- Select the files you don’t need.
- Click to remove them and confirm.

MacCleaner Pro
How to enable File Sharing on Mac
Let’s see how to use the File Sharing option and share a folder from a Mac.
- Open System Settings.
- Find and click the Share category.

- Make sure that File Sharing is turned on.
- Click the “i” icon. You will see the list of folders to be shared. Click the Plus (+) or Minus (-) buttons to add or exclude folders.
- Another column shows the list of users who have access to shared items. Click the Plus button to add new users from your contacts list.


Once you enable File Sharing, all the users in your network will see your Mac and have access to the folders you share.
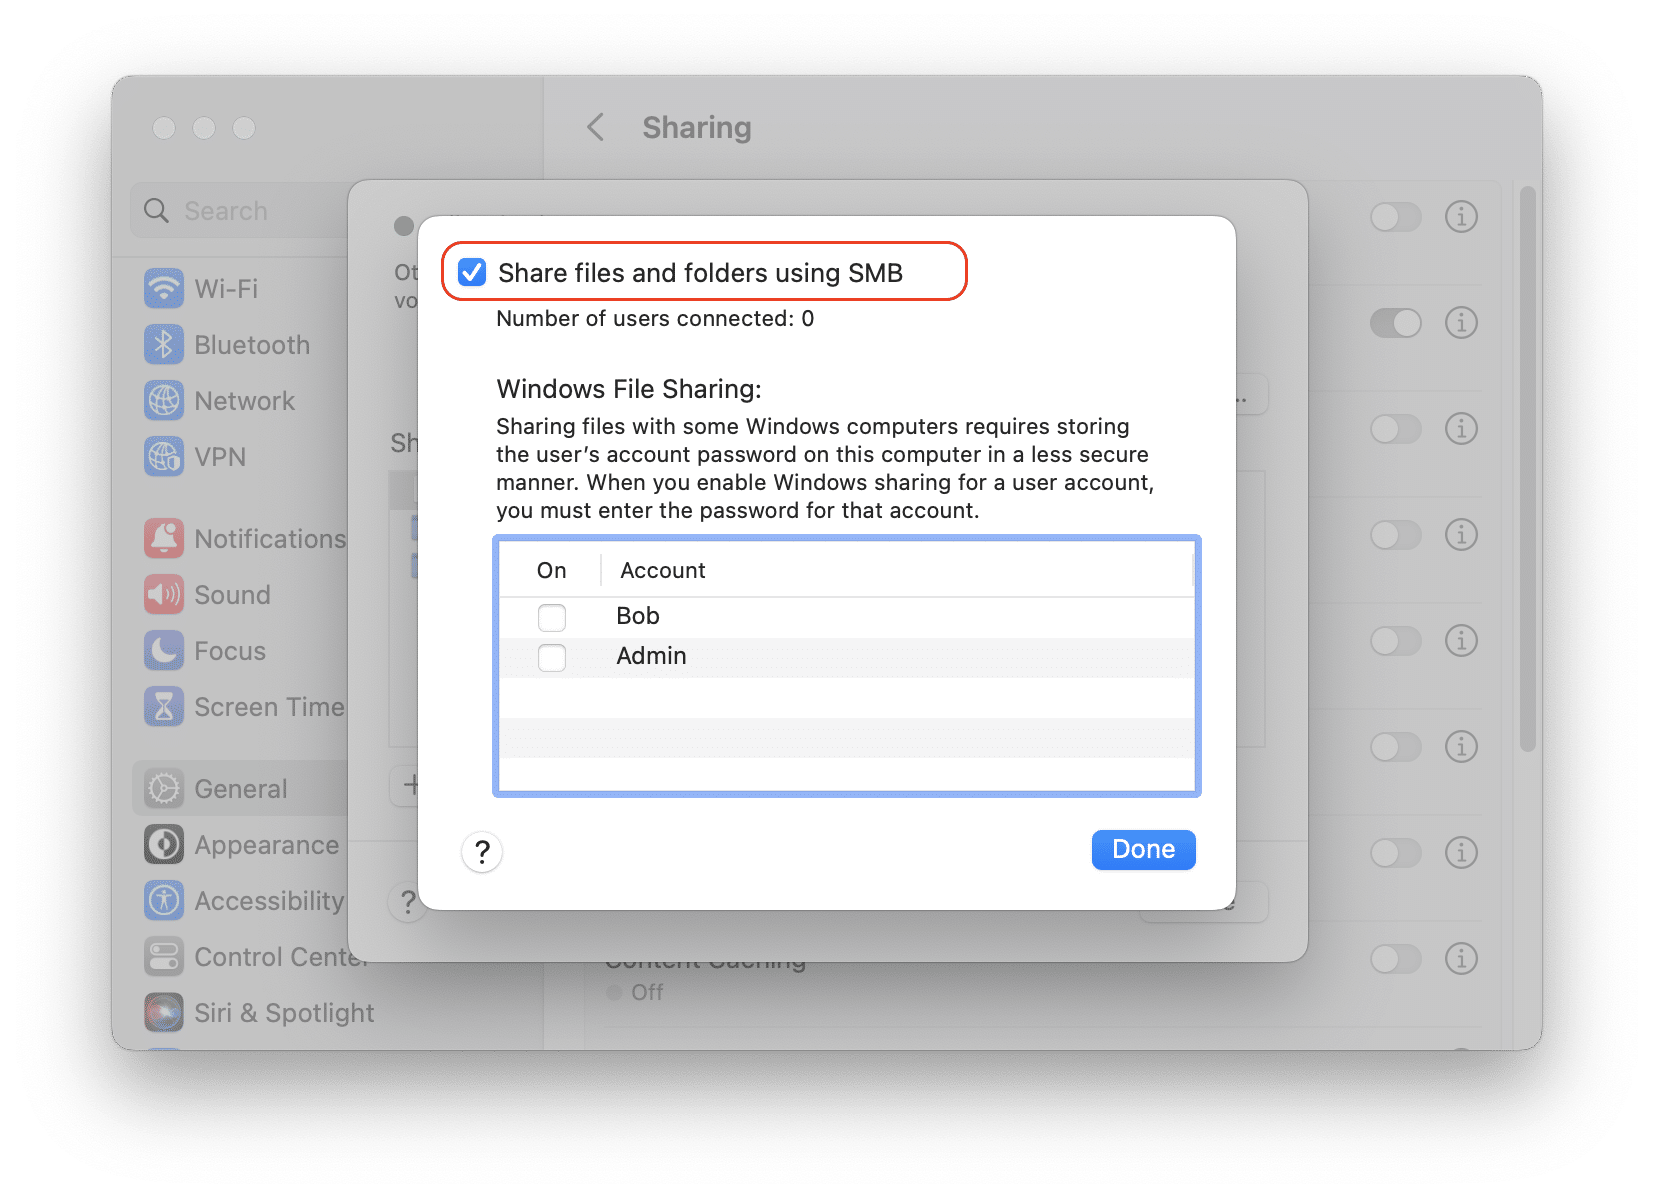
If you want to share files from Mac to a Windows PC, do the following:
- Click the Options button.
- Make sure that the option “Share files and folders using SMB” is enabled.
- Mark the checkbox for your account. You will have to create a password for this account.
- Create a password and click OK.
- Then click Done.

How to fix File Sharing on Mac
Sometimes users face issues with File Sharing. Below you will find tips that can help you to fix File Sharing when it is not working.
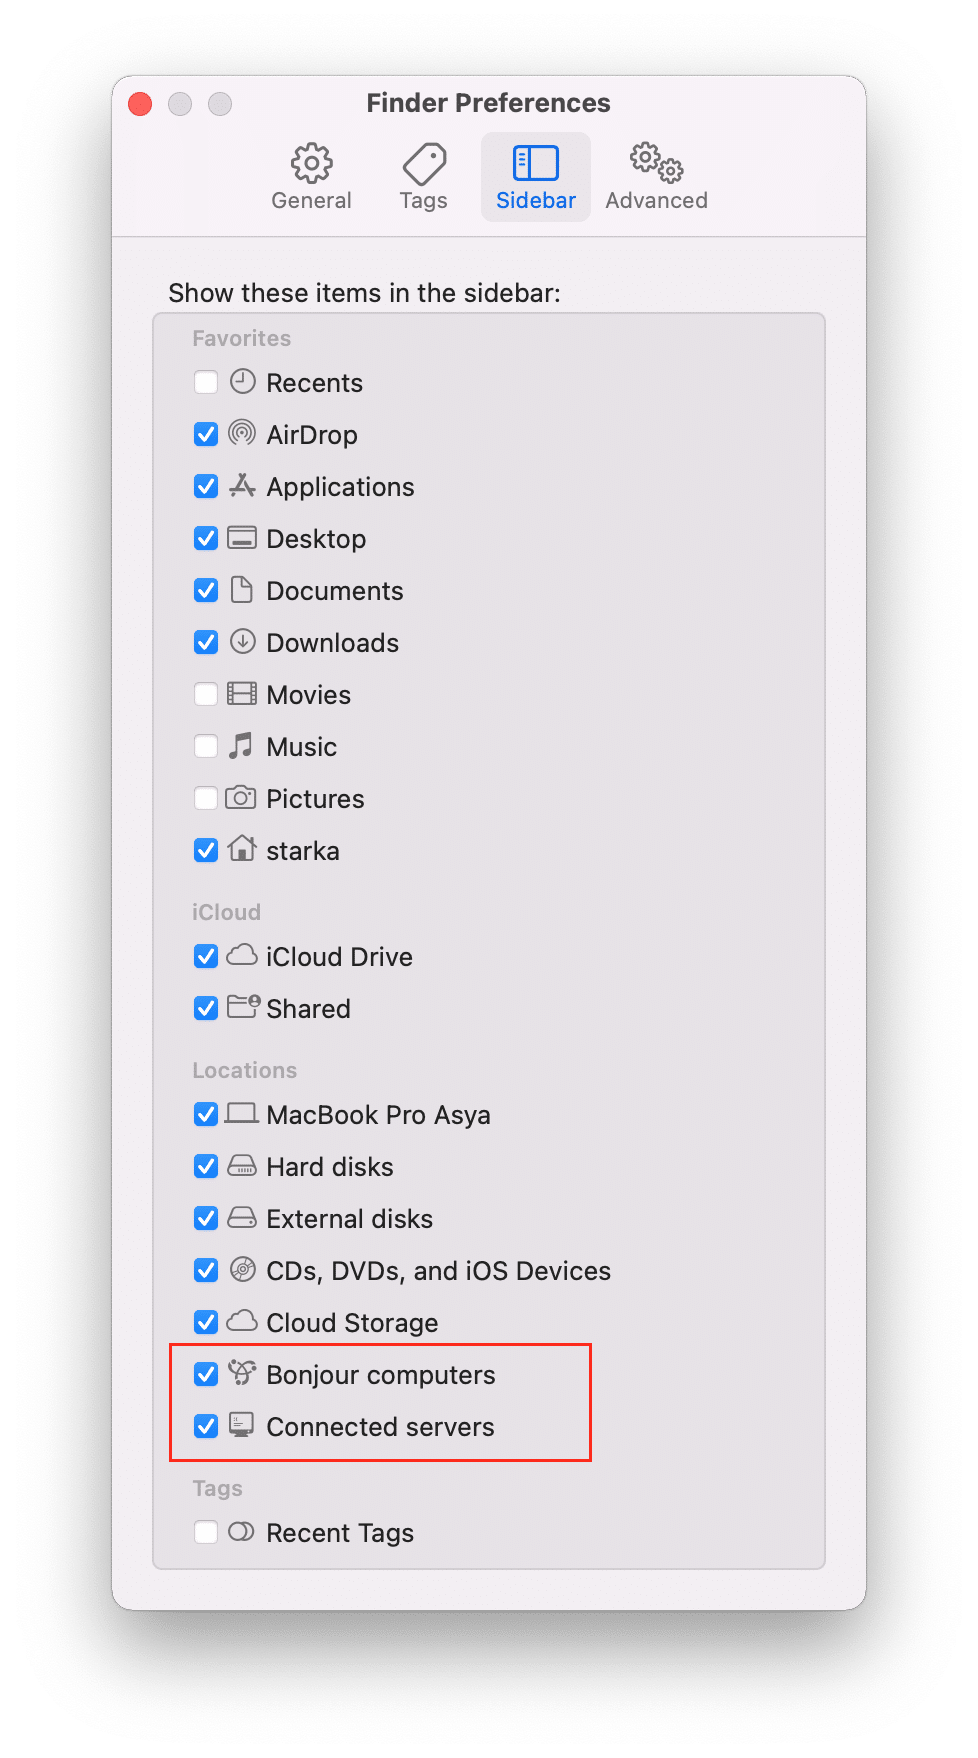
1. You don’t see the Shared Folder in Finder
If you are sure that File Sharing is enabled but the shared folder doesn’t appear in your Finder, try the following:
- Open Finder and go to its Preferences (press ⌘,)
- Switch to the Sidebar tab.
- Make sure that “Bonjour computers” and “Connected servers” are both enabled.

2. Access to the Shared Folder is denied
If you can’t access the shared item, the user most likely didn’t give you permission. As we mentioned above, a Mac user can configure Read Only, Write Only, or Read & Write permission to the shared folder. However, when you move new files inside that shared folder, the permission rights don’t automatically apply to all files inside the folder. To fix it, do the following:
- Open System Settings.
- Go to the Sharing section.
- Select a Shared folder and user in the right panel.
- Click the arrow in the Permission column, right-click on the permission line for the user.
- Select Apply Permissions to Enclosed items.

3. You are unable to log in to a Shared Mac
If you can’t log in to a shared Mac, ask the administrator to check whether File Sharing is turned on and your computer is on the list of users that can access the shared folders.
The administrator has to do the following:
- Open System Preferences.
- Go to the Sharing section.
- Mark the checkbox next to File Sharing.
- Add the folder you want to access to the list of Shared Folders.
- Ensure that your username is in the list of users who can access this folder.
- Try to open the shared folder again.
4. Unexpected error occurs
If you use antivirus on your Mac, it might have settings that deny accessing your folders from any external device. Ensure that the Firewall in your antivirus application is set to Public Network. For this, go to Preferences → Network connections → change the settings from Public to either Work or Home network.
Another reason why something may go wrong is when a user tries to access shared folders with outdated software. Ensure that the system on both computers is up-to-date.
Solution when Files Sharing is not working on Mac
If even after following the guide above File Sharing is still not working, you can try other solutions to share your files and folders.
Use iCloud Drive
You can use iCloud to share your Desktop and Documents folders with other Mac computers.
Here is how to share files with iCloud:
- Open System Preferences and click Apple ID.
- In the sidebar, click iCloud.
- Find iCloud Drive in the list and click Options.
- Mark the checkbox for Desktop & Documents Folders and click Done.

- iCloud will now automatically save files from Desktop and Documents folders to your iCloud Drive. You can access these files from other devices using iCloud.

Use AirDrop to share files between 2 Macs
If you need to share files between two Mac computers, you can use AirDrop. With AirDrop, you can transfer photos, videos, and other files between Mac computers in one room. It works over Bluetooth. This option can be used when you want to share files with your colleagues in your office.

Use Public and Shared folders to share files between users on Mac
If you need to share files between different users of the same Mac, you can use default Public and Shared folders. You can find the Shared folder in the following directory: Macintosh HD/Users/Shared. The Public folder is located inside the Home folder. All you need to do is to drag the files and folders to the Shared or Public folders, and other users can open these items from their user accounts.

The last tip when sharing folders between computers
File Sharing is a great feature that allows other users to easily access files and folders on your Mac. However, when you share your whole Home folder, we recommend first cleaning up your Mac of all types of junk files, like caches, unused applications, duplicates, unused large files, and so on.
You can easily do this with the help of a special software tool called MacCleaner Pro. MacCleaner Pro provides all the features you need to safely clean and speed up your Mac, fix most performance issues, and optimize your disk space usage. Here is a link for a free download.


