Macs allow you to have multiple user accounts. Having several accounts can be convenient when, for example, family members use the same Mac, office colleagues use the same Mac, or you want to let a friend use your computer. With multiple user accounts, each person’s files and settings are safe and unaffected by other users.
This article will explain how to add a user on your Mac, delete an account, and quickly switch between accounts.

Contents:
- How to create a new user on a Mac
- How to delete a user on a Mac
- How to change the admin username on a Mac
- How to change a standard username on a Mac
- How to switch users on a Mac
Before We Start
MacCleaner Pro is an all-in-one software solution for cleaning up and speeding up your Mac. It helps clear out junk files like caches, duplicate files, unused large files, service files from previously removed applications, and more. It also detects memory-consuming apps and clears your Mac’s RAM.
The full version of MacCleaner Pro is available for a free trial.
MacCleaner Pro
How to create a new user on a Mac
If you share your Mac with others, it’s best to create separate user accounts for them. Otherwise, you can lose files, emails, computer settings, etc., or at least have them modified.
On your Mac, you can create the following types of user accounts:
- Administrator. An administrator has full privileges and can independently add and remove users (including the administrator’s own account), change system settings, and install applications. In short, an administrator has rights to access all parts of your system and all user accounts.
- Standard. A standard account is recommended if you want to provide normal, daily access to your Mac to use applications, store photos and music, change some system preferences, and customize the desktop.
- Sharing Only. This type of account provides “read-only” access to only shared files and folders. The user cannot make any changes on your Mac.
- Guest User. This type of account that doesn’t need a password to log in. When a guest user logs out, all information and files in the guest’s Home folder are deleted.
- Group. A group account allows you to assign specific access privileges to all members of the group. Once the group is created, you can add existing users to that group.
If you want to permanently share your Mac with others, it’s best to choose the Standard user account for each person.
Steps to create a new user
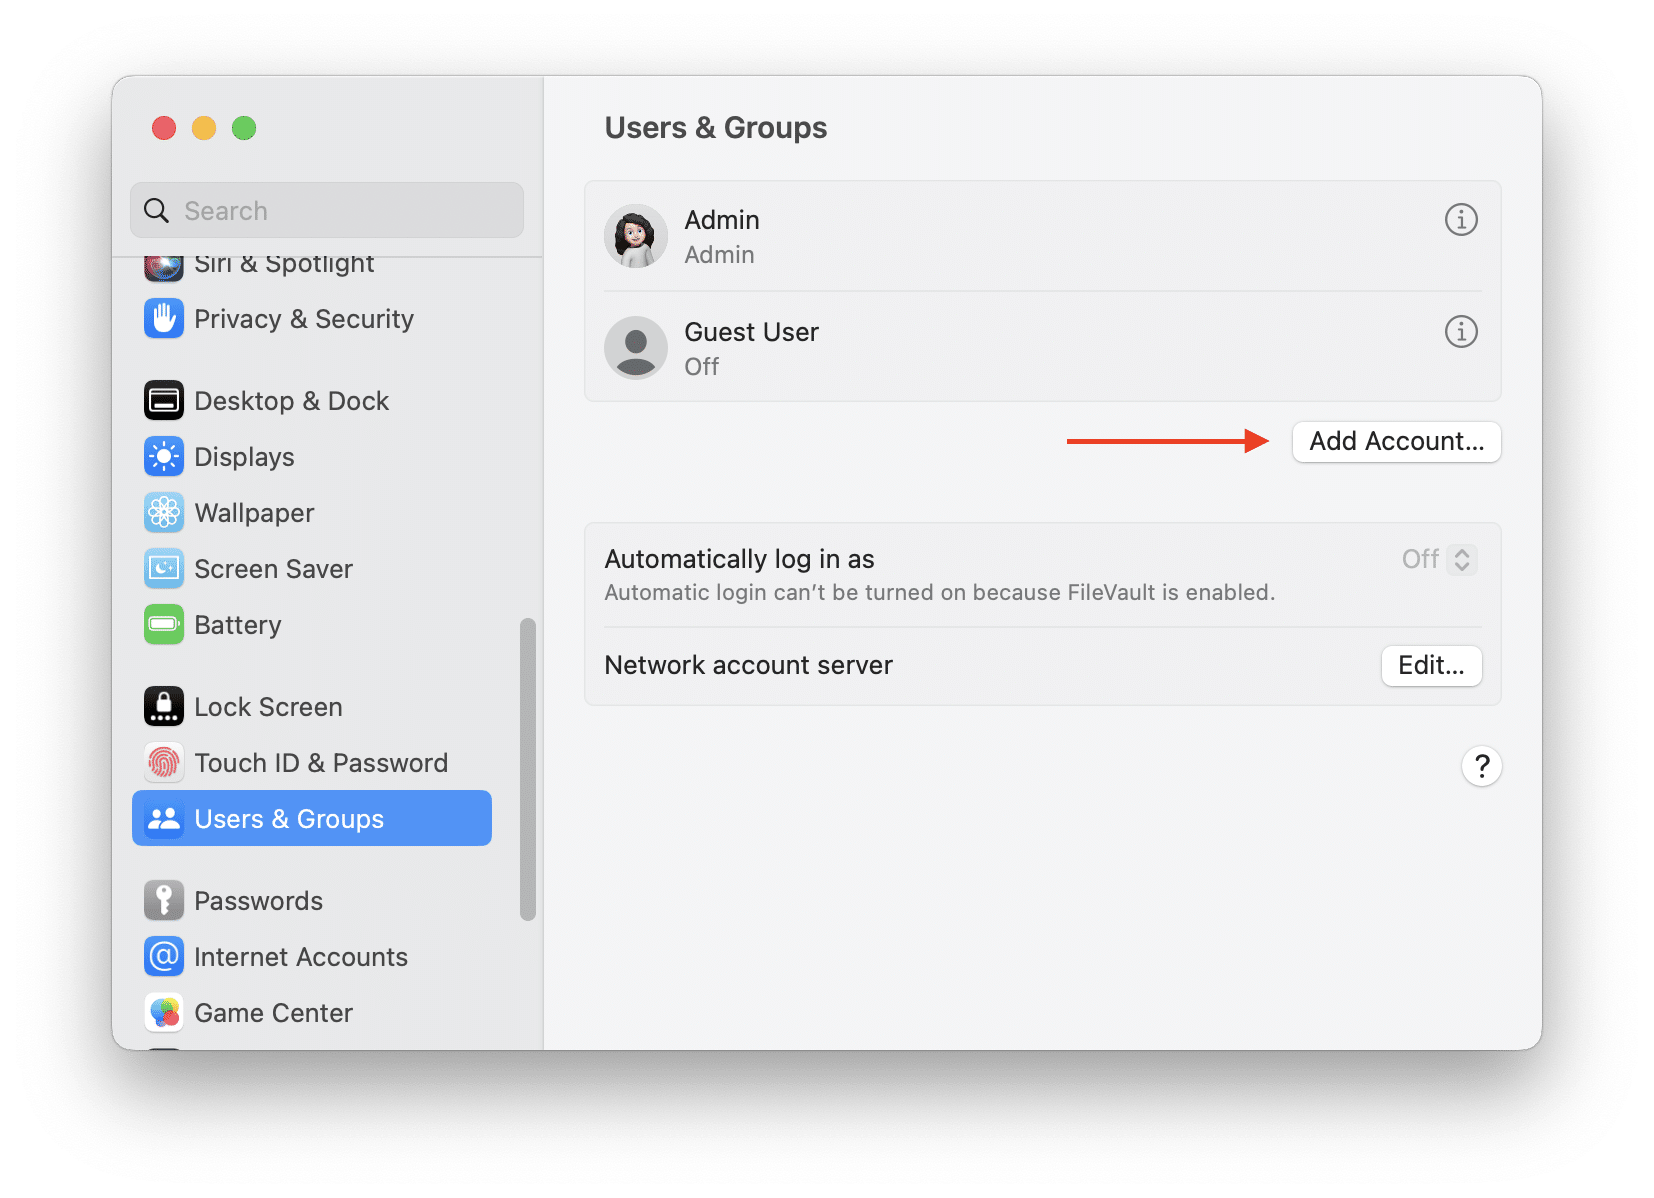
- Open System Settings.
- Click the Users & Groups option on the left.
- Click Add Account.
- Type your admin password to unlock.
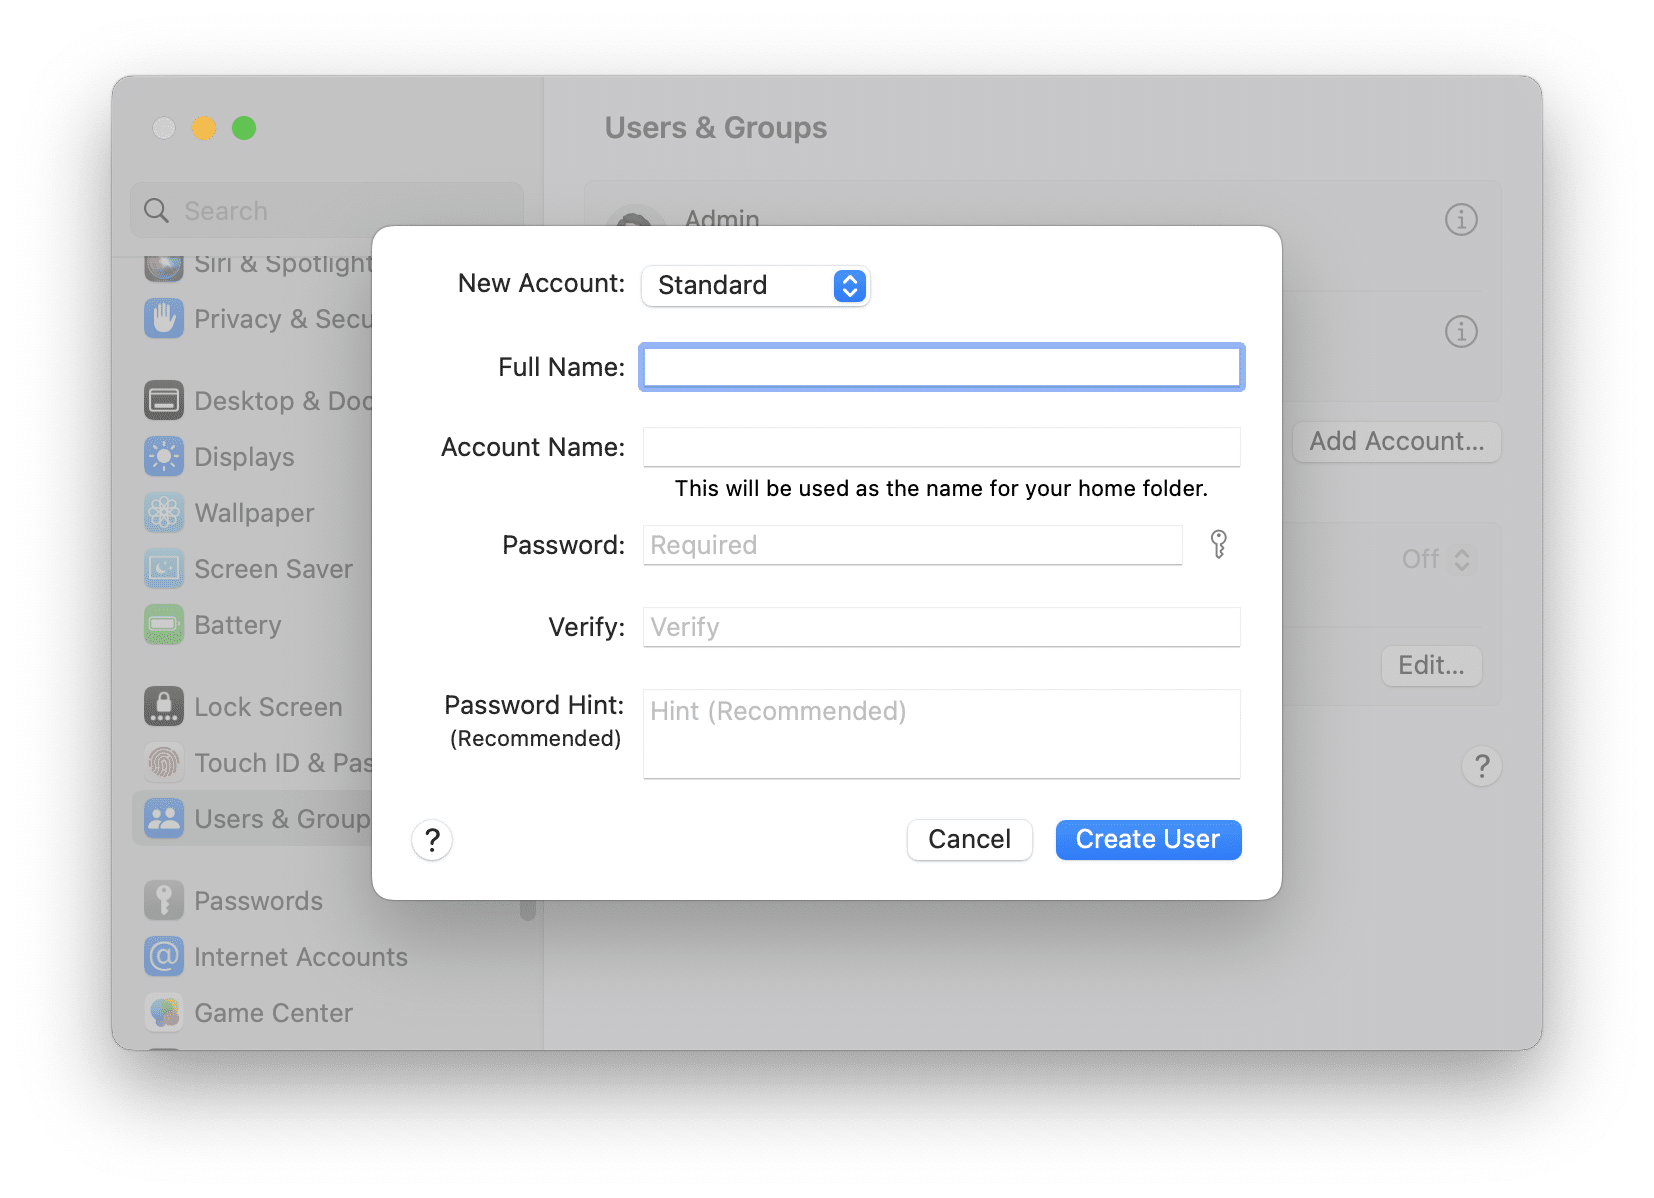
- In the window that appears, choose the type of account you want to provide. Then type in the account name*, account password, and password hint.
* Note that the account name will be used as the name for your Home folder. - Click Create User.
- A new user will appear in the user list in the left sidebar.
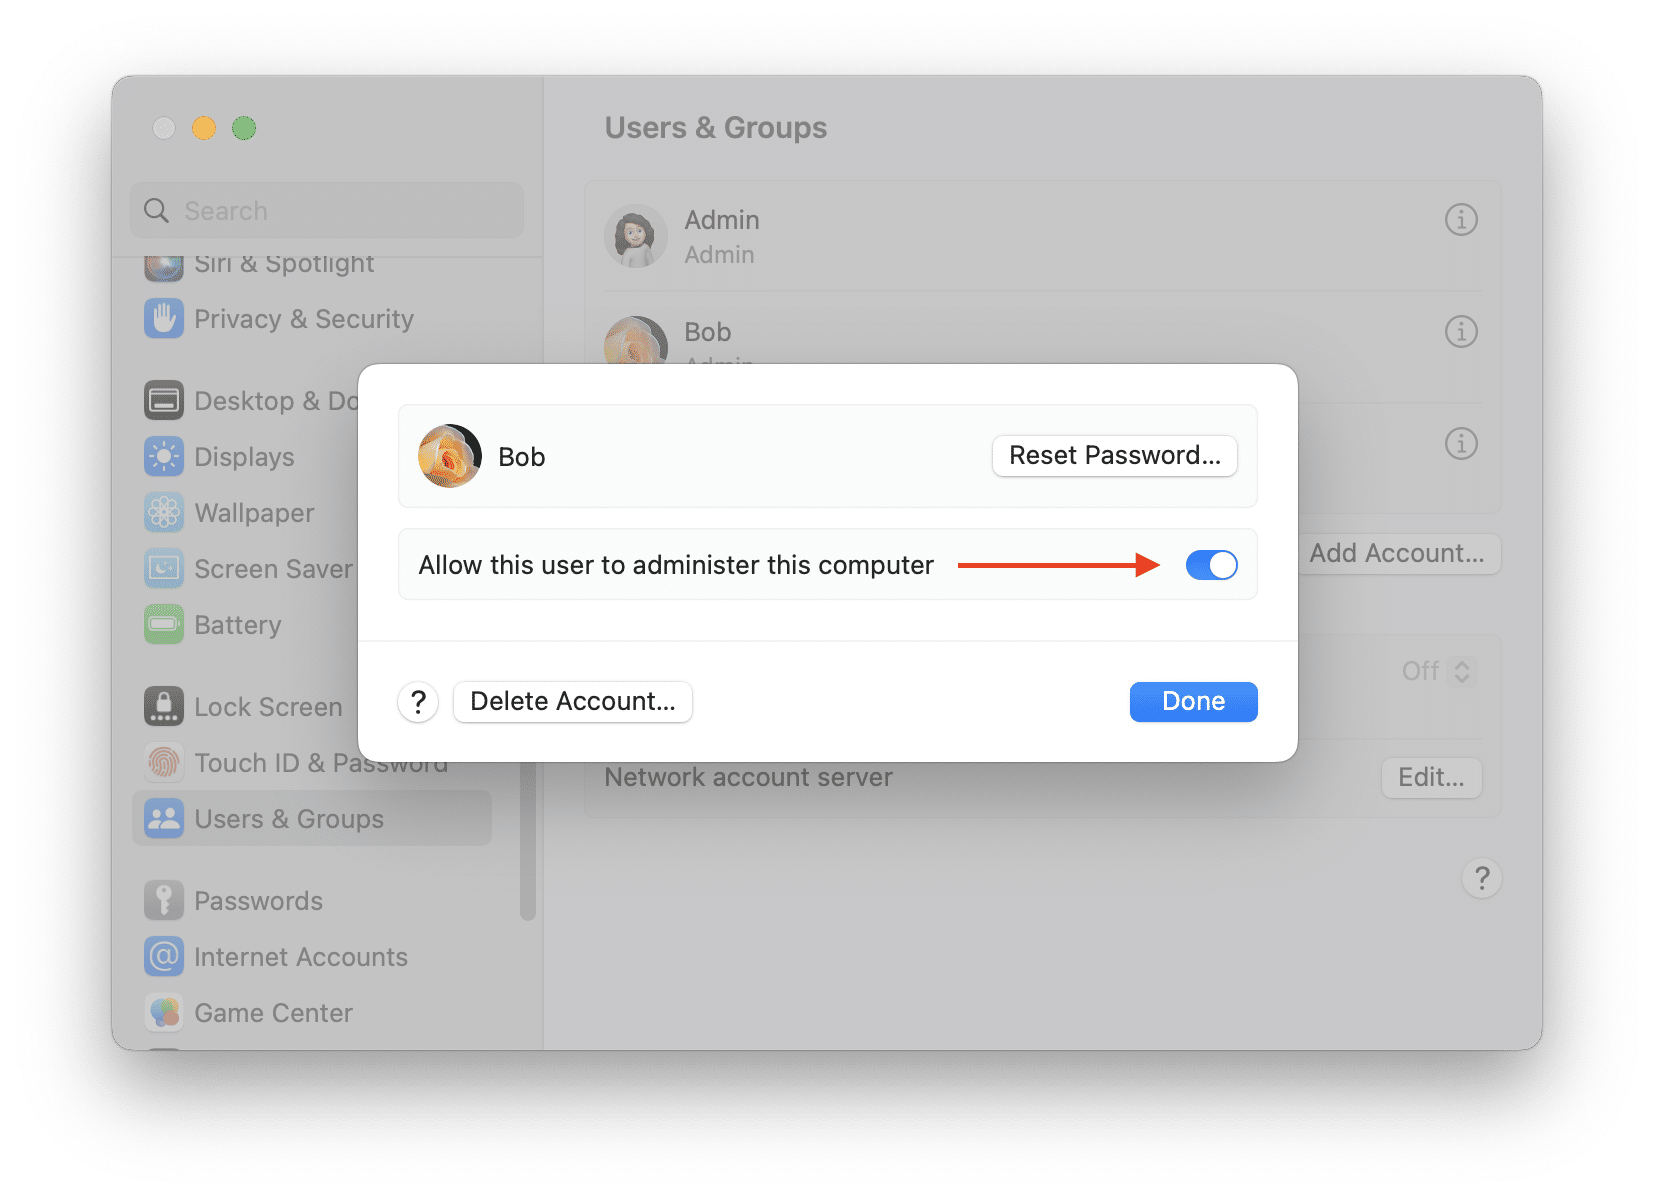
If you want to change a standard user to an administrator, enable this option in the user’s account settings.
How to delete a user on a Mac
Deleting an account is as easy as creating it. Here is how to delete an account on a Mac:
- Open System Settings
- Go to the Users & Groups section.
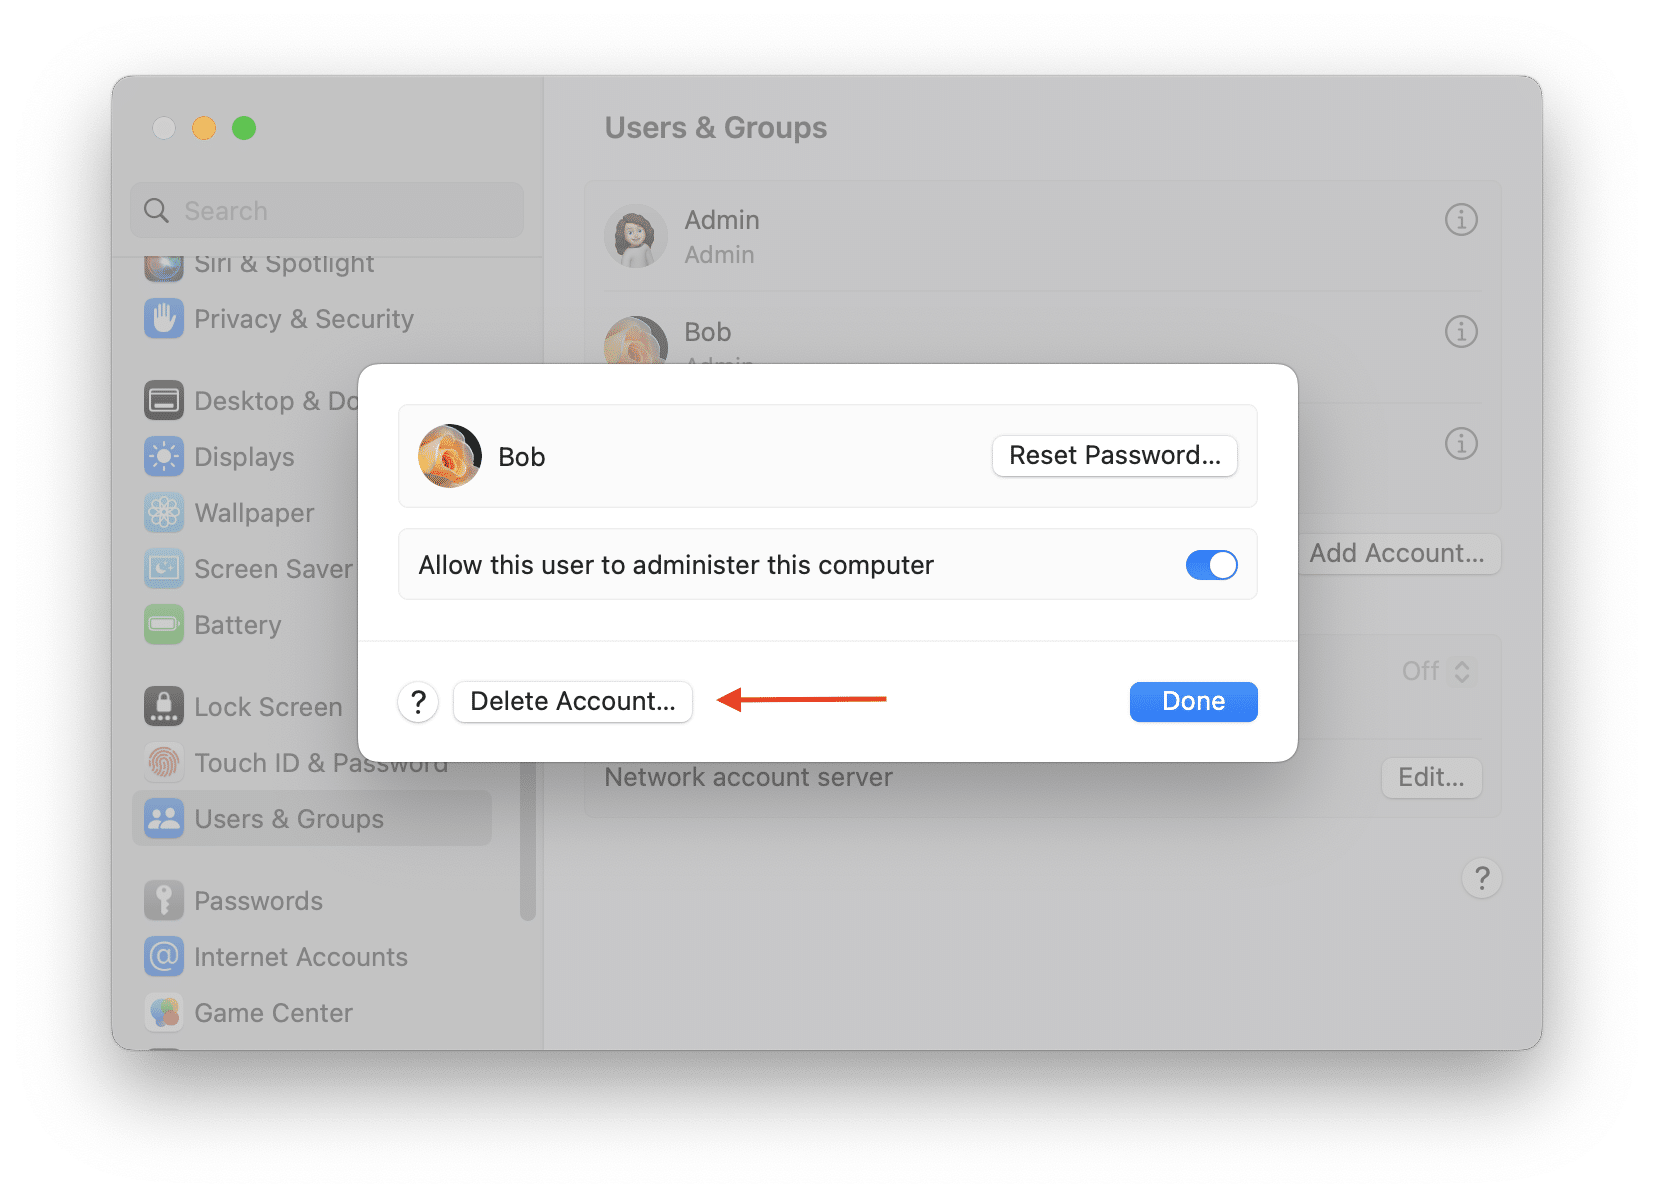
- Select the account you want to delete and click the “i” button.
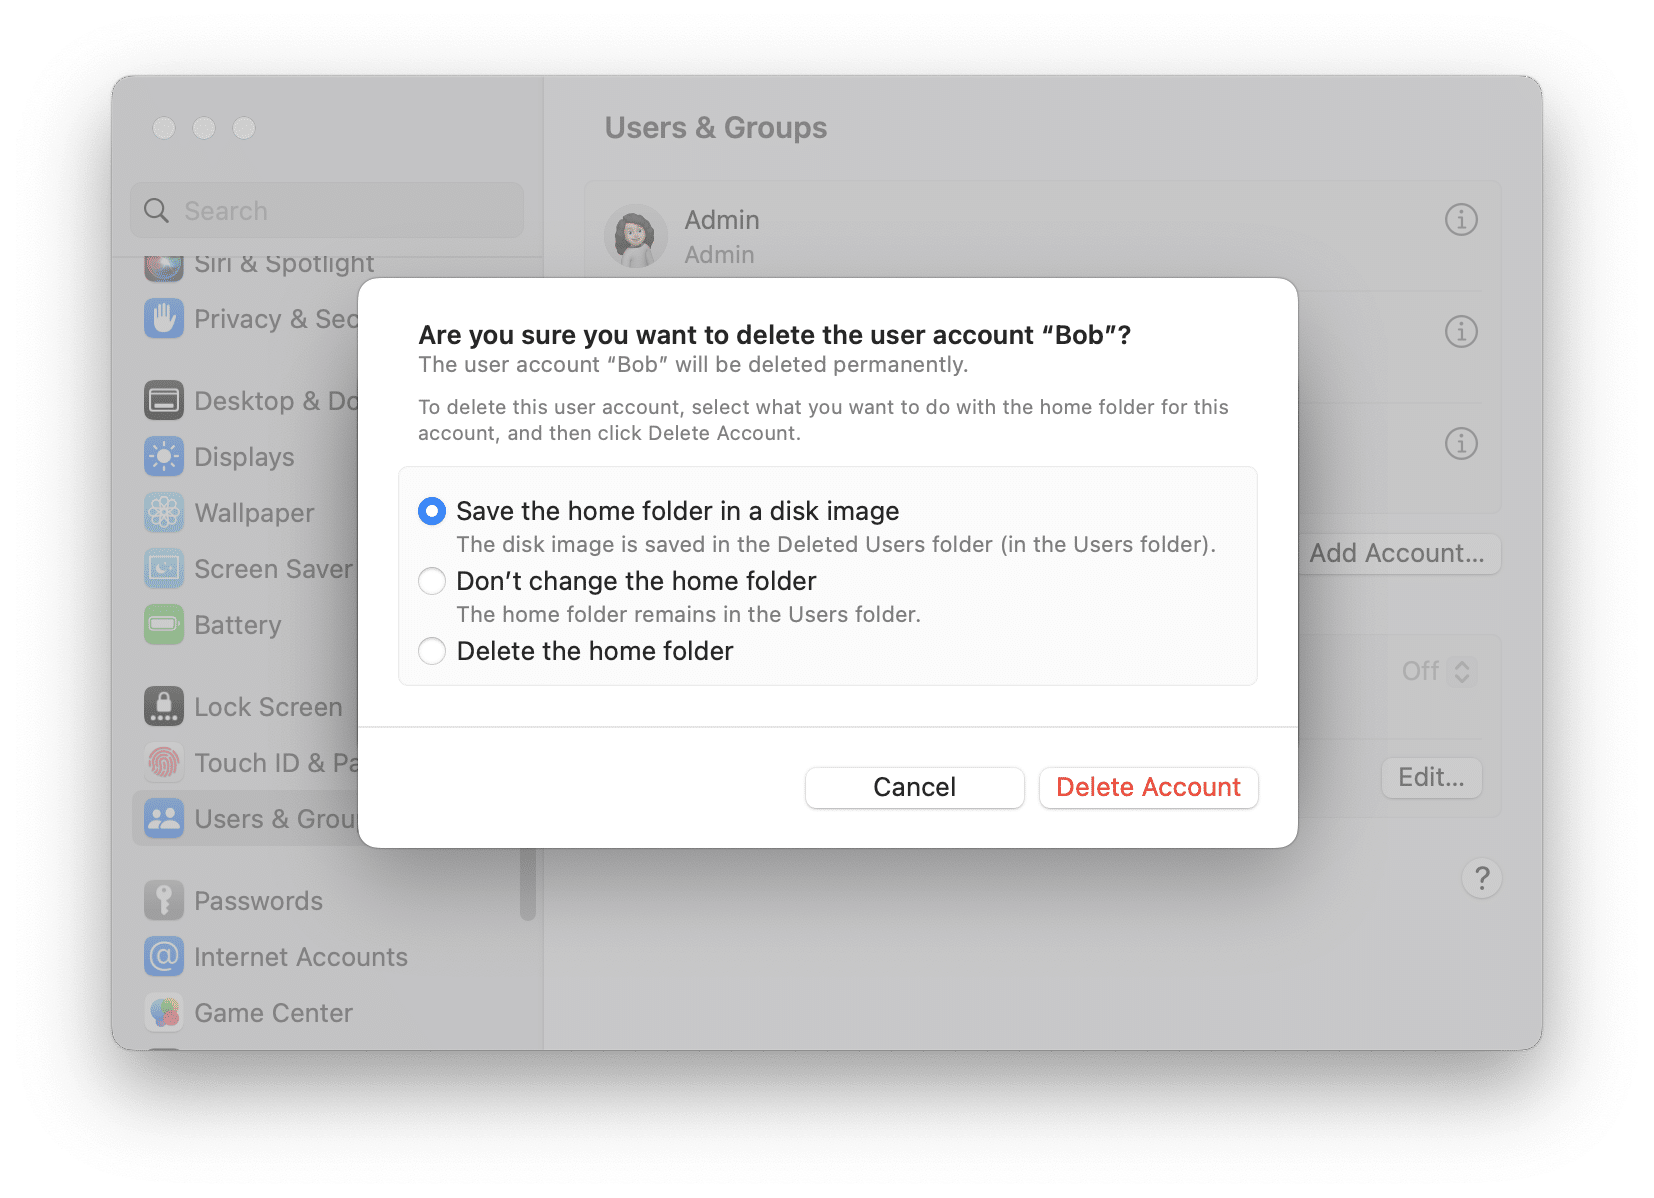
- Select what you want to do with the Home folder created for this user. You have a choice to save the folder to a disk image, keep it in the Mac’s Users folder, or delete it. If you have important files in this account, you may want to choose one of the first two options.
- Click Delete User.
How to change a username on a Mac
IMPORTANT: In the macOS, the account name and the Home folder’s name have to match exactly. We therefore recommend that you first back up your Mac in case something goes wrong when changing a username. This will protect you from losing important files and data.
Steps to change an administrative username on a Mac
- Create a backup copy of your Mac.
- Open System Setings and go to the Users & Groups section.
- Add a new administrator account.
- Reboot your Mac and log in to the new admin account.
- Open System Settings and go again to the Users & Groups section.
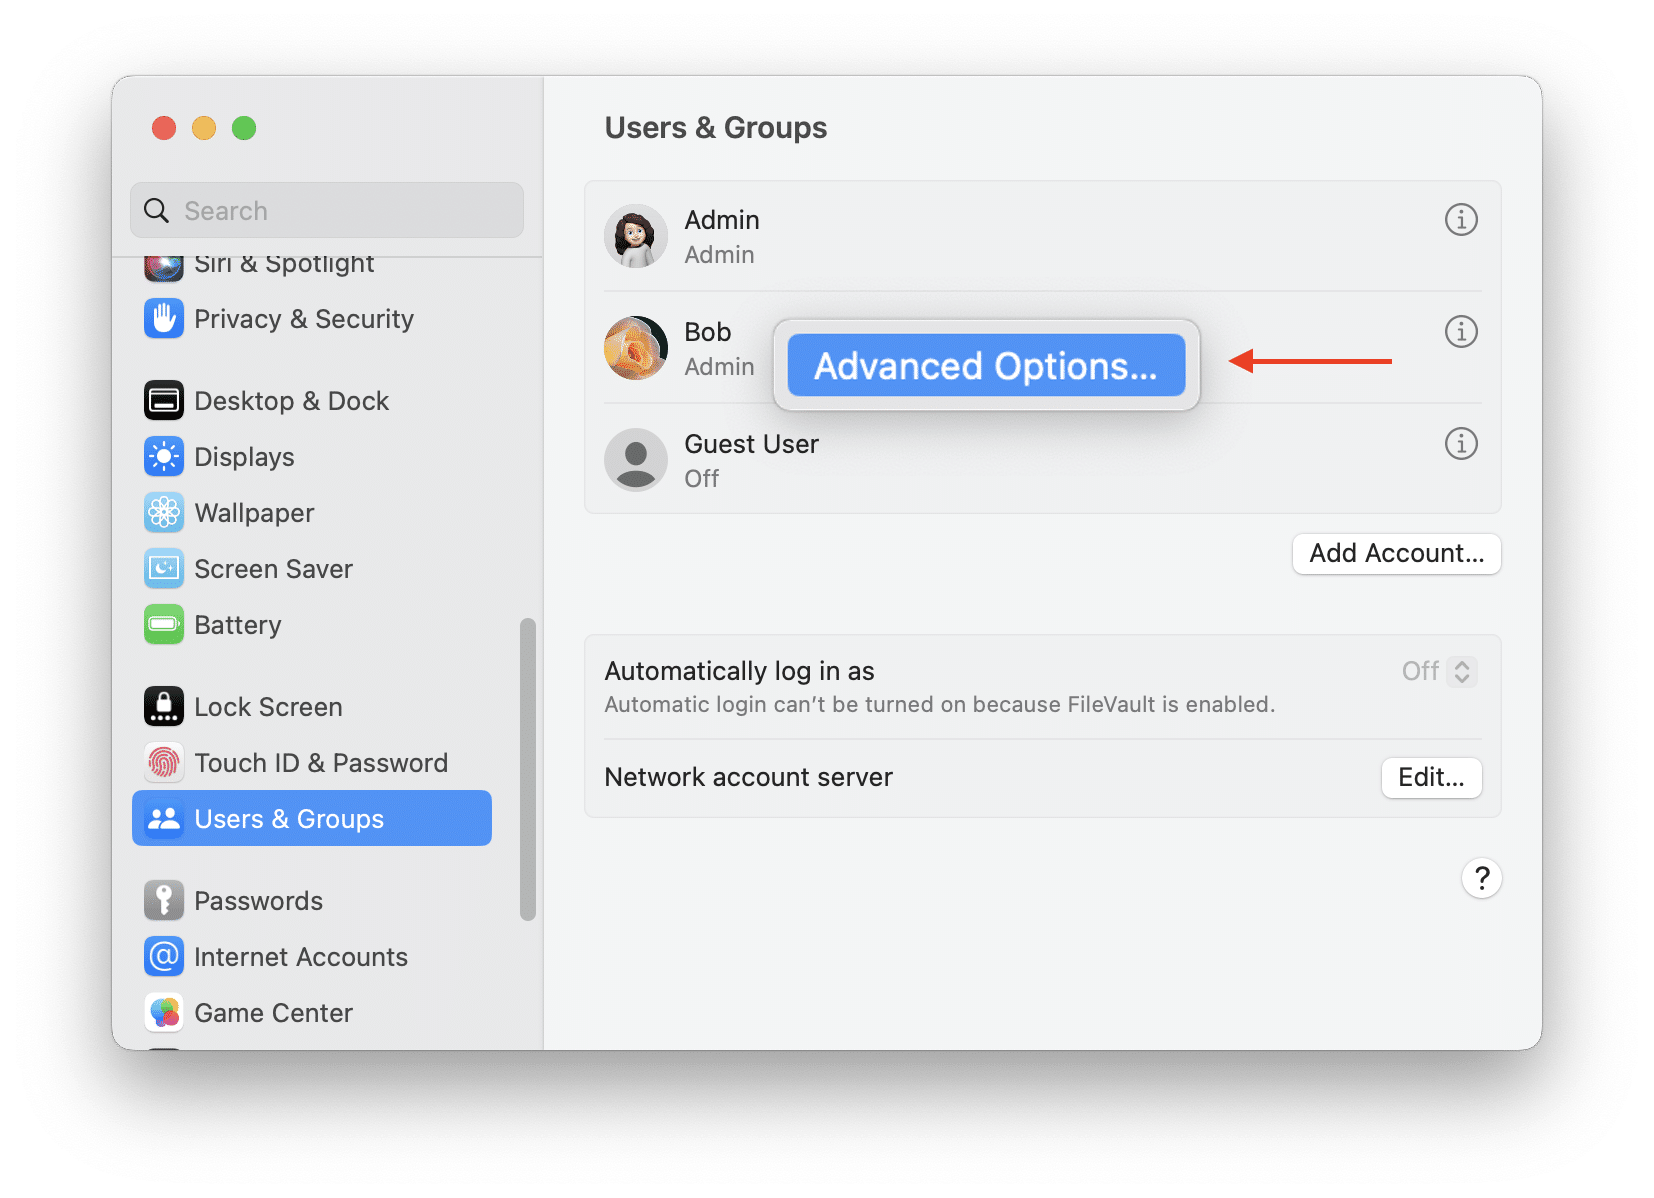
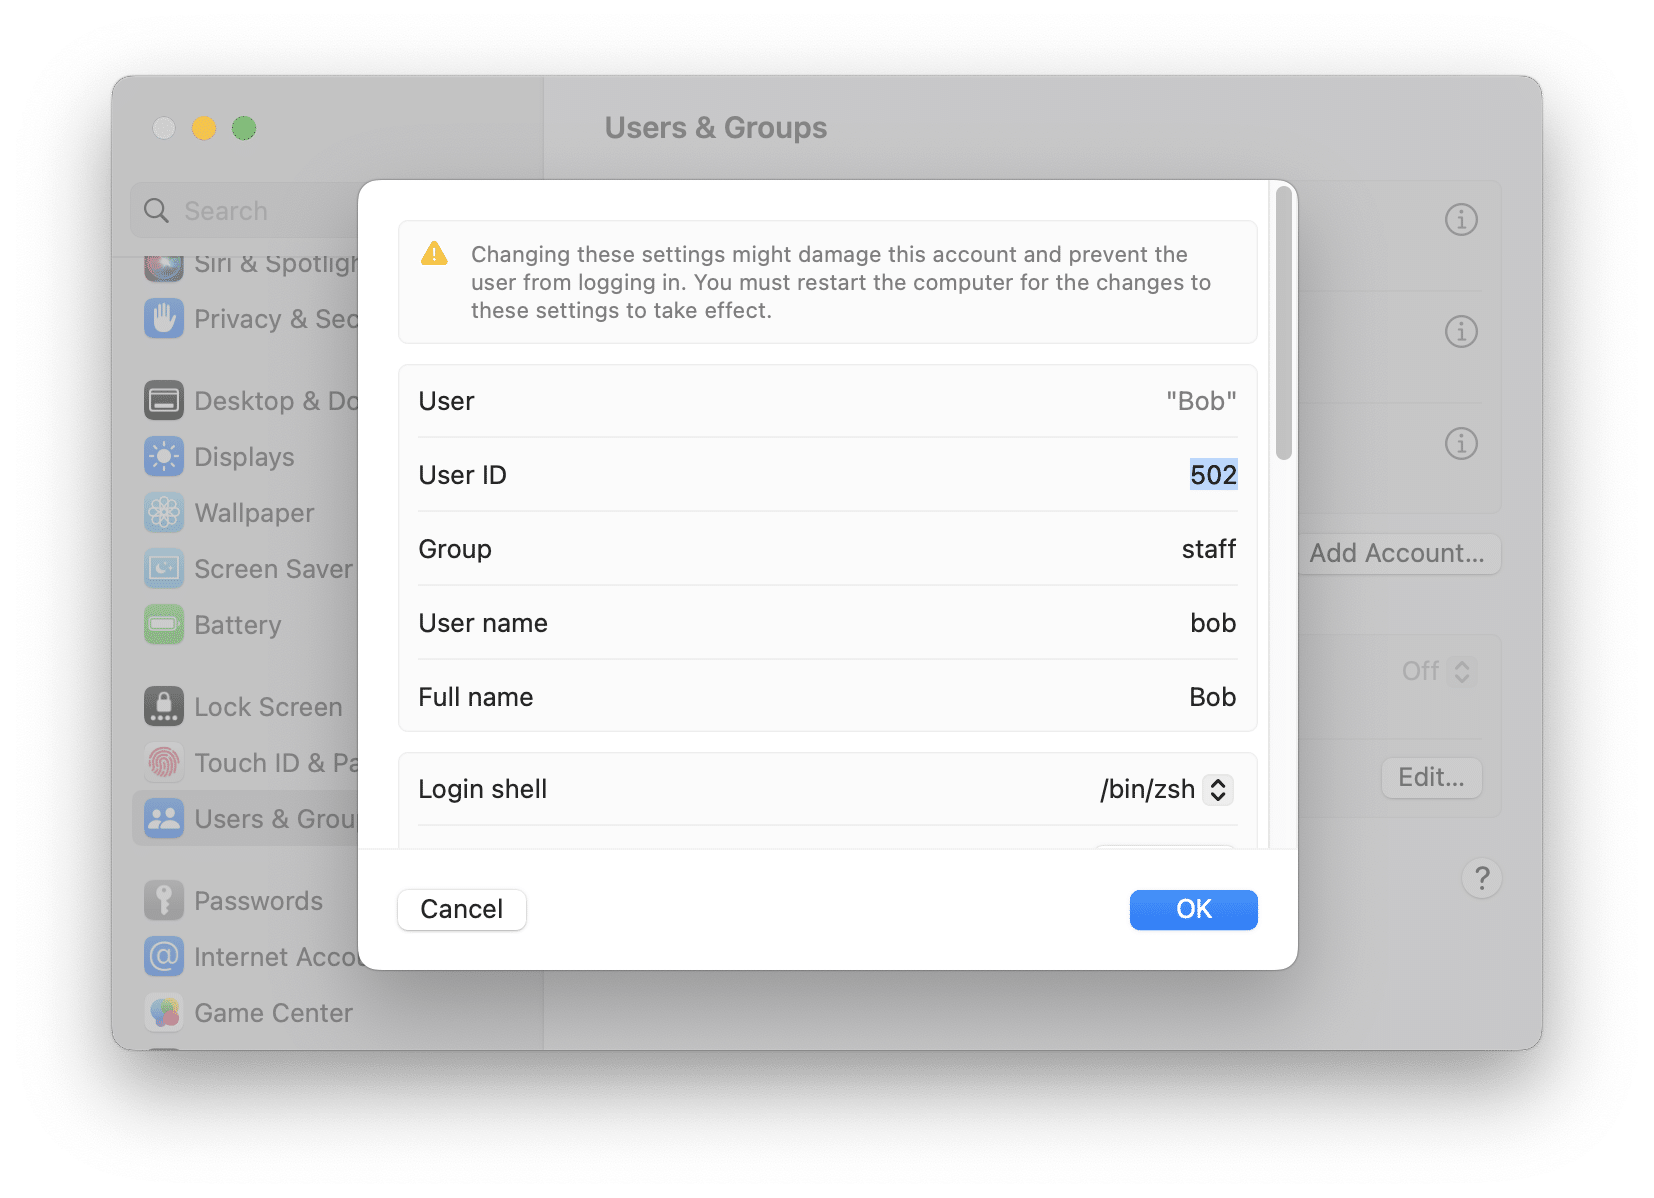
- Right-click the new admin user and select Advanced Options.
- Change the full name and account name. Edit the Home folder’s name so that it is identical to the account name. Please be careful when making these changes; if you make a mistake, you can lose your data and would then have to reinstall the backup you made in step 1.
- Click OK.
The task is done. If everything works fine, remove the old admin account.
How to change a standard username on a Mac
In case you want to change a username for a standard user account, the steps differ from the guide above. You will not have to create a new account for this. Follow the steps below:
- Create a backup copy of your Mac.
- Open System Preferences and click on the Users & Groups icon.
- Click the Lock icon at the lower left of the window and type in your admin password to allow changes.
- Right-click the user and select Advanced Options.
- Change the full name and account name.
- Open the Finder and rename your Home folder with the new account name you provided in step 5. Please make sure the folder’s name is identical to the account name from step 5. If you make a mistake here, you can lose your data and would then have to reinstall the backup you made in step 1.
- Click OK.
How to switch users on a Mac
If you have created one or more user accounts on your Mac, you have to know how to switch between them. Here is how:
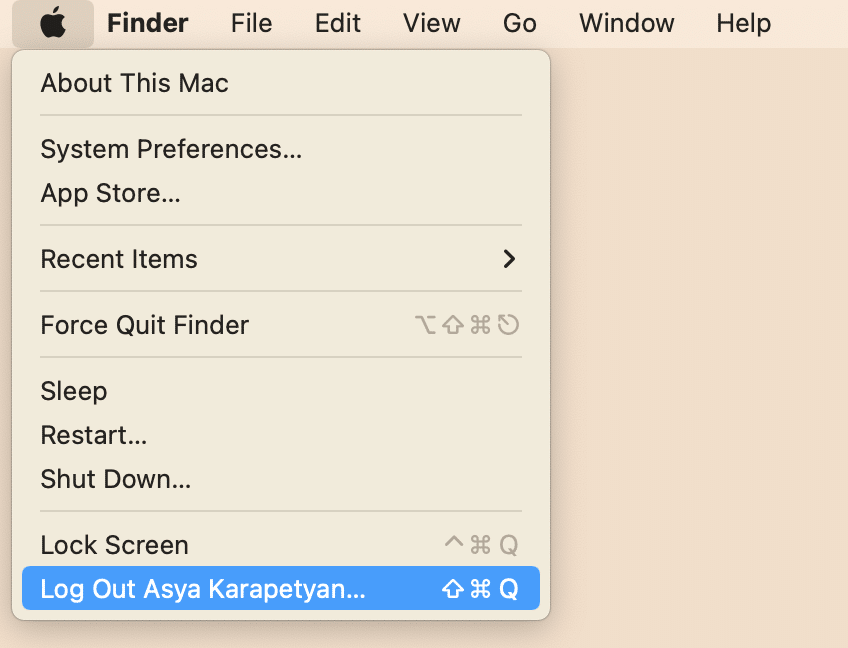
- Go to the Apple Menu.
- Select Log Out. You can also use the keyboard shortcut Cmd+Shift+Q for this.
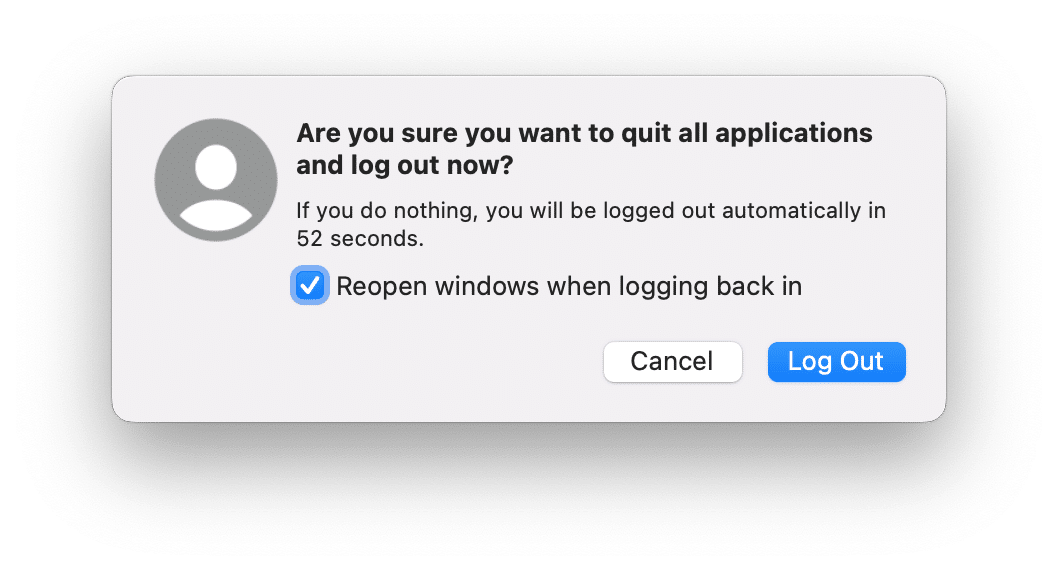
- In the window that appears, click Log Out to confirm. Here you can enable the option to automatically reopen the currently open windows when you log back in.
- In the Login window, click Switch Account.
- Choose another user account, provide the password, and press Enter (Return).
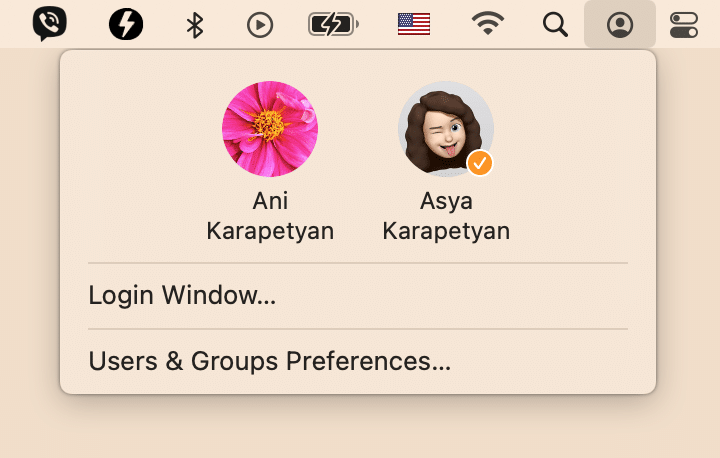
If you want to quickly switch between the users on your Mac, you can do this right from the Menu Bar or Control Center. But first you need to enable this option:
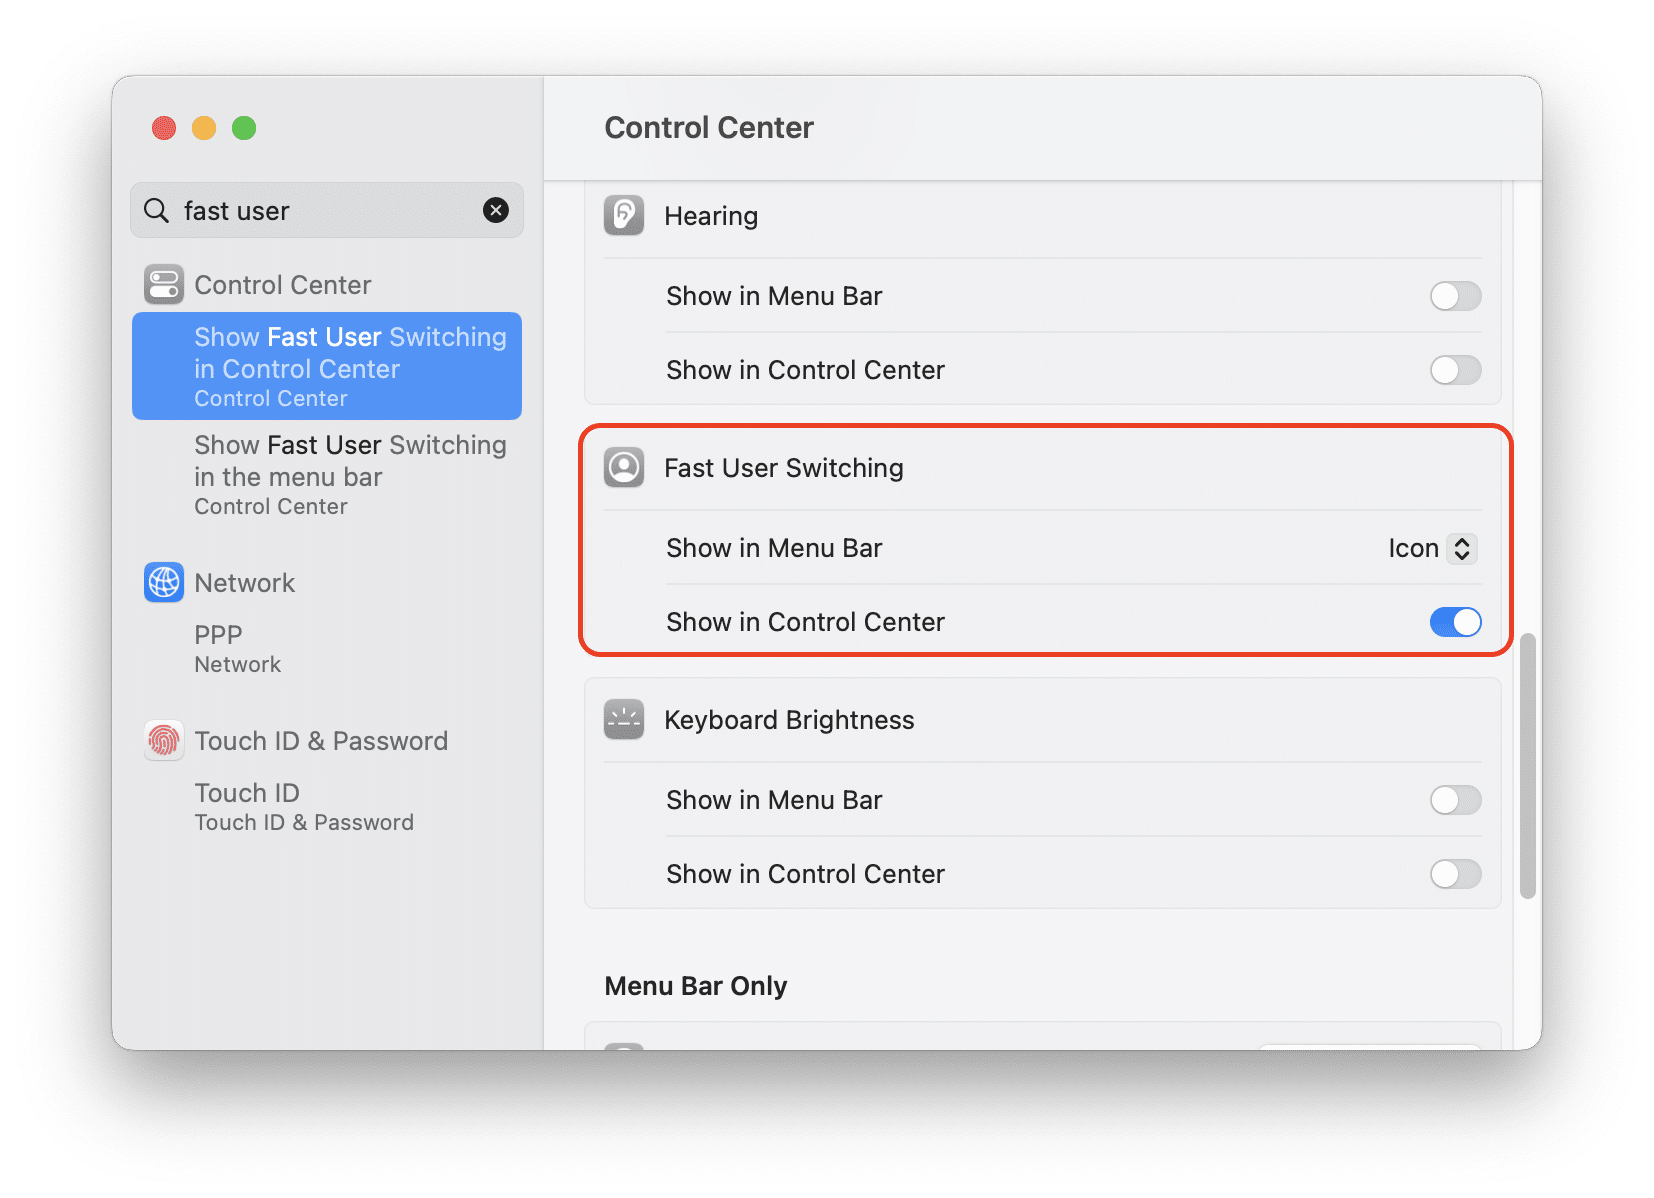
- Open System Settings.
- Go to the Control Center section
- Scroll down and find Fast User Switching.
- Enable “Show in Menu Bar.” If desired, you can also enable the option to “Show in Control Center.”
- Now you can click the User icon in the Menu Bar and switch to another user account.
Conclusion
We hope this article helped you create a new user or enable the Guest user on your Mac. If you still have questions, feel free to write them in the discussion section below.
