If you want to use a USB on your Mac, you may need to format it first. This article will explain the best format for a flash drive, how to format a USB drive on a Mac using Disk Utility, and how to easily manage any disk on your Mac.
Contents:
- What is formatting the USB drive?
- Best format for flash drive
- How to format a USB drive on a Mac
- How to manage any disk on your Mac
Before we start
Disk Space Analyzer checks the storage usage on a Mac or any external storage and helps find what uses the most space. Download a free trial and find bulky content on your disk.
Disk Space Analyzer
What is formatting the USB drive?
Formatting a USB drive involves the process of erasing all existing data on the device and configuring it with a new file system. This procedure essentially resets the USB drive and creates a file system that allows the operating system to read and write data on the disk. Formatting a USB can be useful for various reasons, such as:
- Removing viruses or malware that may have infected the drive.
- Repairing corrupted or damaged sectors that may cause errors or data loss.
- Changing the file system to make the drive compatible with different operating systems or devices.
- Creating partitions to organize the data or install multiple operating systems on the same disk.
- Increasing the performance or reliability of the disk by optimizing the allocation of space and resources.
Best format for flash drive
There are many file formats that exist for different purposes, such as storing documents, images, videos, audio, and more. However, when it comes to flash drives, the most important thing is the file system, which determines how the data is organized and accessed on the disk.
The file system also affects the compatibility of the flash drive with different operating systems, such as Mac and Windows. Some common file systems are FAT32, exFAT, NTFS, and APFS. Each has advantages and disadvantages, such as maximum file size, performance, security, and reliability.
If you want to use a flash drive to work on both Mac and Windows operating systems, the best format for a flash drive is **exFAT**. This file system is supported by both Mac and Windows, and it can handle files larger than 4GB, unlike FAT32. It is also faster and more efficient than NTFS on Mac.
How to format a USB drive on a Mac
Formatting a USB drive will erase all the data on it, so ensure you have a backup of any important files before proceeding. Here’s how to format a USB drive on a Mac using the built-in USB formatter – Disk Utility.
Here’s how to reformat a USB drive with Disk Utility:
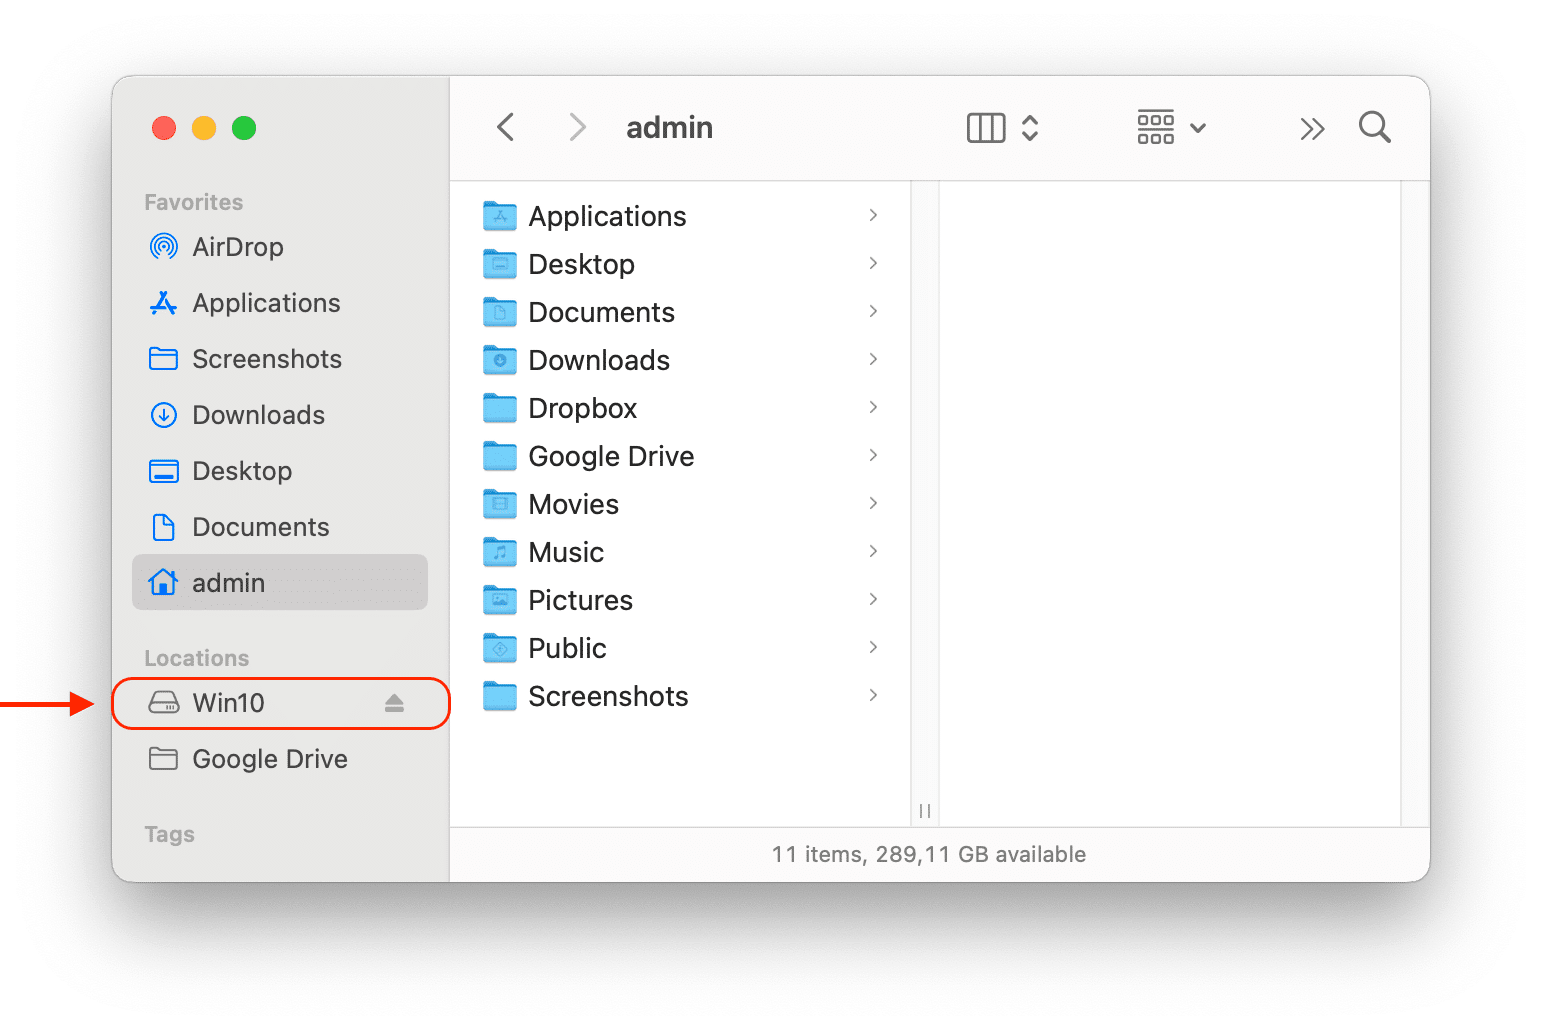
- Connect your USB to your Mac. You should see the appropriate icon on your desktop or the Finder sidebar.
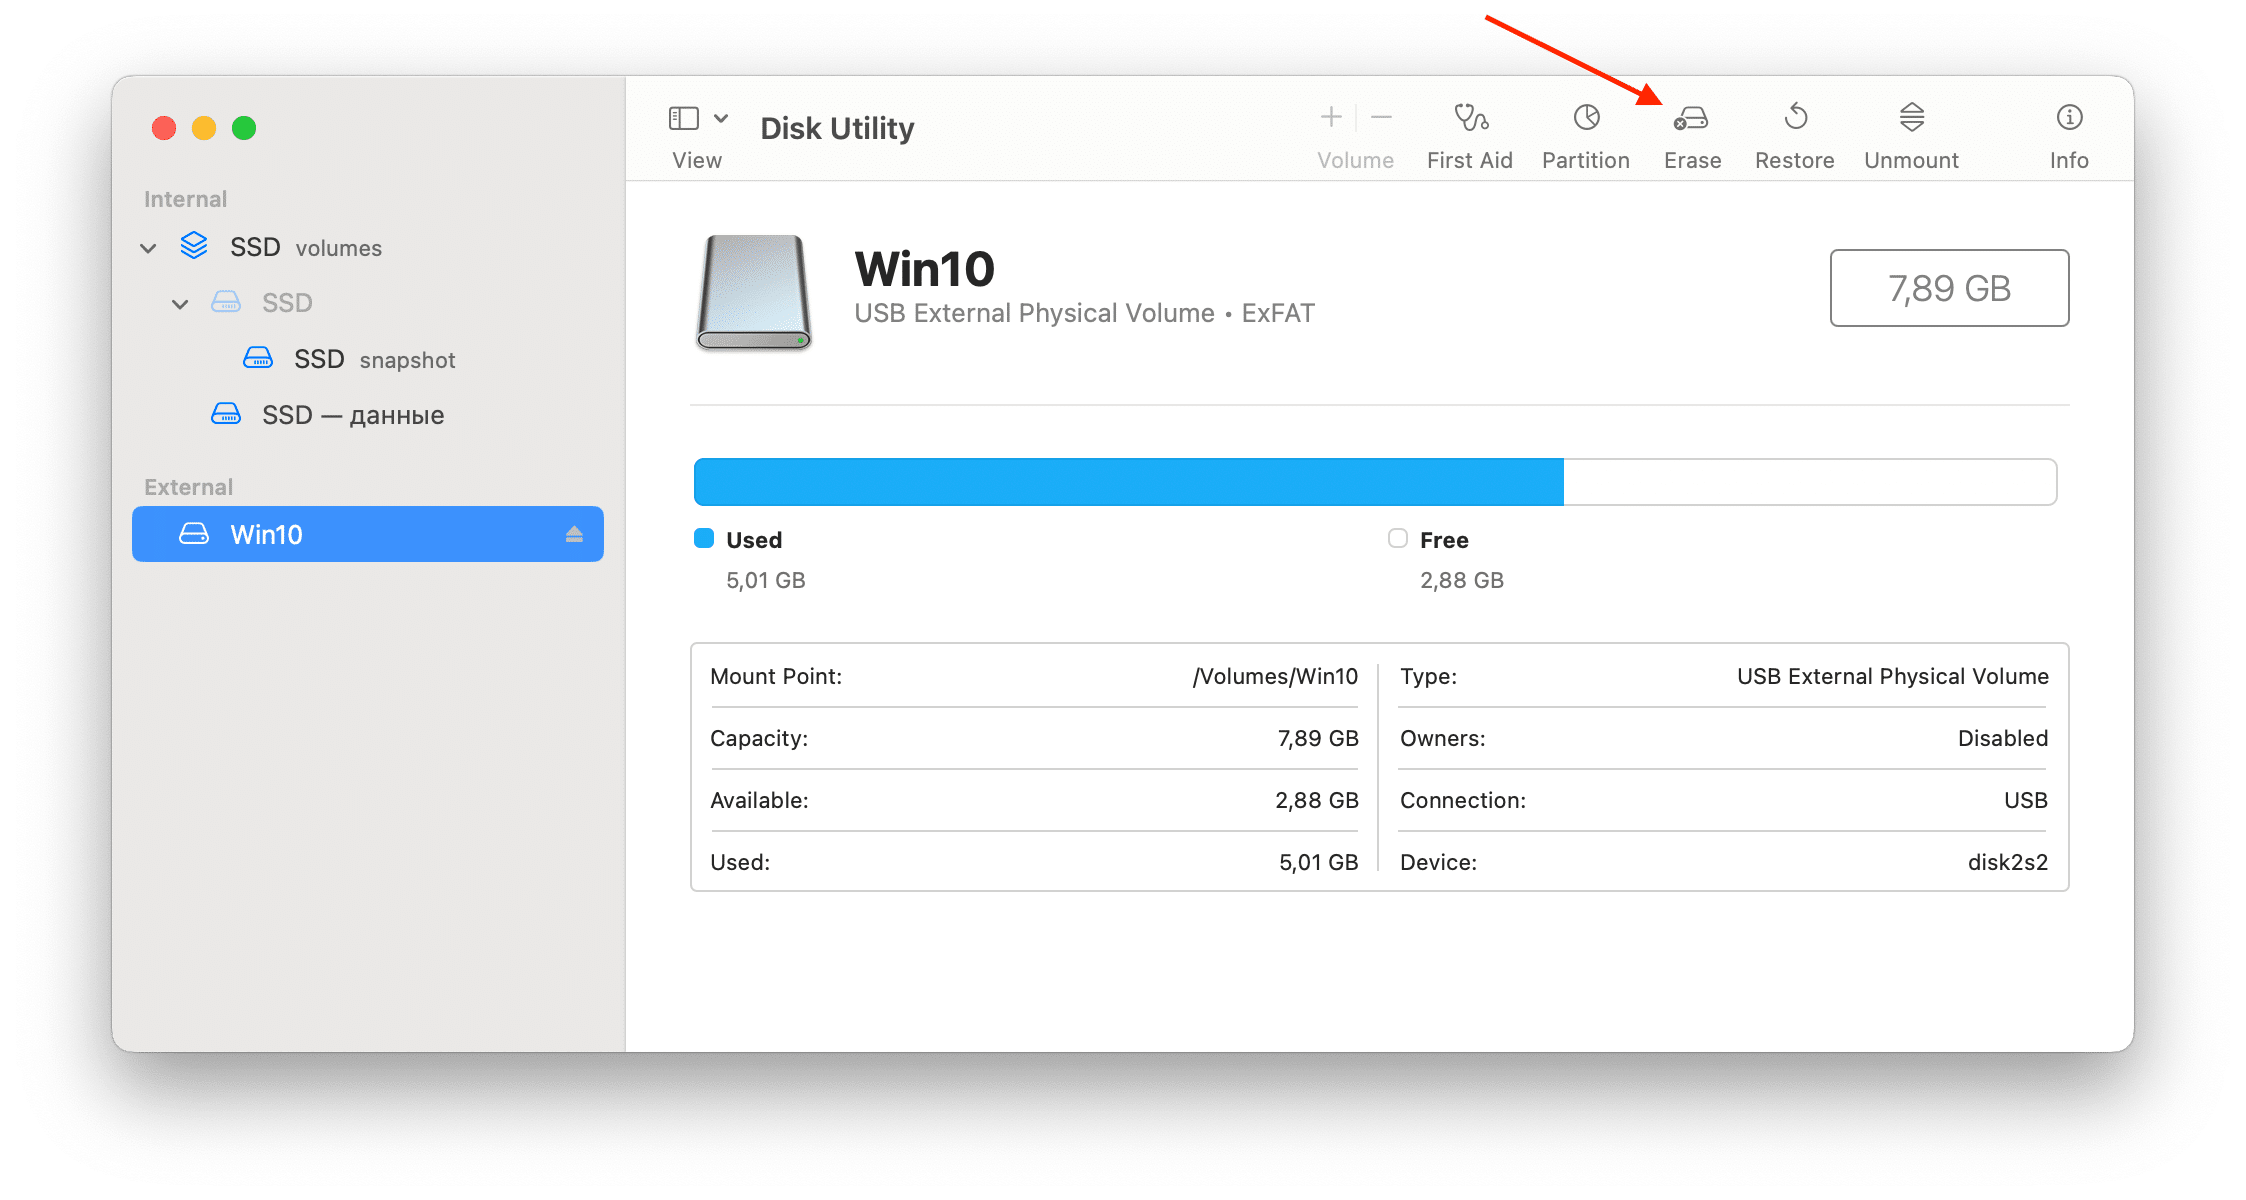
- Open Disk Utility. You will find it in the Applications folder → Utilities.
- In Disk Utility, you will see a list of all the connected drives on the left sidebar. Select your USB by clicking its name. It should be under the “External” section.
- Then, click the Erase button at the top of the window.
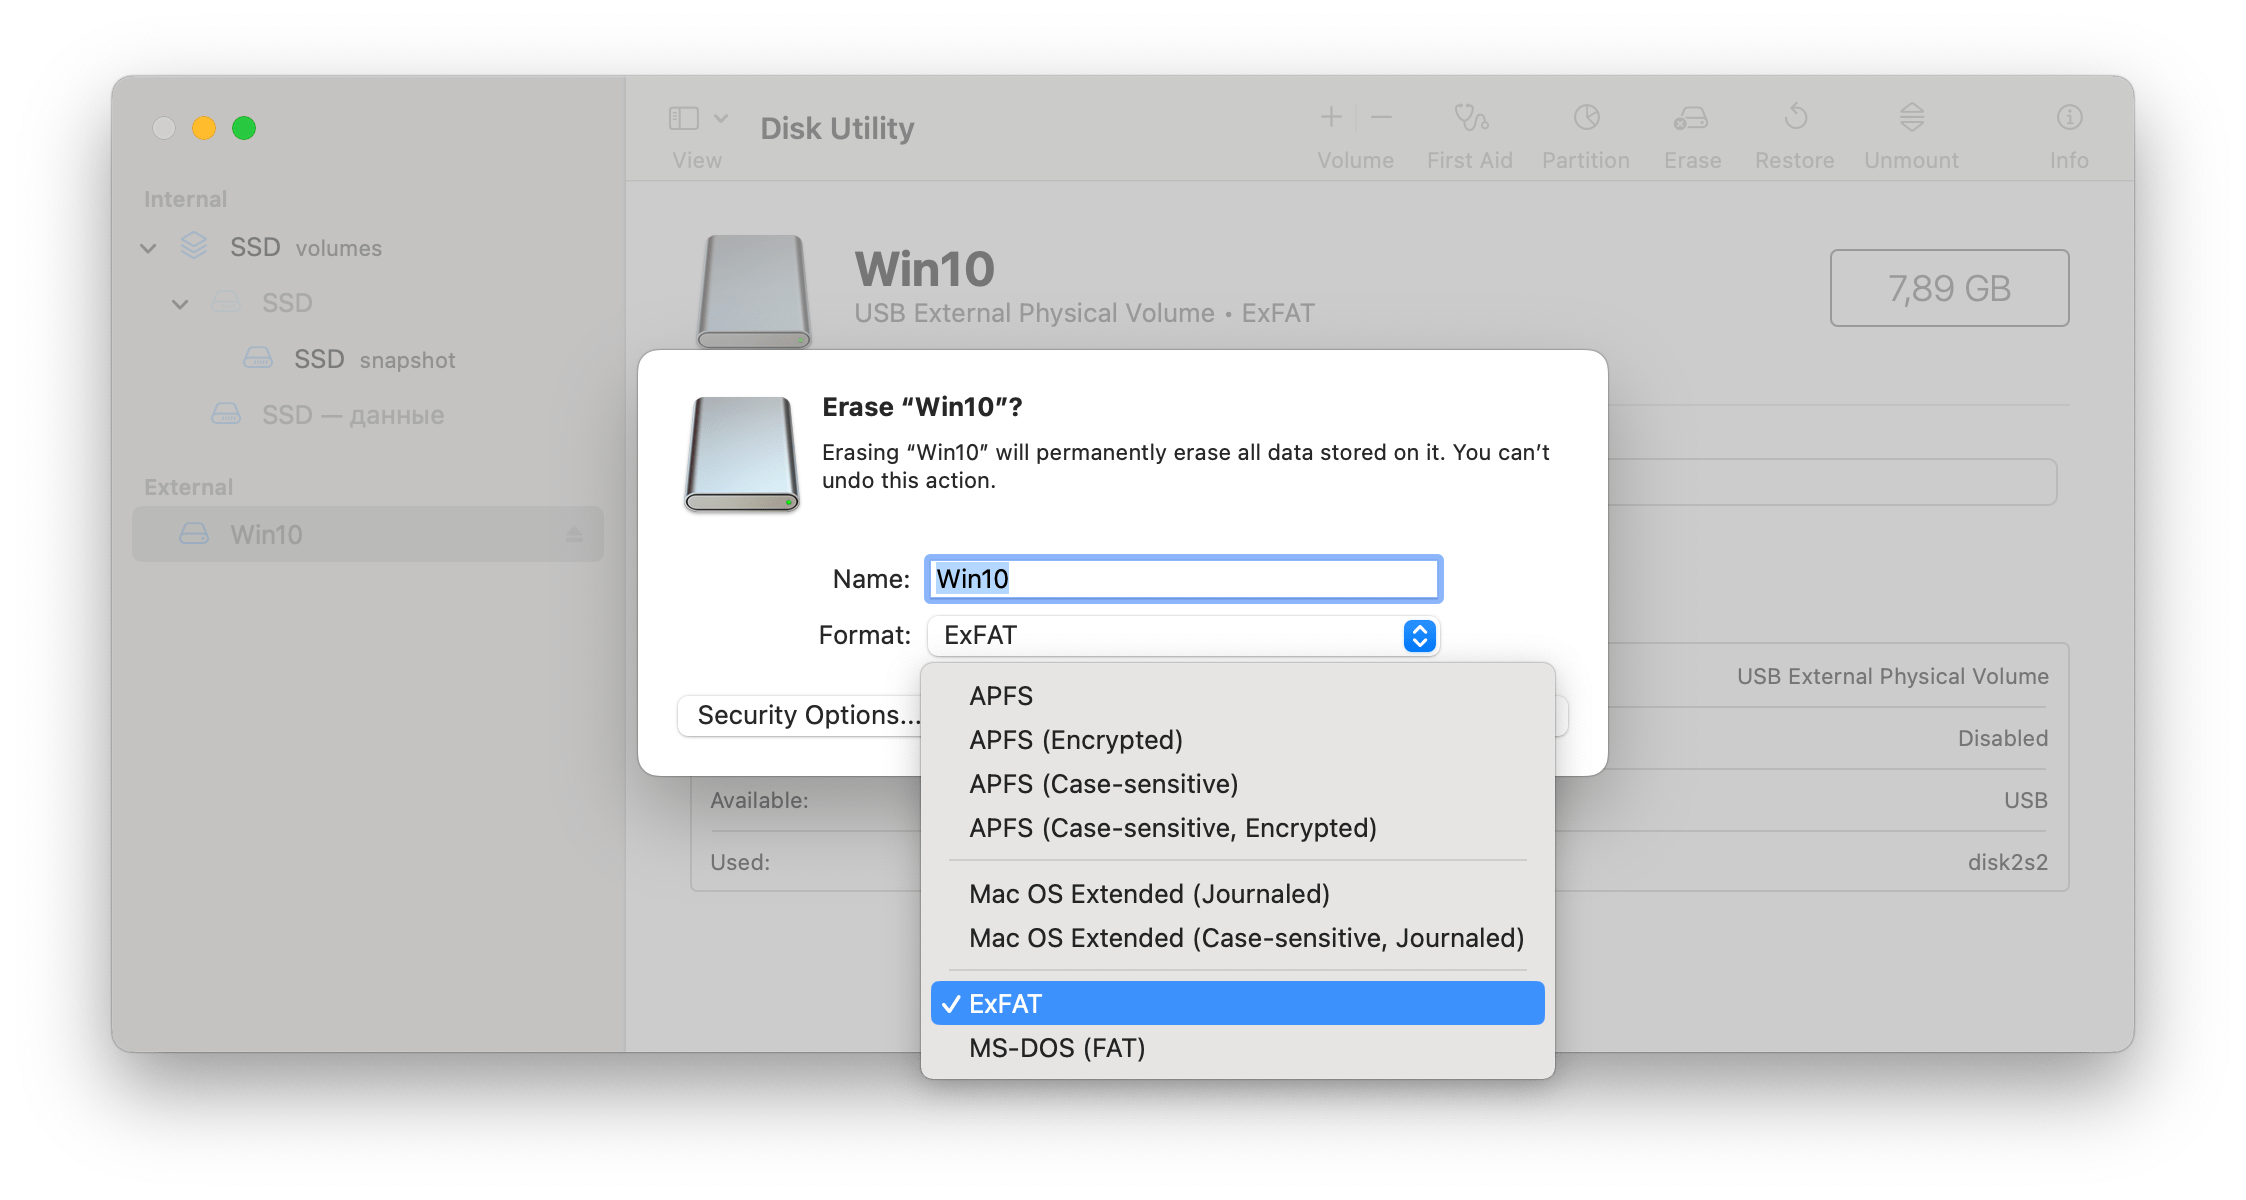
- This will open a dialog box where you can choose the name, format, and scheme for your USB drive.
-
Choose a name, format, and scheme for your USB drive. There are several formats to choose from, but the most common ones are:
- OS X Extended (Journaled) – this is the default file system for Macs. It supports all the features of macOS, such as encryption, permissions, and Time Machine backups. However, it is not compatible with Windows or other operating systems. Use this format if you only plan to use your USB drive with Macs.
- exFAT – a file system that works with both Macs and Windows PCs. It can handle large files and volumes, unlike the older FAT32 format. Use this format if you want to use your USB drive with different devices and operating systems.
- MS-DOS (FAT) – an old file system that is compatible with almost all devices and operating systems, including Macs, Windows PCs, TVs, game consoles, etc. However, it has some limitations, such as a maximum file size of 4 GB and a maximum volume size of 32 GB. Use this format only if you need to use your USB with very old or specific devices.
- Click Erase and wait for the process to complete. Depending on the size and speed of your USB device, it may take from a few seconds to several minutes.
- Click Done to close the dialog box once the process is done.
Your USB drive is now formatted and ready to use.
How to manage any drive on your Mac
When a disk is running a low disk space, this can affect your system performance and limit your ability to store new files. Fortunately, there is a solution: Disk Space Analyzer from Nektony. This is a powerful tool that helps you manage any drive on your Mac, whether it is an internal disk, an external disk, or a cloud storage service.
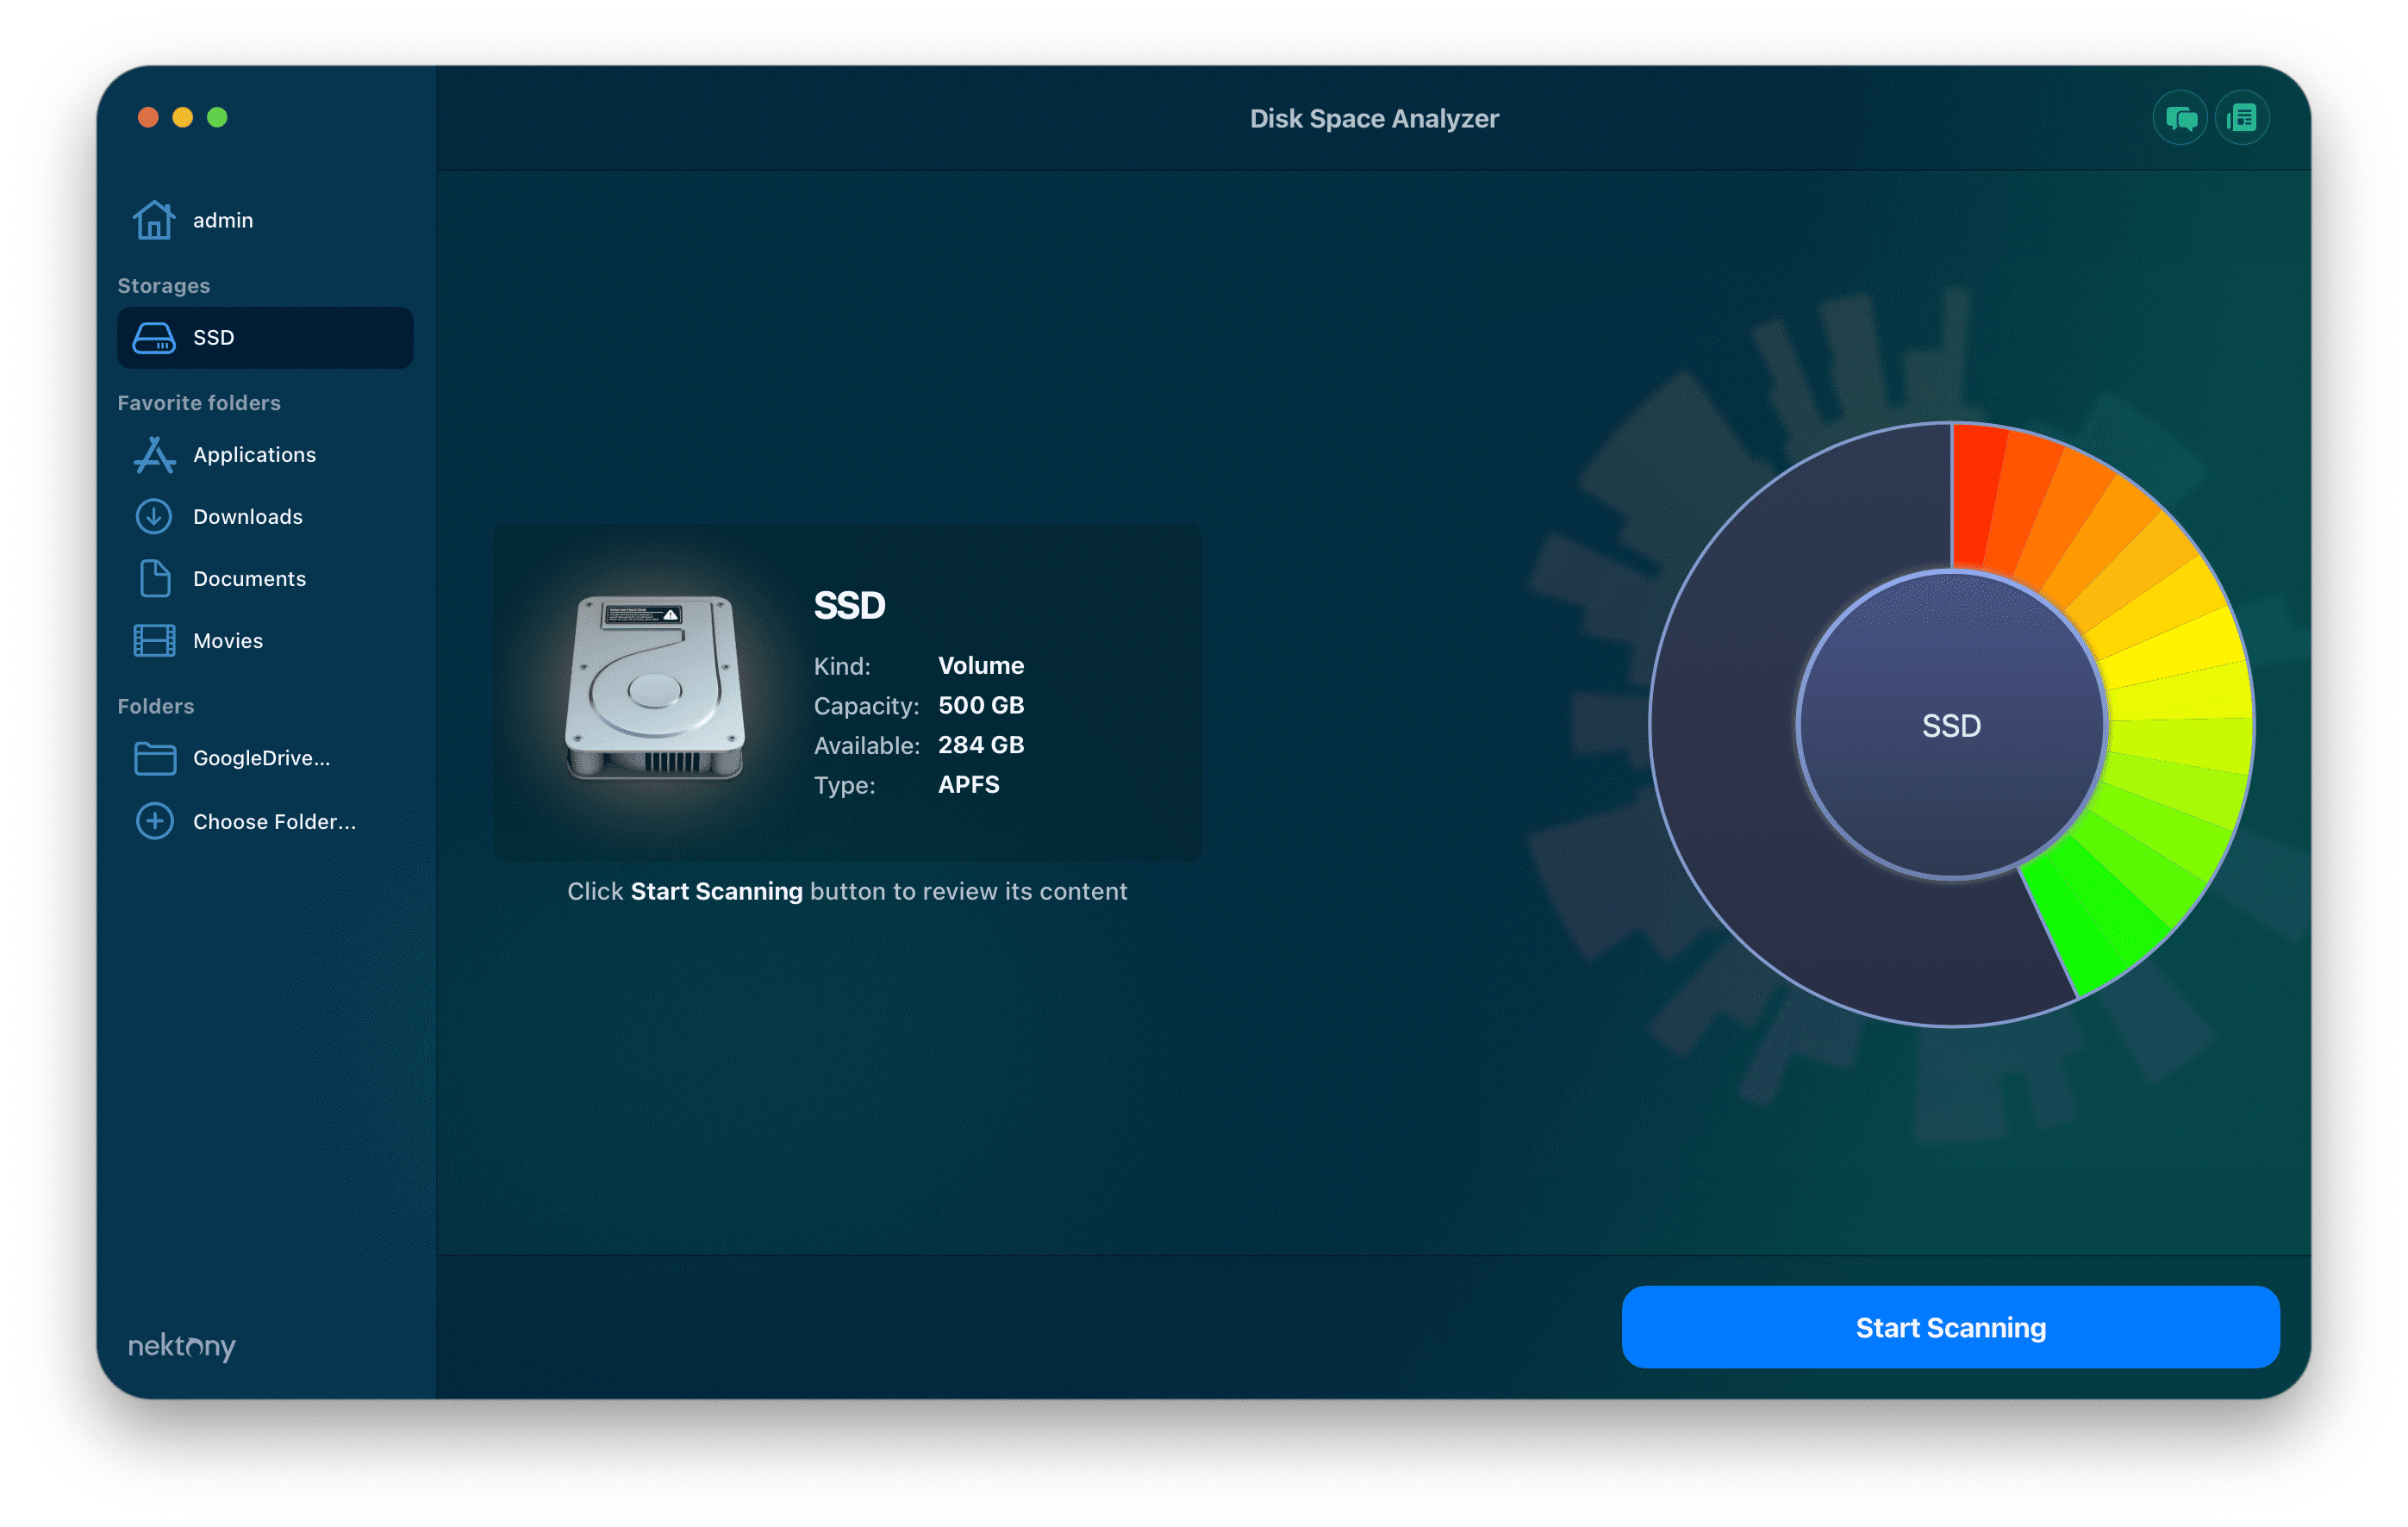
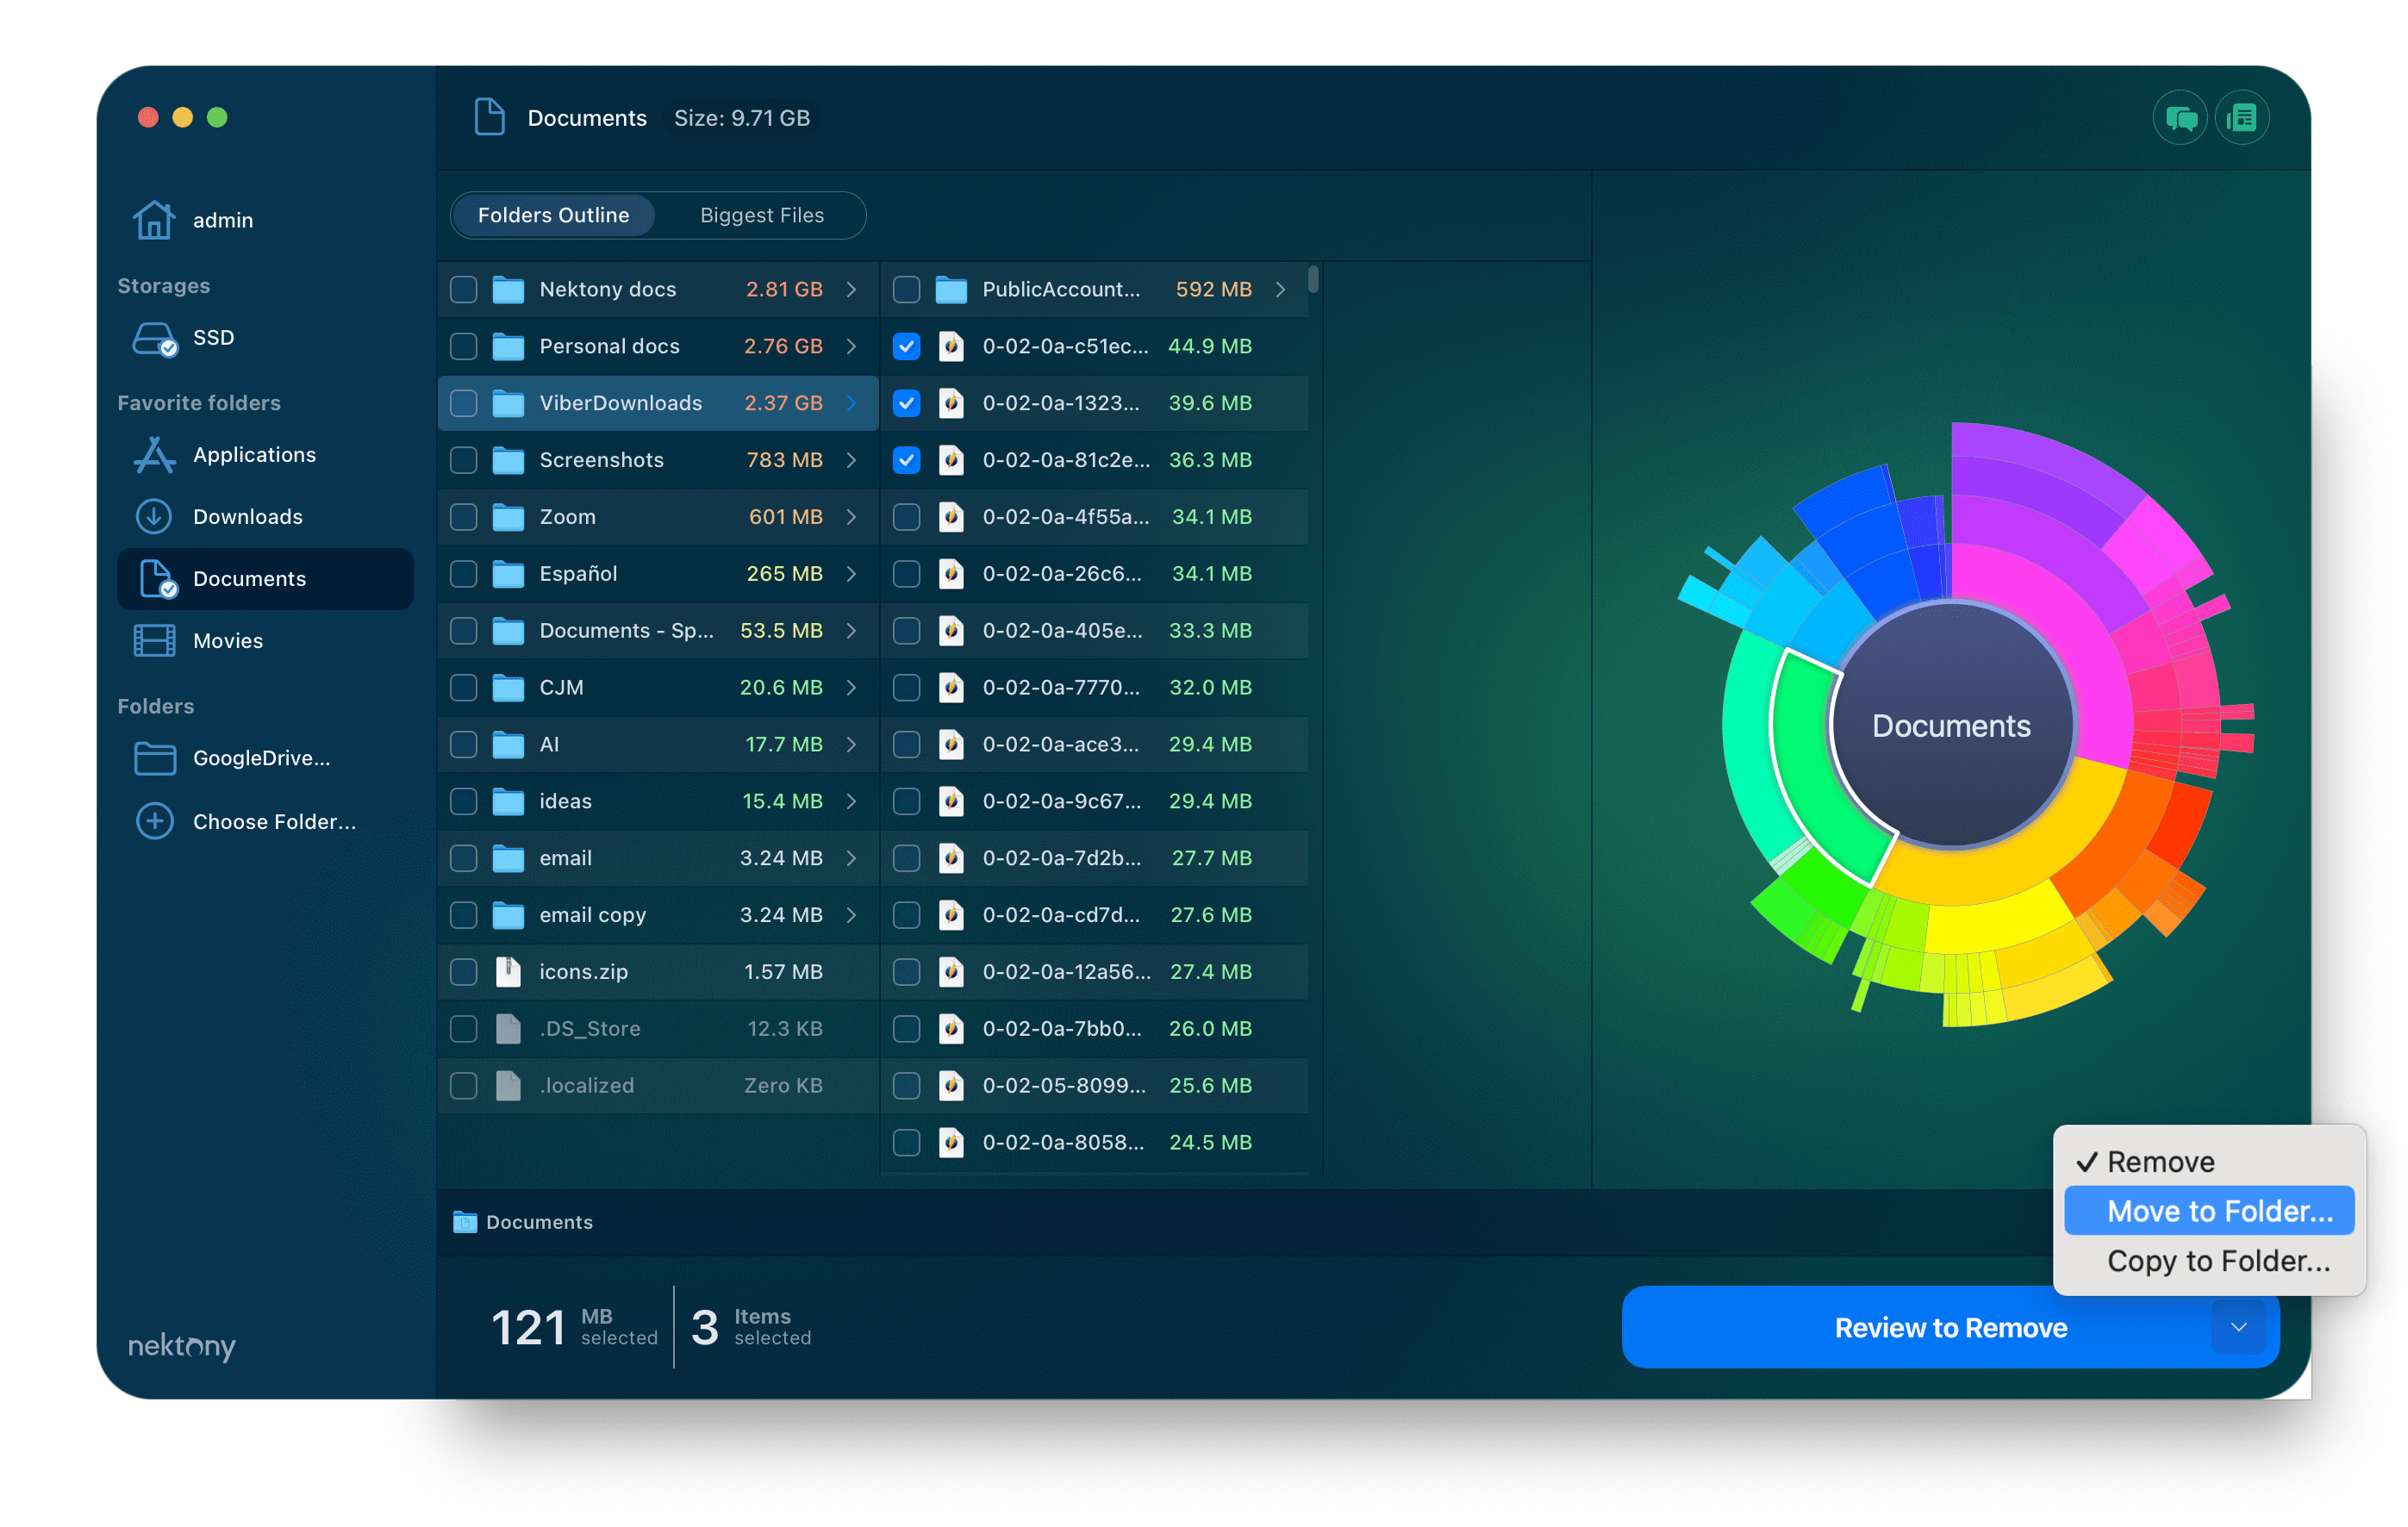
Disk Space Analyzer is a simple and intuitive app that lets you see the structure and size of your files and folders. You can download it from the official website or the Mac App Store. Once you launch it, you will see a list of all the disks connected to your Mac. You can choose any disk to scan and get a detailed report of its contents. Here’s how to use it:
- Download and launch Disk Space Analyzer.
- Select the drive or folder in the left panel and click Start Scanning.
- The scan results are presented in a visual and interactive way. You can easily navigate through the file system levels and see what takes up the most space on your drive.
- Select the largest or old unused files.
- Click to remove them or move them to an external storage.
Disk Space Analyzer also helps you optimize your disk space by deleting unnecessary files and folders. You can use the built-in cleanup tools to remove duplicates, downloads, large files, or old files. You can also use the Quick Look feature to preview any file before deleting it. You can also move files to another location or compress them to save space.
Disk Space Analyzer is a must-have app for any Mac user who wants to manage their disk space efficiently and effectively. It is compatible with macOS 10.10 or later and supports any drive format.
