Two-factor authentication helps to improve your online account security. However, many users ask how to turn off it on iCloud. In this article, we explain how to turn off two-factor authentication for Apple ID or how to set it up when you want to add an extra level of protection to your account.
Contents:
- What is 2FA (two-factor authentification)
- Key distinctions between two-factor authentication and two-step authentication
- How to turn on two-factor authentication for Apple ID
- How to turn off two-factor authentication for Apple ID
- 5. How to switch from two-step authentication to two-factor authentication
What is 2FA (two-factor authentification)
Two-factor authentication (also known as 2FA or 2-factor auth-n) is an extra level of protection that requires an additional piece of information to be entered, usually delivered to you in the form of a text message via SMS or an app. It could also be your PIN code, fingerprint, last digits of your credit card, voice recognition or other identity verification methods.
An additional verification process such as this keeps you safe from cybercriminals hijacking your accounts and more importantly, prevents identity theft. With easy passwords being so common, a preventive method like this is crucial for users’ safety. And even if you have a strong password, you are still at risk of having your account information stolen. Understandably, getting 2FA up and running would be a great solution to keep your data safe.
#1 Tip – Double your security and privacy with VPN Client for Mac
VPN Client
Key distinctions between two-factor and two-step authentication
In comparison, two-factor authentication is a much more complex and reliable verification process than two-step authentication, as it requires more than just a classic verification code to be submitted. While two-step verification just needs your password and a text code, 2FA gives you more options for processing verification codes, such as through the devices that you set as trusted. 2FA is already synchronized with all of Apple’s websites and macOS products such as iPhones, iPads, Apple TV’s, Apple Watches, and more.
Another difference between the two would be the fact that while two-step authentication can be switched on and off, that would not be the case for another option. Once you enable 2FA it becomes a mandatory feature in the latest versions of both macOS and iOS.
How to turn on two-factor authentication
With Apple’s two-factor authentication, turning it means that accessing your accounts can only be done through devices that have already been authenticated. And if you ever decide to add another trusted device, you will need to verify it by providing both the password to your account and a 6-digit code that will appear on one of the previously-authenticated devices. It’s worth noting that as long as you don’t exit your account or change the browser, you won’t have to repeat the same procedure get into your account – your device’s fingerprint, cookies and cache will automatically be remembered and recognized each time you sign in.
Having a phone number that you can have access to at all times is crucial when it comes to two-factor authentication. This is because the verification code will go directly to your number in the form of a text message. To get started, follow the screenshots below:
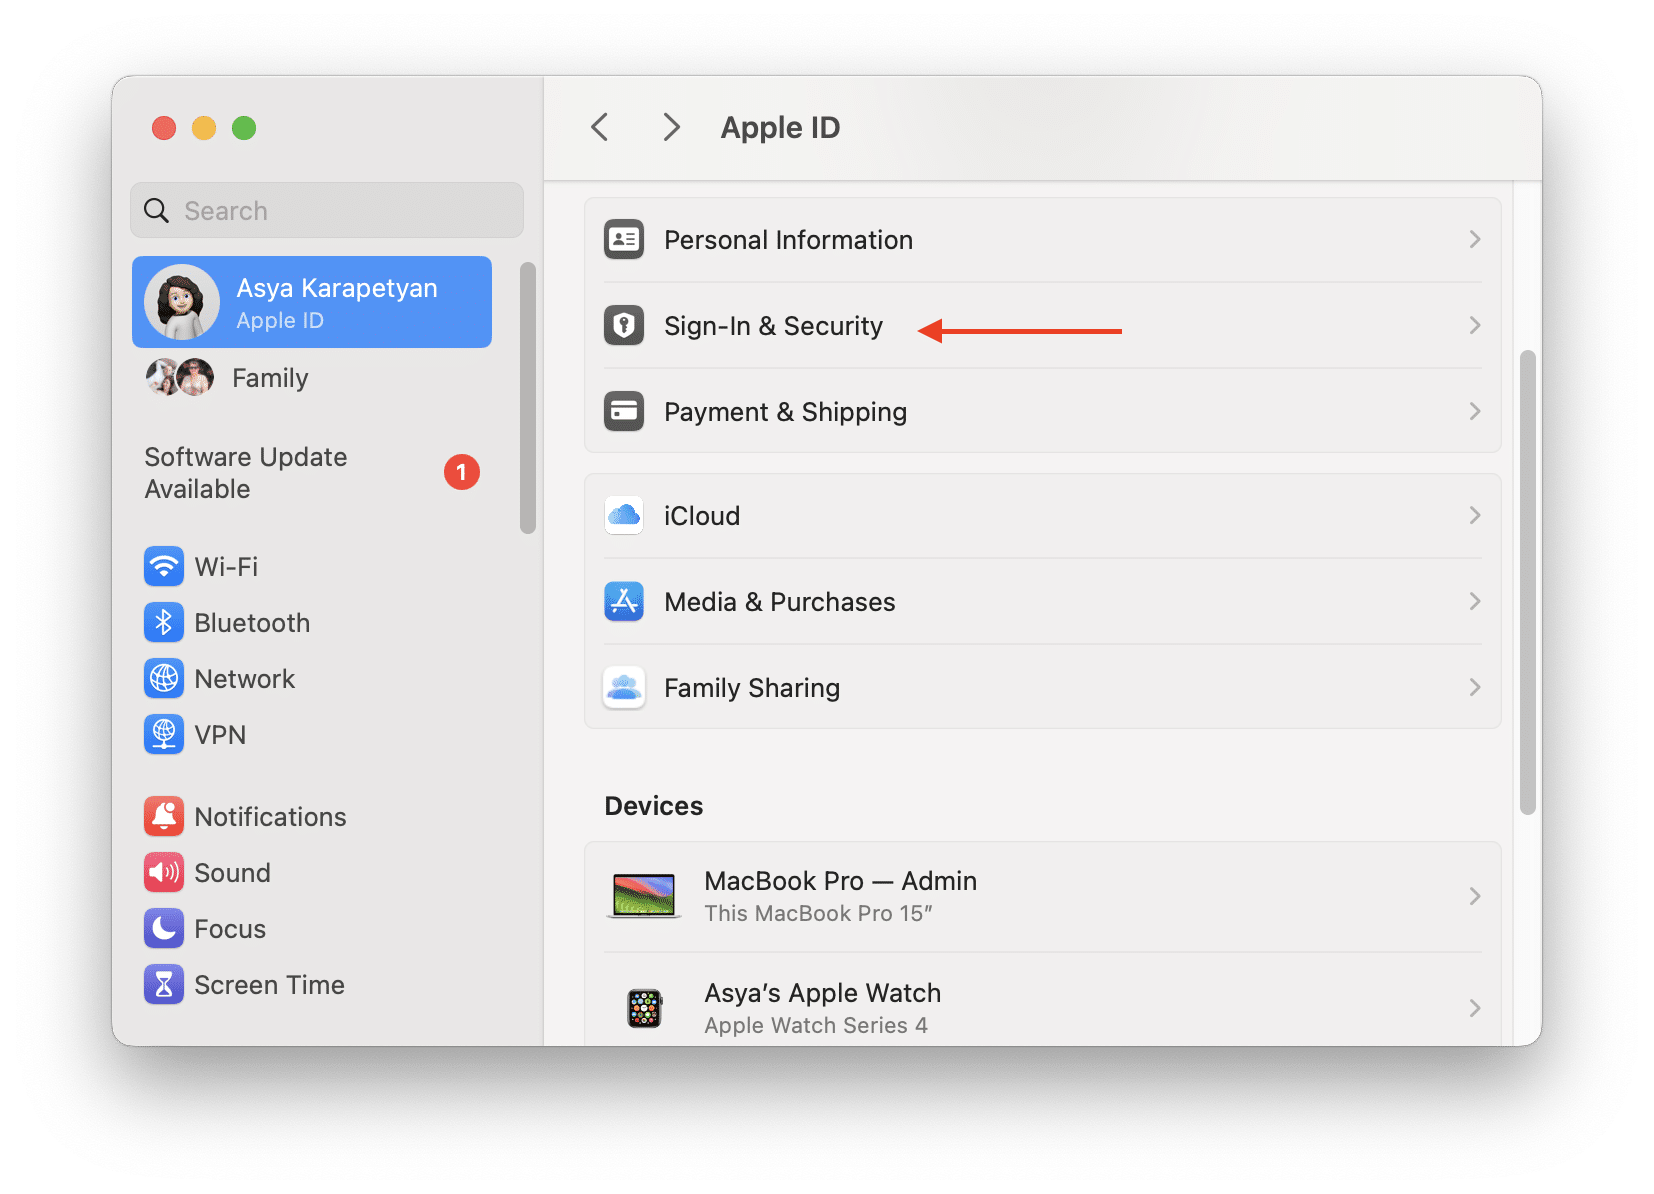
- Go to System Settings and click Apple ID.
- Select Sign-in & Security in the right panel.
- Scroll down and click to turn on Two-Factor Authentication.
- Simply confirm the procedure by clicking on and proceed with the instructions in order to complete the change.
- Setting up authentication will require you to enter a phone number that can receive verification codes. Enter your phone number and click .
- Once you receive the verification code, enter it in the columns provided and voila, you have 2FA enabled.
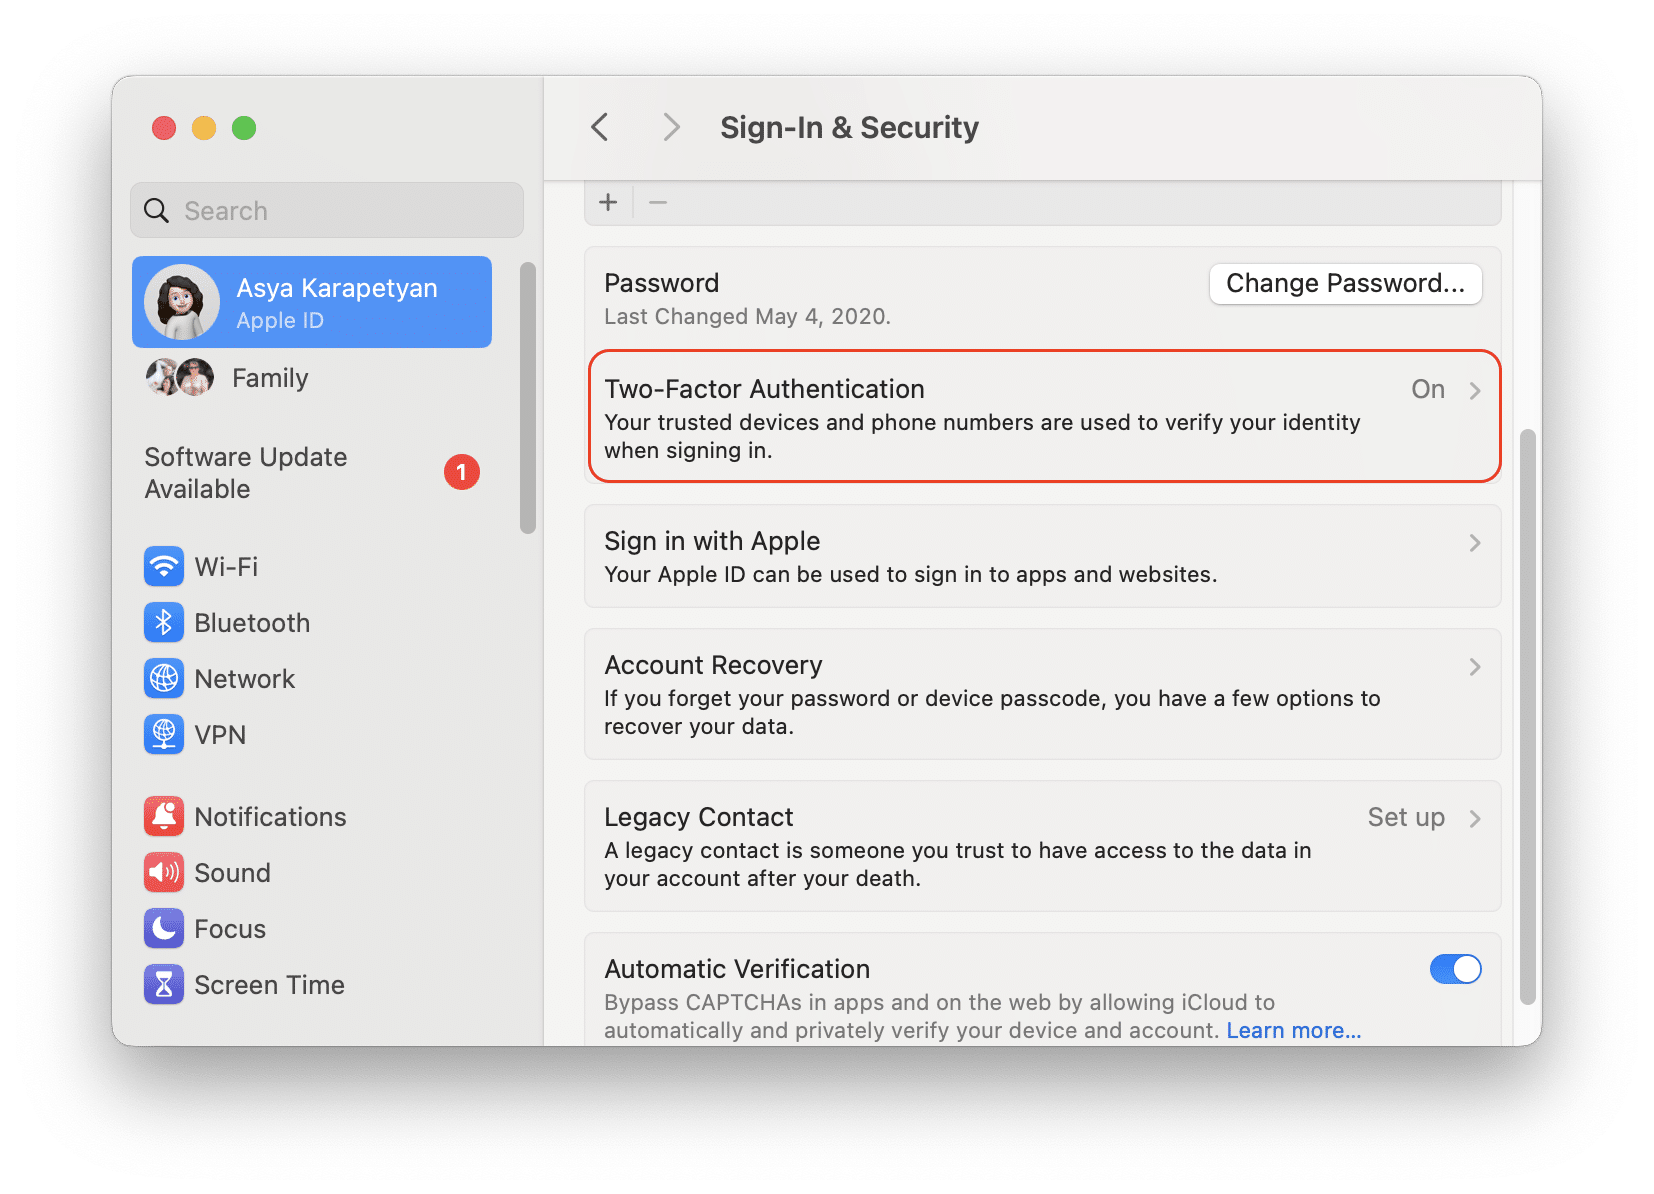
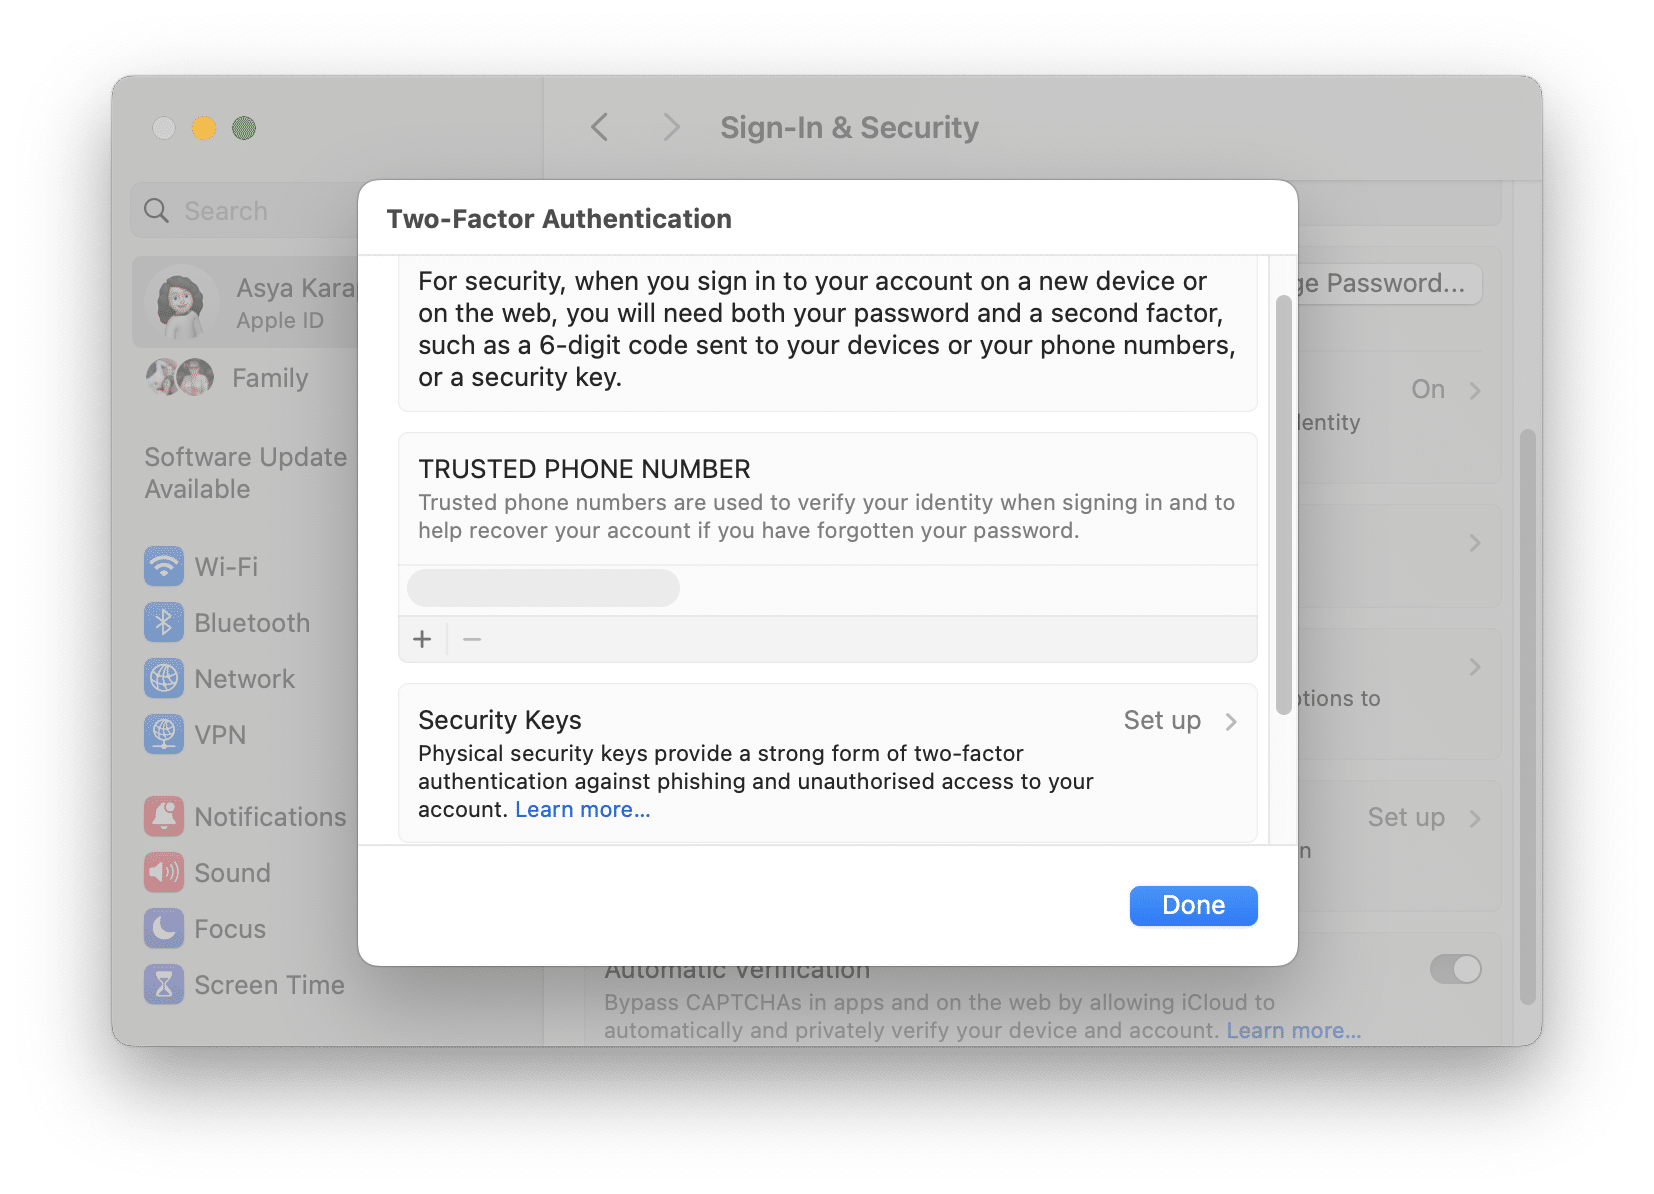
As already mentioned previously, setting up two-factor authentication takes only a couple of minutes and you only have to do it once. Once completed, you can be confident that your device is more secure.
How to turn off two-factor authentication
Most users experience the same issue- they can’t turn off two-factor authentication in Apple because it does not let them do that. Unfortunately, as previously mentioned, it is now a mandatory feature in the latest versions of both macOS and iOS. This means there is no option to turn off two-factor authentication after having turned it on. However, if you are still using an older version on either of your devices, simply follow the steps below:
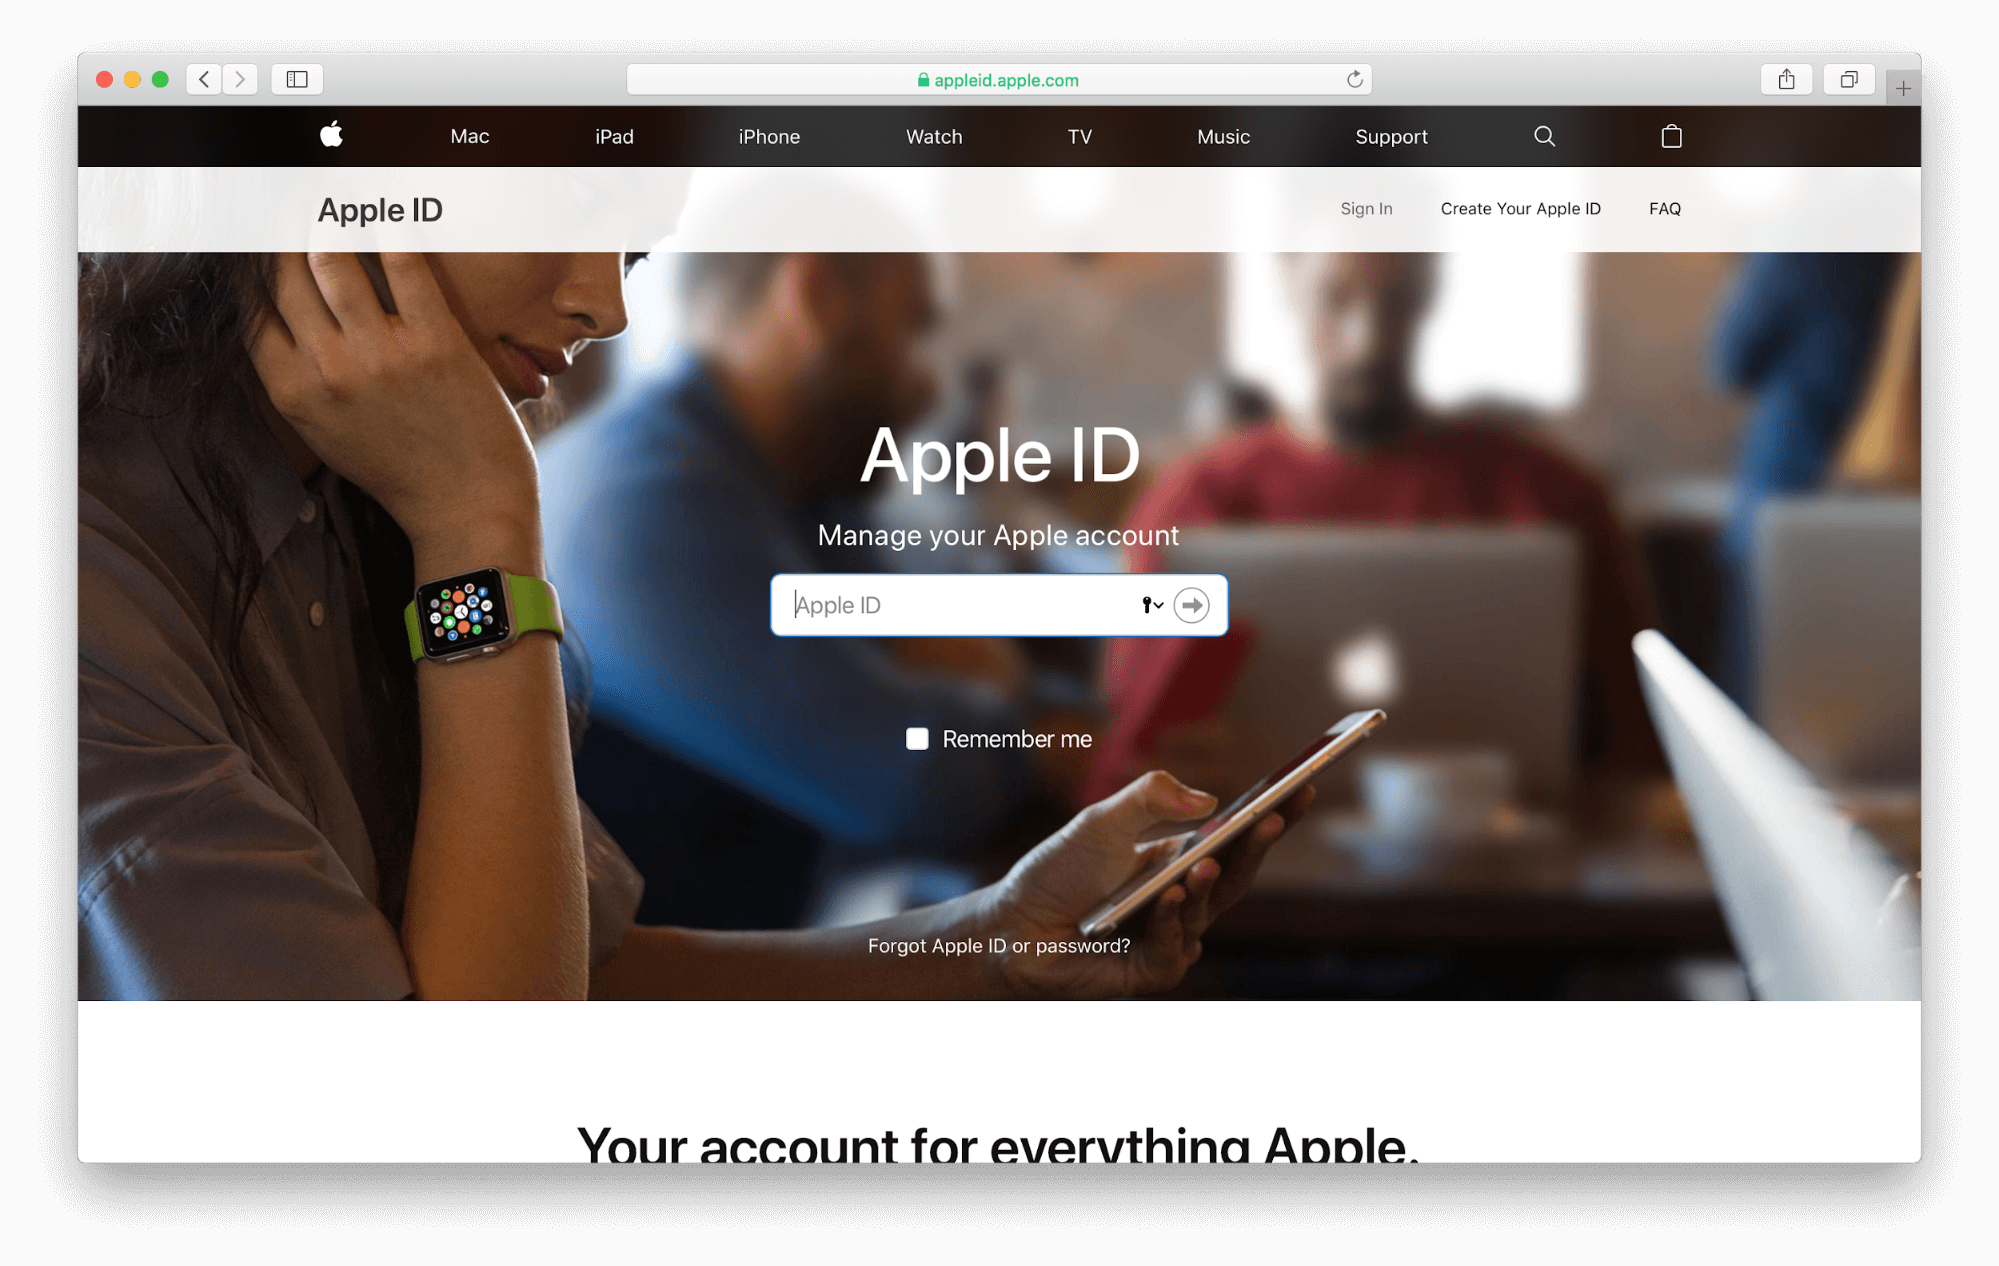
- Launch the appleid.apple.com website and login with your Apple ID.
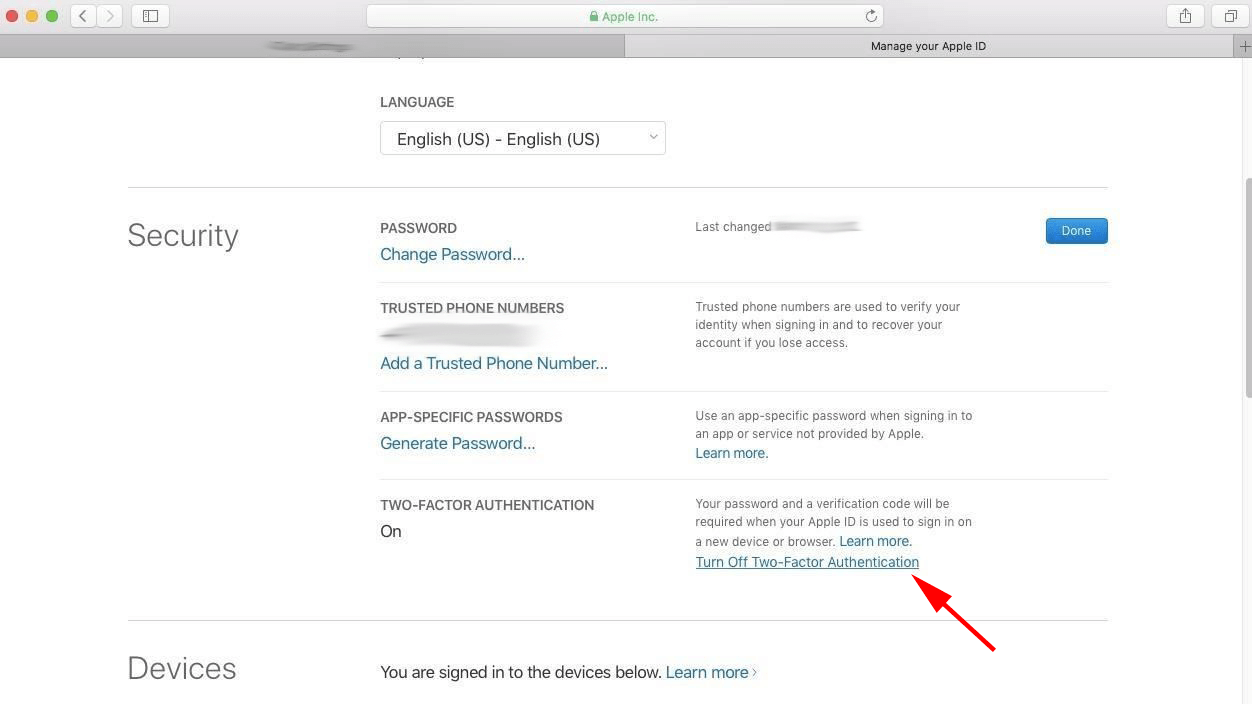
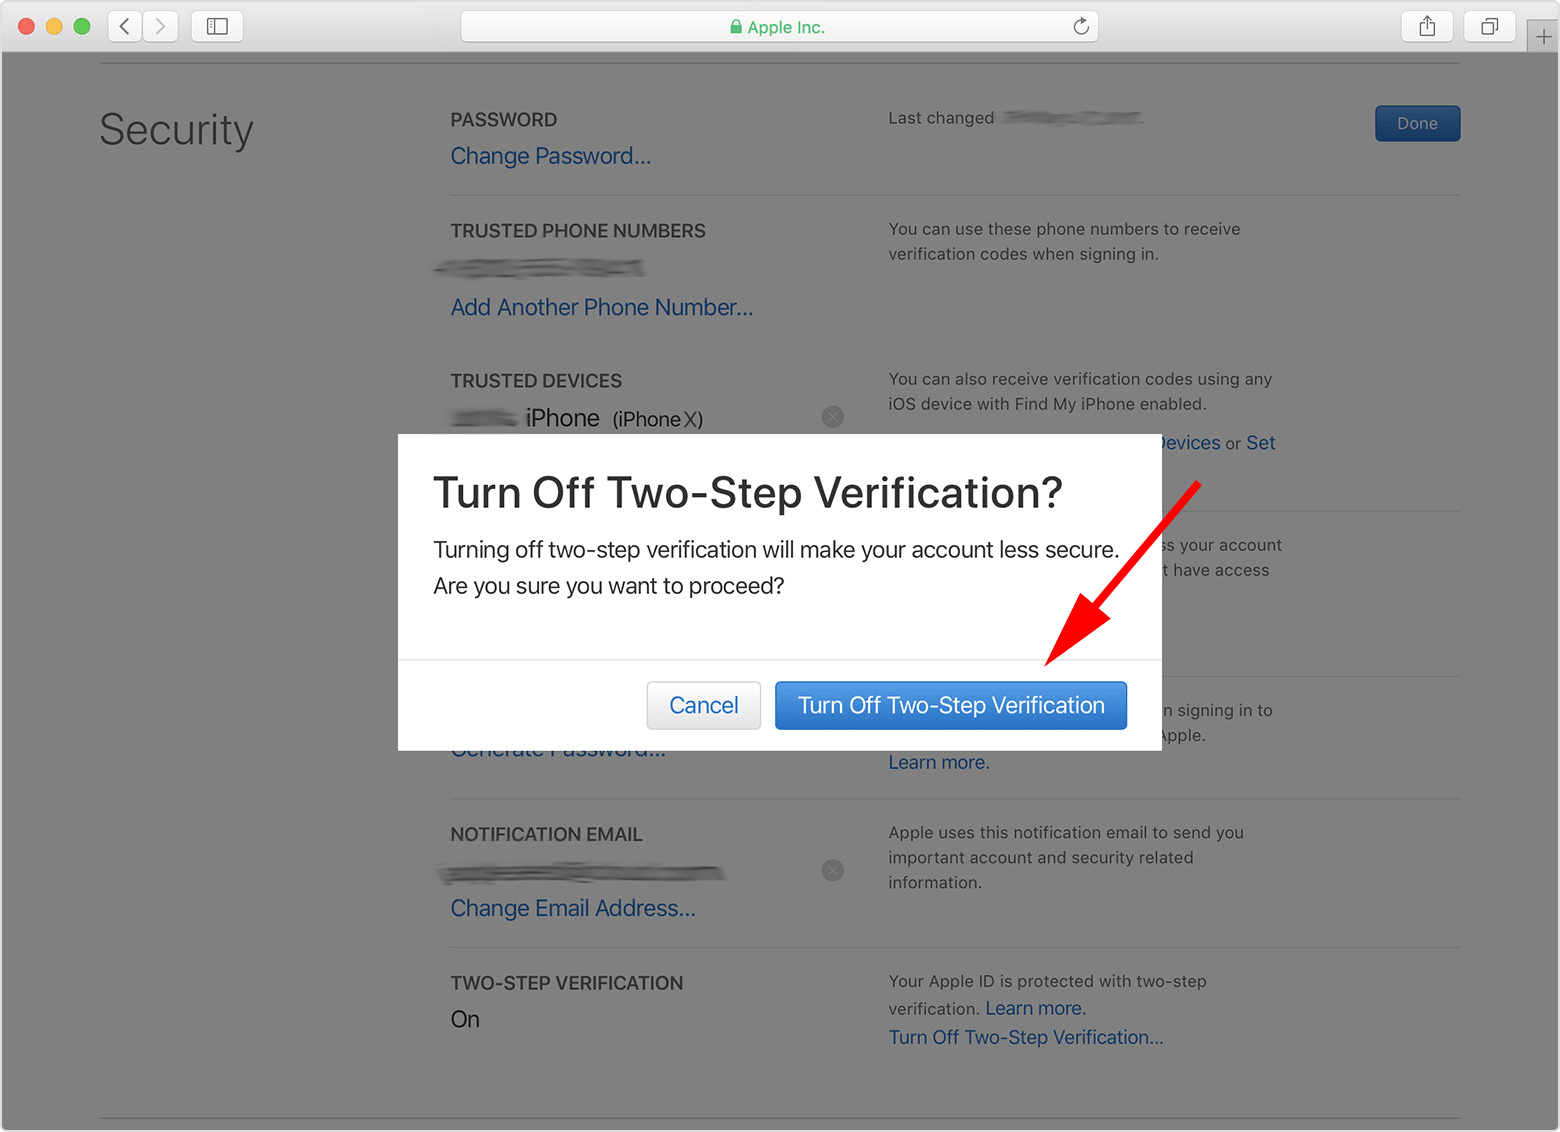
- Head over to the Security section of your account settings and select . Where it shows the Two-Factor Authentication section, click on it and set it to OFF.
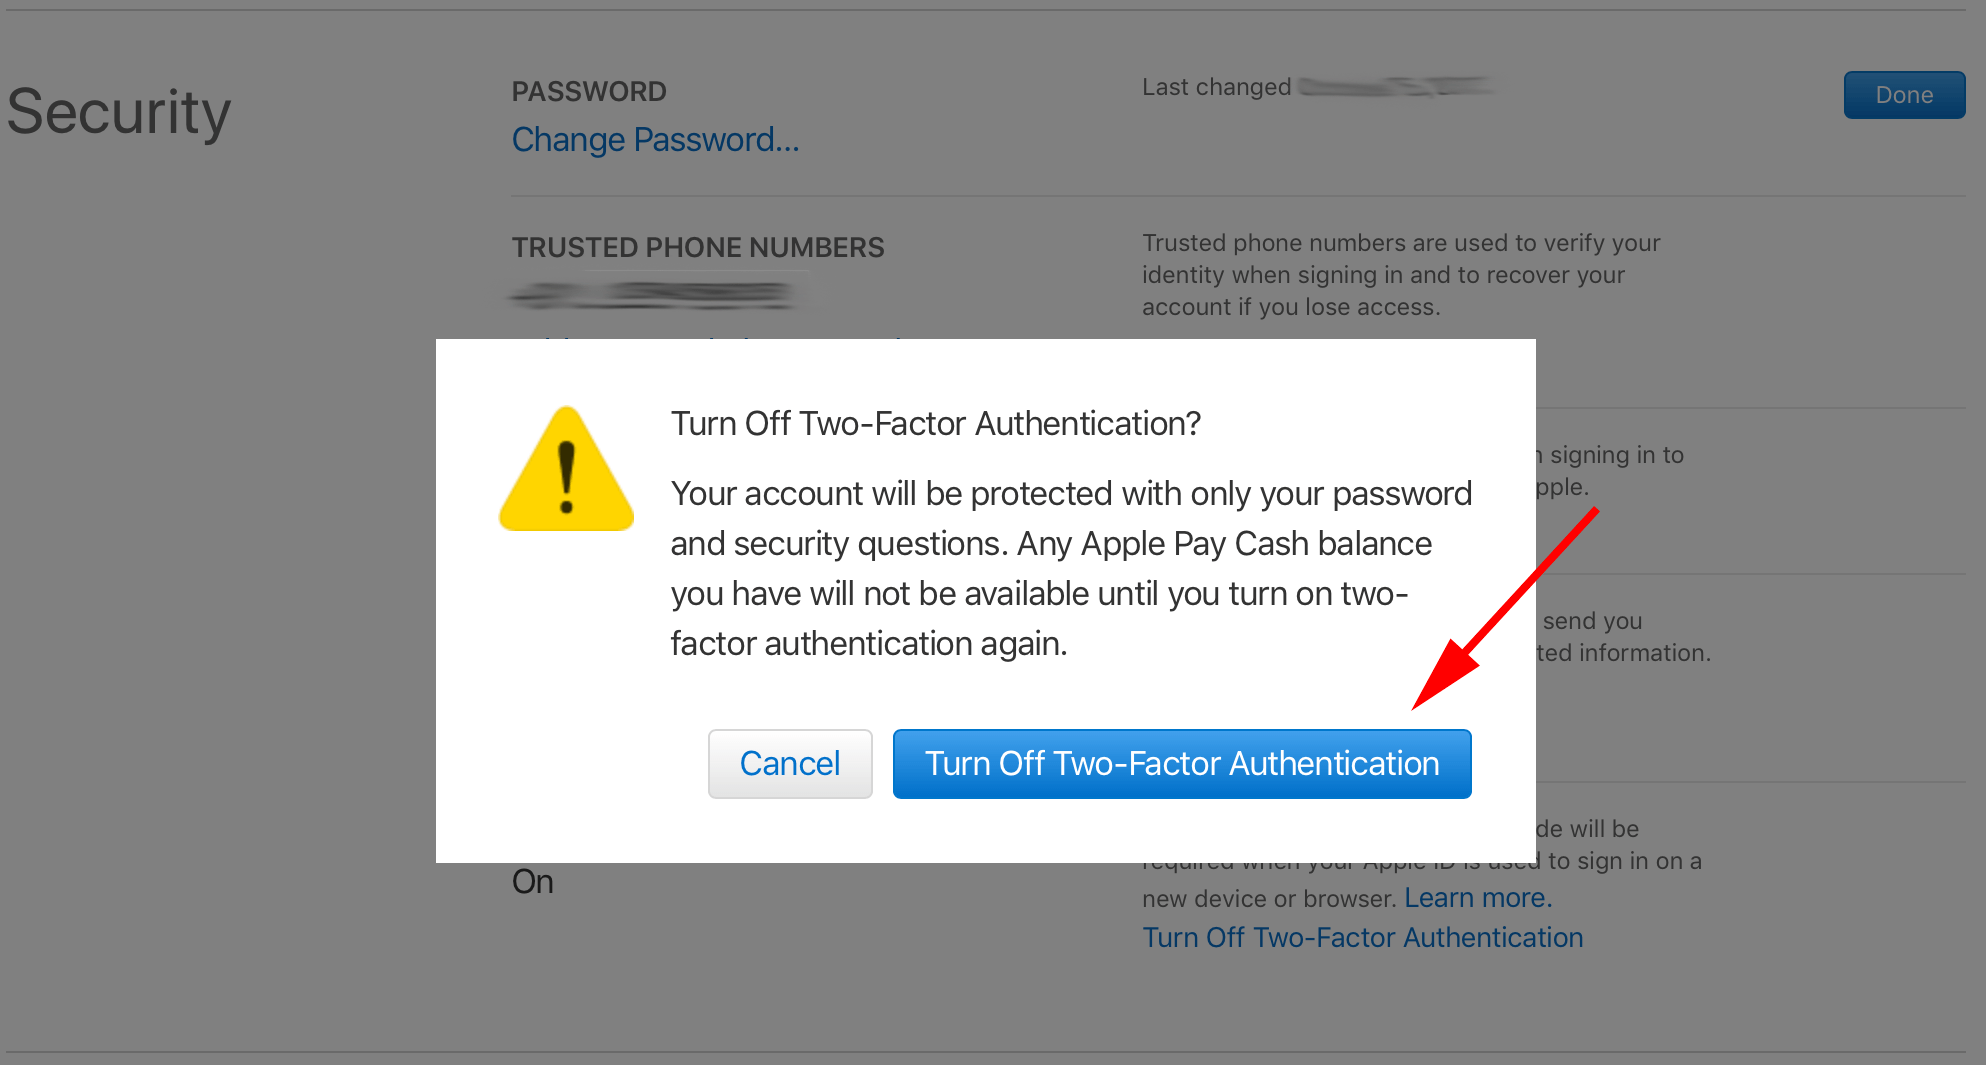
- Confirm your change by clicking on .
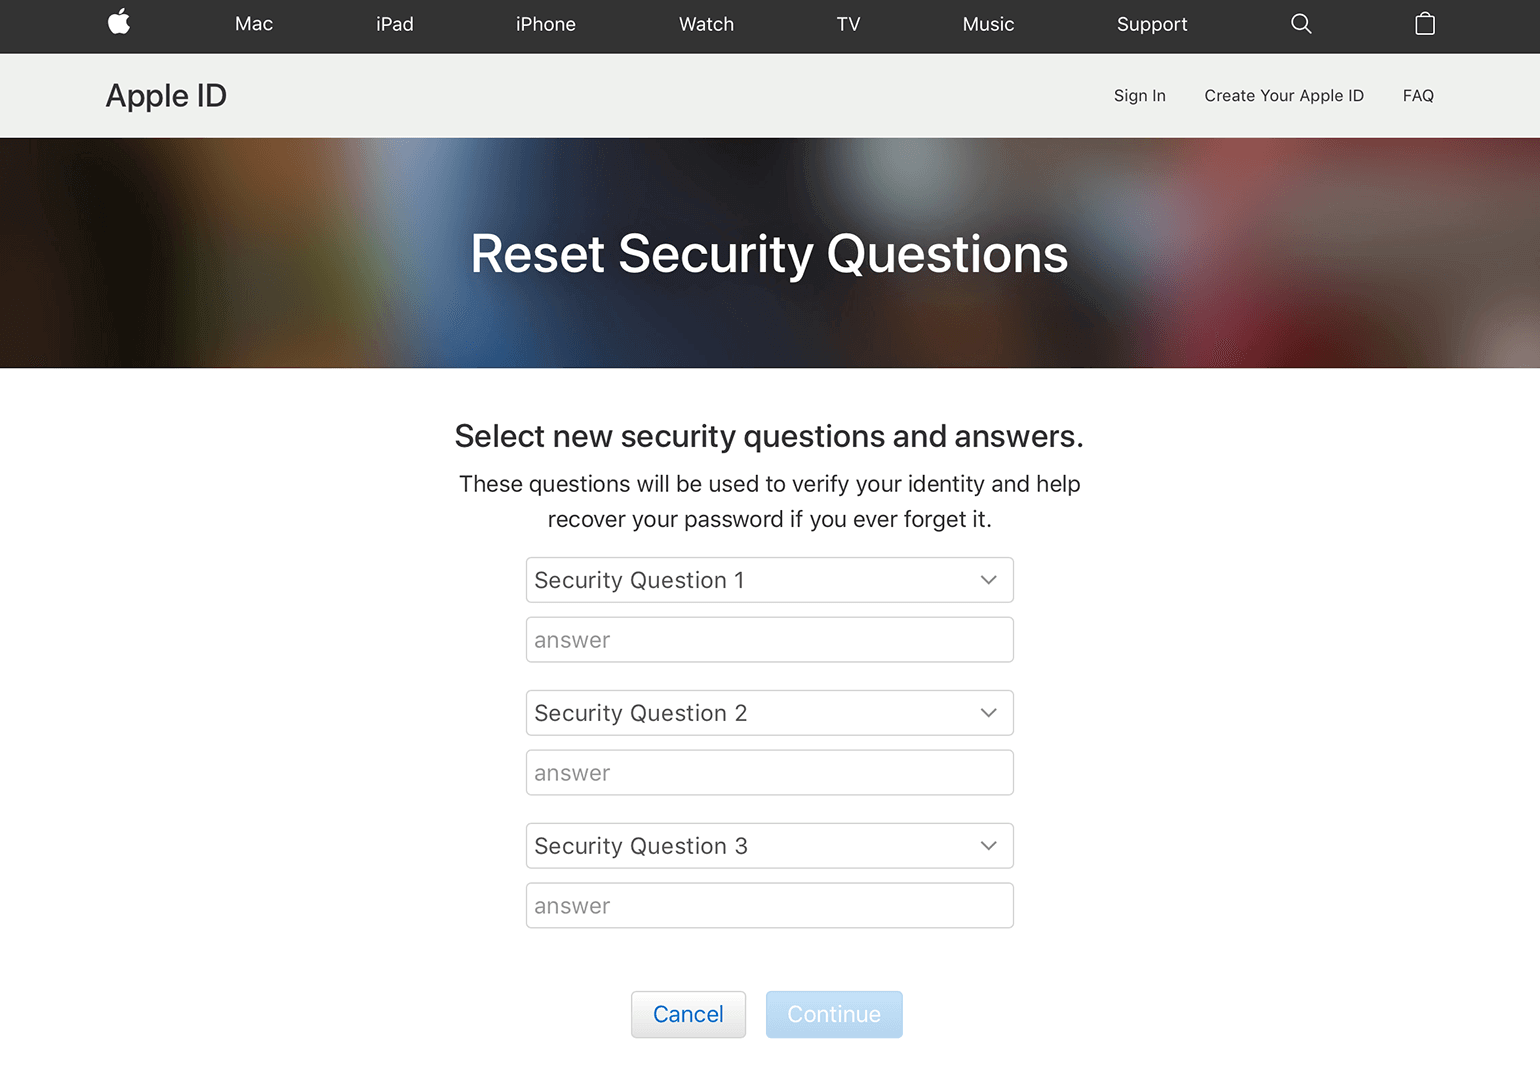
- Instead of using verification codes, assign new security questions for your Apple ID.
Once you have followed the instructions provided by Apple, you are done- two-factor authentication has been successfully turned off.
How to switch from Two-step authentication to Two-factor authentication
Two-step authentication is a classic verification process that some users are still using because they have not signed up for two-factor authentication. In order to switch to the newer two-factor verification process, you will need to switch the existing authentication mode off. Simply do exactly as the steps below show:
- In your Apple ID account, see if your verification process is switched on already.
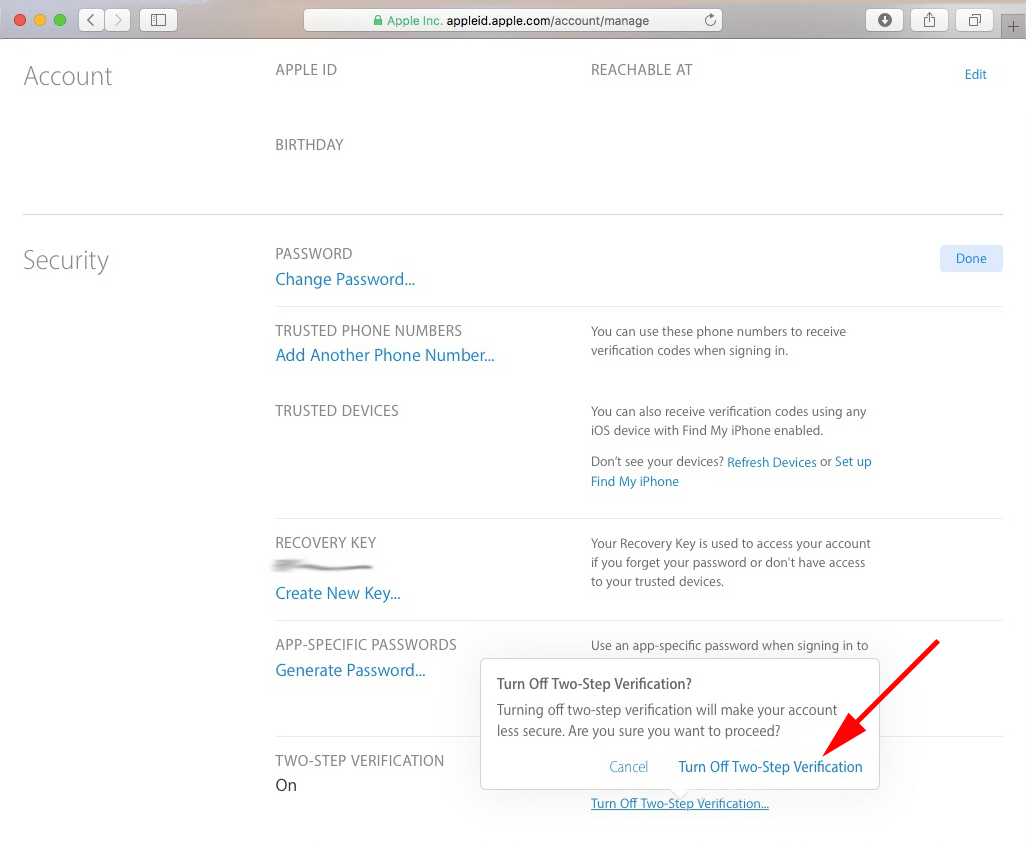
- If it is, simply turn it off in order to make the switch. Confirm the step.
- Confirm the change; you will also need to create security questions for your account.
- Once security questions have been set up and two-step authentication has been disabled, you can simply turn two-factor authentication on as shown in the instructions previously.
Conclusion
Although many users have claimed the mandatory two-factor authentication feature is not user-friendly, it is still considered to be one of the most effective threat-prevention methods used against cybercrime, viruses, malware and trojans that infect devices on a daily basis. Also, we recommend using VPN Client for Mac to protect your personal data from hackers.
