

Duplicate files are one of the chief space eaters on your disk, which not all computer users take seriously. However, these duplicates may sometimes take up a significant part of your drive space, so we recommend cleaning up duplicates periodically.

Fortunately, there is a duplicate cleaner app from Nektony, which allows you to detect and remove duplicates in several clicks. We are talking about Duplicate File Finder – the best program for finding duplicate photos, music, videos, documents, archives and other files types. What is most important about the app is that it is the fastest duplicate file finder we know of. We have tested several programs which find duplicate files and compared the results in the table below.
| Application |
How long it took to scan the Home folder on Mac with SSD (72 GB) |
|---|---|
| Duplicate File Finder | 9 sec |
| Gemini 2 | 1 min 44 sec |
| Easy Duplicate Finder | 1 min 52 sec |
| DupeGuru | 16 sec |
| Duplicate Detective | 14 sec |
*Also read our previous article Comparison chart of duplicate file finders for Mac.
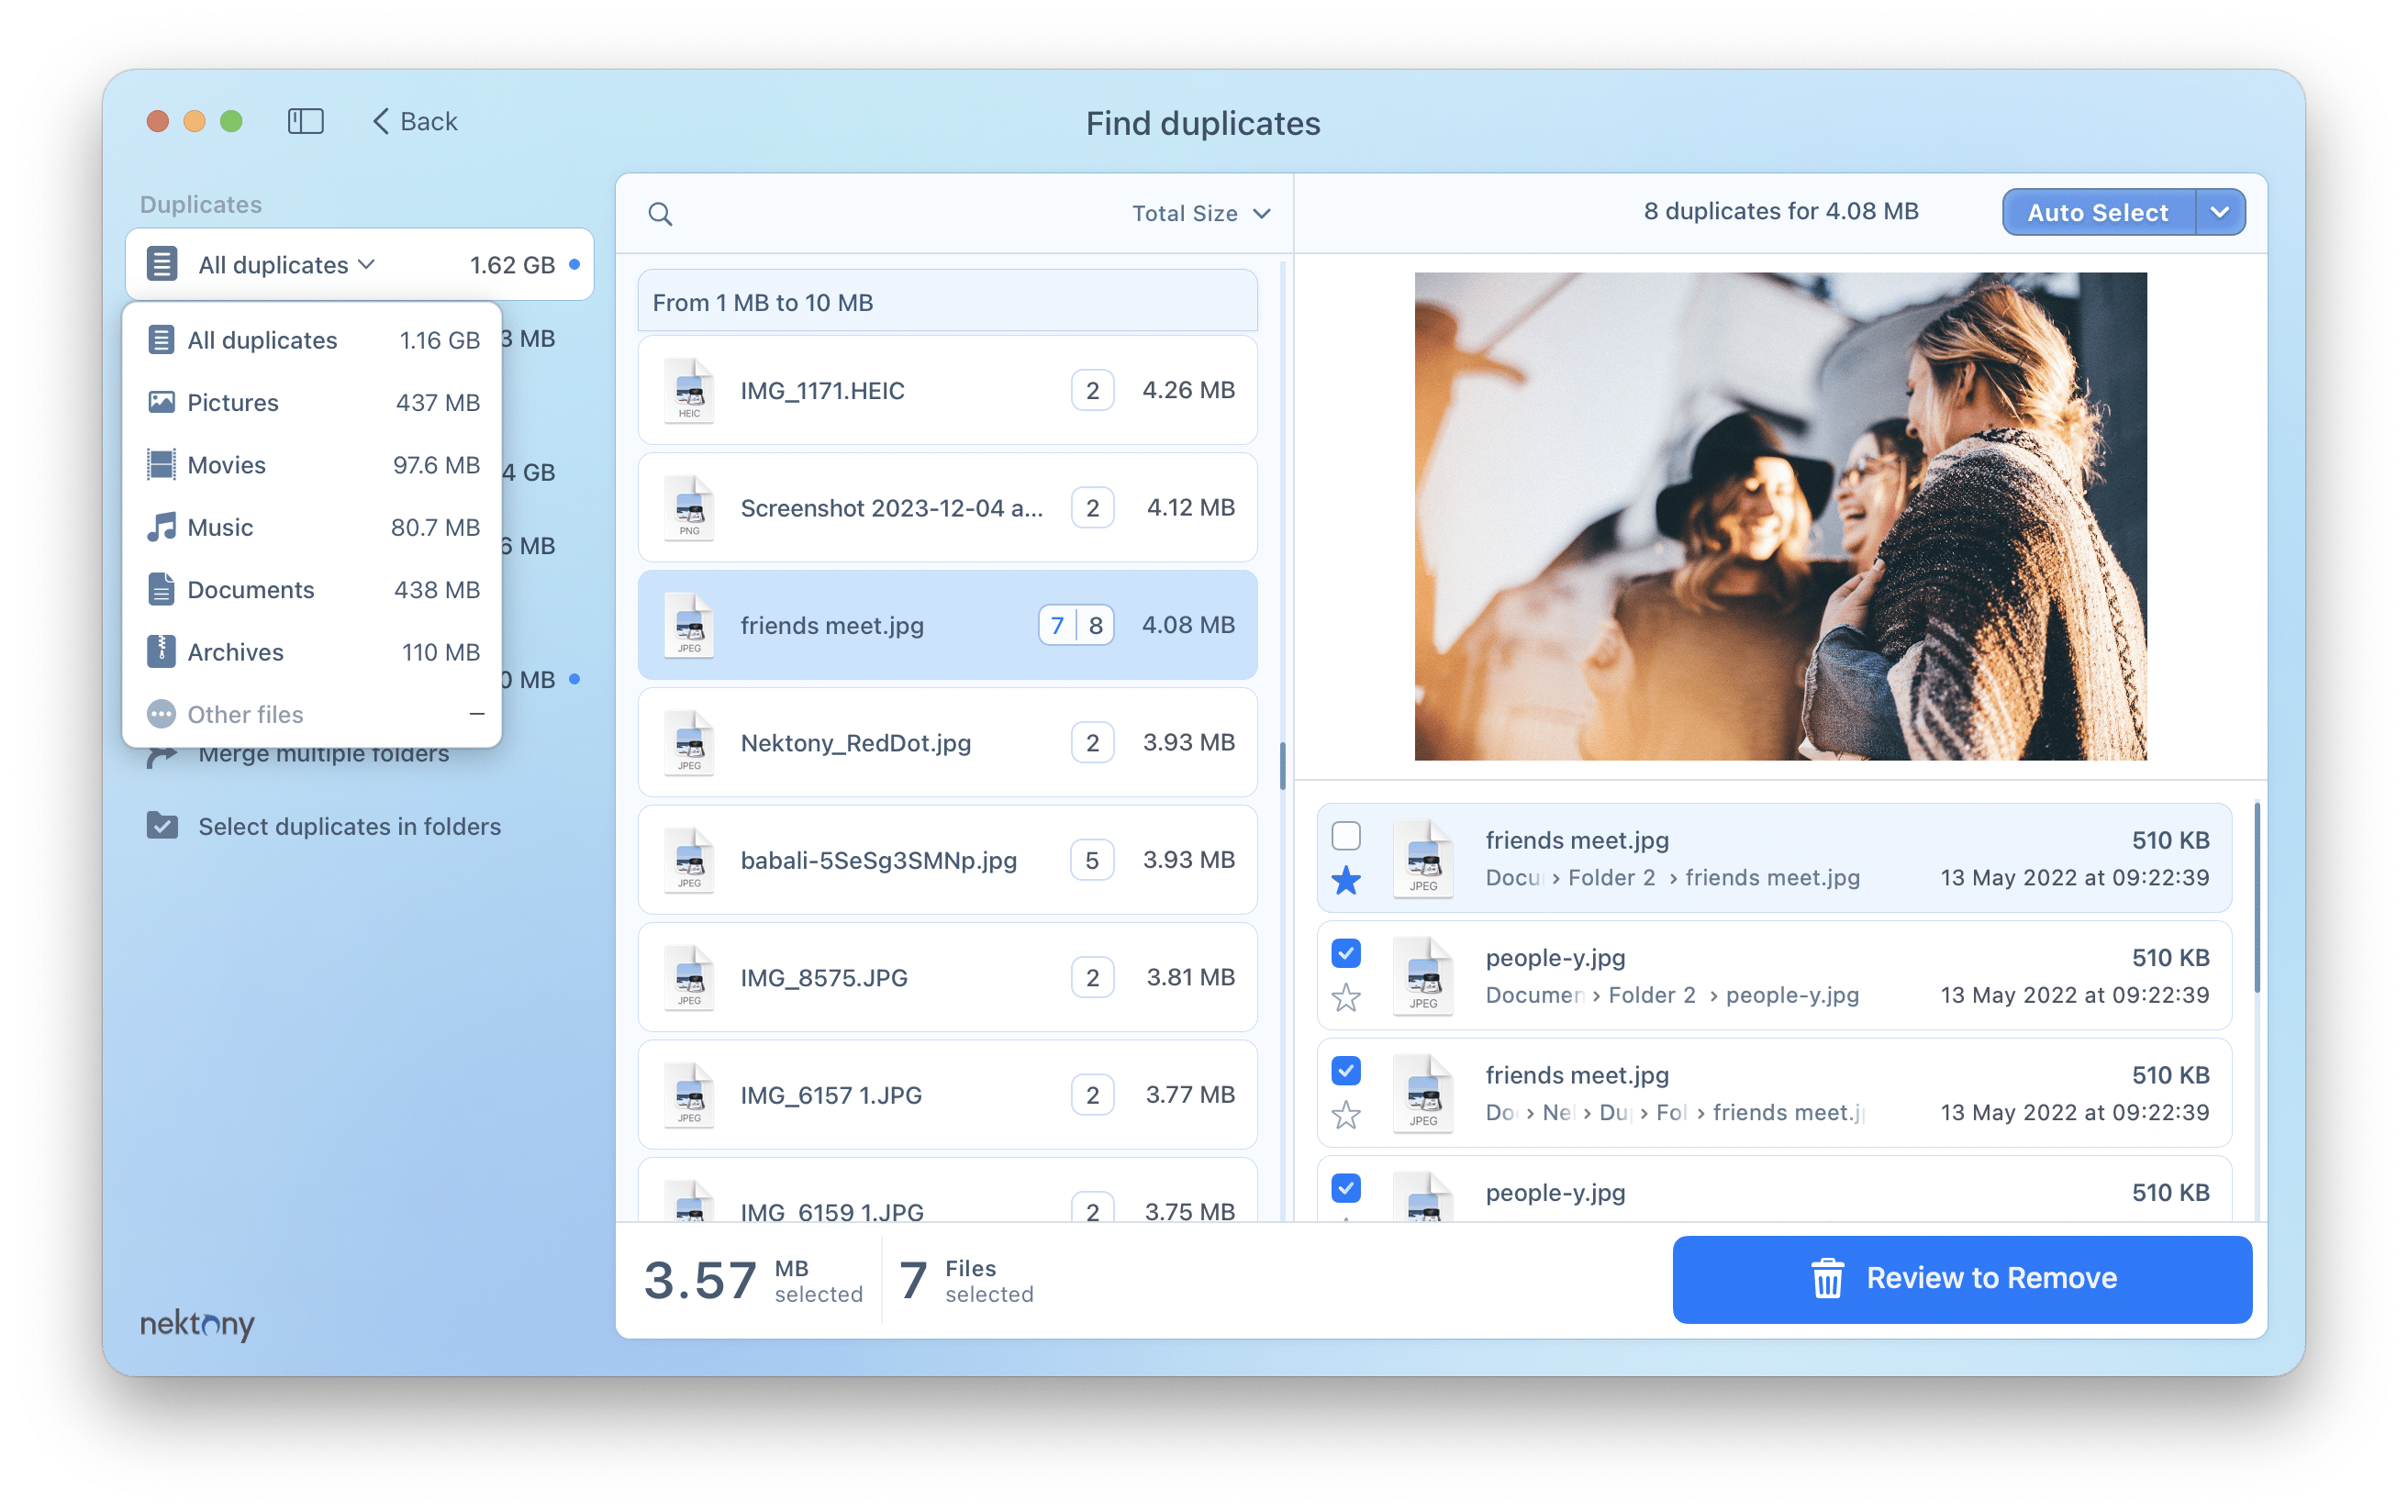
As you can see in the table, Duplicate File Finder has the fastest speed for file scanning and comparing. Awesome! But what if you can make finding copies with Duplicate File Finder even faster? In this article, we will share some tips on how to find and remove duplicates on Mac in a flash.
How to speed up duplicate search with Duplicate File Finder
- 1. Set up the size of duplicate files
- 2. Enable or disable scanning hidden files
- 3. Enable or disable full-scale scan
- 4. Skip certain files from duplicate search
- 5. Use automatic selection of duplicates
- 6. Set up permanent removal of duplicates
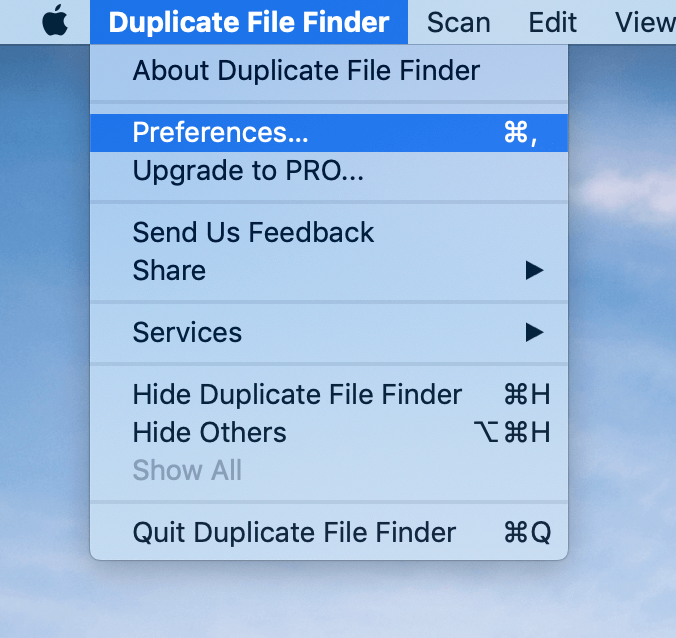
To accelerate the speed of the duplicate search, you will need to open the app’s Preferences window. For this, launch the application, go to Menu → Duplicate File Finder → Preferences or use Command (⌘)+ Comma (,) key shortcut.
Now, let’s take a look at each tab and learn how it can help you in your task.
Scan tab
1. Set up the size of duplicate files
Imagine that you have a huge number of files and the application has to compare one file with another to find the copies. In this section, you can manually specify the minimal size of files to be scanned with Duplicate File Finder. This means that if you, for example, set up the slider at 1 MB, the application will skip all files smaller than the specified size, so that, even if you want to find duplicate files across multiple drives, it would be much faster than scanning absolutely all the files.
This option would be especially useful when you need to free up some space on your disk very quickly. So, when you increase the size settings of the file, the app needs to check fewer items and hence the process of scanning is speeded up. It takes less time to search for identical images or videos.

2. Scan hidden folders – Enable searching hidden duplicates only when needed
Duplicate File Finder can find even hidden files and folders. There is a special option you can enable, and Duplicate Finder will also scan all hidden folders for duplicates.
However, it is recommended that you disable this option because it may slow down the scanning process.
3. Full-scale duplicates scan – Enabling search across all file contents slows down the scanning process
Duplicate File Finder compares the contents of files to find duplicates. If the option is disabled, then the application checks only parts of the files. This rule applies only to binary file formats. For simple formats (e.g. text, bmp), Duplicate File Finder checks the file completely.
Though, byte-by-byte checking can also slow down the scanning process.
Skip List tab
4. Skip files from duplicate search
In the Skip List tab, you can add folders, files and extensions that will not be checked for duplicates. Why add items to Skip List? Imagine you have created duplicates for sharing in DropBox, Google Drive or any other cloud storage. You may want to add these folders to the Skip List, so they won’t be scanned by the duplicate file cleaner application.
Use this option also when you have important folders and would like to protect them. By default, the Skip List includes system extensions and some files and folders in order to prevent accidental deletion of files which are critical to the system.

Auto Select tab
5. Use automatic selection of duplicates
When you have too many duplicates, it will take too much time to preview each one of them and select certain ones manually. If you know from which folders exactly you want to remove duplicates, Auto Select option will help you. You can add specific folders where you usually accumulate files. Or, in reverse, add folders to the Never Select list to insure against selecting copies of needed files.Also, you can add prefixes and suffixes used in the file name to be selected. And finally, you can enable or disable other selecting rules for the Auto Select option by marking the appropriate checkboxes and choosing the needed option for each of them.
Then you can select all duplicates due to your rules with one click by using the Auto Select button. This option is one more way to speed up the duplicate cleaning process.

Remove tab
6. Set up permanent duplicate removal system
Remove Empty Folders
When you select and remove duplicate files from the folders, they become empty. Then you usually need to find these folders and move them to Trash. But you don’t have to do so if you use our double file cleaner application. Duplicate File Finder can delete the empty folders automatically after cleaning the duplicates. Just enable the option “Remove empty folders.”
Log Removed Duplicates
In case, you want to preview the history of deleted duplicate files from your Mac, enable this option. For this, click on Duplicate in the applications menu bar and select “Restore Removed Duplicates”. If some files were accidentally removed to the Trash bin, you can select them and restore.
Removal Method
By default when you remove files with Duplicate File Finder, they are sent to Trash. Here you can enable the Remove option to delete your files permanently without moving them to Trash. This can save you the time taken to go to Trash every time and empty it. However, you should be careful and understand that in this case you will have no chance of recovering your files.

We have given you short tips on how to operate the application’s preferences so that duplicate cleaning is fast. Read more about quick ways to find and remove duplicates on Mac.
Download our fast Duplicate File Finder for professional needs and clear your Mac of useless files.


