Discovering countless duplicate files is something almost every Mac user is faced with. If you are a music lover, you may download dozens of songs from iTunes daily. If you are a photographer, you transfer hundreds of photos from your photo camera or smartphone to your Mac. You may also copy documents, folders, archives, and other files by accident and forget to delete them.
No matter how accurately you keep your files on the computer, as practice shows, most people cannot imagine how much disk space they lose because of duplicate files. Luckily, this problem can be easily solved with the application Duplicate File Finder. Moreover, we have prepared cleanup tips for you that will help make the duplicates cleanup process as easy and fast as possible.
A short Duplicate File Finder guide
Before learning about the promised tips for using Duplicate File Finder, let’s take a quick look at the application.
Duplicate File Finder helps check your Mac for duplicate files. It is free to download and can be used as a duplicate music files finder, duplicate video finder or scanner for any other identical docs and folders.
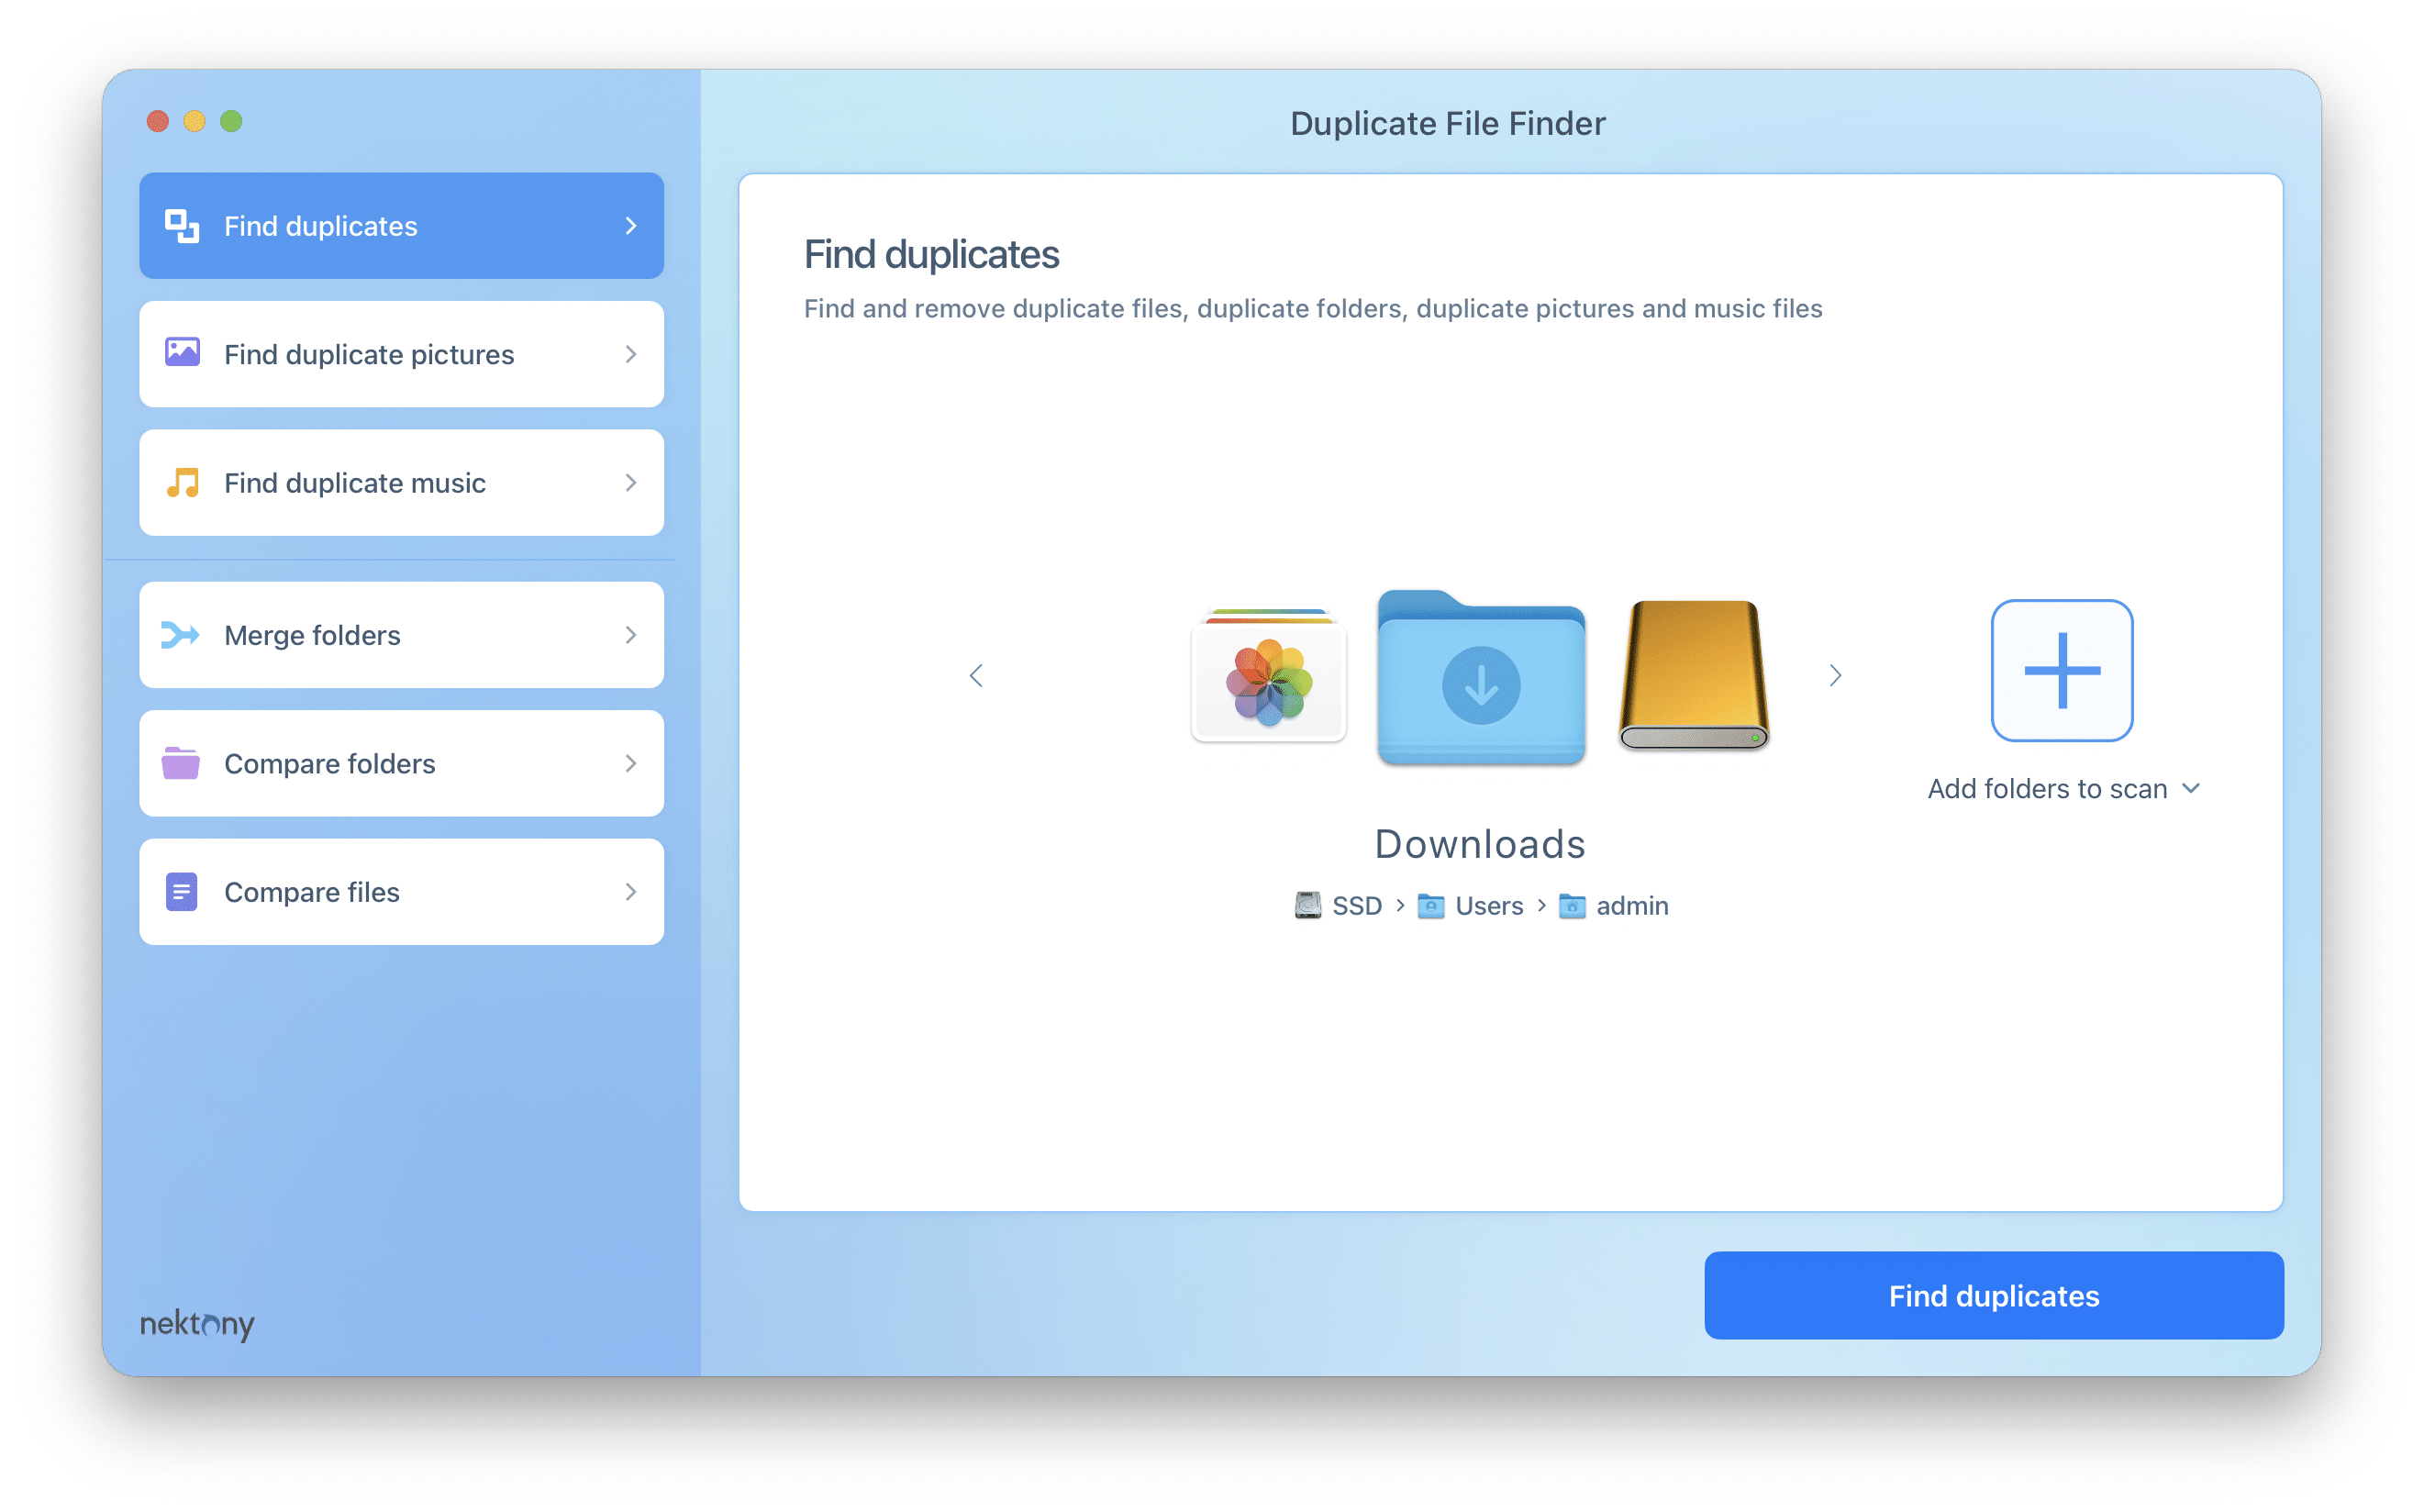
When you launch Duplicate File Finder, you will be amazed at its intuitive interface. It’s so easy to find identical files.
- Choose the folders or drives you want to check, and click Find duplicates.
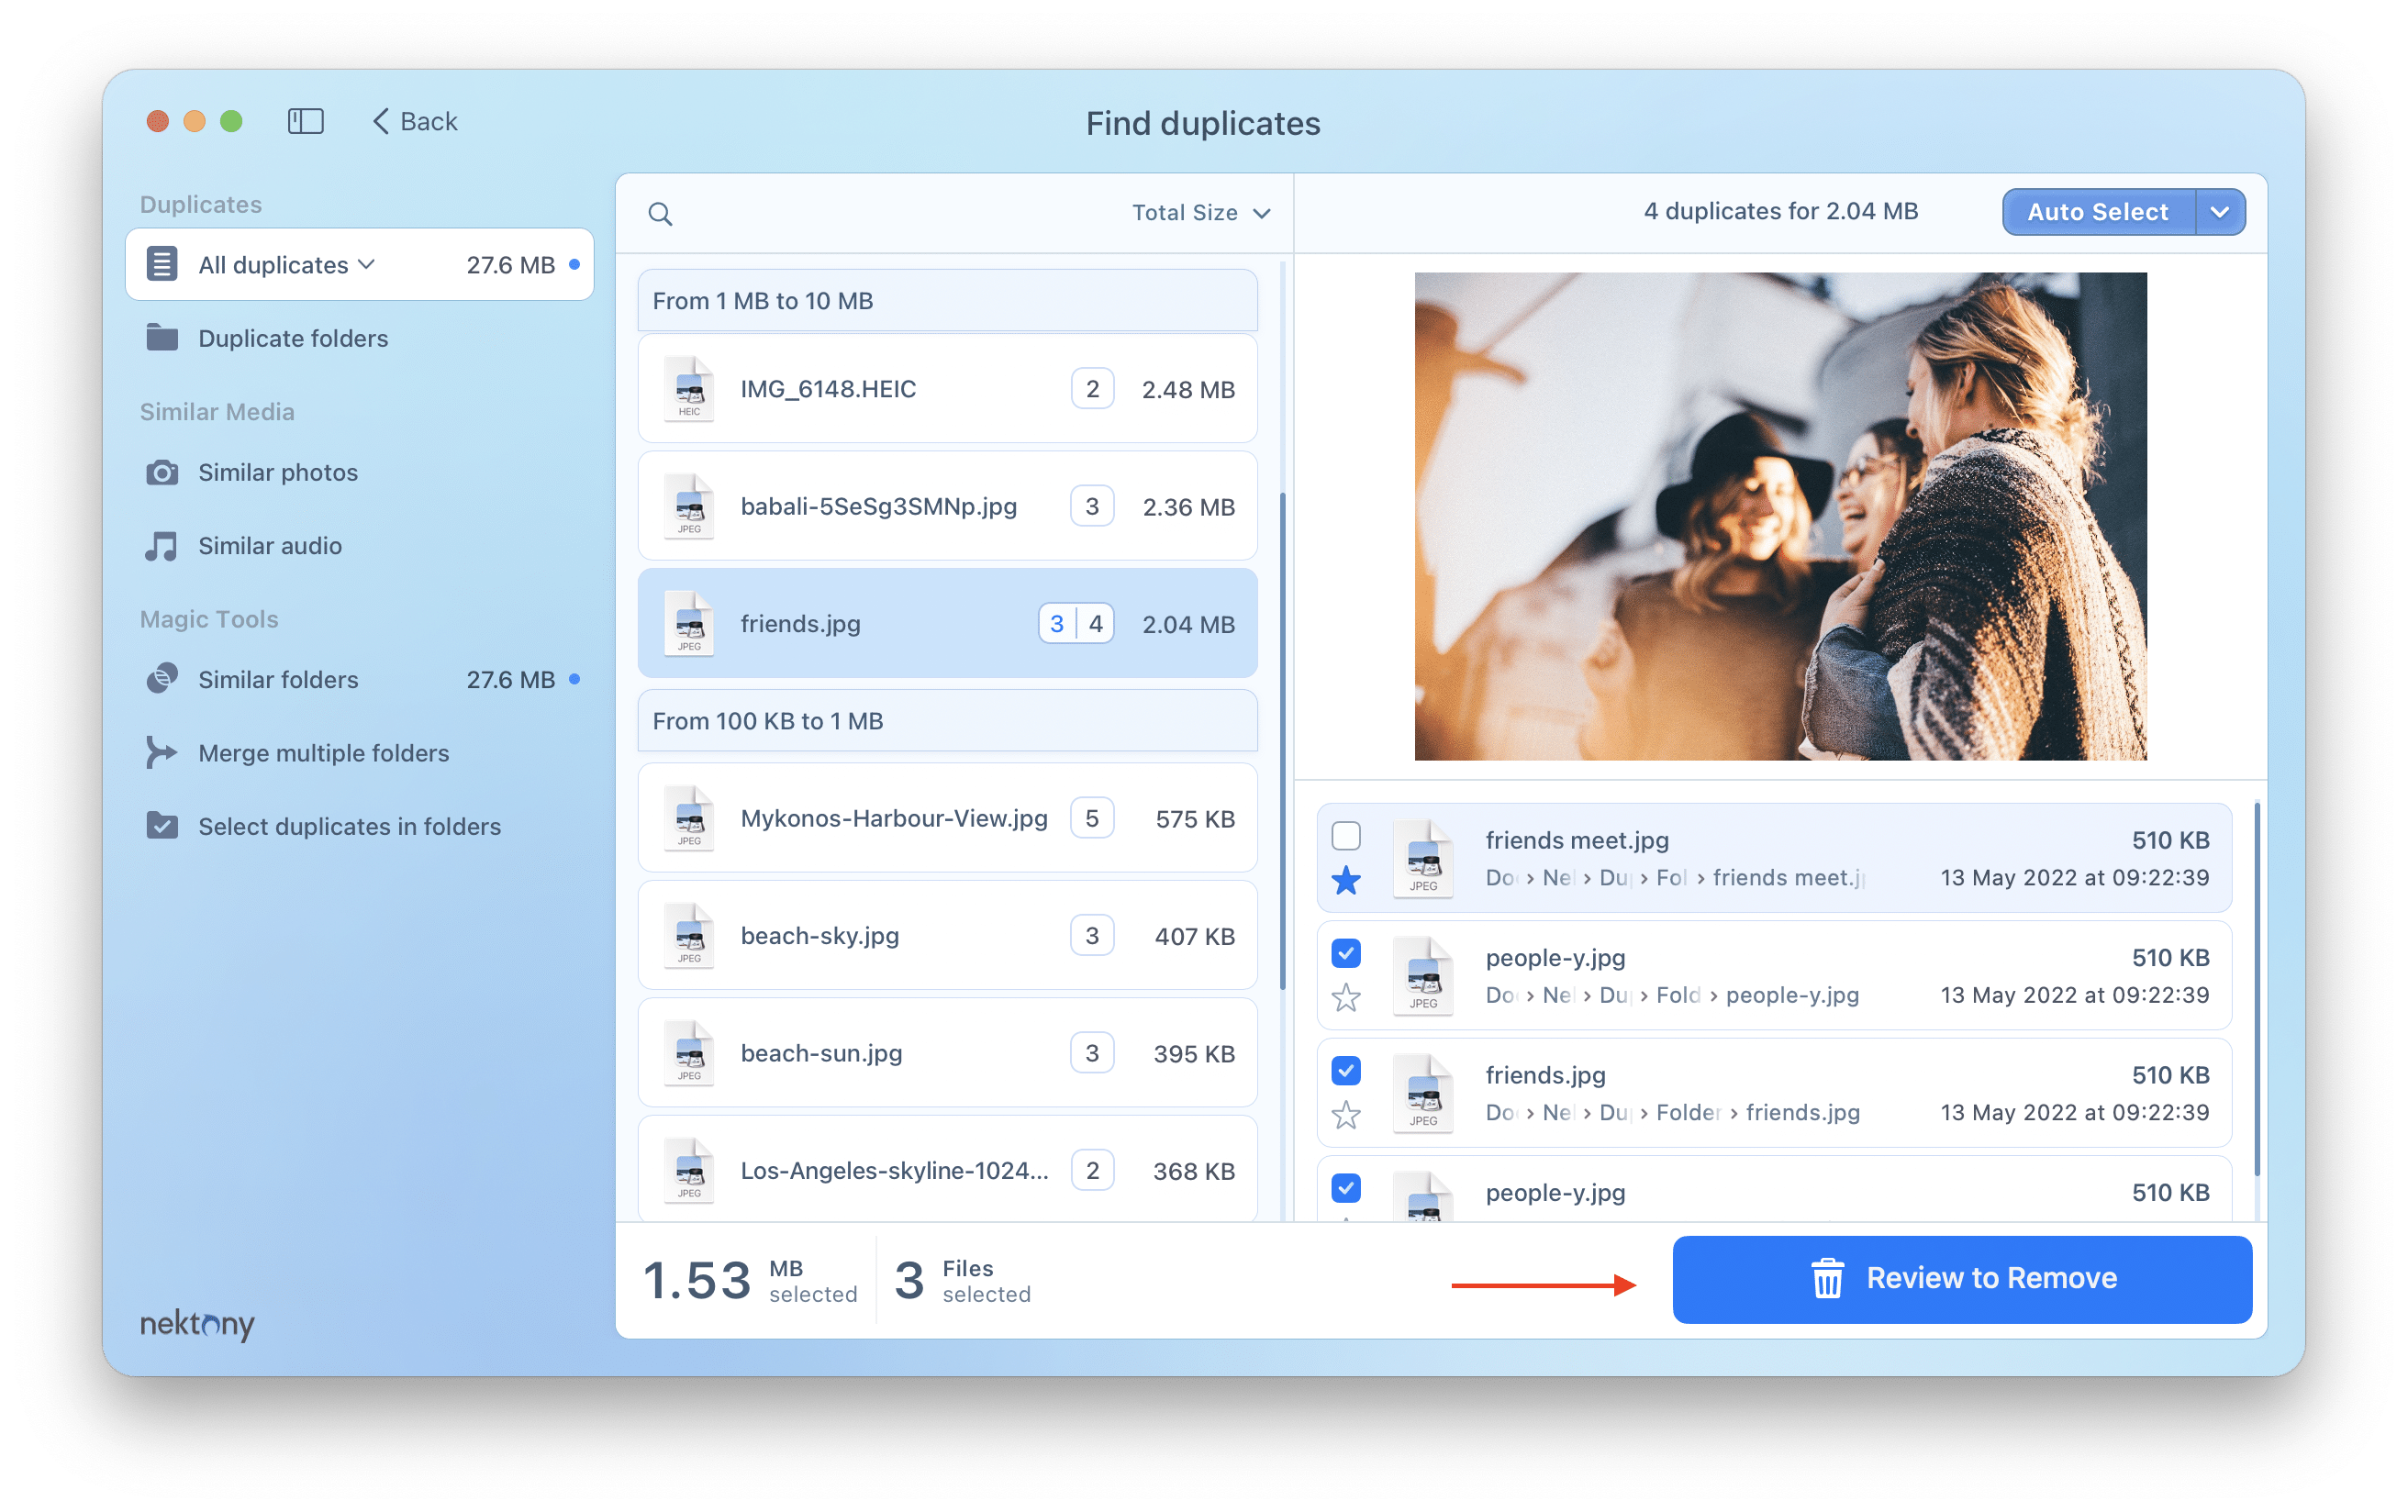
- Review the duplicates and select all unneeded copies.
- Click Review to Remove.
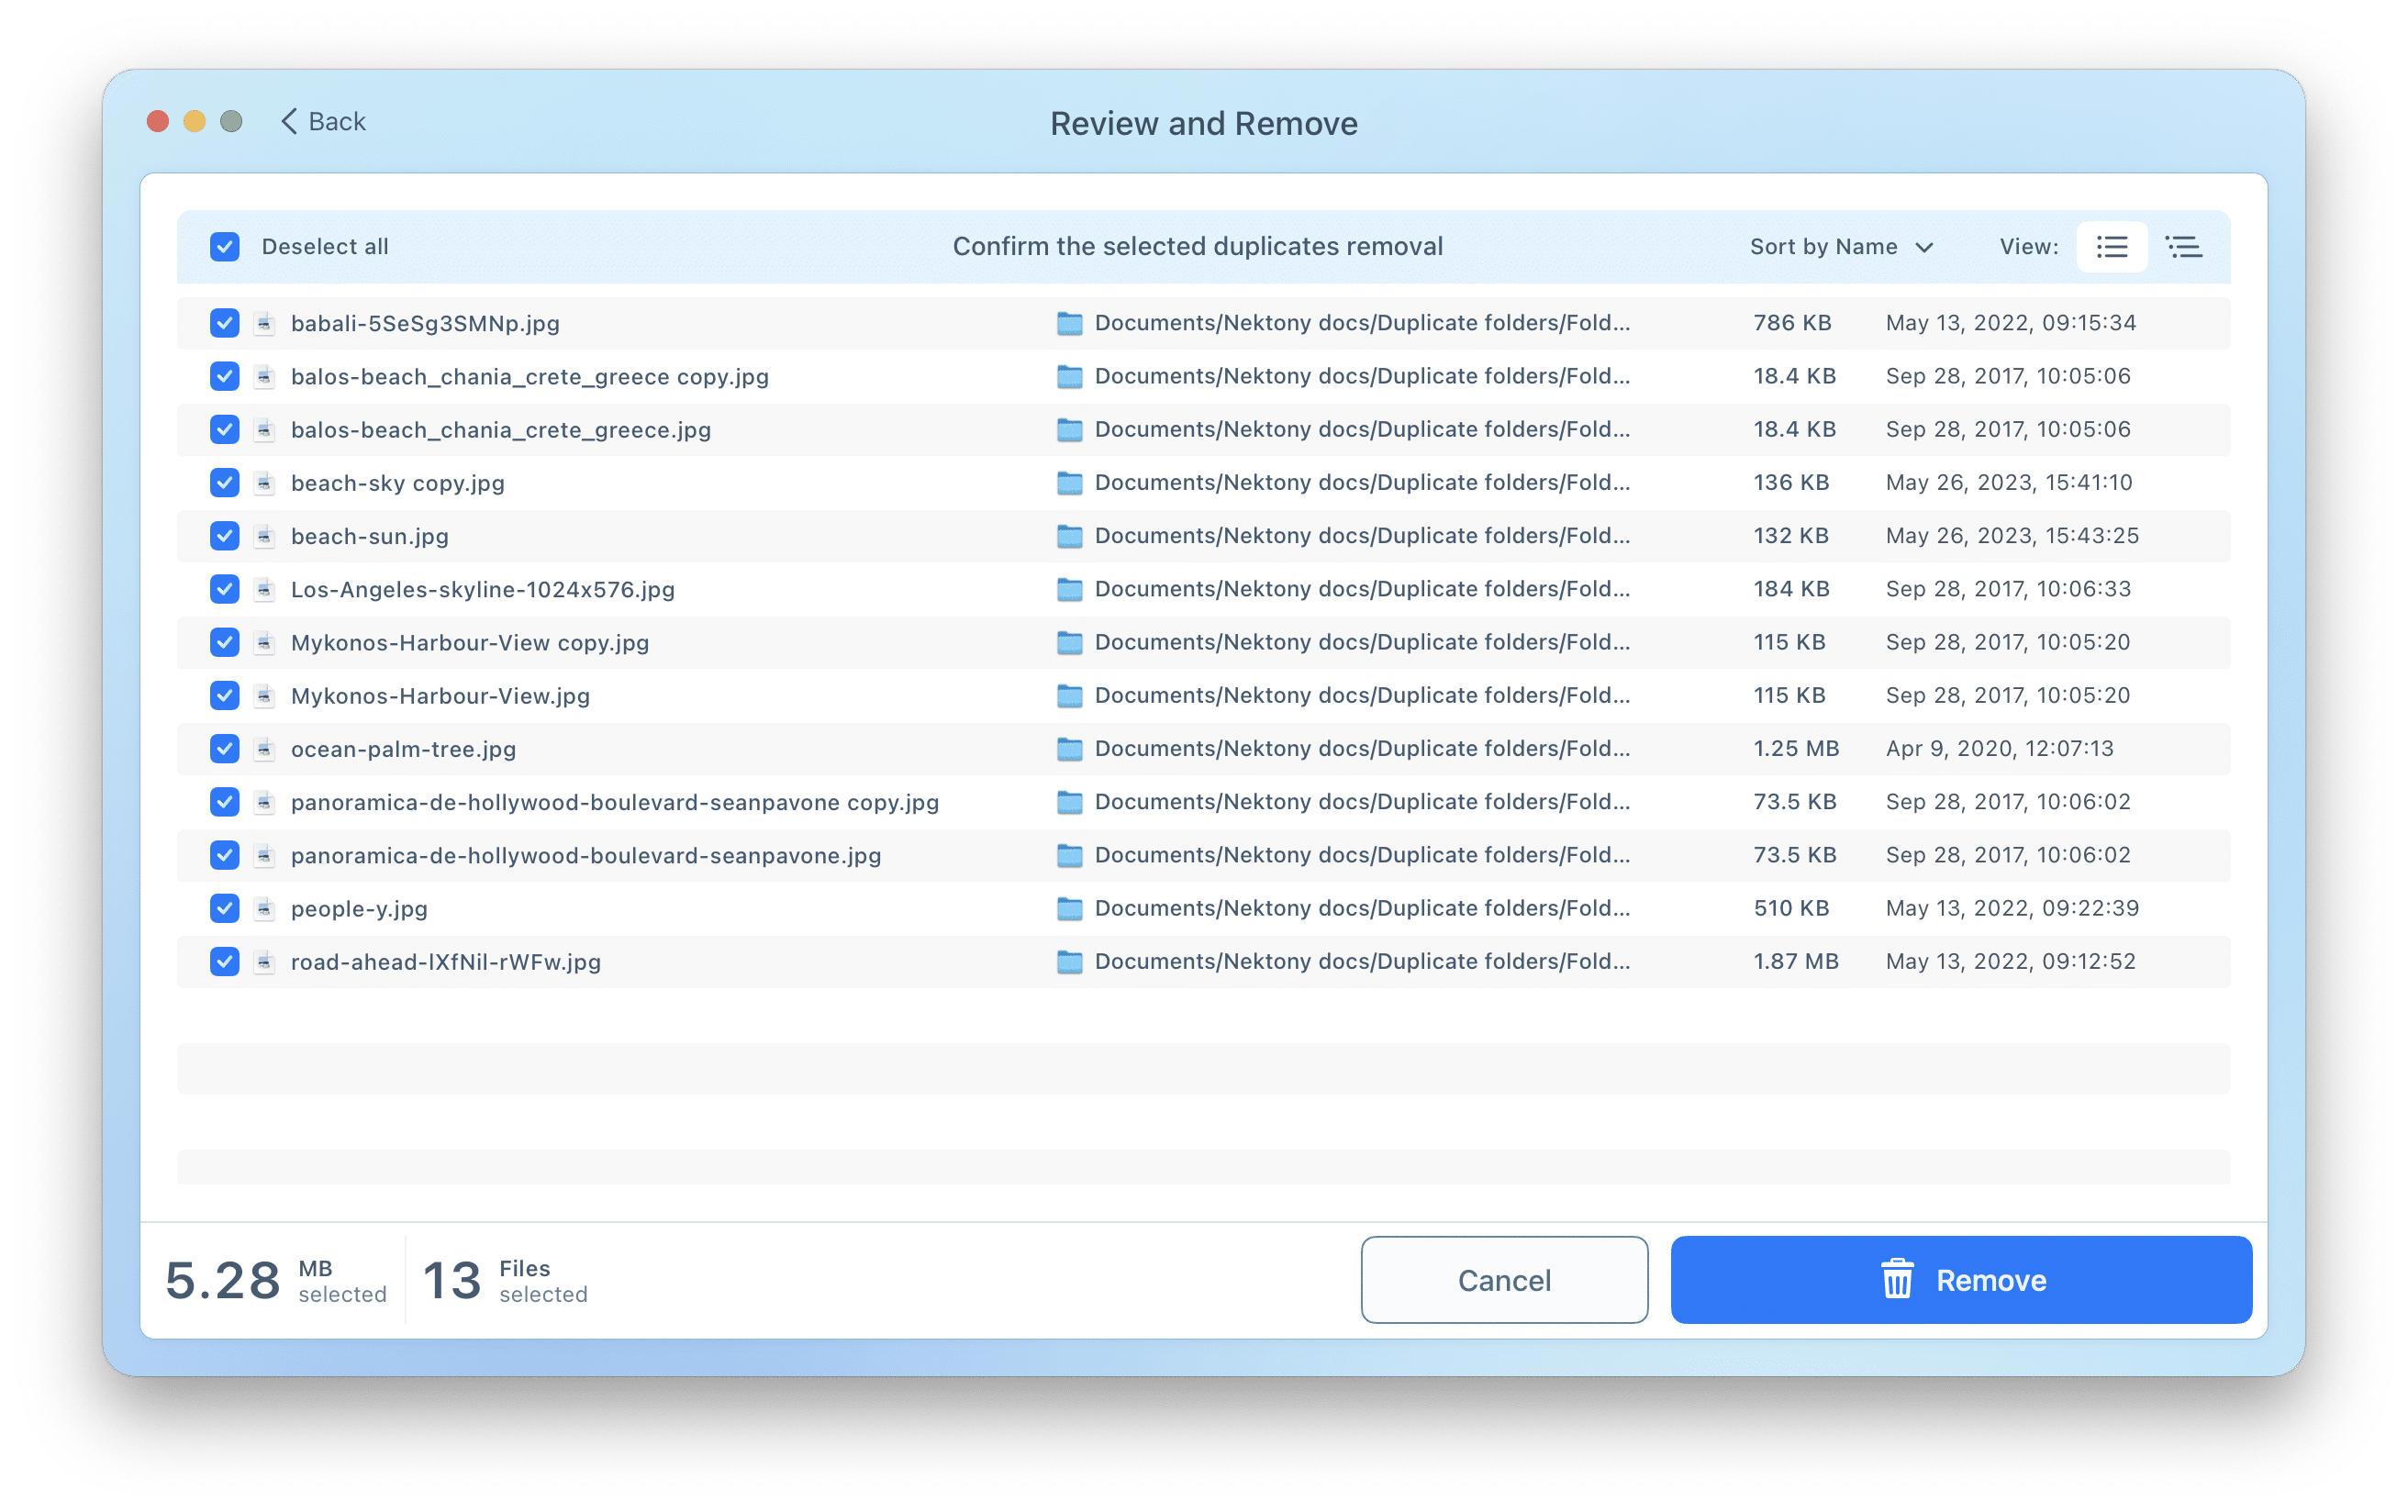
- Confirm deleting the duplicates.
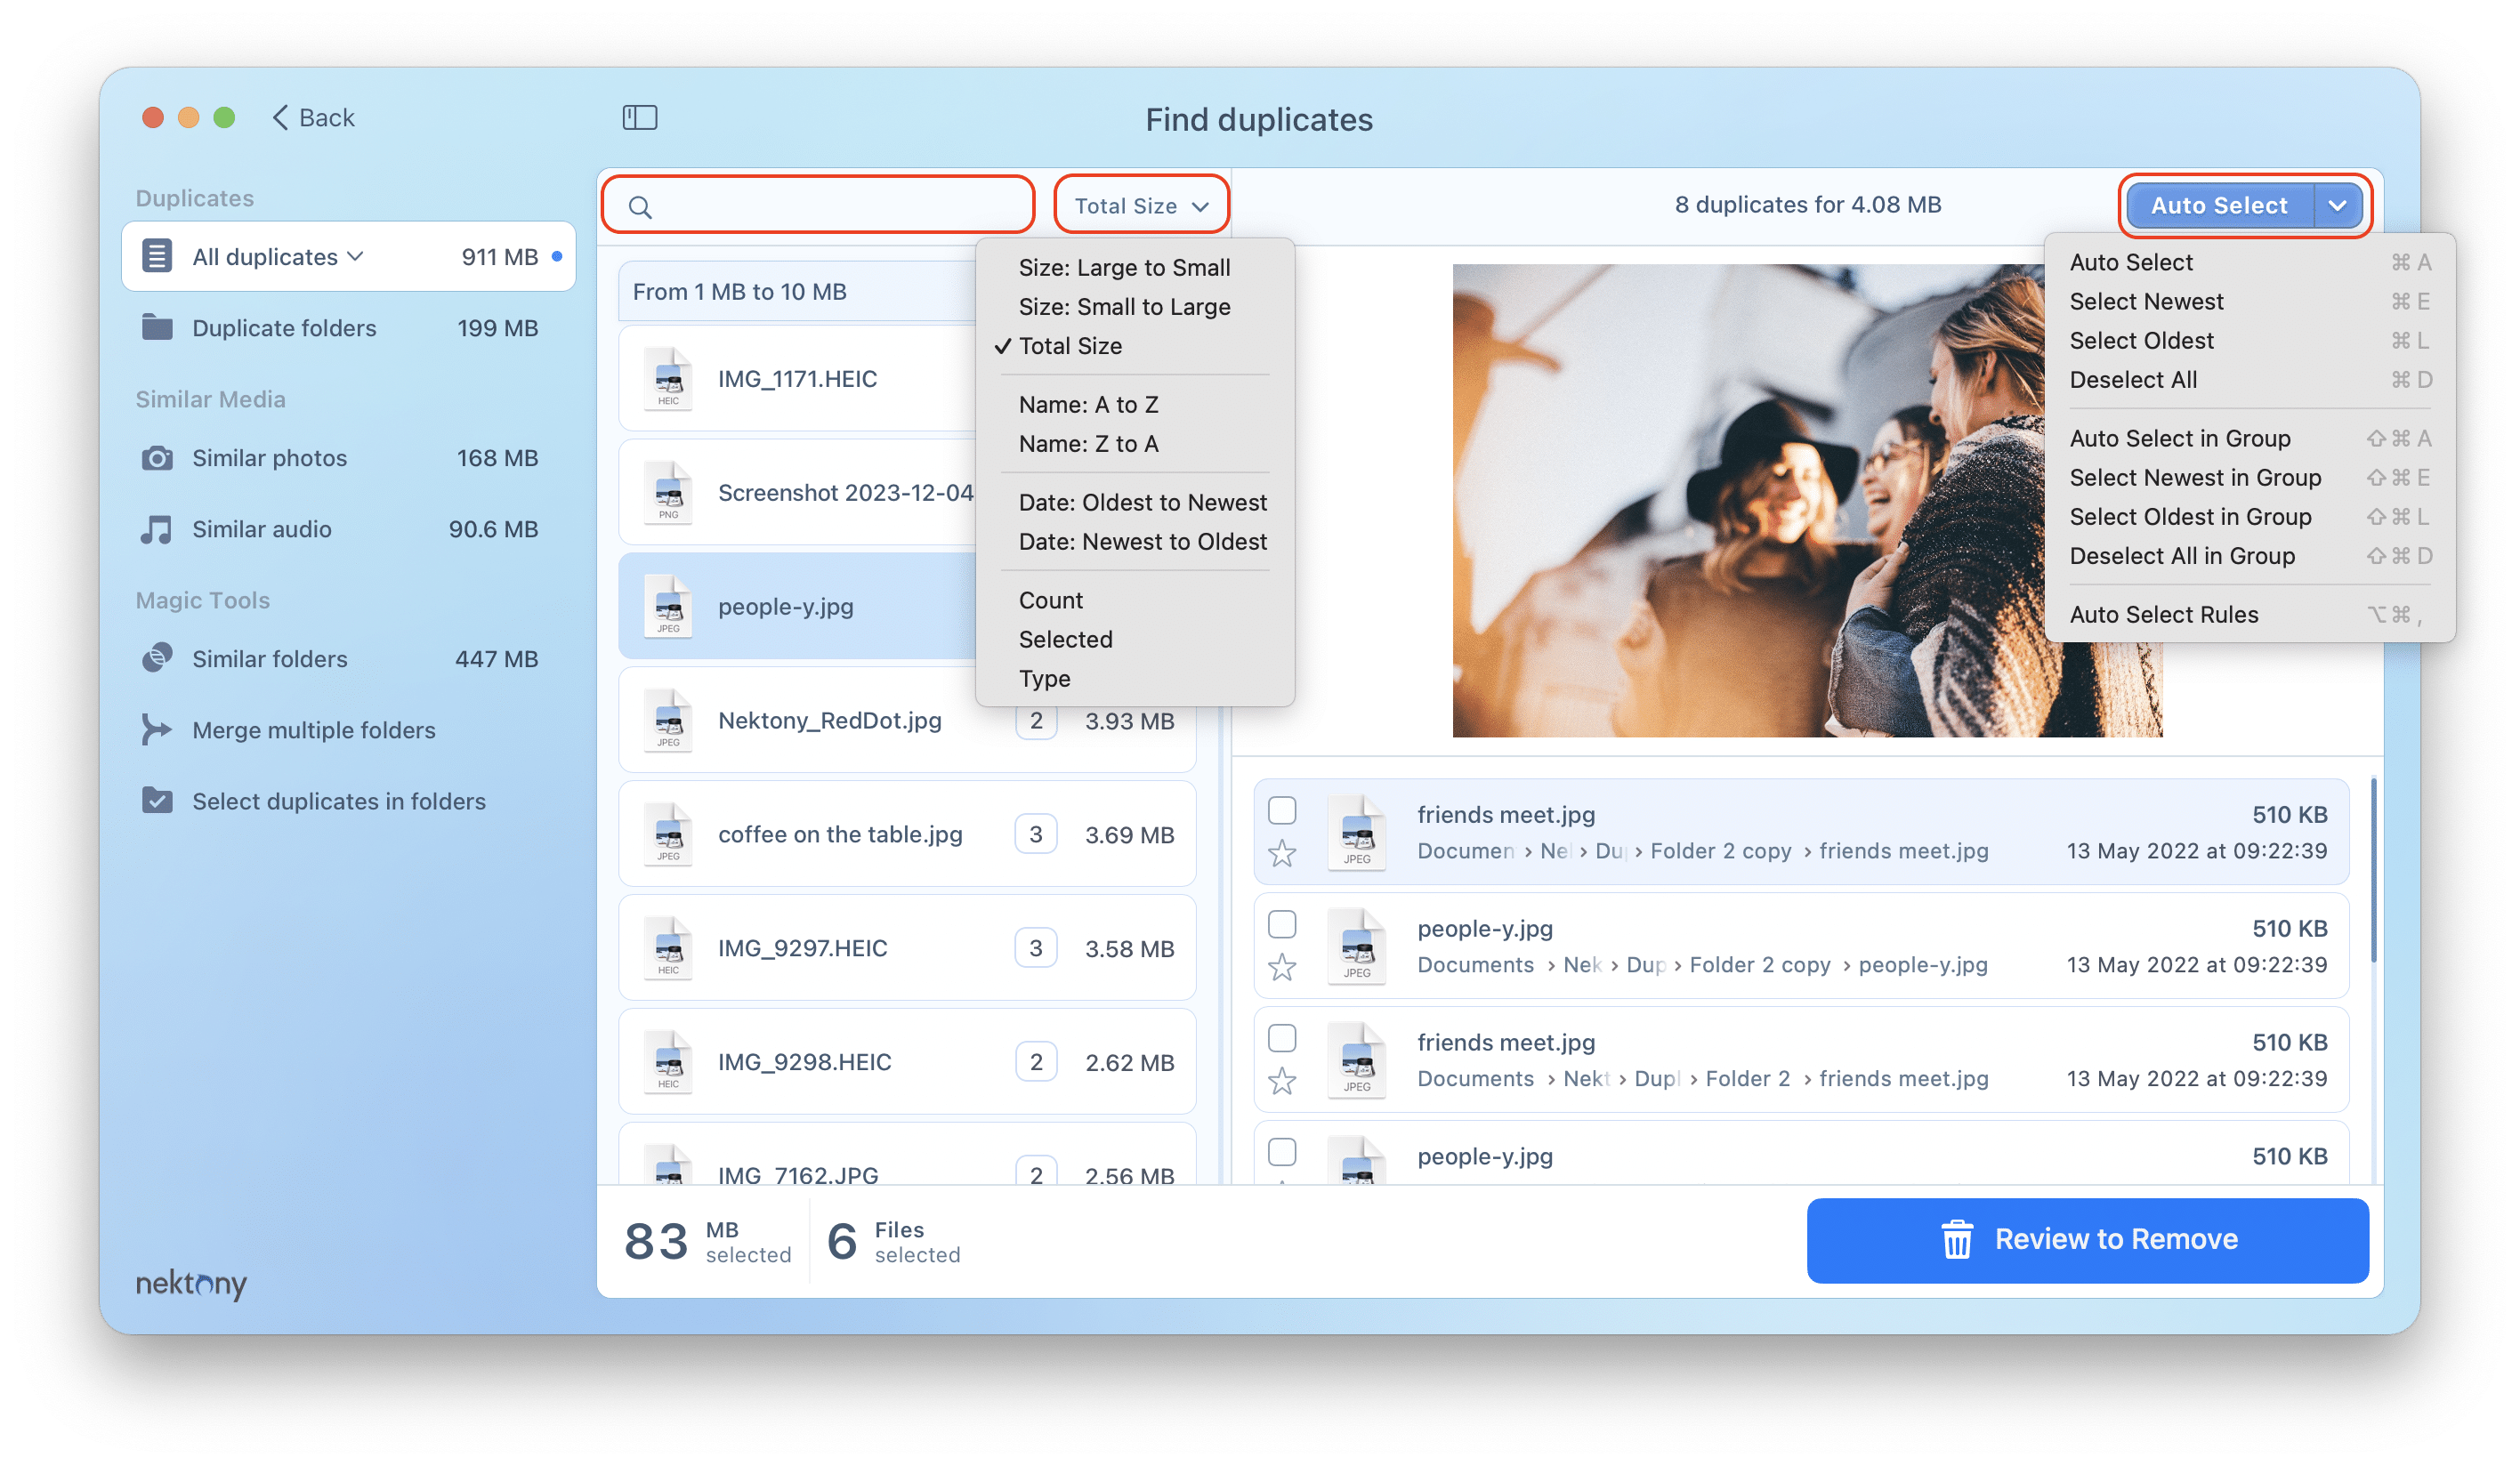
- Use the filter to sort duplicates from Large to Small → select and remove the biggest duplicate files.
- Switch to the Duplicate Folders panel and remove duplicate folders.
Scenarios for removing duplicate files
There are three possible common scenarios for removing duplicate files from Mac with Duplicate File Finder:1. Find duplicates for a particular file
Select one or several folders to scan → when the scanning is completed, you will see the list of all duplicate files → enter the filename in the search panel → select your file → preview its duplicates → remove unneeded copies.
If you need to find specific files among all the duplicates quickly, you can also use the filter option Sort by name.
2. Find and remove the biggest duplicates to free up disk space
Tips to quickly select and remove duplicates
If you have a huge number of duplicates, you may be confused as to how to select them. But don’t worry, there are some useful features that will make your task easier, faster and smarter.
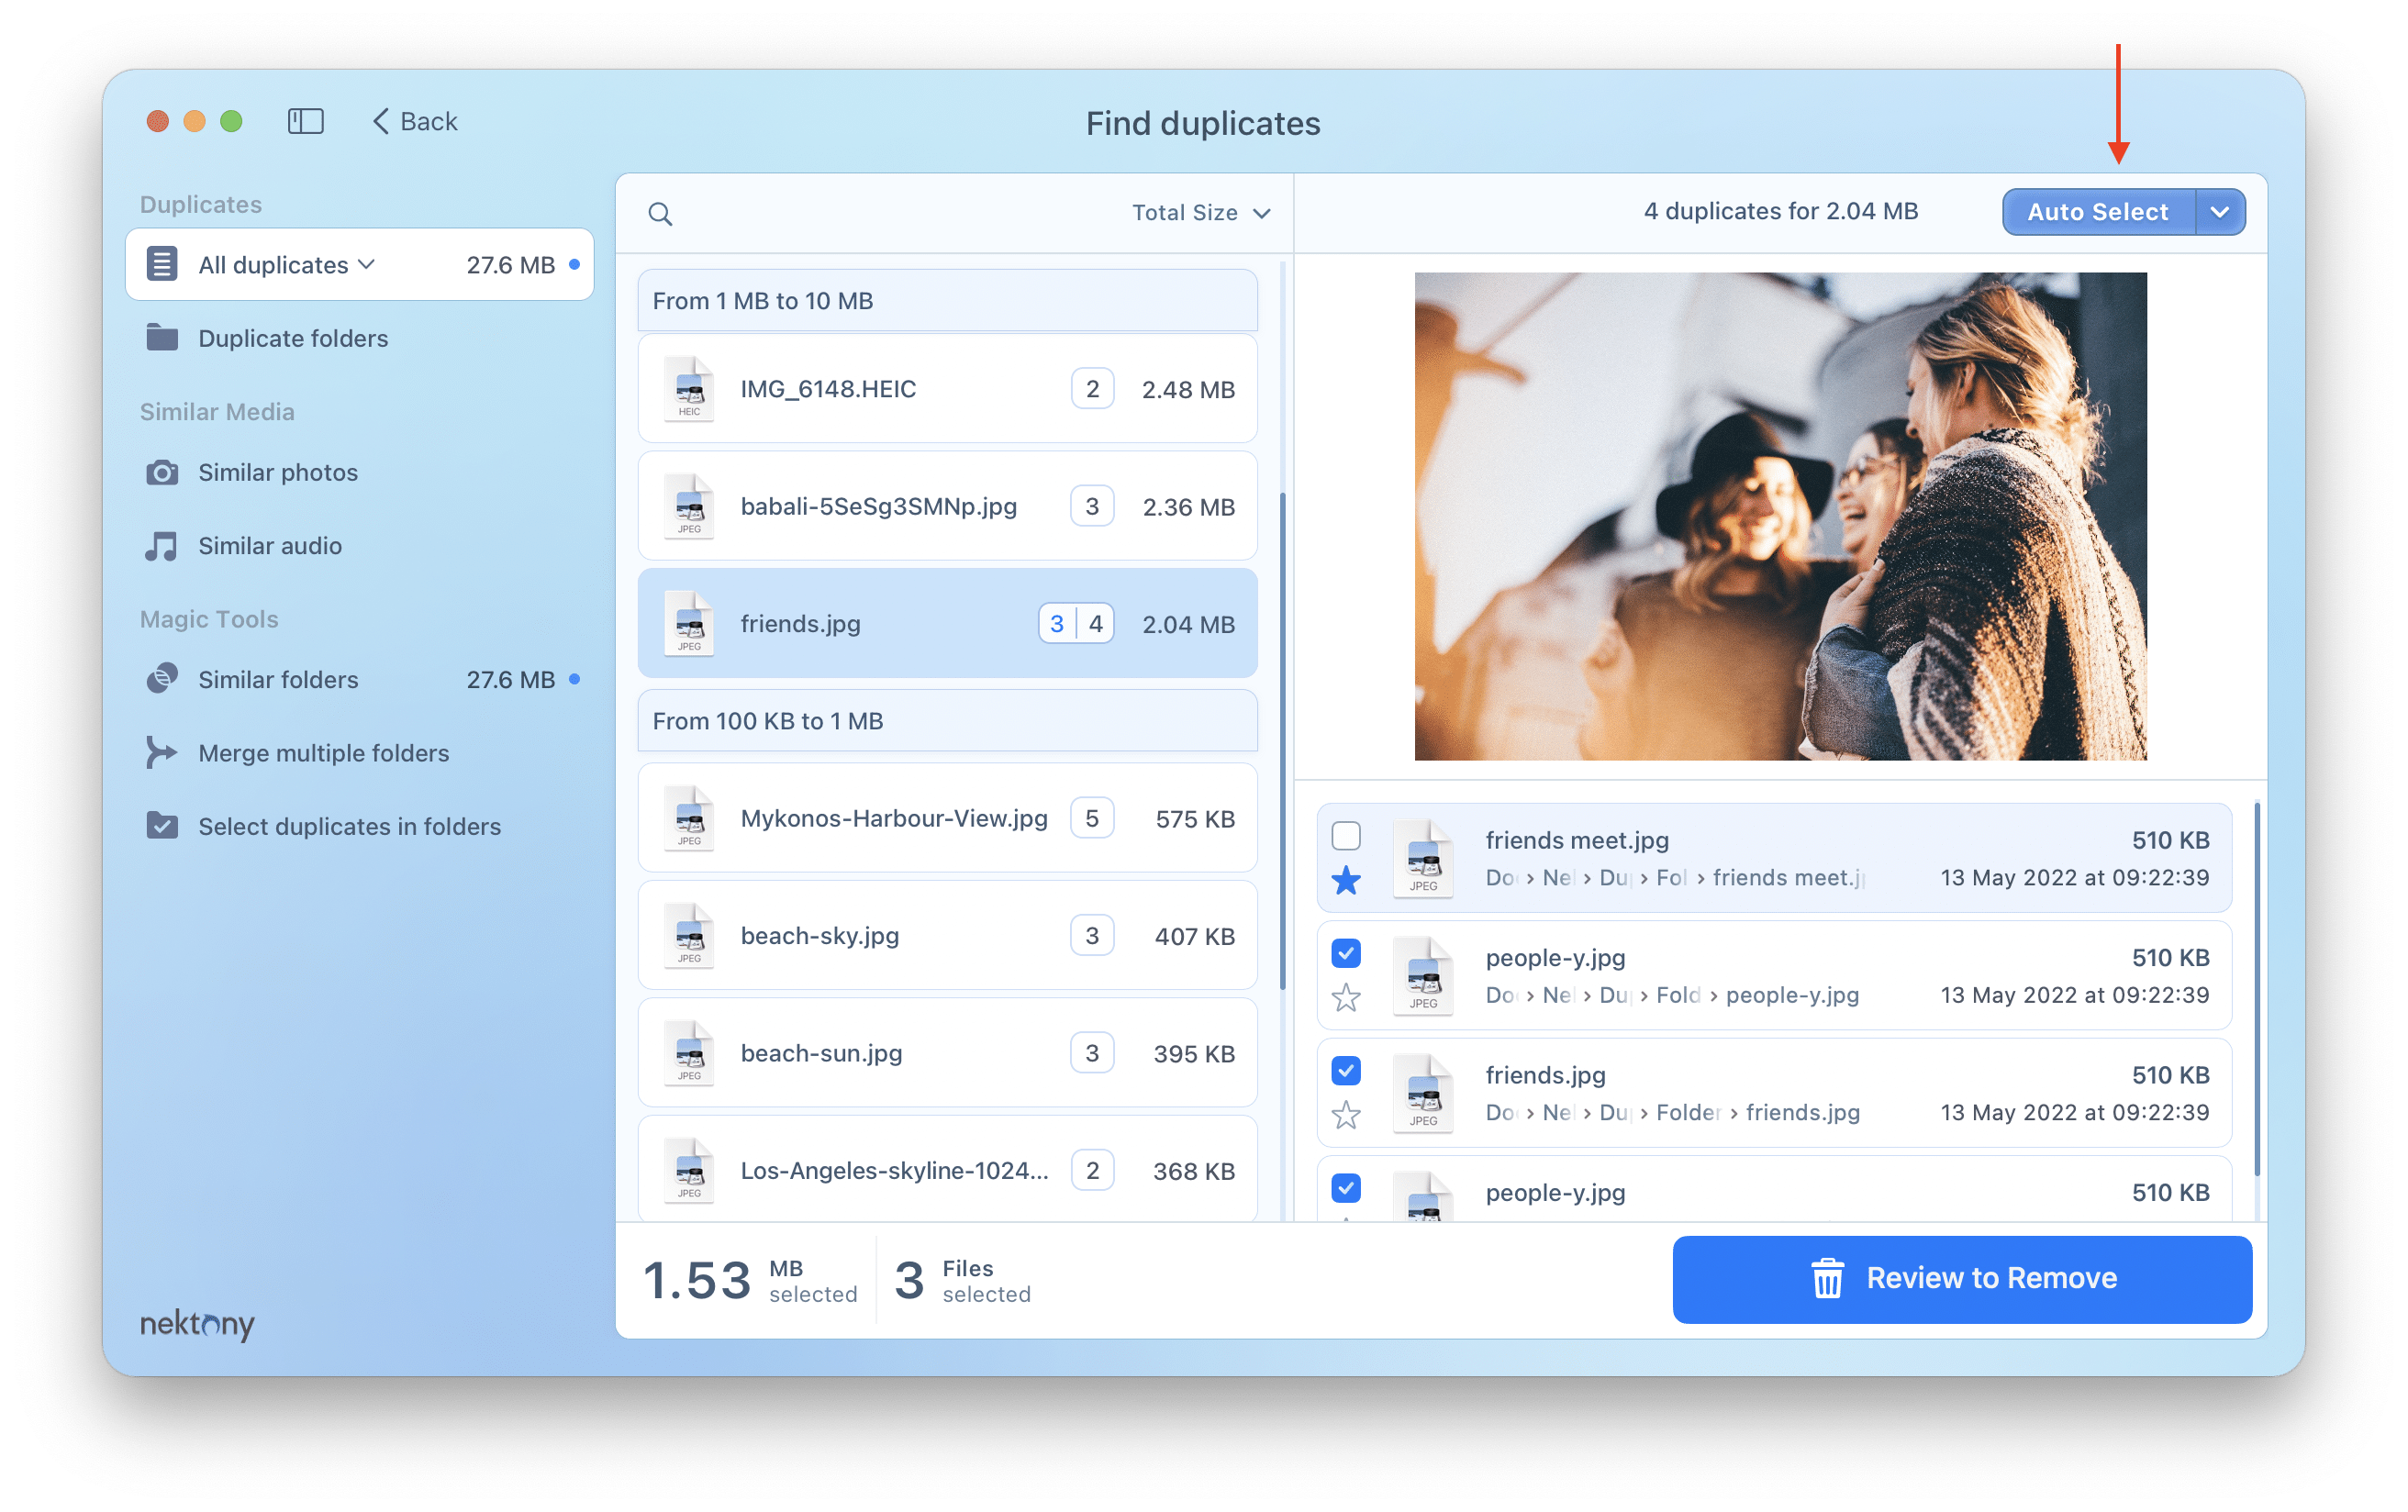
1. Use the Auto Select button
If you’d like to select the duplicates automatically, use the Auto Select button. Read our previous article on how to operate the Auto Select option. This feature will be helpful when you have several folders with duplicates and know exactly from which folder you want to remove files. So you don’t need to review each file separately. Auto Select will do it for you in just one click.
2. Sort your duplicate files
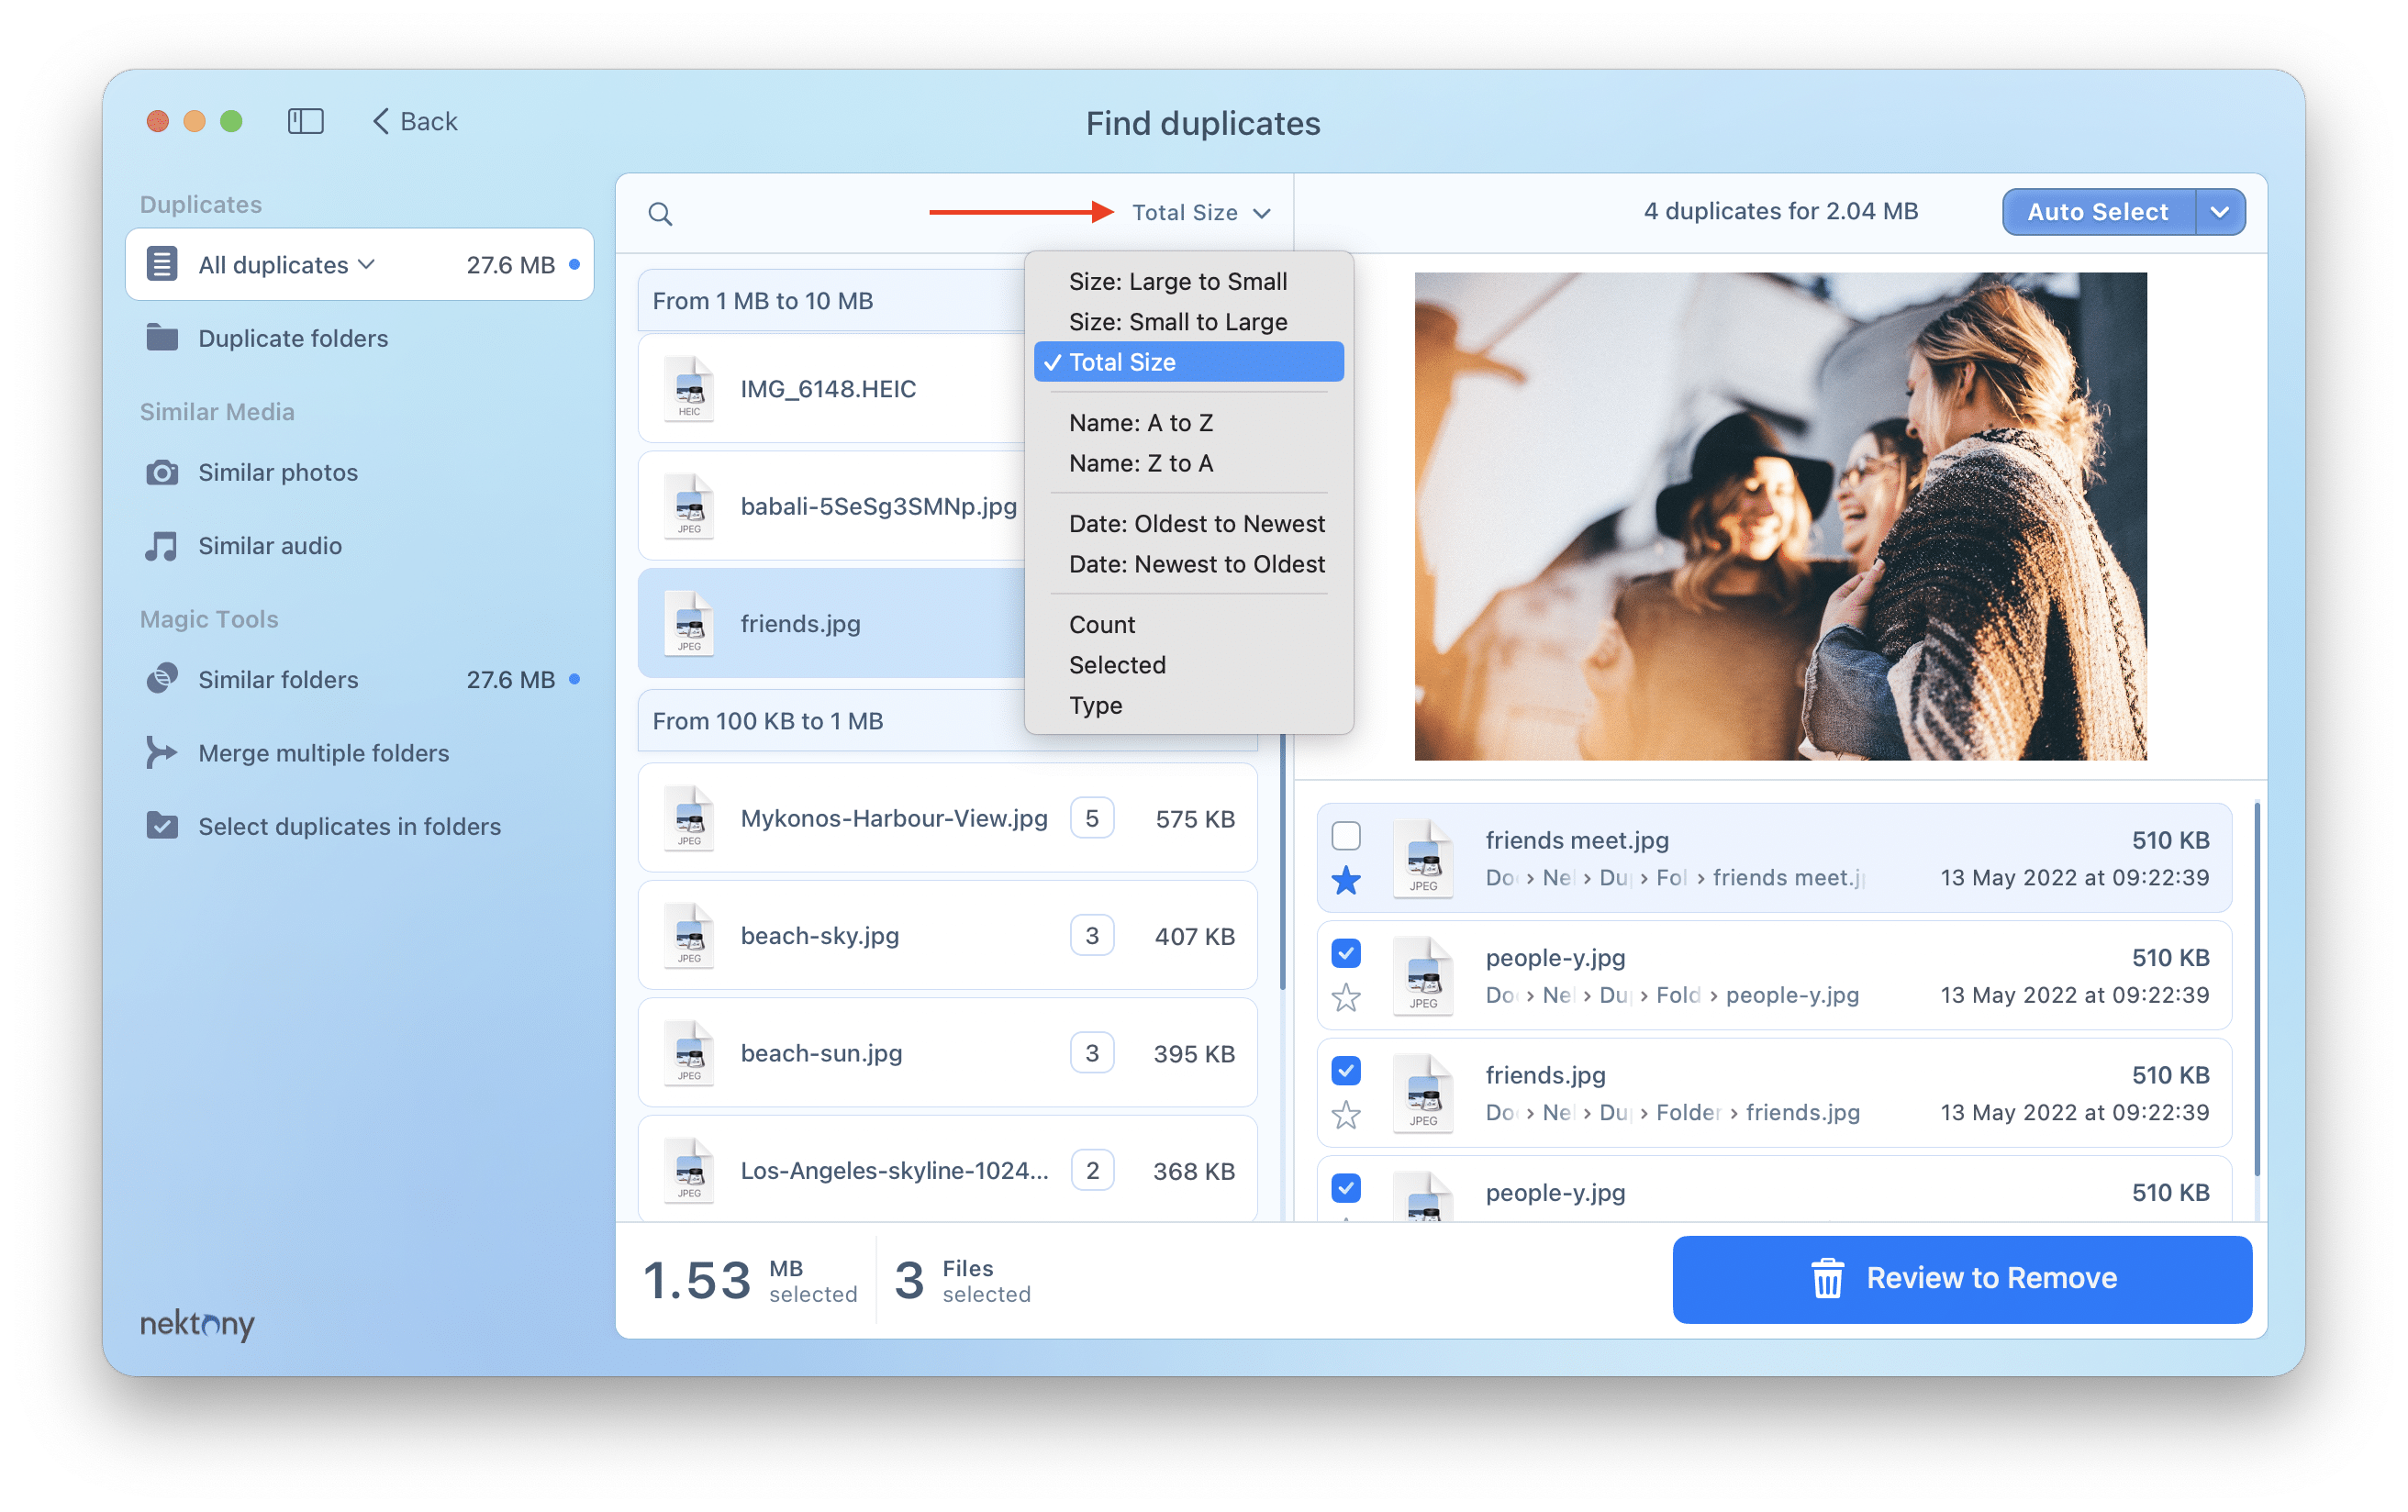
If you need to quickly free up some space on your disk, you can use the Filter option. For example, sort your duplicates by size and first remove the biggest files. Or, if you know the name of your duplicates, sort the files by name and quickly get rid of them.
3. Skip the scanning of some folders
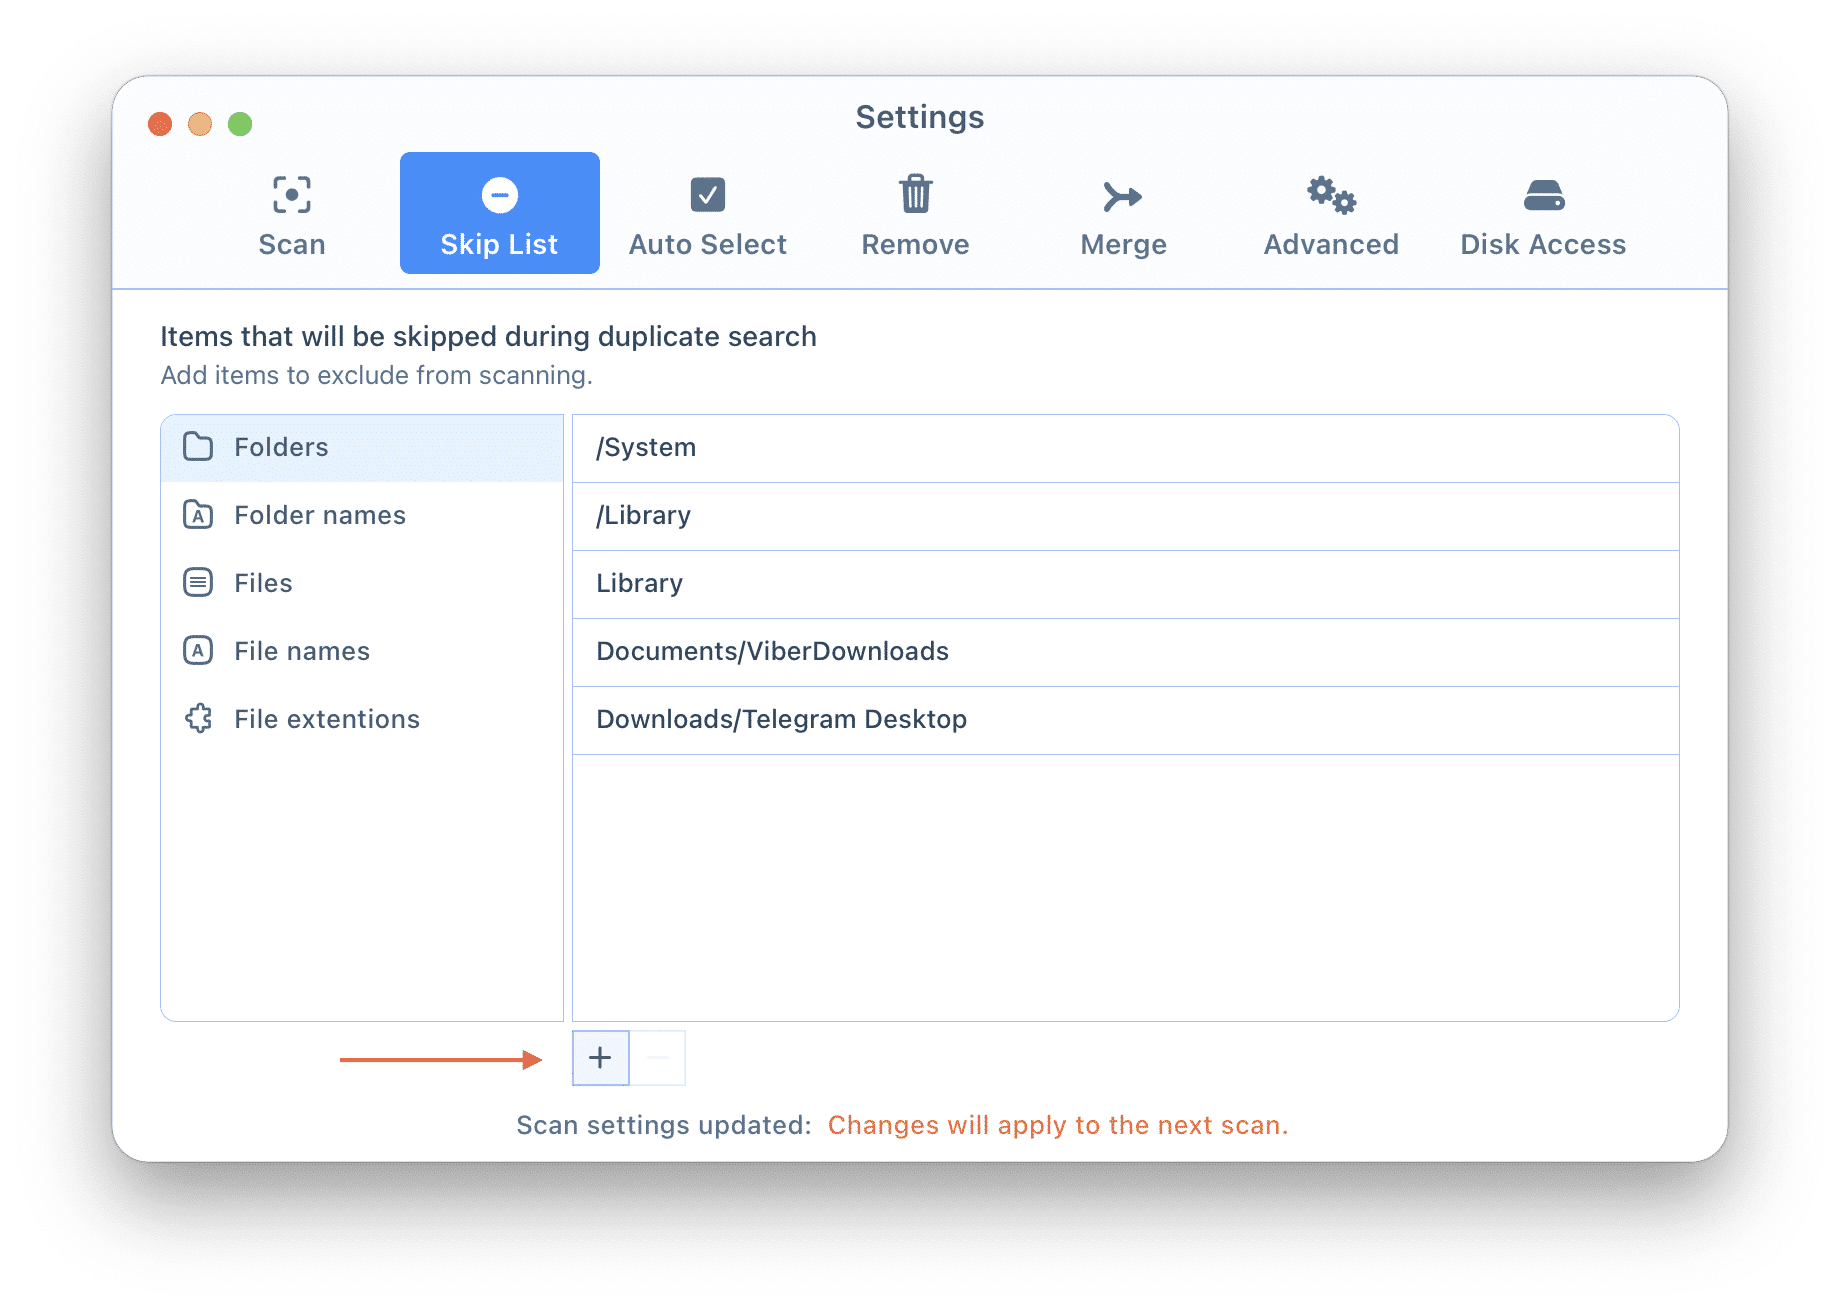
In the app’s settings, you will find the Skip List tab. Here you can choose which folders, files, and extension types the apps should skip during the scanning process. As a result, you save time as you scan files and select duplicates from hundreds of duplicate items.
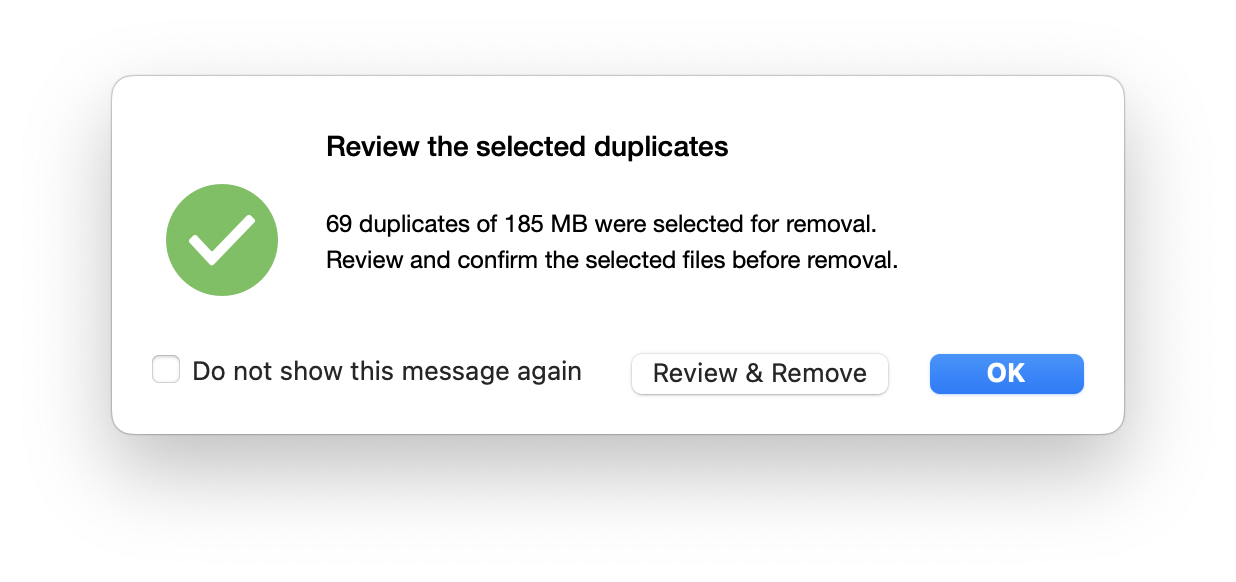
Note: if you are unsure about your folders’ content, you should review the selected duplicates before deletion. The application doesn’t delete any file without your confirmation. It is an obvious option, so be attentive to this popup message.
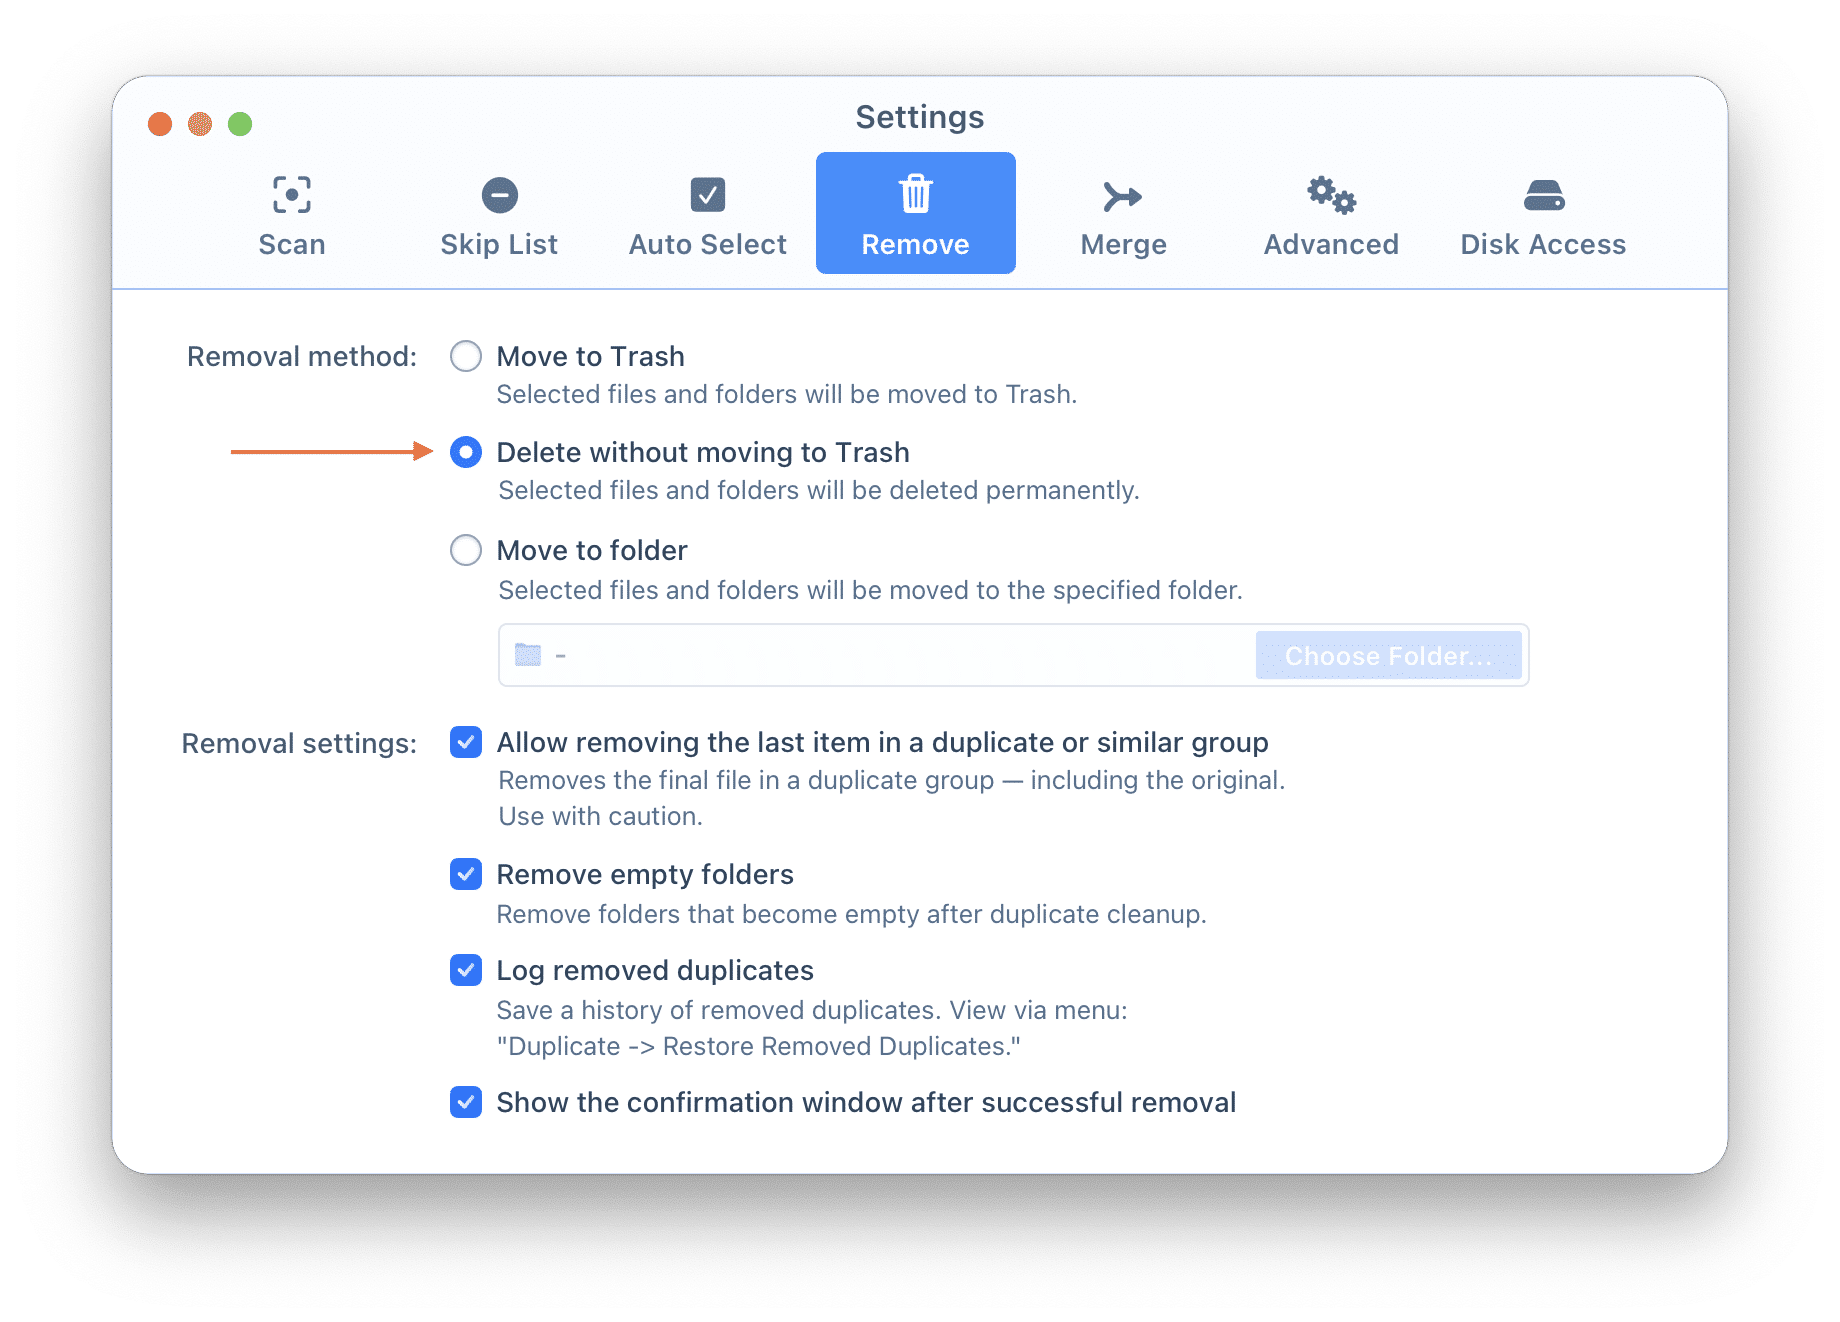
Nevertheless, if you have deleted files by mistake, don’t worry. That is understandable with many of our users, so when you delete duplicates, by default the files go to Trash. If you need to recover your files, just go to Trash and use the command from the context menu.
At the same time, note that this option can be changed in the app’s Preferences.
5. Select Duplicates in Folder
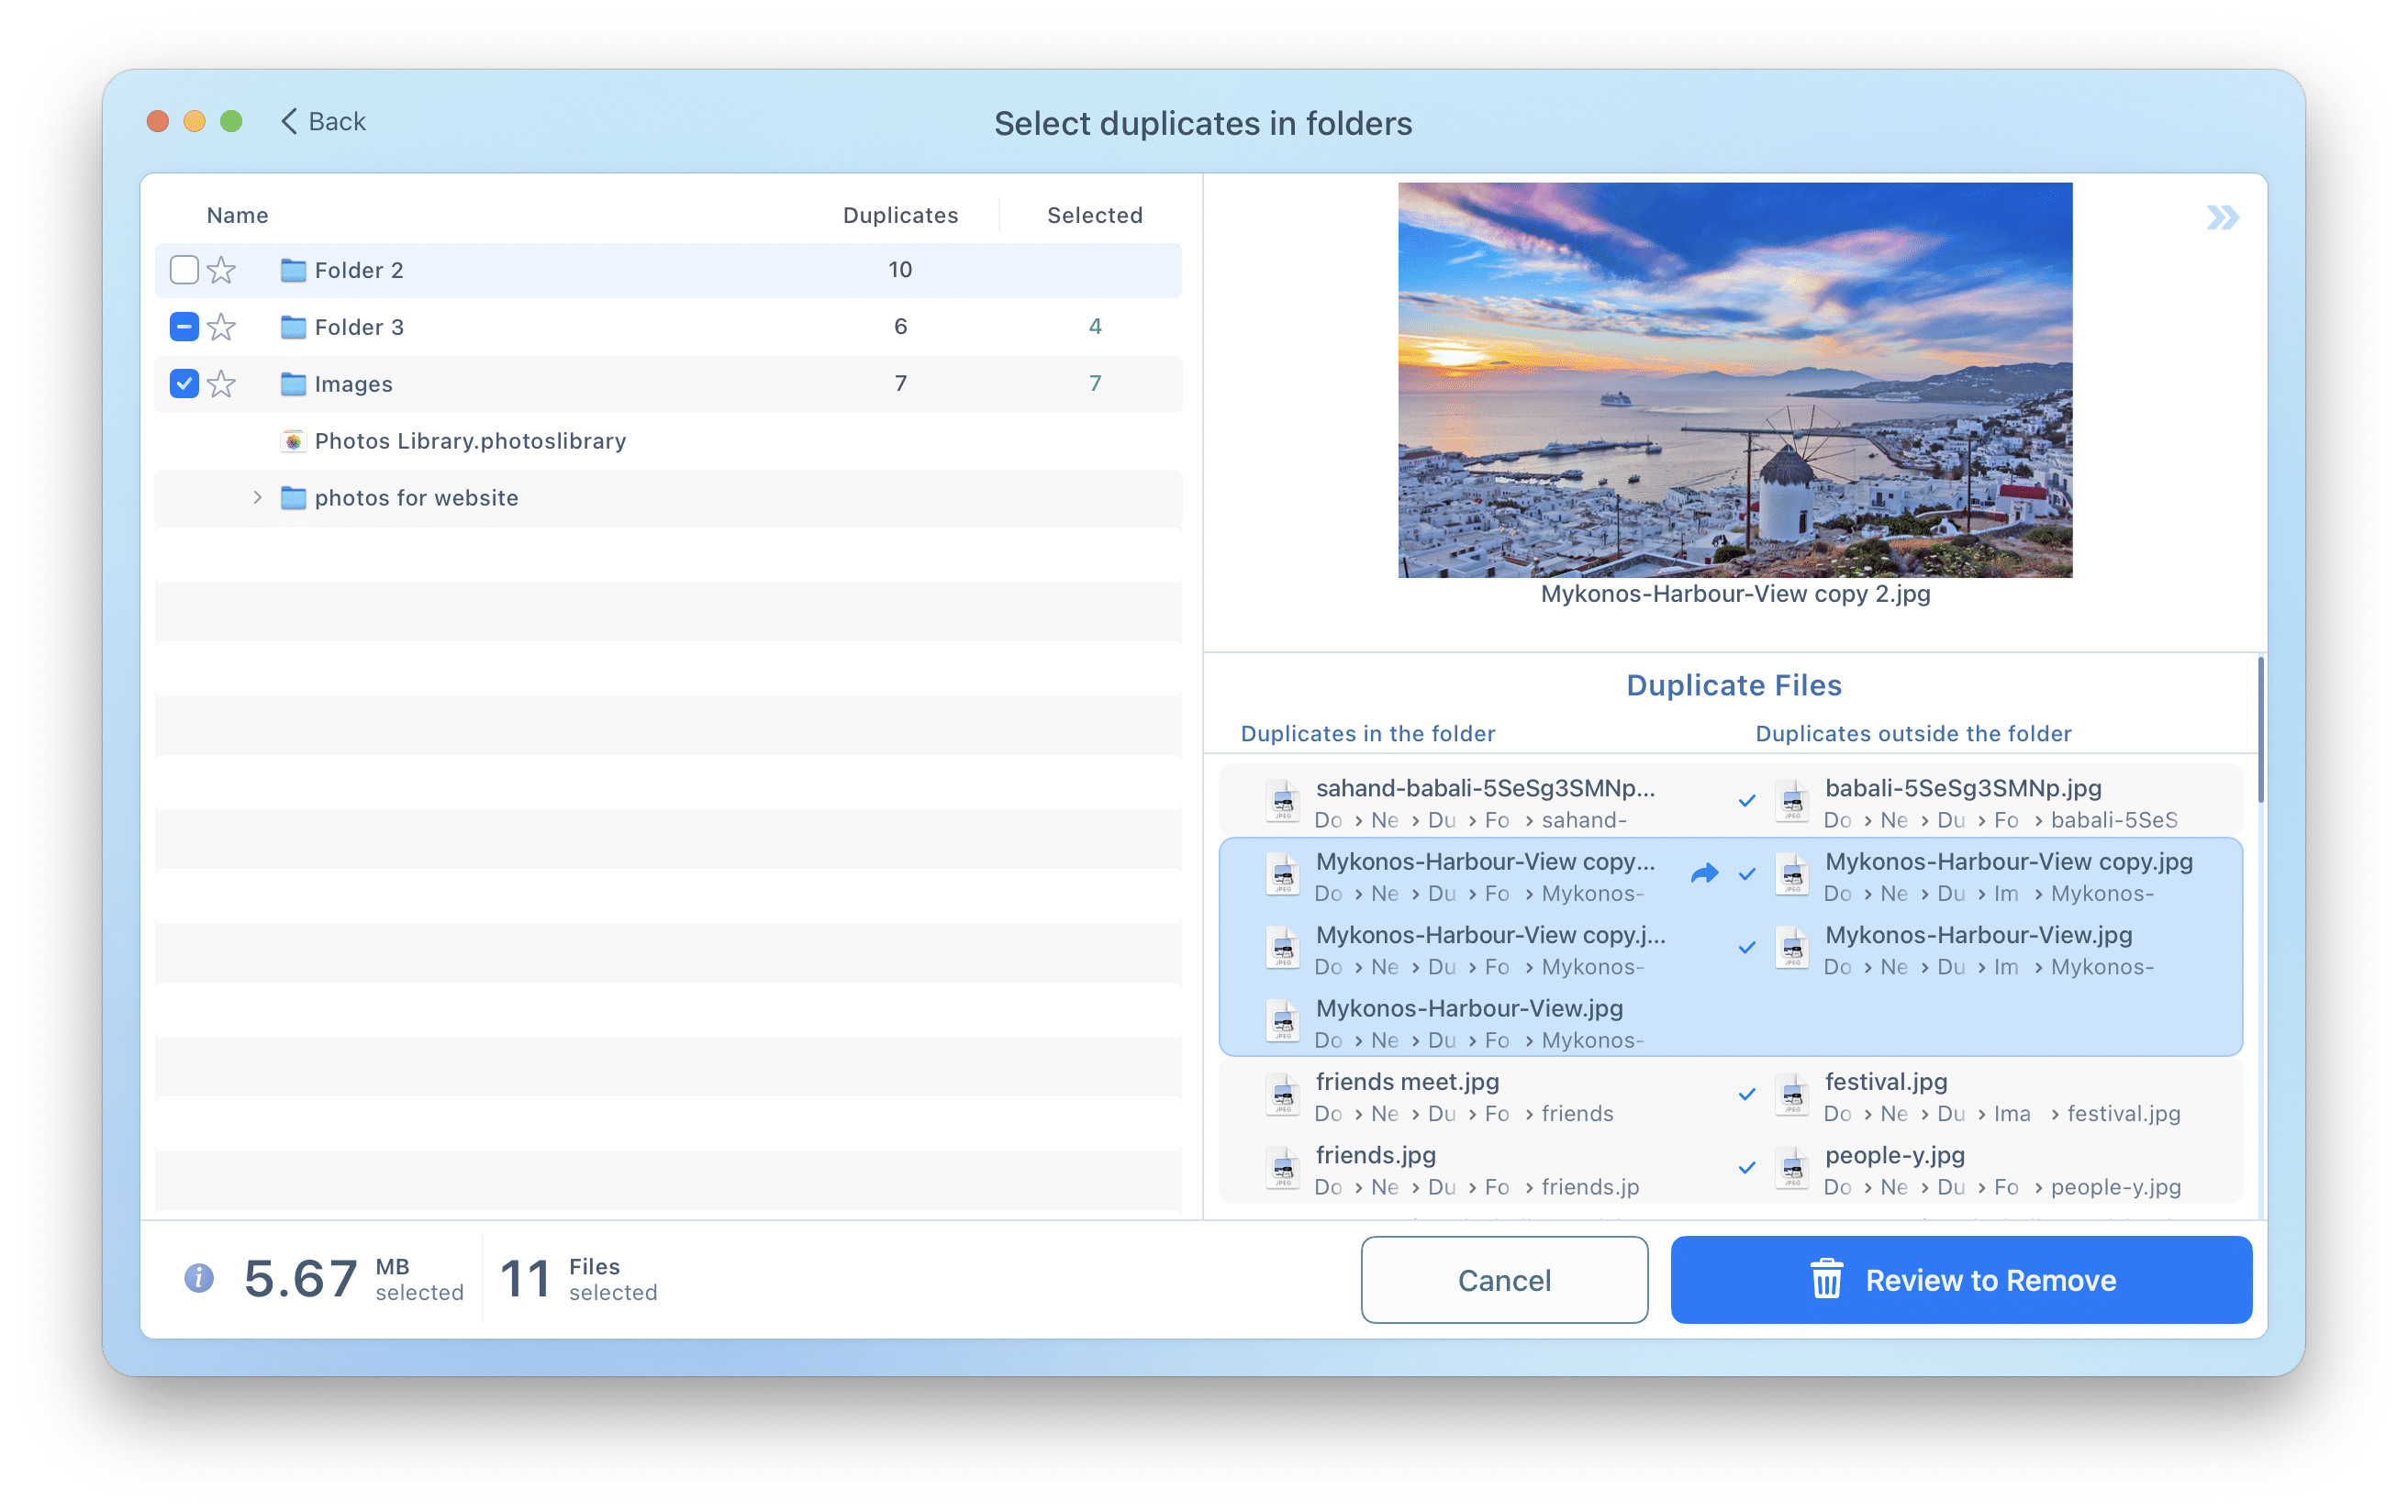
If you have many duplicates, reviewing each file and selecting unneeded copies in a specific folder might take a significant time. That’s why the application provides a special feature, which will help you to complete this task much faster. Click the Select Duplicates in Folder button. You will see a new window with a list of your folders, and detailed information about how many duplicate and unique files each of them has. Mark the folders where you want to select the duplicates and click to remove them.
6. Merge Similar folders
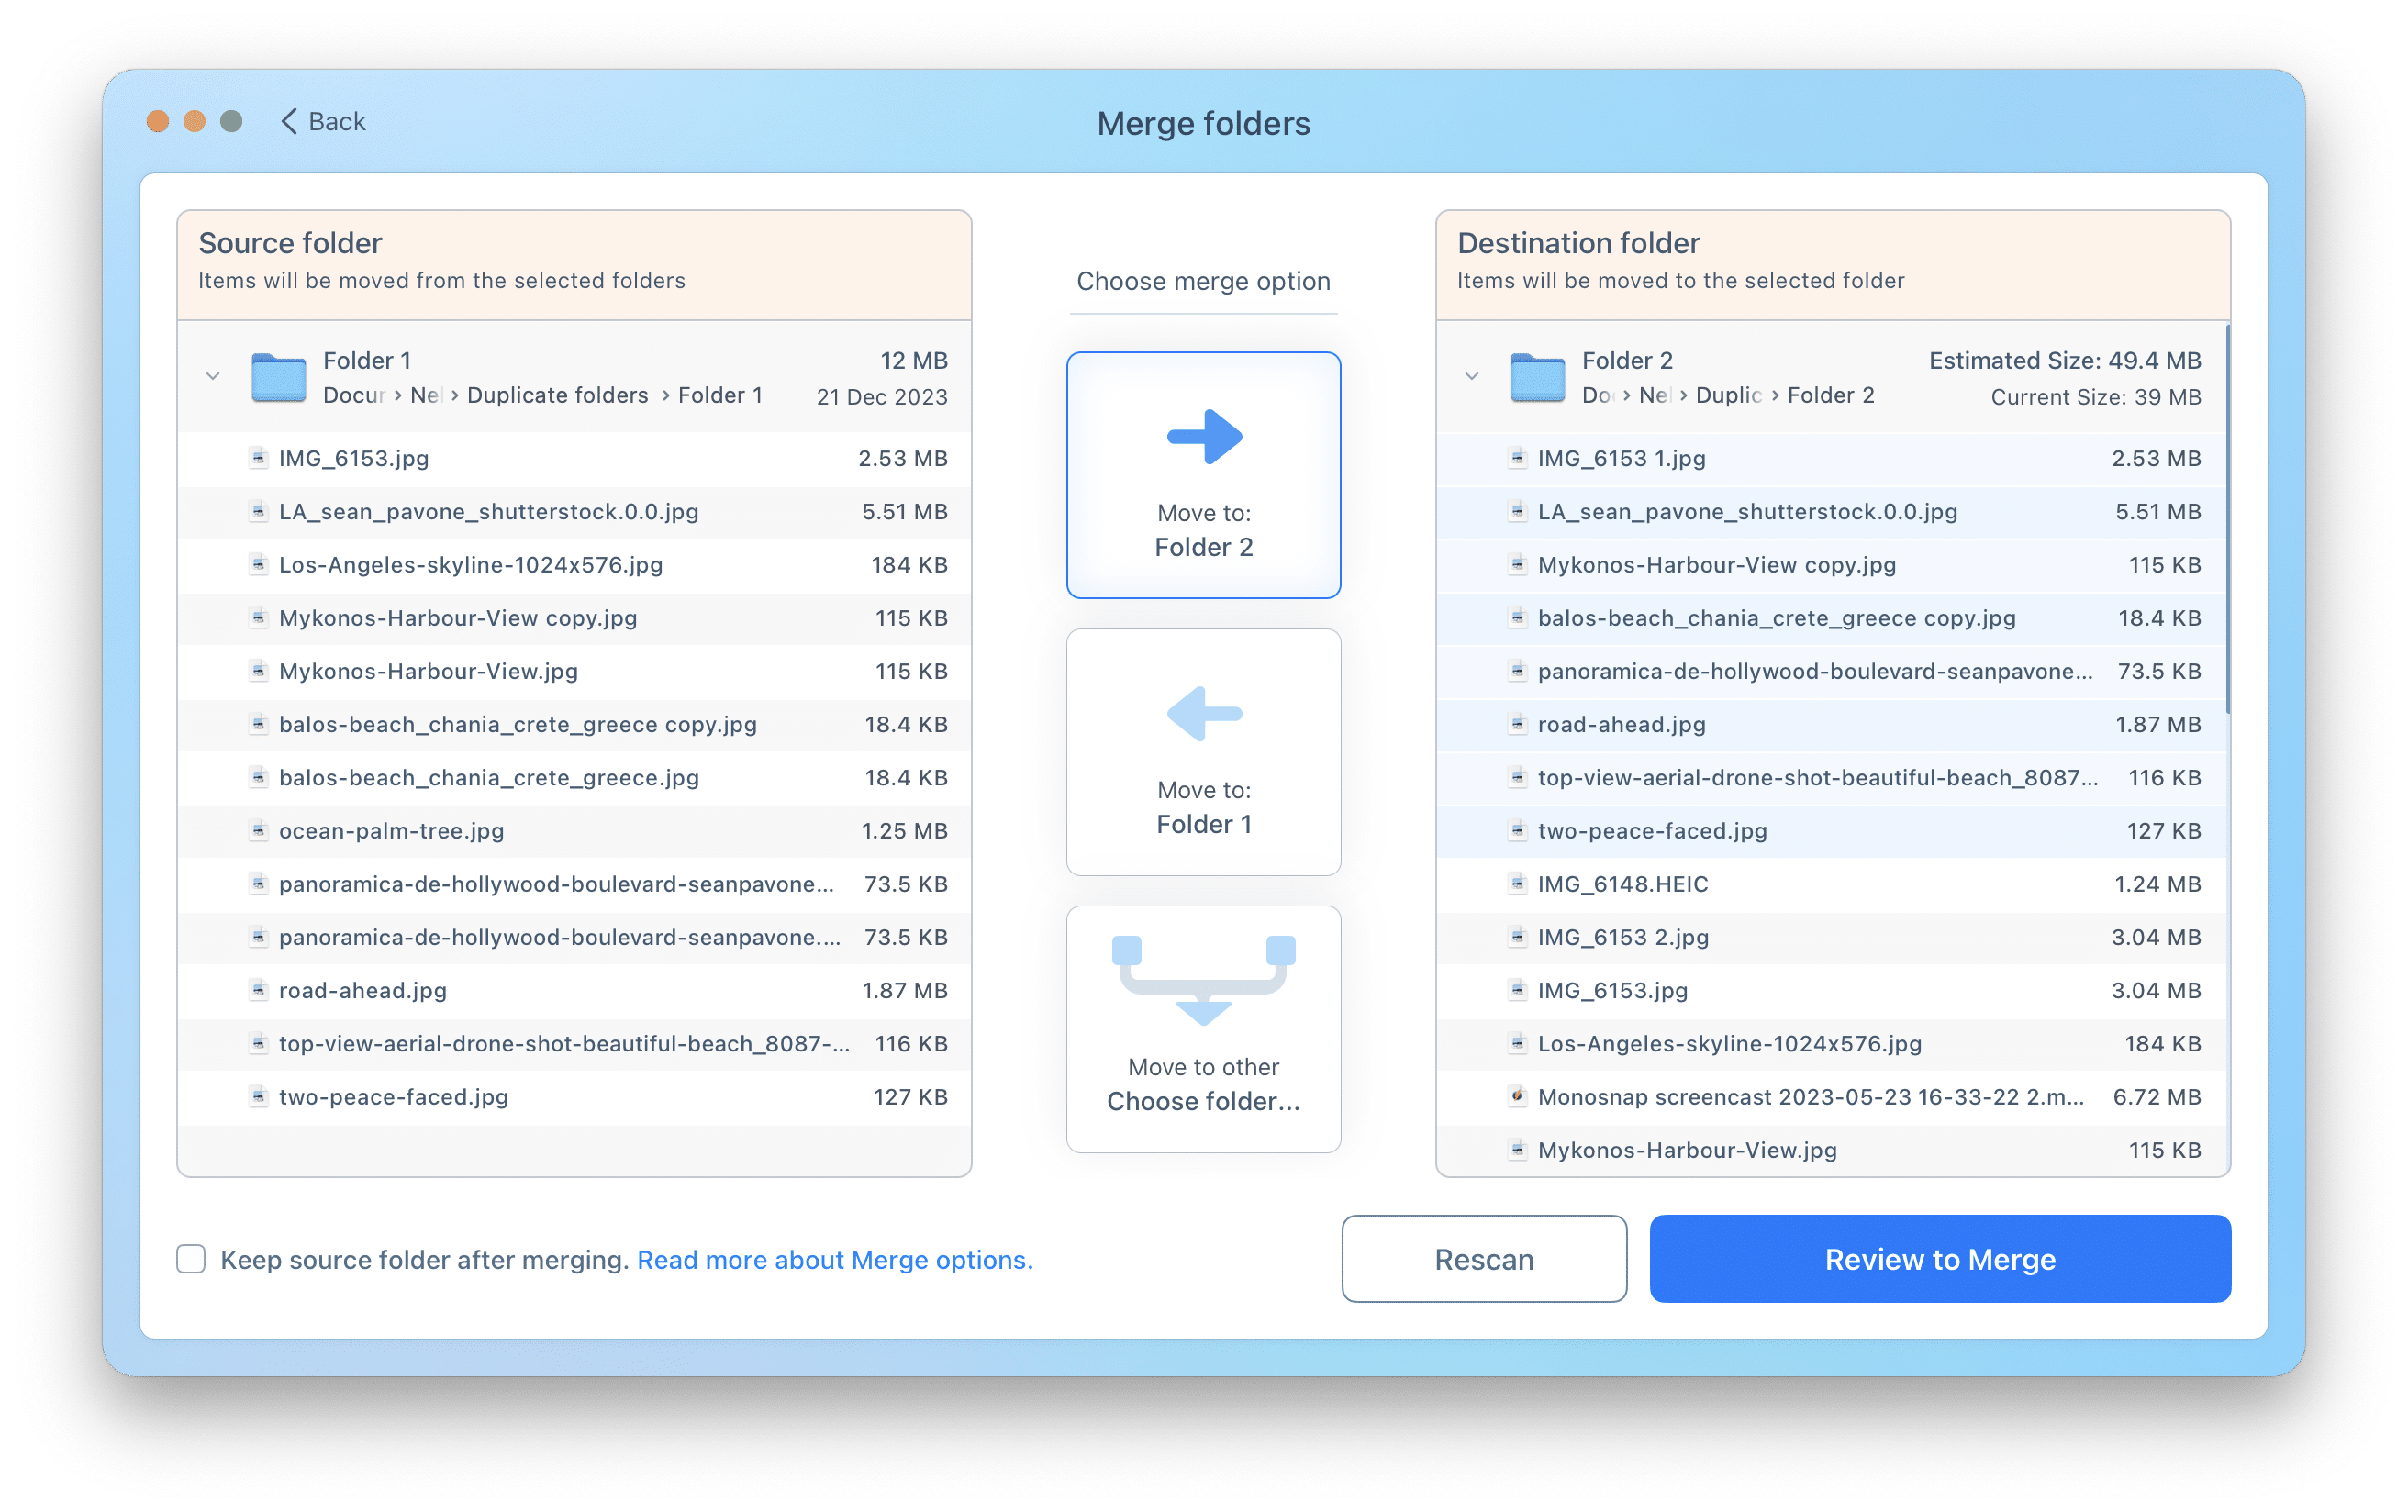
This option would be helpful for you if you need to quickly organize your files and folders with duplicates and unique items. When you merge folders, the application moves or copies unique files from one folder to another. As a result, you get two duplicate folders so that later you can just remove an extra duplicate folder.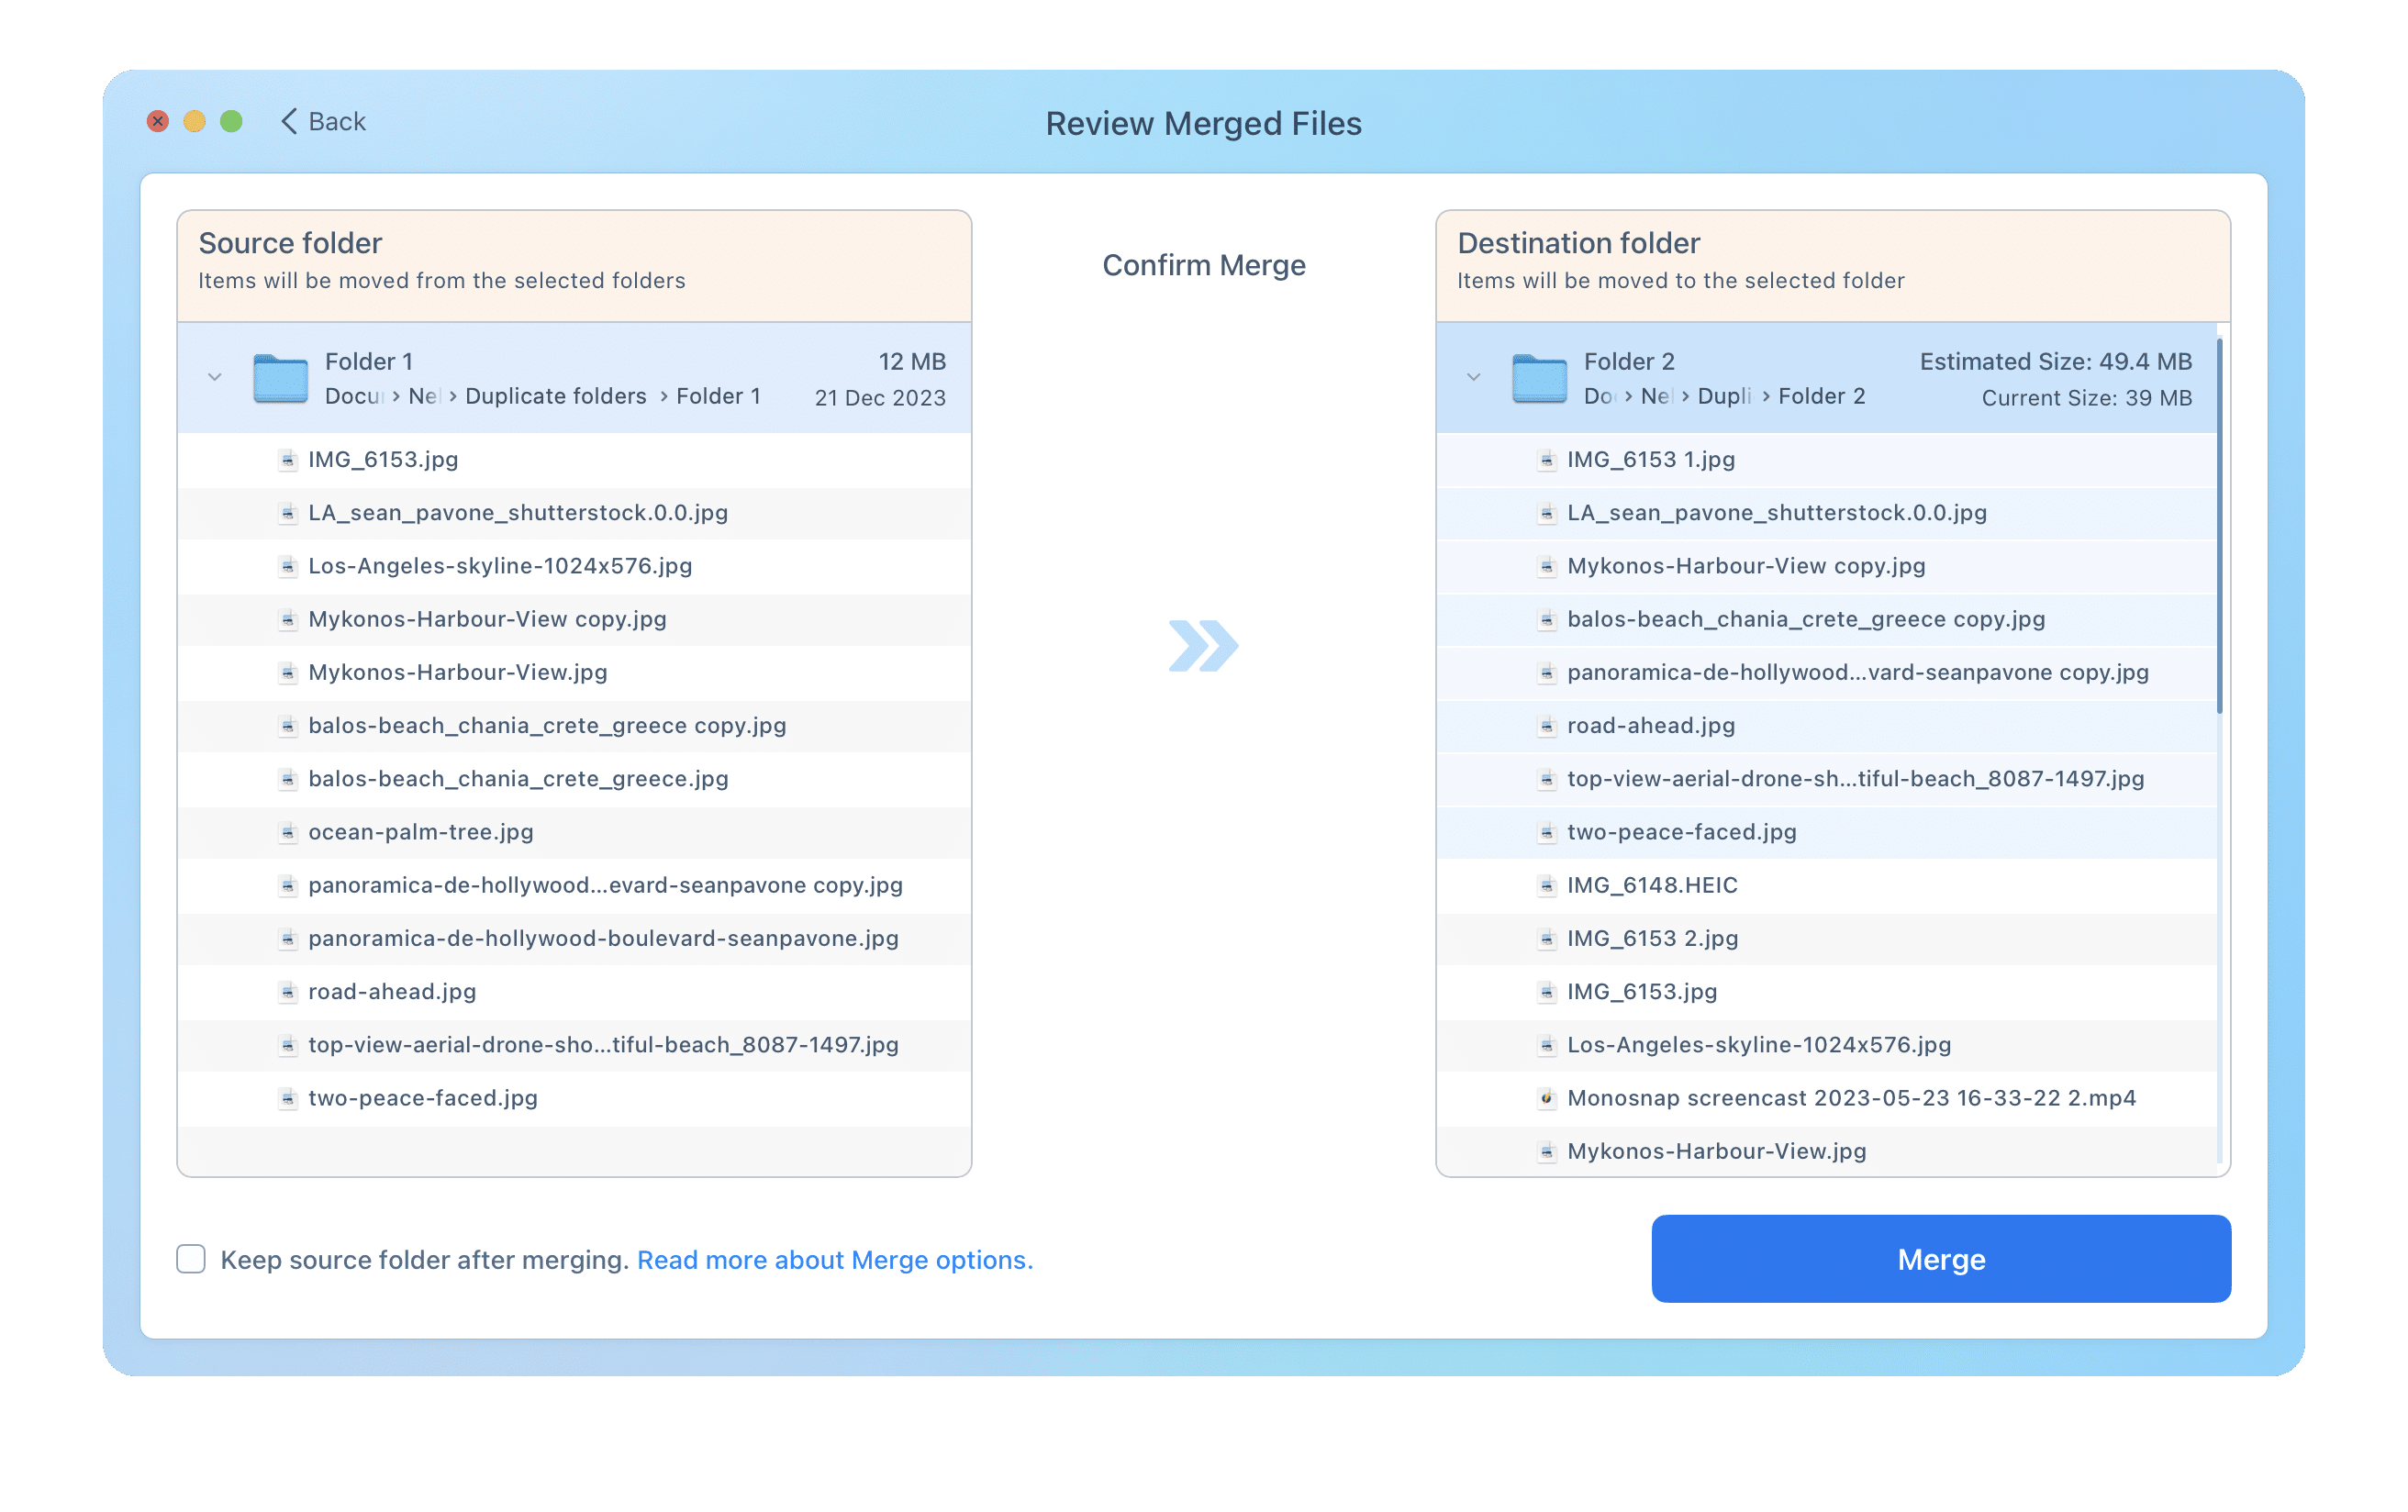
Benefits of Duplicate File Finder Pro
Once again, Duplicate File Finder is free to download and allows you to find and remove duplicates in the fastest and most reliable way. This is an awesome utility when it comes to searching for “space eaters” on your Mac, i.e. duplicates. With this smart and fast duplicate detector, it will take less than a minute to get rid of all unneeded files on your internal or external drives. And with in-App Purchase mode you have the benefit of even more features:
- Remove duplicate folders
- Remove duplicates in similar folders
- Select duplicates in particular folders
- Merge scanned folders
- Recover removed duplicates
- Remove unwanted similar photos