If you are looking for the best software to remove duplicate files on Mac, a free application Duplicate File Finder is exactly what you need. It allows you to identify double files on any disk or folder on your local disk, external drive, or network drive.
Whether you are looking for duplicate videos, music copies in iTunes, duplicate pictures, or even similar photos, this duplicate detector will save you time and help clear gigabytes of useless file copies.
Duplicate File Finder is a great app with a fast scanning speed to find duplicate files. In this article, we would like to give you some recommendations to improve your experience with the app and help you identify duplicate files on your external drive in less than a minute.
How to find and remove duplicates from an external drive
After you have set up the application settings, you can start searching for duplicates. Please note that the scanning process depends on the amount of data that you have on the external drive. The more gigabytes you have, the longer the application will analyze the disk.
To find and delete identical files from your external drive, follow these steps:
- Launch Duplicate File Finder.
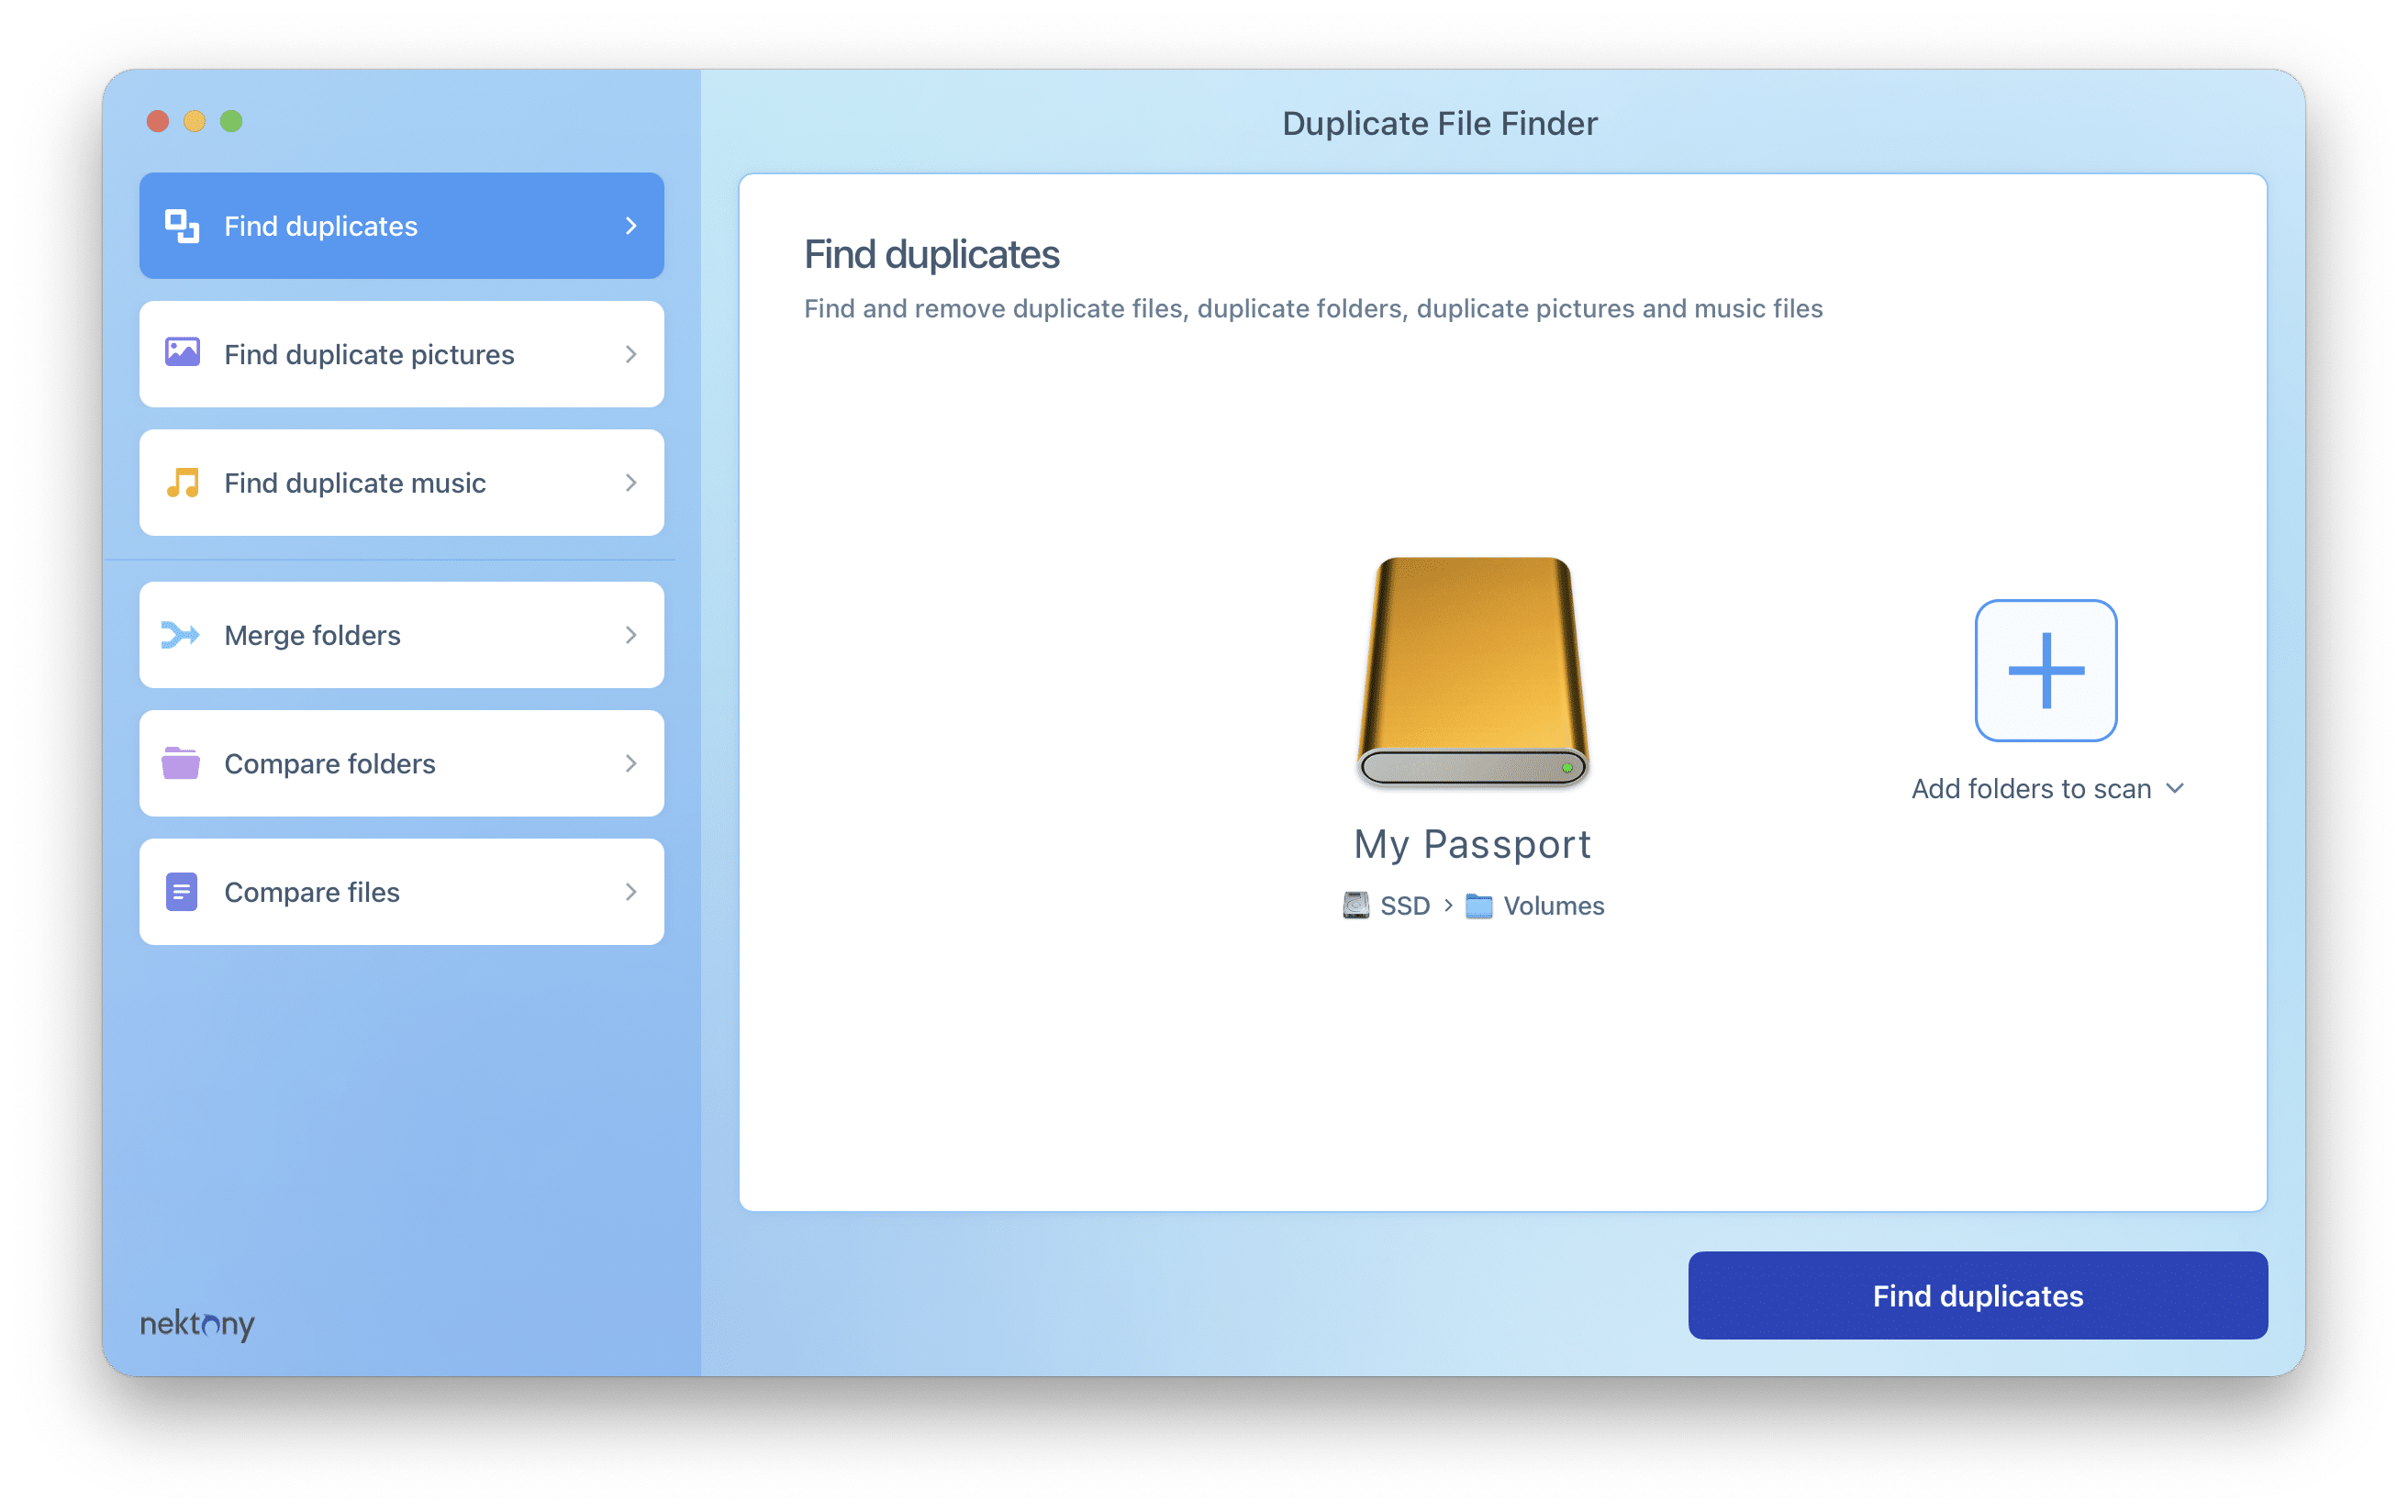
- Add your external drive. You can select the entire drive or select specific folders.
- Click to find duplicates.
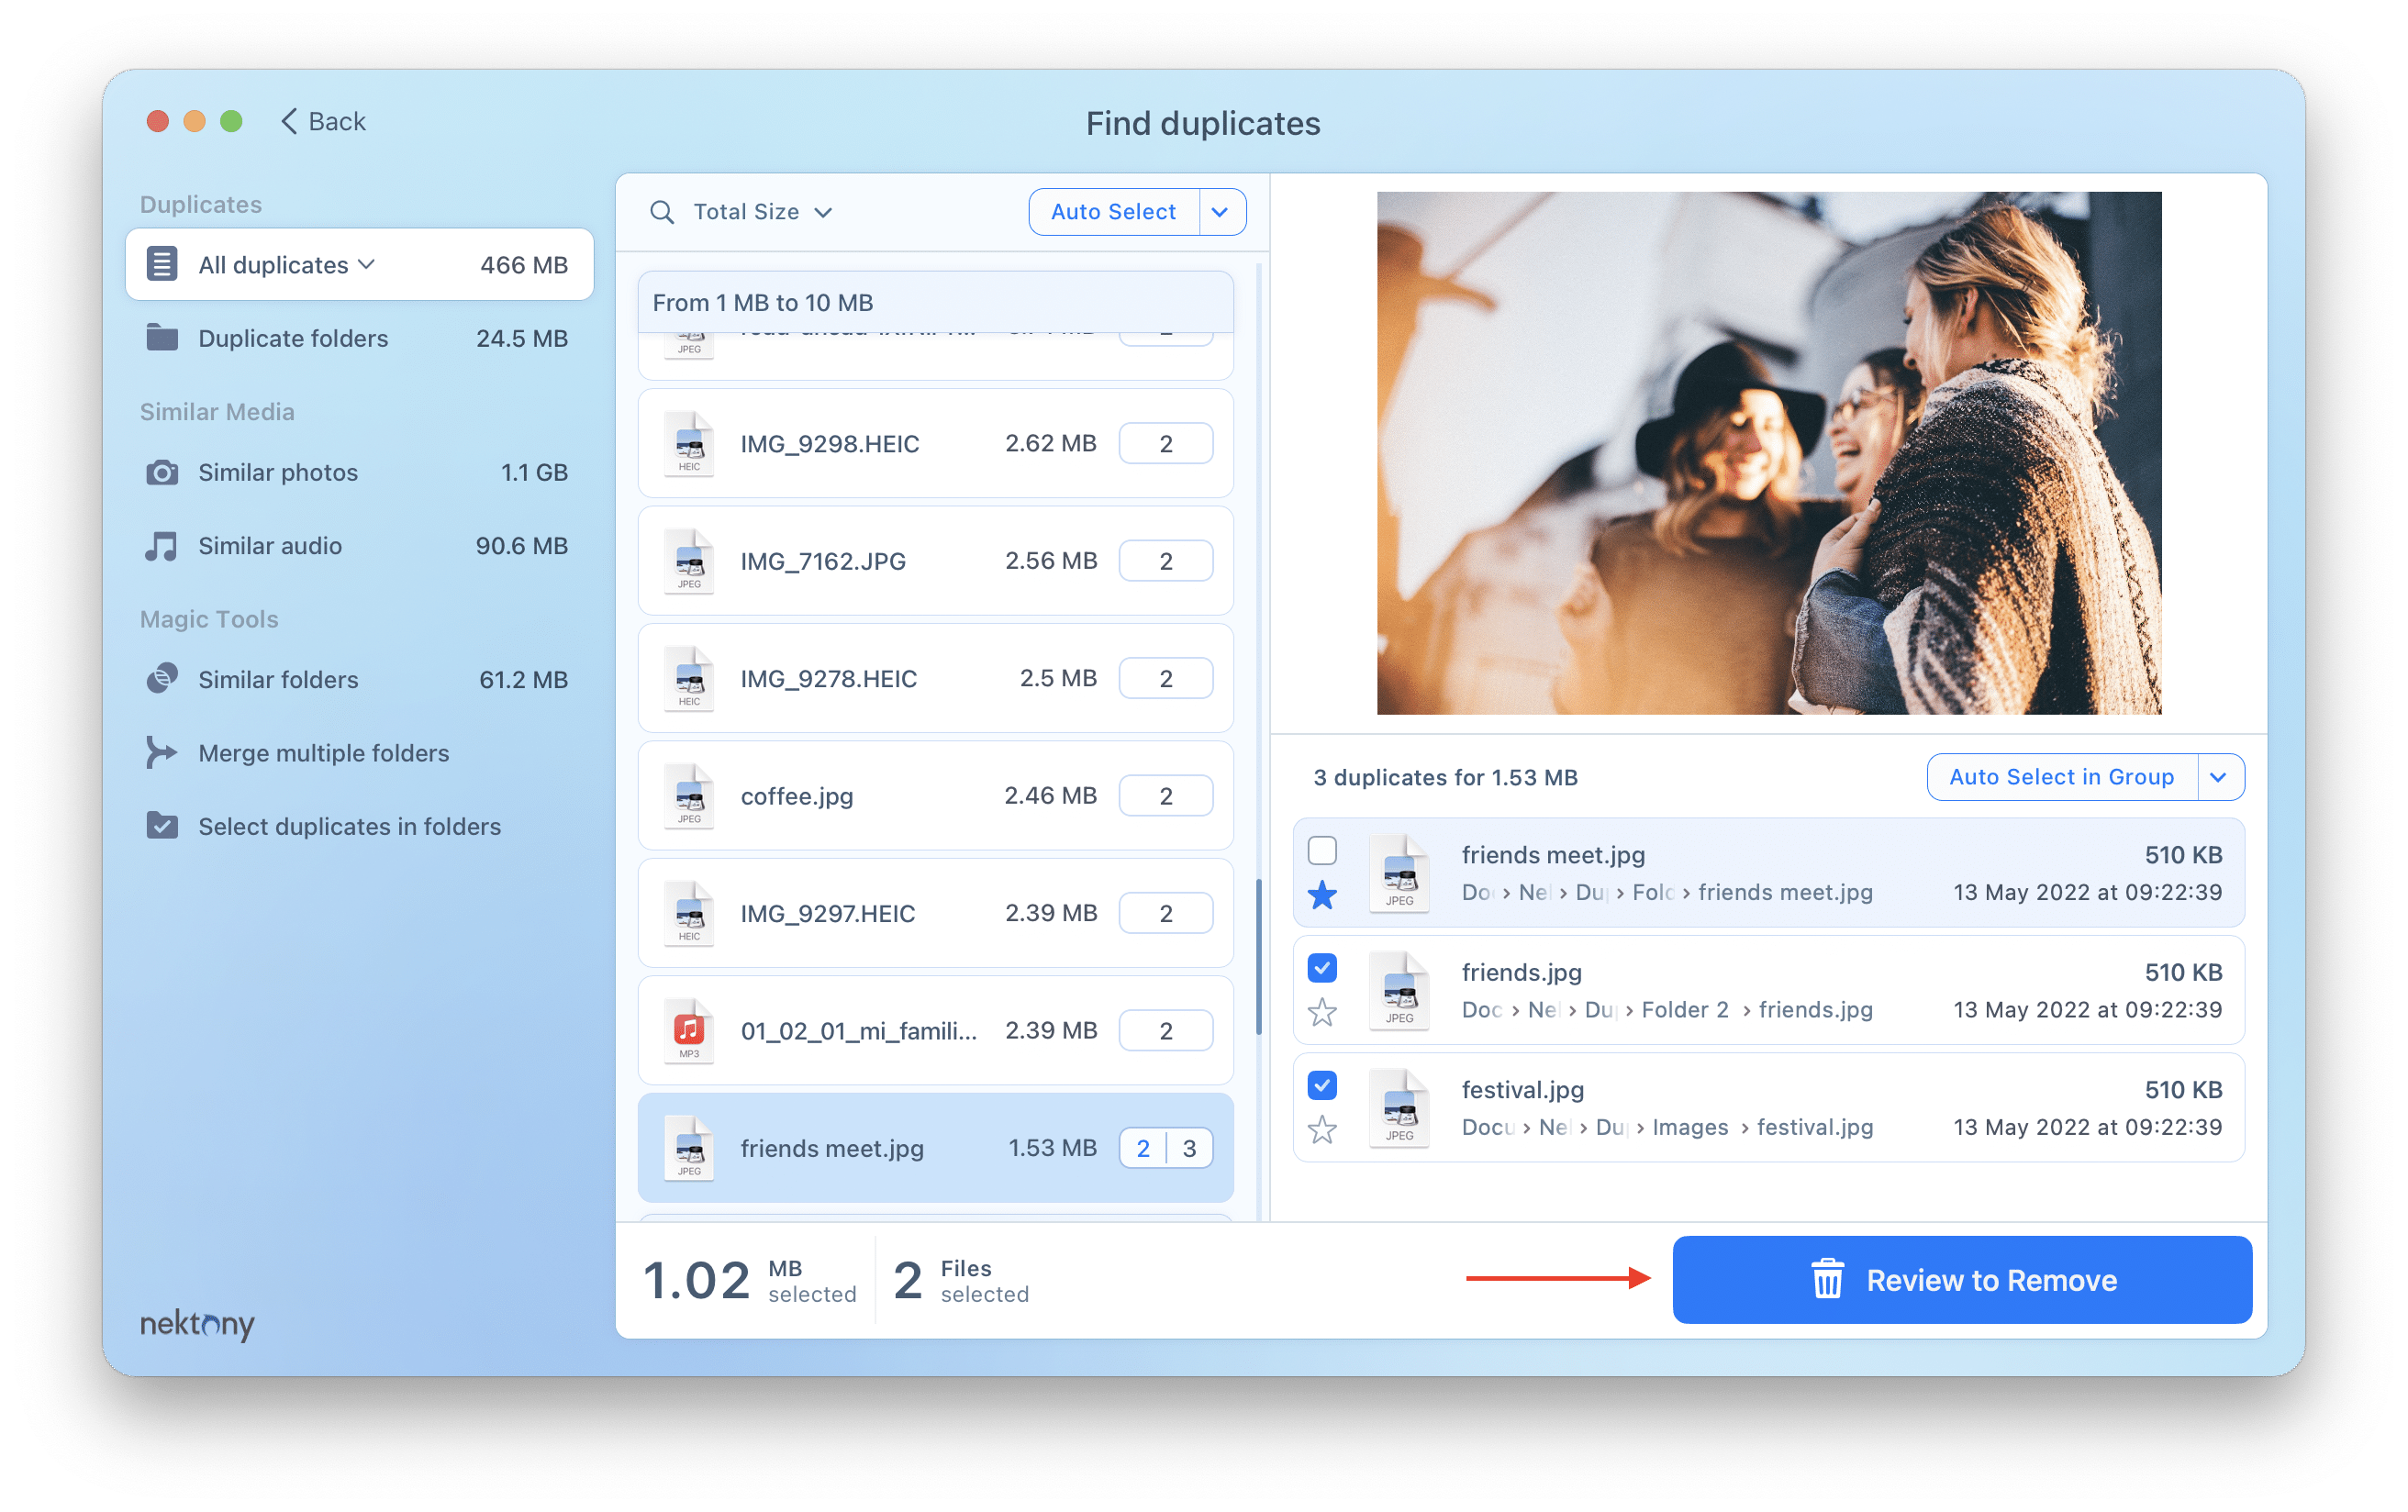
- After a while, you will see the scan results. You can switch between tabs on the top to see duplicates by file types, duplicate folders, similar media, and similar folders. In the right section, you can see the duplicates’ preview and their location.
- Skim the items and select the unneeded files in the group. You can also click on the Auto Select button. This option allows the application to select duplicates according to your preferences automatically.
- Click on the Review to Remove button.
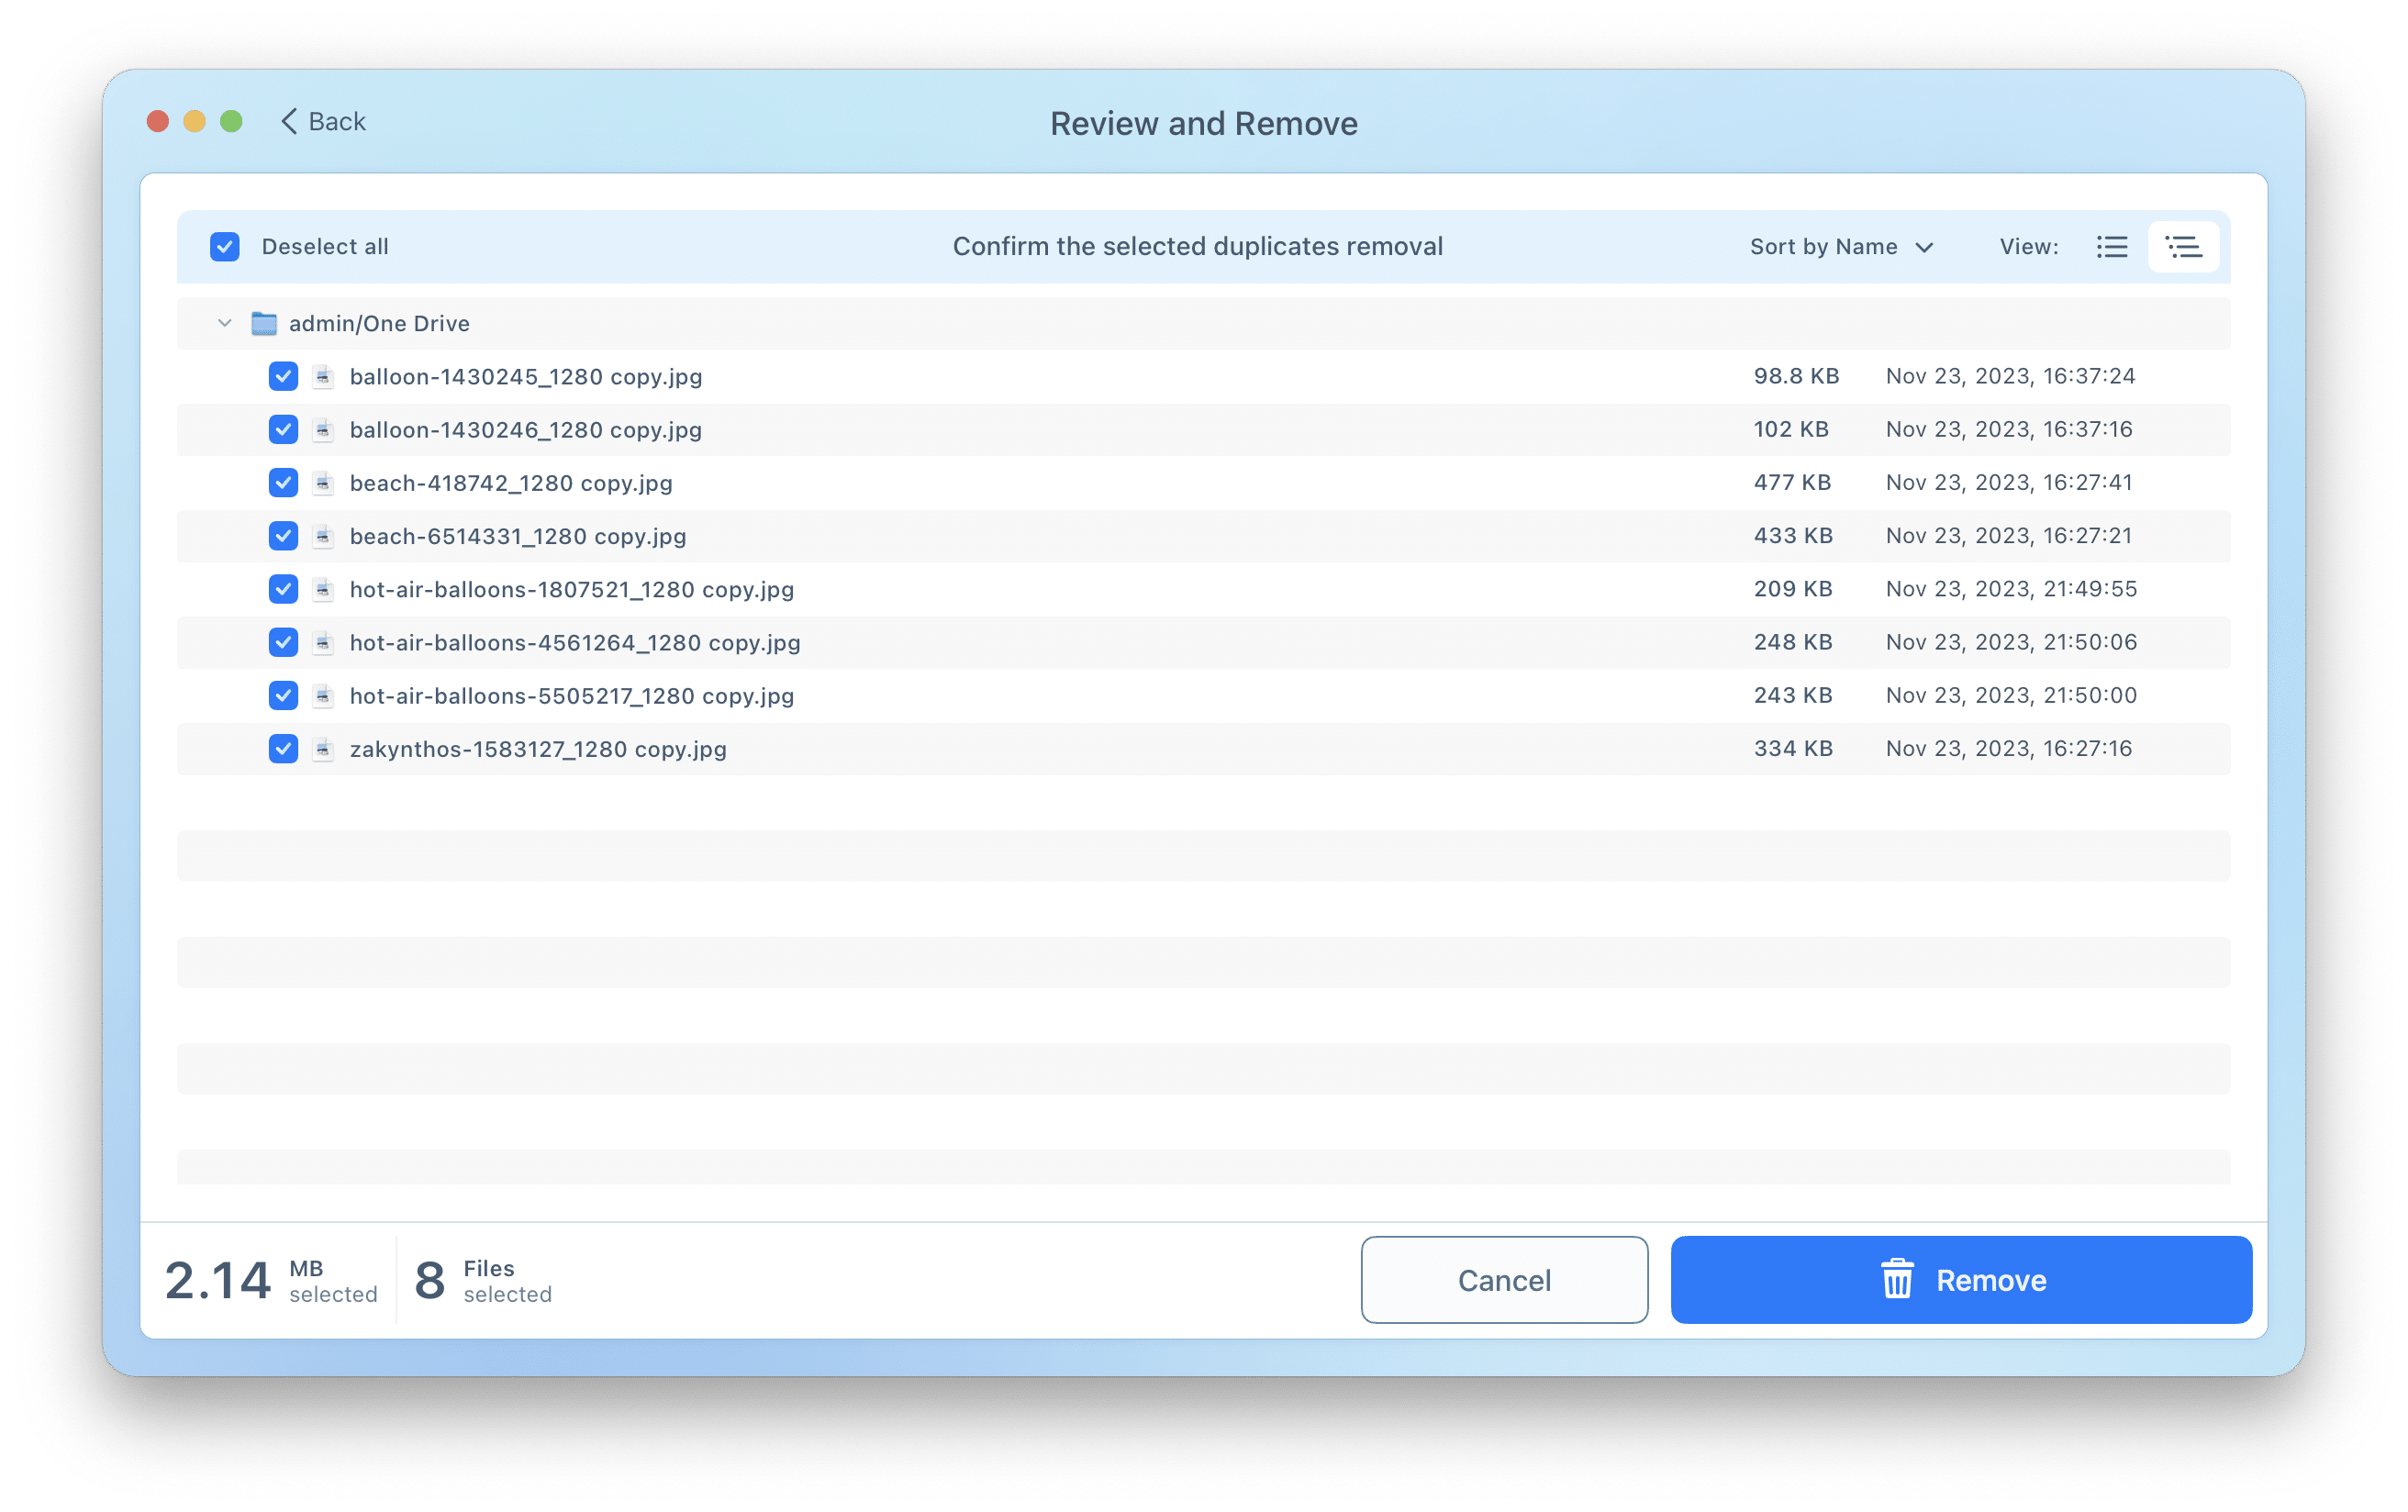
- Confirm the removal of selected files.
- By default, the files are moved to the Trash. But, you can set it to delete files or transfer them to a special folder permanently.
Note, that when you scan an external drive, you should check some important points for successfully removing duplicates.
- Your external drive should have a Trash bin, which is created when you remove a file via Finder.
- Your disk has the necessary extension (NTFS) and is writable. You should have a driver on the disk, which allows you to manage its files.
- If you are scanning large volumes, we recommend changing Mac battery preferences and turning off the option to put your hard disks to sleep when possible. This will prevent Duplicate File Finder from stopping scanning your disks. You can go about your business while the program will do its job.
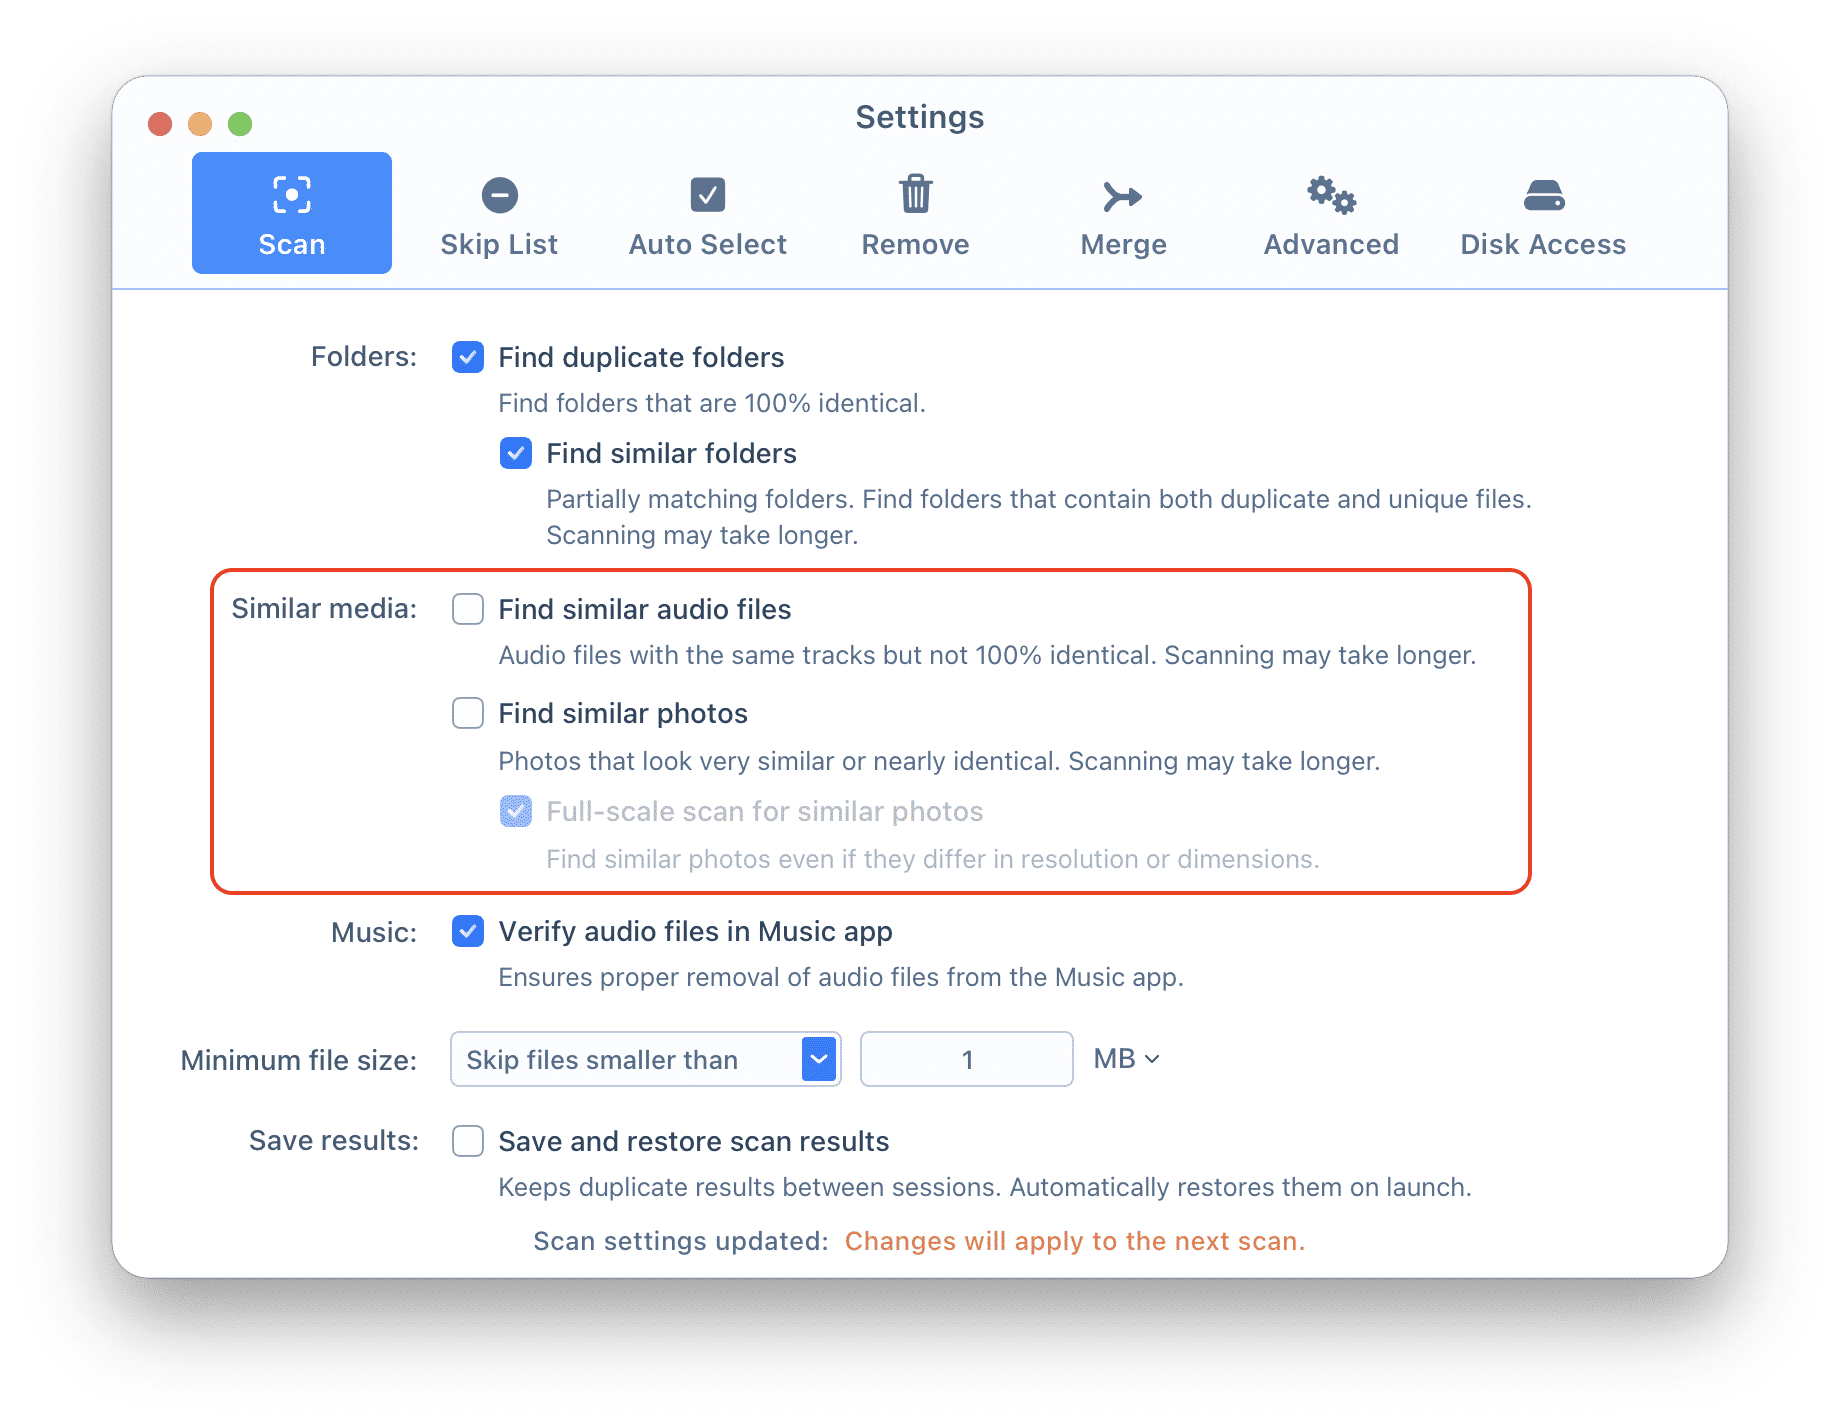
To stop putting hard disks to sleep when possible, open System Settings → go to the Battery section → Options → disable the appropriate option. - We also recommend the following: when searching for duplicates on a large disk for the first time, turn off the search for similar photos and audio files to reduce the scanning time.
Firstly clean up the duplicates, then you can start clearing similar files. To turn off searching for similar files, open Settings of Duplicate File Finder and disable the appropriate options in the Scan tab.
- What are duplicates?
- Quick ways to select and remove duplicates.
- How to set up the minimal file size in Duplicate File Finder.
- Scan two folders and quickly remove duplicates from one of them.
- How to clean up Similar folders.
How to speed up searching for duplicates on an external drive
Recently, we were asked by one of our users what to do if the search for duplicates on a huge external disk takes too much time. Let’s see why this may happen and how it can be solved.
First, we would like to mention that the scanning time depends on the speed of your disk and its connection speed. Duplicate File Finder compares the files’ content byte-to-byte to identify duplicates. A slow disk or slow connection interface may increase the search time. Nevertheless, you can scan, not necessarily the whole disk, but specified folders or you can set the minimal file size of files for the scan.
1. Skip the Time Machine backups to be scanned
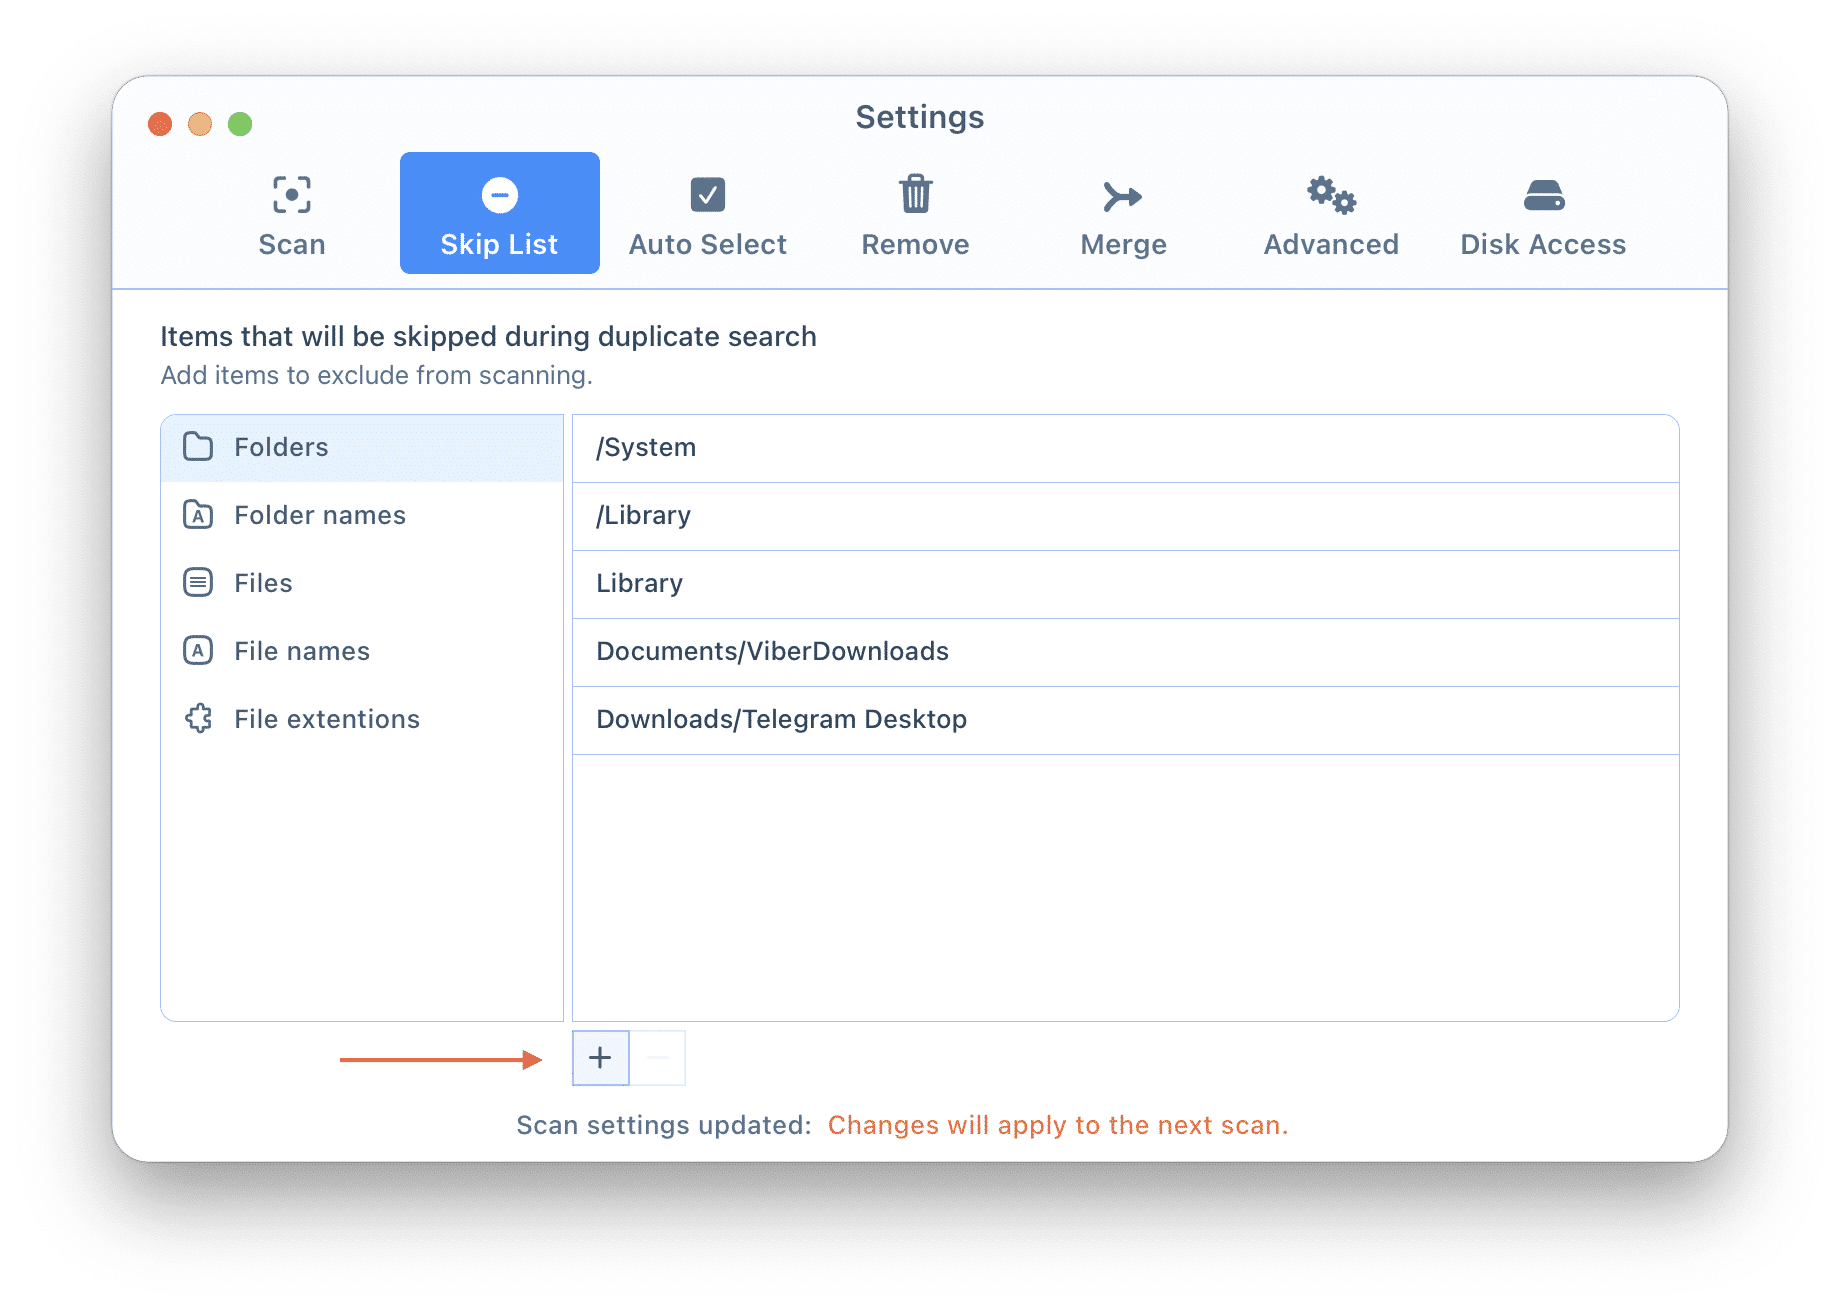
If you use your external drive for making Mac backups and want to find duplicates on the drive, it’s strongly recommended that you add the Time Machine backup folder to the Skip List. Time Machine tracks the changed files and makes backups on the hour. This means that when Duplicate File Finder scans your drive, it checks useless data of tons of backup copies byte-to-byte, which may take a lot of time.
To exclude backups from being scanned, go to the app’s settings and switch to the Skip List tab. Here you can click the Plus (+) button and add any folder or your backup folders to Skip List.
2. Skip the smallest files from the scan
If you want to find only the biggest duplicates and quickly free up some disk space, you can limit the size of files to be scanned and skip scanning the smallest files; this means the smallest files will not be checked. As a result, you will find the biggest duplicates in minutes.
It makes sense to use this tip when you have a huge and slow external drive. To change the app’s settings and skip scanning the smallest files go again to Settings → Scan tab → select Skip files smaller than in the Minimum file size option and set the size.
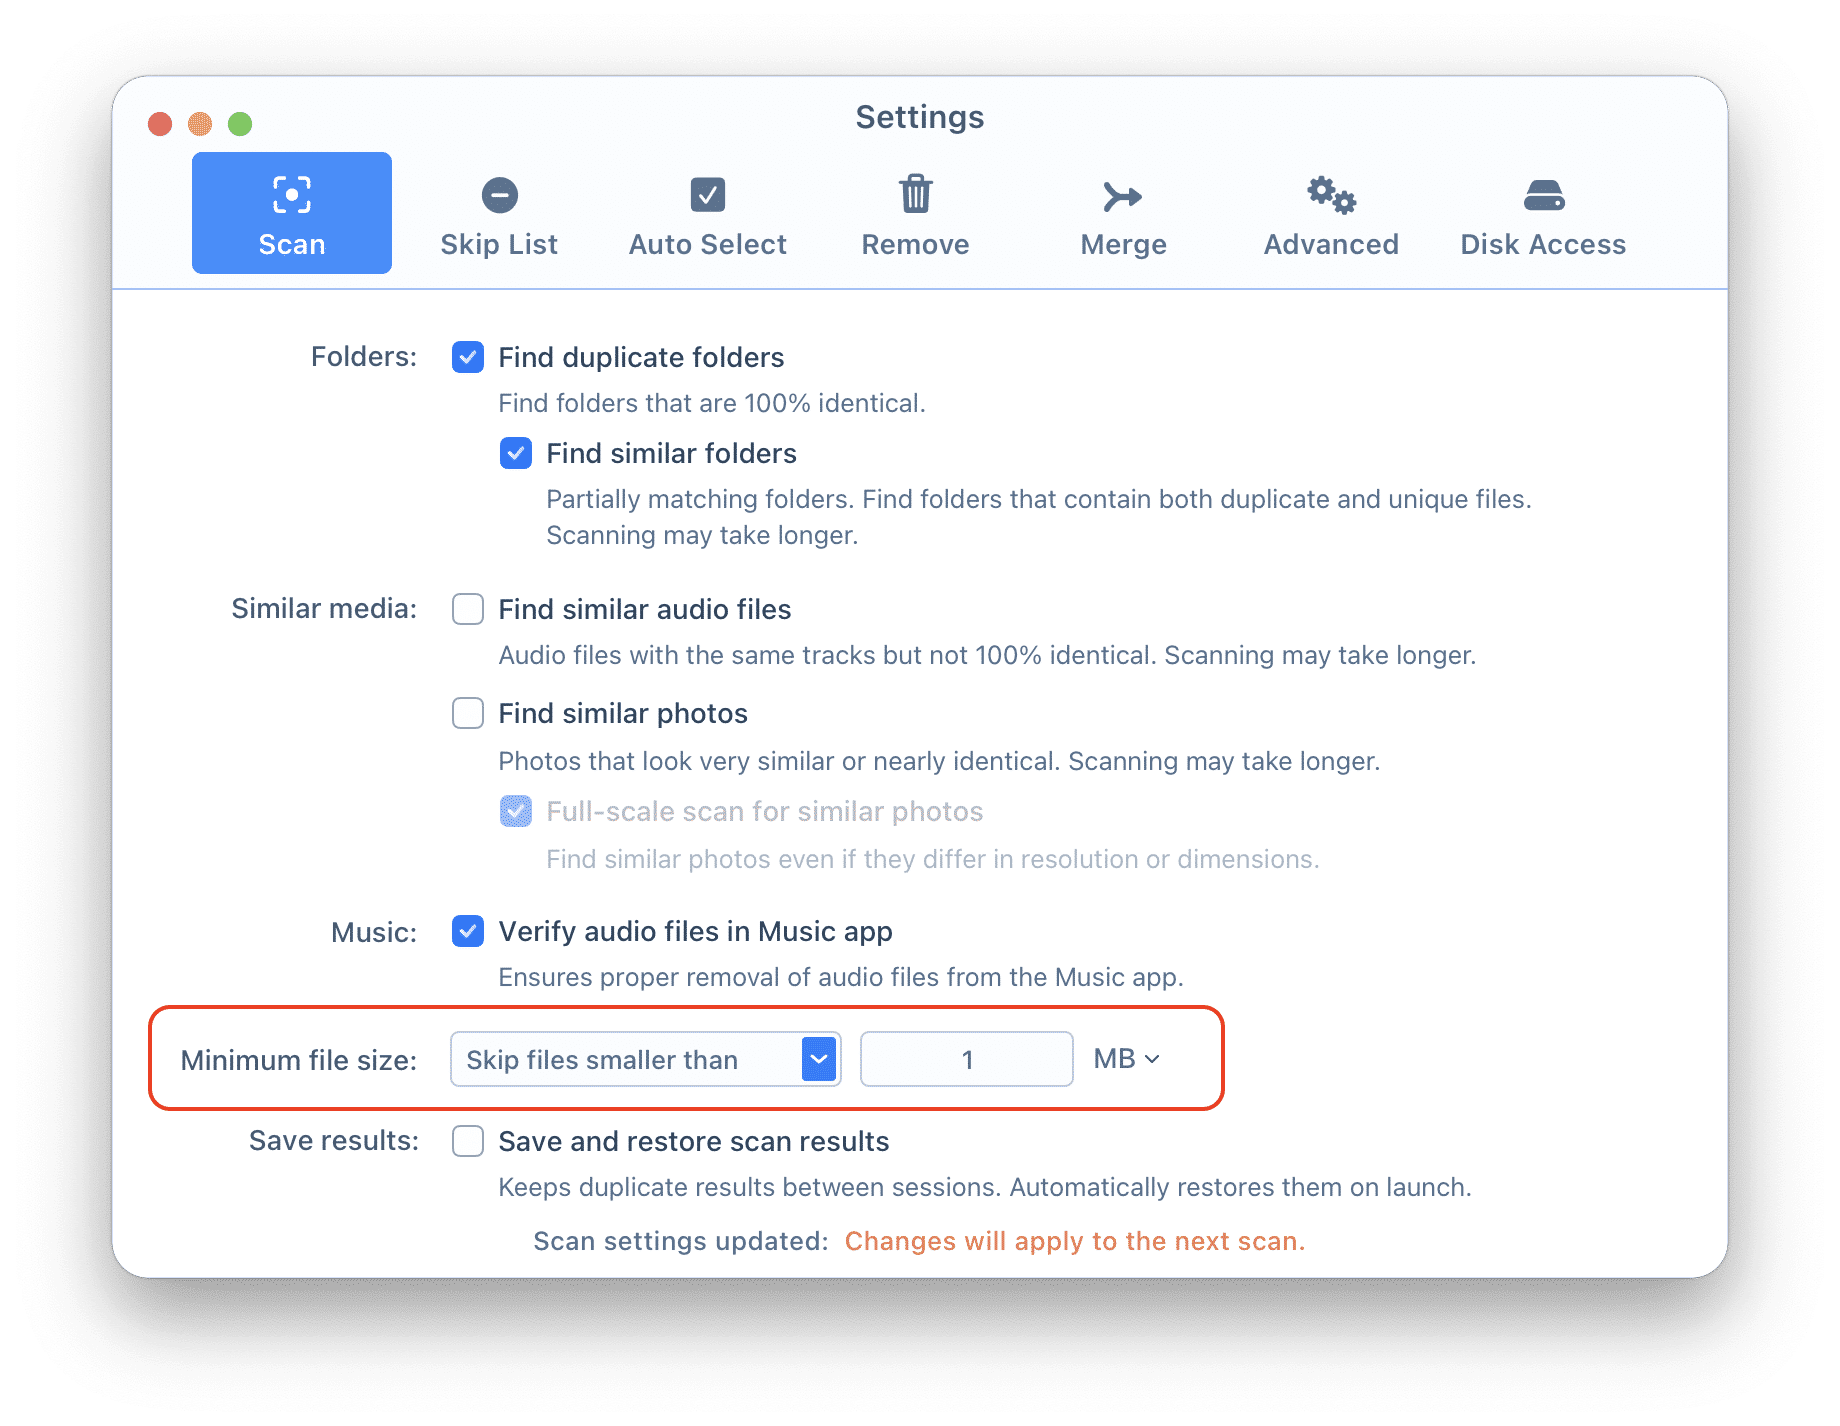
You can set different sizes for better performance and find as many duplicates as you need.
Duplicate File Finder is a software tool, which helps to remove unwanted duplicate files from various storages. It has a user-friendly interface and simple in use. So even if you are not a tech-savvy person, you will easily find and delete unneeded duplicates from your Mac hard drive or an external drive. Free download Duplicate File Finder from the App Store to free up your disk space.
We hope these tips are useful for you. Here is also a set of articles about Duplicate File Finder software that may interest you.
If you still have questions, feel free to contact our support team. We are here to help you.