Duplicate File Finder is a really fast duplicate file search and removal app for Mac. The application allows you to find any type of duplicate files, including images, videos, music, documents, and so on. It takes less than a minute to scan your folders and find duplicates within them.
Duplicate File Finder provides a wide set of features to make the search process simple and fast. For example, you can set up the file size threshold to be searched. This is a useful option when you want to preview only the biggest duplicates to quickly free up some space on your drive. Read on to learn how to change the size of duplicate files to be scanned.
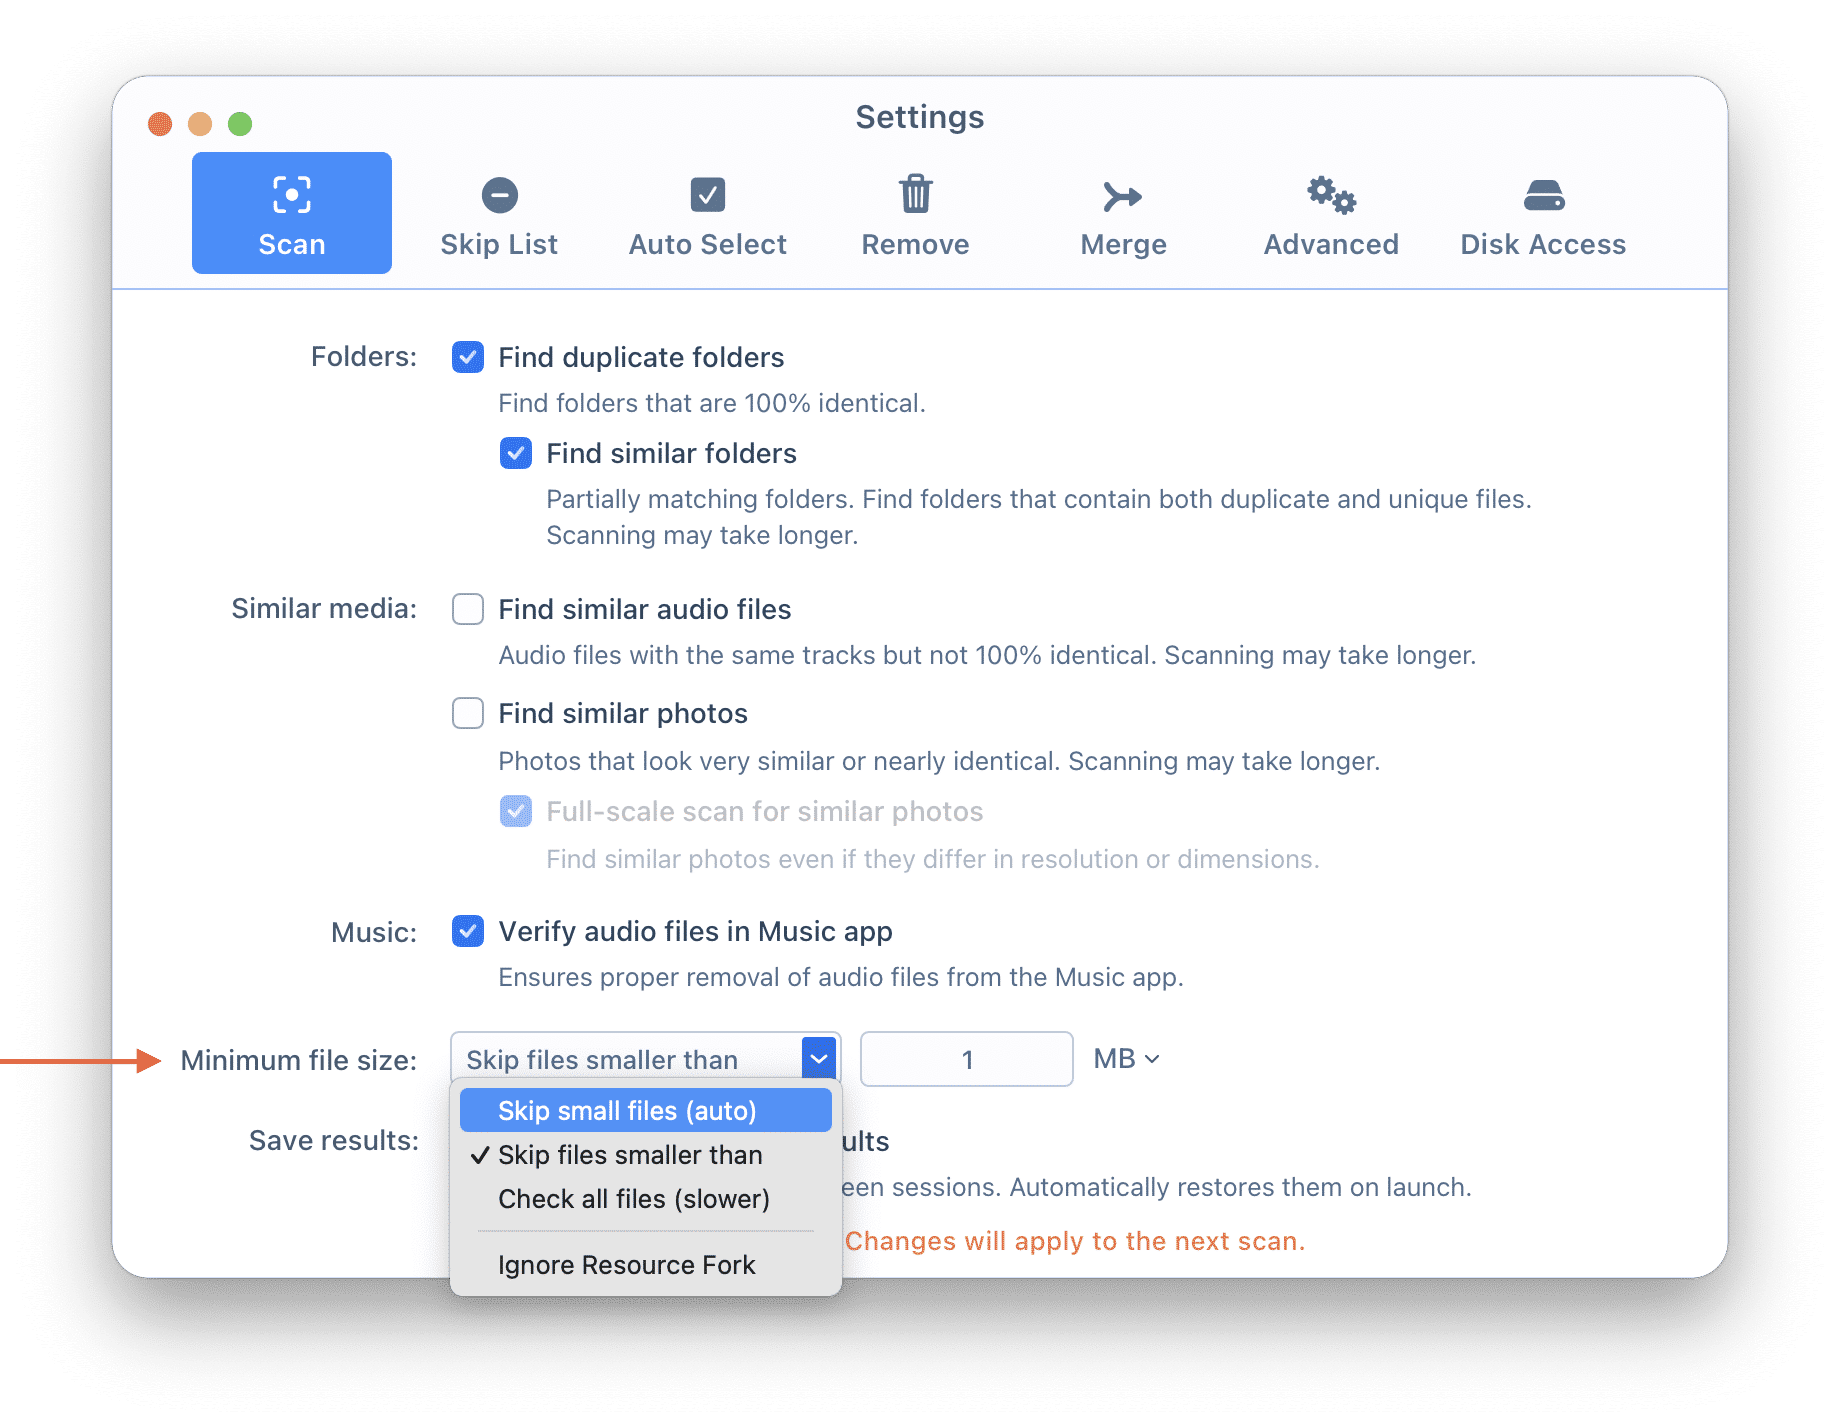
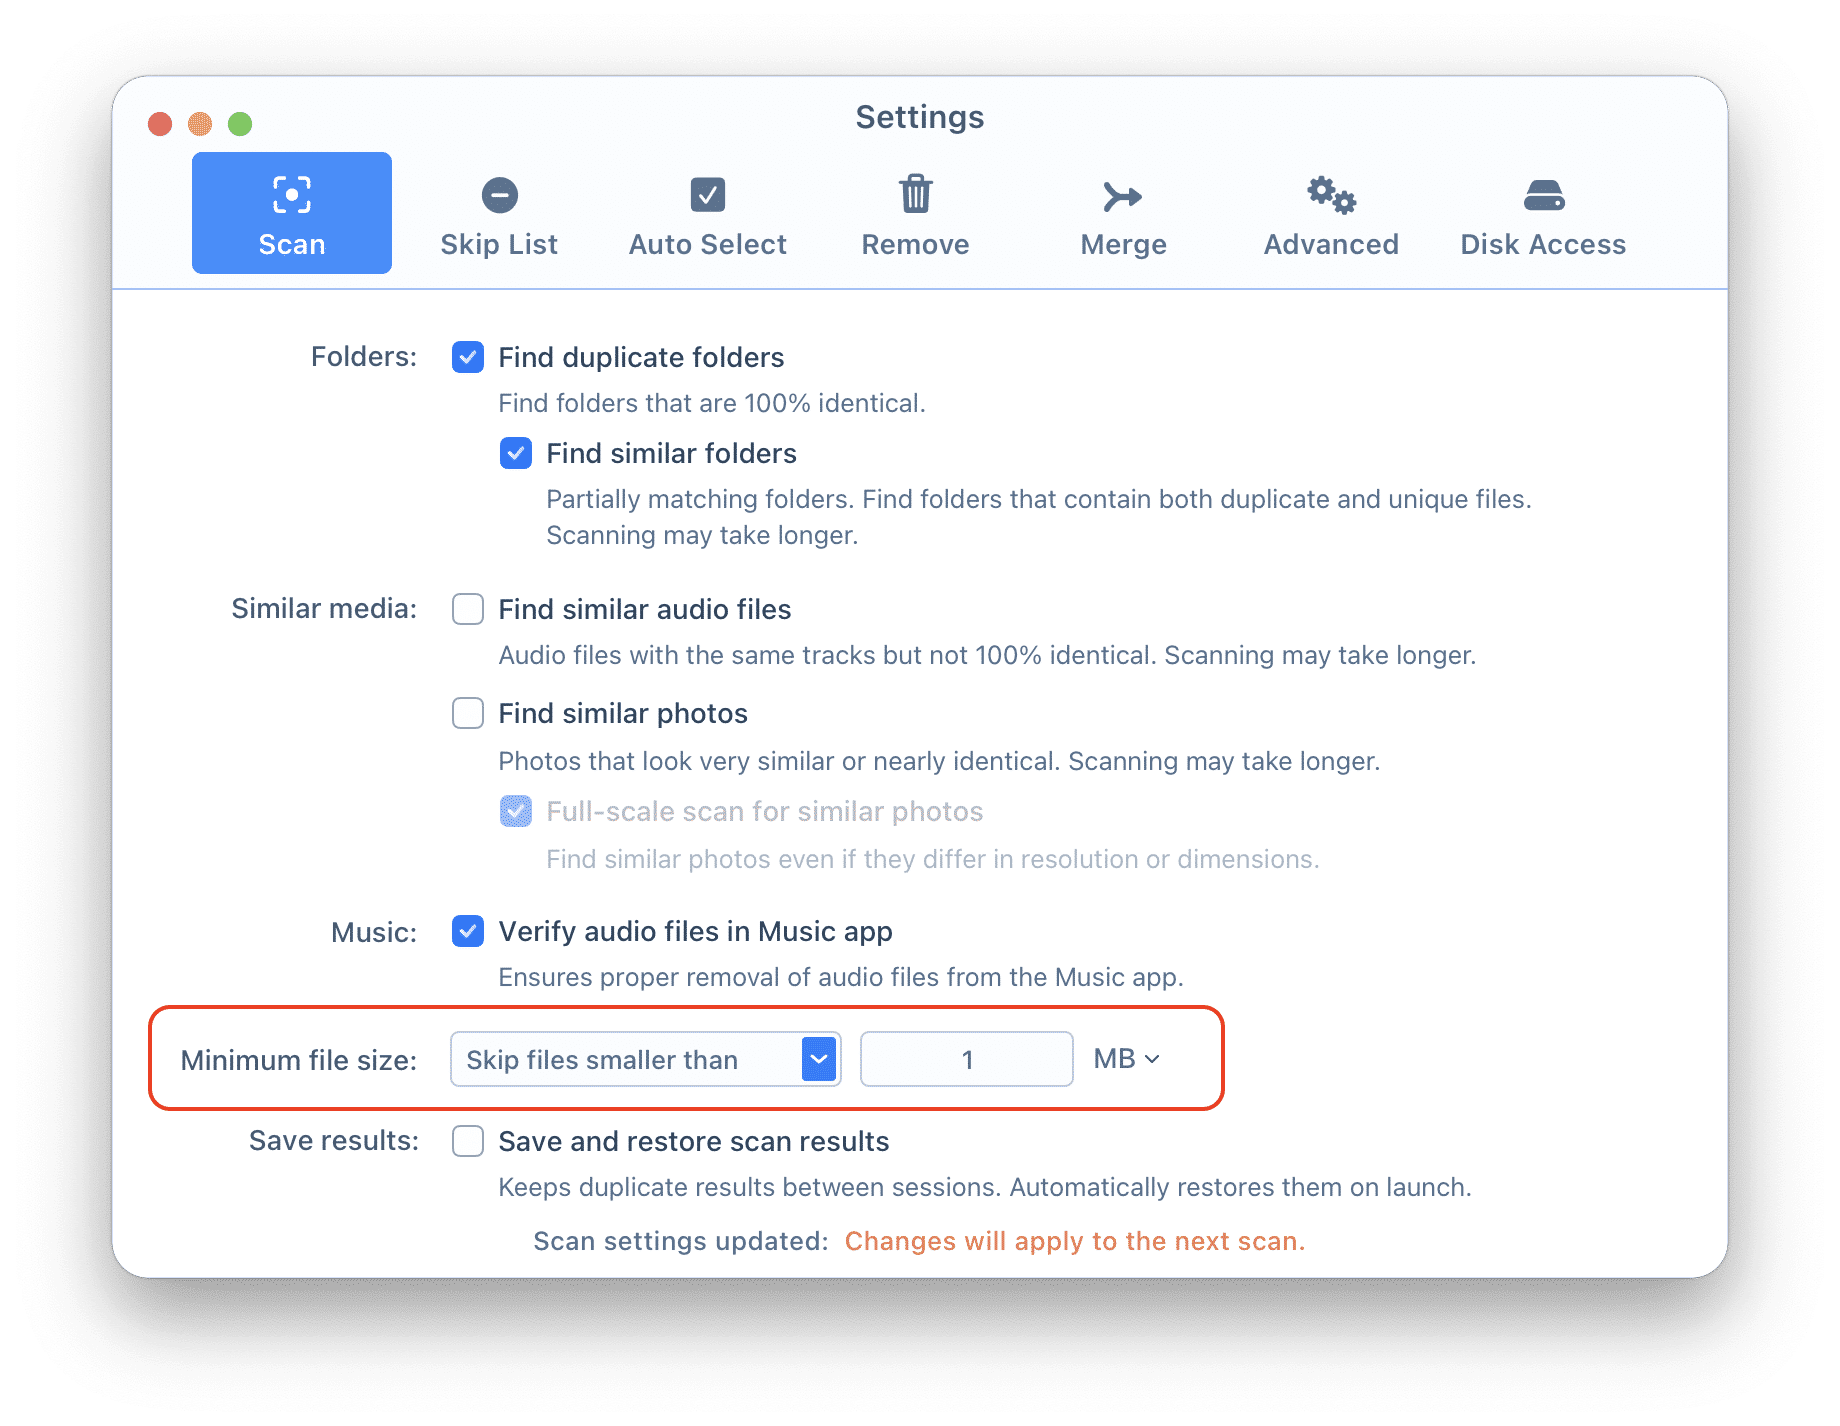
To change this option, open the Settings window and go to the Scan tab. Here, you can change the way the app scans your files by size. Just choose one of the available modes in the Minimum file size option: Skip small files (auto), Skip files smaller than, and Check all files (slower).

Each mode serves a different purpose. Depending on the mode you choose, you will get the following results:
- Skip small files (auto). With this mode, the app automatically detects which size of duplicate files to search in order to give you the best performance.
- Check all files (slower)
In this case, the application will scan and compare absolutely every file on your drive, including the smallest ones. As a result, it might take more time to scan your folders.
- Skip files smaller than
Enable this option if you want to customize the threshold of file sizes to be scanned by Duplicate File Finder. This option is especially useful when you scan storage folders with a large number of small files and want to find only the bigger duplicate files. For example, if you set the size 1 MB, Duplicate File Finder will skip all files smaller than 1 MB and only show you larger duplicate files.

Conclusion
In most cases, we recommend using the automatic mode of defining the minimal file size. However, it’s your choice and you can change the settings to suit your needs. For example, if you want to get rid of absolutely all duplicate files on your drive, you should use the “Check all files” option to scan all files. When you have a large storage space with thousands of small files, use the “Skip files smaller than” mode to focus on optimizing the most critical duplicates.
And finally, if you are scanning your Home folder and just need to quickly free up some space, the “Skip small files” mode will provide the best performance of the duplicate search process.
Related Entries: