Help
Funter
Overview
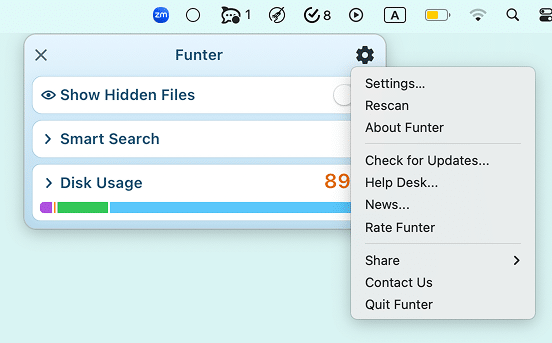
Funter is a free application that allows you to find hidden files and folders on your Mac. Once you launch Funter, you will see its icon in the menu bar. Click it to open Funter’s window and operate hidden files.

Show hidden files
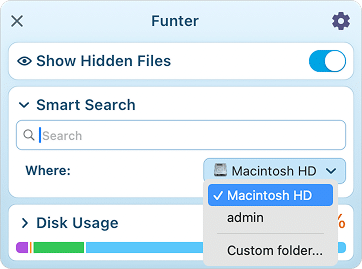
Open Funter’s drop-down window and use the slide button to show hidden files and hide them again.

Find hidden files
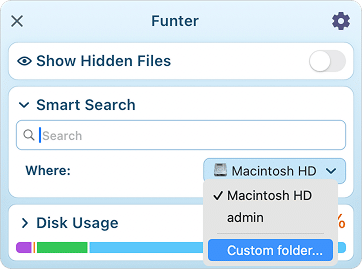
With Funter, you can search for hidden files on your Mac and in any particular folder. For this, type the file’s name in the search field, choose the location where you want to search for hidden files, and press Return.
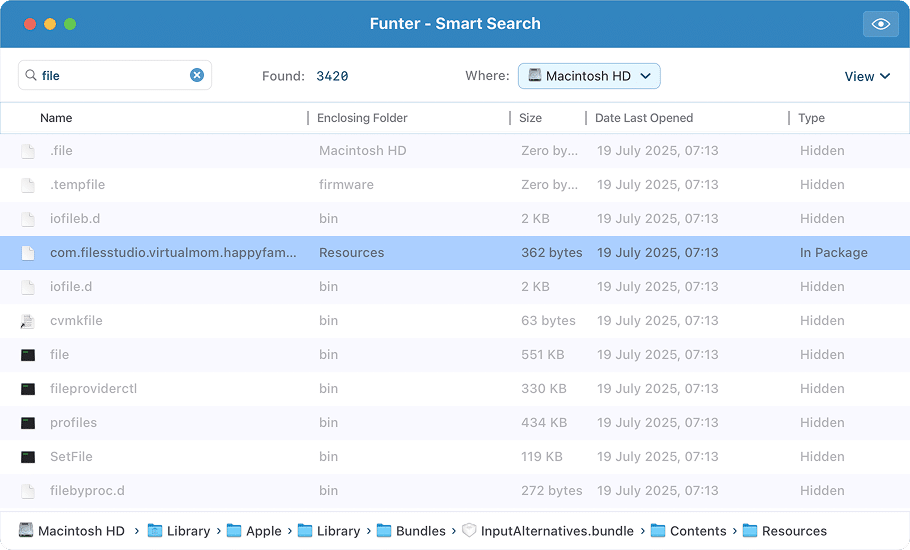
You will see a new window with the list of files with the query word in their names.

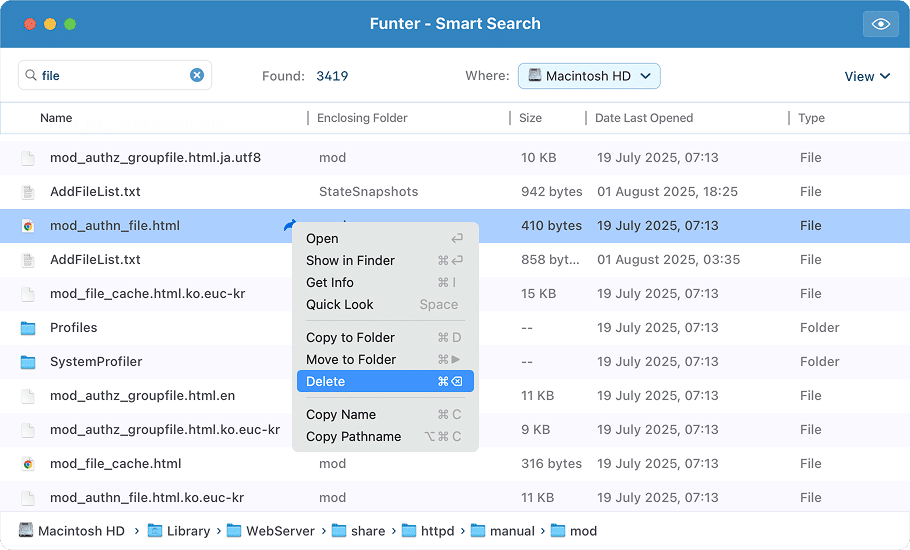
You can preview any file with the Quick Look option or open them in Finder. For this, use the context menu.

Hide your files
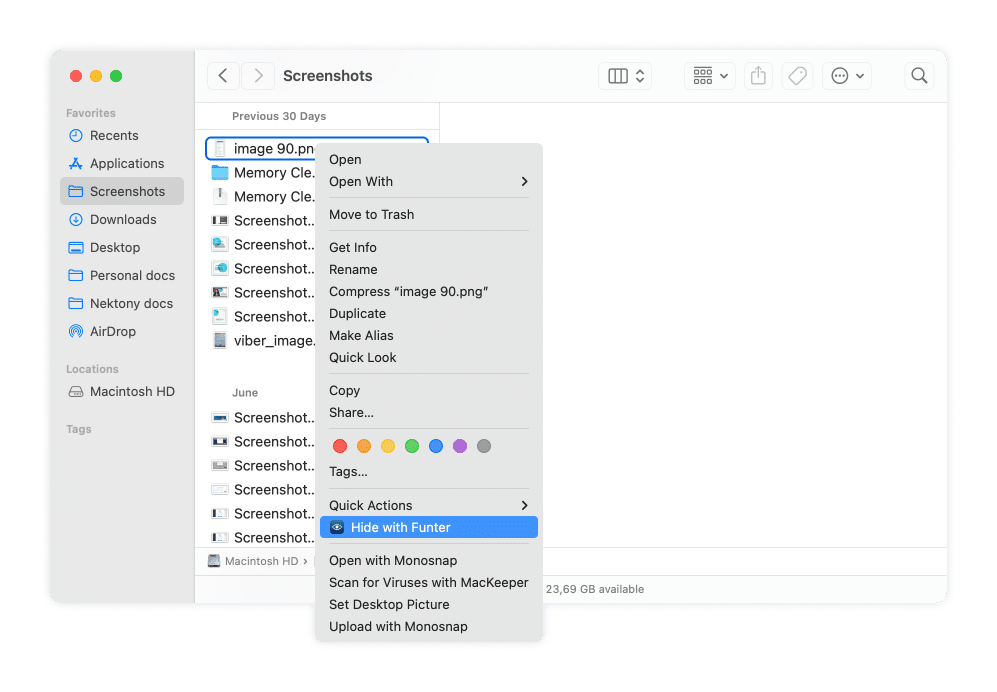
Funter integrates with Finder and adds its command to the context menu. This means that you can hide any file or folder in Finder using the context menu. Here is how:
- Find the file that you want to hide in Finder.
- Right-click on the file.
- In the context menu, click “Hide with Funter.”
- The file will be hidden.

Unhide hidden files
To unhide hidden files on your Mac, you can use the context menu, but first, you need to make your hidden files visible.
- Open Funter’s window and use the toggle button to show hidden files.
- Find the hidden files you want to unhide in Finder.
- Right-click on the file, and in the context menu, click “Unhide with Funter.”

Search for files
Searching for hidden files with Funter is simple and fast. Follow these easy steps to find hidden files on your Mac:
- Launch Funter.
- Click Funter’s icon in the toolbar on your desktop.
- In the Smart Search field, type the file name.
- Select the location where you want to search for files.
- Press Enter (Return) on your keyboard.

- The app will display a list of files that match your search query.

- At the bottom of the window, you can see the full path to the selected file. This lets you easily see exactly where the file is located in Finder.
Operate files
In Funter, you can customize which types of files you want to see in your search results. Click the View dropdown in the top-right corner of the window to filter your results by file visibility.
- Regular files – these are standard visible files found on your Mac.
- Hidden files – files that are normally hidden by macOS (often start with a dot, e.g., .file).
- Files in package contents – some apps are actually folders called “packages.” This option allows you to search inside those packages for individual files.

Preview Files
You can preview files instantly without opening them in a separate app using the Quick Look feature. How to use it:
- Right-click on a file in the search results.
- Select Quick Look from the menu or press the Spacebar on your keyboard.

Move, remove or copy files
Funter allows you to manage files directly from the search results. You can copy, move, or delete files in just a few clicks:
- Right-click the file.
-
Choose what to do with the selected item:
- Copy to Folder – create a copy of the selected file and send it to another location.
- Move to Folder – relocate the file to a different folder, and the file will no longer be in its original location.
- Delete – remove the file to the Trash.
Finder integration
Funter can be integrated with Finder to help you quickly show or hide all hidden files.
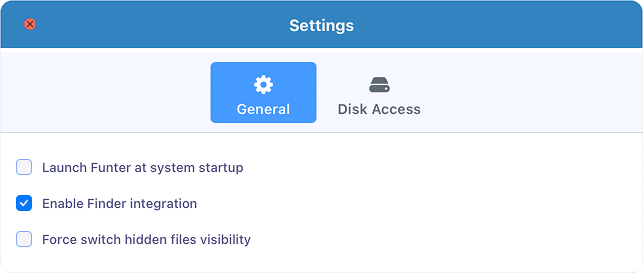
To enable Finder integration, follow these steps:
- Click the Funter’s icon in the Mac toolbar.
- Click the Gear icon and select Settings.

- In the General tab, switch on the option “Enable Finder integration.”

Once you’re done, you will see the Funter icon at the top of Finder, and you’ll be able to hide and unhide files directly from Finder.

You can also use the context menu in Finder to hide or unhide individual items.
Full Disk Access
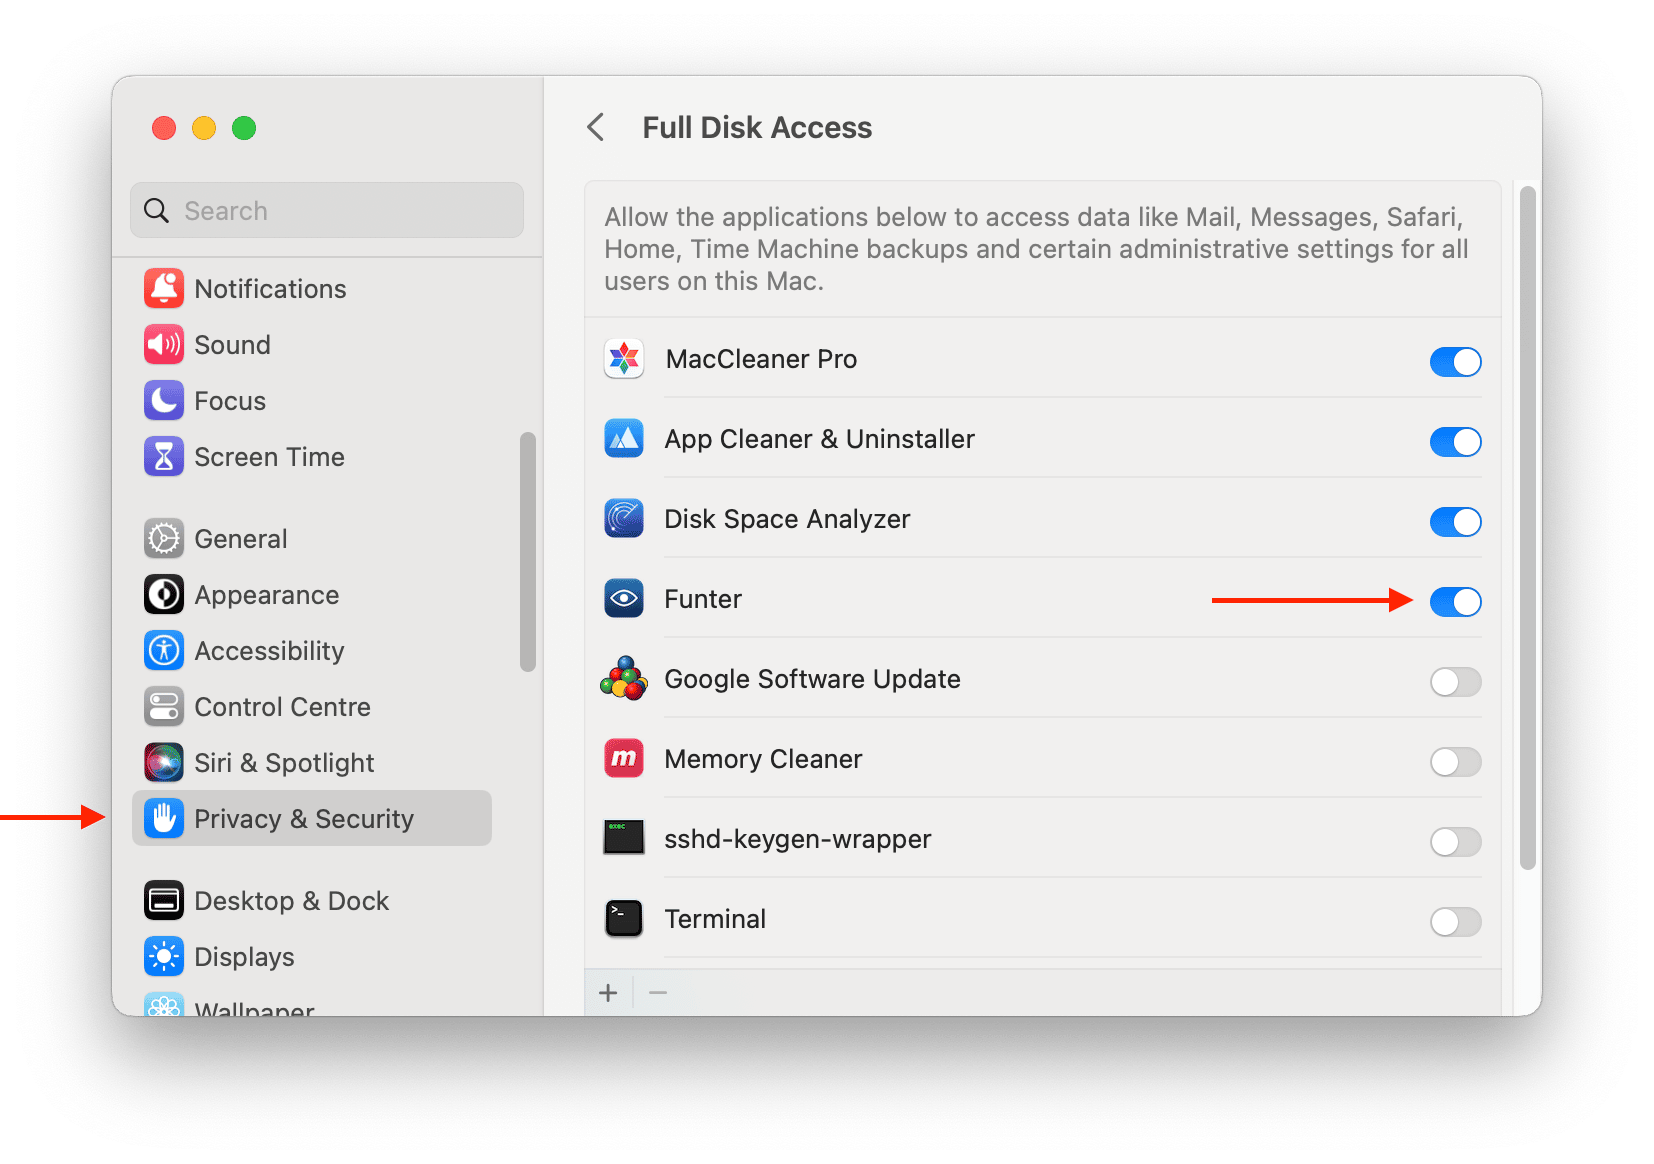
By default, Apple requires that you manually grant access to your apps to operate the users` files. This is done for security reasons. Since Funter searches for files on the whole of your Mac hard drive, you will need to grant Full Disk Access to allow the app to perform its task.
Here is how to grant access for Funter to your disk to find any file, including hidden files.
- Open the app’s Settings.
- Switch to the Disk Access tab.
- Click Open System Settings.

- It will open System Settings window showing the Security & Privacy section → Full Disk Access option.
- Switch on the toggle button for Funter.
- If you don’t see the app in this list, click the plus(+) icon and add Funter.

After this, when you search files with Funter, the app will be able to scan your whole Mac hard drive.
Change language
Funter is localized to the following languages:
- English
- German
- French
- Spanish
- Russian
- Japanese
- Chinese
Funter uses the preferred language you set up for your macOS. To change the language, follow these steps:
- Open System Settings.
- Go to the General section → Language & Region.
- Scroll down and find the list of Applications.
- Click the Plus (+) button at the bottom of the window and add Funter.
- Then change the language for Funter.
- The application will restart, and the language will be changed to the one you chose.

Uninstall Funter
To uninstall Funter, follow these steps:
- Click the Funter icon in the tool bar→ click the Gear icon → select Quit Funter.
- Open Finder → go to the Applications folder → locate and remove Funter to Trash.
- In Finder, press Cmd+Shift+G → navigate to the ~/Library folder.
- In the Library folder, find and remove all files associated with Funter:
- ~/Library/Application Support/com.nektony.Funter-SIII
- ~/Library/Application Scripts/com.nektony.Funter-SIII
- ~/Library/Caches/com.nektony.Funter-SIII
- ~/Library/Containers/Funter Integration
- ~/Library/Containers/Funter Finder Integration
- ~/Library/Containers/FunterLauncher
- ~/Library/HTTPStorages/com.nektony.Funter-SIII
- ~/Library/Preferences/com.nektony.Funter-SIII
Another option to quickly and completely uninstall Funter is to use App Cleaner & Uninstaller.
If you stiil have any questions about Funter, contact our support team. We will be happy to assist you.
Video Guides

More useful information


