
Since 2020, Google Play Music has not been supported anymore. Due to this, you might need to uninstall Google Play Music from your Mac. Also, like any application on Mac, it creates temporary files and stores them on your disk, so you also need to remove all of the Google Play Music service files which are cluttering your disk space. This article will explain how to correctly and completely remove Google Play Music from your Mac.

Contents:
What is Google Play Music
Google Play Music is a music and podcast service controlled by Google. The program allows users to store up to 50,000 songs from their libraries for free. If you use a paid subscription, you can stream any song in the Google Play Music catalog and YouTube Music Premium. Also, the users can buy additional songs from the music store in Google Play. The Mobile version of Google Play Music supports offline usage, so you can play back the tracks stored on your device.
Google Play Music is no longer supported, so you should uninstall it from your Mac. It will free up your disk space and avoid possible problems while using YouTube Premium. Generally, cleaning junk files makes your Mac work more quickly and reliably.
Is Google Play Music no longer available?
Since 2020, Google Play Music has not been supported. The service stopped working globally. If you visit play.google.com or try to open the application, you will see the following message:
“Google Play Music is no longer available. All the best features of Google Play Music are available in YouTube Music.”
However, if you were using Google Play Music, you can “relocate your account and library” to YouTube Music.
If you have the Google Play Music application on your Mac, you should uninstall it to prevent its files from occupying your disk space. We will explain how to remove Google Play Music from Mac completely.
How to remove Google Play Music from Mac?
Any application on your Mac creates a lot of service files. When you delete the application by moving it into the Trash bin, its leftovers remain on your Mac. So to completely uninstall Google Play Music from Mac, you need to remove its service files as well. You can find those leftovers manually or with the help of third-party applications.
The easiest way to uninstall Google Play music is to use App Cleaner & Uninstaller. It is a special utility that automatically finds all unneeded support files of applications on your Mac. It will help you to completely remove Google Play Music with a few clicks. Here is the download link for a free trial of the uninstaller.
Uninstall Google Music Manager manually
To manually uninstall Google Music Manager from your Mac, you will have to find and remove its service files in Finder.
Steps to manually remove Google Play Music and its support files:
- Quit Google Music Manager.
- In Finder, go to the Applications folder and remove the Music Manager.app to the Trash.
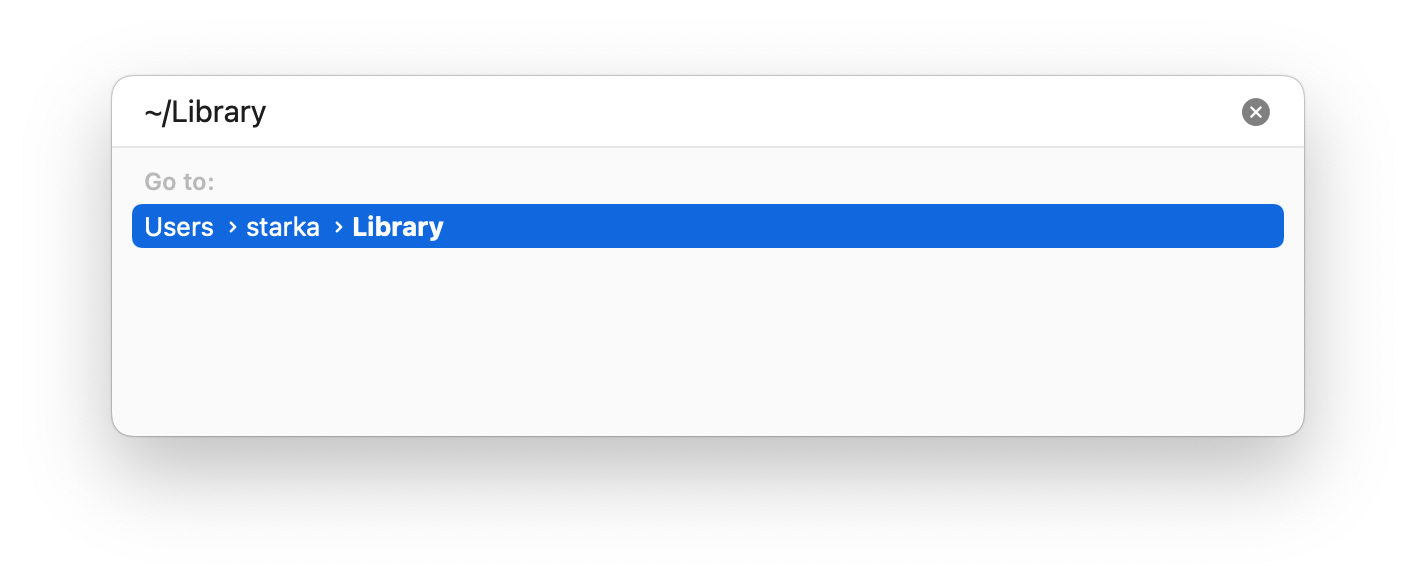
- As temporary service files are usually stored in the user’s hidden Library folder, you need to go to this folder. For this, open Finder → in the menu bar click Go → Go to Folder → type ~/Library → press Enter.
-
Now find and delete all useless service files related to the Google Play Music Manager app. Check the following directories:
- ~/Library/Application Support/Google/MusicManager

- ~/Library/Google/GoogleSoftwareUpdate/Actives/com.google.musicmanager/
- ~/Library/Logs/MusicManager/MusicManagerHelper.log/
- ~/Library/PreferencePanes/MusicManager.prefPane/
~/Library/Preferences/com.google.musicmanager.plist/
- ~/Library/Application Support/Google/MusicManager
-
We also recommend that you check the following subfolders for the leftovers of Google Music Manager:
- ~/Library/Caches
- ~/Library/LaunchAgents
- ~/Library/LaunchDaemons
- ~/Library/StartupItems
- The last step is to empty the Trash bin.


If you have removed all of the Music Manager’s support files, you can be sure that you completely uninstalled the application.
The number of service files and directories where they can be stored depends on the user’s experience and application preferences. Moreover, some apps may scatter their service files throughout the disk, and it can be hard to find all of them. That’s why we recommend using App Cleaner & Uninstaller, which automatically finds service files associated with applications on Mac.
How to uninstall Google Music Manager with App Cleaner & Uninstaller
Now we will explain how to delete Music Manager automatically, using an uninstaller App Cleaner & Uninstaller. App Cleaner & Uninstaller helps to uninstall more than 1000 applications on Mac entirely and quickly.
Here is how to remove Google Music Manager using App Cleaner & Uninstaller.
- Quit Google Music Manager.
- Download and launch App Cleaner & Uninstaller.
- Select Music Manager in the list of the Applications tab. All its service files will be selected automatically.
- Click the Remove button.
- Confirm the uninstallation.
- Complete the deletion of Google Music Manager by emptying the Trash bin.

Conclusion
We shared two methods on how you can remove Google Play Music Manager from your Mac. If you use the manual method, you should manually find and delete application’s service files. However, App Cleaner & Uninstaller can do all this work quickly and safely with just one button click.


