Need to uninstall the NetEase Music app from your Mac? In this article, we’ll explain how to completely remove NetEase Music from your Mac, preventing any leftover files from remaining on your system.
Contents:
- Should I uninstall NetEase Music from my Mac?
- How to manually delete NetEase Music on a Mac
- How to remove NetEase Music on a Mac using an uninstaller
Should I uninstall NetEase Music from my Mac?
NetEase Music is one of the largest and most well-known music streaming platforms in China, with over 600 million registered users. However, despite being one of Asia’s major music streaming platforms, NetEase Music has a relatively limited selection of Western music compared to Spotify.
If you’ve stopped listening to music on NetEase Music or have switched to a different music streaming service, there’s no point in keeping the app taking up space on your Mac. NetEase Music can take up a significant amount of storage space, especially if you have a large music library or have downloaded songs for offline listening. Uninstalling the app can help to free up storage space on your Mac.
Also note, that if you’re experiencing technical issues with NetEase Music, such as crashing, errors, or compatibility problems, reinstalling the app might resolve the issue.
Whether you’re looking to free up storage space, switch to a different music streaming service, or simply remove the app’s lingering presence on your computer, learning how to properly uninstall NetEase Music is important. Read below on how to do it.
How to manually delete NetEase Music on a Mac
To manually delete NetEase Music from your Mac, follow these steps:
- Quit NetEase Music.
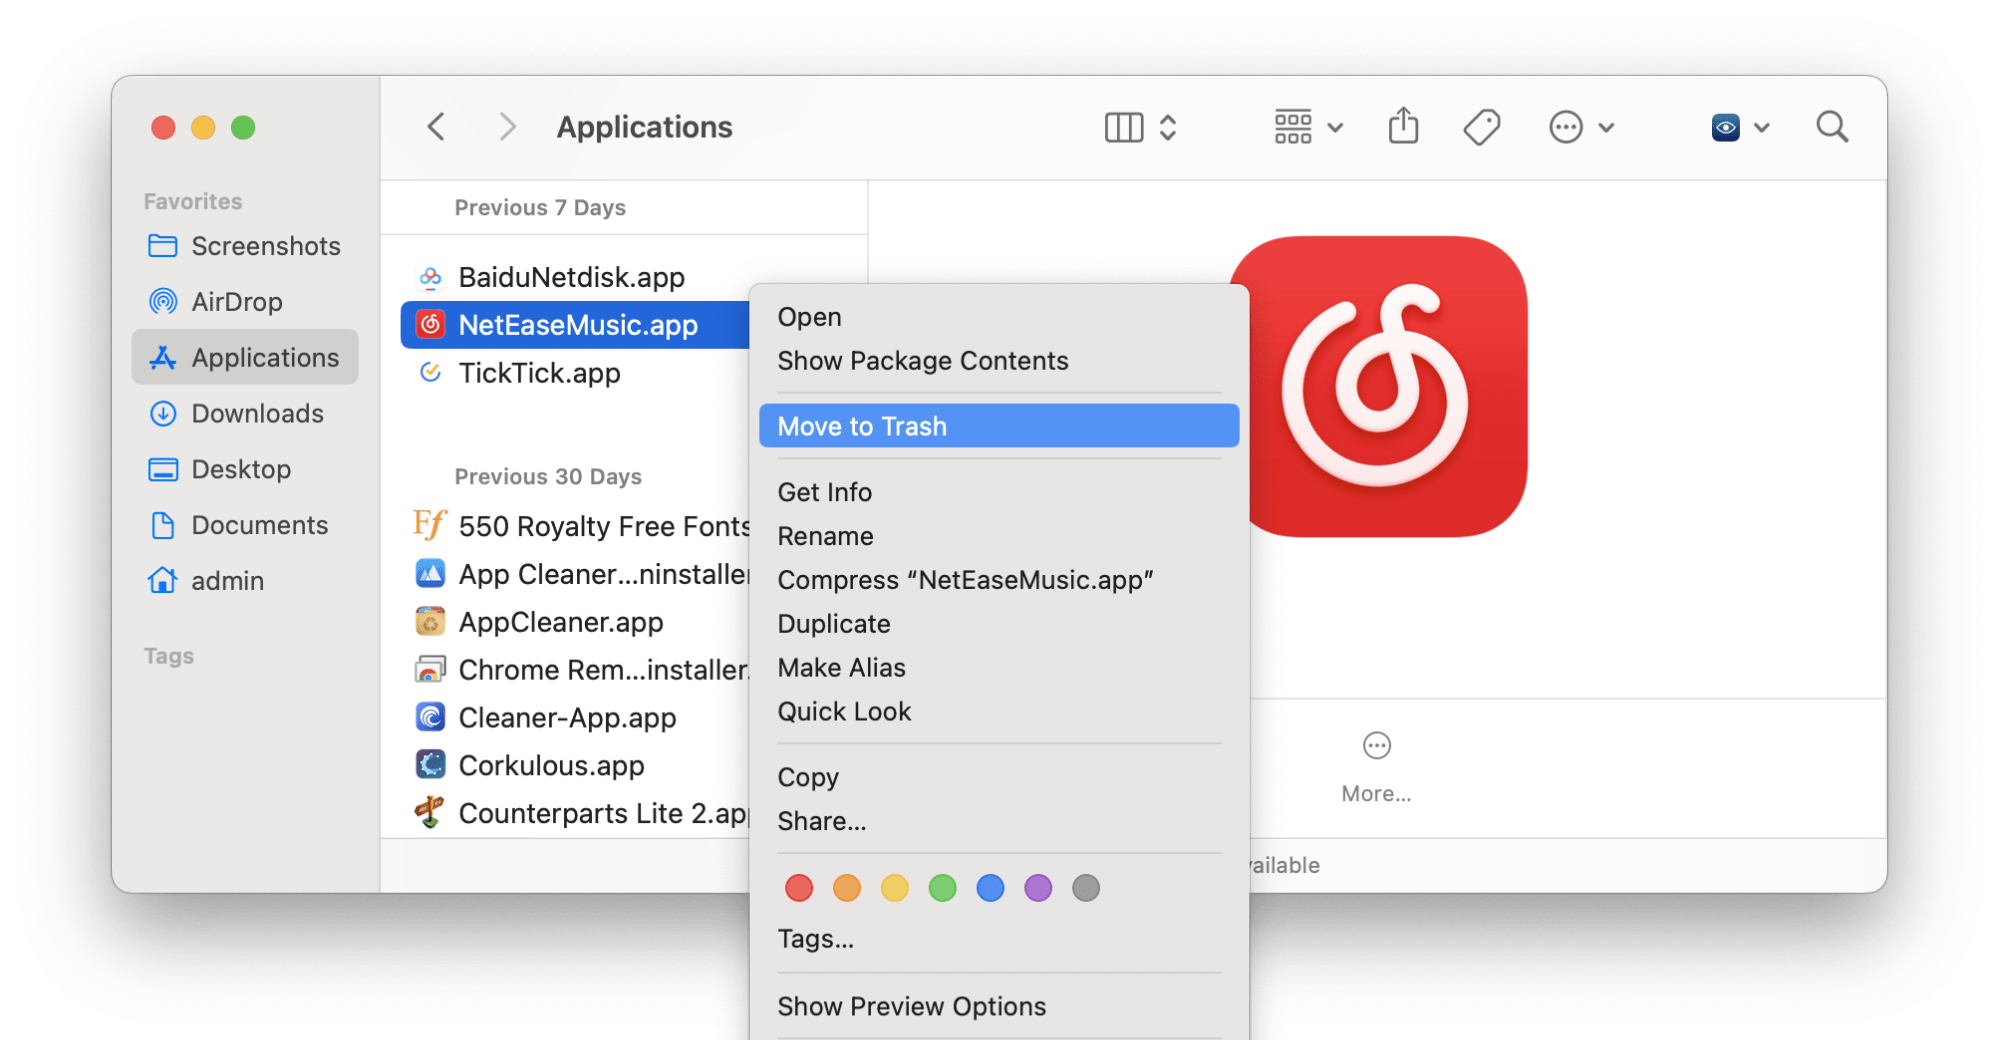
- Open the Applications folder.
- Locate and remove the NetEase Music app into the Trash.
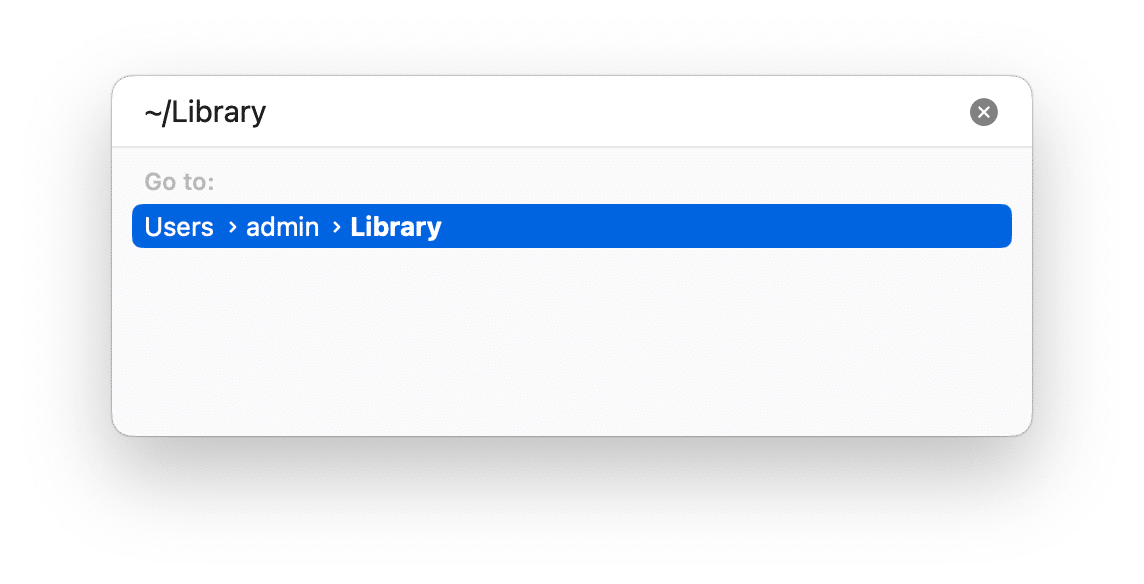
- Now you need to remove any leftover files or folders associated with the app. In Finder, press Cmd+Shift+G.
- Navigate to the following directory: ~/Library.
-
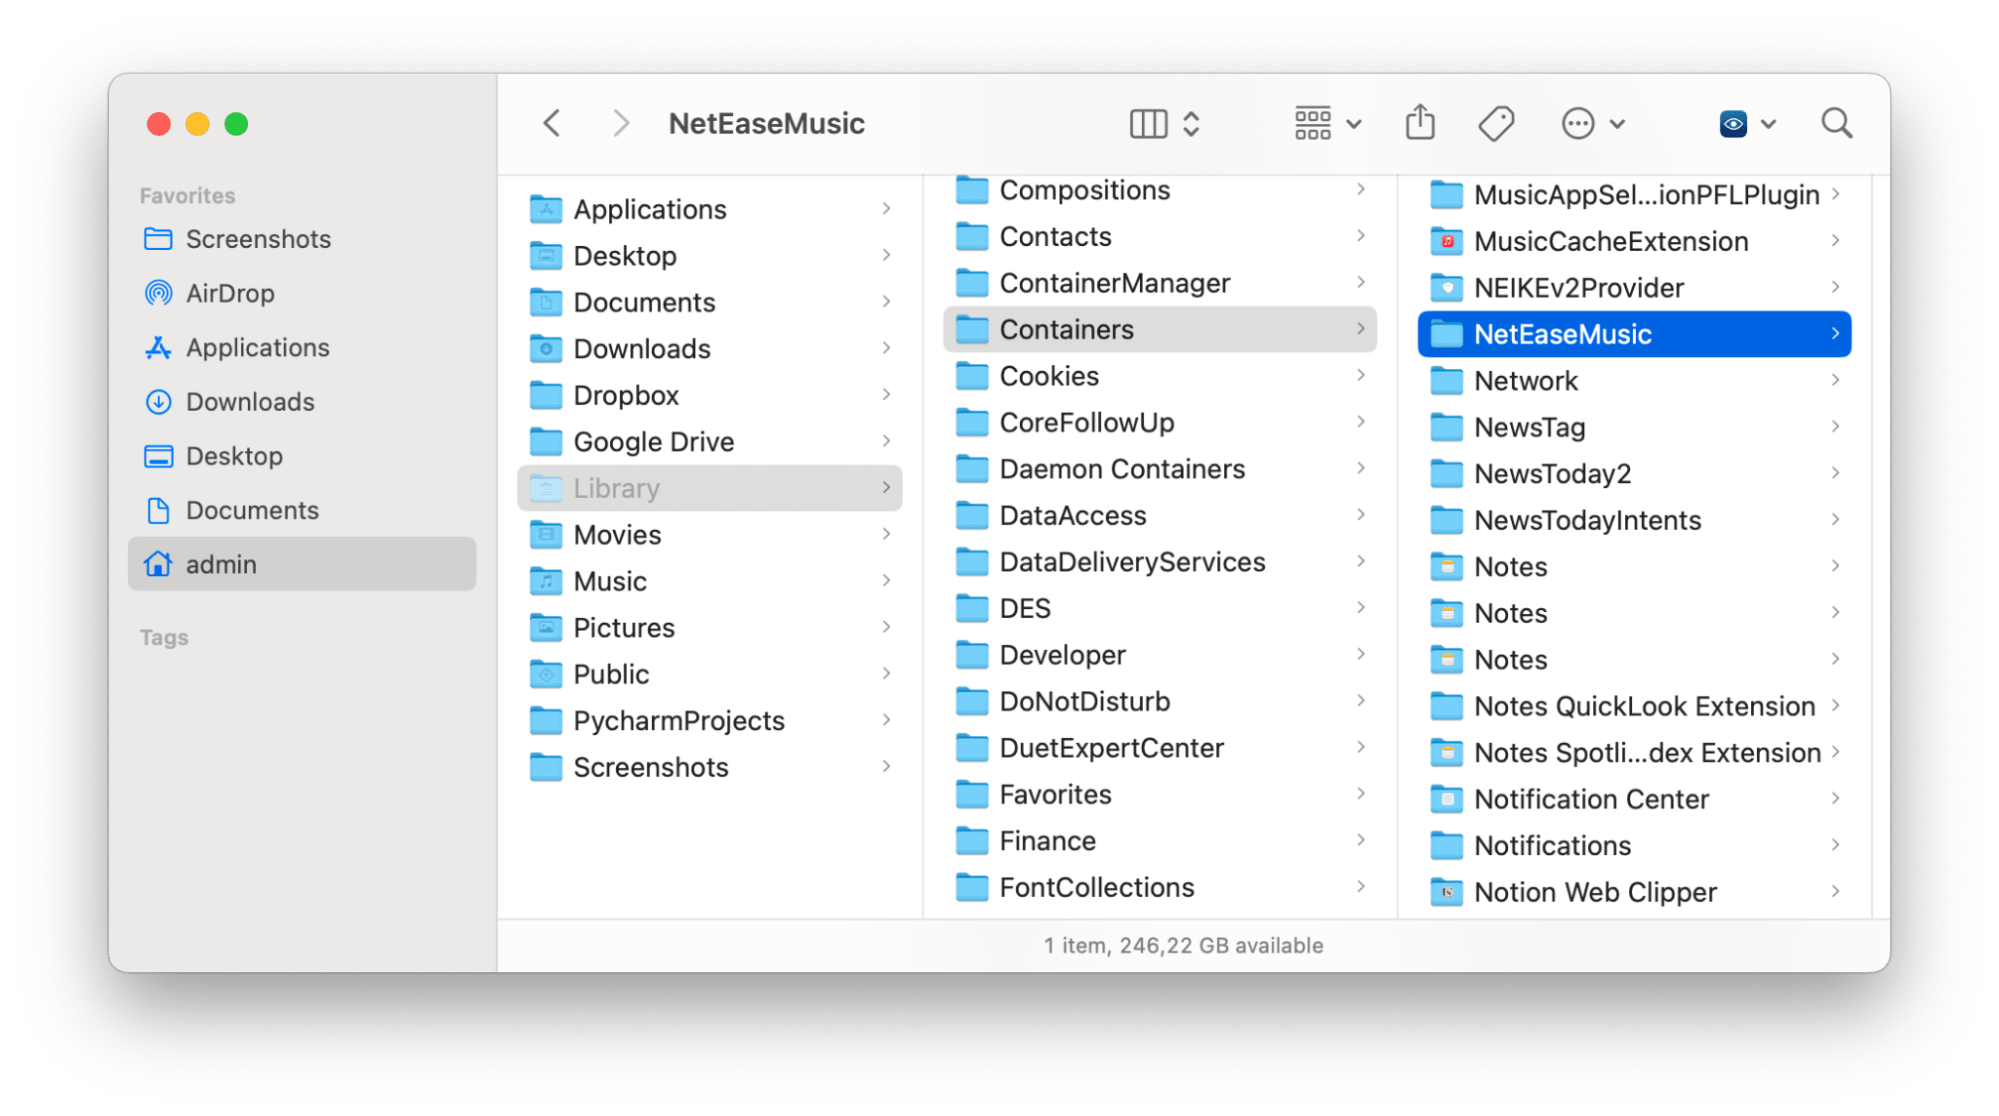
In the Library folder, find and delete any NetEase Music-related files or folders. Check the following subfolders for them:
- ~/Library/Application Support/
- ~/Library/Caches/
- ~/Library/Preferences/
- ~/Library/Logs/
- ~/Library/Containers/
- Once you’ve done this, empty your Trash bin.
How to remove NetEase Music on a Mac using an uninstaller
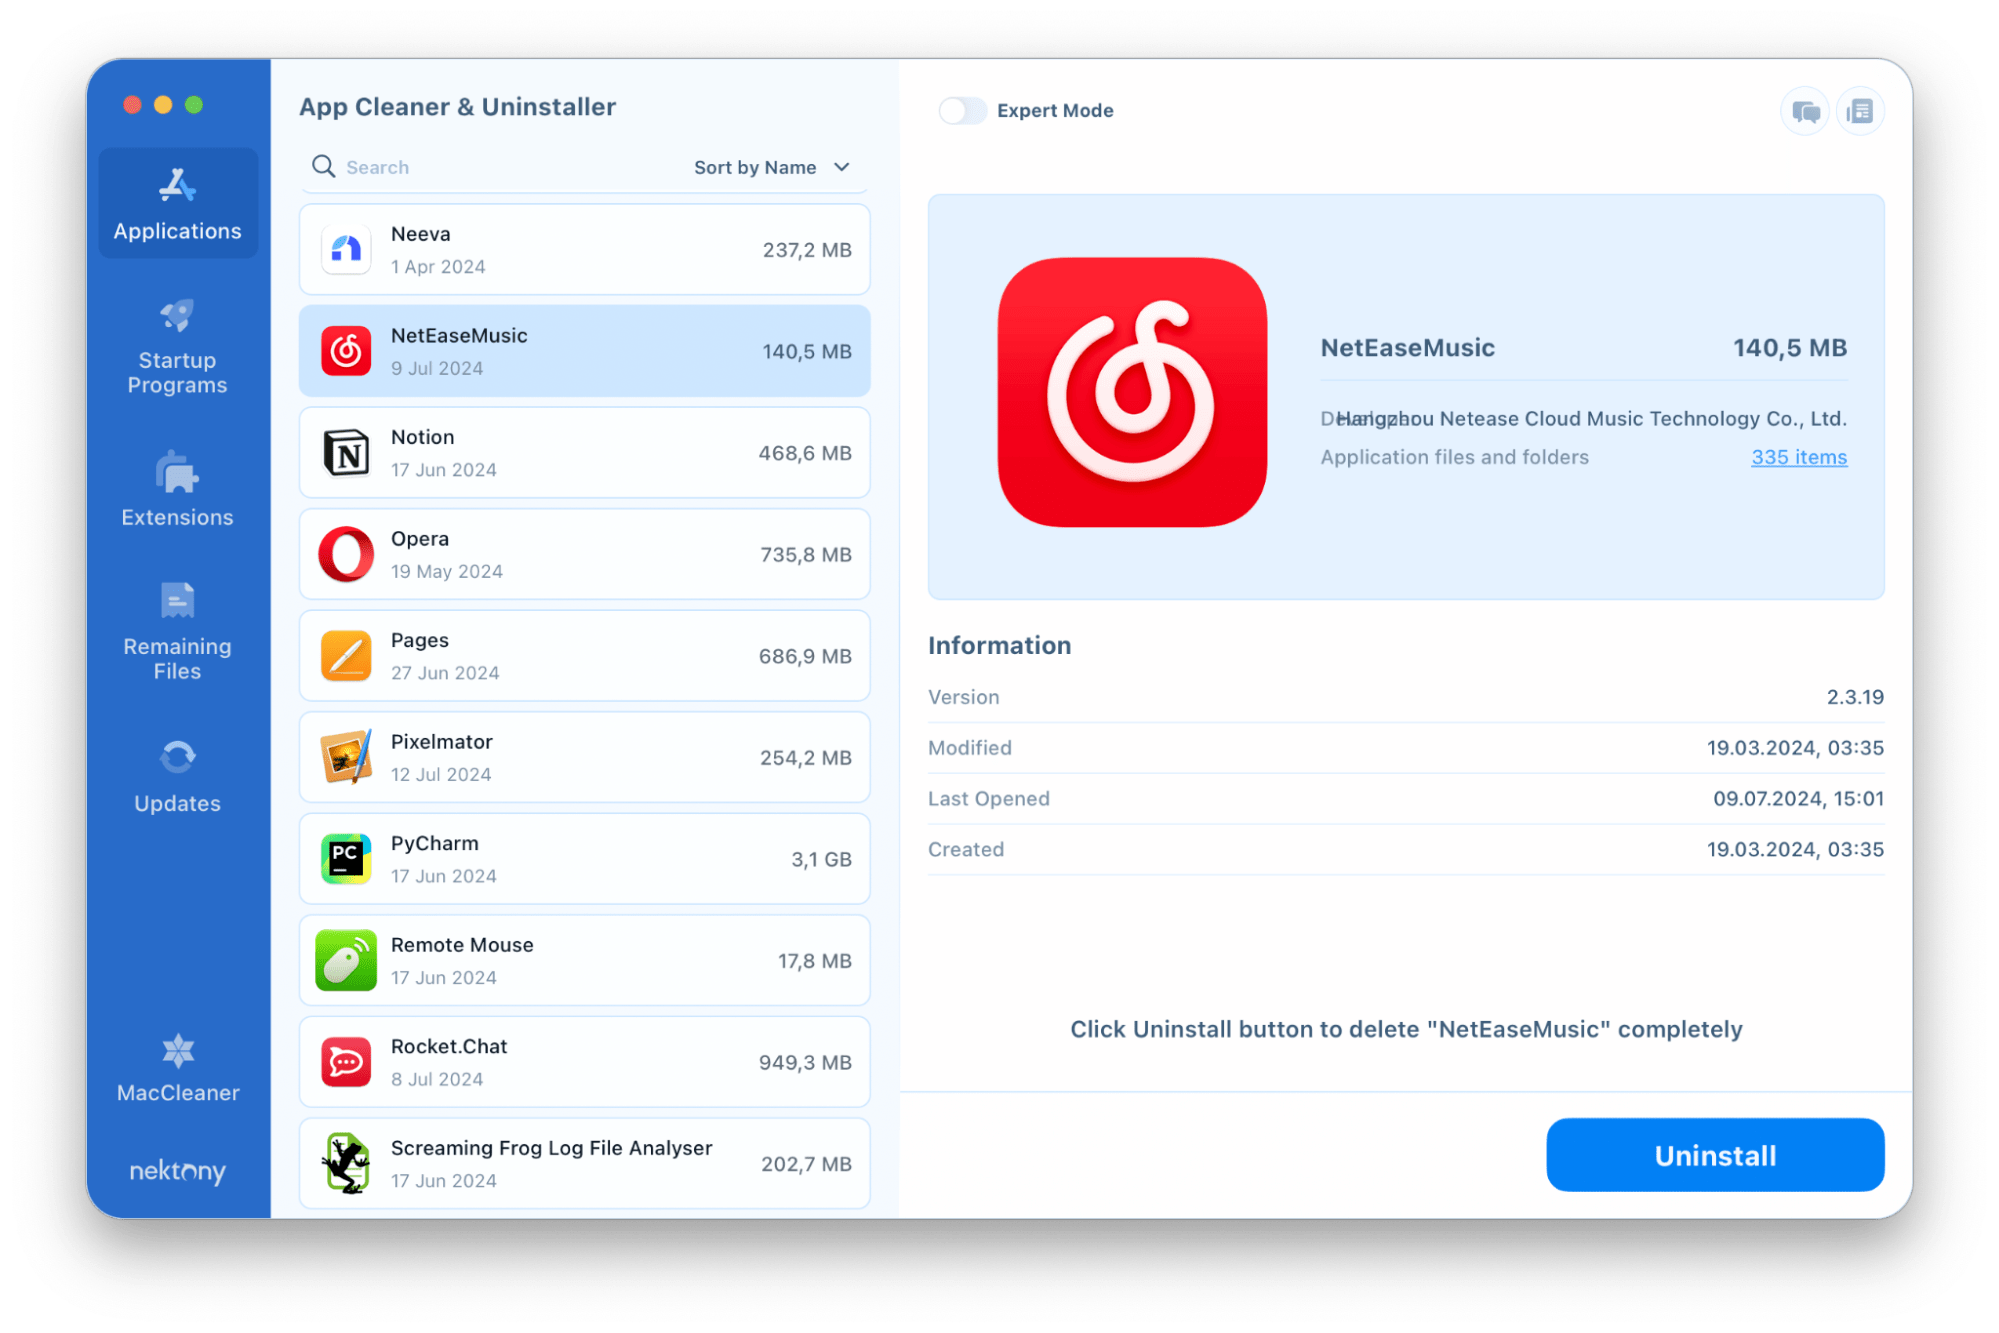
To quickly and entirely delete NetEase Music from your Mac, you can use third-party uninstallers like App Cleaner & Uninstaller. This app will remove NetEase Music and its associated files with a few clicks. It automatically finds preferences and cache files. Cookies, logs, and other service files. As a result, it leaves your Mac clean and free of any leftover files and data from deleted apps.
Here’s how to use App Cleaner & Uninstaller to delete NetEase Music:
- Download and install App Cleaner & Uninstaller.
- Launch and wait for the scan to complete.
- Find NetEase Music in the list of installed apps and select it.
- Click the Uninstall button.
- Confirm that you want to uninstall NetEase Music.
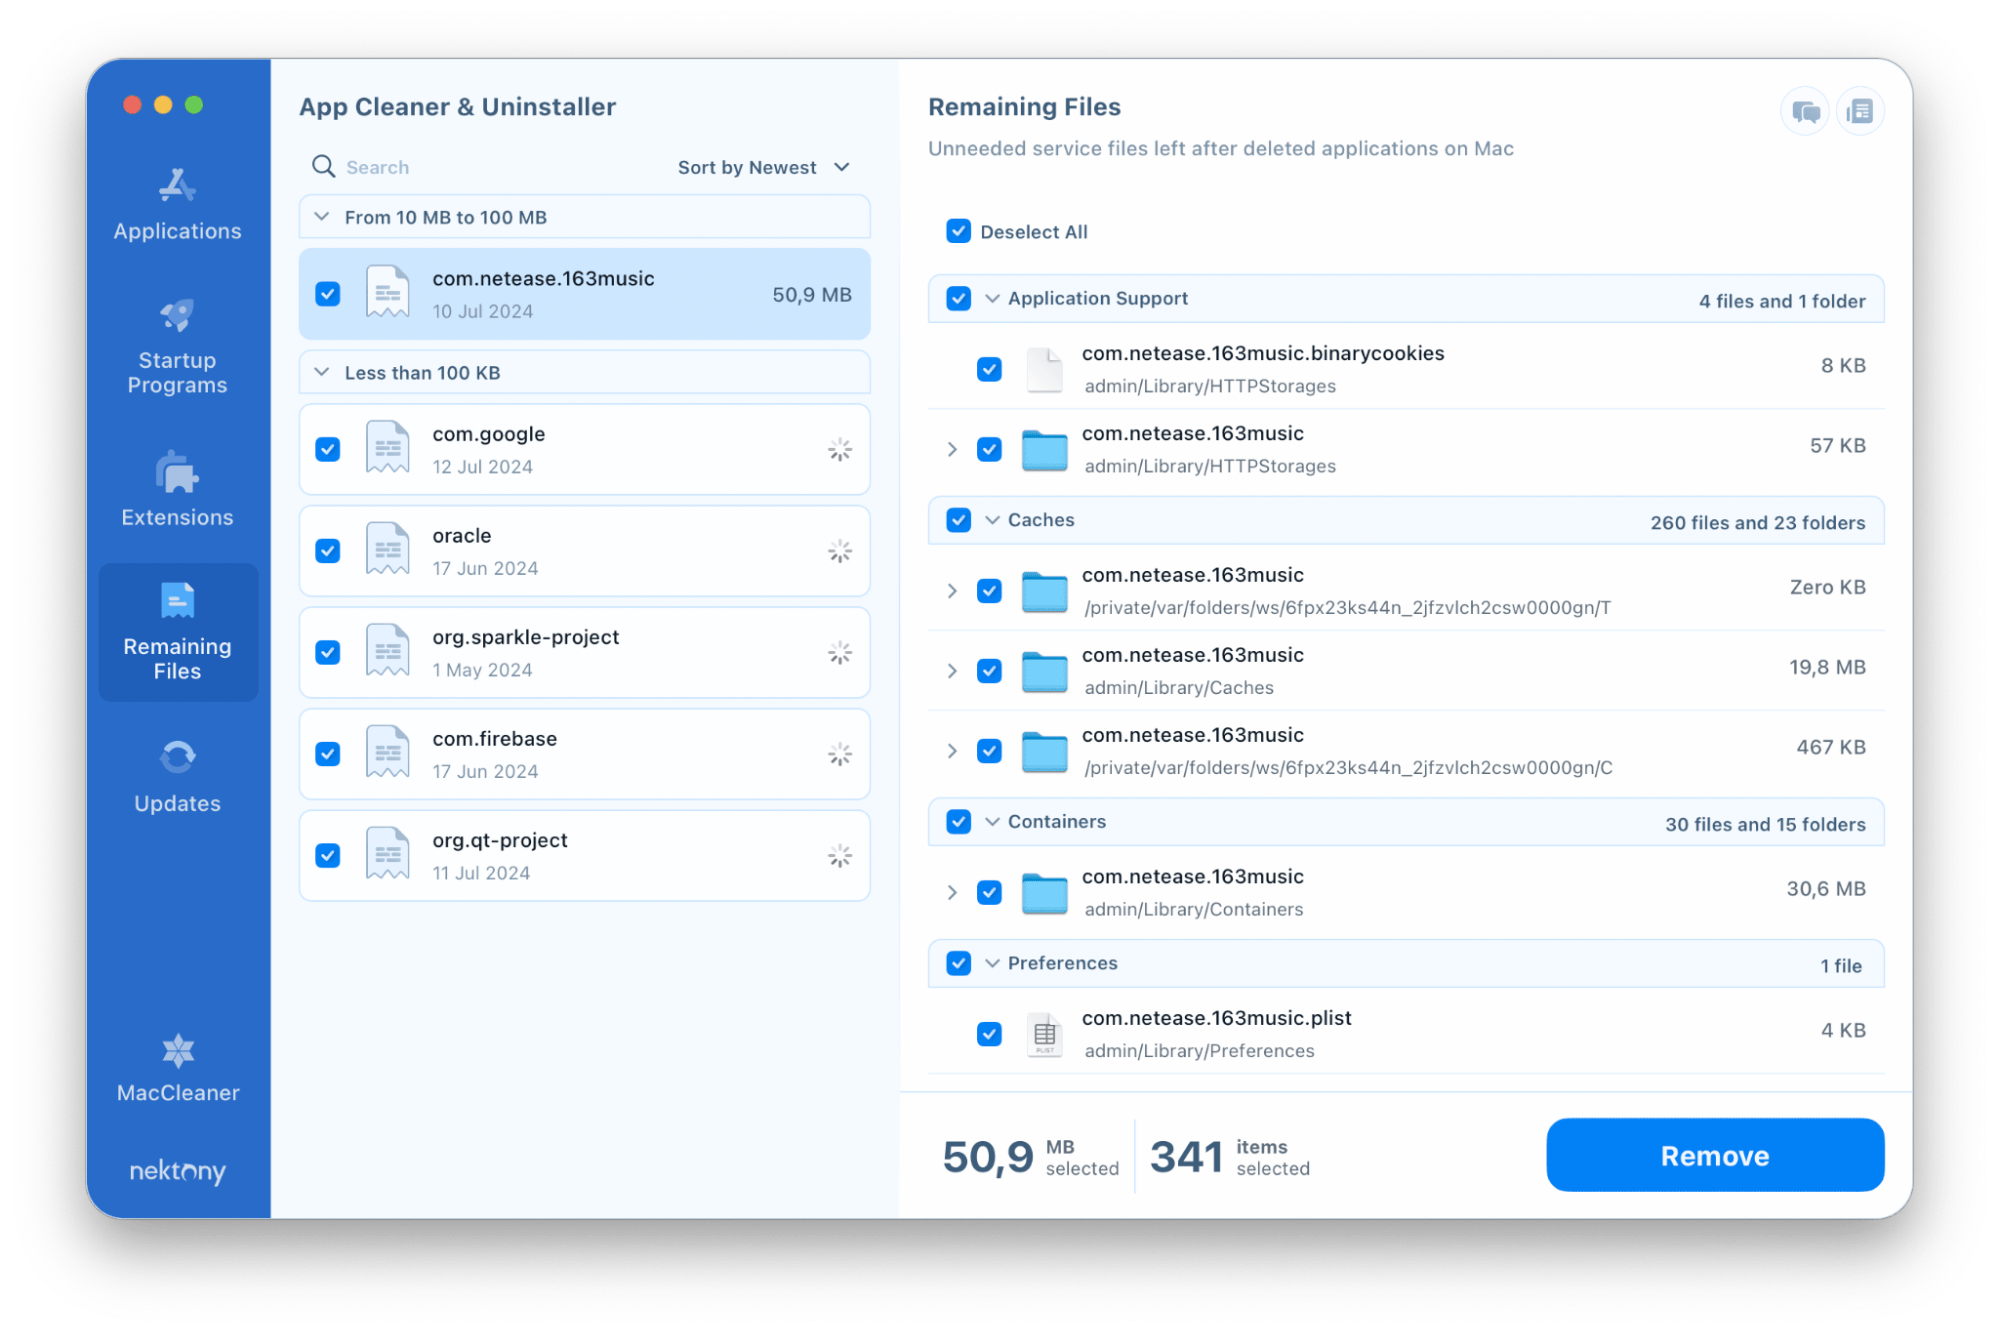
By using App Cleaner & Uninstaller, you can ensure thorough removal of NetEase Music and its associated files, leaving your Mac tidy and organized. Even if you have already deleted NetEase Music by dragging it into the Trash, you can find its leftover files. `for this switch to the Remaining Files Section. You will find there all the remnants of previously deleted apps. Simply select them and click on Remove.
Conclusion
Removing NetEase Music from a Mac can be achieved through various methods, including manual uninstallation and third-party tools like App Cleaner & Uninstaller. Whether you choose to delete the app or use a specialized tool manually, it’s essential to remove all associated files and data to avoid any potential issues or conflicts with other apps.
