If for some reason you want to uninstall BaiduNetdisk on your Mac, you’re on the right page. This article provides a step-by-step guide on how to delete BaiduNetdisk with all of its remaining files.
Contents:
- What is BaiduNetdisk and should I remove it
- Uninstall BaiduNetdisk from Mac manually
- Uninstall BaiduNetdisk with App Cleaner & Uninstaller
What is BaiduNetdisk and should I remove it
BaiduNetdisk is a cloud storage service provided by Baidu, a leading Chinese internet company. Similar to other cloud storage services like Google Drive or Dropbox, BaiduNetdisk allows users to upload, store, and share files online.
Deciding whether to remove BaiduNetdisk depends on your specific use case and priorities. If you find that you no longer need the service or if it’s causing issues, following the uninstallation guide can help you remove it completely from your Mac. Also note, that as with any cloud service, you should consider the privacy and security implications of storing your files online, especially with a service based in China.
Uninstall BaiduNetdisk from Mac manually
Using a built-in uninstaller is always the easiest way to remove an application from your Mac. However note, that the built-in uninstallers typically don’t always remove all the residual files and directories related to the application. So please, follow the instructions without missing any step so that completely to get rid of BaiduNetdisk.
- Quit BaiduNetdisk. You can do this by right-clicking on the BaiduNetdisk icon in the Dock and selecting “Quit,” or by pressing Cmd + Q if the application is active.
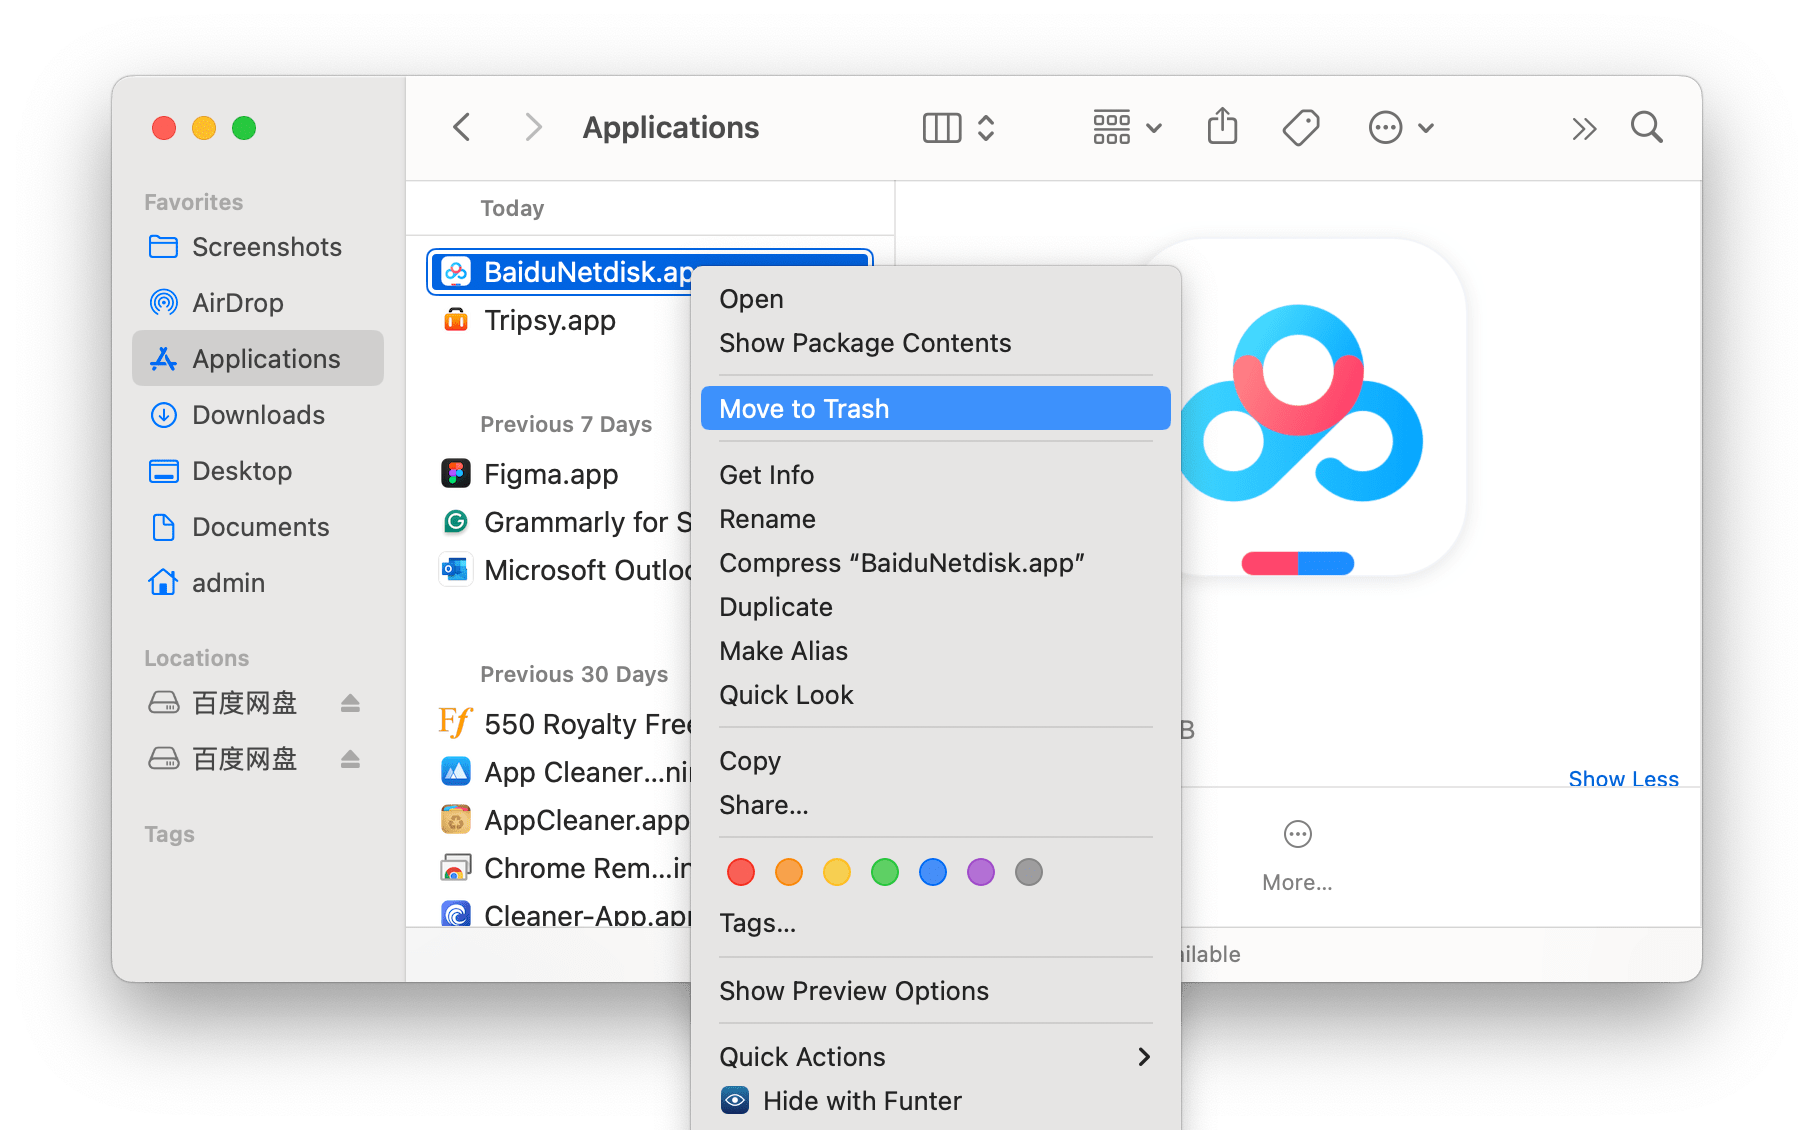
- Open Finder and go to the Applications folder.
- Find the BaiduNetdisk application, then drag and drop it to the Trash.
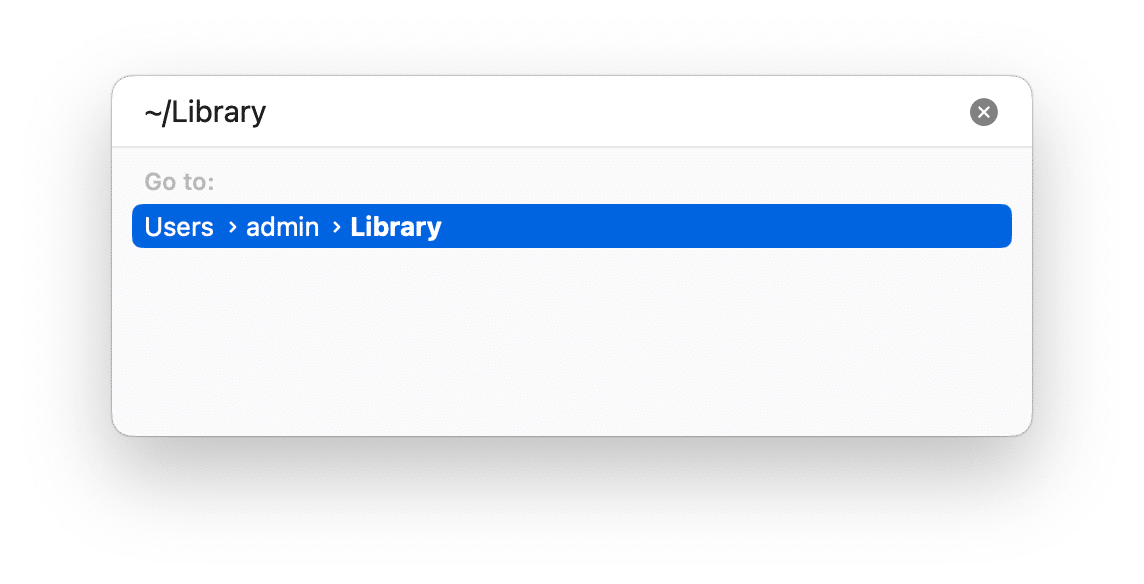
- While you’re in Finder, click on “Go” in the menu bar.
- Select “Go to Folder…” or press Shift + Cmd + G.
- In the search panel, type ~/Library/ and press Enter.
-
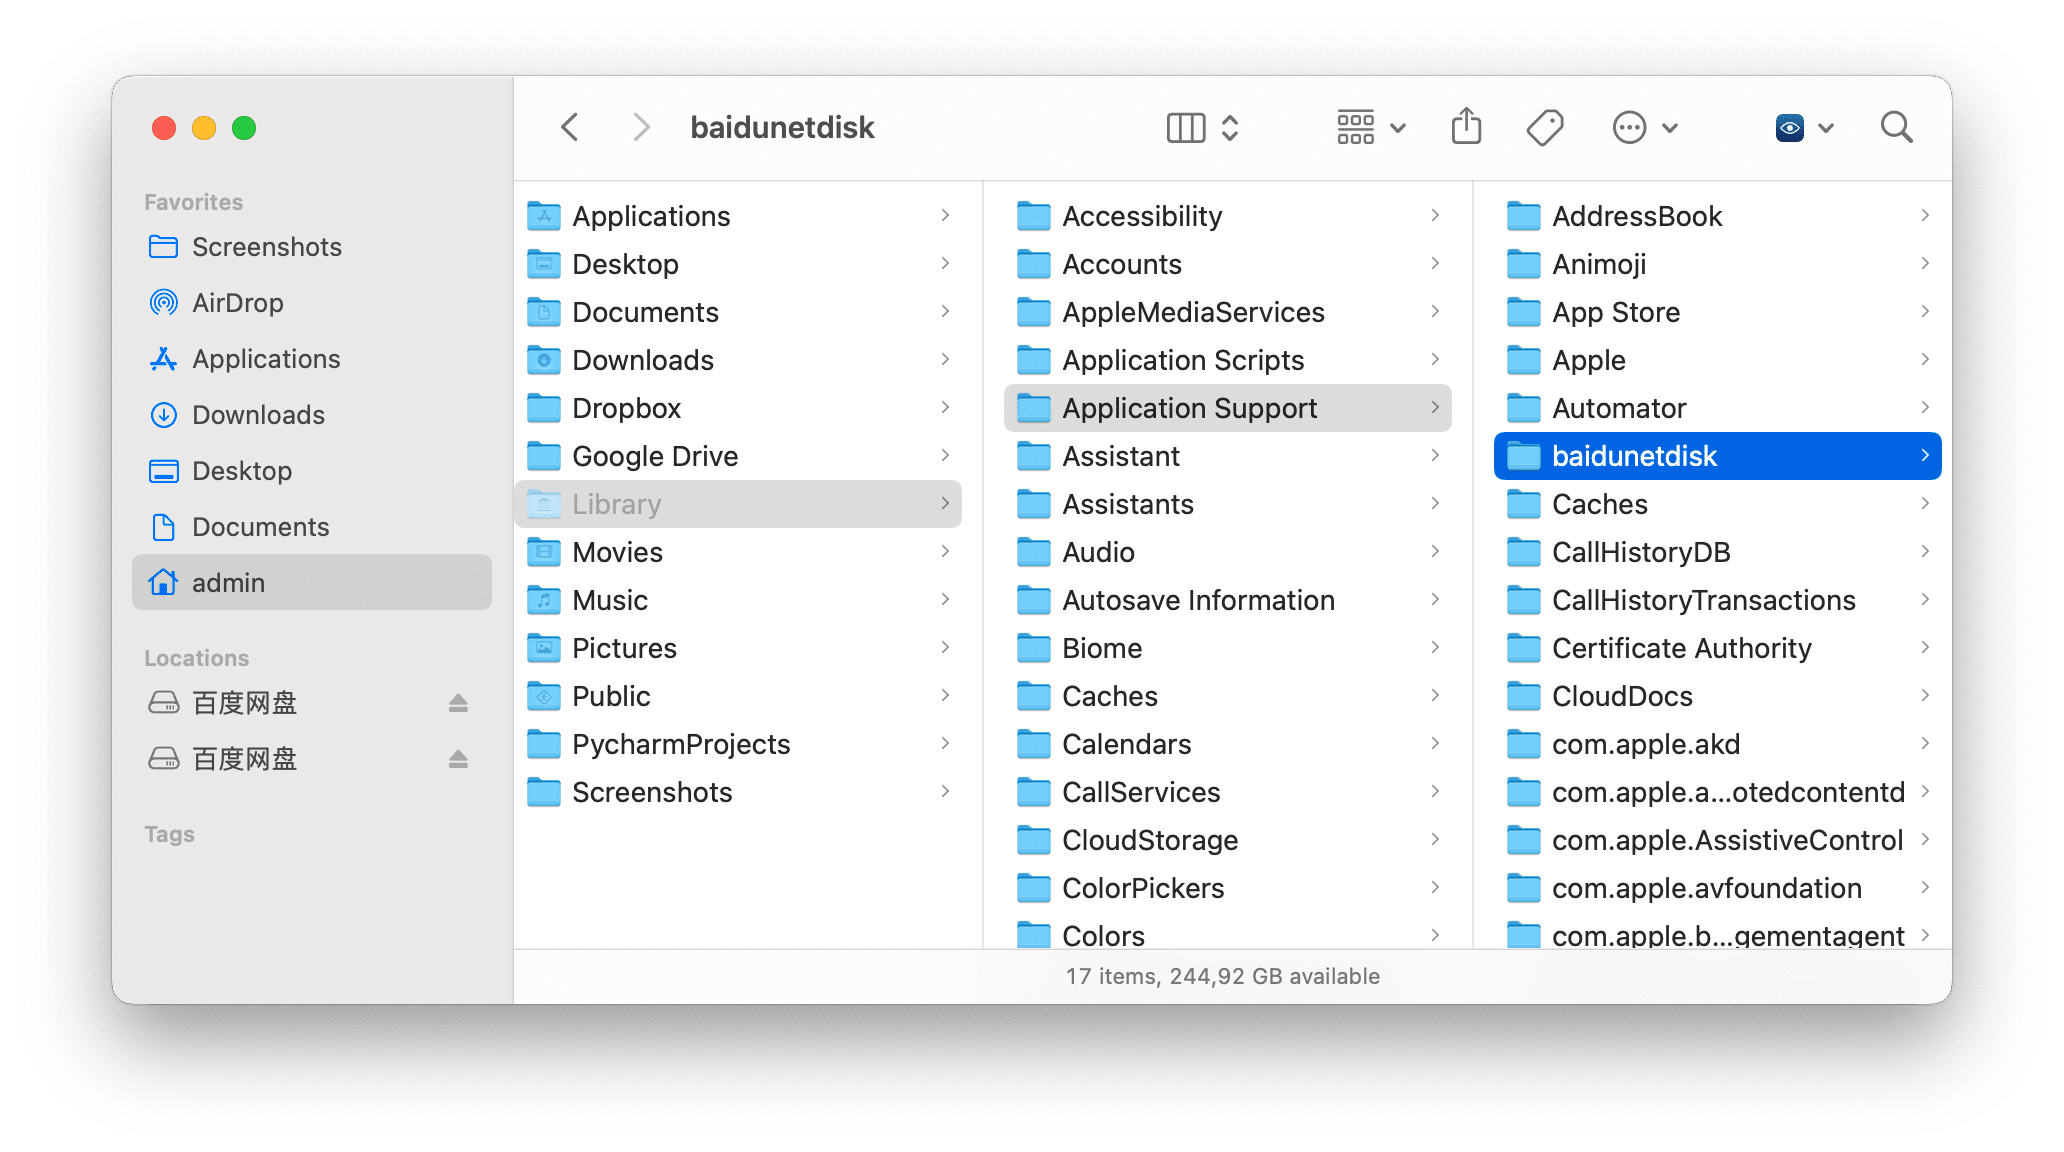
Enter the following paths one by one and delete the BaiduNetdisk corresponding files and folders:
- ~/Library/Application Support/
- ~/Library/Caches/
- ~/Library/Preferences/
- ~/Library/Logs/
- ~/Library/Containers/
- ~/Library/Cookies/
- After deleting all the related files, empty the Trash bin and restart your Mac to ensure all changes take effect.
Uninstall BaiduNetDisk using a third-party uninstaller
If you prefer an automated process, you can use a third-party uninstaller like App Cleaner & Uninstaller to remove BaiduNetdisk completely.
App Cleaner & Uninstaller scans your Mac for all files associated with BaiduNetdisk, including caches, logs, preferences, and support files that are often left behind when you simply move an application to the Trash. The application provides an intuitive interface that makes it easy to select and uninstall unwanted applications. Even users who are not tech-savvy can navigate and use the tool effectively. Here’s how to use it:
- Download and Install App Cleaner & Uninstaller.
- Open the application and let it scan your installed apps.
- Find BaiduNetdisk in the list of applications and select it.
- Click on the “Uninstall” button.
- Confirm the removal of BaiduNetdisk along with all its support files.
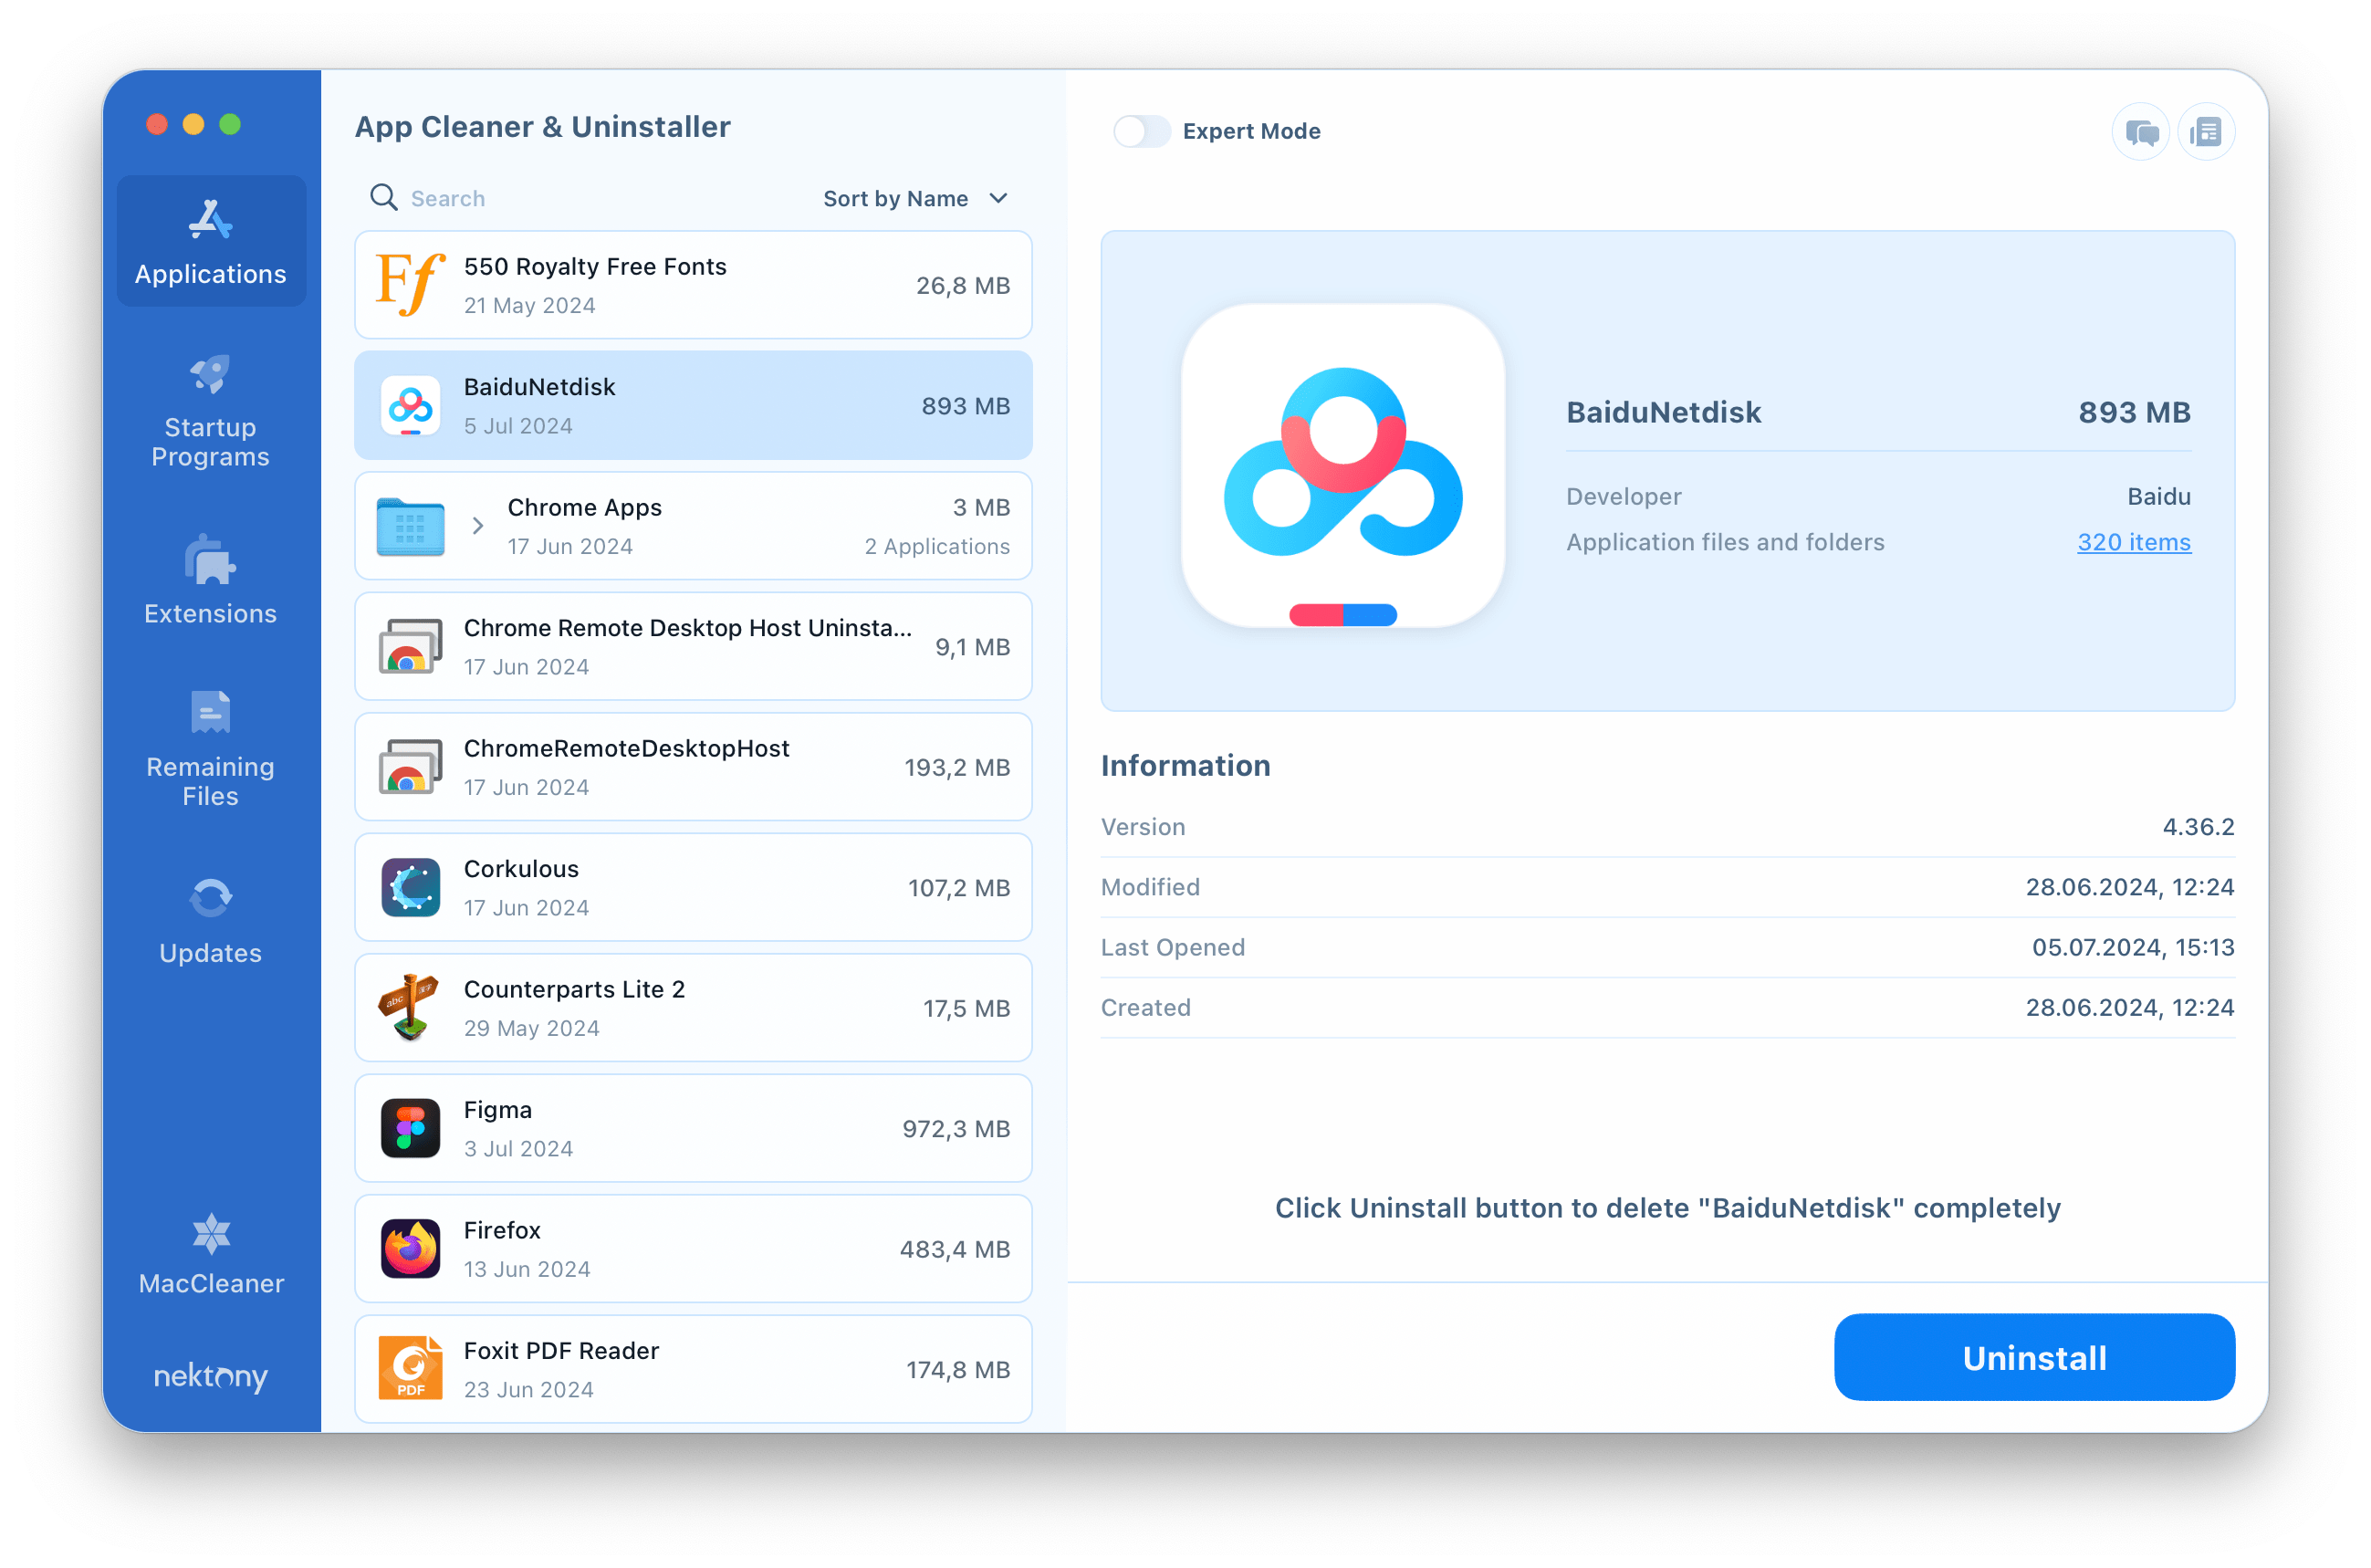
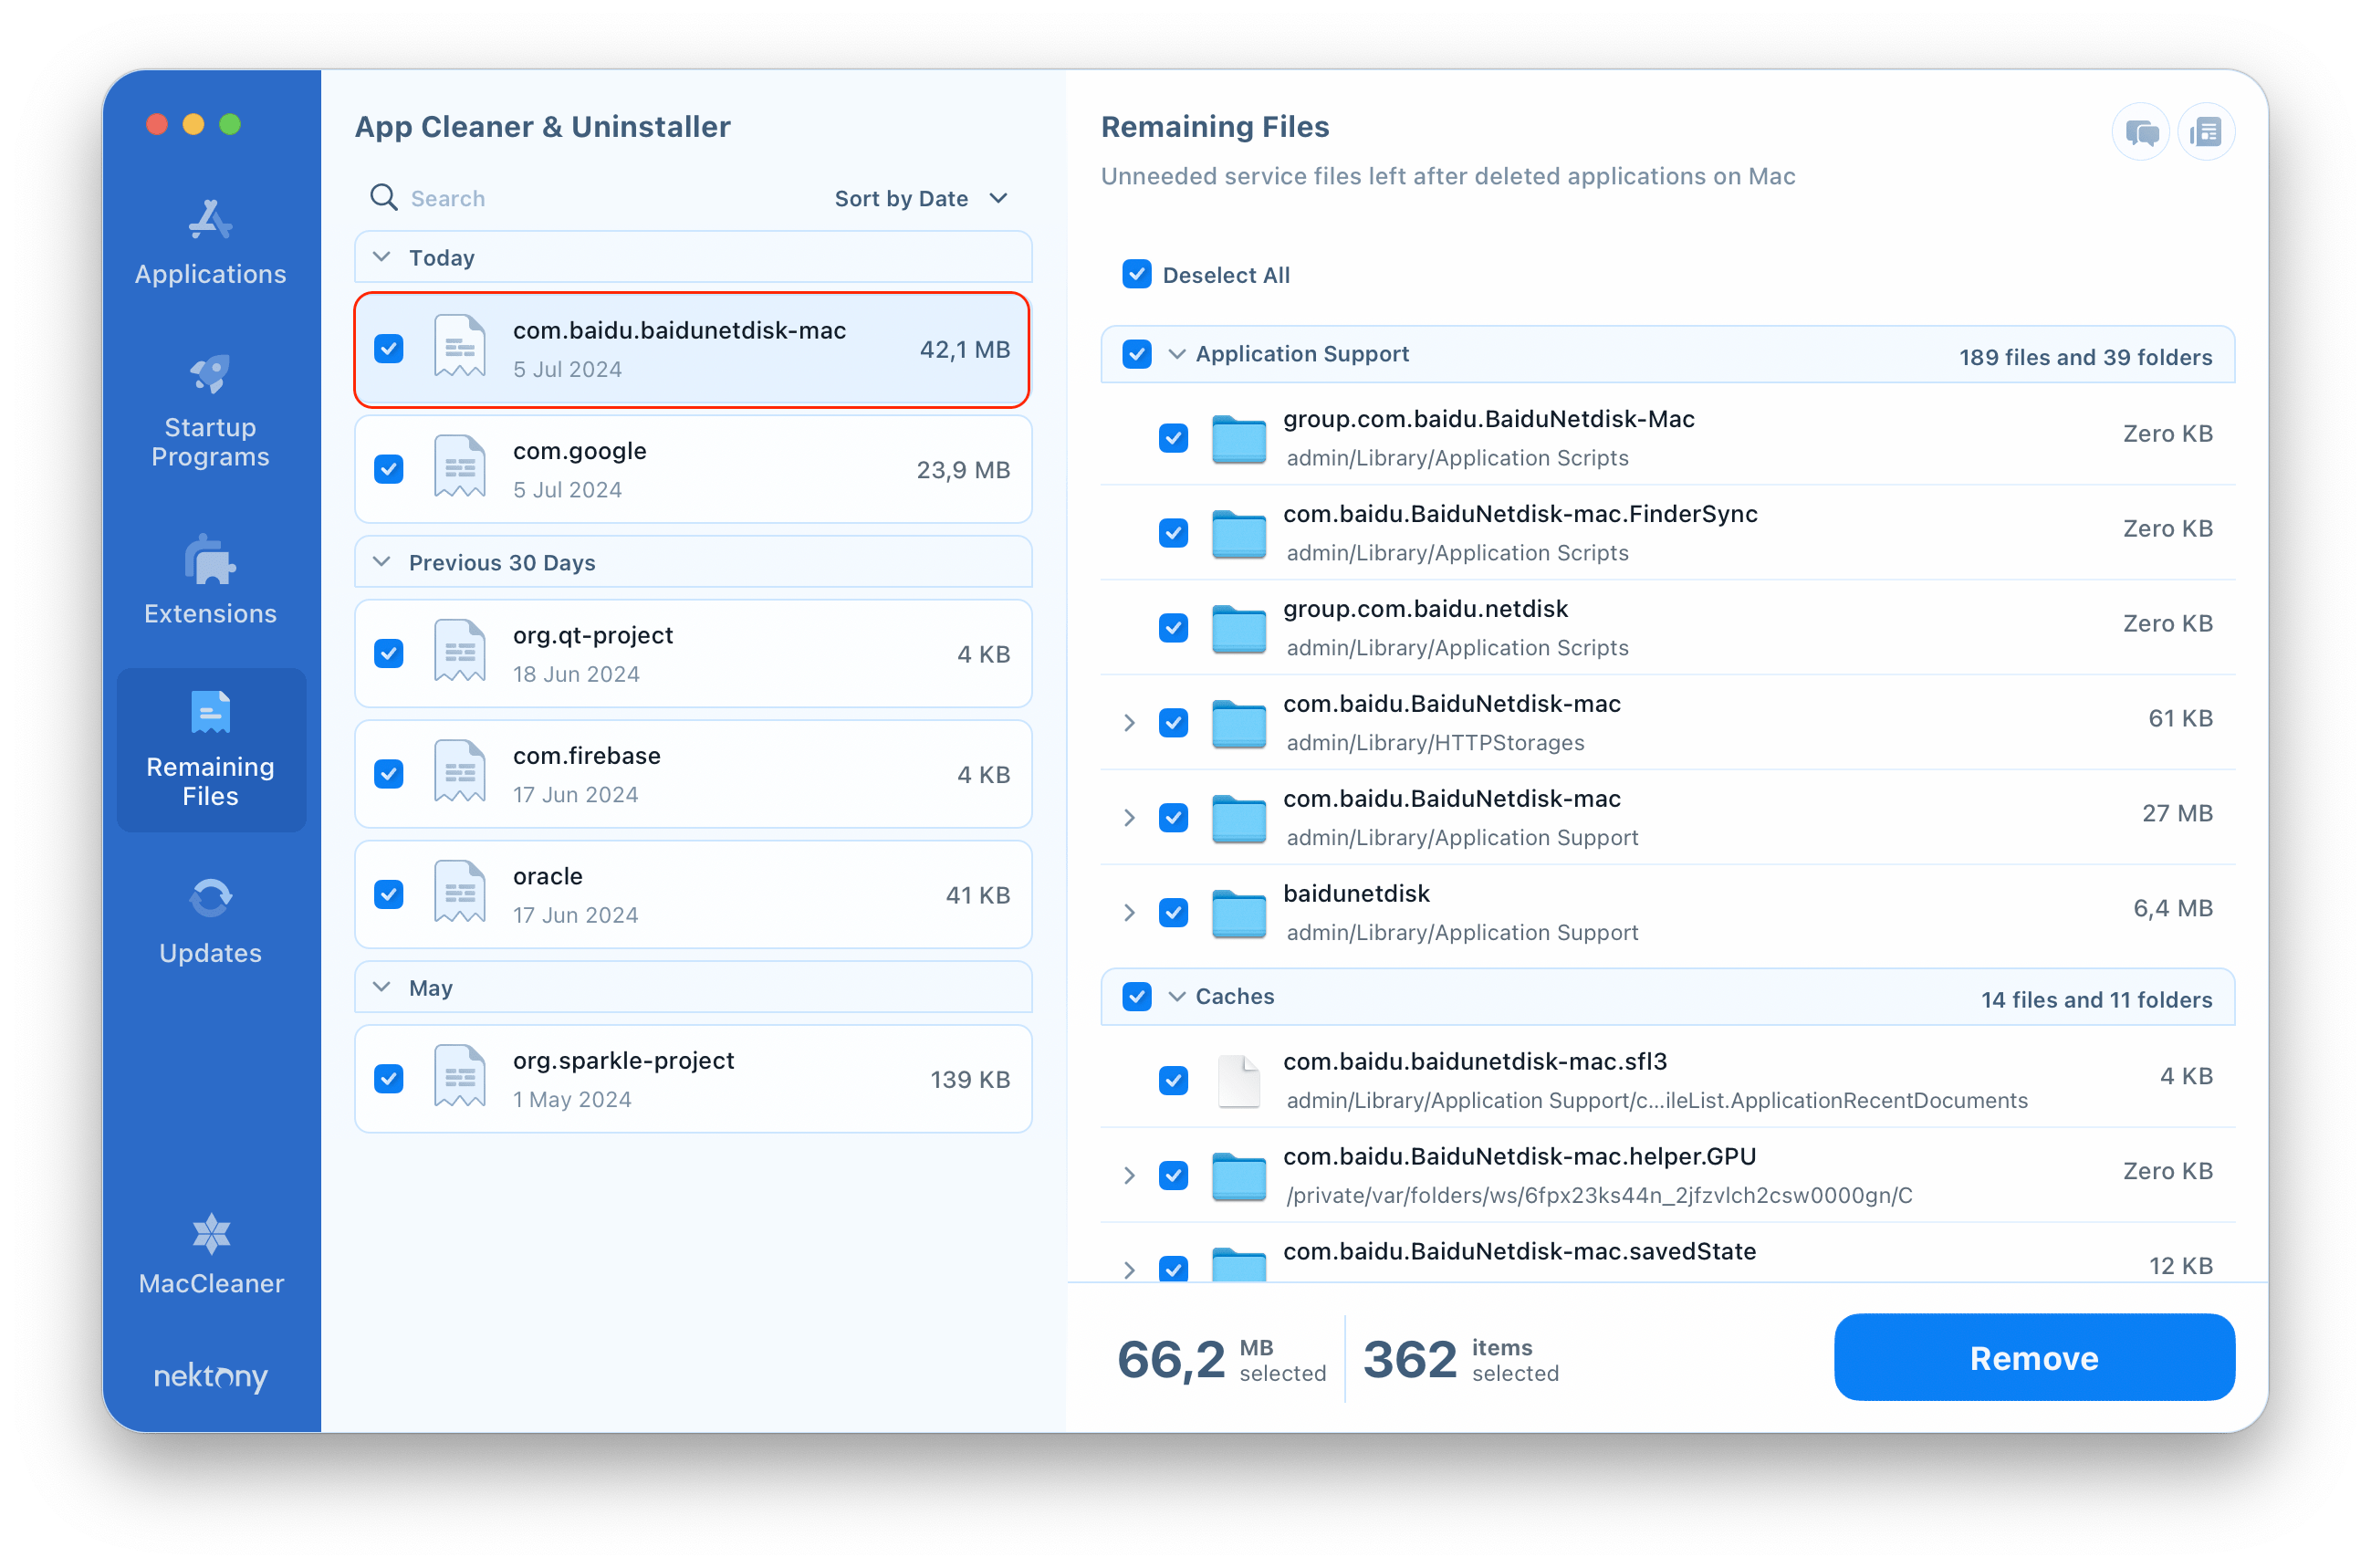
Even if you have already deleted BaiduNetdisk to the Trash, App Cleaner & Uninstaller can still help you find and remove any leftover files associated with the application. For this, simply switch to the Remaining Files section, where you’ll find all the leftover files of previously deleted apps.
Conclusion
By following these steps, you can ensure that BaiduNetdisk is completely removed from your Mac. Whether you choose the manual method or a third-party uninstaller, make sure to delete all associated files to free up space and maintain your system’s performance.
