If you’ve experienced any tricky technical issue with Vim, probably the only way to fix it is to reinstall it. This article will share with two ways on how to uninstall Vim on Mac completely.

Contents:
- What is Vim and should I uninstall it?
- How to uninstall Vim manually
- How to uninstall Vim automatically
What is Vim and should I uninstall it?
Vim is a text editor application that allows you to edit files in a Terminal window. It is popular among programmers and system administrators who need to work with code and configuration files. It has a steep learning curve and a complex interface, but it also offers many features and customization options. If you are not using the app for any specific purpose, you may not need it on your computer. You can use a third-party uninstaller or follow some manual steps to remove Vim completely from your Mac.
How to uninstall Vim manually
If you want to delete Vim for macOS from your computer, you should remember that it is a complex software tool, which contains an executable file and various service files. Depending on how and how long you have been using MacVim, the app has created lots of service files on your disk. Therefore, to completely delete the Vim app from your Mac, you would need to remove all its components as well. For this, take the following steps:
- Quit MacVim.
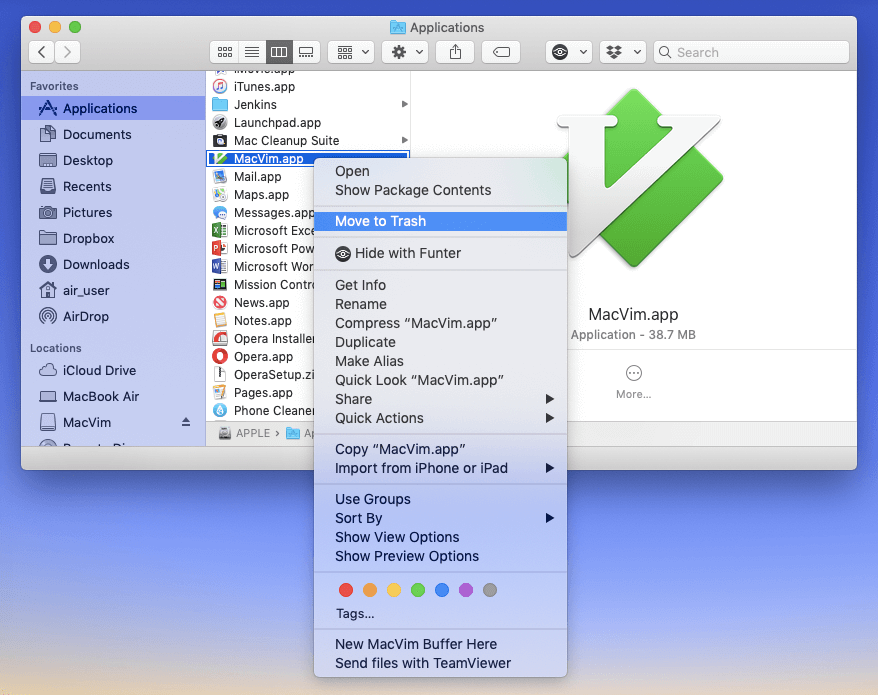
- In the folder, find and select the MacVim.app file. Right-click on it and select from the menu that appears.
- Now, delete the service files of the MacVim app on your disk. These are mainly stored in the hidden Library folder. To access this folder, click in the Finder’s menu bar → select from the drop-down menu → type ~/Library in the window that appears → press Enter.
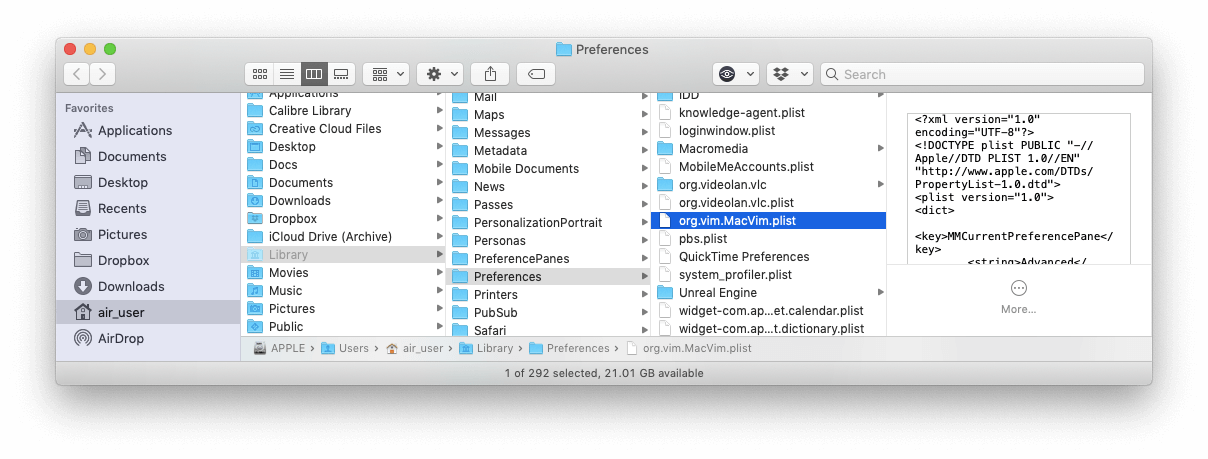
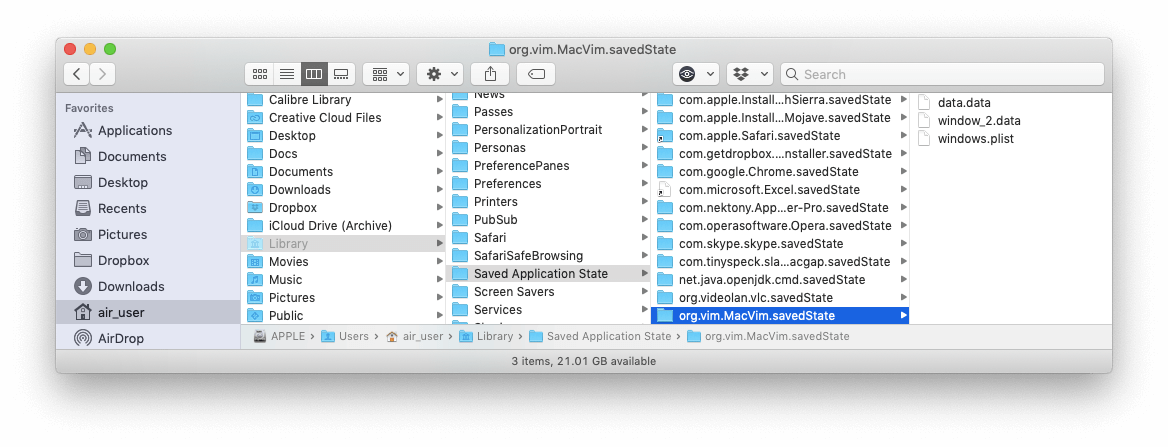
- Within the Library folder, step by step find and remove the useless service files related to Vim. The support files of MacVim are commonly located in the following directories:
~/Library/Preferences/org.vim.MacVim.plist
~/Library/Saved Application State/org.vim.MacVim.savedState
Depending on your use of the text editor, you can also check to see if any unneeded MacVim service files are stored in the next Library subfolders:
~/Library/Caches
~/Library/Logs
~/Library/Application Support - Then, empty the Trash bin to get rid of Vim entirely.
How to uninstall Vim on Mac with App Cleaner & Uninstaller
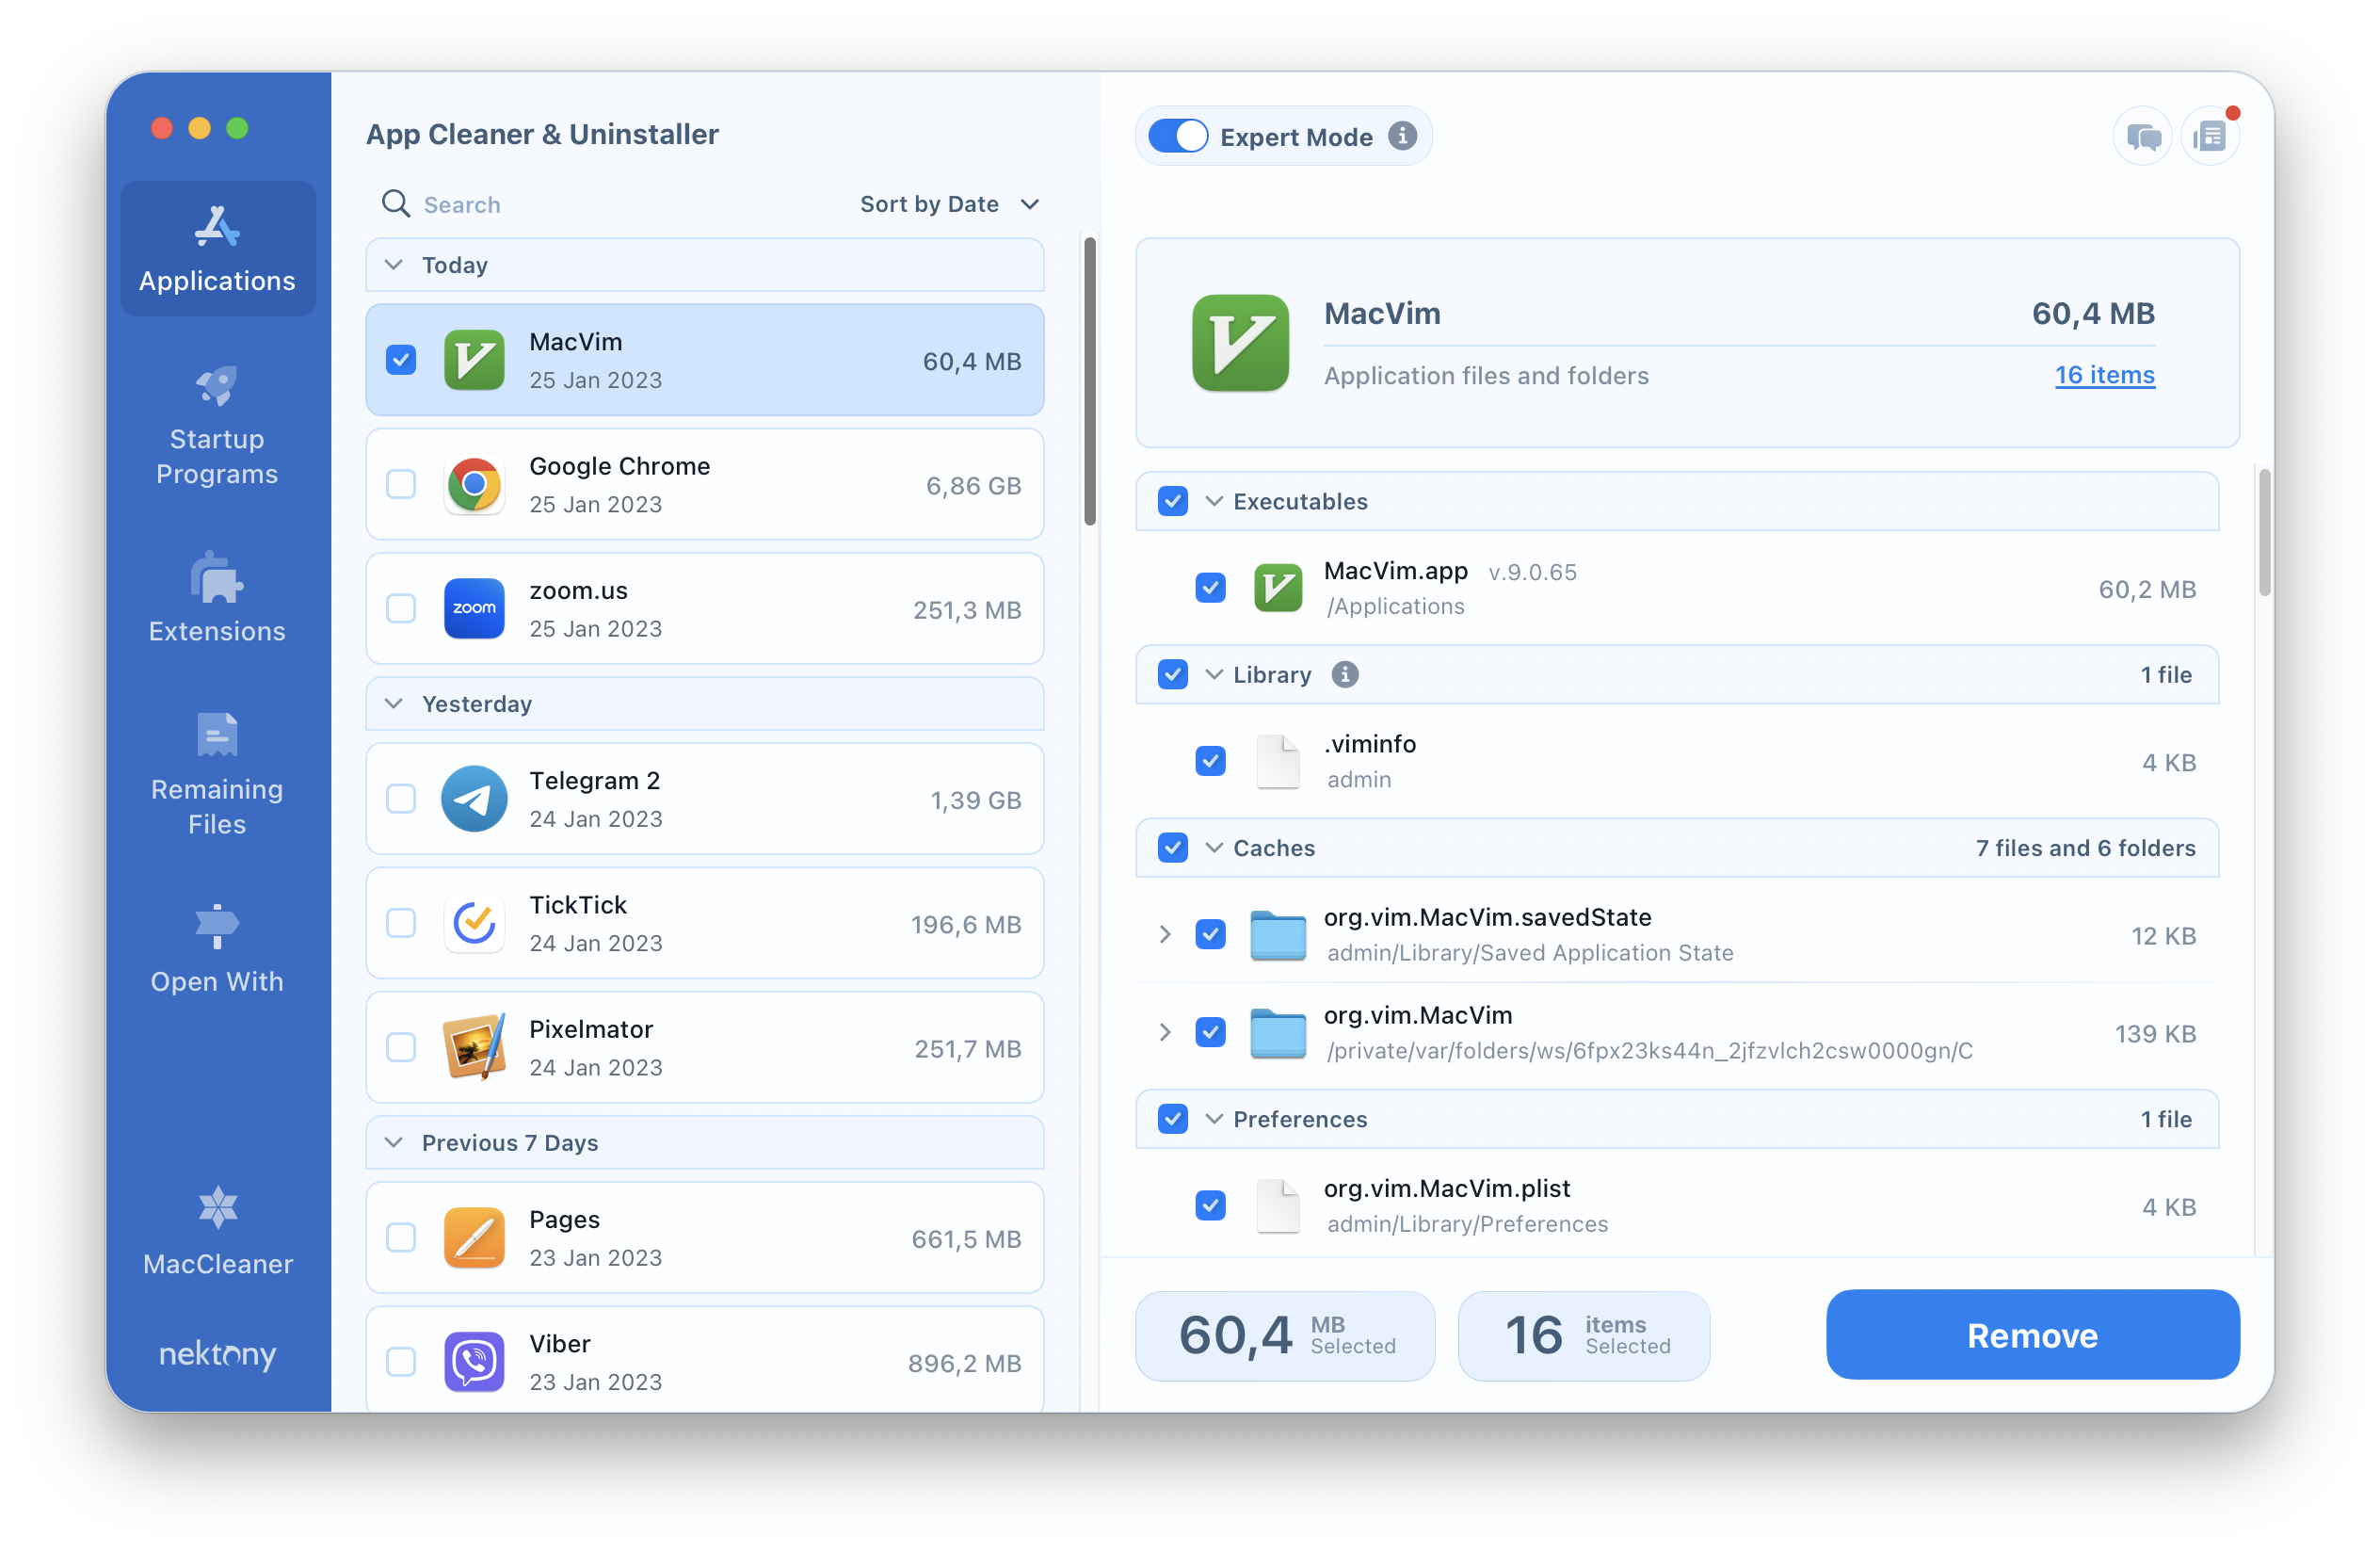
If you want to delete the Vim Mac version from your computer in a much easier way, try a third-party uninstaller. We recommend you use App Cleaner & Uninstaller that completely removes programs from Mac in less than a minute. To delete the Vim editor using App Cleaner & Uninstaller, follow the next steps:
- Launch App Cleaner & Uninstaller.
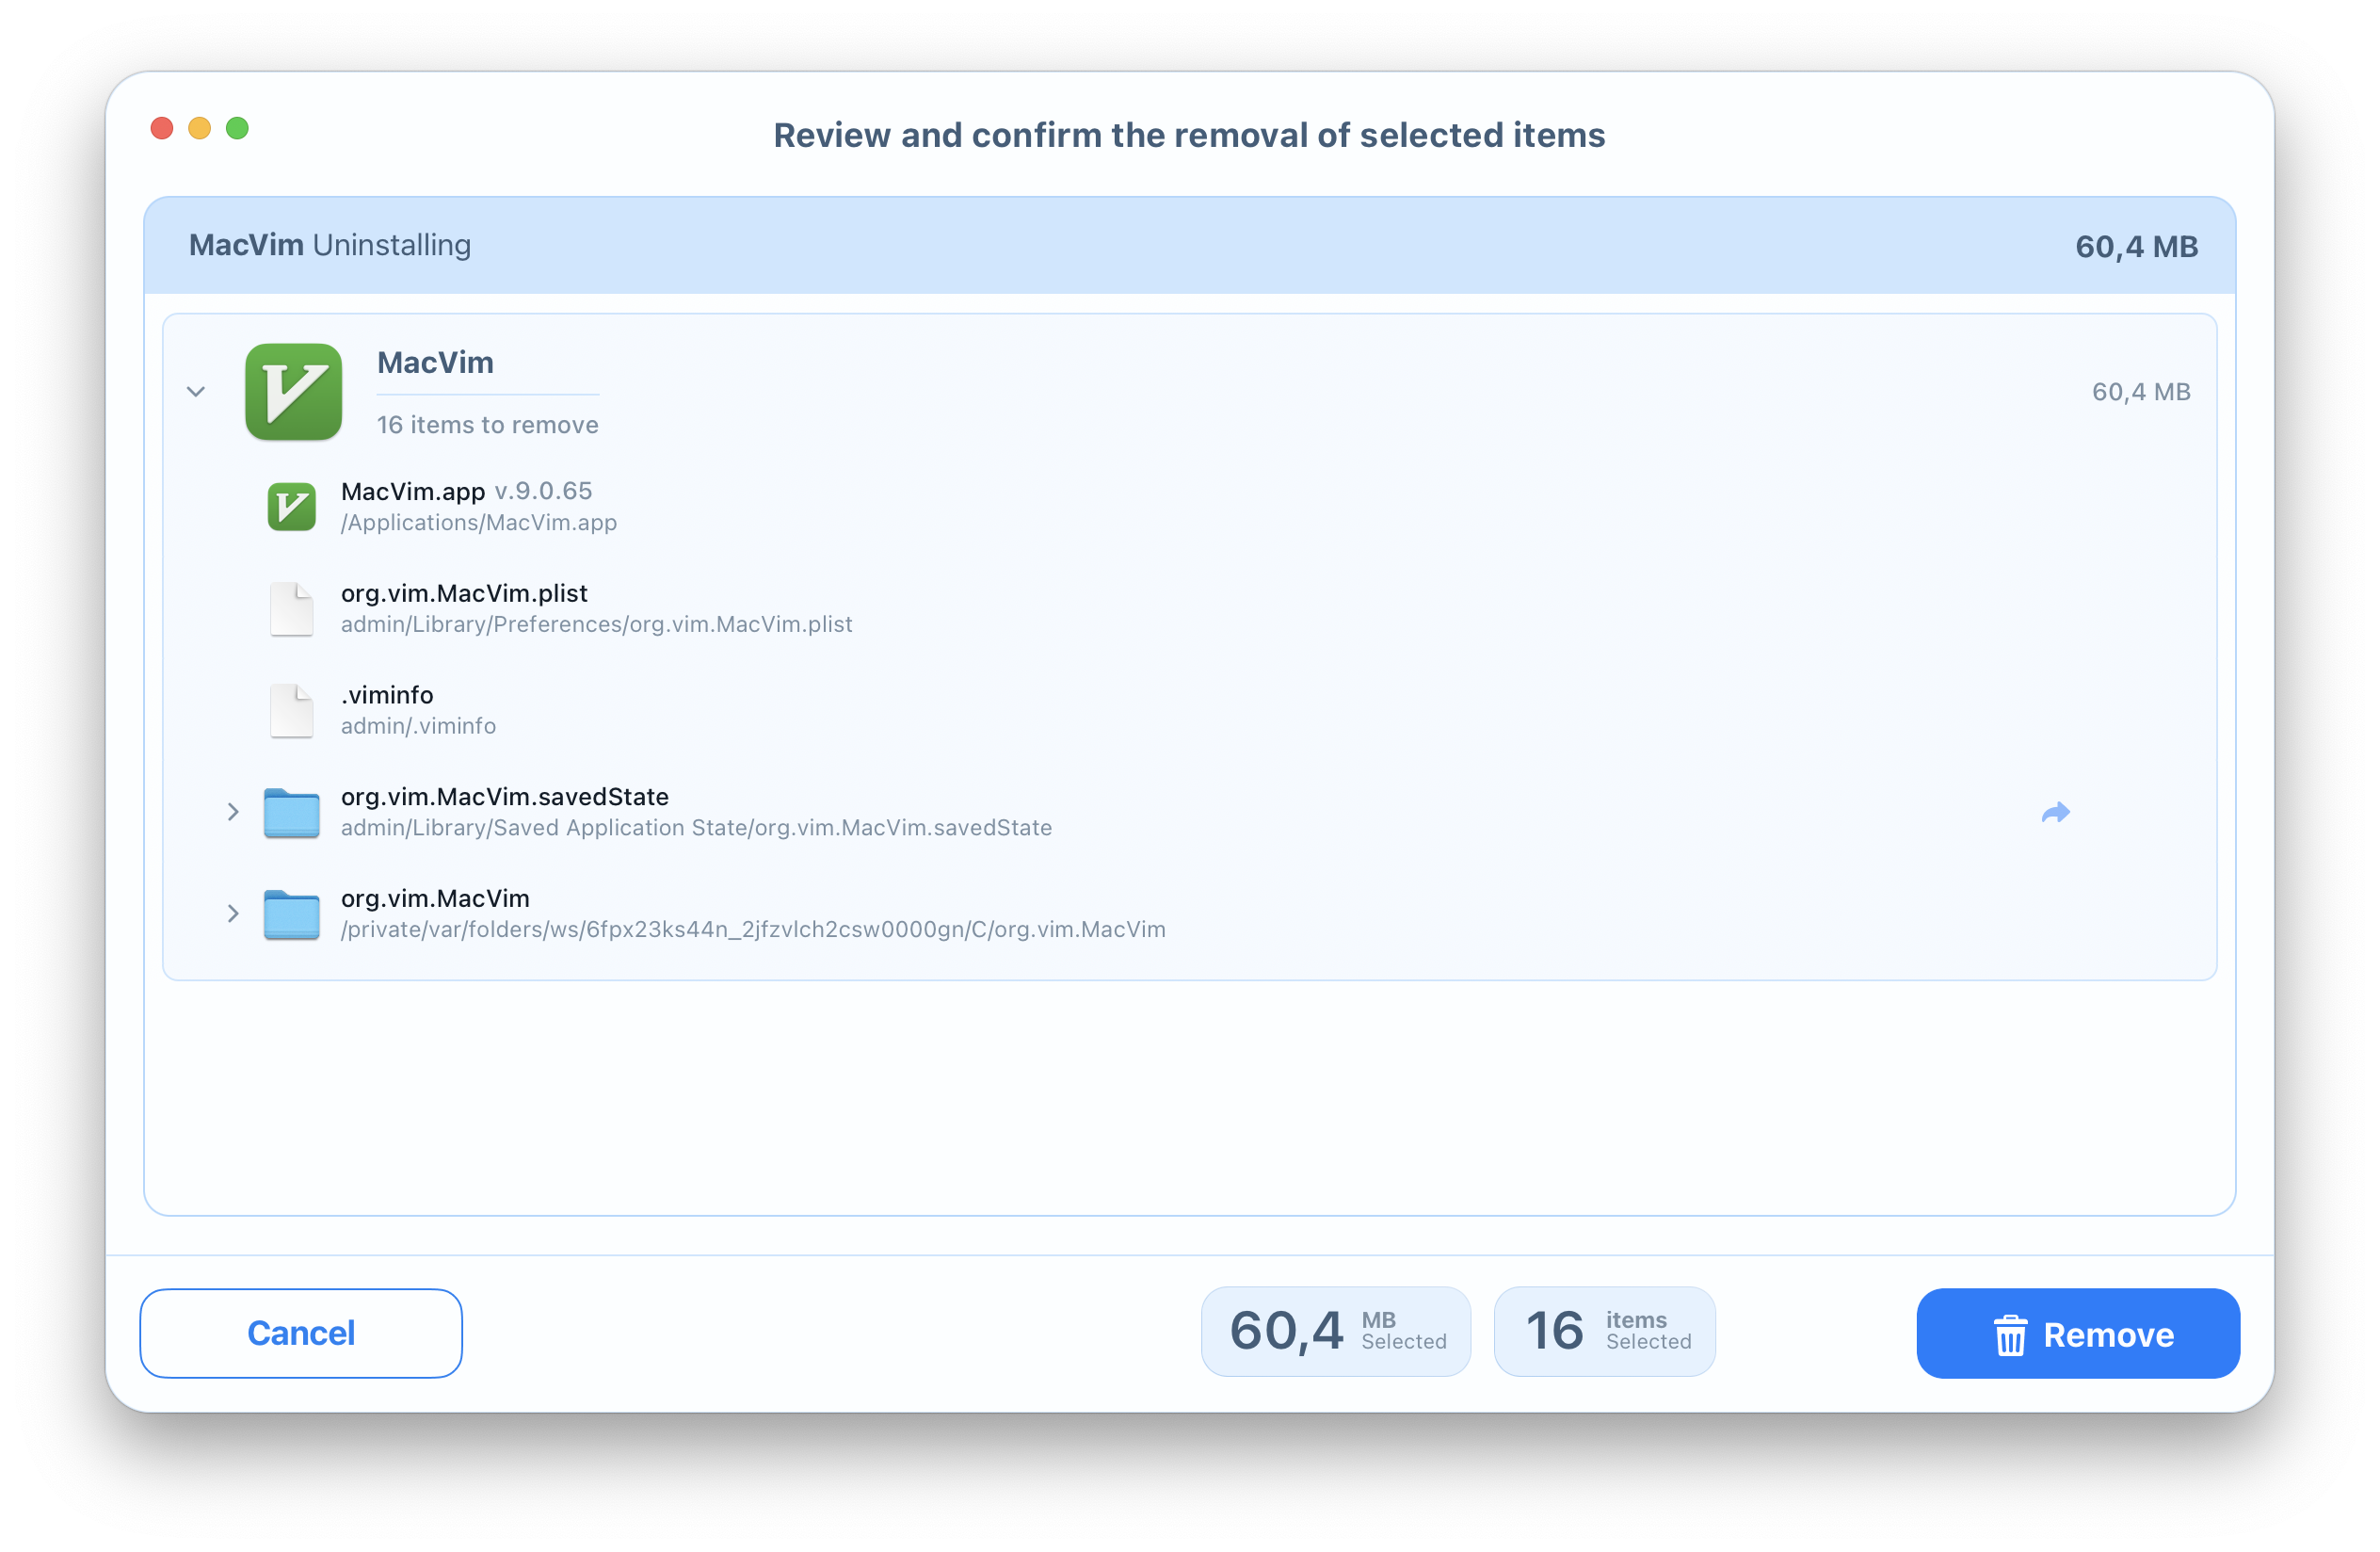
- Select MacVim in the list of applications. All its service files will be selected automatically.
- Click the button.
- Review the items you want to delete and confirm uninstalling.
- Empty the bin to completely uninstall Vim on your Mac.
Conclusion
The decision is yours which uninstallation method you choose to remove MacVim; but be careful. If you need to uninstall any program, make sure that you get rid of all its components. In some cases, useless leftovers of a certain app may affect the performance of a new version of this application. Also, over time they may occupy significant storage space on your disk. Therefore, we would advise using App Cleaner & Uninstaller to delete various programs from your computer.
App Cleaner & Uninstaller correctly, quickly and entirely removes more than 1000 apps from Mac. Download the trial of App Cleaner & Uninstaller and try it right now.
