September 12, 2025
How to uninstall McAfee on Mac: Three proven methods
If you’ve ever tried removing McAfee from your Mac, you know it’s not a one-click affair. Even after dragging the app to Trash, background services and browser add-ons can stick around. I’ve been through this a few times myself; once when McAfee clashed with my VPN, and once when I just wanted it gone for good.
This guide walks you through three reliable ways to uninstall McAfee completely, from official tools to full manual cleanup, with all file paths and screenshots included.
This Article Contains
Clean removal without the fuss
McAfee isn’t easy to shake off. Even its own uninstaller leaves behind background components like menu bar helpers and browser add-ons. If you’d rather not spend time chasing down leftover files across system folders, App Cleaner & Uninstaller by Nektony offers a faster way out. It detects everything related to McAfee and helps you remove it thoroughly in one go.
Why remove McAfee?
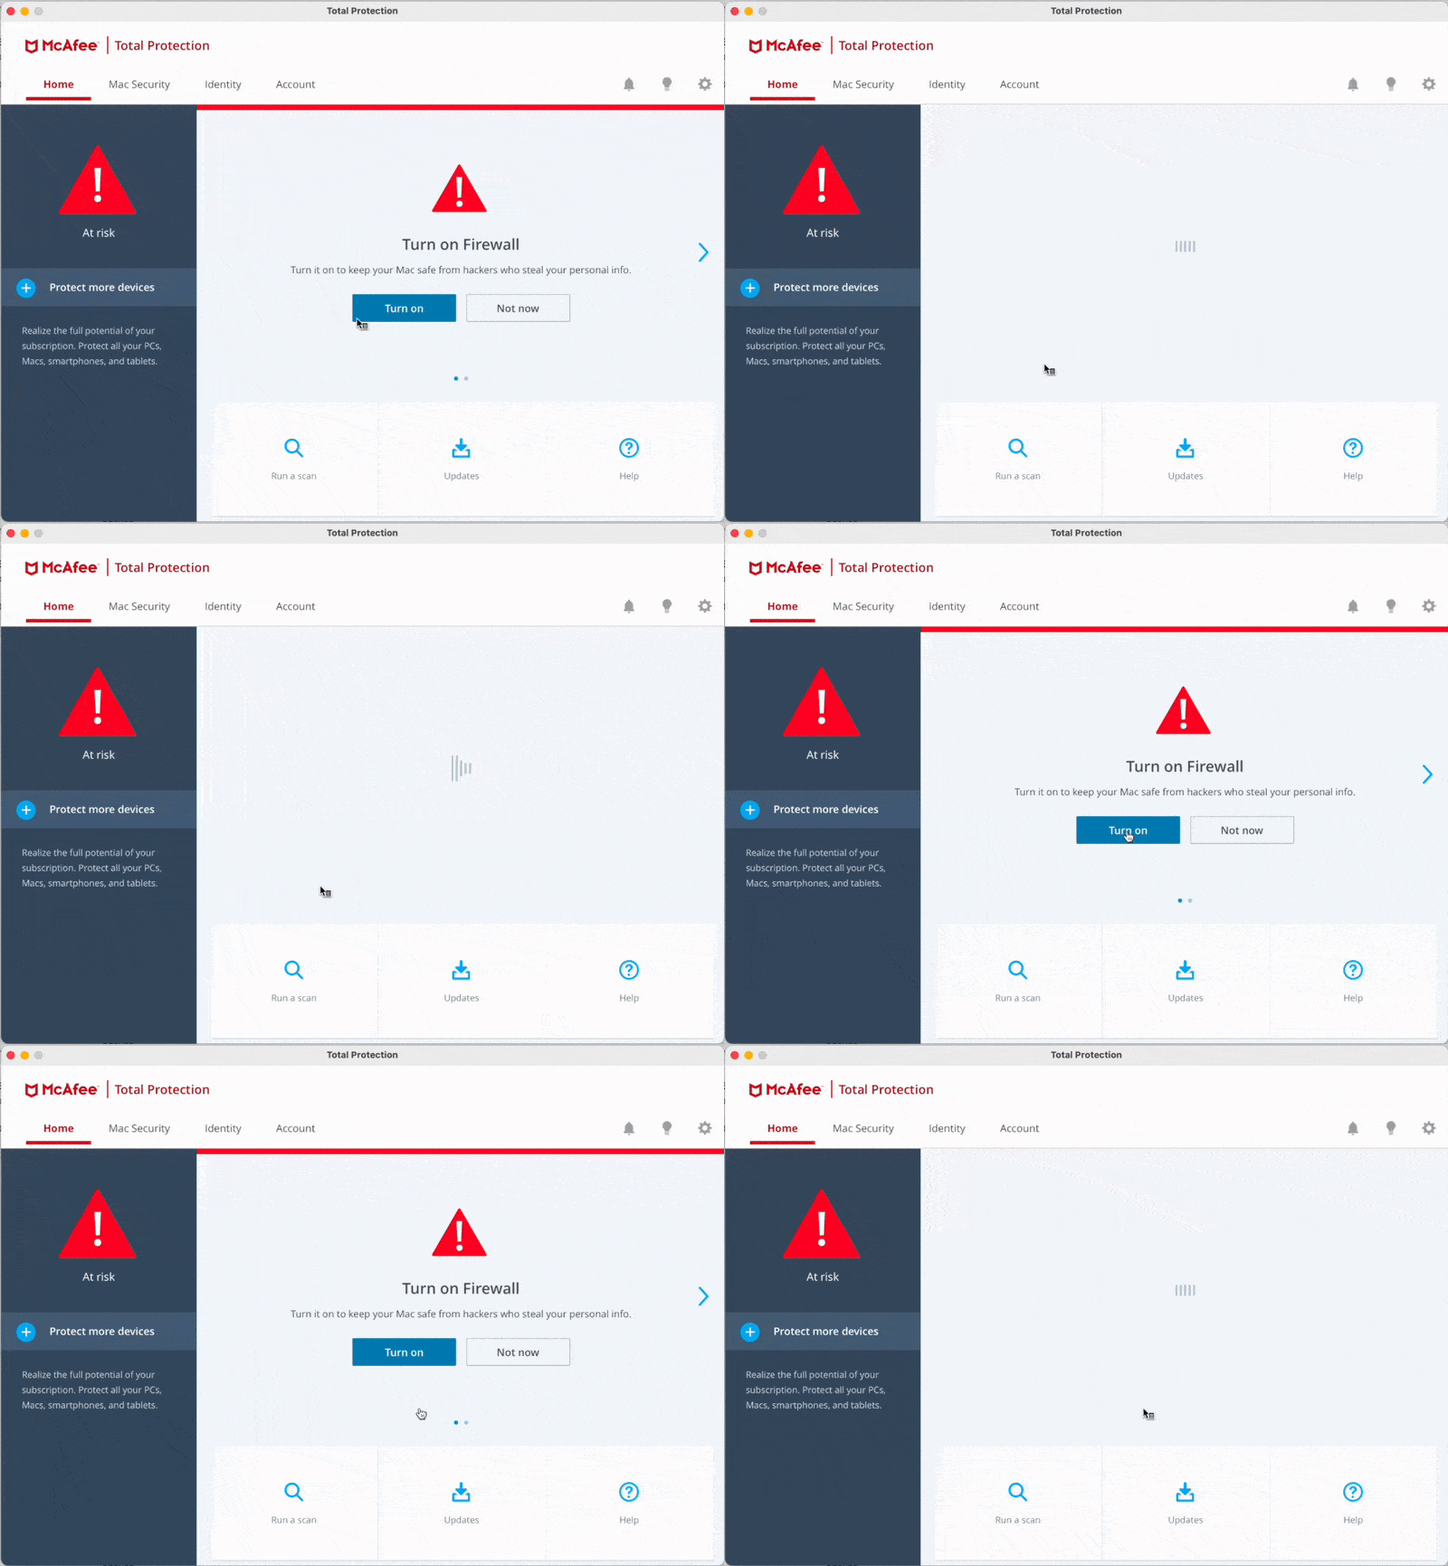
While McAfee promises comprehensive protection, many Mac users find it more frustrating than helpful. macOS already includes robust built-in security, and for most people, adding a third-party antivirus only complicates things.
Users on Reddit, Apple Discussions, and other platforms report issues like:
- Firewall malfunctions
Even after reinstalling McAfee, the firewall module may stay inactive or behave unpredictably. - Incomplete uninstallers
Official uninstallers often leave behind support components such as Finder integrations and background processes. - Annoying browser extension behavior
Trying to delete WebAdvisor (from home editions) or Web Control (from Endpoint Security) through Safari usually triggers an error. Safari reports the extension is part of the app and can’t be removed directly. This forces users to track it down manually. - Performance and compatibility problems
Some users experience slowdowns, blocked script execution, or even failed VPN connections. McAfee’s aggressive controls can interfere with developer tools, utilities, and apps that rely on system-level access. - Outdated or broken extensions
WebAdvisor often fails to function properly in recent versions of Safari, which leads users to remove it just to restore normal browsing.
Ultimately, the decision to remove McAfee often comes down to regaining control. Antivirus software keeps getting more complex, but for many Mac users, that complexity brings more hassle than peace of mind.
Three uninstallation methods: What’s the difference?
Below you’ll find several ways to uninstall McAfee from your Mac, and not all of them are equally effective or beginner-friendly. This quick overview should help you choose the right path based on your experience level, available time, and how clean you want the removal to be.
| Method | Skill level | Time | Removes all files? |
|---|---|---|---|
| Manual removal | Advanced | 10–30 minutes | ⚠️ Mostly |
| Terminal script | Advanced | 1–2 minutes | ⚠️ Mostly |
| App Cleaner & Uninstaller | Beginner-friendly | ~30 seconds | ✅ Yes |
Whether you remove McAfee manually or via Terminal, there’s no guarantee you’ll catch every log or report. The app can generate service files dynamically; in other words, what appears for one user may not appear for another. That’s why a dedicated removal tool is often the safest bet.
Why we don’t cover the official uninstaller as a method
While McAfee does include an official uninstaller for Total Protection, we’ve chosen not to highlight it as one of the primary removal methods in this guide for a simple reason: it doesn’t remove everything.
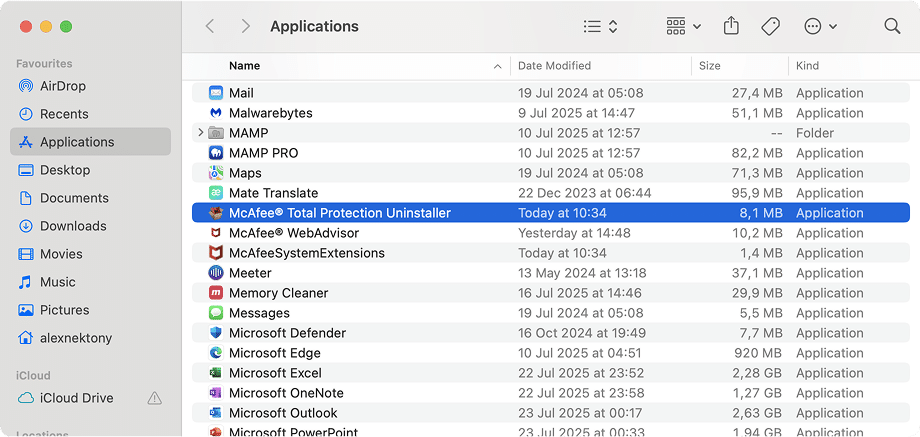
Yes, the uninstaller is easy to run. You’ll find it in the Applications folder as McAfee Total Protection Uninstaller. Launch it, click Continue, and follow the prompts. In just a couple of minutes, the core app is gone.
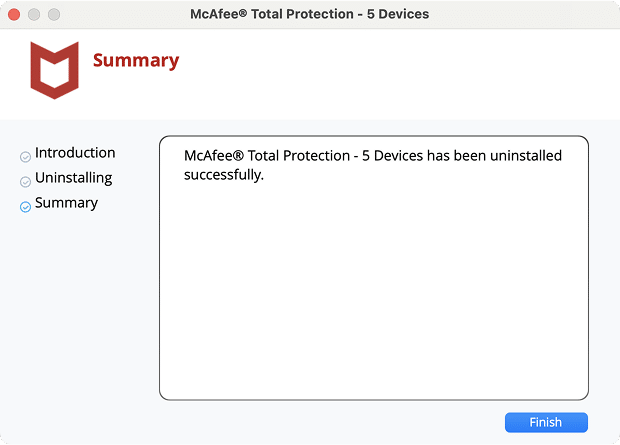
But that’s where it stops.
After testing, we consistently found that critical background components, such as the MenuletFinderExtension, browser helpers, and support scripts, remain on the system. These leftover files require manual cleanup or a second pass with a tool like App Cleaner & Uninstaller.
And for McAfee Endpoint Security, there’s no official uninstaller available at all.
Since this article is about complete removal, not just surface-level uninstalling, we’ve chosen to focus on three proven methods that actually do the job:
- Fully manual cleanup.
- Terminal-based script.
- App Cleaner & Uninstaller for a quick, automatic sweep.
Let’s proceed to explaining them in detail.
Before you start: Identify what’s installed
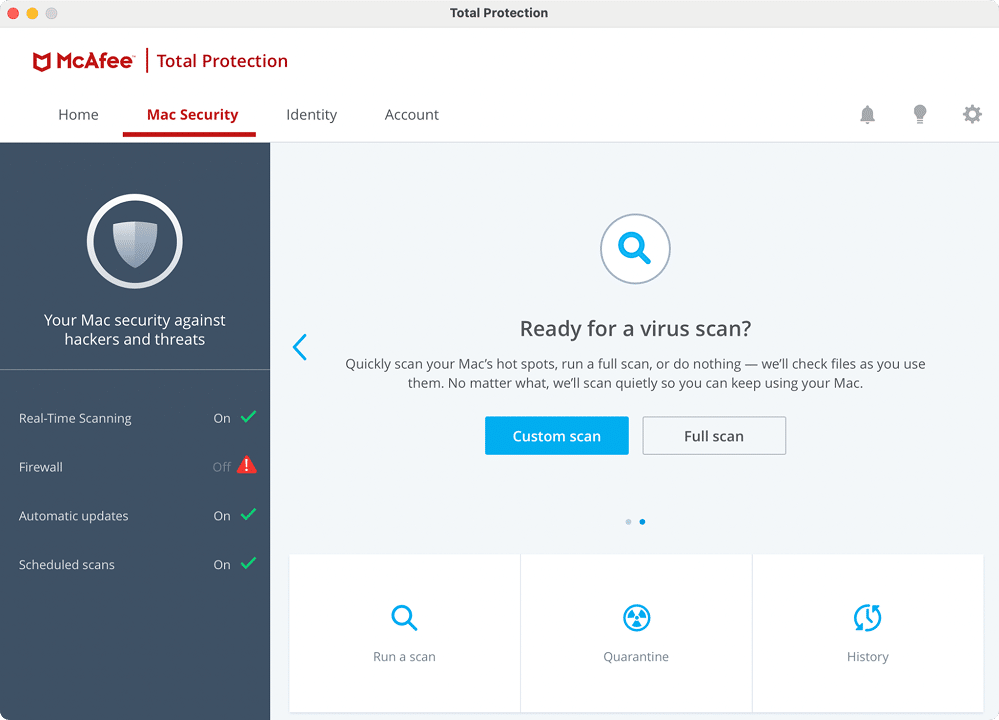
McAfee offers several different products for macOS, but only one core app is installed at a time. Your cleanup process will depend on which version you have.
Here’s how to tell them apart:
- McAfee Endpoint Security
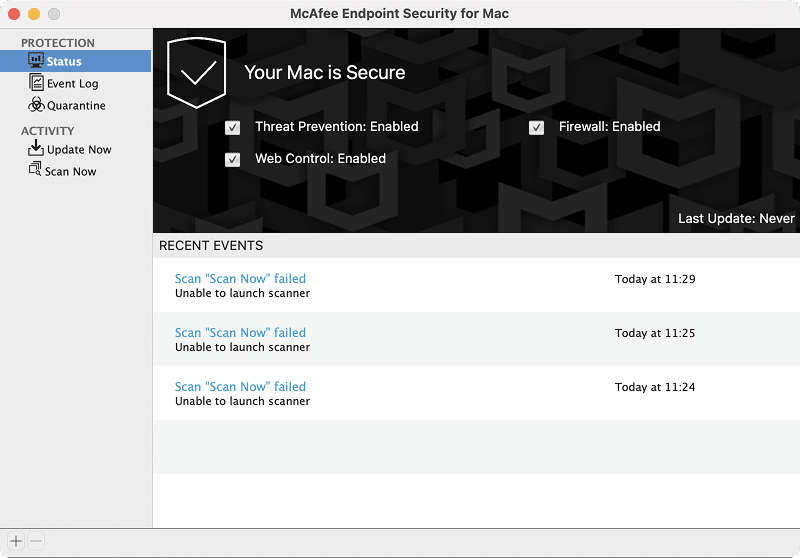
Typically installed by IT departments on work devices. It includes advanced modules like Threat Prevention, Web Control, Firewall, and ATP (Advanced Threat Protection). If you’re using a corporate Mac, this is likely your version. The Web Control browser add-on is usually part of the package. - McAfee Total Protection
This is the standard home-user edition. It bundles antivirus protection, VPN, secure file storage, and a browser extension called McAfee WebAdvisor. If you installed McAfee yourself, this is probably what you’re running. - McAfee Antivirus Plus
A lighter, more affordable version of Total Protection. It shares many of the same components and also pairs with WebAdvisor for browser protection.
Take note of which version of McAfee you have. The methods below will show you how to remove each one, including both app components and browser add-ons.
Uninstall McAfee manually
Manual removal is the most time-consuming way to uninstall McAfee. At the same time, it is also the most transparent. It gives you full control over what’s being deleted, which can be useful if you want to inspect system changes or avoid using third-party tools.
In this section, we’ll guide you through manual uninstallation for each McAfee product type:
- Endpoint Security – typically installed on work devices.
- Total Protection / Antivirus Plus – home-user editions.
- WebAdvisor – browser extension often bundled with the above.
Let’s start with Endpoint Security.
How to manually remove McAfee Endpoint Security
Note:
This method was tested with McAfee Endpoint Security 10.7 on macOS 15.6, but it should work fine with other versions of the app and macOS as well.
Manual removal of McAfee Endpoint Security involves stopping running processes, removing the main apps, and cleaning out all related support files across system folders. Follow each step carefully.
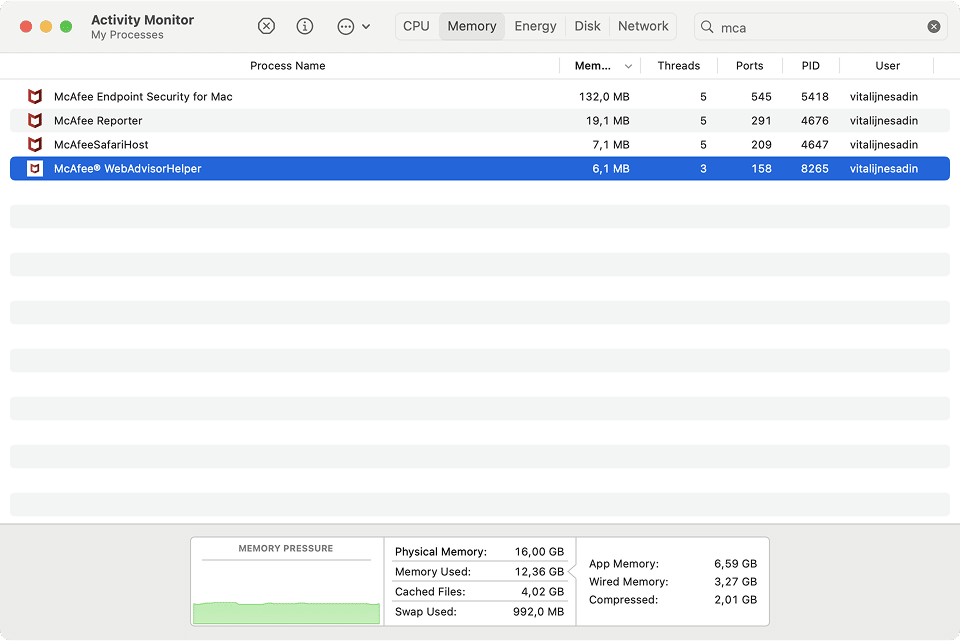
Step 1: Quit all McAfee processes
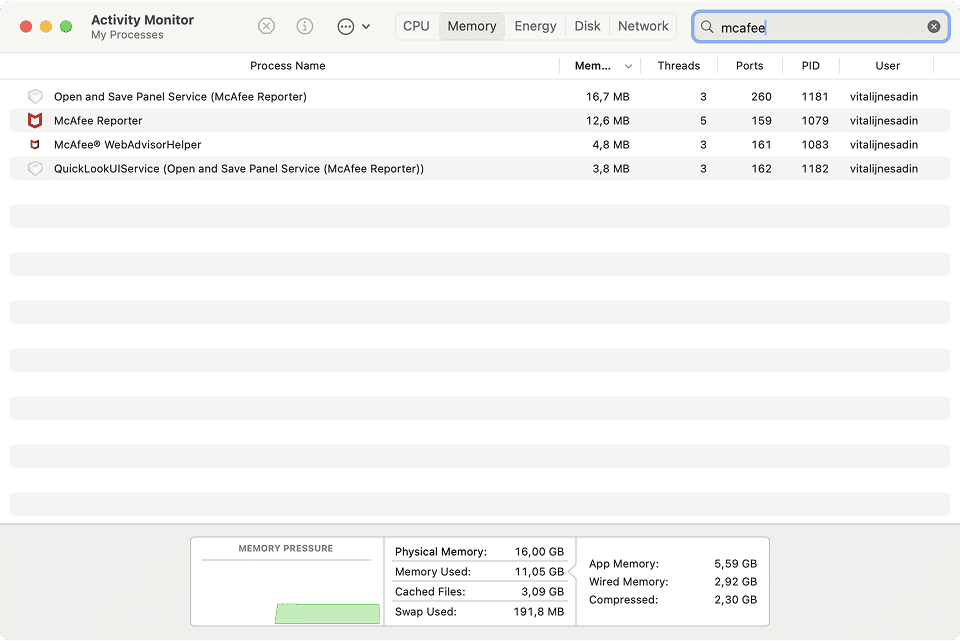
- Open Activity Monitor from your Applications folder → Utilities.
- Use the search field in the top-right corner to search for McAfee.
- For each McAfee-related process you find, select it and click the Stop (✖) button in the top toolbar.
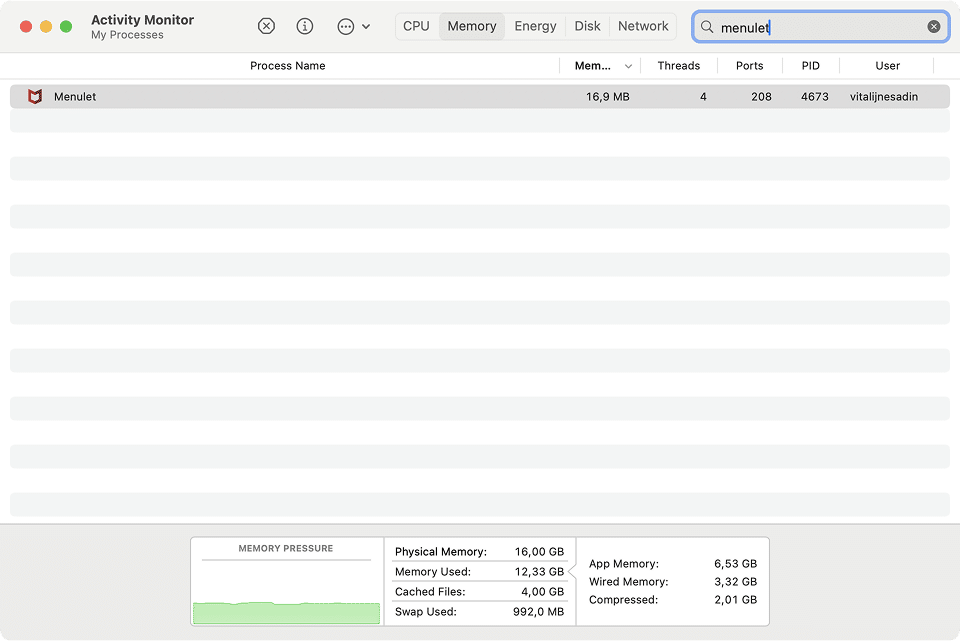
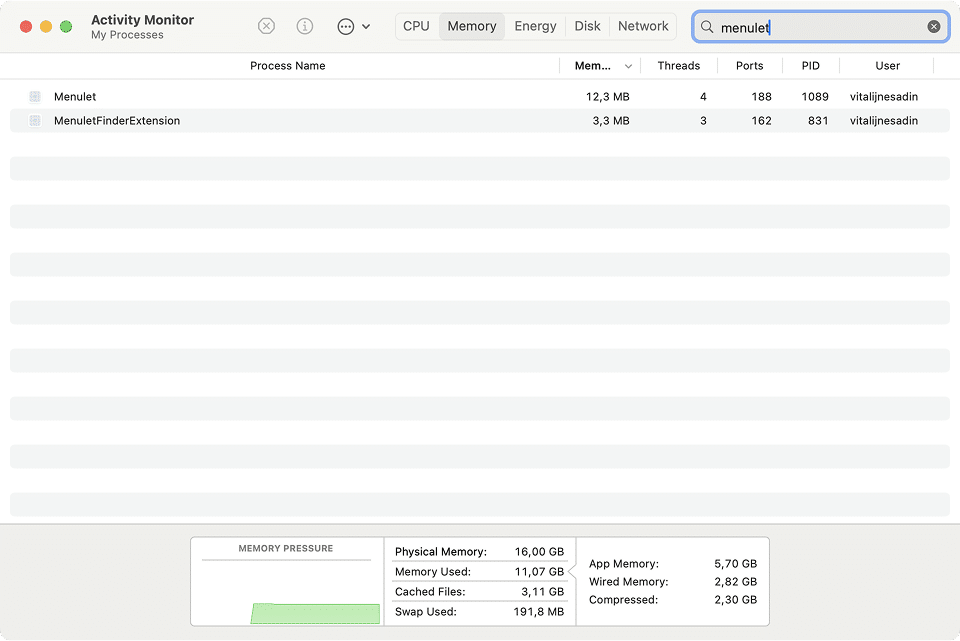
- Repeat the search with the keyword Menulet and stop any related processes.
- Search for Safari and quit it as well — McAfee extensions may auto-relaunch if Safari is still active.
Note:
Make sure you’ve saved any important tabs before quitting Safari.
Step 2: Delete core app components
Note:
Since some McAfee files can start with a dot, like .com.mcafee…, they will be hidden by default, even though they’re safe to remove. To see hidden items in Finder, press Command + Shift + . (dot).
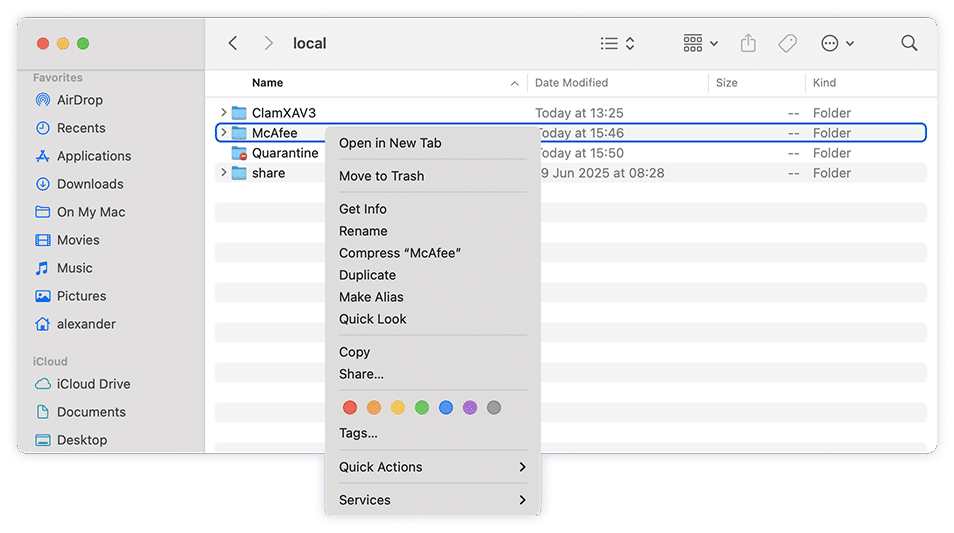
- Open Finder, press Cmd + Shift + G to bring up the Go to Folder window.
- Navigate to the following folders one by one and remove McAfee components if present:
/ApplicationsCopy
/usr/local/Copy
/Library/Application Support/Copy
- In each folder, search for “McAfee” and delete any files or subfolders that match.
- If prompted, enter your administrator password to confirm deletion.
Step 3: Search and remove support files
McAfee installs components across several system folders. You’ll need to repeat the search-and-remove process in each of the folders below. (Reminder: Use the Cmd + Shift + G hotkey to launch the Go to Folder dialogue, enter the desired folder to proceed to it.)
/Library/Frameworks/Copy
/Library/Preferences/Copy
/Library/SystemExtensions/Copy
/Library/LaunchAgents/Copy
/Library/LaunchDaemons/Copy
/Library/Logs/Copy
/Users/Shared/Copy
~/Library/Application Scripts/Copy
~/Library/Application Support/Copy
~/Library/Containers/Copy
~/Library/Preferences/Copy
~/Library/Saved Application State/Copy
~/Library/Logs/DiagnosticReports/Copy
/private/var/db/receipts/Copy
/private/var/folders/Copy
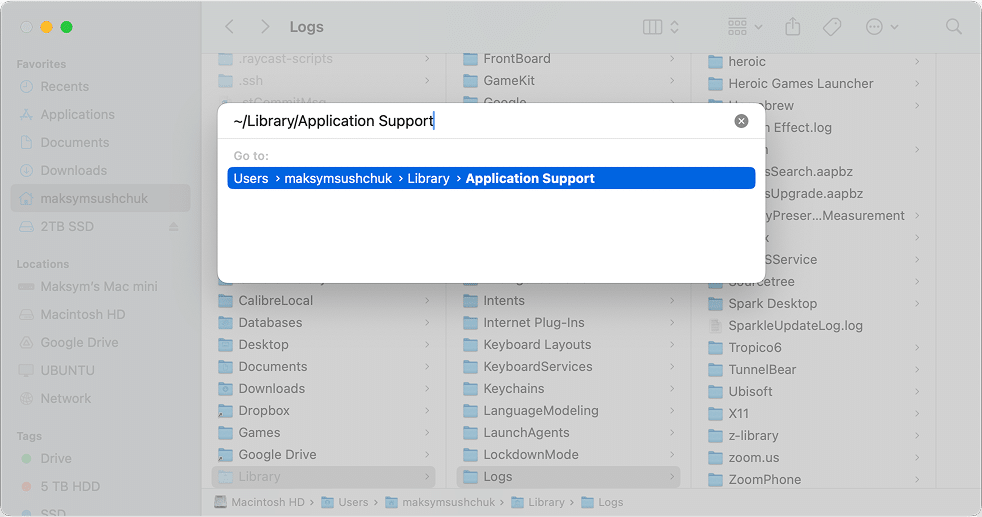
Then use the search bar (top right) to look for McAfee files and folders.
In the SystemExtensions and DiagnosticReports folders, look specifically for matches like:
com.mcafeeCopy
McAfeeSafariHostCopy
McAfee ReporterCopy

To remove certain files, you’ll need to enter your password.
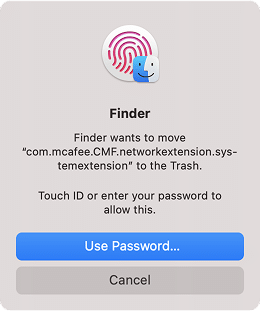
Note:
If any files are protected by System Integrity Protection (SIP) and can’t be deleted, see: How to remove apps protected by SIP.
Step 4: Remove browser extensions (if applicable)
Google Chrome
Endpoint Security installs a browser add-on named Trellix Endpoint Security for Mac Web Control. It won’t disappear on its own after removing the main app.
To remove it:
- Open Chrome, click the puzzle icon (Extensions) in the toolbar.
- Locate Trellix Endpoint Security for Mac Web Control and click Remove.
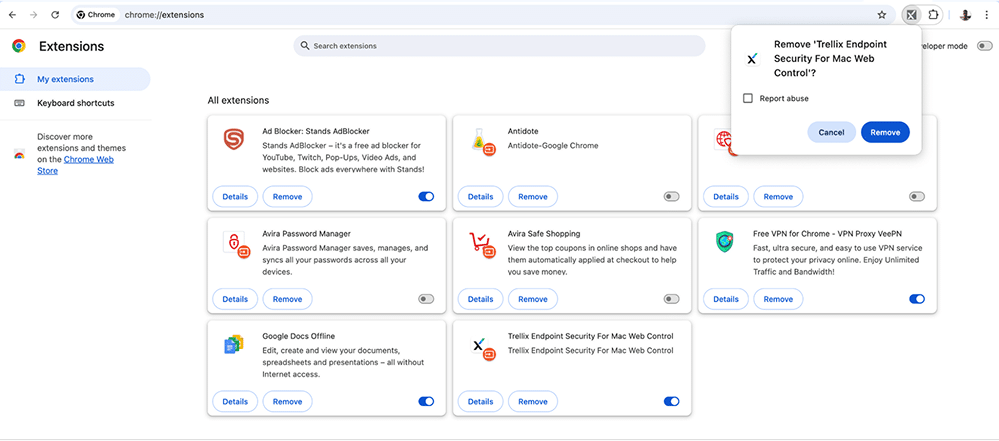
If removal is blocked due to Chrome sync, go to Chrome → Settings, disable Sync, then return to the Extensions panel and remove the add-on.
Safari
The McAfee Web Control (Safari) extension can remain even after uninstalling Endpoint Security. You can remove it in Safari → Settings → Extensions, but sometimes Safari won’t let you delete it directly:
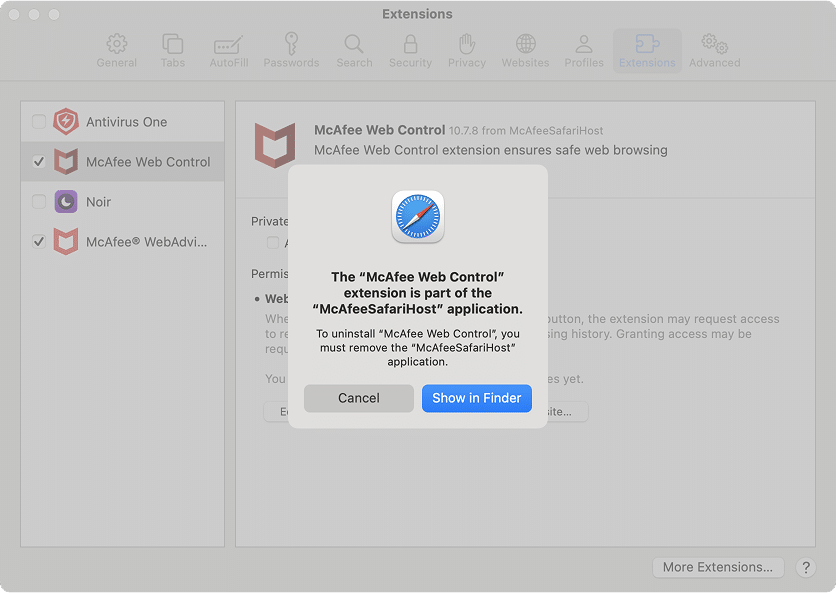
If that happens, follow Step 3’s folder search and remove items named WebControl or SafariHost.
Step 5: Final cleanup
- Open Trash and empty it.
- Restart your Mac to ensure all background processes and leftover launch items are fully cleared.
How to manually remove McAfee Total Protection (or Antivirus Plus)
Note:
This method was tested with McAfee Total Protection 4.27 on macOS 15.6, but it should work fine with other versions of the app and macOS as well.
Note:
This method was tested with McAfee Total Protection 4.27 on macOS 15.6, but it should work fine with other versions of the app and macOS as well.
McAfee Total Protection (and its lighter counterpart, Antivirus Plus) installs multiple background services, menu bar apps, and browser helpers. To remove it manually, you’ll need to quit all related processes, delete the app, and then clean up system folders.
Step 1: Quit all McAfee processes
- Open Activity Monitor from Applications → Utilities.
- In the search bar, type McAfee.
- One by one, stop each process using the Stop (✖) button in the top toolbar. Look for processes like:
- McAfee Reporter
- Open and Save Panel Service
- QuickLookUIService
- McAfee® WebAdvisorHelper
- Total Protection
- Repeat the search using Menulet and stop anything you find.
- Finally, search for Safari and quit it as well (some McAfee components will relaunch if Safari is still running). Make sure to save your tabs before quitting.
Step 2: Delete main application files
- Open Finder and press Cmd + Shift + G to open the Go to Folder window.
- Go to the Applications folder.
- Look for McAfee-related apps. You may find items with names like:
- McAfee LiveSafe – Internet Security
- McAfee® WebAdvisor
- McAfeeSystemExtensions
- McAfee LiveSafe – Internet Security Uninstaller
- Move each one to Trash. You may be prompted for your administrator password.
Step 3: Remove remaining support files
McAfee installs files across multiple locations. You’ll now search key folders and remove anything associated with mcafee.
Note:
Some folders or files may be hidden (they begin with a period). These are safe to remove if their names reference McAfee. To see hidden items in Finder, press Command + Shift + . (dot).
Go to these locations in Finder one by one using Cmd + Shift + G (the shortcut launching the Go to dialogue window):
/Library/Application Support/Copy
/Library/Frameworks/Copy
/Library/PrivilegedHelperTools/Copy
/Library/Preferences/Copy
/Library/LaunchAgents/Copy
/Library/LaunchDaemons/Copy
/private/var/db/receipts/Copy
/private/var/folders/Copy
/private/var/log/Copy
~/Library/Application Scripts/Copy
~/Library/Application Support/Copy
~/Library/Containers/Copy
~/Library/Preferences/Copy
~/Library/Logs/DiagnosticReports/Copy
~/Library/Caches/Copy
~/Library/HTTPStorages/Copy
~/Library/Saved Application State/Copy
~/Library/Application Support/CrashReporter/Copy
In each folder, search for mcafee or known terms like Menulet, WebAdvisor, or Reporter. Delete what you find.
Step 4: Delete diagnostic and crash logs
~/Library/Logs/DiagnosticReports/
Copy
- McAfee Reporter
- Menulet
~/Library/Application Support/CrashReporter/
Copy
- McAfee LiveSafe
Delete all related files you find in those folders.
Step 5: Final cleanup
- Open Trash and empty it.
- Restart your Mac to complete the uninstallation.
How to manually remove McAfee WebAdvisor
Note:
This method was tested with McAfee WebAdvisor 4.21 on macOS 15.6, but it should work fine with other versions of the app and macOS as well.
McAfee WebAdvisor is a browser security extension often bundled with McAfee’s home-user products. Starting with macOS 12, it appears as a standalone app in your Applications folder, yet removing it isn’t as simple as deleting the icon. Some users try to uninstall it via Safari’s settings, but this usually results in an error.
Let’s walk through the correct way to remove it manually.
Step 1: Quit WebAdvisor processes
- Open Activity Monitor from Applications → Utilities.
- In the search bar, type “McAfee” or “WebAdvisor”.
- If you see anything like McAfee WebAdvisorHelper, select it and click the Stop (✖) button in the top toolbar to quit it.
Step 2: Remove the app and support files
- Go to the Applications folder and move McAfee® WebAdvisor.app to Trash.
- In Finder, press Cmd + Shift + G to open the Go to Folder window.
- Now go through the following folders one by one. In each location, search for “mcafee” or “webadvisor” and delete any matches:
~/Library/Application Scripts/Copy
~/Library/Containers/Copy
/private/var/db/receipts/Copy
/private/var/folders/Copy
~/Library/Application Support/com.apple.sharedfilelist/Copy
- In , some subfolders have randomized names. To search effectively:
/private/var/folders/Copy
- Use Cmd + Shift + G to open .
/private/var/foldersCopy
- Use the Finder search bar to look for:
com.mcafee.macwebadvisorCopy
com.mcafee.macwebadvisor-helperCopy
- Confirm you’re searching within the folder, not across the whole disk.
- Delete all found folders.
- Use Cmd + Shift + G to open
Step 3: Final cleanup
- Open Trash and empty it.
- Restart your Mac to complete the process.
Note:
Avoid trying to delete WebAdvisor via Safari → Settings → Extensions. Safari may show an “Uninstall” button for the extension, but clicking it results in an error. That’s because the extension is tied to a system-level application, which must be removed directly via Finder or one of the methods described in this guide.
Remove McAfee via terminal (script-based)
If you’re comfortable using the Terminal, this method is a faster way to uninstall McAfee. It works by running a pre-made shell script that automates everything you’d otherwise do manually: quitting processes, searching system folders, and removing support files.
Since a script is simply a list of commands to run in Terminal, you can read it before launching and ensure it only searches for and removes McAfee files.
Note:
These scripts delete files permanently. If you want to review what’s being removed, check the script contents before running. Admin password will be required.
Uninstall McAfee Endpoint Security (Terminal method)
- Download the script to your Downloads folder.
- Open the Terminal app. Grant execution permissions by typing this command and pressing Return:
chmod +x ~/Downloads/remove_mcafee_es.shCopy
Note:
If your default folder is not Downloads, type in chmod +x in the Terminal instead and then drag-and-drop the downloaded script from Finder to the Terminal in order to insert the path to it. Then hit Enter.
- Run the script with admin privileges:
sudo ~/Downloads/remove_mcafee_es.shCopy
You’ll be asked to enter the password. This is necessary for the script to be able to remove McAfee files in several system directories. Feel free to type it in and hit Enter.
Note:
As you type your password in Terminal, you won’t notice anything on the screen. This is expected behavior in Terminal.
The script will be launched.
- Once the process is complete (it should take several seconds), you’ll be able to enter commands in Terminal again. Restart your Mac.
That’s it, your Mac is clean of McAfee Endpoint Security.
Uninstall McAfee Total Protection (Terminal method)
The instruction here is the same as in the previous section, so you can refer to the screenshots from it to make sure you’re doing everything right.
- Download the script to your Downloads folder.
- Open Terminal. Grant execution permissions by entering the following command:
chmod +x ~/Downloads/remove_mcafee_tp.shCopy
Note:
If your default folder is not Downloads, type in chmod +x in the Terminal instead, and then drag-and-drop the downloaded script from Finder to the Terminal in order to insert the path to it. Then hit Enter.
- Run the script:
sudo ~/Downloads/remove_mcafee_tp.shCopy
Note:
If your default folder is not Downloads, type in sudo instead and then drag and drop the script file onto the Terminal again.
You will be prompted to enter the password to grant it admin privileges. This is required for file removal operations, so you can enter it.
That’s it. Total Protection and its components will be fully removed.
What about McAfee WebAdvisor?
WebAdvisor is often bundled with Total Protection and will usually be removed together with it. The number of related paths is small, so there’s no separate script for it. If you still have WebAdvisor installed, either:
- Remove it manually (see Manual Method for Total Protection removal)
- Use App Cleaner & Uninstaller for a faster cleanup (see next method).
Deleting McAfee with App Cleaner & Uninstaller
This is by far the fastest and cleanest method, especially if you’re not comfortable using Terminal or digging through system folders. App Cleaner & Uninstaller detects all McAfee components automatically and guides you through the removal in a few clicks.
Whether you’re uninstalling McAfee Endpoint Security, Total Protection, or WebAdvisor, the steps are nearly identical.
How to remove McAfee using App Cleaner & Uninstaller:
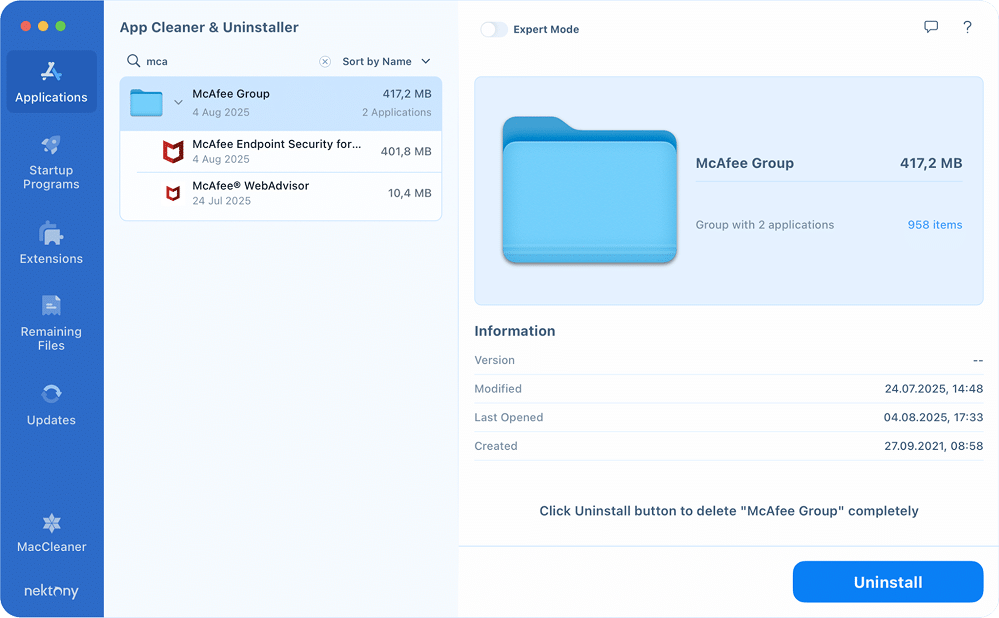
- Download and launch App Cleaner & Uninstaller and wait for the initial scan to complete.
- In the top-right search bar, typeMcAfee. Tick the McAfee apps you want to uninstall.
- Click the Uninstall button.
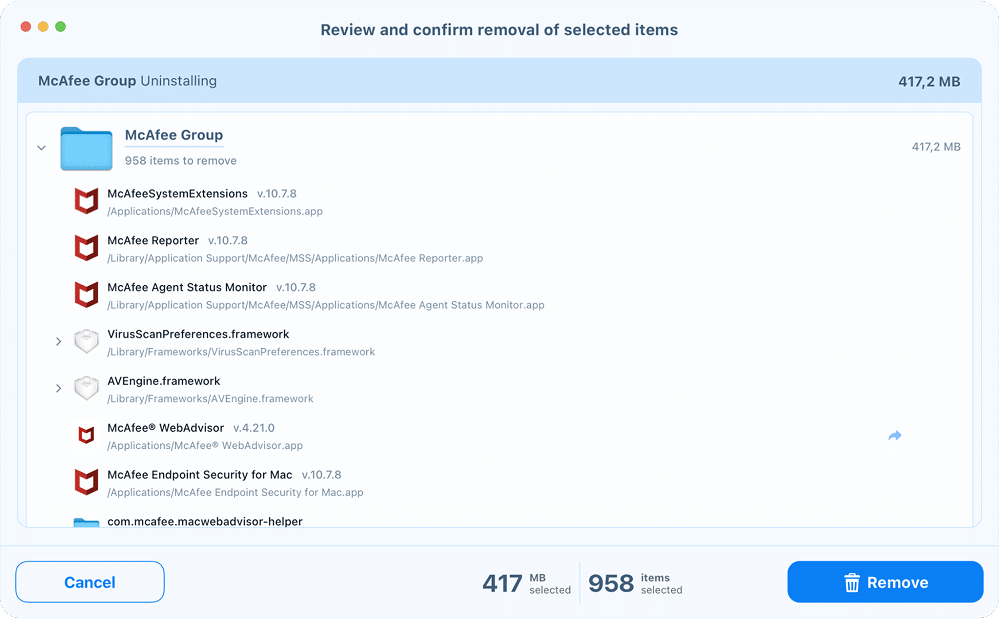
- In the Review and confirm removal window, click Remove to confirm.
If you have already deleted the app manually…
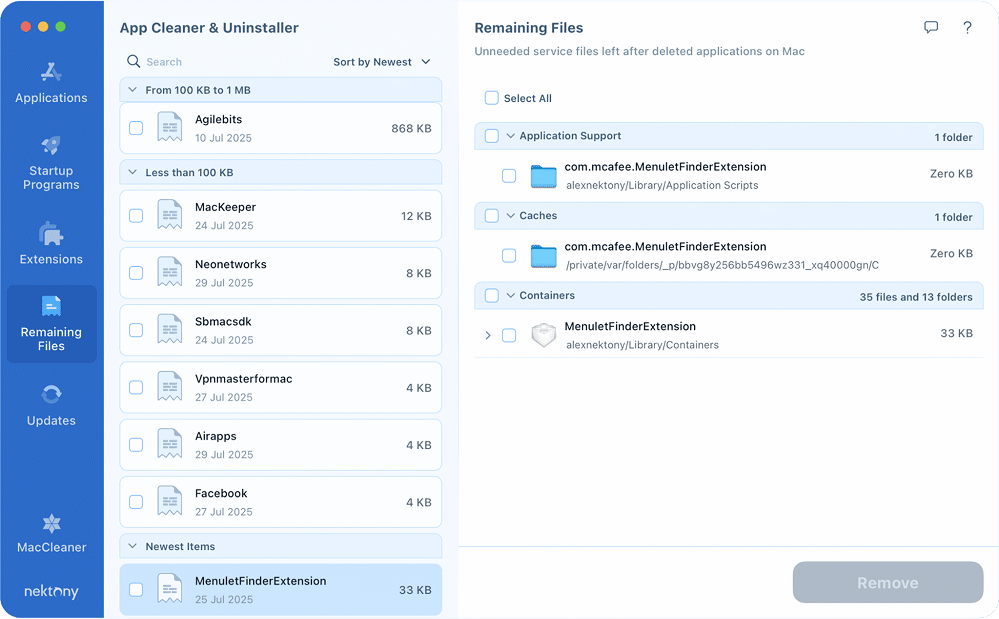
No problem. App Cleaner & Uninstaller will still find leftover support files. Just go to the Remaining Files tab, search for McAfee, and remove what’s listed there.
Final thoughts
I test a lot of security tools on macOS, and McAfee was definitely one of the trickier ones, especially with all its background services, Safari and Chrome add-ons, and those persistent Menulet items.
Out of all removal options listed in this article, using App Cleaner & Uninstaller by Nektony feels like a breath of fresh air. It cleared everything in one go without the usual scavenger hunt.
That said, even if you choose the manual or Terminal method, the result is the same: once McAfee is gone, your Mac feels noticeably lighter and more responsive.
And don’t worry about losing access. If you have your McAfee license key saved somewhere, you can always reinstall and activate the app later if needed.
If you’re exploring other security options, start simple. macOS already has strong built-in protections. Only add extra layers if your use case truly demands it.






Fantastic beat ! I wish to apprentice at the same time as you amend your website, how can i subscribe for a weblog site?