September 12, 2025
How to uninstall Adobe Reader from your Mac completely
Adobe Reader has been with Mac users for decades. Since 1993, when Adobe introduced the PDF format, it has been the go-to tool for opening and reading PDF documents. Many of us still remember it as one of the first apps we installed on a new computer. But times have changed: macOS now opens PDFs natively, lightweight alternatives exist, and Adobe Reader itself has grown heavy and often feels sluggish even on modern Macs.
If you’ve reached the point where Adobe Reader no longer fits your workflow or simply does not work as intended, you’re not alone. In this article, I’ll show you three different ways to uninstall Adobe Reader from your Mac, either for good or for later reinstallation.
This Article Contains
A faster path to a clean Acrobat uninstall
Adobe Acrobat scatters its files across quite a lot of system folders. If you don’t want to spend hours tracking them down manually, App Cleaner & Uninstaller by Nektony provides a quicker solution. It automatically finds all Acrobat-related components and lets you remove them completely in just a couple of clicks.
So it’s Adobe Reader, Adobe Acrobat, or Adobe Acrobat Reader?
Before we move on, let’s clear up one common source of confusion. Many people still call the app “Adobe Reader,” and for years, that was the correct name. But if you try to download it today, you’ll only find Adobe Acrobat in your Applications folder. To add to the confusion, if you open it, it’ll say “Welcome to Acrobat Reader.”
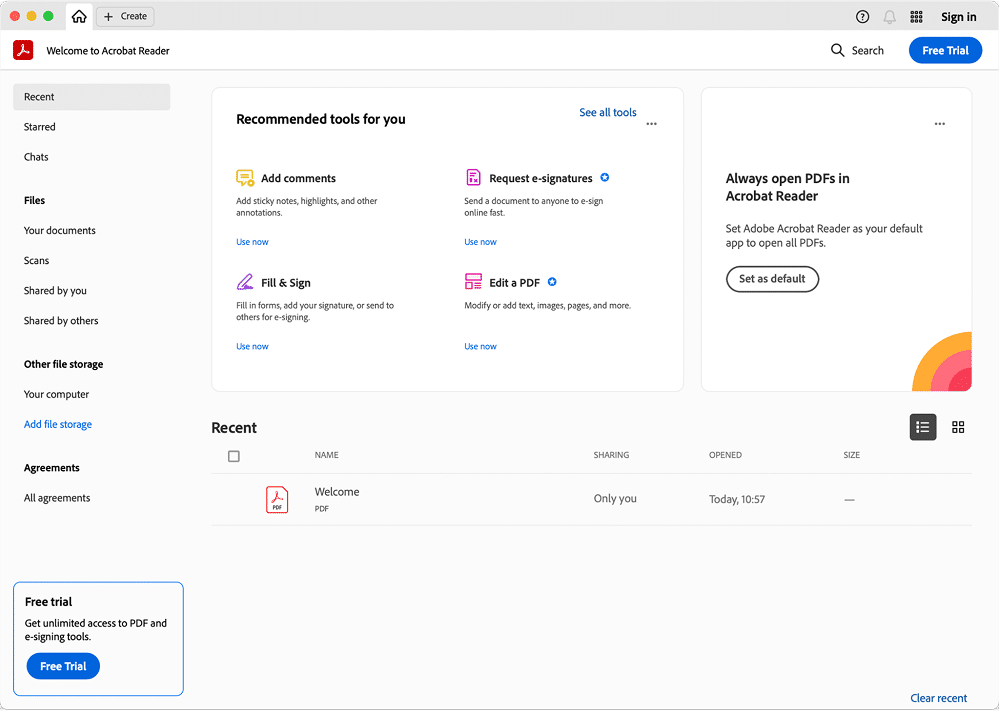
What happened is that the free PDF reading capability now comes bundled within that larger Acrobat app.
The history explains why. In the 1990s, Adobe launched Acrobat Reader as a free viewer for PDF files. Later, it became Adobe Reader to distinguish it from the paid Acrobat products. Then, in 2015, with the launch of the Document Cloud (DC) platform, Adobe folded Reader back under the Acrobat brand. Technically, the app is Acrobat Reader, but in practice, Adobe markets it simply as Acrobat.
This means there is no longer a separate “Adobe Reader.” Instead, users get Adobe Acrobat, an all-in-one platform where the free Acrobat Reader sits alongside paid features like editing, cloud storage, e-signatures, and collaboration tools. Still, all three name variations can be found on the Internet in all kinds of places, including Adobe itself.
Long story short:
In this article, I’ll use Adobe Reader, Acrobat Reader, and Acrobat interchangeably
Three ways to remove Adobe Reader
When it comes to uninstalling Adobe Reader from your Mac, there are three main approaches. Each method has its own specifics, advantages, and limitations:
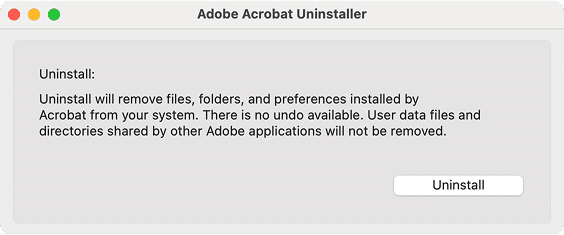
- Official removal via Acrobat Uninstaller. Adobe provides an uninstaller tool that removes the main app. However, it typically leaves behind numerous Acrobat-related files like preferences, caches, and background services that stay on your Mac.
- Manual uninstallation. This method involves finding and deleting Acrobat files from several system folders. While it takes more time and care, it ensures a complete cleanup. We’ll provide step-by-step instructions and a list of directories where Acrobat stores its data.
- Quick uninstallation via an app cleaner. Using a professional uninstaller tool such as App Cleaner & Uninstaller by Nektony makes the process fast and thorough. The app automatically finds all Acrobat files across your system and removes them in just a few clicks.
Here’s a comparison table to help you weigh the pros and cons at once and decide on your preferred method.
| Method | Removes main app | Removes all leftover files | Effort required | Safety & ease |
|---|---|---|---|---|
| Acrobat uninstaller | ✅ Yes | ❌ No | ✅ Low | ✅ High |
| Manual uninstallation | ✅ Yes | ⚠️ Yes (if thorough) | ❌ High | ⚠️ Medium |
| App Cleaner & Uninstaller | ✅ Yes | ✅ Yes (automatic) | ✅ Very Low | ✅ Very High |
As you can see, the official uninstaller is the easiest but leaves files behind, manual removal is complete but time-consuming, while an app like App Cleaner & Uninstaller combines speed, safety, and thoroughness.
How to uninstall Adobe Reader via Acrobat Uninstaller
Adobe includes a built-in uninstaller for Acrobat on macOS. It’s a straightforward solution, especially for those who prefer using official tools, but keep in mind that while it removes the main application, it may leave behind residual files.
Here’s how to use the Acrobat Uninstaller:
- Quit Acrobat if it’s running.
- Open Finder, navigate to Applications, and locate the Adobe Acrobat folder.
- Double-click the Acrobat Uninstaller within that folder.
- When prompted, select the specific Acrobat product you want to remove (e.g., Acrobat Pro) and click Open.
- Confirm the uninstallation by clicking OK in the dialog and Uninstall in the next one.
- Restart your Mac to complete the process.
This official uninstaller removes the main Acrobat application and several related files, folders, and preferences installed by Acrobat. It warns you that it does not delete directories shared by other Adobe apps, which is expected, yet it still leaves behind Acrobat-only files on your system that can be safely trashed. That’s why the threads on Reddit and Apple discussions concerning Acrobat removal exist.
This makes the official uninstaller a safe and easy first step, but not a complete cleanup. For a more thorough removal, you’ll need to follow up with manual deletion of leftover files or use a dedicated uninstaller tool. which we’ll cover further on.
Uninstall Acrobat Reader manually
In this section, we’ll cover which files and folders are related to Acrobat (formerly Adobe Reader) and should be removed for a complete cleanup. The method was tested on macOS 15 with Adobe Acrobat version 2025, but it should work with earlier versions of macOS and the app as well.
Note:
If you have already used the official Acrobat Uninstaller and now want to finish the job manually, expect that some of the paths listed below no longer exist on your Mac.
Before you start: how to search for Acrobat files in Finder
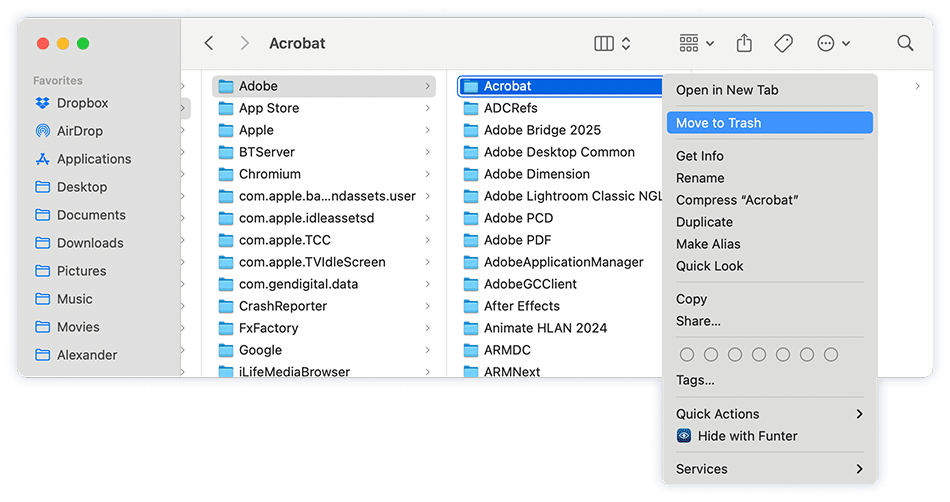
The safest way to perform manual removal is to use Finder to locate Acrobat-related files. In most cases, you’ll either utilize Search to look for the word acrobat and reveal the files you need to remove, or the instructions will point you at specific files in the folder.
Here’s how to do it:
- Open Finder .
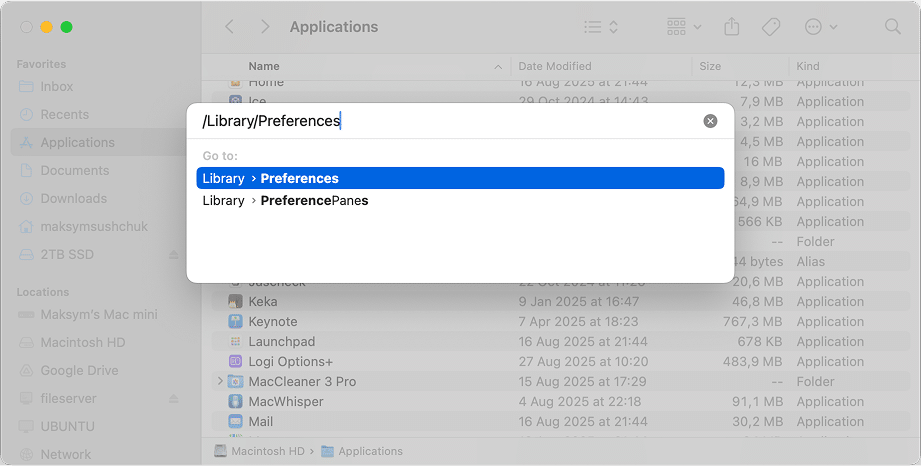
- From the top menu, click Go → Go to Folder…
- Enter the path of the folder you want to check (e.g., /Library/Preferences/).
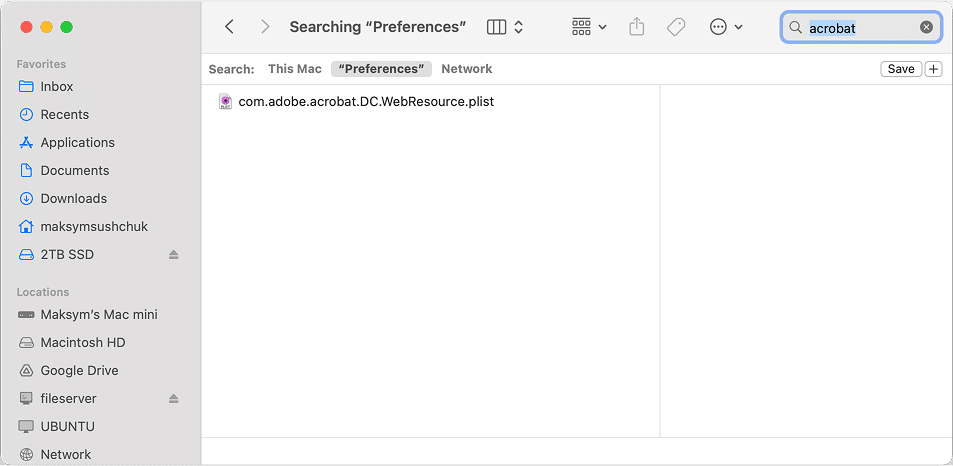
- Once inside the folder, type the word suggested by the instruction into the search bar in the upper-right corner.
- Change the search scope from This Mac to the current folder.
- Select the found items and move them to Trash .
- Repeat the process for each directory listed in the steps below.
Now, let’s proceed to the manual uninstallation of Adobe Acrobat Reader.
Step 1: Stop Acrobat and remove it from Applications
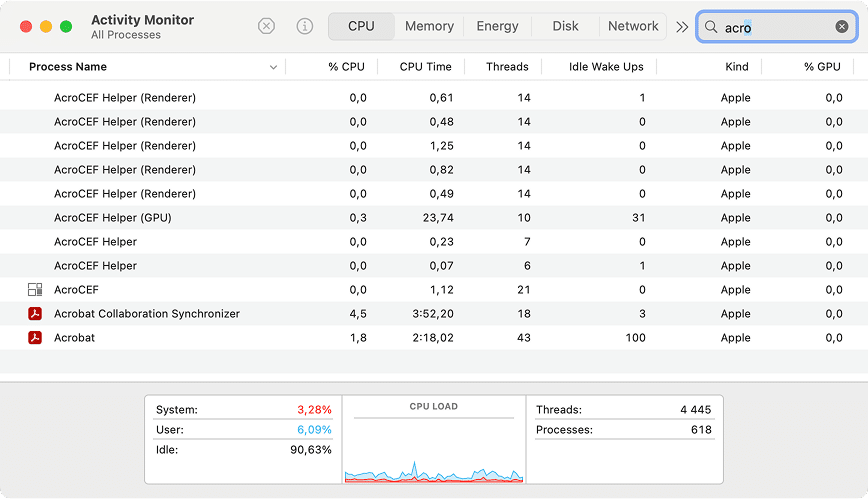
- Launch the Activity Monitor utility and stop all Acrobat-related processes by selecting them and clicking the Close (X) button. Search by the keyword “acro” to locate them.
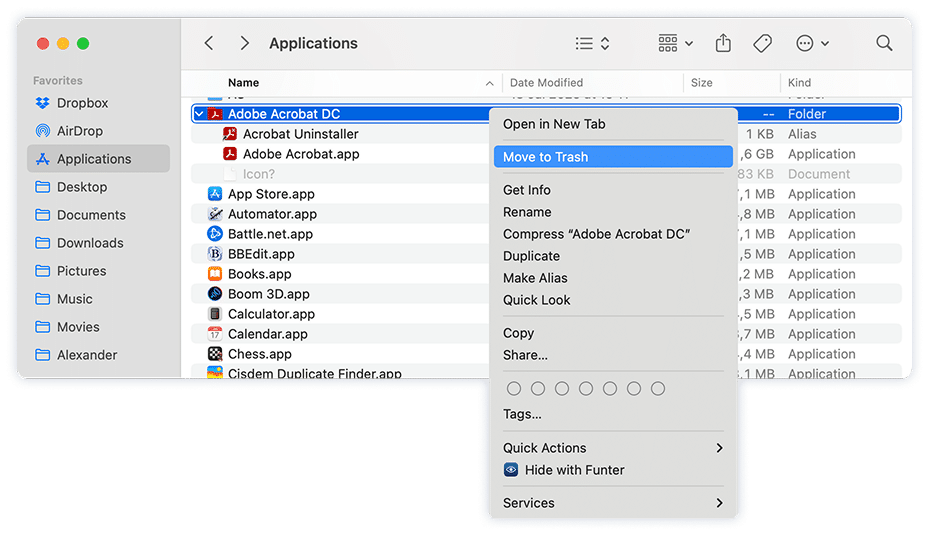
- Open Finder → Applications folder.
- Delete the Adobe Acrobat DC folder , which typically includes Adobe Acrobat.app and Acrobat Uninstaller.
Step 2: Start with the “acrobat” keyword
Look for files and folders having ‘acrobat’ in the following folders and trash them:
System Library (shared for all users)
/Library/Preferences/Copy
/Library/Application Support/Adobe/Copy
/Library/Application Support/Mozilla/NativeMessagingHosts/Copy
/Library/Application Support/Adobe/ARMDC/Registered Products/Copy
/Library/Internet Plug-Ins/Copy
User Library (current user)
~/Library/Preferences/Copy
~/Library/Containers/Copy
~/Library/Application Scripts/Copy
~/Library/Application Support/Adobe/Copy
~/Library/HTTPStorages/Copy
~/Library/Caches/Copy
~/Library/Application Support/com.apple.sharedfilelist/com.apple.LSSharedFileList.ApplicationRecentDocuments/Copy
~/Library/Logs/Adobe/Copy
~/Library/Application Support/CrashReporter/Copy
System temporary folders and receipts
/private/tmp/Copy
/private/var/folders/Copy
/private/var/db/receipts/Copy
Root user Library (may require admin rights)
/var/root/Library/Preferences/Copy
Step 2: Run secondary searches for the stragglers
These don’t always contain the word “acrobat,” so search using the terms below in the listed folders.
- Browser plug-ins: search for AdobePDFViewer in
/Library/Internet Plug-Ins/Copy
- Preferences and support files: Look for distiller in and
/var/root/Library/Preferences/Copy
/Library/Application Support/Adobe/Copy
- CEF runtime used by Acrobat: delete files with AcroCef in
~/Library/Application Support/Adobe/Copy
- Patch/update traces: Get rid of files containing AcroPatchInstall in and
~/Library/HTTPStorages/Copy
~/Library/Caches/Copy
- Remove the WebExtnUtils folder in
/Library/Application Support/Adobe/Copy
- Background sync prefs: find and delete files containing Synchronizer in
/var/root/Library/Preferences/Copy
- System logs: Trash acroUpdaterTools files in
/private/var/log/Copy
Step 3: Manually remove the few items that won’t show up via keywords
These entries either have very short names or are hidden. Navigate to the exact paths and remove them.
Show hidden files with Cmd+Shift+. if needed.
/Library/Application Support/Adobe/MACPDFM/DCCopy
/Library/Application Support/Adobe/MACPDFM/MacPDFM.frameworkCopy
/Library/Application Support/Mozilla/NativeMessagingHosts/.DC (hidden file)Copy
/Library/Application Support/Mozilla/Extensions/*/.DC (hidden file in each Firefox/Thunderbird profile)Copy
Step 4: Empty the Trash.
Once you empty the Trash, you’ve fully removed Adobe Acrobat (Adobe Reader) from your Mac.
Yes, this method takes time, but it guarantees that no leftovers remain on your system.
Uninstall Adobe Reader quickly via an app
If you want to save time and be sure that every trace of Adobe Acrobat is gone, the easiest way is to use App Cleaner & Uninstaller by Nektony. The app automatically finds the main executable, hidden support files, caches, logs, and browser plug-ins – all in one go. Here are three useful scenarios you can choose from:
How to uninstall Adobe Acrobat completely
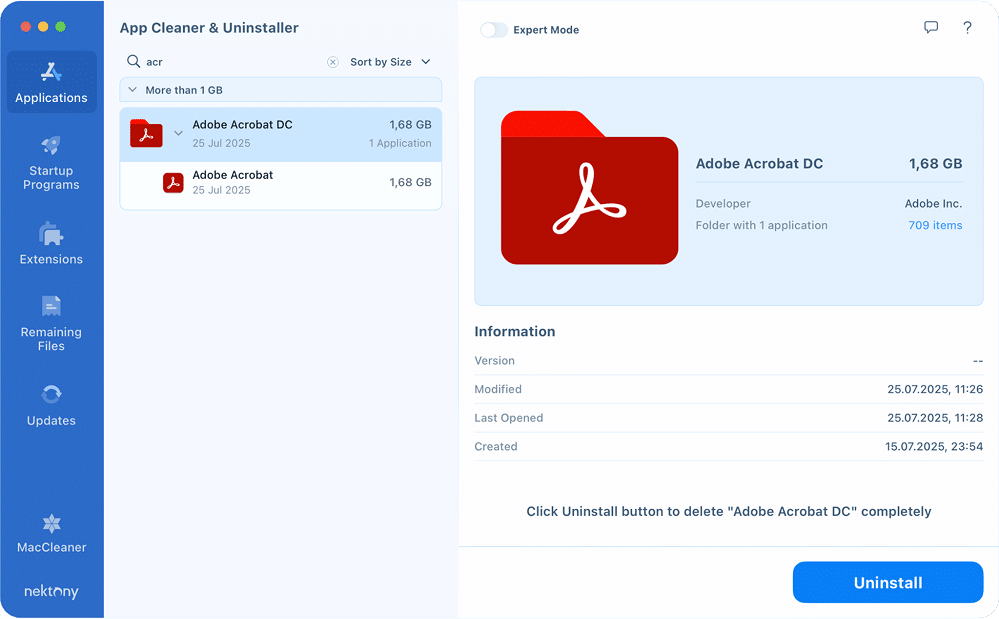
- Download and launch App Cleaner & Uninstaller.
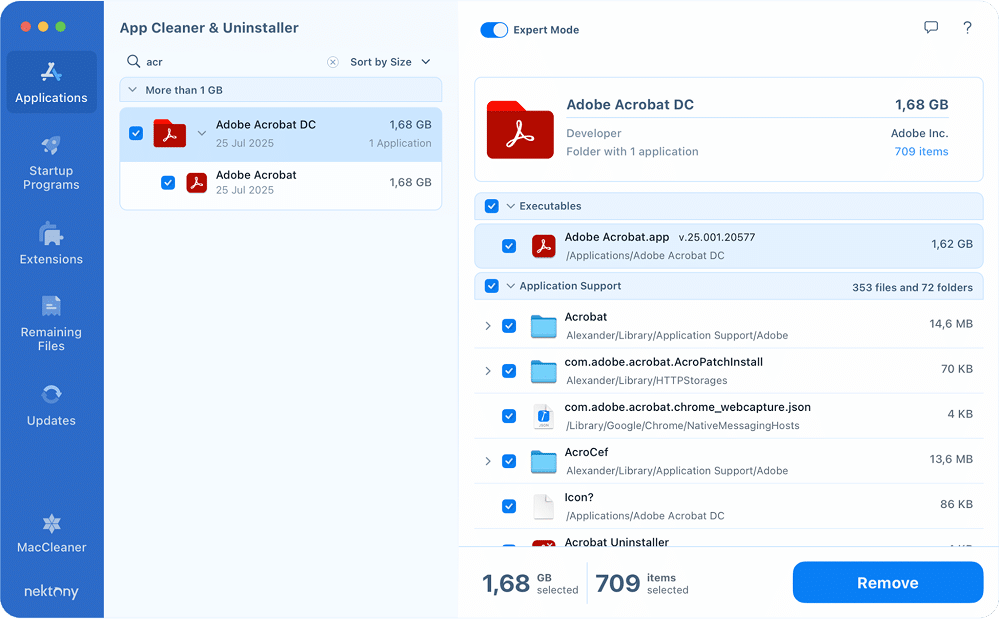
- In the list of apps, select Adobe Acrobat DC.
- If the Expert Mode is toggled, the tool will display all associated files: application files, preferences, caches, and plug-ins.
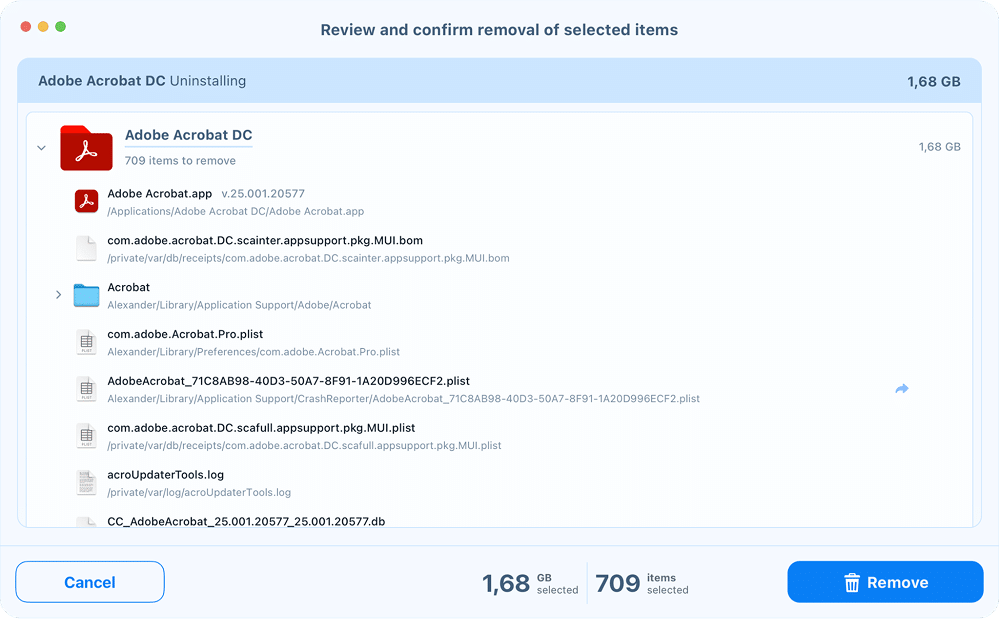
- Click Uninstall (or Remove in the Expert Mode) and then confirm the deletion.
- Acrobat and all of its service files are gone in seconds.
How to remove remaining files after using the official Adobe uninstaller
Sometimes you may have already uninstalled Acrobat via its built-in uninstaller or even dragged it to Trash, but leftover files remain on your Mac. App Cleaner & Uninstaller can still help:
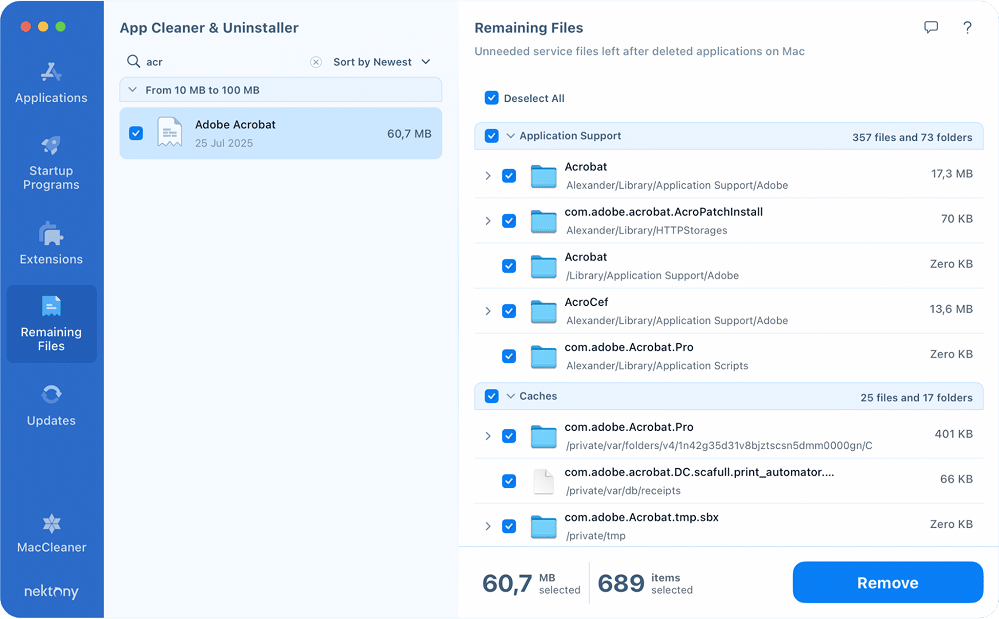
- Open the app and switch to the Remaining Files tab.
- Look for Acrobat-related entries (e.g., acrobat, distiller).
- Select them and click Remove.
This ensures that you clean up the system without repeating the manual search process.
How to reset Acrobat Reader (instead of uninstallation-reinstallation)
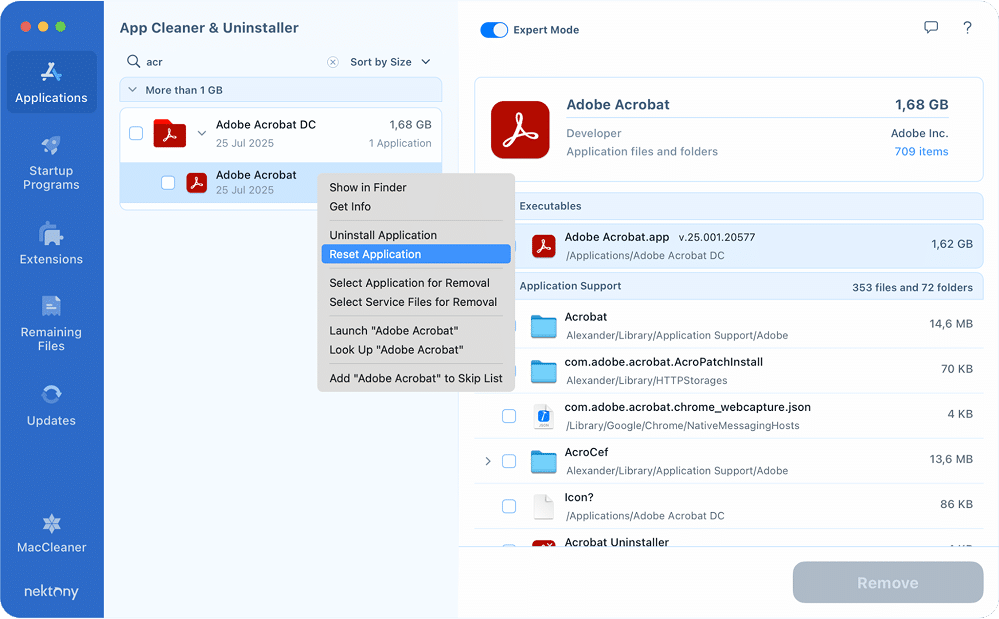
If you don’t actually want to uninstall Acrobat but want to fix it if it’s misbehaving, App Cleaner & Uninstaller lets you reset the app instead of uninstalling it:
- Locate Adobe Acrobat in the app list.
- Right-click it and select Reset Application in the menu.
The tool deletes Acrobat’s support files (preferences, caches, logs) but leaves the app itself intact.
After the reset, Acrobat launches as if freshly installed, which often solves glitches or performance issues.
Whether you need a quick full uninstall, want to erase leftovers after manual or official removal, or just reset Acrobat for a fresh start, App Cleaner & Uninstaller covers all three scenarios with minimal effort.
My take on removing Acrobat Reader
Acrobat is one of those apps that leaves its traces everywhere, and even the official uninstaller refuses to take them all down. Manual removal does the job perfectly in this regard, but it takes patience and focus to dig through all the folders. That’s why tools like App Cleaner & Uninstaller exist. There’s no magic, just a smarter way to save time and avoid the grind.
Personally, I miss the good old Adobe Reader, but I don’t miss Acrobat. Apple’s Preview handles my PDFs perfectly well. And on the rare occasion I need extra features, there are plenty of free or trial web apps that do the job.
