Just installed App Cleaner & Uninstaller? This guide walks you through the first launch and the main tasks – from granting Full Disk Access to uninstalling your first app.
Before we start, watch a quick video on how to use App Cleaner & Uninstaller.
Your first launch: what to expect
When you first open the app, App Cleaner & Uninstaller will ask you to grant Full Disk Access.
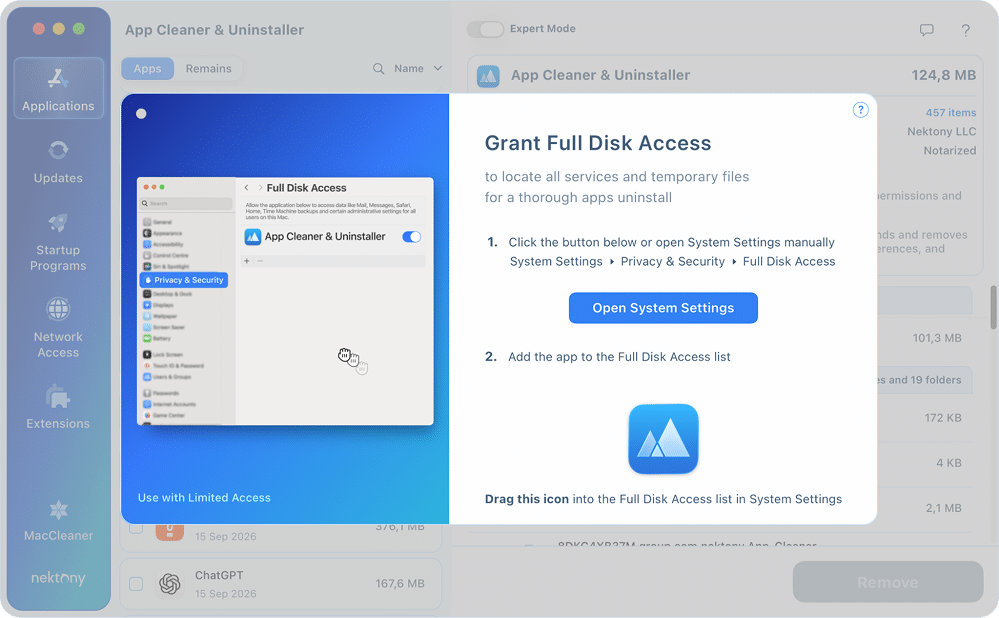
It’s needed to find all service files and leftovers in protected folders. You can skip it, but then some leftovers may stay undetected.
- Click Open System Settings in the dialog.
- It will automatically open the Full Disk Access section of your macOS settings.
- Toggle ON for App Cleaner & Uninstaller.
- Relaunch the app. It will automatically scan your Mac to find all apps and their support files.
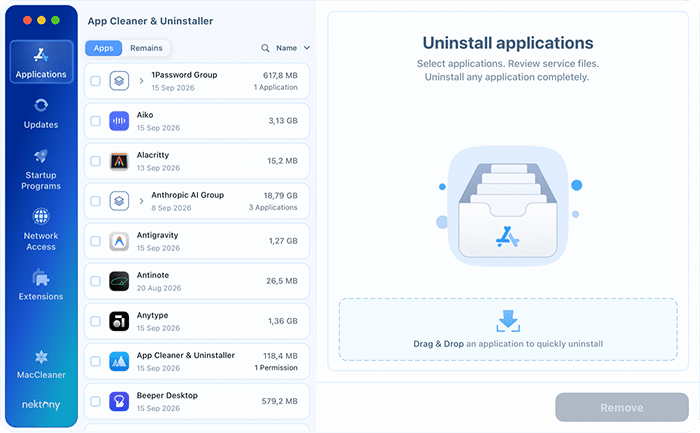
Understanding the dashboard
On the left-hand panel, you can navigate through six key management categories:
- Applications: Uninstall software and its service files, and – through the Remains switch – clear out the files left behind by apps you deleted earlier.
- Updates: Install new versions of your software.
- Startup Programs: Control apps that launch at login.
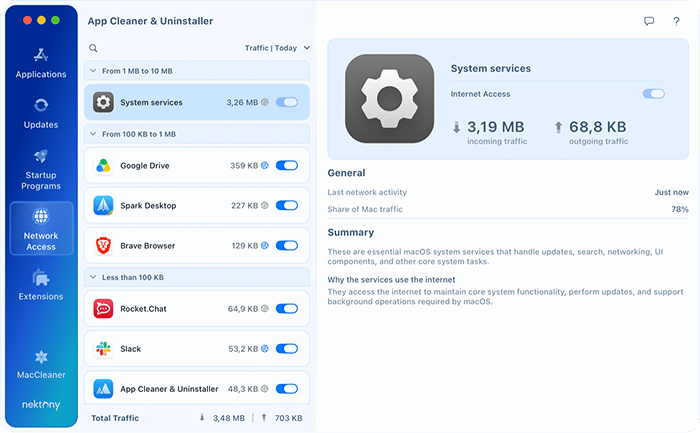
- Network Access: See how much internet traffic each app uses and block the ones you do not want online.
- Extensions: Manage browser plugins, widgets, and screen savers.
- MacCleaner: Reach the rest of the Nektony clean-up tools.
How to uninstall an app
- In the Applications tab, select the app you want to remove (use the search bar if needed).
- Click the Uninstall button.
- Review the list and click Remove to confirm.
Want to keep the app but delete only its caches? Toggle Expert Mode at the top to select specific files for removal.

How to check app security and permissions
In the Applications tab, select any app to see additional details:
- Notarization status – see whether the app has been checked by Apple for known malicious components.
- Access – manage system and folder permissions granted to the app (Camera, Microphone, Files, etc.)
Use this to spot apps with broader access than expected.

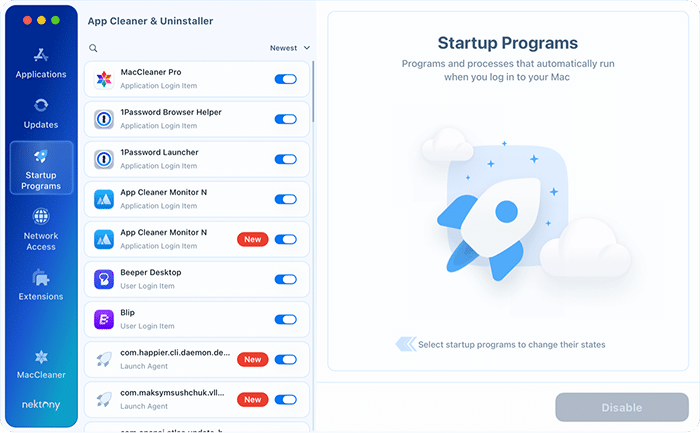
How to manage startup programs
This section allows you to control which applications and background processes launch automatically when you turn on your Mac.
- Go to the Startup Programs tab.
- Select a startup item and click the Disable or Enable button to change its status.
- Alternatively, you can use the toggle switch to turn it ON or OFF.
Permanent removal: Hover over an item and click the Remove button that appears next to its toggle, then confirm. If Remove doesn’t appear, you can still disable the item with its toggle.
How to control which apps go online
The Network Access tab shows how much internet traffic each app on your Mac moves, and lets you block the ones that have no business being online. Traffic is analyzed locally on your Mac.
- Open the Network Access tab and click Turn on Network Monitoring.
- Allow the macOS network extension when prompted: System Settings → General → Login Items & Extensions → Extensions → By Category → Network Extensions, then turn on App Cleaner & Uninstaller.
- Back in the app, click Allow on the “Would Like to Filter Network Content” prompt if you see it.
- Switch the toggle next to any app OFF to cut off its internet access.
How to remove extensions
The Extensions tab shows the list of plugins, browser extensions, and system add-ons installed on your Mac.
- Choose the type of extension you want to view.
- Browse the list and click the checkbox next to the specific extension you wish to delete.
- Confirm removal.

How to remove remaining files
These are files left behind by apps you deleted in the past by dragging them to the Trash. Starting with version 10, they live inside the Applications tab.
- Go to the Applications tab and switch the list from Apps to Remains.
- Review the list – the app shows which deleted application left each file.
- Select the files you want to delete and click Remove.

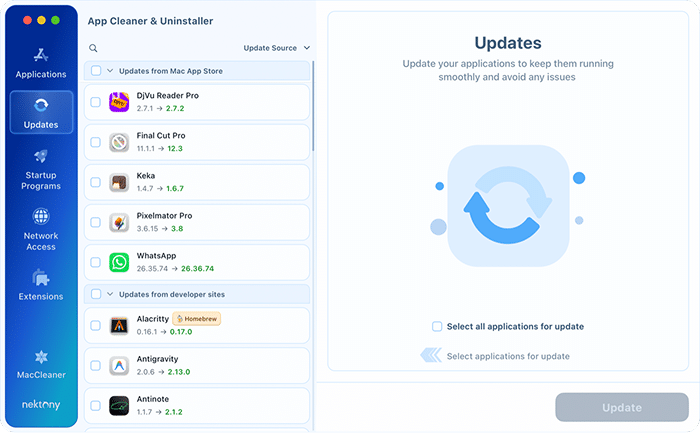
How to update apps
This tool identifies updates from the App Store and developer sites for all your installed software.
- Navigate to the Updates tab.
- Select an app to see the “What’s new” release notes.
- Use the checkboxes to select one or multiple apps.
- Click Update at the bottom right and confirm.