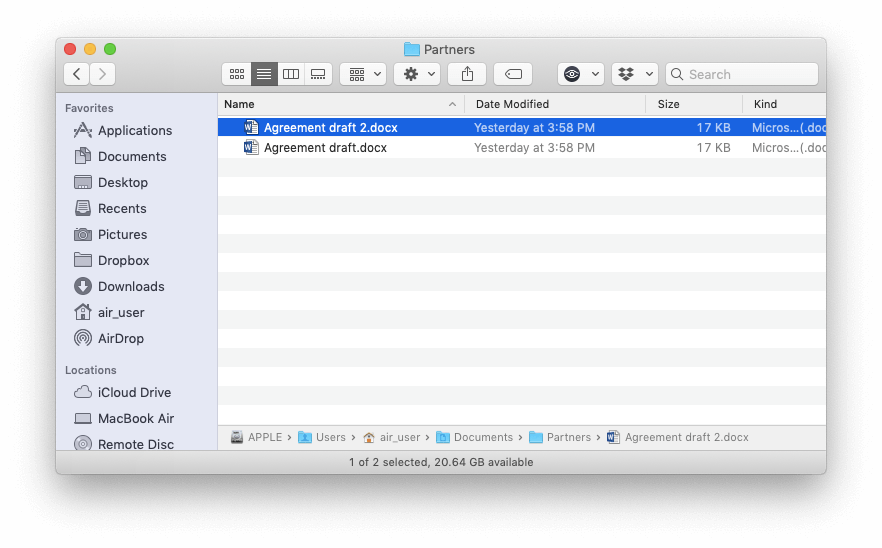
We create lots of various files on our computers daily. In some cases, you may want to create a copy of a particular file to edit and save the original without changes. In this post, we want to highlight a few tips for duplicating files on a Mac, as well as for getting rid of useless replicas.
Contents:
- How to create duplicates using Copy and Paste on Mac
- How to create duplicates using the context menu
- How to create duplicates using the Option key
- How to delete duplicate files on Mac
How to Copy and Paste on a Mac to Create Duplicate Files
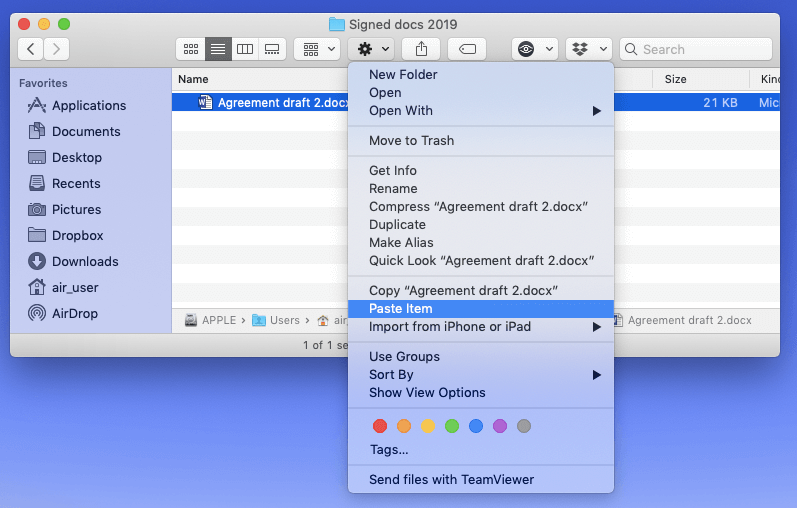
The option to сopy and paste on Mac is easy, and is possible either with the toolbar command or with keyboard shortcuts. If you want to copy a file or folder and paste it to another location on your disk, choose from one of these methods:
- Open the folder where the specific file is located → Select an item → Click on the in the folder’s toolbar → Choose in the drop-down menu.
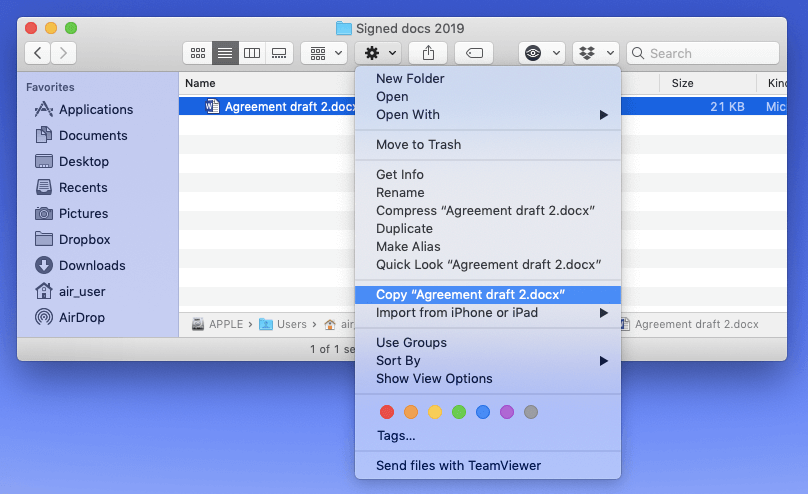
- Then open the destination folder → Click on the in the folder’s toolbar → Choose in the menu that appears.
- To make copying on Mac simpler, you can also use the keyboard shortcuts:
- – Select a file or a folder and press the keys to copy an item.
- – Open a destination folder and press the keys to paste an item.
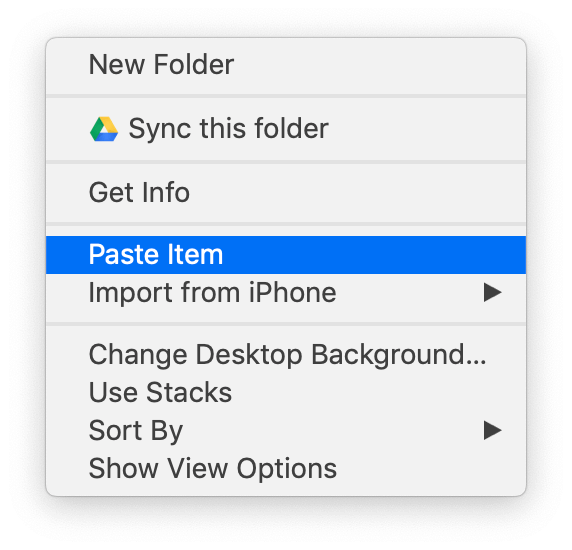
- If you want to save a duplicate on the Desktop, just right-click on an empty field in the Desktop, and select in the context menu.
In these cases, the duplicate file will have the same name as the original file.
Create Duplicates Using the Context Menu
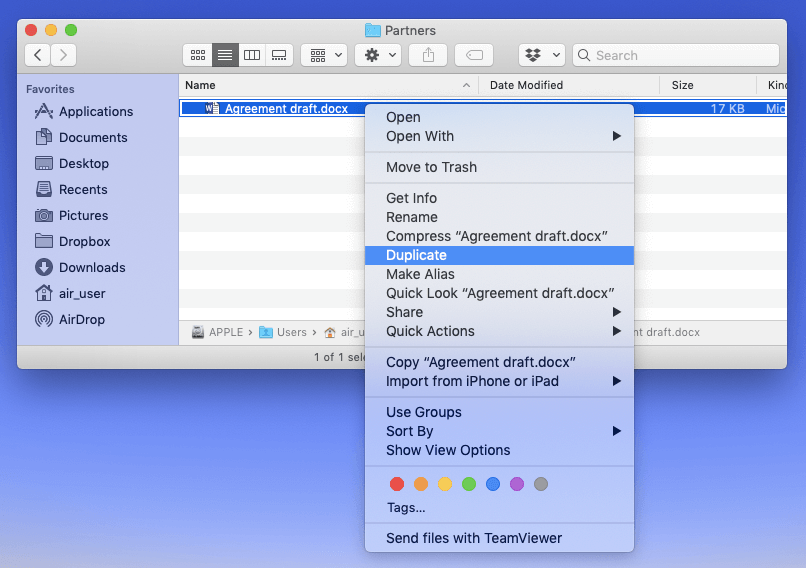
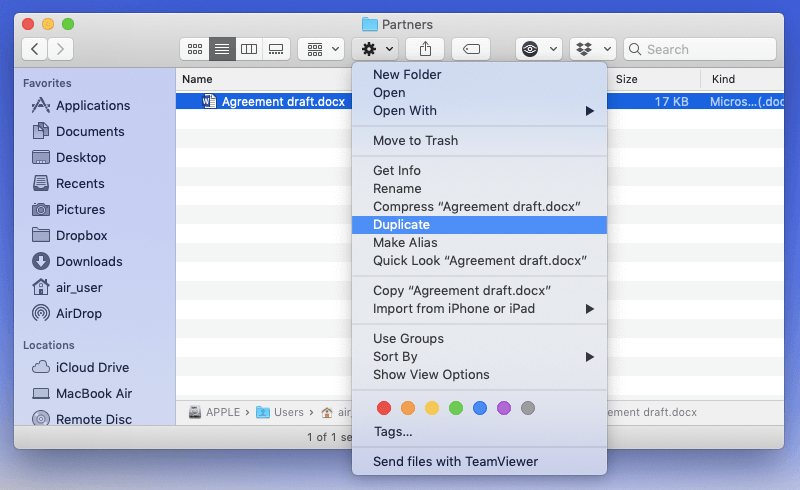
You can create duplicates on your Mac using a context menu. In this case, duplicates appear in the same folder. To do so, follow these steps:
- Within a particular folder, select a file you want to duplicate→ right-click on it and choose in the menu that appears.
- Alternately, you can use the in the folder’s toolbar and select in the drop-down menu. In this case, a duplicate file will automatically be reamed with the word copy in its title.
- A keyboard shortcut is also available to duplicate files. Just select an item and press the keys to duplicate. In this case, a duplicate file will also receive a word copy in its title by default.
Create Duplicates Using the Option Key
The last way to create a duplicate file is to use the key. For this, select a file in a particular folder → press the key → click on the file and within this folder. As soon as you start to drag the file, a green circle icon with a plus sign next to the file appears. It shows that you are creating a duplicate. Drop the duplicate to another spot within this folder. In this case, each new duplicate will be renamed with an ordinal number in its name.
Delete Duplicate Files
If for any reason you often create duplicates on your computer, over time you may have complete chaos in your folders. Besides that, your disk fills up with unnecessary copies of files. Lots of Mac users spend hours afterwards looking for and deleting useless replicas. But there is a much simpler way to remove duplicates from your Mac. You can use the free Duplicate File Finder program that quickly finds matching files of any extension type. If you want to delete counterpart files using Duplicate File Finder, complete the following steps:
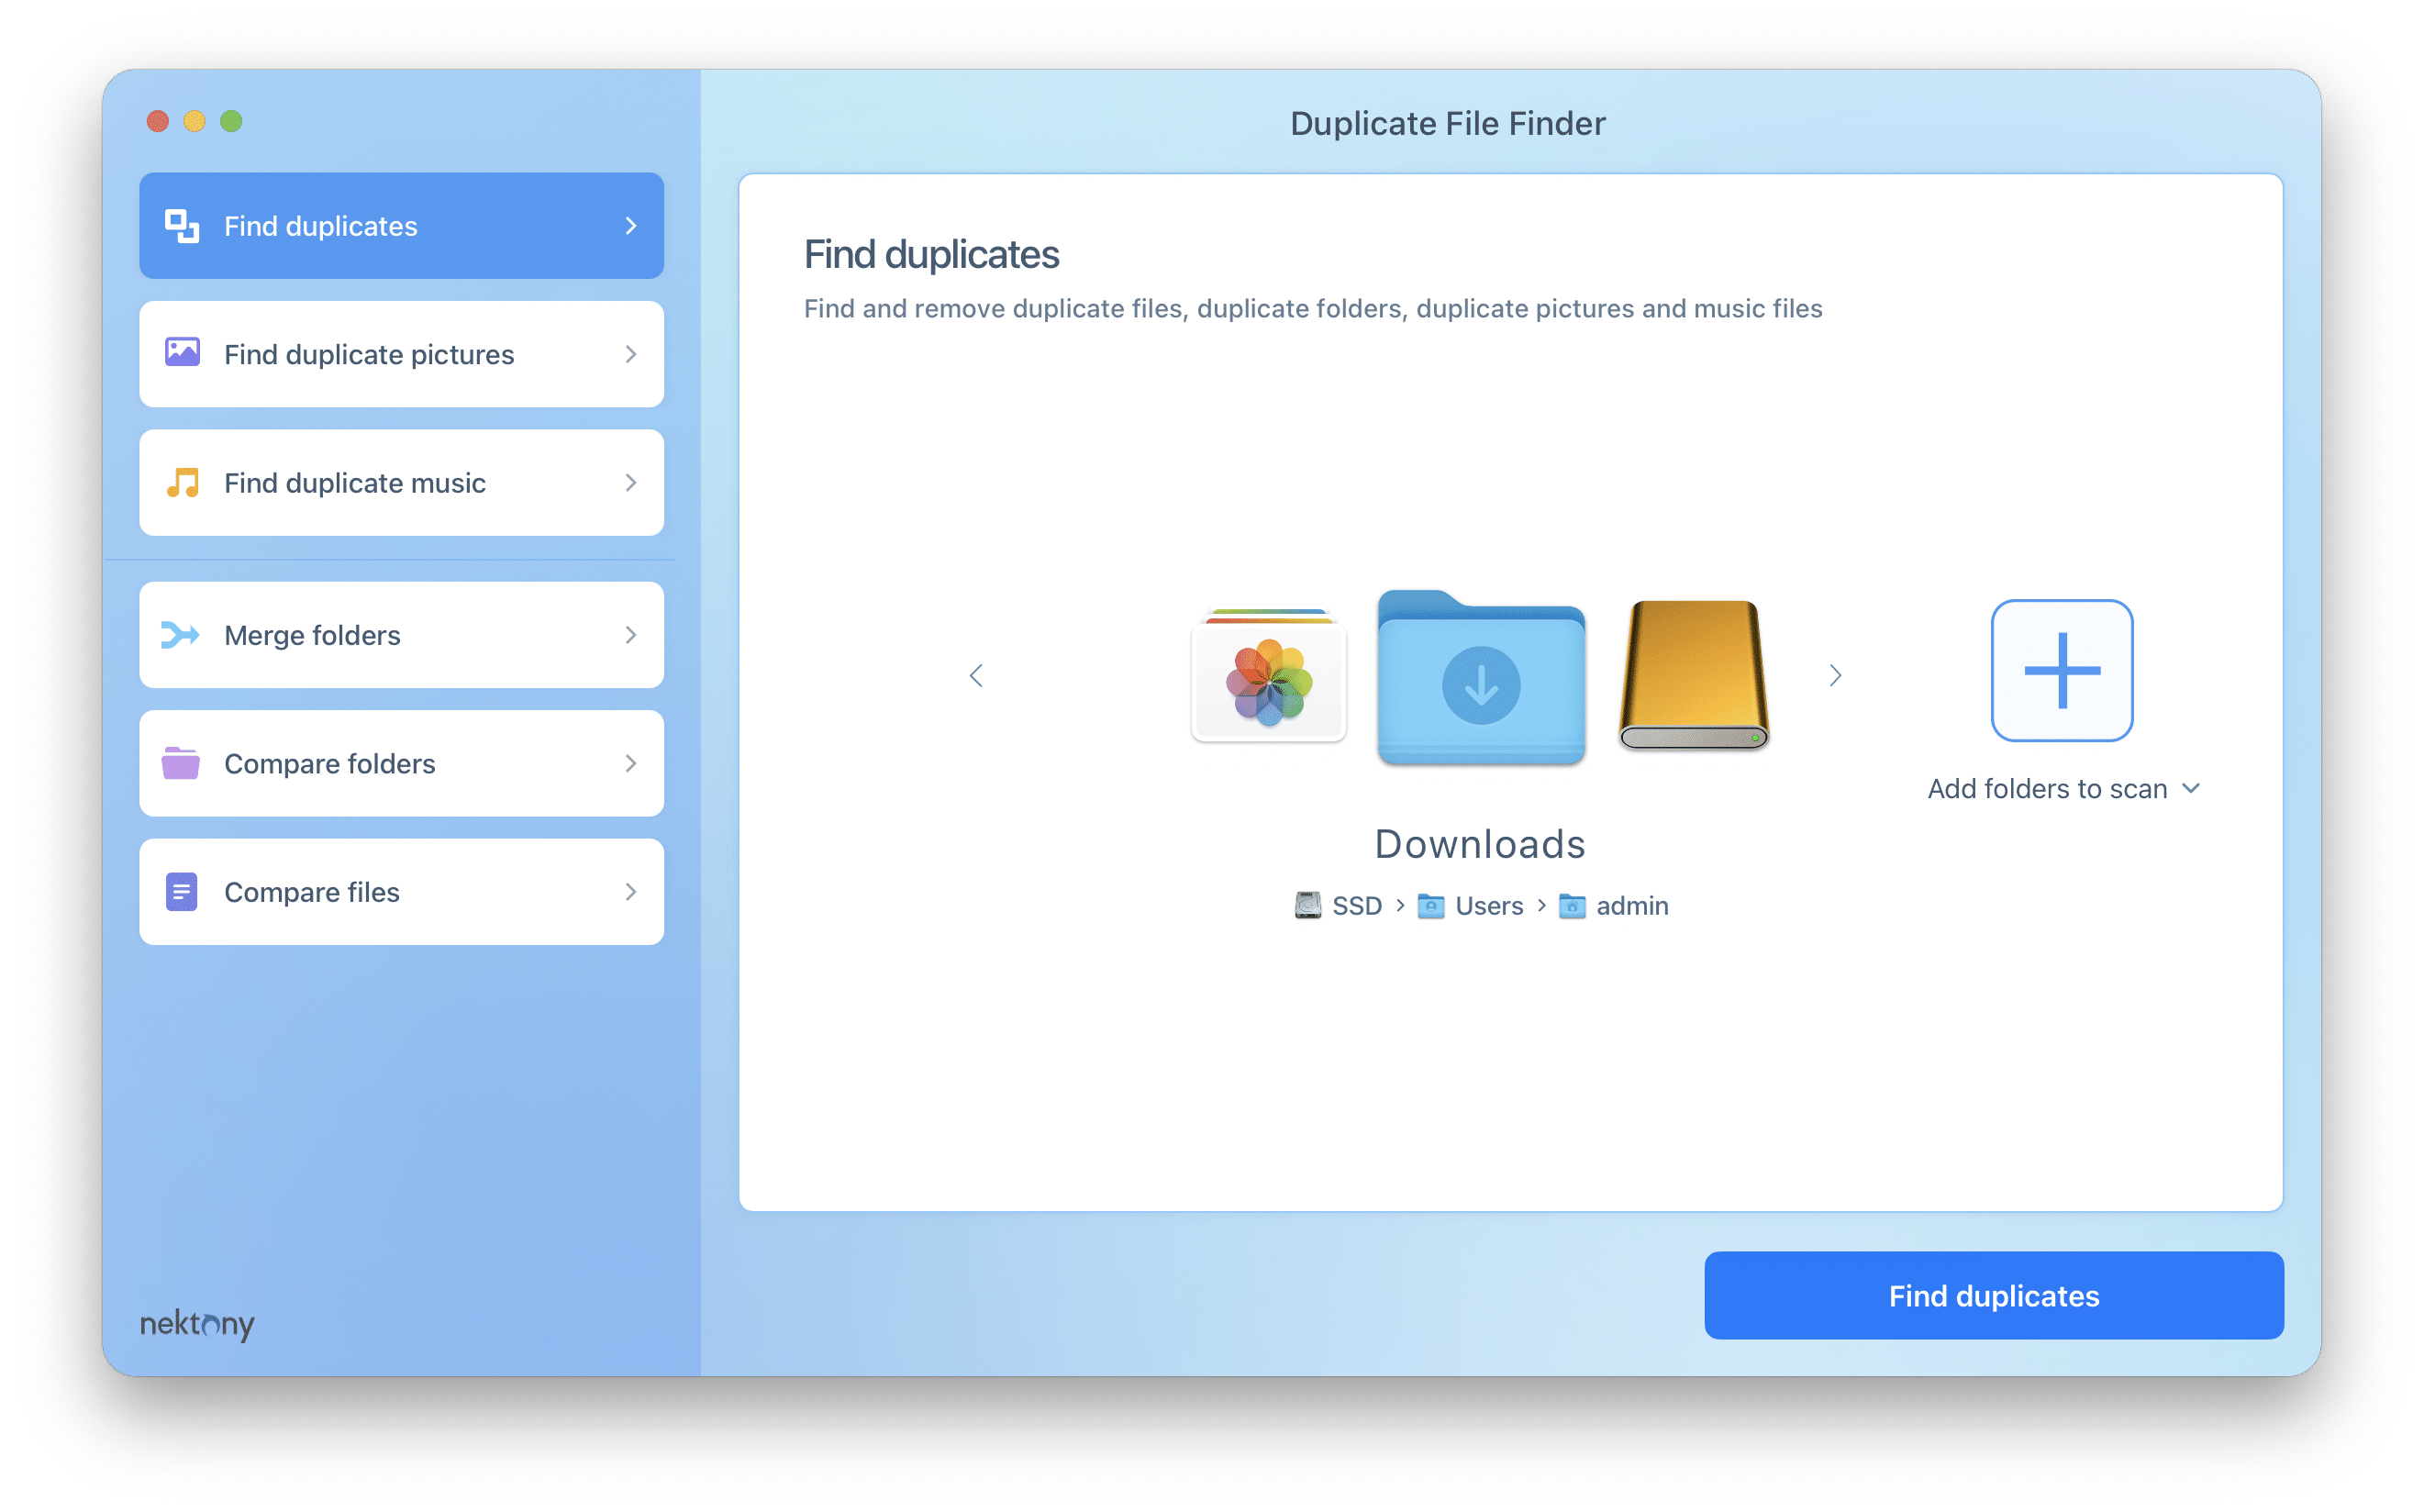
- Launch Duplicate File Finder.
- Select the folders you want to check for duplicates and click Find duplicates.
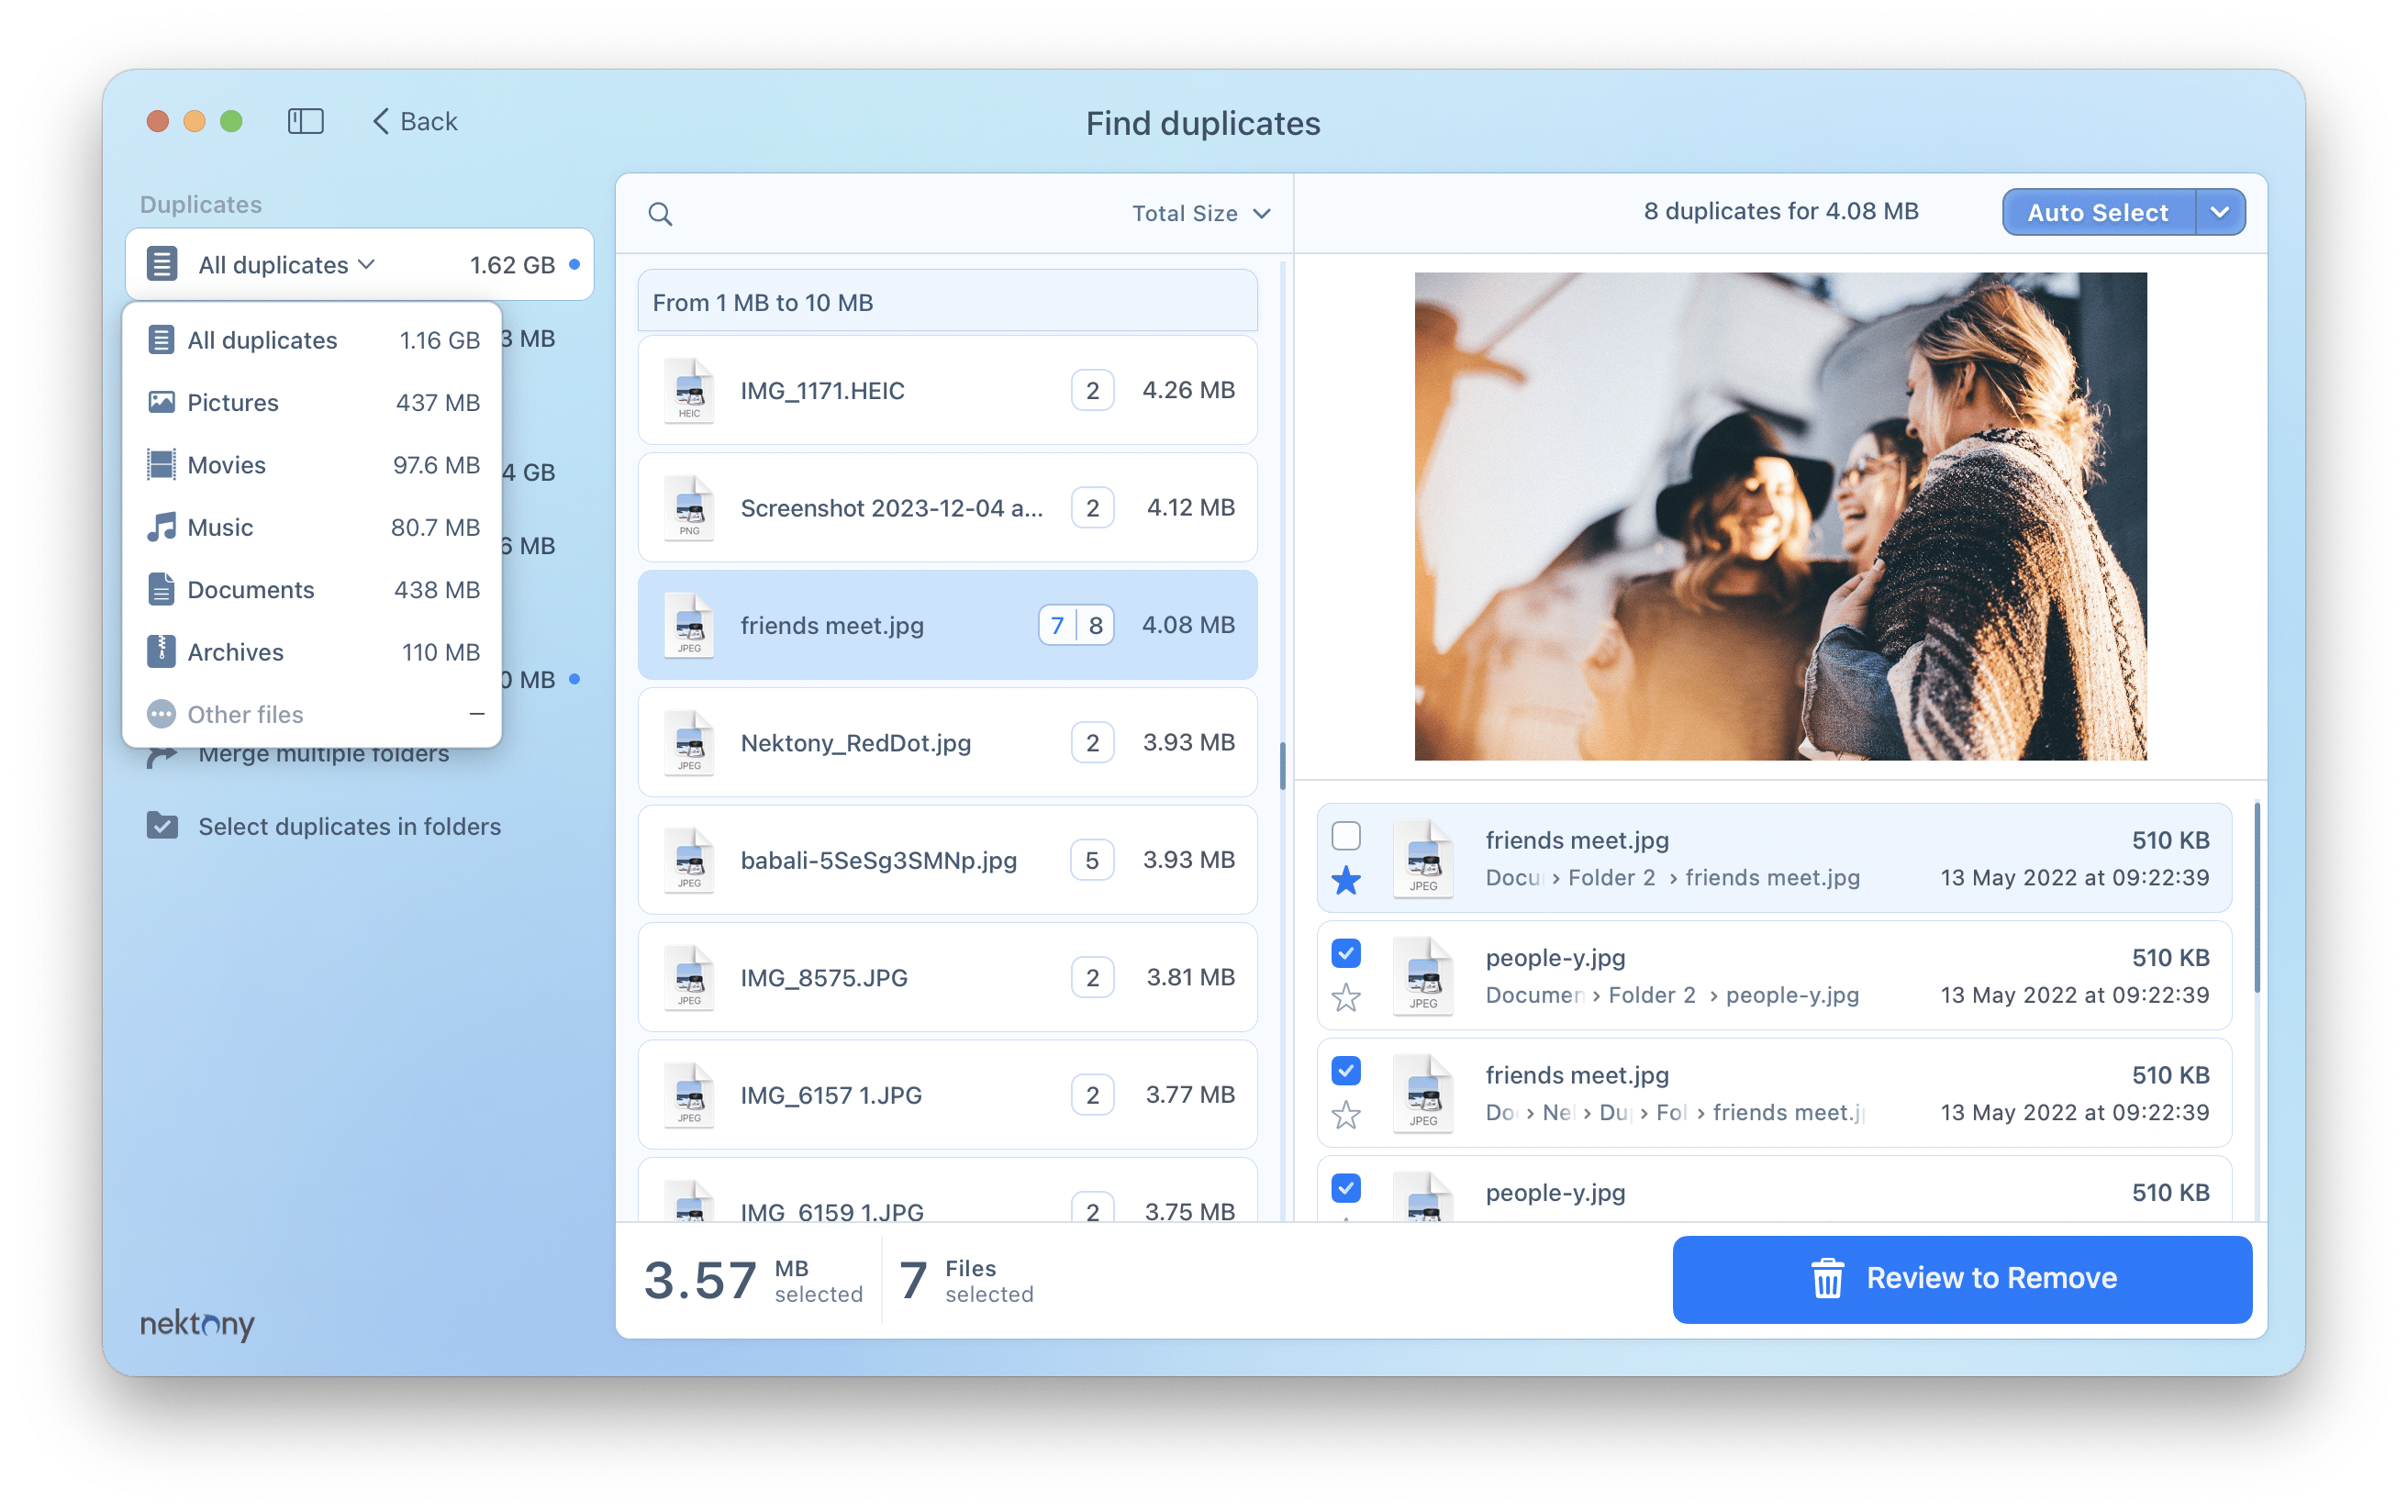
- Next, you will see the results of all duplicate files on a Mac. You can select which type of duplicates you want to review.
- Review the items which were detected as replicas. You can view them within the Duplicate File Finder’s window or reveal the files in Finder.
- Select the useless copies and click on the button.
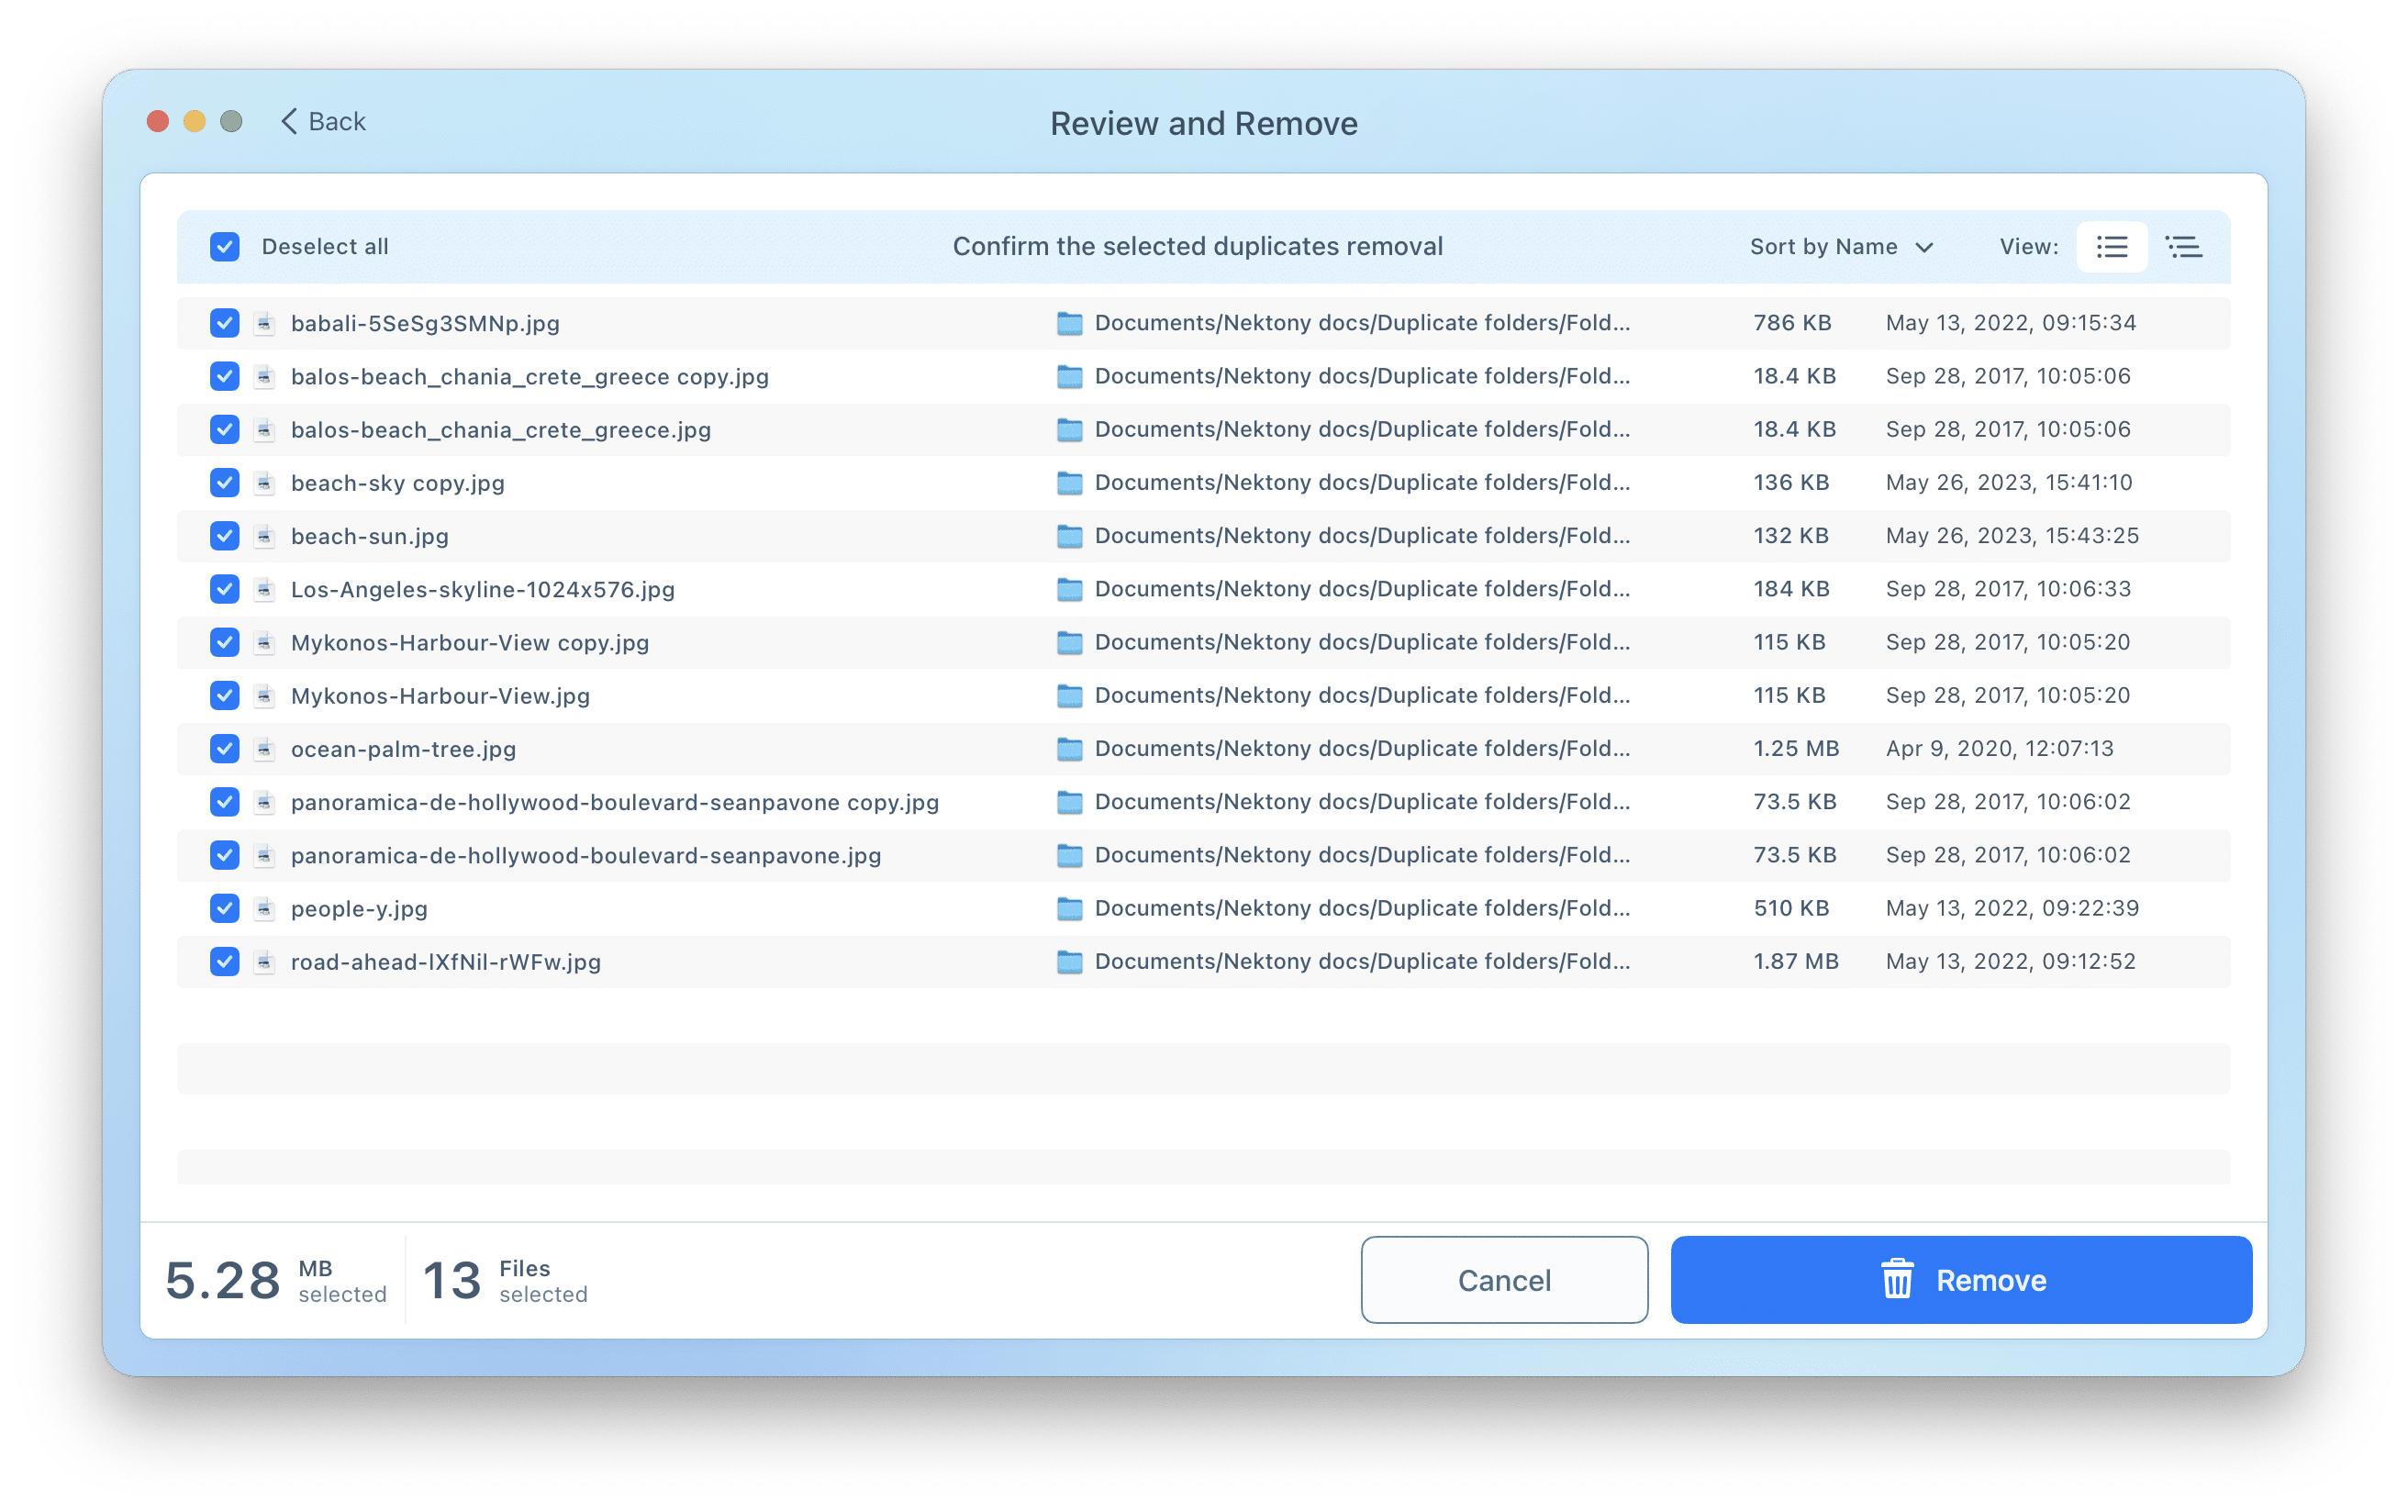
- Review the items you are going to delete and click to confirm the action.
- Then empty the bin to permanently remove the unneeded replicas from your Mac.
Conclusion
You can create lots of files on your Mac each day, but no matter how useful, eventually, they become unnecessary. To help you better manage your files, we have explained how to duplicate files on your Mac and how to delete unneeded copies as well. We do hope that our article was useful. Please feel free to share it with your friends.
You can download the Duplicate File Finder app from App Store and use it for free to remove unnecessary files from your Mac. Also, Duplicate File Finder has additional features in the Pro version. Duplicate File Finder Pro allows you to find and remove similar folders and photos, and merge scanned folders to keep your disk space orderly.
