If you have ever been trying to delete applications preinstalled on your Mac, you know that by default Apple programs are protected from being removed. In this article, we’ll explain why you don’t have permission to access and uninstall default macOS apps and how to make it able to delete a locked app on your Mac.

Contents
- Why are default Apple apps protected from being removed
- How to uninstall default Apple apps with Terminal
- How to completely uninstall third-party apps on Mac
- How to reset default Apple apps
Important notes about uninstalling default applications on Mac
- Generally, you don’t need to uninstall default apps from your Mac. If you don’t use them, they don’t accumulate caches or other service files and as a result, they don’t take much space on your drive.
- The only way to uninstall default system applications is to disable SIP. However, since macOS Monterey Apple automatically restores apps after enabling SIP.
- Uninstalling the default application on your Mac can damage your system. That’s why Apple tries to prevent you from deleting them. You should remove locked files only if you understand the macOS file system and ensure that it will not affect your Mac badly.
- If you want to uninstall default apps just because you need more free space on your Mac, read our article “How to clean up a Mac.” There are some more effective ways to recover space on your drive.
- There are two ways to delete apps on Mac. You can do it manually or use third-party software tools like App Cleaner & Uninstaller.
Why are default Apple apps protected from being removed
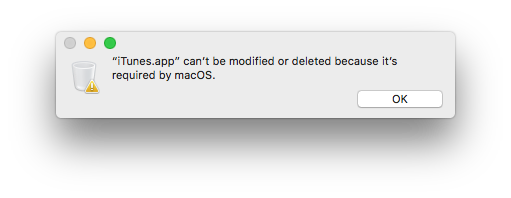
If you have tried to uninstall Safari, Photos, Mail, iTunes, or other standard macOS applications, you might have seen this error message about the impossibility of deleting these apps because it’s a requirement of macOS.
It is prohibited to delete system applications in a regular way due to the fact that the removal of built-in applications and system files may damage the viability of the system. Although you can download Safari or iTunes from the official Apple website, other important programs are not available to be restored. Apple doesn’t allow you to delete its necessary apps.
This rule is extremely important for inexperienced users. However, if you are a computer geek and understand which default programs are safe to remove, you can do it via Terminal.
How to uninstall default apps on Mac with Terminal
Despite the warning, it is possible to remove unnecessary standard programs via Terminal. But first, you should know that with the release of macOS 10.12 Apple has made changes in its security technology System Integrity Protection (SIP) and it now forbids modifying system items on Macs. The SIP limits the actions that the user can perform on protected parts of the Mac operating system.
That’s why, before trying to remove default apps, you would need to disable the Apple System Integrity Protection.
Steps to disable SIP and uninstall default apps on macOS 10.14 -10.15
- Restart your Mac and press Command+R key shortcut while the reboot is in progress.
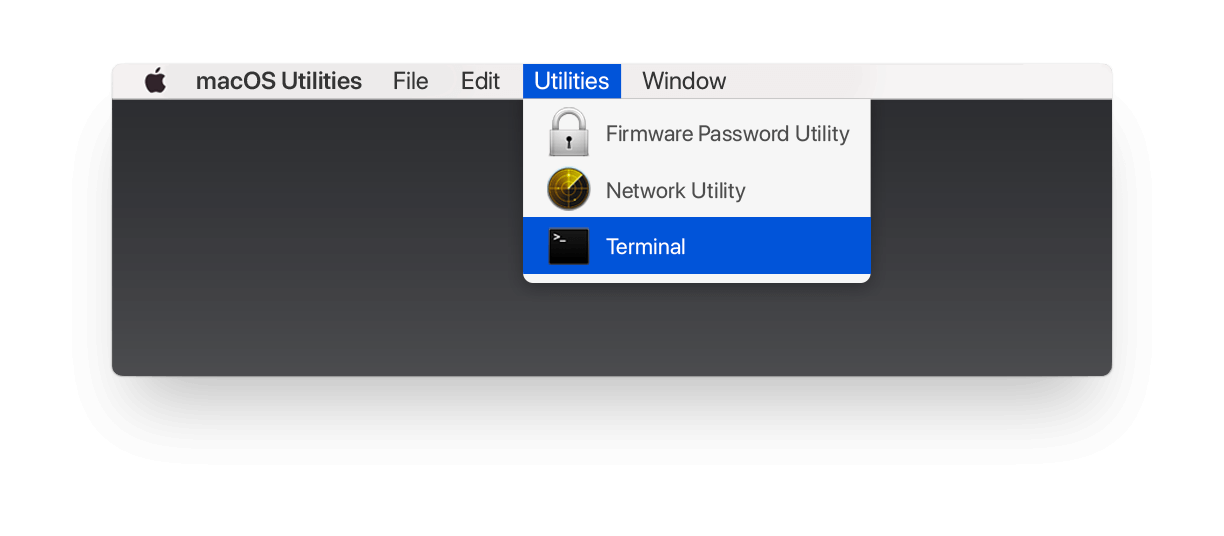
- You will see an unusual startup window – this is the recovery mode. In the Menu bar click Utilities → Terminal.
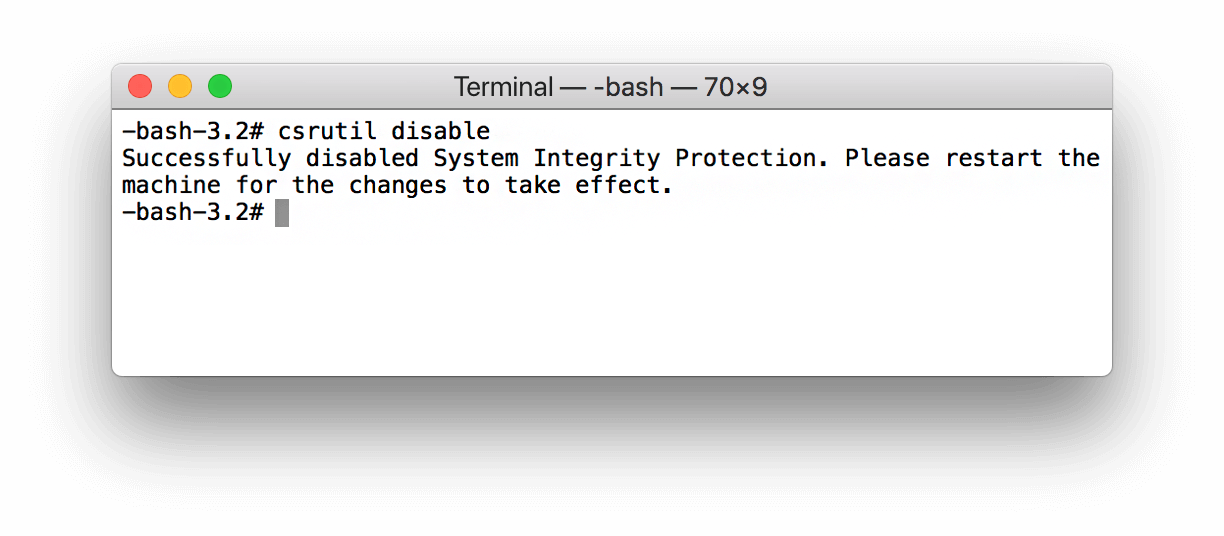
- Type in Terminal the next command: csrutil disable
- Press the Return key. You will see that your SIP is disabled.
- Restart your Mac.
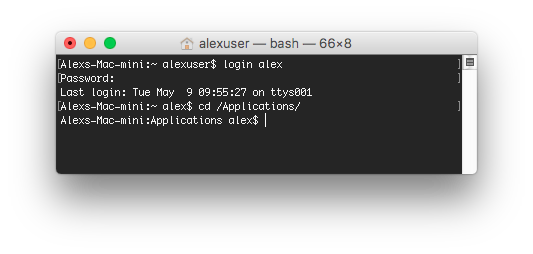
- Login to your system through your admin account. You can remove default apps only if you have administrator rights. However, if you have already signed into your user account, you can use a special command right in the Terminal to log in again.
- Launch Terminal.
If you have macOS 10.14, skip step 8.
-
Mount the “/“ folder to have Read & Write permission. For this, use the following command:
sudo mount -uw /
*If you have signed into your user account, first use this command to re-login:
login
[admin username=””][/admin] → enter the password → and then mount the folder.
-
Then type another command to show the application directory and press the Return (Enter) key.
cd /Volumes/
Catalina/System/Applications – use this command if you have macOS 10.15
cd /Volumes/Mojave/System/Applications – use this command if you have macOS 10.14 -
Now you can start deleting applications using Terminal. To remove apps with Terminal, use the command
sudo rm -rf APPLICATION_NAME
Please be careful: when you remove items via Terminal, the system does not ask for confirmation. Each application has its own command:
- Safari (on macOS 10.15): sudo rm -rf ~/mount/Applications/Safari.app
- Safari (on macOS 10.14): sudo rm -rf Safari.app
- Mail (on macOS 10.15): sudo rm -rf ~/mount/System/Applications/Mail.app
- Mail (on macOS 10.14): sudo rm -rf Mail.app
- FaceTime: sudo rm -rf FaceTime.app
- QuickTime: sudo rm -rf QuickTime\ Player.app
- Notes: sudo rm -rf Stickies.app
- Chess: sudo rm -rf Chess.app
- Photo: sudo rm -rf Photo\ Booth.app
- ITunes: sudo rm -rf iTunes.app
ImportantUsually, after deleting the apps, we recommend enabling back the System Integrity Protection in order to not remove other important apps by mistake. However, note that on macOS Monterey, the apps can be restored after enabling SIP.
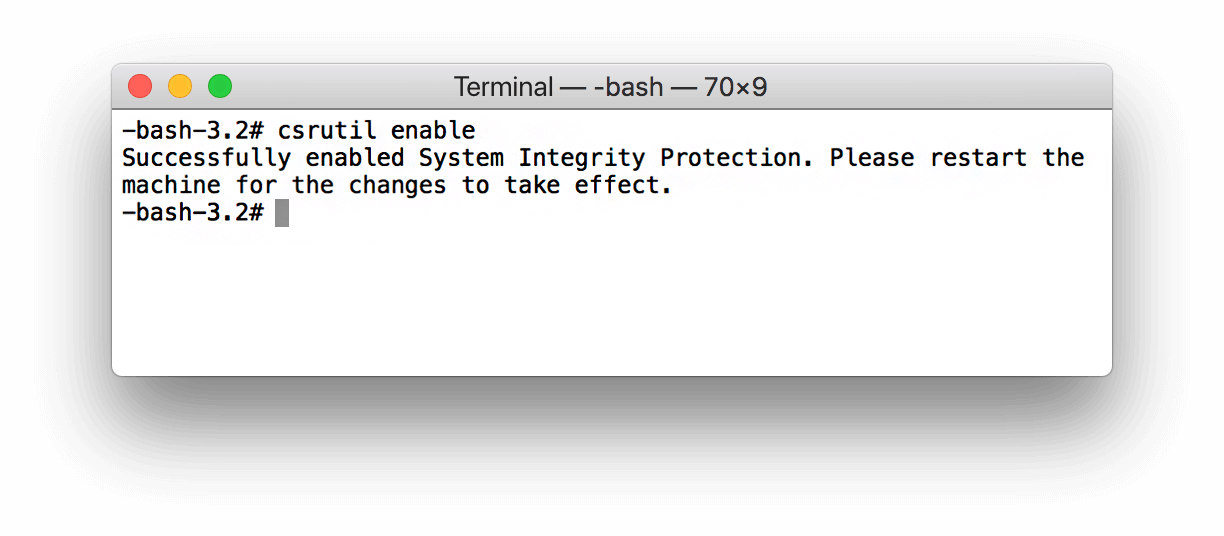
If you use earlier versions of macOS, here is how to enable SIP: restart your Mac → use Command+R shortcut → open Terminal and this time type the command csrutil enable. Then restart the Mac.
Steps to uninstall default apps on macOS (Big Sur, Monterey, Ventura)
This guide is based on the user’s experience on StackExchange. We’ve tested and checked how it works on macOS (Big Sur, Monterey, Ventura) and added additional steps for a safe experience.
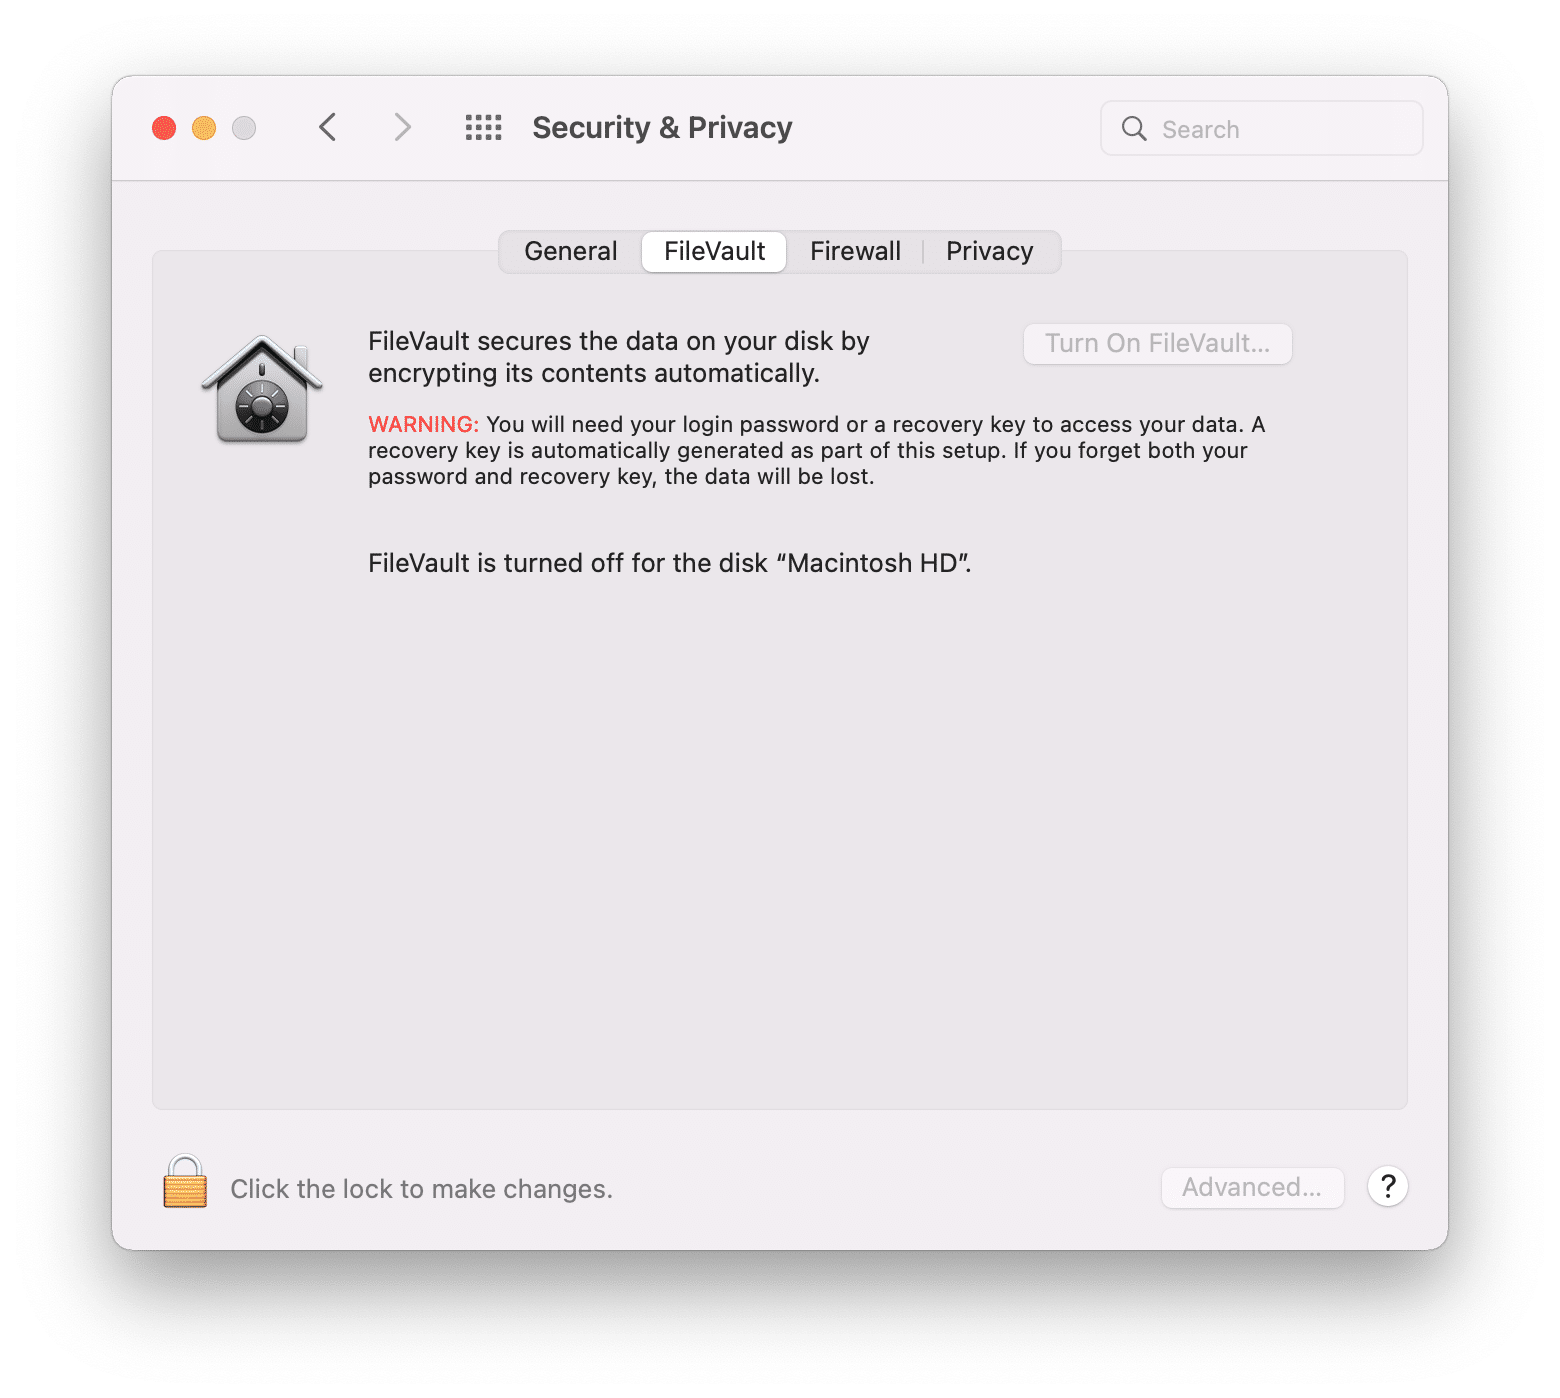
- Make sure that FileVault is disabled. On macOS Big Sur and Monterey, do the following:
- Open System Preferences.
- go to Security & Privacy → FileVault. If needed, click the Lock icon, provide your admin password and click Turn Off FileVault.
- Open System Settings.
- Click Privacy & Security in the sidebar.
- Scroll down, find FileVault and turn it off.
- Reboot your Mac in Recovery mode. For this, press and hold CMD+R while restarting.
- Go to the menu bar → select Utilities → Terminal.
-
In the Terminal window, type the following commands, and after each of them, press Enter.
csrutil disable – it will disable System Integrity Protection (SIP)
csrutil authenticated-root disable – it will disable Signed System Volume (SSV) - Reboot your Mac in a normal mode and enter your admin account. You can remove default apps only if you have administrator rights.
- Run Terminal.
-
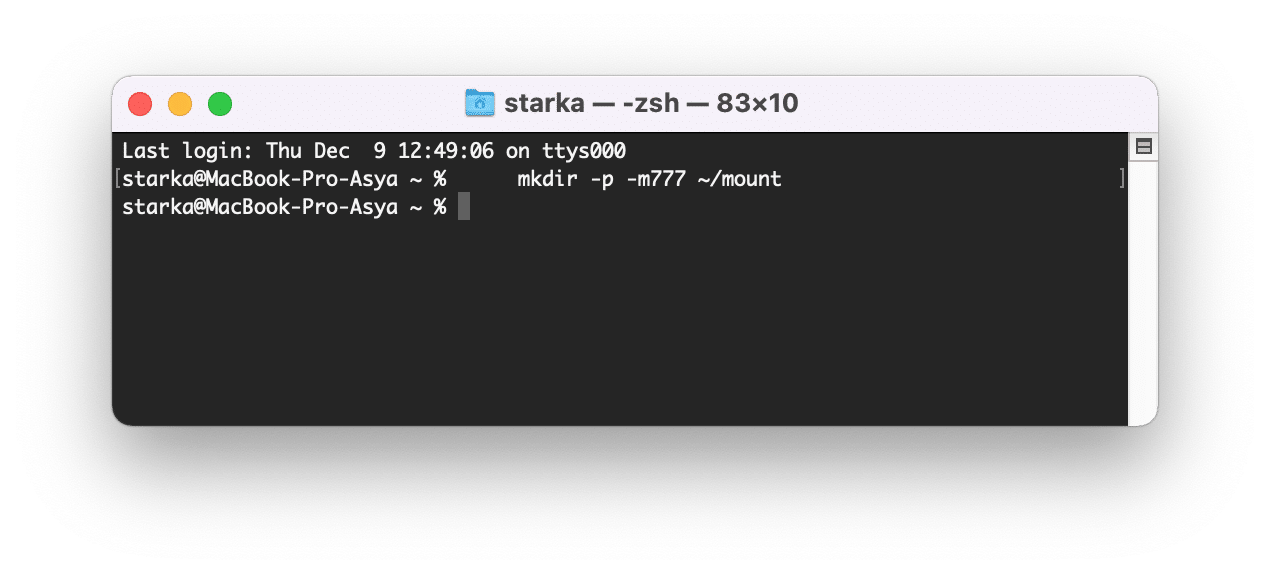
Create a new directory
mkdir -p -m777 NAME_DIRECTORY
For example, for the ~/mount directory, type the following:
mkdir -p -m777 ~/mount
-
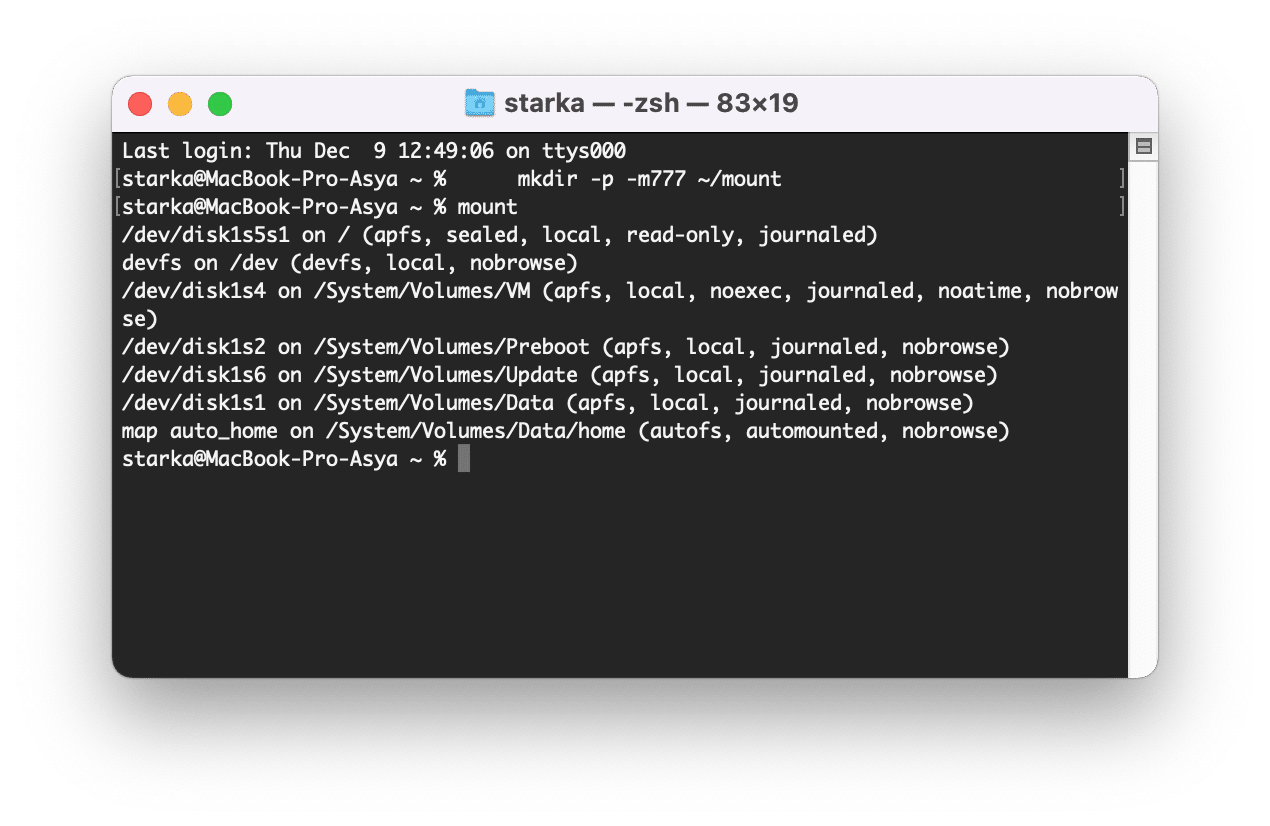
Find your root mount’s device. For this, type the following command:
mount
Chop off the last s, e.g., if your root is /dev/disk1s5s1, you’ll mount /dev/disk1s5. -
Mount the root mount’s device to have a Read & Write permission. For this, type the following command (using the values from above):
sudo mount -o nobrowse -t apfs DISK_PATH MOUNT_PATH
For example,
sudo mount -o nobrowse -t apfs /dev/disk1s5 ~/mount
-
Modify the files under the mounted directory. Remove default applications using the following command:
show the application directory and press the Return (Enter) key
cd ~/MOUNT_PATH/System/Applications/
For example,
cd ~/mount/System/Applications/
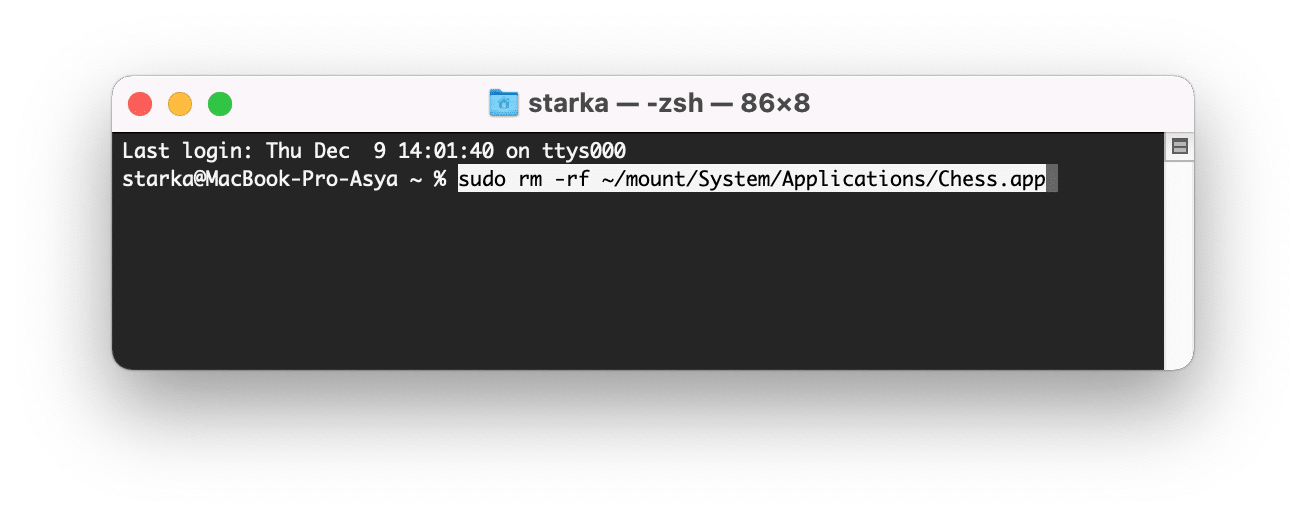
Now you can start deleting applications using Terminal. To remove apps with Terminal, use the command
sudo rm -rf ~/MOUNT_PATH/System/Applications/NAME_APPLICATION.app
Please be careful: when you remove items via Terminal, the system does not ask for confirmation. Each application has its own command:
- Safari: sudo rm -rf ~/mount/Applications/Safari.app
- Mail: sudo rm -rf ~/mount/System/Applications/Mail.app
- FaceTime: sudo rm -rf ~/mount/System/Applications/FaceTime.app
- QuickTime: sudo rm -rf ~/mount/System/Applications/ QuickTime\ Player.app
- Notes: sudo rm -rf ~/mount/System/Applications/Stickies.app
- Chess: sudo rm -rf ~/mount/System/Applications/Chess.app
- Photo: sudo rm -rf ~/mount/System/Applications/Photo\ Booth.app
- ITunes: sudo rm -rf ~/mount/System/Applications/iTunes.app
-
Then run this command:
sudo bless --folder MOUNT_PATH/System/Library/CoreServices --bootefi --create-snapshot
For example:
sudo bless --folder ~/mount/System/Library/CoreServices --bootefi --create-snapshot
- Reboot your Mac. The system automatically be booted from the new snapshot you have. The default apps will be removed.
Please, don’t forget to enable back SIP и SSV to protect yourself from removing other important apps by mistake. For this, again restart your Mac in Recovery mode and, in the Terminal, type these commands:
csrutil enable
csrutil authenticated-root enable
If you have macOS Ventura, follow these steps to turn off FileVault:
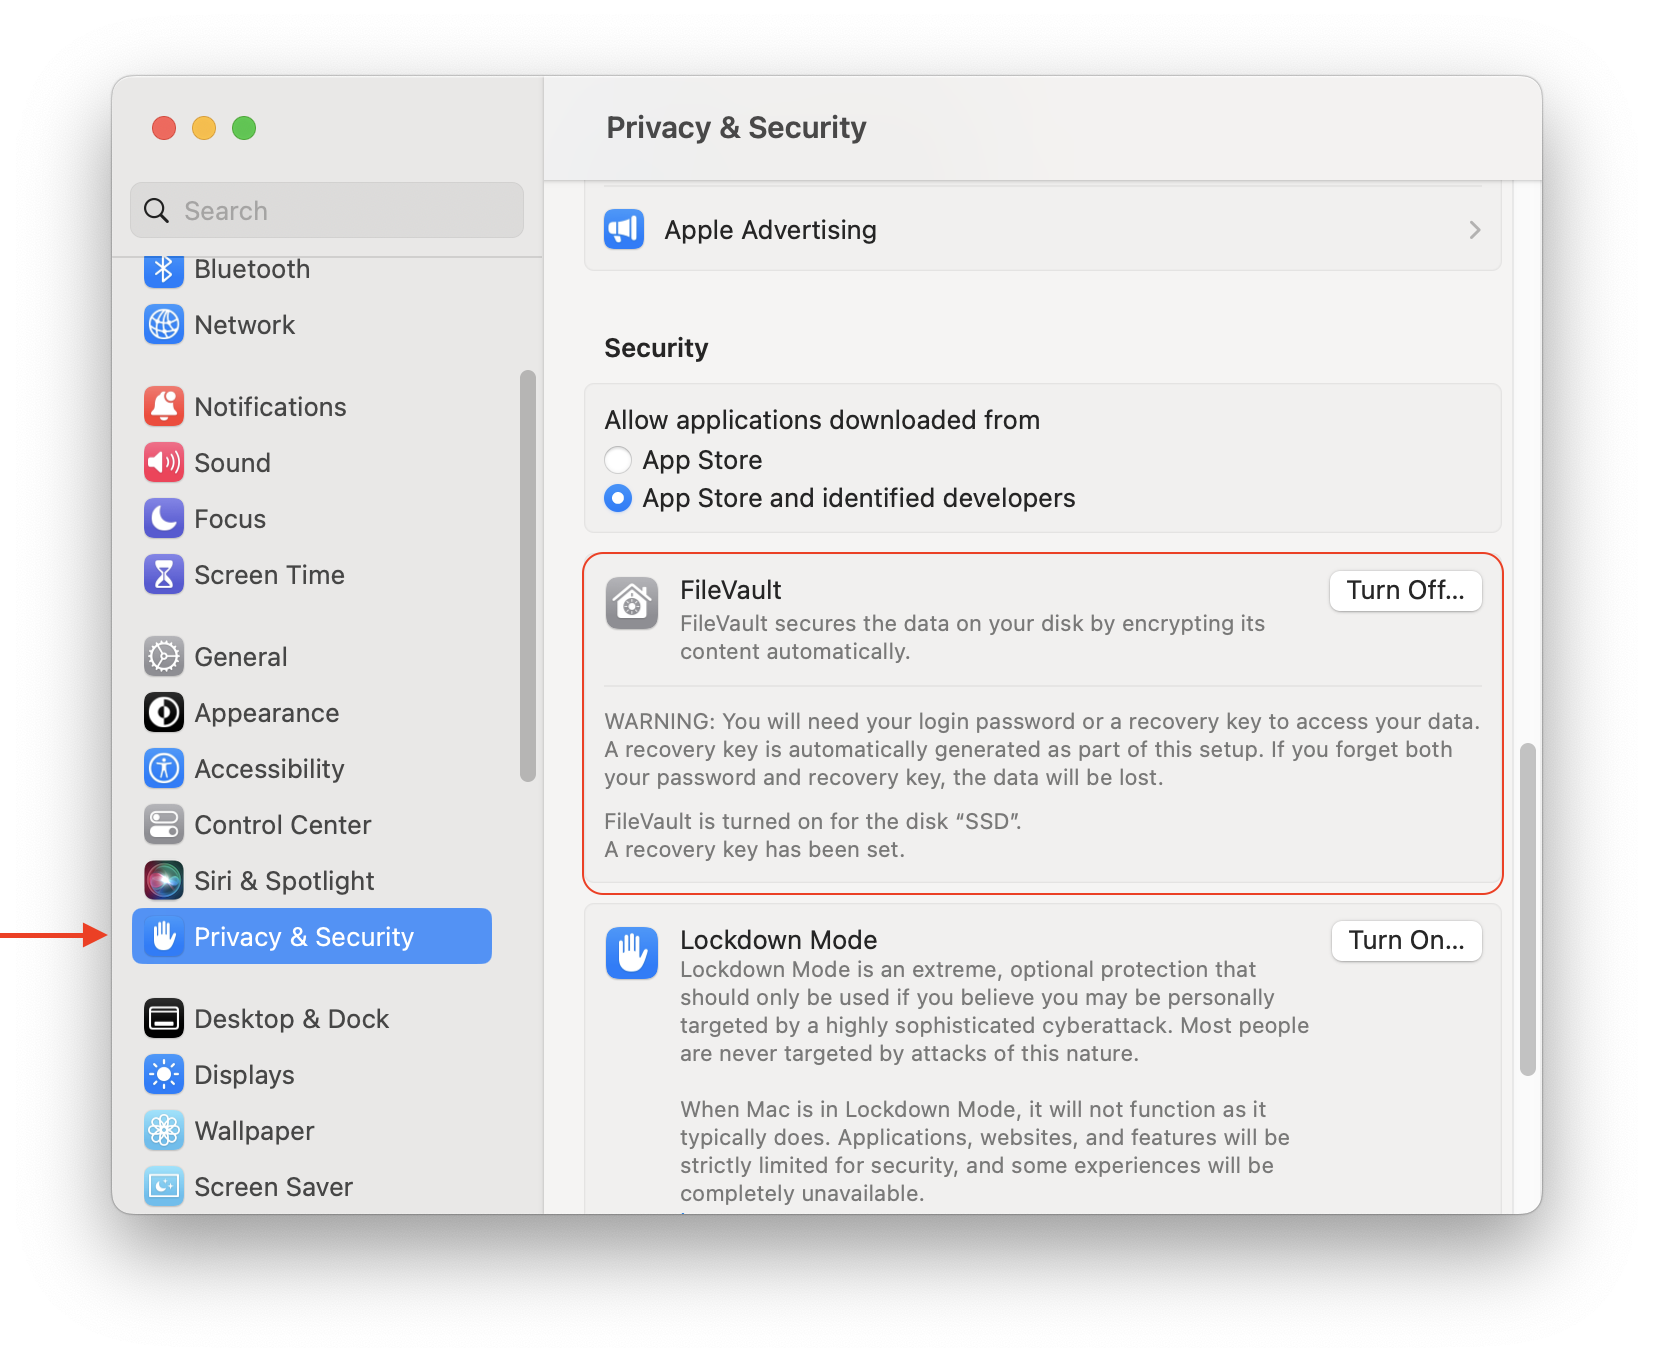
Note: On macOS Ventura (13.0), Safari is located in the following root: /System/Volumes/Preboot/Cryptexes/App/System/Applications/Safari.app. This means that if you want to uninstall Safari on macOS Ventura, you need to use the following command in Terminal:
sudo rm -rf ~/mount/System/Volumes/Preboot/Cryptexes/App/System/Applications/Safari.app
That’s all!
Therefore, if you are not exactly sure what you are doing, it’s better not to attempt it!
How to correctly uninstall third-party apps on Mac
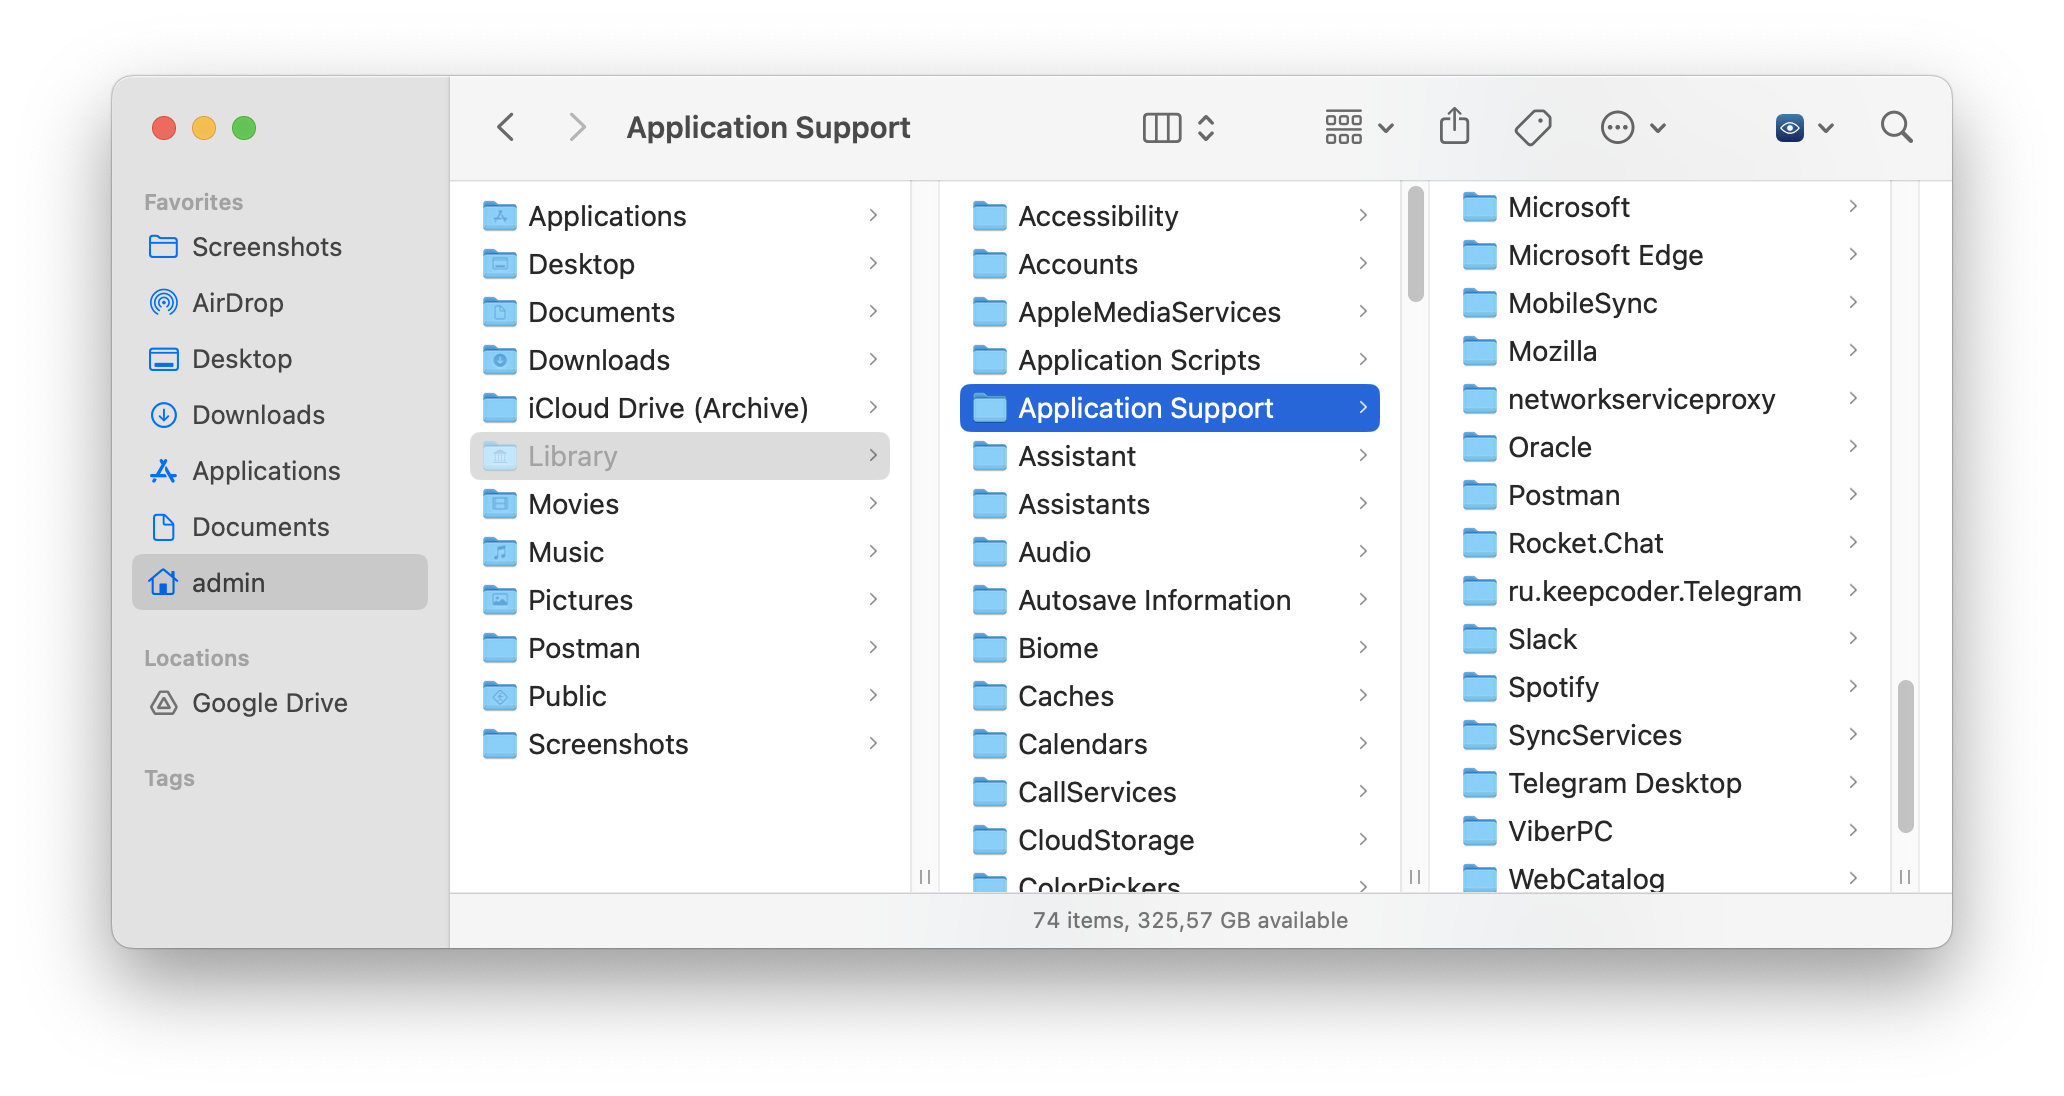
You might know that when you simply move apps to the Trash, they leave their service files on the disk. So usually you then need to go to the Library folder andremove the app’s related items from the Application Support folder. To get to Library, open Finder, press Cmd+Shift+G and type the file path ~/Library in the search bar.
Also, you can use App Cleaner & Uninstaller – a professional utility to remove applications correctly and completely. With App Cleaner & Uninstaller you can save time and do all these necessary activities in just one click.
- Launch App Cleaner & Uninstaller and swith on the Expert mode.
- Sort the apps by size.
- Select the app or the list of the biggest apps have not been used for a long time.
- Click the Remove button.
- Confirm deleting applications with all their service files.
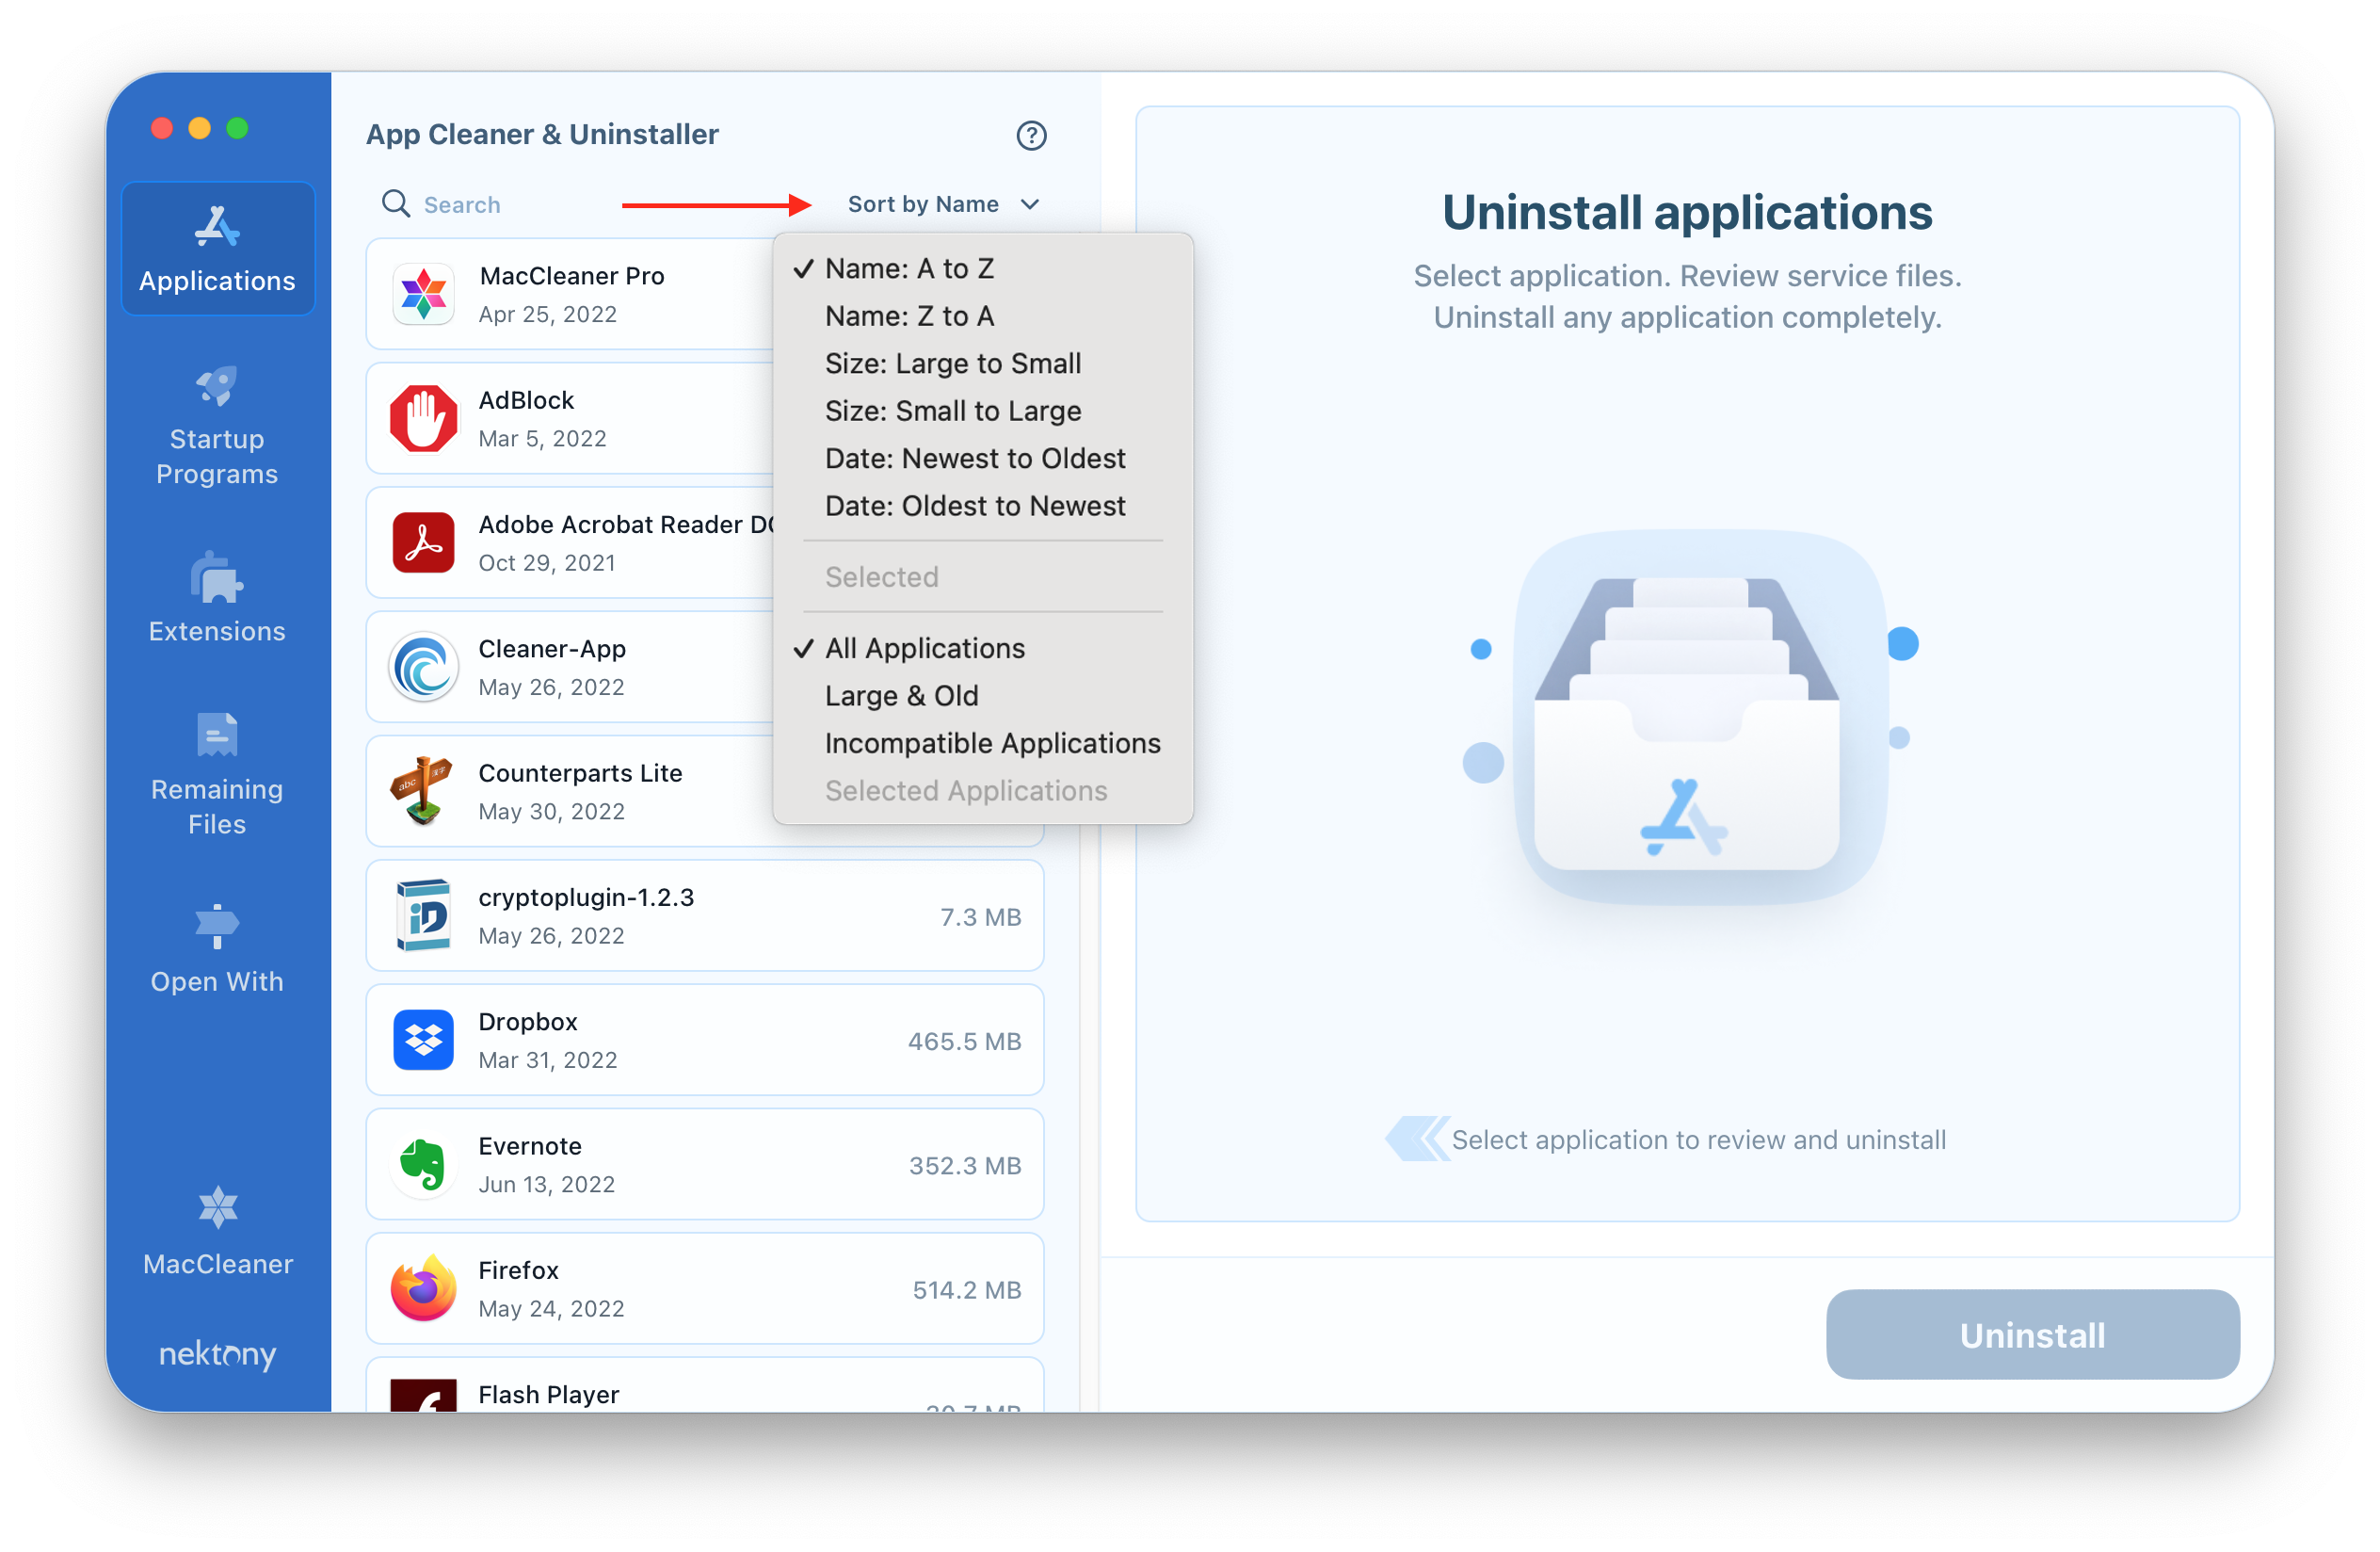
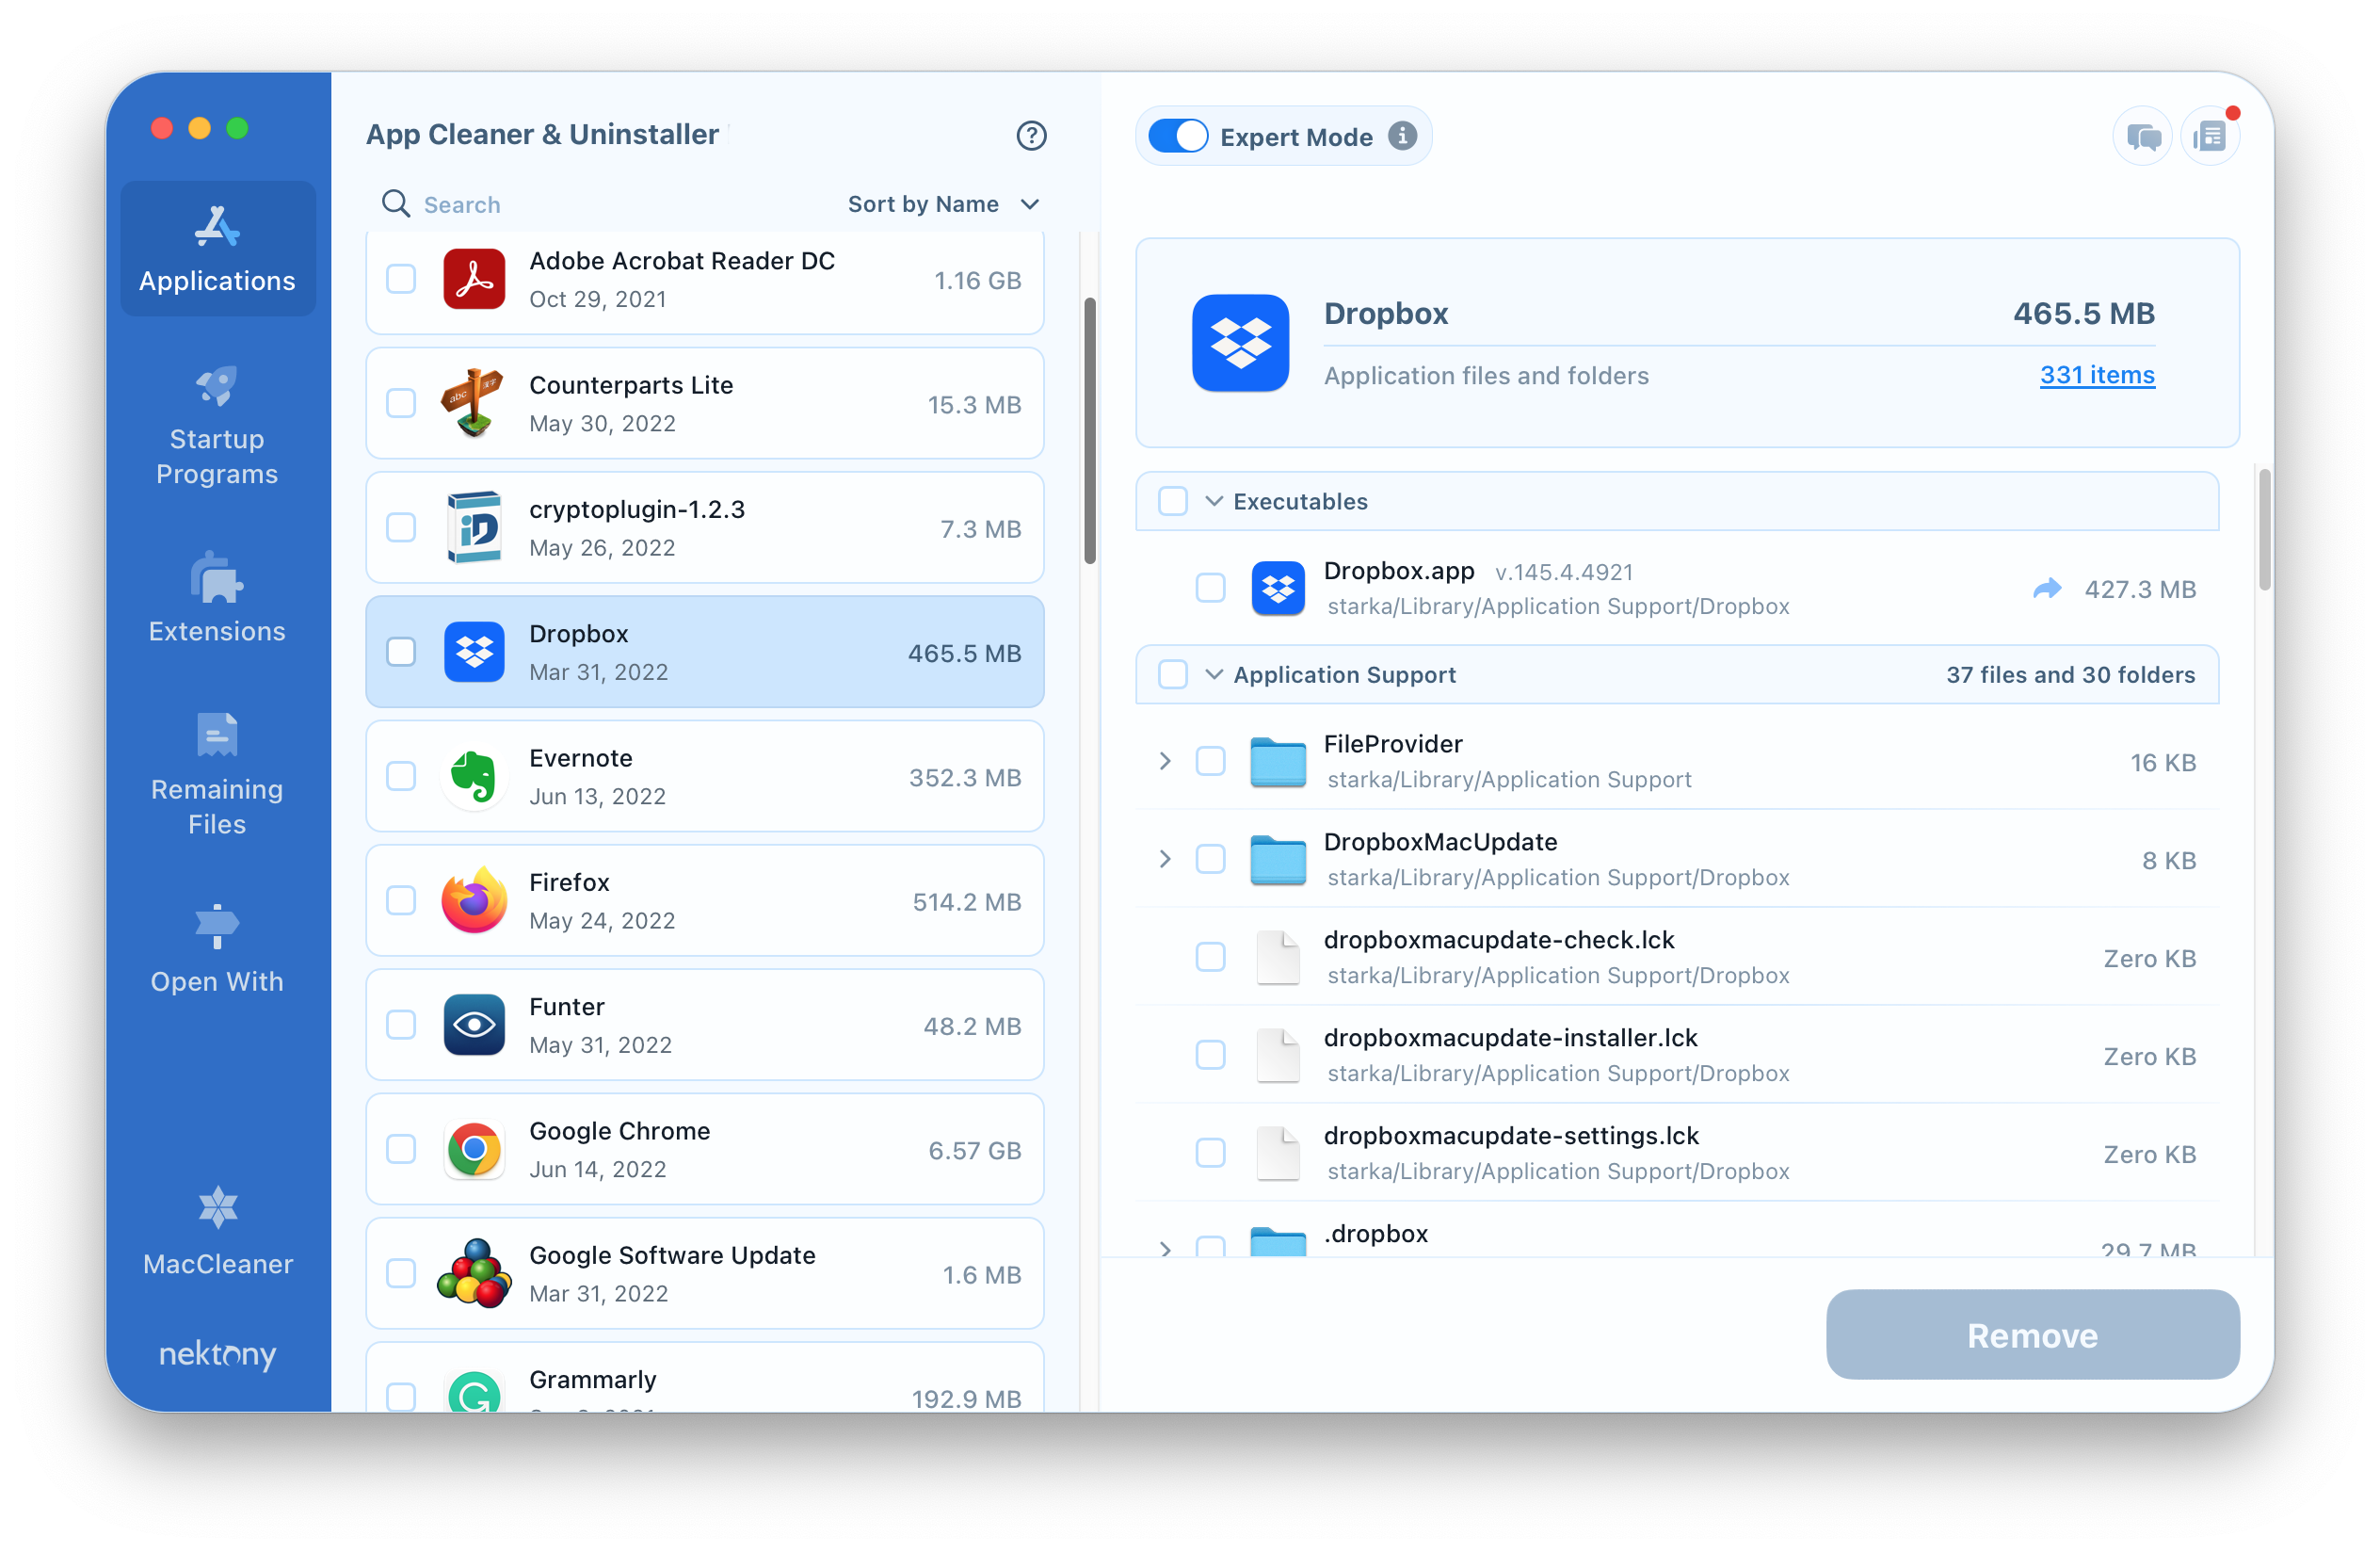
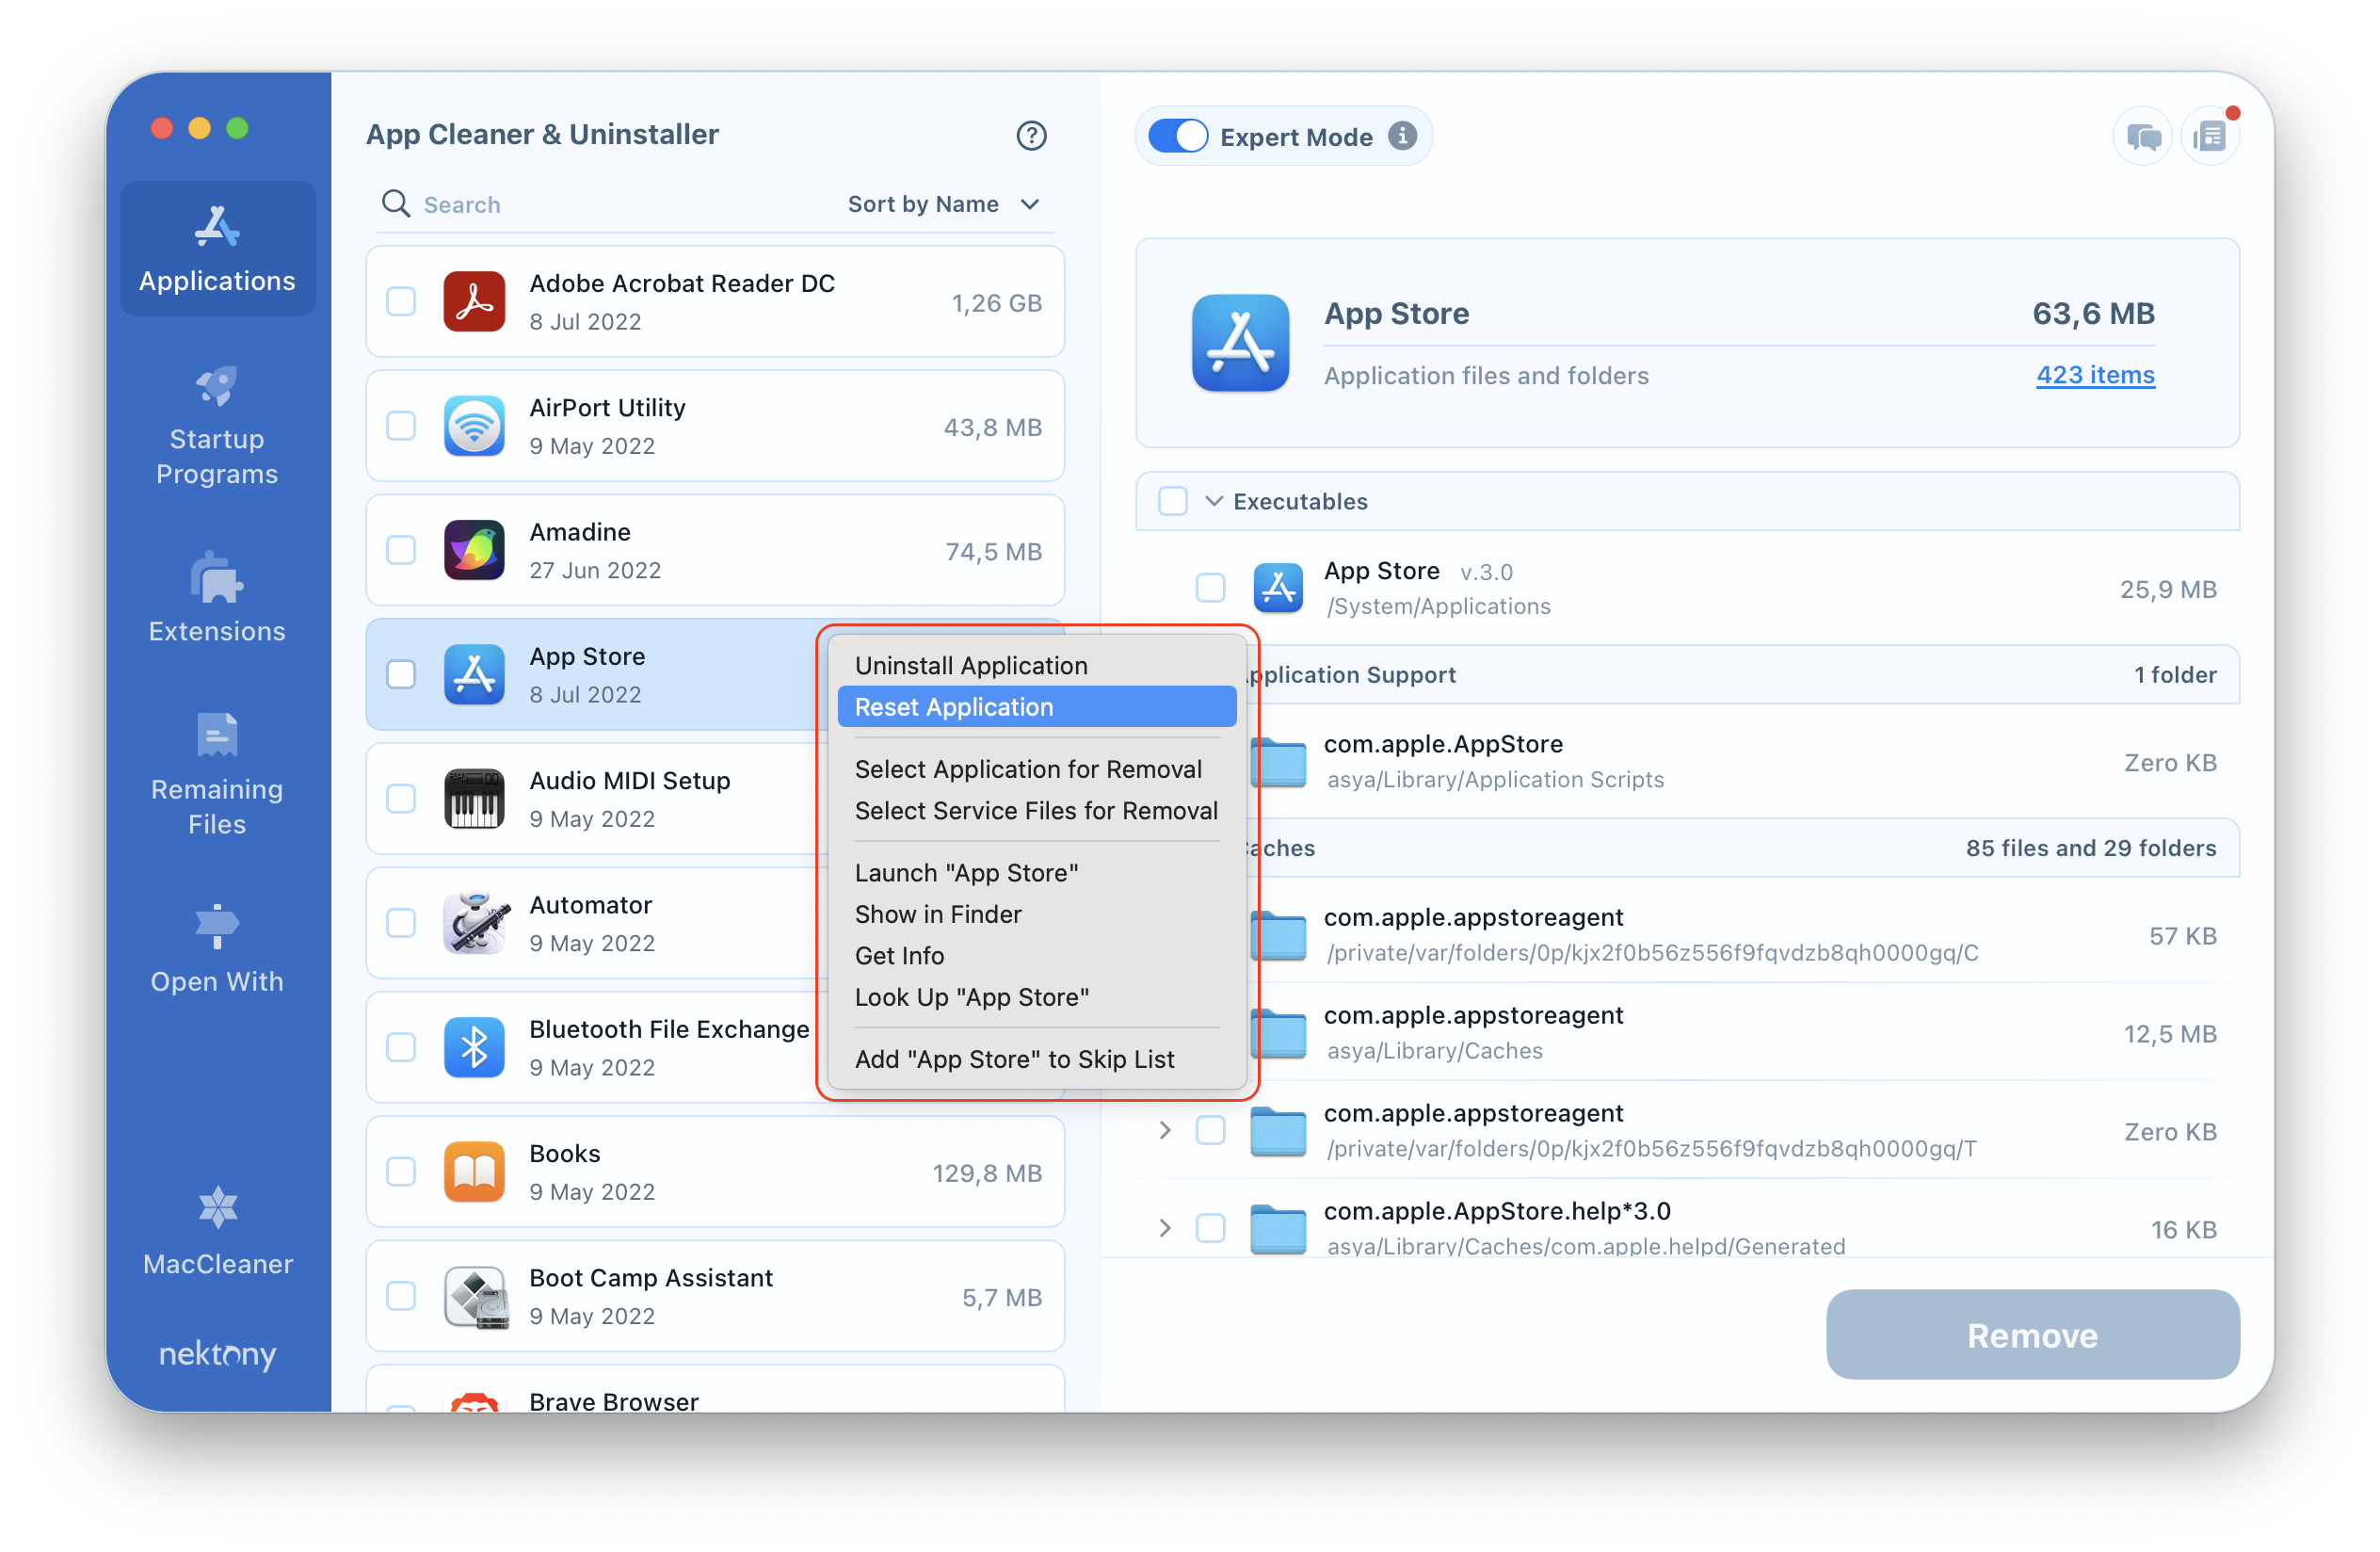
Here you will not find default Apple applications like Safari, Notes, Photos and others. As we explained above, Apple does not allow removing its default apps. That’s why App Cleaner & Uninstaller does not uninstall such apps as well. However, you can remove the service files of default apps and reset them.
How to reset default Apple apps
- Launch App Cleaner & Uninstaller.
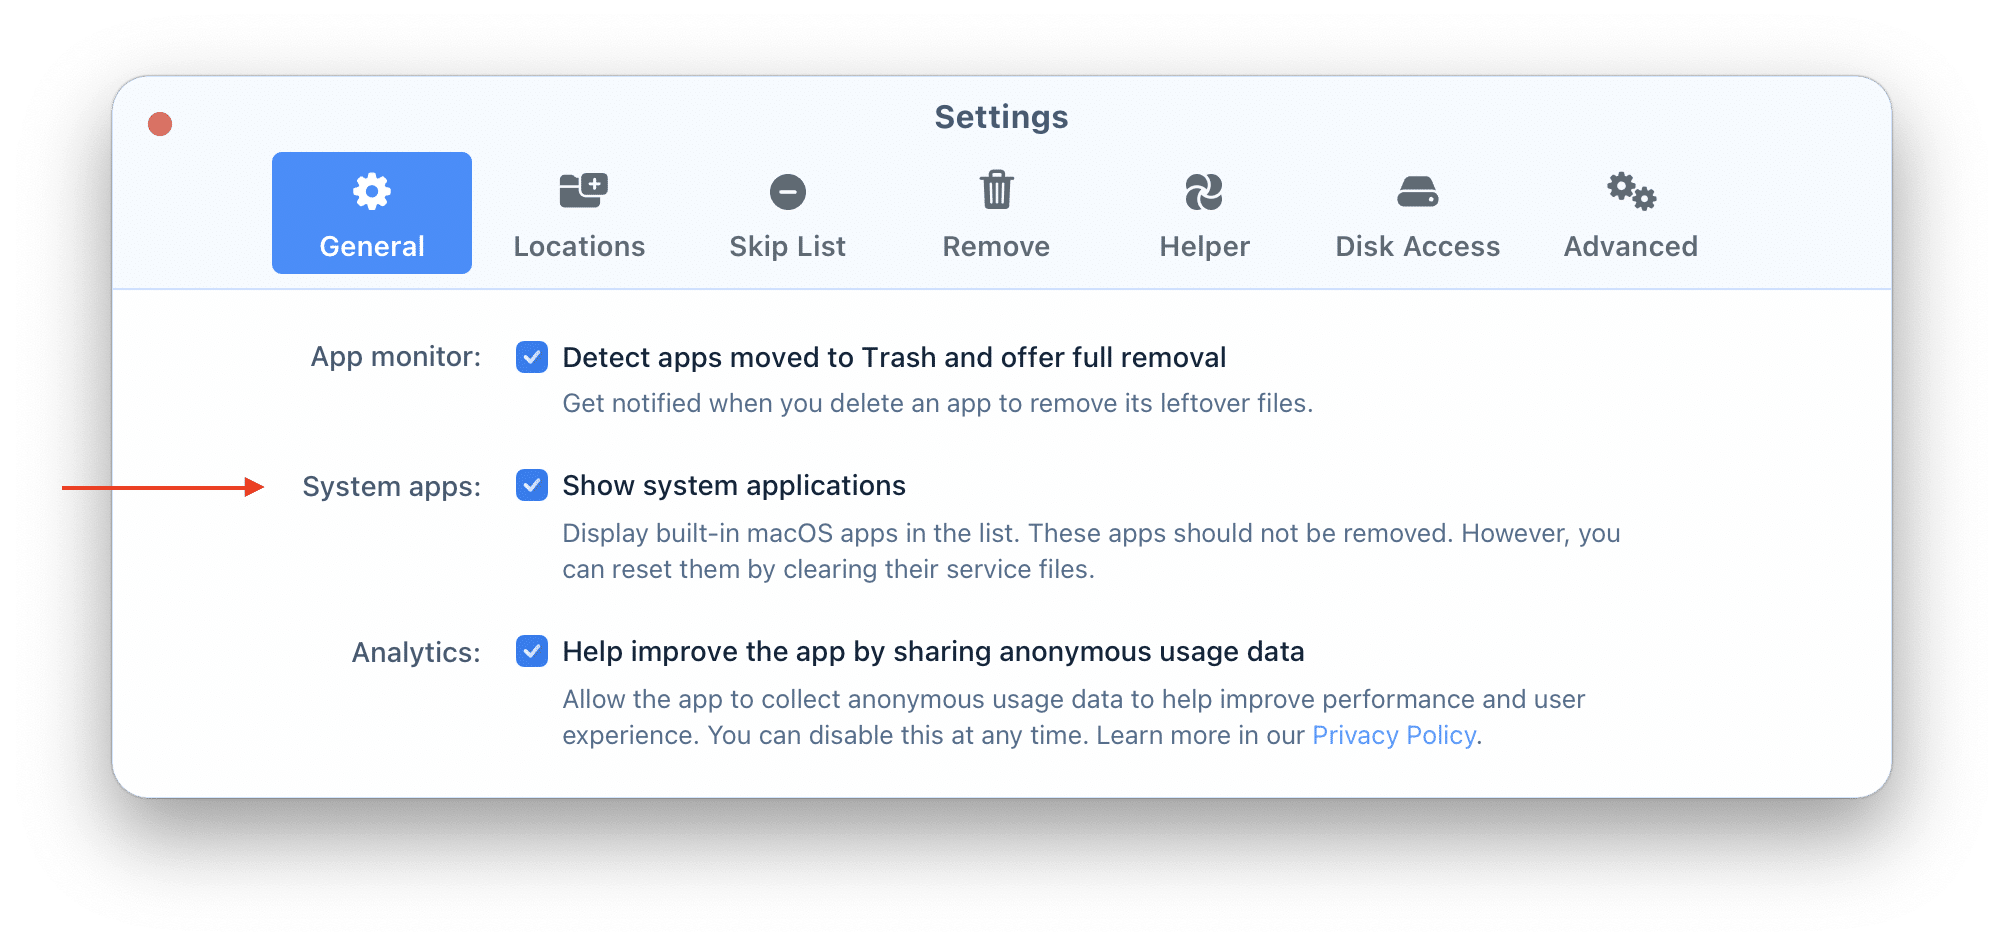
- Go to its settings and enable Show system applications in the General tab.
- Find system apps and select their service files for removal.
- Click on Remove.
Thus, if you need to free up space on your Mac, we recommend uninstalling only third-party applications and clear service files of default apps. With App Cleaner & Uninstaller you’re able to uninstall apps in lesst than a minute.


Peculiar article, just what I was looking for.|