July 25, 2025
How to remove protected apps when using App Cleaner & Uninstaller
When you are removing applications using App Cleaner & Uninstaller from Nektony, you may face an error with deleting some service files and folders. In this case, the uninstaller tool shows the exclamation mark next to the file name in the Removal window.
This may happen for the following reasons:
- The app can’t be removed due to being locked files or folders
- Some subfolders in the ~/Library are protected from changes.
- The apps have system (kernel) extensions.
- The files are protected from removal by System Integrity Protection (SIP).
- The app has wrong permission for the configuration file.
- The Trash folder is damaged.
After understanding what is causing the issue, you will be able to uninstall the apps completely. Here’s how to do that.
1. The app can’t be removed due to being locked files or folders
If you are trying to remove apps with the Nektony’s uninstaller, you can get the message that the files could not be removed to Trash because you don’t have permission to access them.
To give permission, you need to manually check if your files are locked or if they are located in a folder which is also locked. To check it, right-click the file or folder, select Get Info from the context menu, and look for it in the General section.

If the folder is locked you can’t remove the files in it. Uncheck this option to be able to modify or remove the folder.
After getting permission to operate the files, you will be able to remove files and folders using App Cleaner & Uninstaller.
2. Some subfolders in the ~/Library are protected from changes.
- (the contents of Mail)
~/Library/MailCopy
- (the contents of Messages)
~/Library/MessagesCopy
- (Safari browsing history)
~/Library/SafariCopy
- (the contents of Safari Cookies)
~/Library/CookiesCopy
~/Library/HomeKitCopy
~/Library/IdentityServicesCopy
~/Library/Metadata/CoreSpotlightCopy
~/Library/PersonalizationPortraitCopy
~/Library/SuggestionsCopy
- the contents of Miscellaneous
- the contents of iTunes backups
- Time Machine backups
That’s why to allow the uninstaller tool to remove apps completely, you need to add it to Full Disk Access in the System Settings.
Here’s how:
- Open System Settings.
- Go to the Privacy & Security settings.
- Scroll down and select Full Disk Access.
- Turn on full disk access for App Cleaner & Uninstaller.
Now launch the uninstallation app and try again to remove the app that you faced an issue with. Now the issues connected with this reason should be solved.
3. The apps have system (kernel) extensions.
Some apps create system extensions that are able to protect themselves from being removed. Also, these files can protect other service files and folders from being removed. It’s impossible to remove such files to Trash, as Finder ignores the removal command. You can remove kext files only in the recovery mode of your Mac.
Learn in our previous article how to uninstall system (kernel) extensions. Removing kexts will allow you to delete all other service files of the problematic application.
4. The files are protected from removal by System Integrity Protection (SIP).
Apple forbids modifying system items on Macs. The SIP limits the actions that the user can perform on protected parts of the Mac operating system. The problem is that, even if you have a third-party application, it may be able to create files that Apple thinks are default system files. In this way, such applications protect themselves from being deleted.
So, to remove a problematic file or app, you would need to disable the Apple System Integrity Protection. Below, we will show how to do this.
How to disable SIP on Intel Macs:
- Restart your Mac and press Command+R key shortcut while the reboot is in progress. You will see an unusual startup window – this is the recovery mode. In the Menu bar click → .
- Type the following command in the Terminal window and press Return:
csrutil disableCopy
- You will see that your System Integrity Protection is disabled.
- Restart your Mac and delete the problematic files.
Important
After you have deleted the files, don’t forget to re-enable the System Integrity Protection in order not to remove other important apps and files by mistake. For this, again restart your Mac → use Command+R shortcut → open Terminal and this time type the command
csrutil enableCopy
You should understand what files you are removing. If you are not exactly sure what you are doing, it’s better not to attempt it!
How to disable SIP on M1 Macs:
- Shut down your Mac.
- Press and hold the Power button. Keep holding it until you see loading startup options.
- Click Options and then click Continue. If asked, select a volume for recovering and click Next.
- Select your administrator account and hit Next.
- Provide your admin user password and click Continue.
- In the Menu bar, click and .
- Type in Terminal the next command:
csrutil disableCopy
- Press the Return key. You will see that your System Integrity Protection is disabled.
- Restart your Mac and delete the problematic files.
5. The app has wrong permission for the configuration file
If your file system permissions are set incorrectly, App Cleaner & Uninstaller may not be able to uninstall applications for you correctly. Instead, you will receive error messages that will prevent you from deleting files. In this case, you can try to restore the sudo file permissions to see if this solves the issue for you:
- Open → go to the and click on → select → in the search field type and press Return.
/etcCopy
- Locate and select the following file:
sudoersCopy
- Right click on the file and select
- In the section click on the icon in order to make changes. You will be asked to enter the administrator’s password.
Change the following file permissions as it is shown in the screenshot below:
- system – Read only
- wheel – Read only
- everyone – No access
- Click on the icon once again in order to lock editing.
After you have followed through with these instructions, return to App Cleaner & Uninstaller and try to remove those files again. The issue should be solved.
6. The Trash folder is damaged
You may face an issue when you are trying to remove files with App Cleaner & Uninstaller and find you have to open Finder and manually delete each item one by one; this is all very time-consuming. This is happening due to a bug in the macOS, when the Trash folder turns into a Trash file and you cannot move a single item to the Trash bin.
To solve this issue, please follow these steps:
- Open Finder and go to your Home folder.
- Press the Command+Shift+dot shortcut. It will show hidden files on your Mac.
- Find and remove the file named “Trash“. Make sure that you are deleting a file, not a folder.
- Then try to remove some unneeded files from Finder. Check if the removed files appear in the Trash folder. If they do, the issue is solved.
- Press again Command+Shift+dot to hide hidden files in Finder.
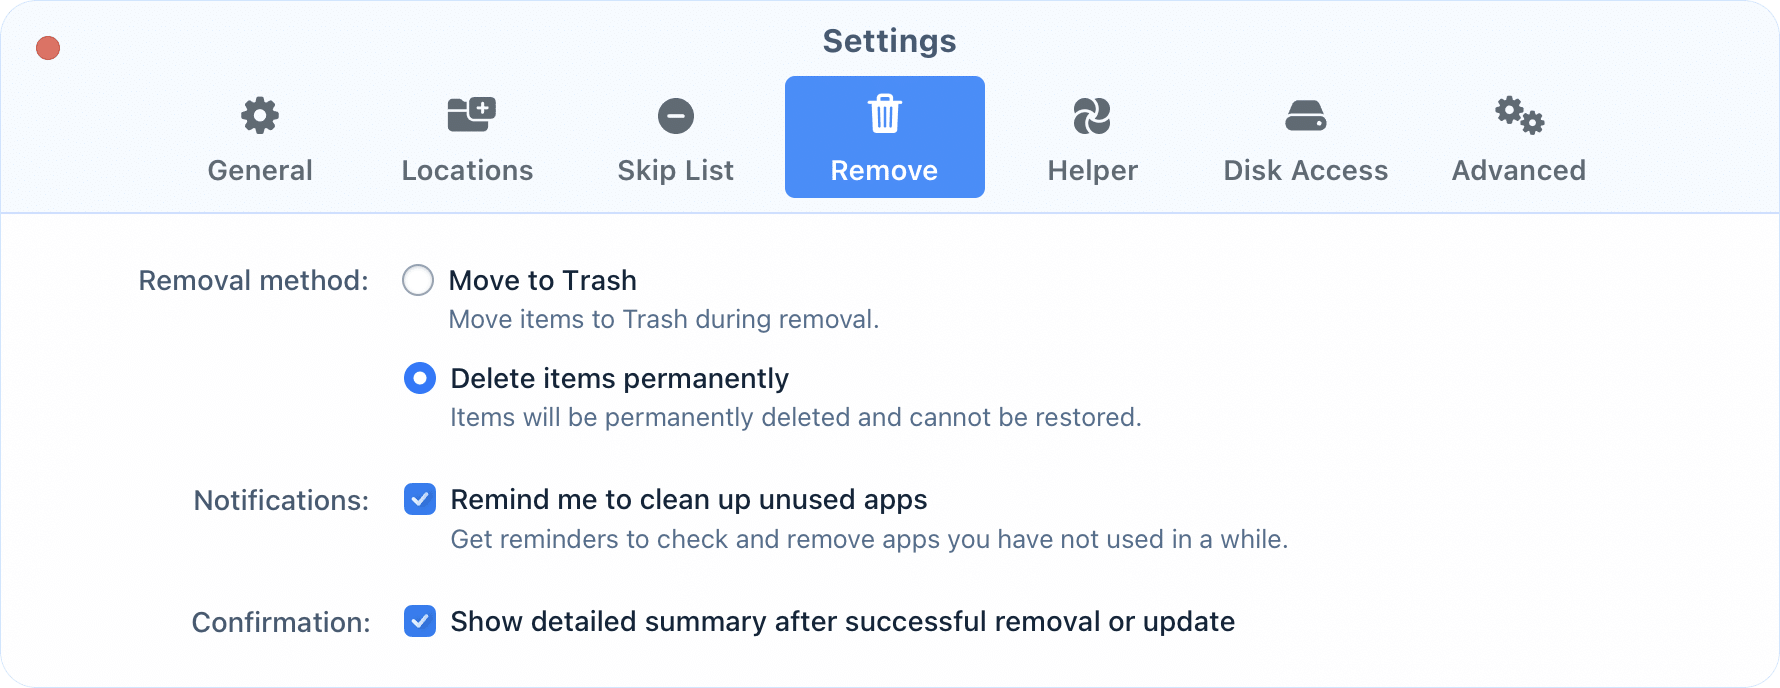
- Open App Cleaner & Uninstaller Settings. You can access it from the menu bar.
- Go to the Remove tab and make sure that the option Delete items permanently is disabled.
Now App Cleaner & Uninstaller can move apps and files to the Trash without any problem.

If you are still experiencing issues with deleting specific service files or folders, don’t hesitate to get in touch with our support team.


