If you are using iDrive and for some reason now want to switch to another cloud storage, this article is for you. Most users have a problem when they are trying to remove the app. So just read on to learn how to uninstall iDrive for Mac completely and safely.

Contents:
Uninstall iDrive Manually
There are several ways to uninstall applications on Mac. Most programs provide their own uninstaller tools so that it is possible to remove an app completely in several clicks. However, iDrive doesn’t have its own uninstaller, so you would need to remove it manually and search for its leftovers, also manually. Let’s follow the step-by-step guide.
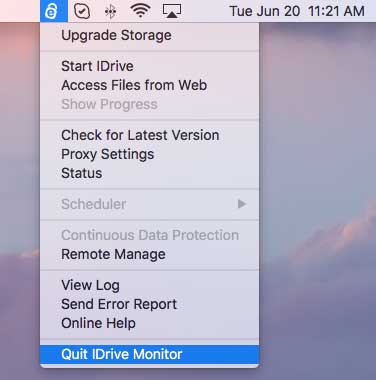
- First, you need to quit iDrive. For this go to Menu Bar → click the iDrive icon → select Quit iDrive Monitor.
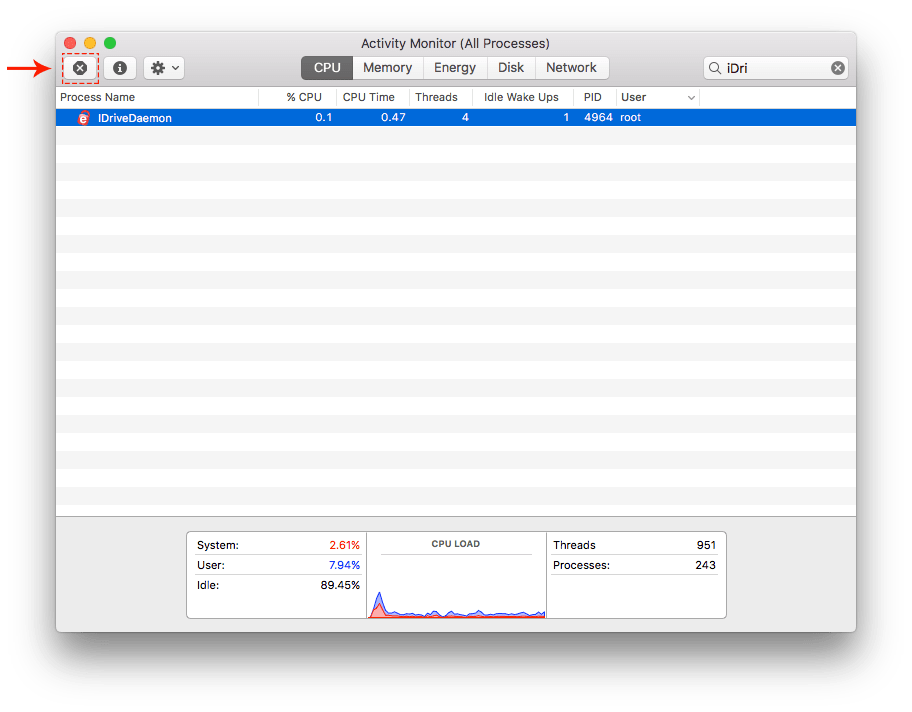
Please note, when you quit iDrive, its agents remain running in the background. Later they may create some residual files when you are trying to remove the app. So it is highly important to close all running processes related to the app with the help of Activity Monitor.
- Open Activity Monitor → select iDrive Daemon there → click the “close” icon in the top-left corner → and then reboot your Mac.
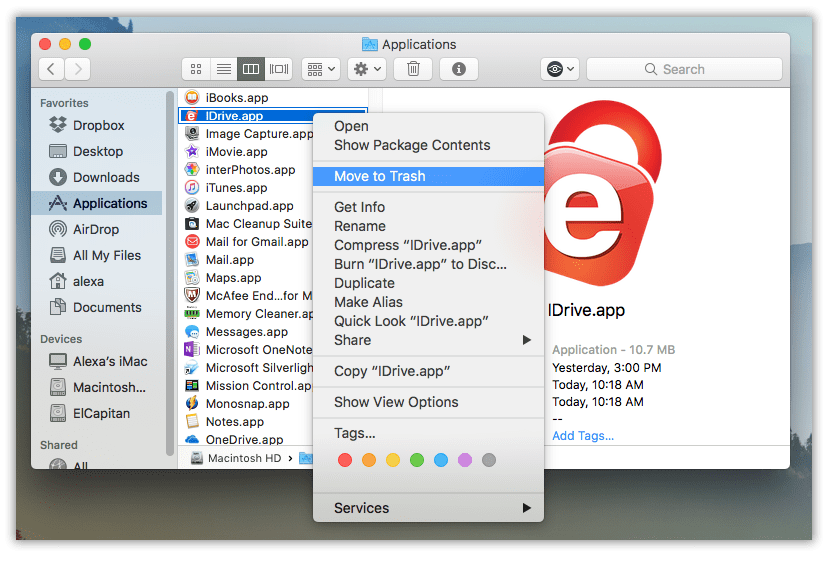
- Now you are ready to remove the app. Go to the Application folder in the Finder, find iDrive and delete it with the context menu, or drag and drop it to the Trash.
-
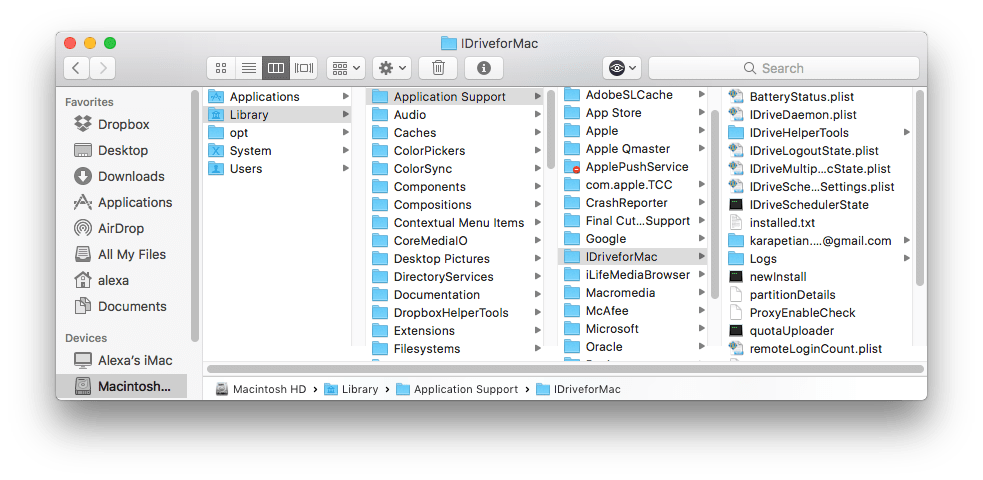
After this, it is important to remove all service files which were created by the application on your Mac. For this, go to the ~/Library folder and find the leftovers of iDrive in the following subfolders:
- ~/Library/Application Support/iDriveforMac
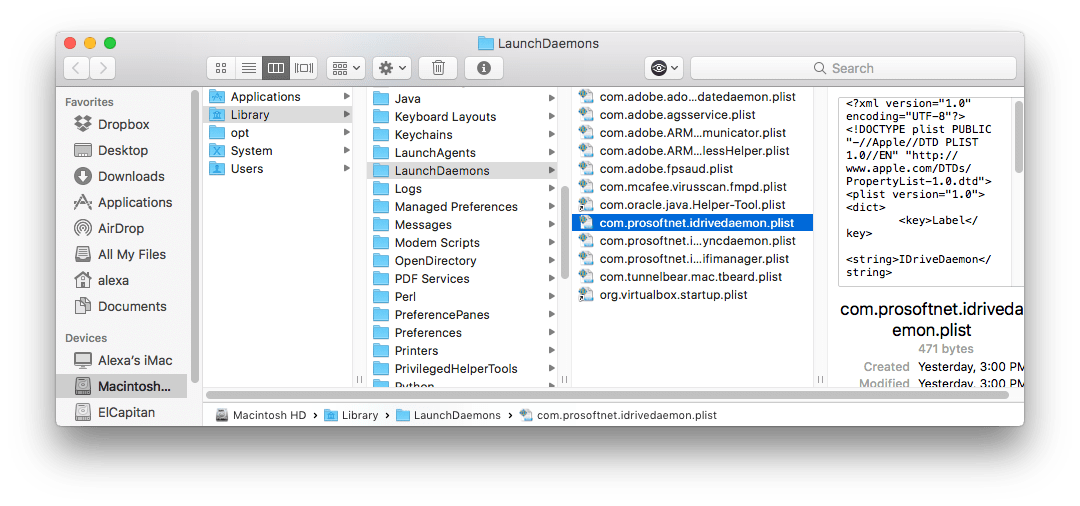
- ~/Library/LaunchDaemons/com.prosoftnet.idrivedaemon.plist
- ~/Library/Preferences/com.prosoftnet.iDrive.plist
- ~/Library/Application Support/iDriveforMac
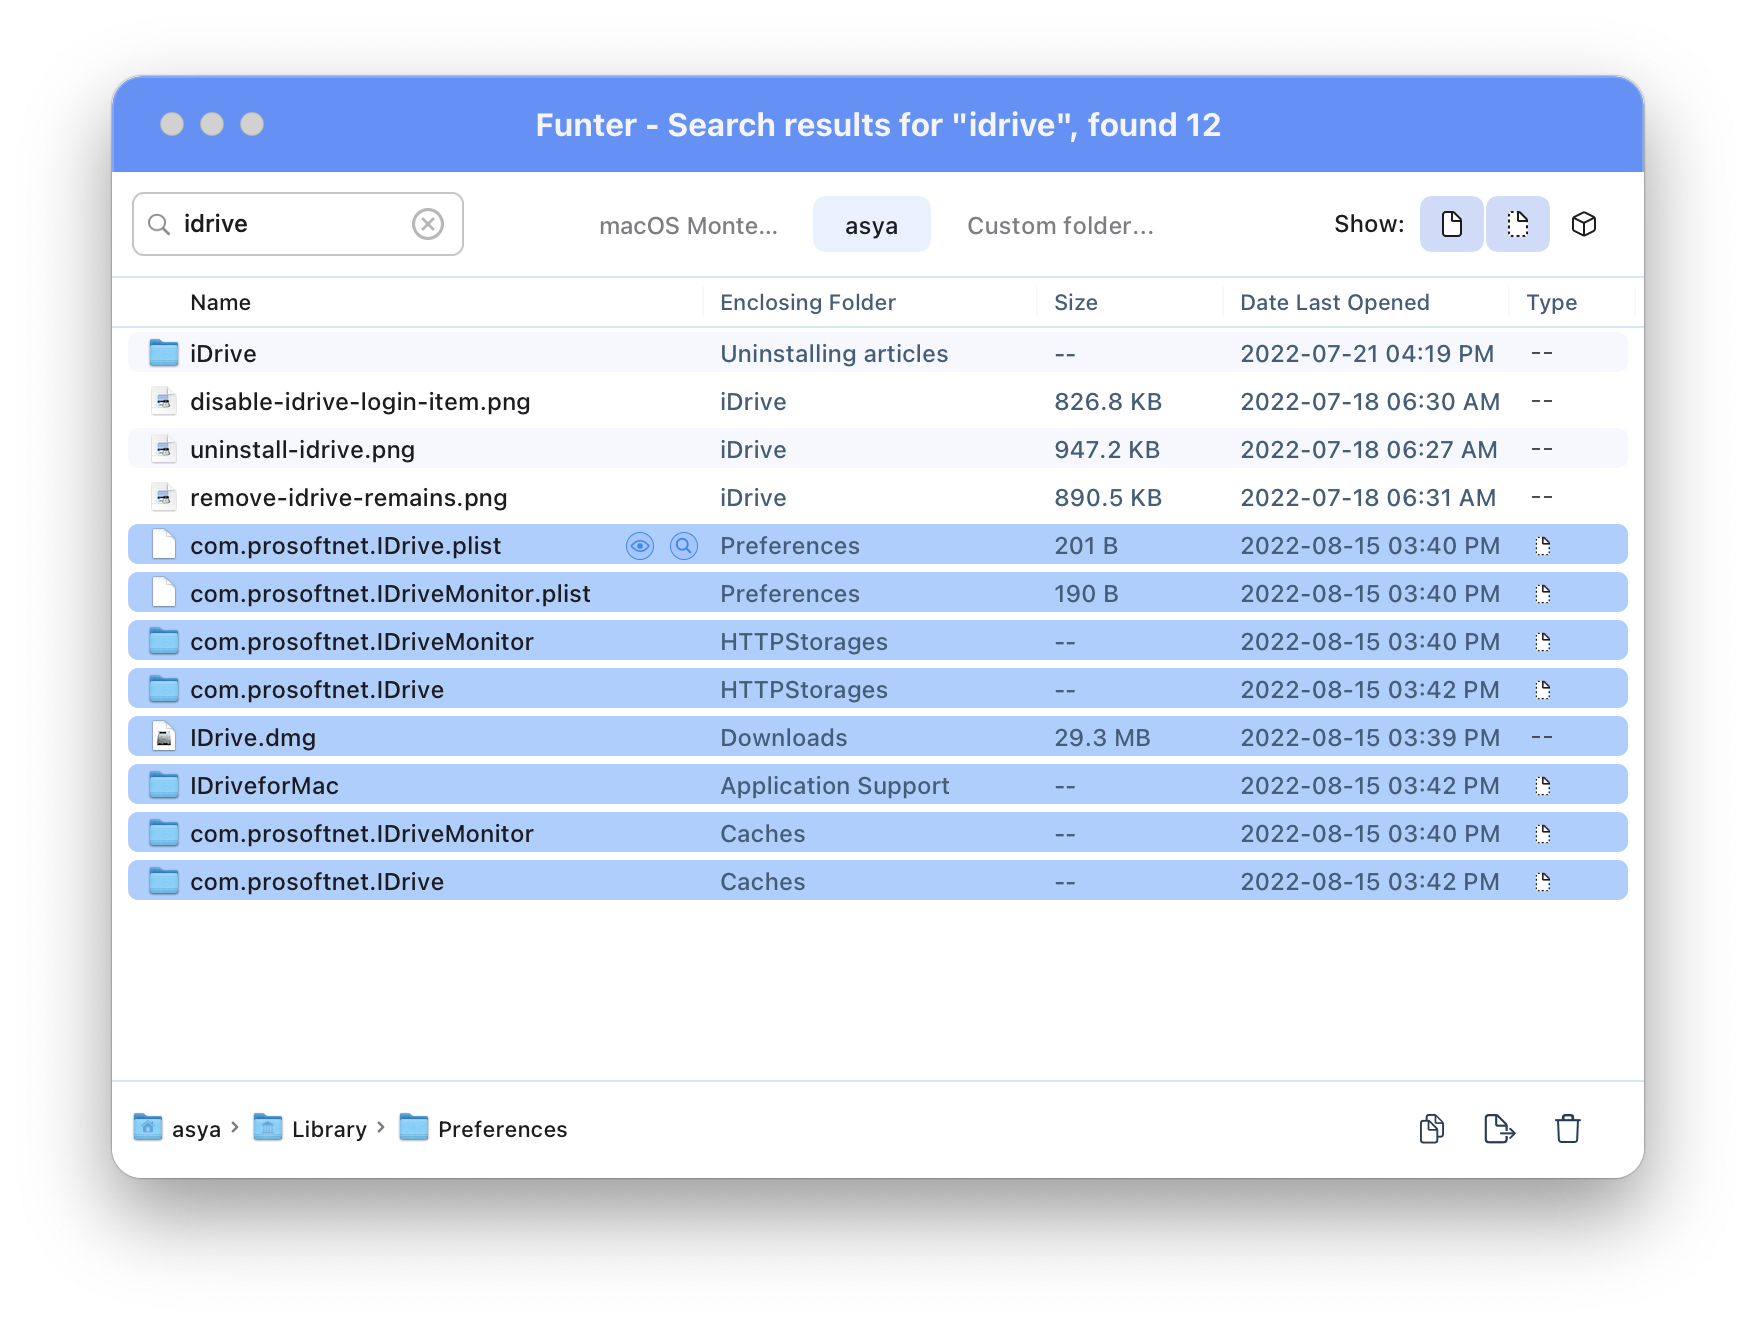
- Then reboot your Mac. The iDrive application should be uninstalled completely. However, we recommend that you check your Mac for its leftovers once again and remove whatever files you find. You can use a free tool Funter to find all files related to the app and even hidden files.
Uninstall iDrive with App Cleaner & Uninstaller
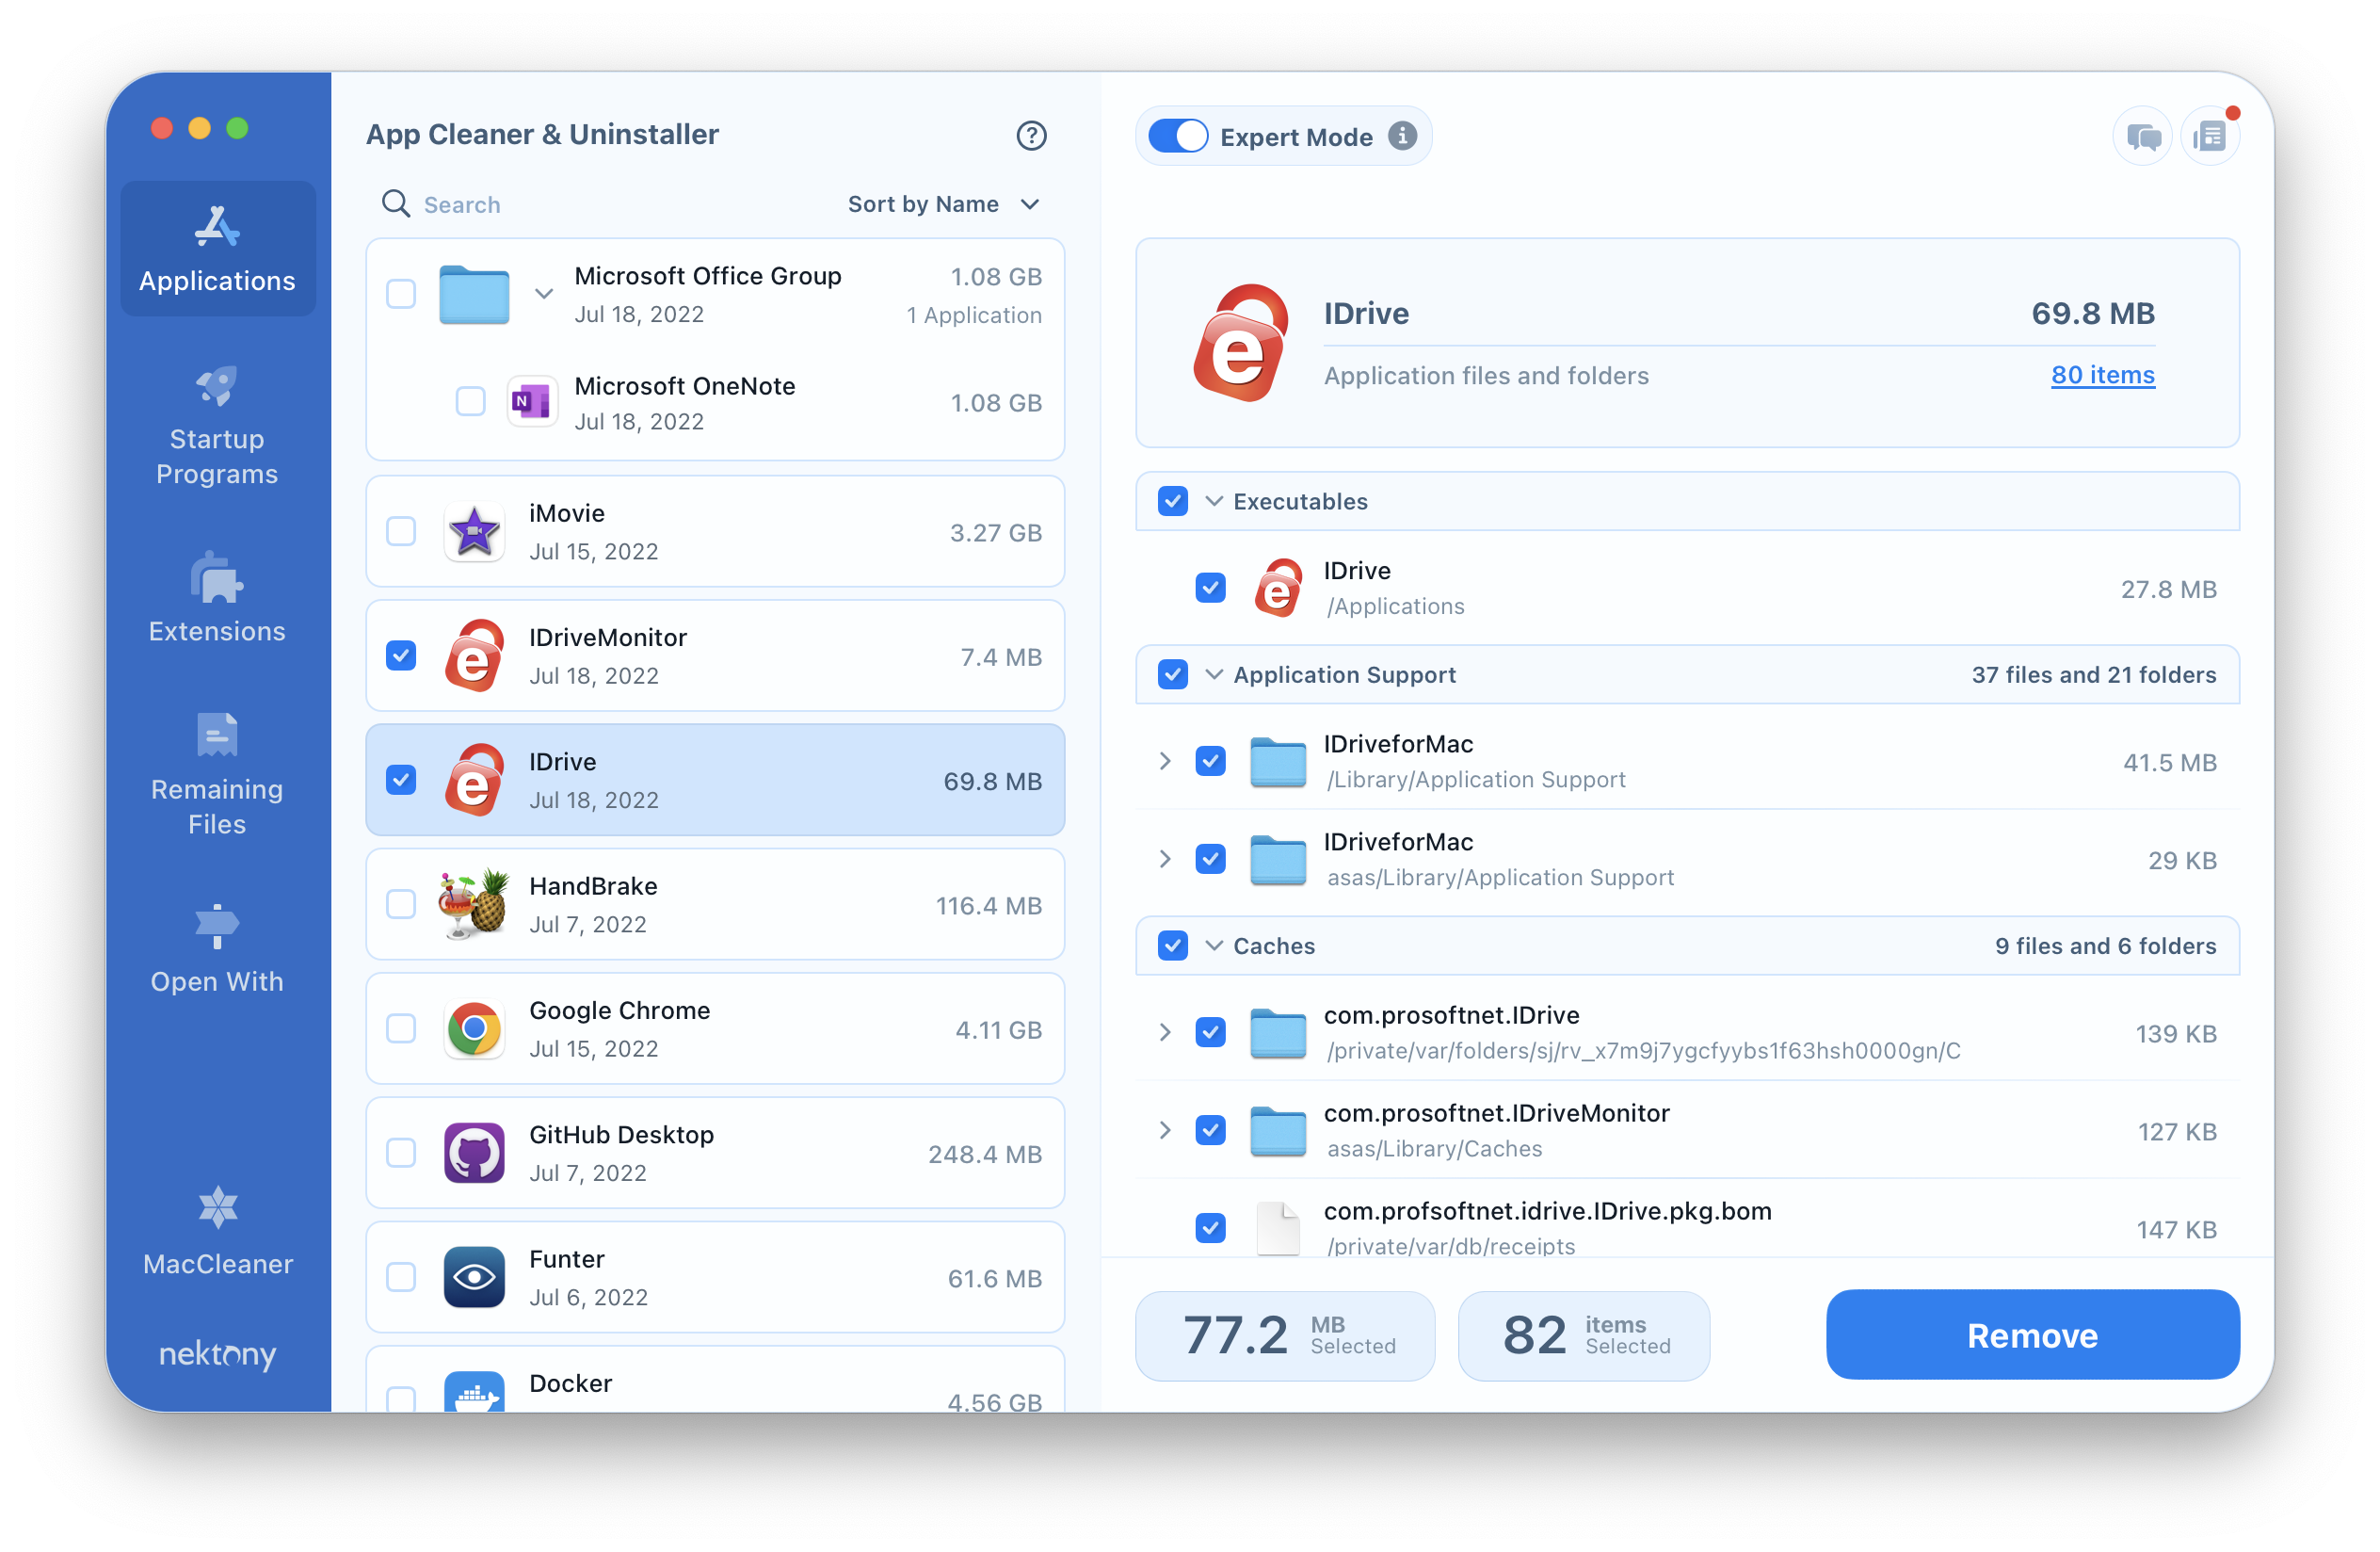
This time we promise to tell you how to uninstall iDrive quickly with just a few clicks. It is available with App Cleaner & Uninstaller.
- Please note, before removing iDrive with an uninstaller tool, you also should quit iDrive and close all its running processes.
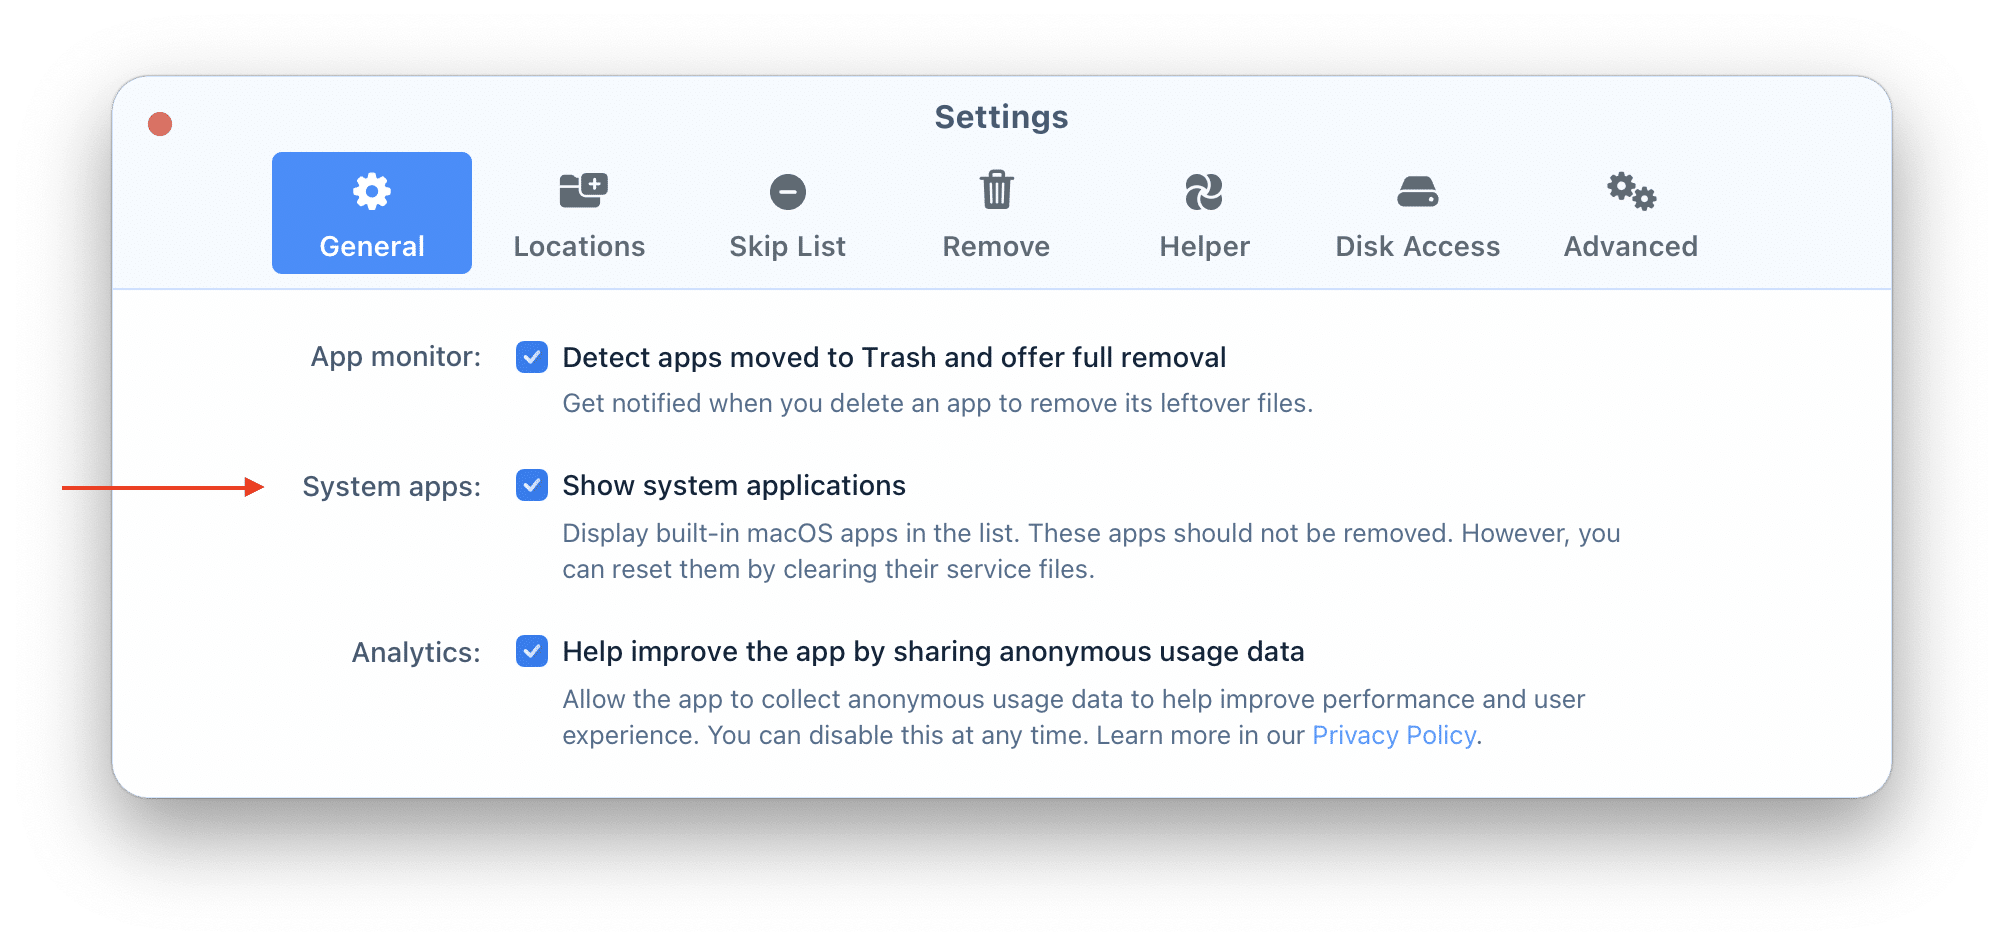
- After Mac rebooting launch App Cleaner & Uninstaller, check if the Show system applications option is enabled. Go to Menu bar → click App Cleaner & Uninstaller → select Settings → tick the checkbox near Show system applications.
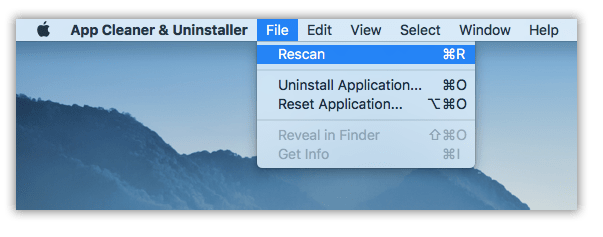
- Rescan applications: in the Menu Bar click File → Rescan.
- In the Applications tab, find iDrive, select it and click to Remove.
After these steps, the app also will be uninstalled completely.
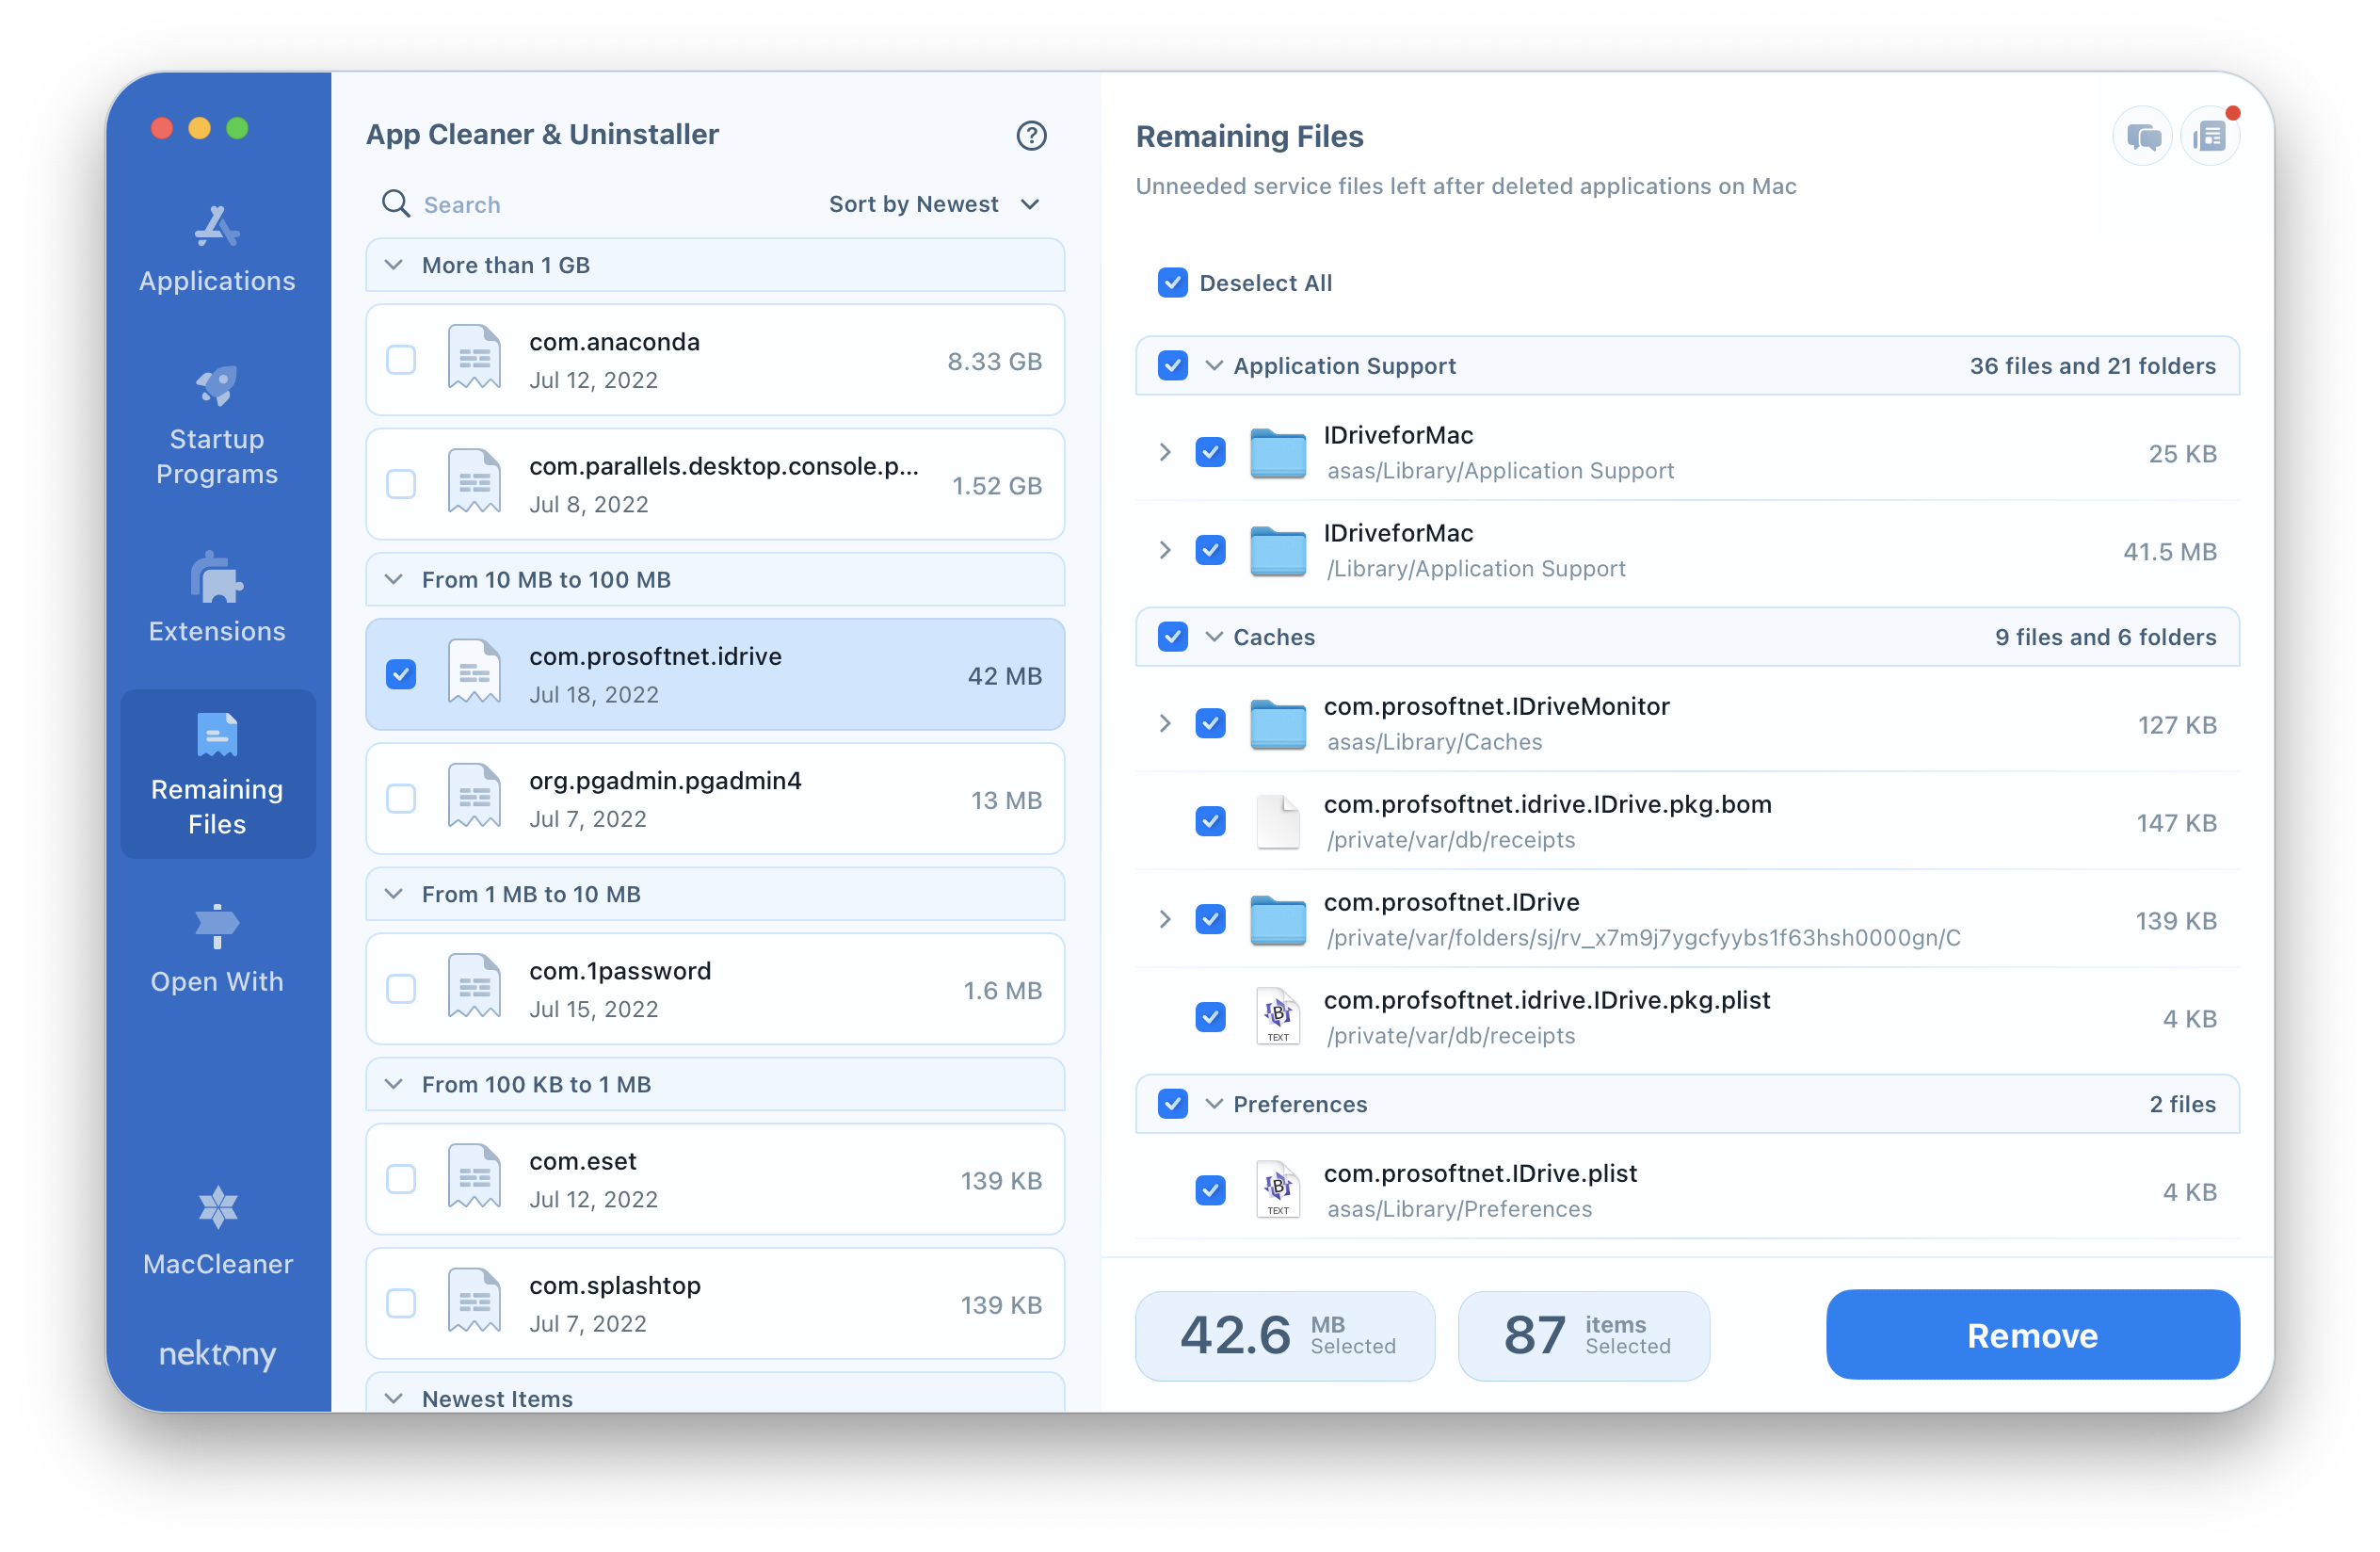
Those users who have already removed the executable file of iDrive manually, should check the Startup Programs, Extensions and Remaining Files tabs, where you will find all leftovers of the iDrive. Select and remove them.
