

Contents:
Tip: The quickest way to uninstall iMovie on Mac
App Cleaner & Uninstaller
What is iMovie and should you uninstall it?
iMovie is a video editing application from Apple which allows you to easily create movies and trailers, trim videos, add music to videos, and much more. iMovie has an intuitive interface and a wide set of editing tools. Sometimes, however, the program is only useful for casual fans and not for professional editors due to its lack of professional options. If you don’t use iMovie or you want to switch to another video editing software tool, we recommend that you remove iMovie from your Mac, which will free up significant space. In addition, if you’ve faced some issues with iMovie, reinstalling it can often help to fix the issues. Generally, we recommend that you clean up your Mac, deleting any unused applications to optimize your disk usage. We will share two ways of deleting iMovie from a Mac completely and safely.Important notes and the methodologies used to uninstall iMovie from Mac
- To completely uninstall any application on Mac – including iMovie – you have to find and remove all of its remaining files.
- We used Funter and App Cleaner & Uninstaller from Nektony to find and remove support files.
- At Nektony, we have been coding a Mac uninstalling tool for many years. We regularly check apps for all the service files they create in the system, so we know all about the temporary files that applications create on Mac. Below we will explain where to find iMovie’s service files.
- If you have any questions regarding this article or how our applications work, feel free to reach out to the Nektony support team.
How to manually uninstall iMovie from a Mac
These instructions can be used to uninstall not only iMovie but any third-party application on a Mac. Just note that, after moving an application into the Trash, it is important to find and remove its caches and other service files. We will explain where to find applications’ support files.Steps to uninstall iMovie
- Quit iMovie.
- In Finder, go to the Applications folder → Select the iMovie app and move it to the Trash.

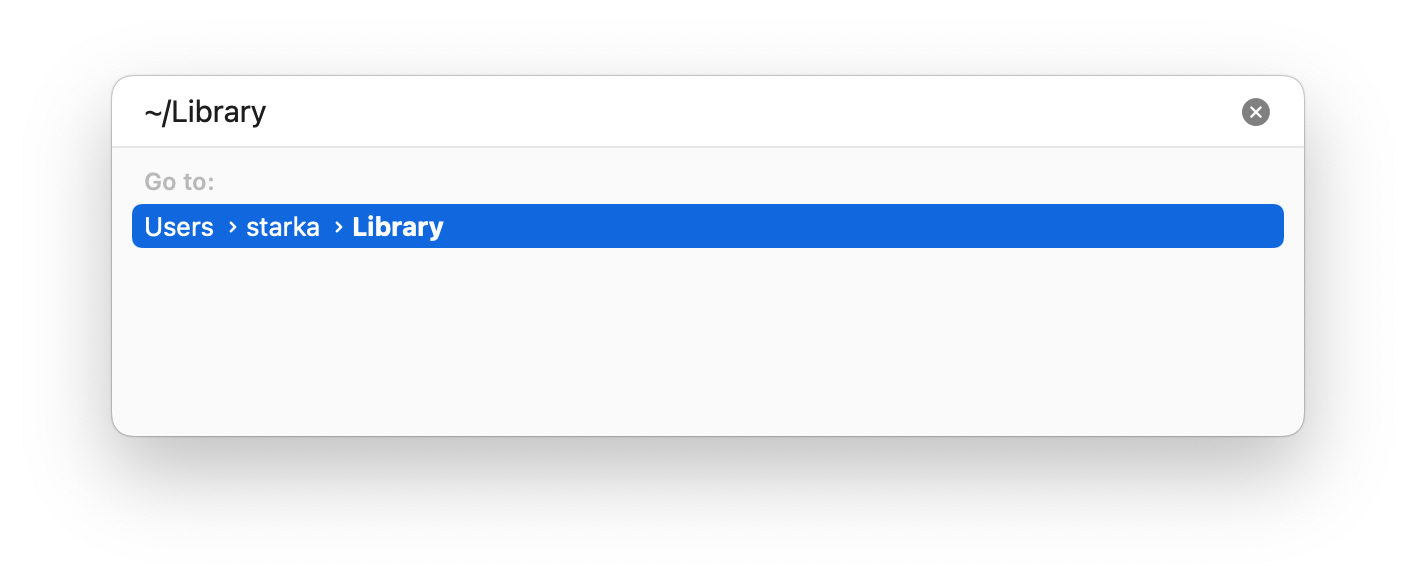
- Now you need to clear iMovie cache files. In Finder, press Command+Shift+G and, in the search field that appears, type ~/Library.
Here in the Library folder, find all the files and folders related to iMovie and delete them. Check the following folders that usually contain applications’ service files:
- ~Library/Application Support
- ~Library/Application Scripts
- ~Library/Caches
- ~Library/Preferences
- ~Library/Containers

- Once you remove all iMovie support files, empty your Trash. The application is now uninstalled from your Mac.


- Download and launch Funter.
- Click on Funter’s icon in the menu bar.
- In the search field of the drop-down menu, type “iMovie” and press Enter.
- Funter will display the list of all files that contain “iMovie” in their names. You can find iMovie support files in any location on your Mac.
- Select and remove all unneeded iMovie service files.
- Empty your Trash to remove iMovie service files completely.

How to delete iMovie with App Cleaner & Uninstaller
You may agree that the manual way of removing apps is not convenient and takes too much time. That’s why we recommend that you use a special program for this task – App Cleaner & Uninstaller. App Cleaner & Uninstaller allows you to uninstall any app with just a few clicks. What is most important is that the program finds absolutely all the service files related to the apps you’re deleting and leaves no chance for traces to stay on your disk.Here is how to uninstall iMovie with App Cleaner & Uninstaller
- Download and launch App Cleaner & Uninstaller.
- Select iMovie from the list of scanned apps.
- Click the Uninstall button and confirm your removal.
- Empty the Trash bin.


Uninstall any Mac application in 2 minutes
iMovie FAQ
How do I delete the iMovie library on Mac?
By default, the iMovie library is located in the following location: Macintosh HD/[user]/Movies/iMovie.imovielibrary. Go to the Movies folder on your Mac to select and remove iMovie.imovielibrary from there.
Why can’t I delete iMovie from my Mac?
Before you try to delete iMovie from your Mac, make sure that it is closed and there are no iMovie processes running in the background. You can check this with the Activity Monitor. If you don’t quit iMovie and its processes, you will get an error when you try to remove it. You can use App Cleaner & Uninstaller, which will automatically terminate iMovie and then safely uninstall it.
How do I permanently delete iMovie?
To delete iMovie from your Mac permanently, you need to remove its support files as well. Use App Cleaner & Uninstaller, which will automatically find all such support files and completely uninstall iMovie.


