June 4, 2025
How to uninstall MySQL on macOS
For uninstalling MySQL from Mac completely it’s not enough to remove the app’s icon from the System Settings window. It is crucial to delete MySQL with all of its service files.
This article provides a step-by-step guide on how to remove MySQL from Mac correctly and entirely.
Contents:
Video Guide: How to completely uninstall MySQL on Mac
1:20

What is MySQL, and why remove it?
MySQL for Mac is a software tool used for most popular programming languages, like PHP, Java, Perl, C, C ++, and others. In short, it is a database management system (DBMS), which allows you to connect to the database, run SQL queries and receive a response.
According to the 2024 Stack Overflow Developer Survey, MySQL remains one of the most popular databases among developers, ranking 3rd among the most used databases with 51.0% of professional developers reporting regular use. Despite the rise of newer technologies, MySQL continues to be a solid and widely adopted choice in many tech stacks.
However, there are a few reasons why you might want to remove MySQL from your system:
- Developers may want to remove MySQL in order to start fresh with a clean configuration or upgrade to a newer version.
- MySQL operates as a background service (daemon), which can consume significant memory and CPU resources, especially on older Mac computers. This may affect your system’s overall performance.
- If you don’t use MySQL, then you should better uninstall it from your Mac operating system and don’t allow useless files to take up valuable space on your disk. From this article, you will learn two ways on how to uninstall MySQL from Mac.
- You may face some issues with MySQL. In this case, try to reinstall MySQL — the problem should be solved.
From this article, you will learn two ways to uninstall MySQL from Mac.
Uninstalling MySQL from Mac manually
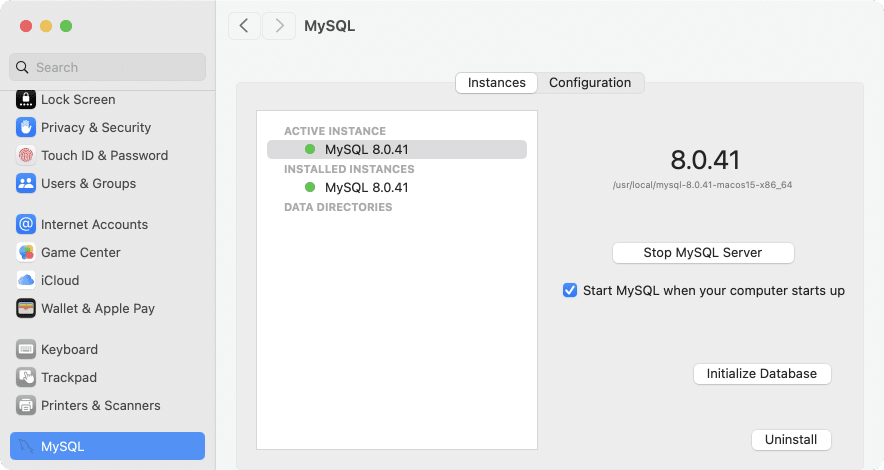
MySQL is a preference pane that can be found in the System Settings window. Please carefully follow each step in the guide below to remove all the support files of MySQL.
- Open System Settings.
- Scroll down, find and click the MySQL icon in the left panel.
- In the MySQL Instances tab, click the Uninstall button.
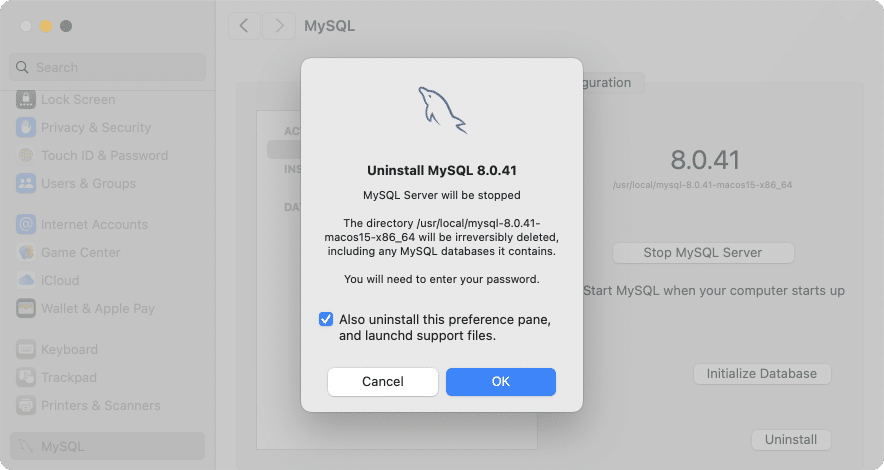
- In the window that appears, mark the checkbox for Uninstall this preference panes and its support files.
- Click Ok.
- Provide your admin user password to confirm.
Now you need to remove the MySQL database. We will show how to do this using the Terminal command line.
- Open Terminal from the Launchpad.
- Back up your data to text files. Copy and paste the following command and press Return:
mysqldumpCopy
- Check the MySQL service and its processes that are working in the background. To close them, use the following command:
ps -ax | grep mysqlCopy
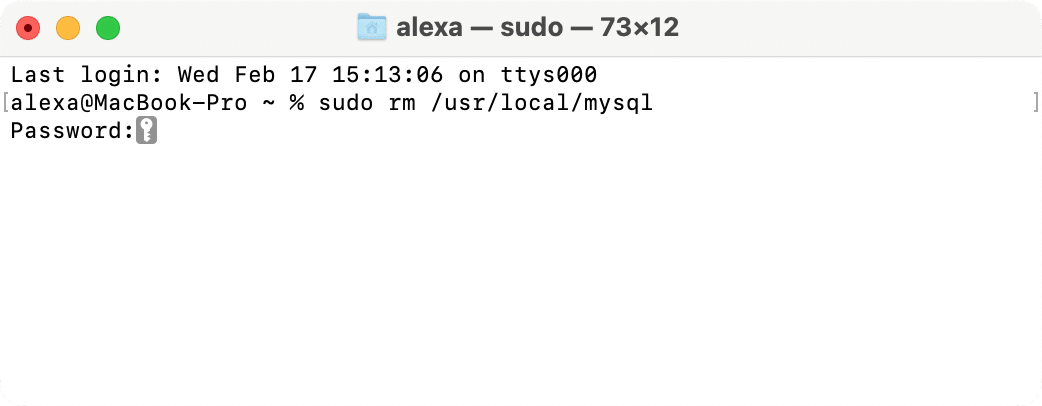
- Type the command below and press Return.
sudo rm /usr/local/mysqlCopy
- If required, enter your user password.
- Remove MySQL files. Enter the commands below consistently. After each command you need to press Return.
sudo rm -rf /usr/local/var/mysqlCopy
sudo rm -rf /usr/local/mysql*Copy
sudo rm ~/Library/LaunchAgents/homebrew.mxcl.mysql.plistCopy
sudo rm -rf /Library/StartupItems/MySQLCOMCopy
sudo rm -rf /Library/PreferencePanes/My*Copy
- Edit /etc/hostconfig and remove the line MYSQLCOM=-YES-
- Remove MySQL preferences:
rm -rf ~/Library/PreferencePanes/My*<Copy
sudo rm -rf /Library/Receipts/mysql*Copy
sudo rm -rf /Library/Receipts/MySQL*Copy
sudo rm -rf /private/var/db/receipts/*mysql*Copy
- Reboot your Mac for reliability.
Now MySQL should be uninstalled completely.
Using the Terminal commands is more for computer geeks, and some users prefer to avoid using it. Luckily, there is another way to uninstall the Mac MySQL server. We will show up how to do this with a few clicks with App Cleaner & Uninstaller’s help.
How to delete MySQL with App Cleaner & Uninstaller
App Cleaner & Uninstaller automatically detects all the support files that each application creates and stores on Mac. It allows you to remove applications entirely, and you don’t have to search for their support files anymore.
How to use App Cleaner & Uninstaller:
- Open the uninstaller.
- It will scan all the apps you have in the Applications folder.
- Find MySQL in the left section and select it.
- Click the Remove button.
- Confirm the deletion.
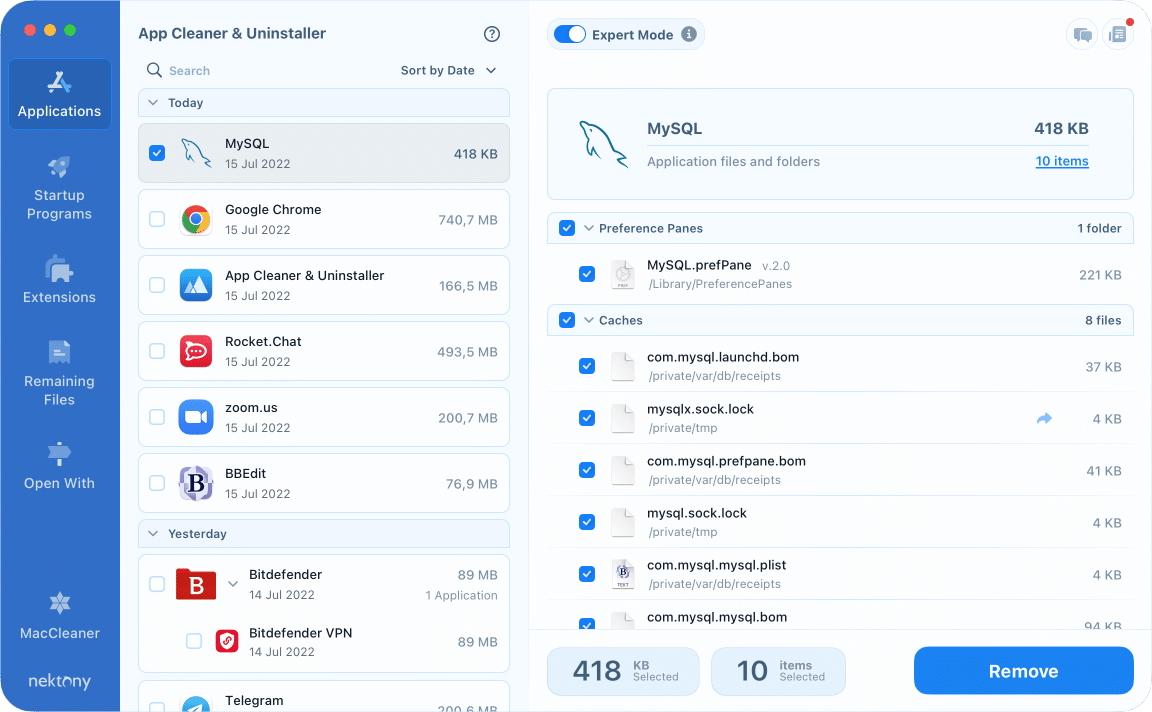
MySQL will be uninstalled from your Mac. By default, all files are removed into the Trash. So don’t forget to empty your bin to get rid of the application completely.
If you have already removed MySQL from the System Settings window, check your Mac for its remaining files. For this, in App Cleaner & Uninstaller, switch to the Remaining Files section. Here you can select and remove unneeded MySQL’s leftovers.
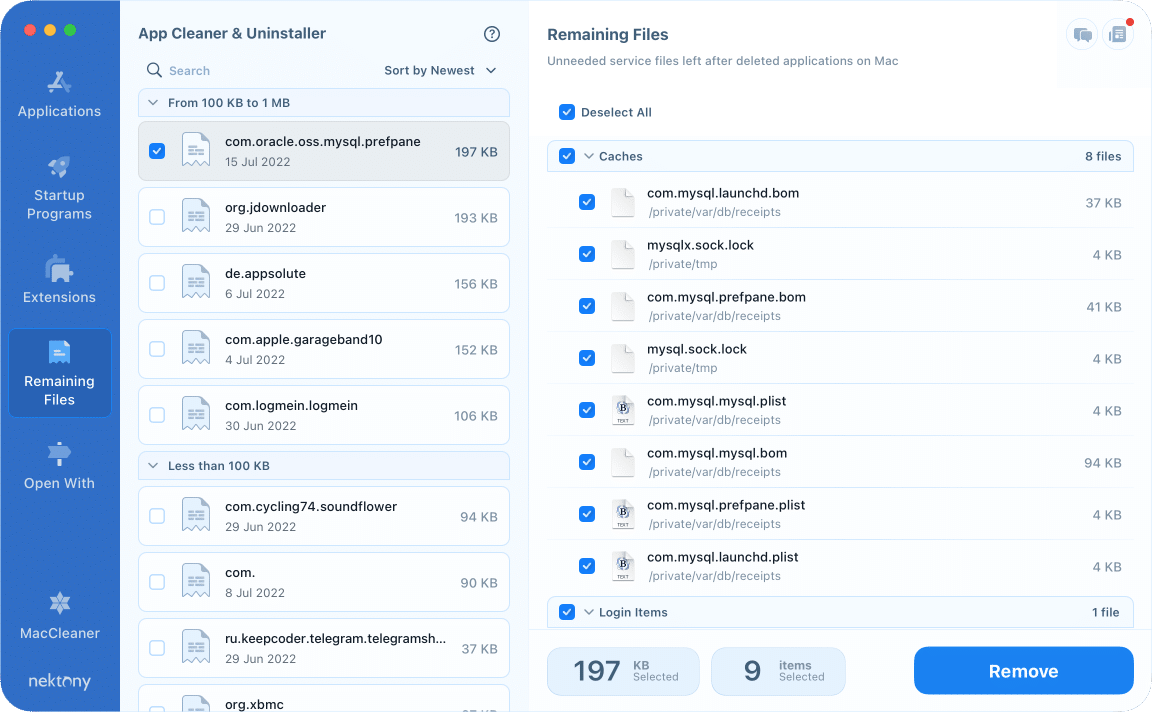
Note, if you want to uninstall any Preference Pane but don’t see this program in the Applications section, switch to the Extensions tab → Preferences Panes. Here you can remove the System Panes of MySQL.
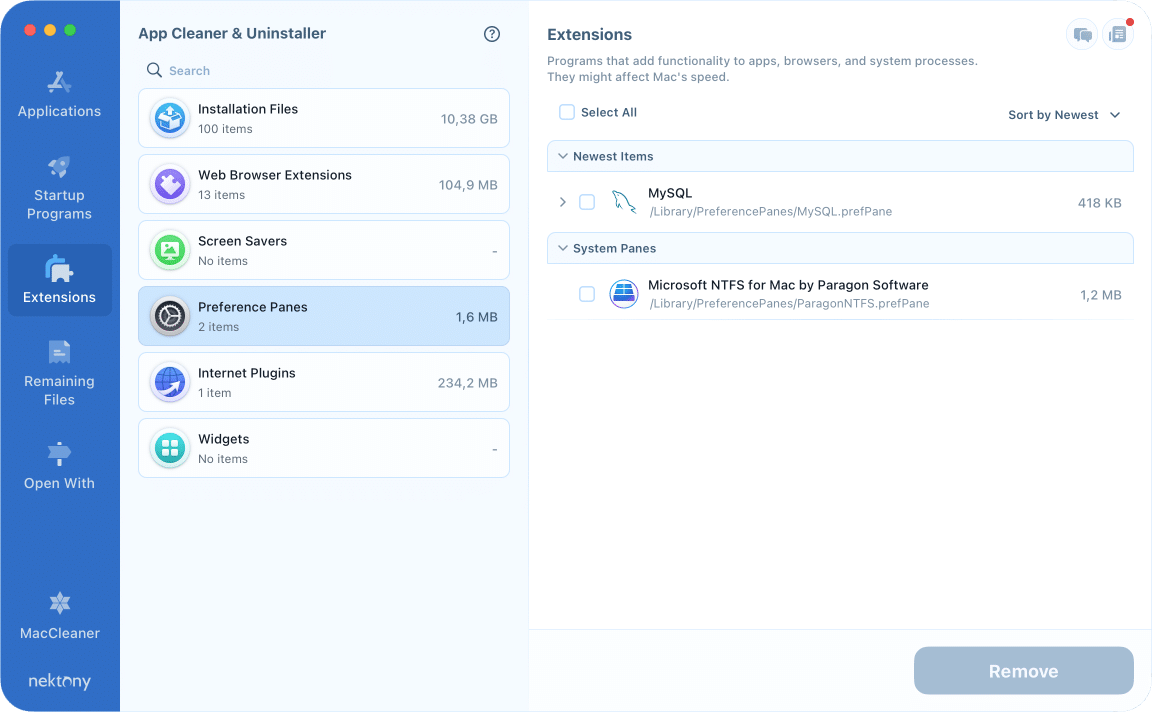
As you can see, Mac’s uninstalling applications and extensions are done easily and safely with App Cleaner & Uninstaller. You can try it absolutely for free.
