As a Mac user, you are likely aware of the importance of keeping your data secure. Whether it be personal documents or sensitive business information, encrypting and securing files and folders on your Mac is essential to protecting yourself from malicious attacks. In this blog post, we’ll discuss some of the best ways to ensure that your data is kept safe from prying eyes.
Possible methods for securing your files and folders on your Mac
- Disk Utility: It allows you to password-protect your folders.
- FileVault: It allows you to encrypt your entire computer.
- Funter: It allows you to hide any file or folder on your Mac.
What does encrypting files mean?
Encrypting files on a Mac means converting the original file into a coded format that can only be accessed by someone who has the encryption key or password. This process ensures that the contents of the file are secure and cannot be accessed by unauthorized users.
When you encrypt a file on a Mac, the operating system uses a complex algorithm to scramble the data in the file. The encryption algorithm creates a unique key or password that is required to decrypt the file and make it readable again.
Encrypted files are useful for storing sensitive information such as financial records, personal information, or confidential business data. If someone gains unauthorized access to your computer or external storage device, they won’t be able to view the contents of an encrypted file without the correct key or password.
How to encrypt files on Mac with Disk Utility
Disk Utility is a built-in utility in macOS that allows users to manage, format, and repair internal and external hard drives. It also allows users to create disk images, which can be encrypted to provide additional security for sensitive files.
Here is how to encrypt files on Mac using Disk Utility:
- Open Disk Utility from Launchpad or use Spotlight to find it.
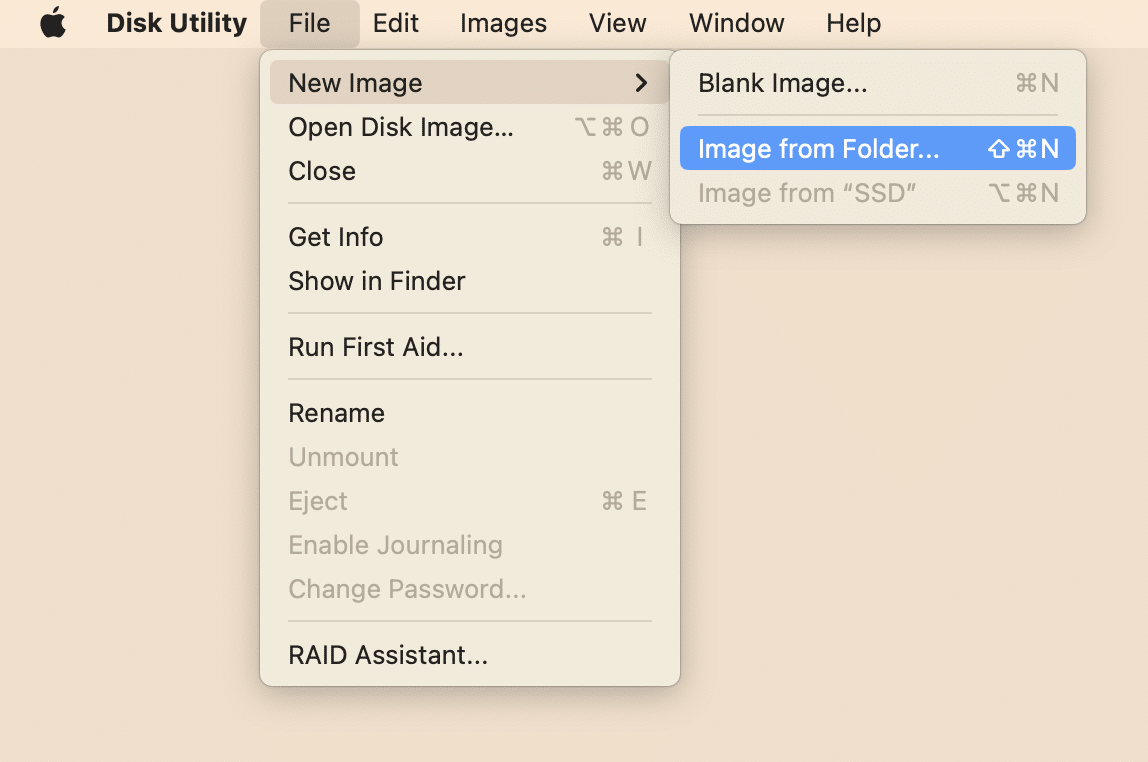
- Click on File in the menu bar → select New Image → Image from Folder.
- Choose the folder you want to encrypt.
- Select the location, encryption type, and image format type for the folder you want to encrypt.
- Set a password for the encrypted item. This password will be required to access the file, so make sure to choose a strong and secure password.
- Click Save.
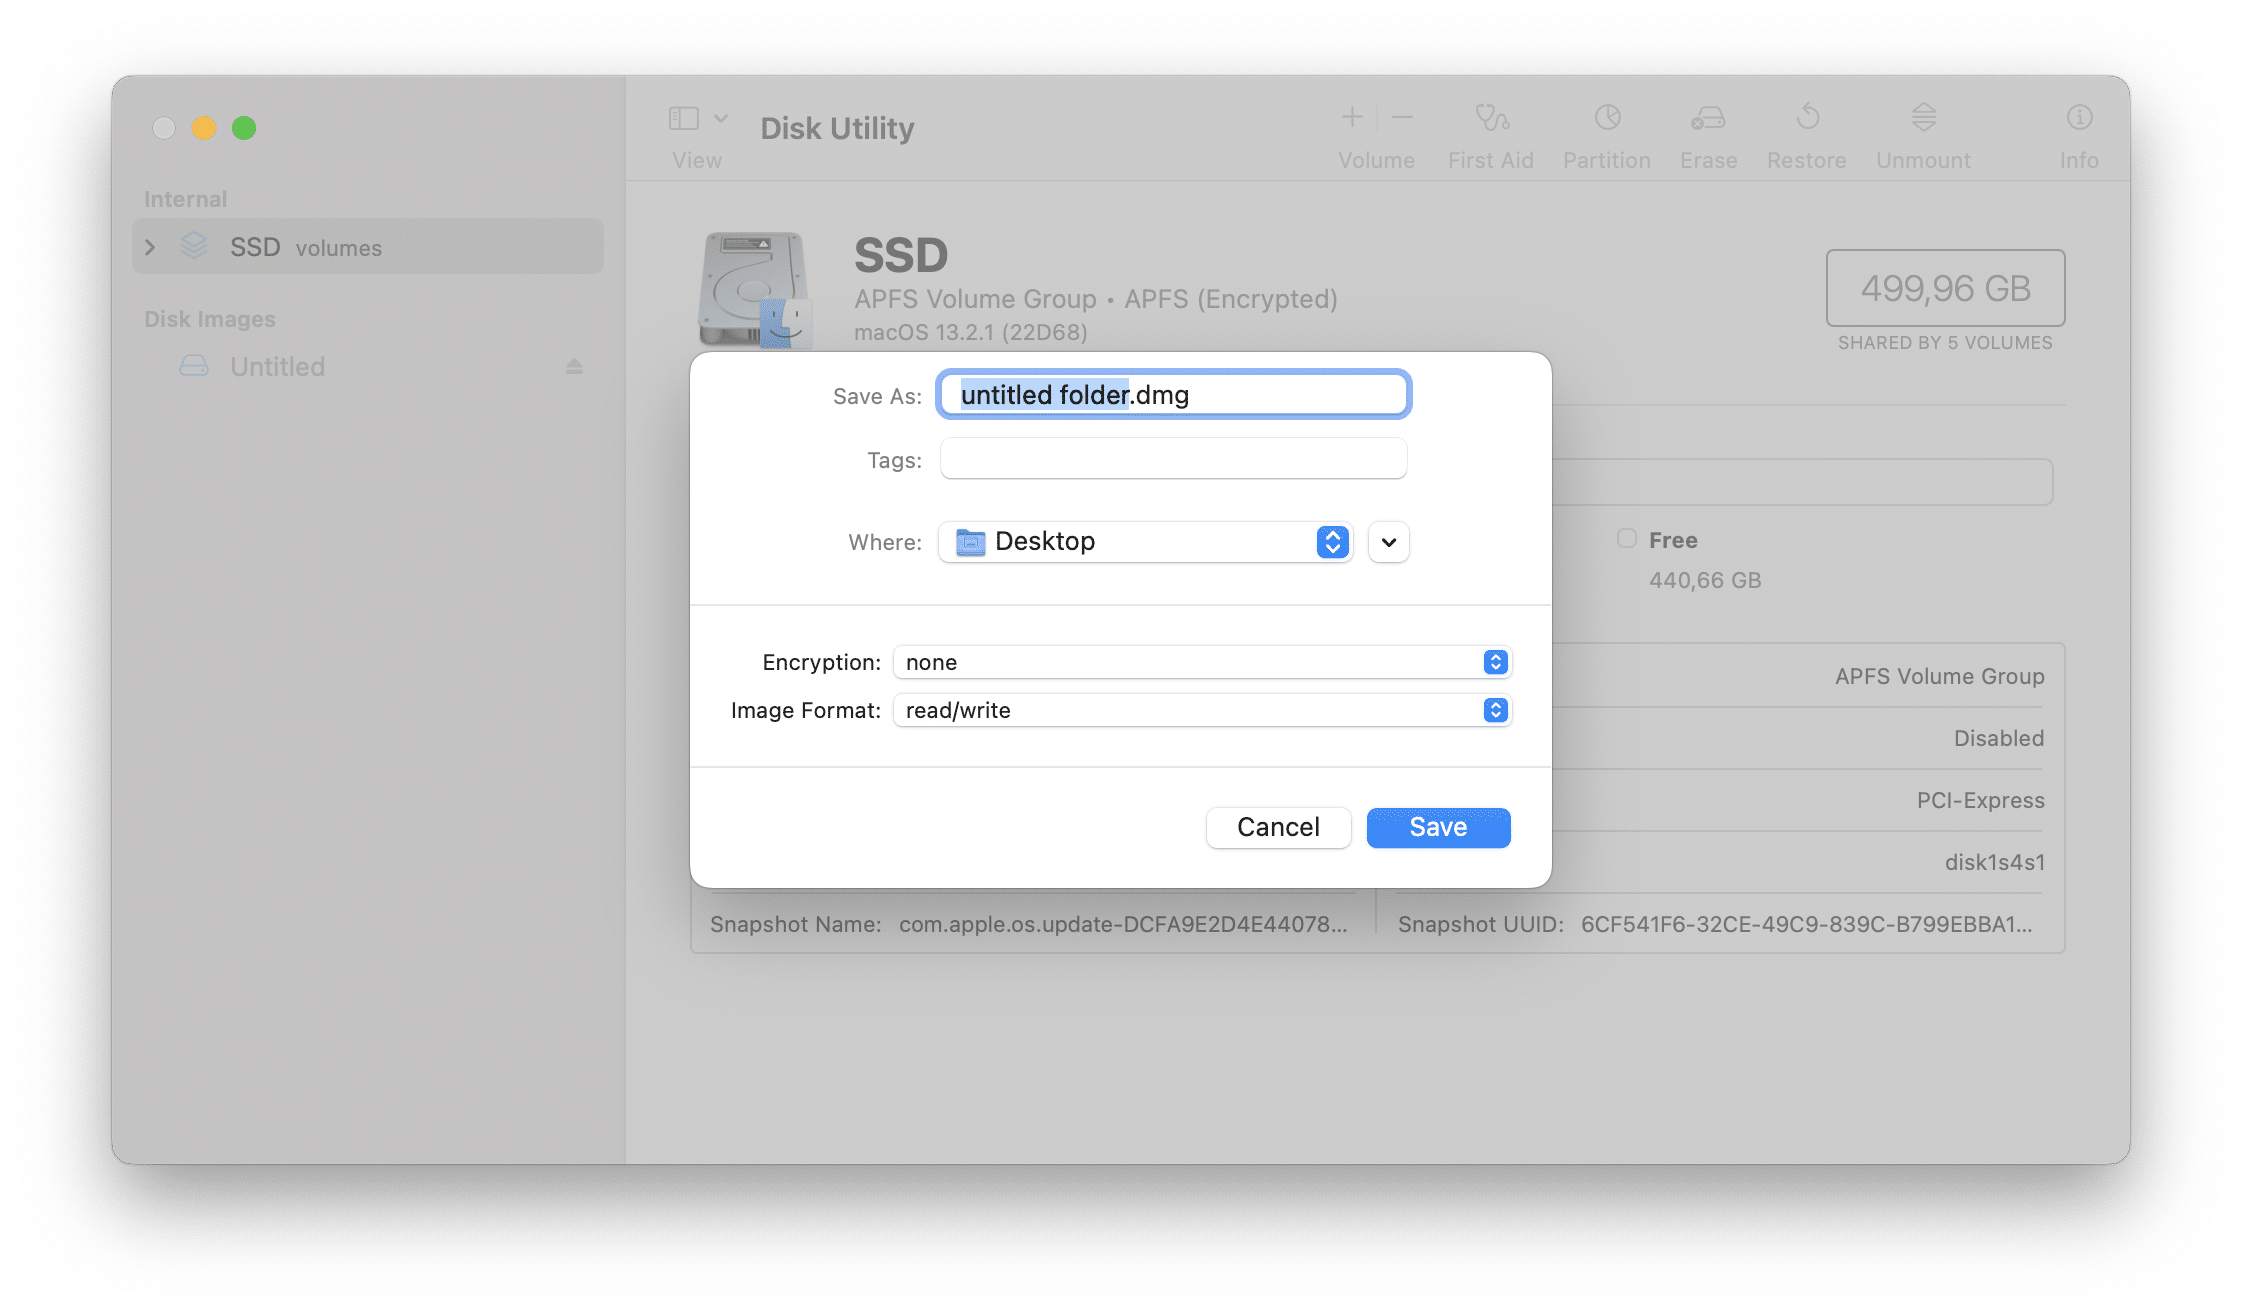
Once the encrypted folder is created, you can add files to it by dragging and dropping them into the file. To access the encrypted folder, simply double-click on it and enter the password you set earlier.
How to encrypt Mac disk with FileVault
FileVault is a built-in encryption feature in macOS that allows users to encrypt their entire system drive. Here’s how you can use FileVault to encrypt your data on Mac:
- Open Mac System Settings.
- Select Privacy & Security from the sidebar.
- Scroll down and find the FileVault option.
- Click to turn on FileVault.
- Choose how you want to unlock your encrypted disk. You can use your iCloud account, or create a recovery key.
- Click Continue.
- Wait until the encryption process is complete.
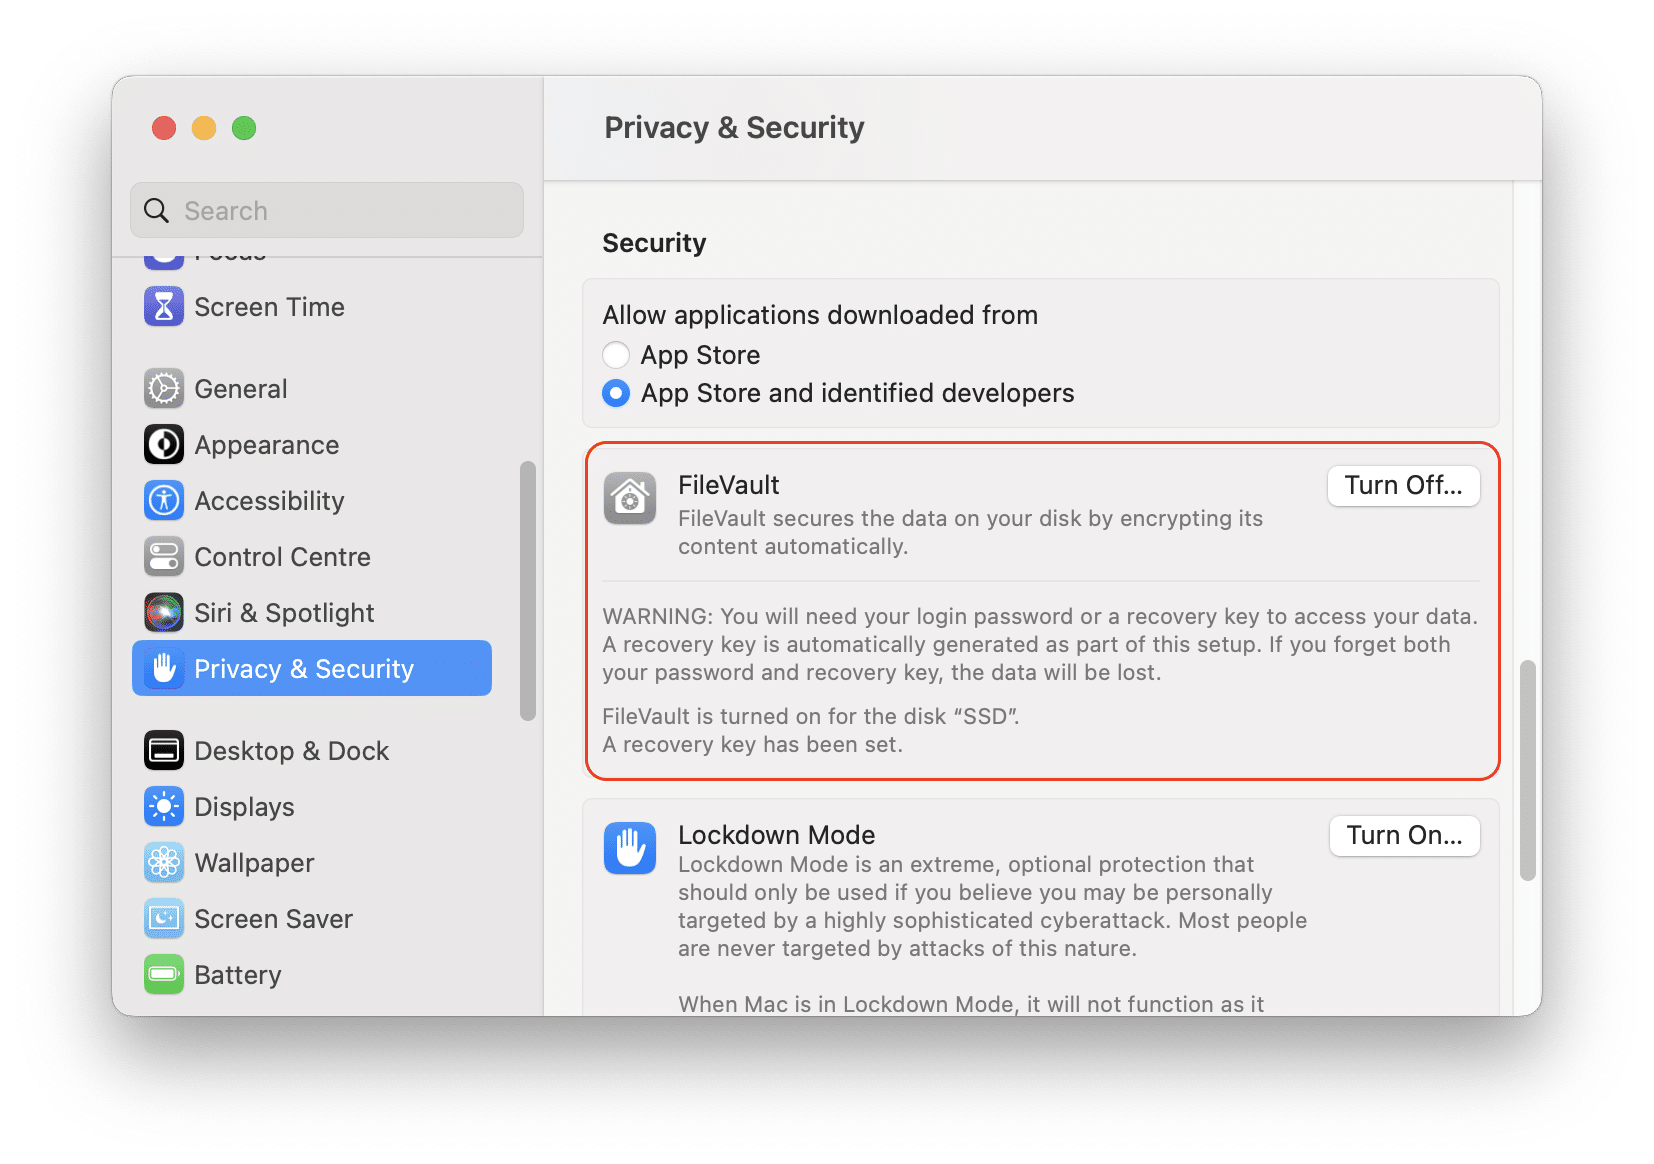
After these steps, all data on your system drive will be encrypted using XTS-AES-128 encryption.
How to hide files on Mac using Funter
Hiding files doesn’t actually encrypt the file or protect it with a password, however, it can provide an additional layer of security for your files.
You can hide any item on your Mac with a free tool from Nektony called Funter. This app allows you to hide any item on your Mac, search for hidden files and manage hidden files on your Mac.
To hide files on a Mac using Funter, follow these steps:
- Download and install Funter from the developer’s website.
- Launch Funter from your Applications folder.
- Go to Funter’s settings and ensure that Finder’s integration is enabled for the app.
- Open Finder and select any file that you want to hide.
- Right-click this file and select Hide from the context menu. The selected file or folder will now be hidden from view.
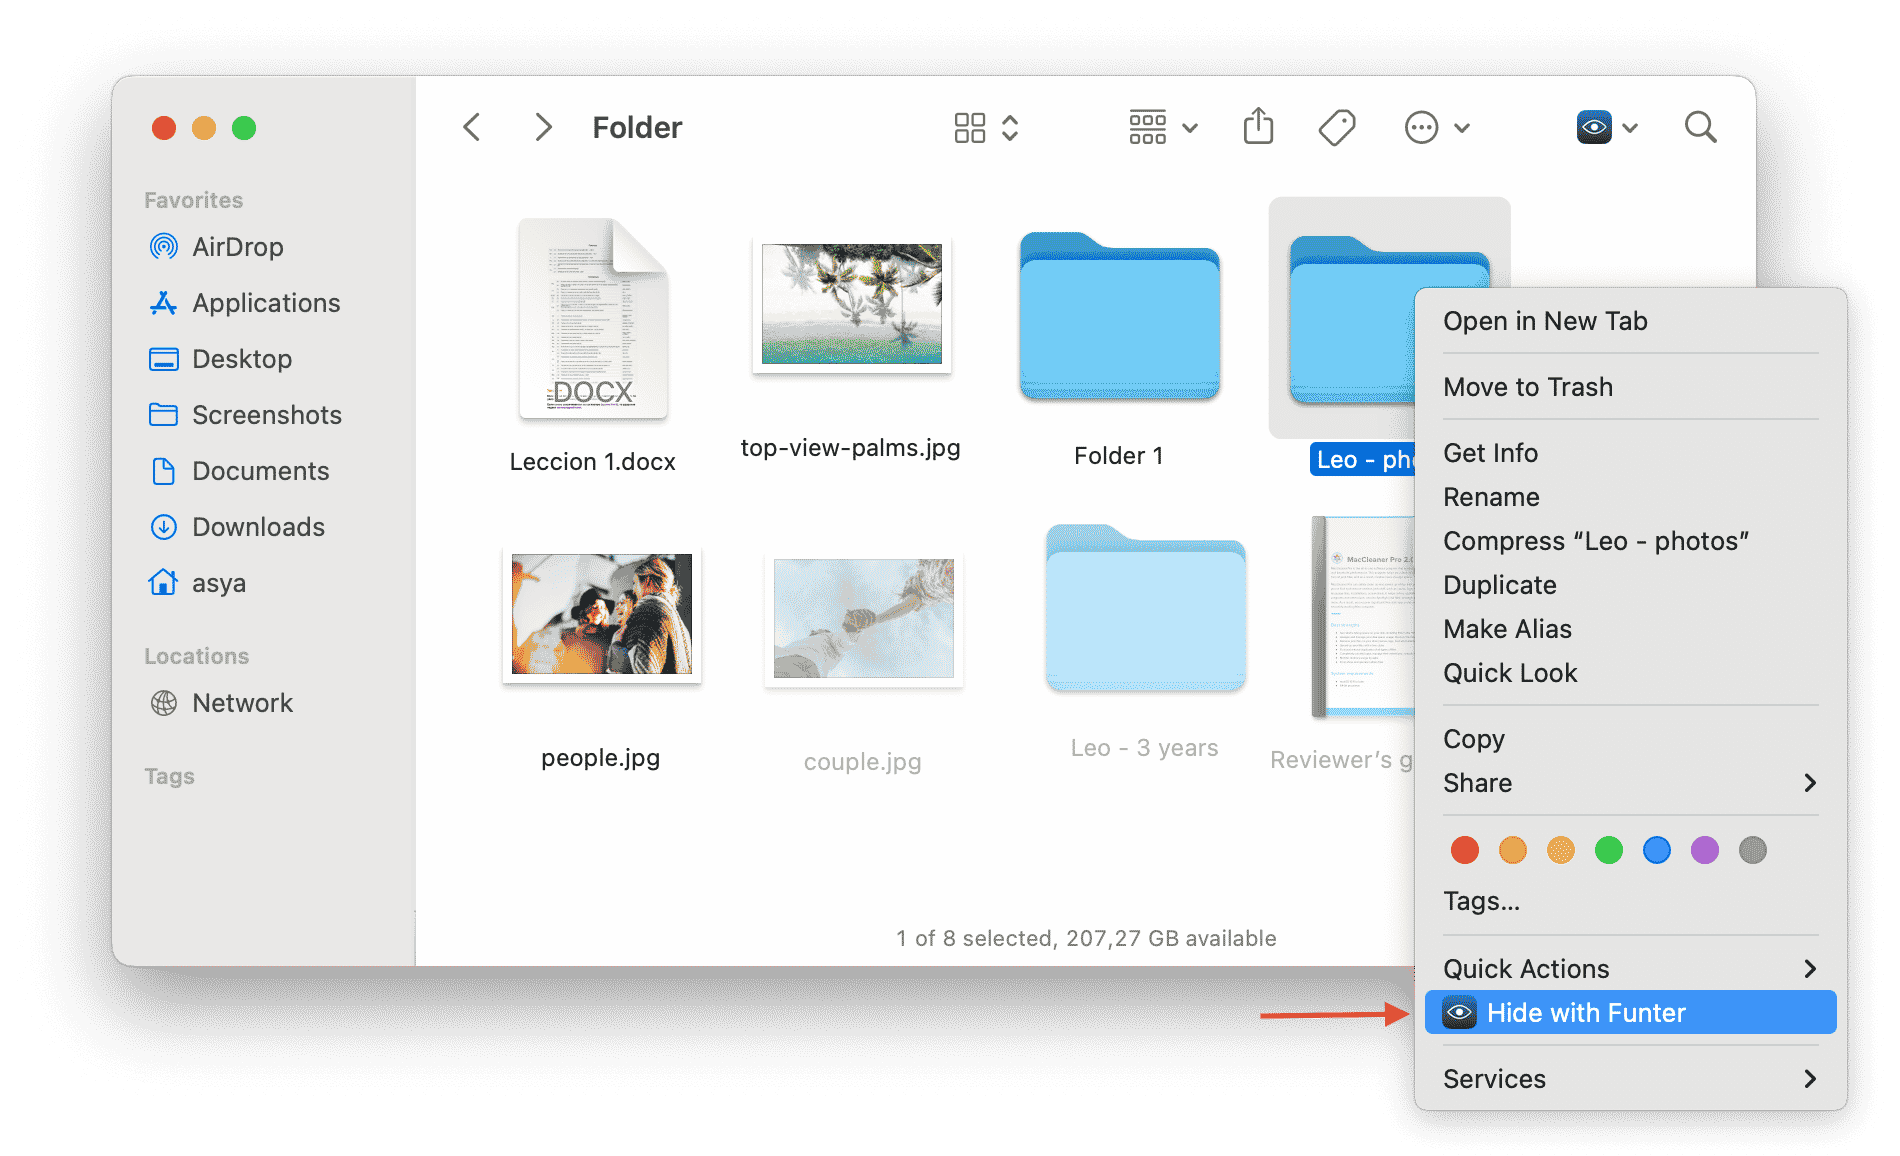
To unhide the file or folder later, simply make hidden files visible by clicking “Show Hidden Files” in Funter. You can right-click on any hidden files and select the “Unhide” option in the context menu.
Funter
Conclusion
All said above, having the right combination of tools in place helps safeguard private materials digital world today where threats abound at each corner! Encrypting & Securing files on a Mac should certainly be a high priority list for every conscientious user out there who wishes to keep the data safe.
