When you get a new computer, you may want to partition your hard drive into two or more parts. This can help you to organize your data better and allow you to install two different operating systems. This article explains what a disk partition is and how to partition a hard drive on a Mac.
Contents:
- What is a partition on a Mac?
- How to partition a hard drive on a Mac?
- How to repartition a hard drive on a Mac?
Tip #1 – Remove junk files from your disk before partitioning it
MacCleaner Pro allows you to remove all junk – like caches, cookies, leftovers of already deleted applications, duplicate files, screenshots, and more. With MacCleaner Pro, you can free up RAM and optimize your Mac’s performance. The application provides a free trial with unlimited features.
MacCleaner Pro
What is a partition on a Mac?
Partitioning a hard disk means dividing it into separate and stand-alone parts. For example, you can partition an external hard drive and use one part for your Mac’s backup and another part for storing your documents and photos. In this case, your system and personal files will be stored separately. If you have to reinstall your system, your files will remain on another part of your drive.
Also, anyone who wants to install multiple operating systems on a Mac first needs to split the disk into several partitions. This allows you to have easy and convenient access to your data on your Mac from each operating system. Without partitions, integrity would be impossible, and one system would damage another.
When you partition a drive for installing two different operating systems, both systems think they have their own hard drive and work correctly.
How to partition a hard drive on a Mac?
MacOS has a default built-in application for working with disks and drives, called Disk Utility. In recent updates, its options have been slightly reduced, but you can still partition your disk with this utility. For this, follow the steps below.
Steps to partition a hard drive on a Mac:
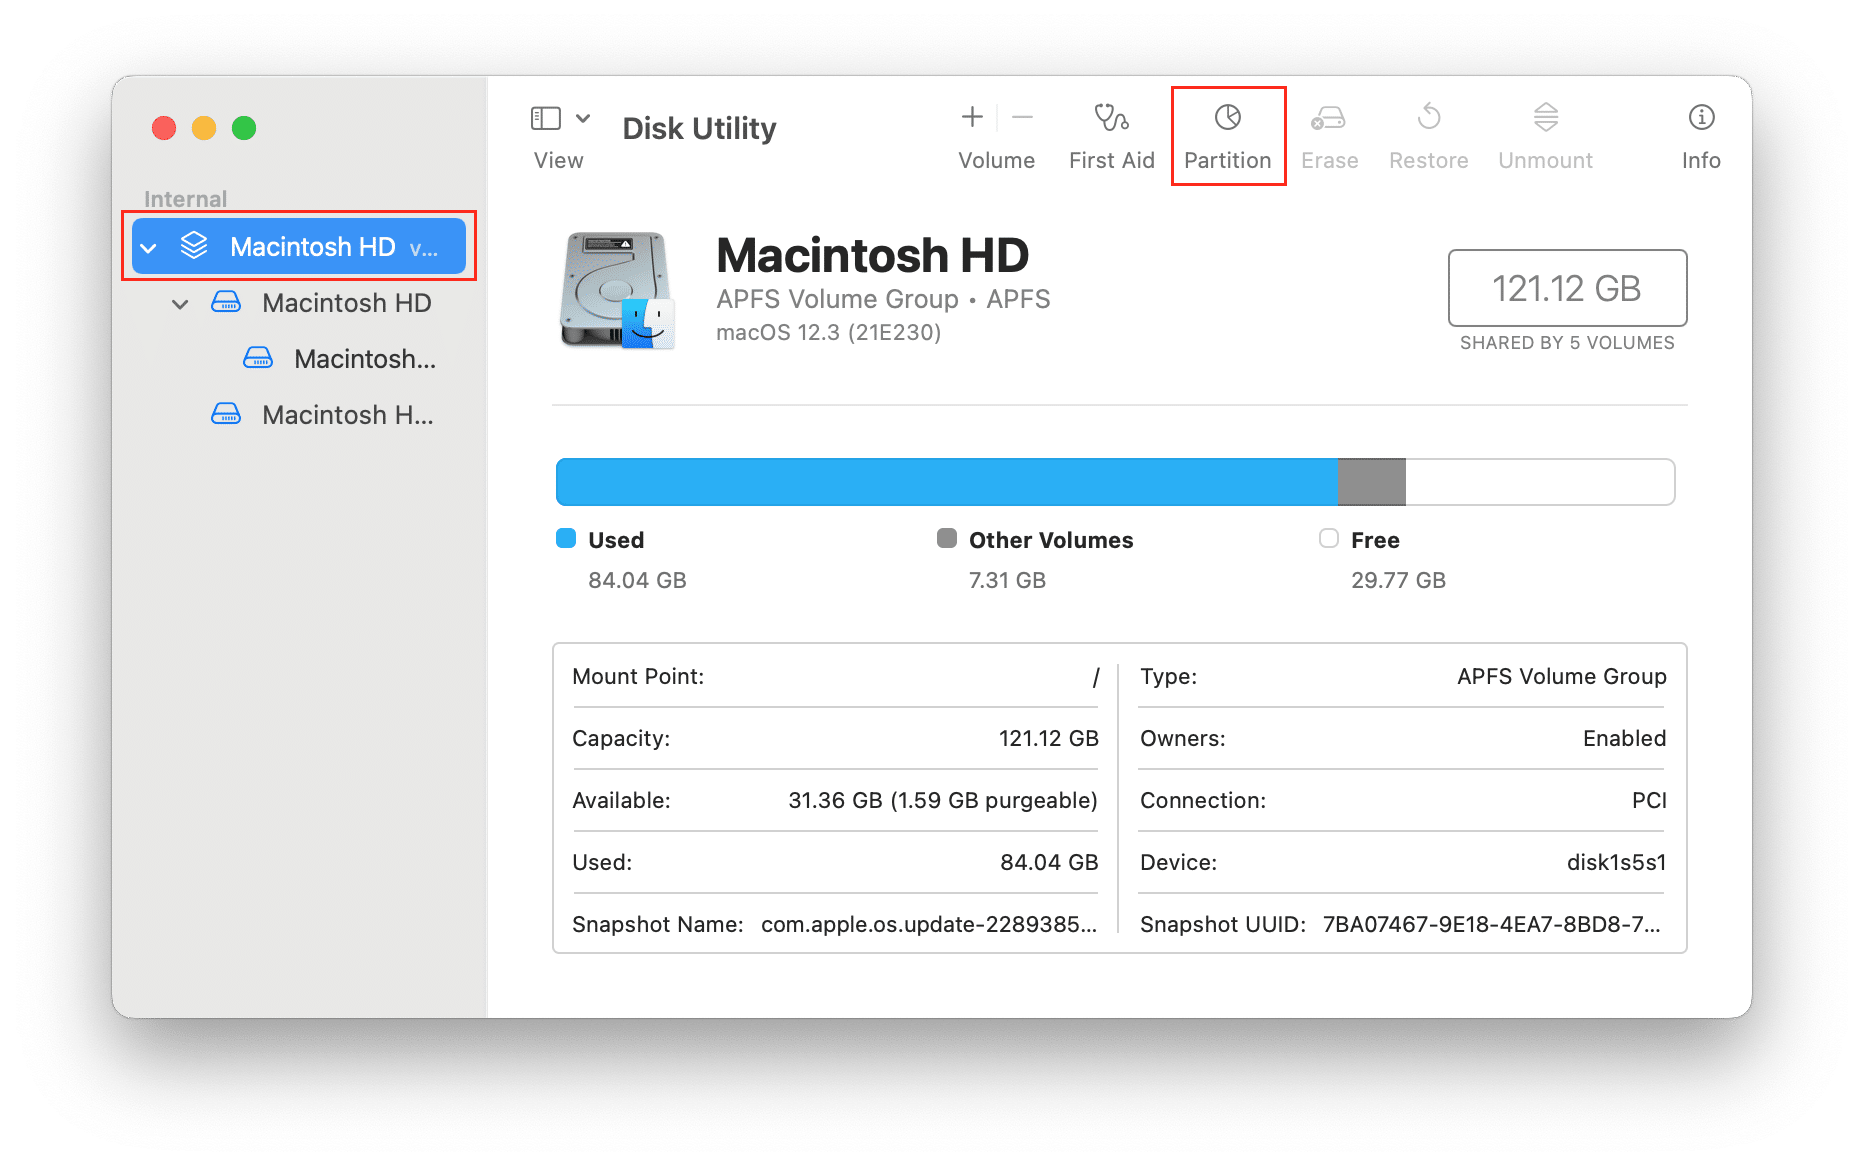
- Open Disk Utility. You can find it in the Launchpad Applications folder or use the Spotlight search.
- In the sidebar, select the drive you want to partition. Your Mac’s hard drive is named Macintosh HD here.
- Click Partition in the top panel.
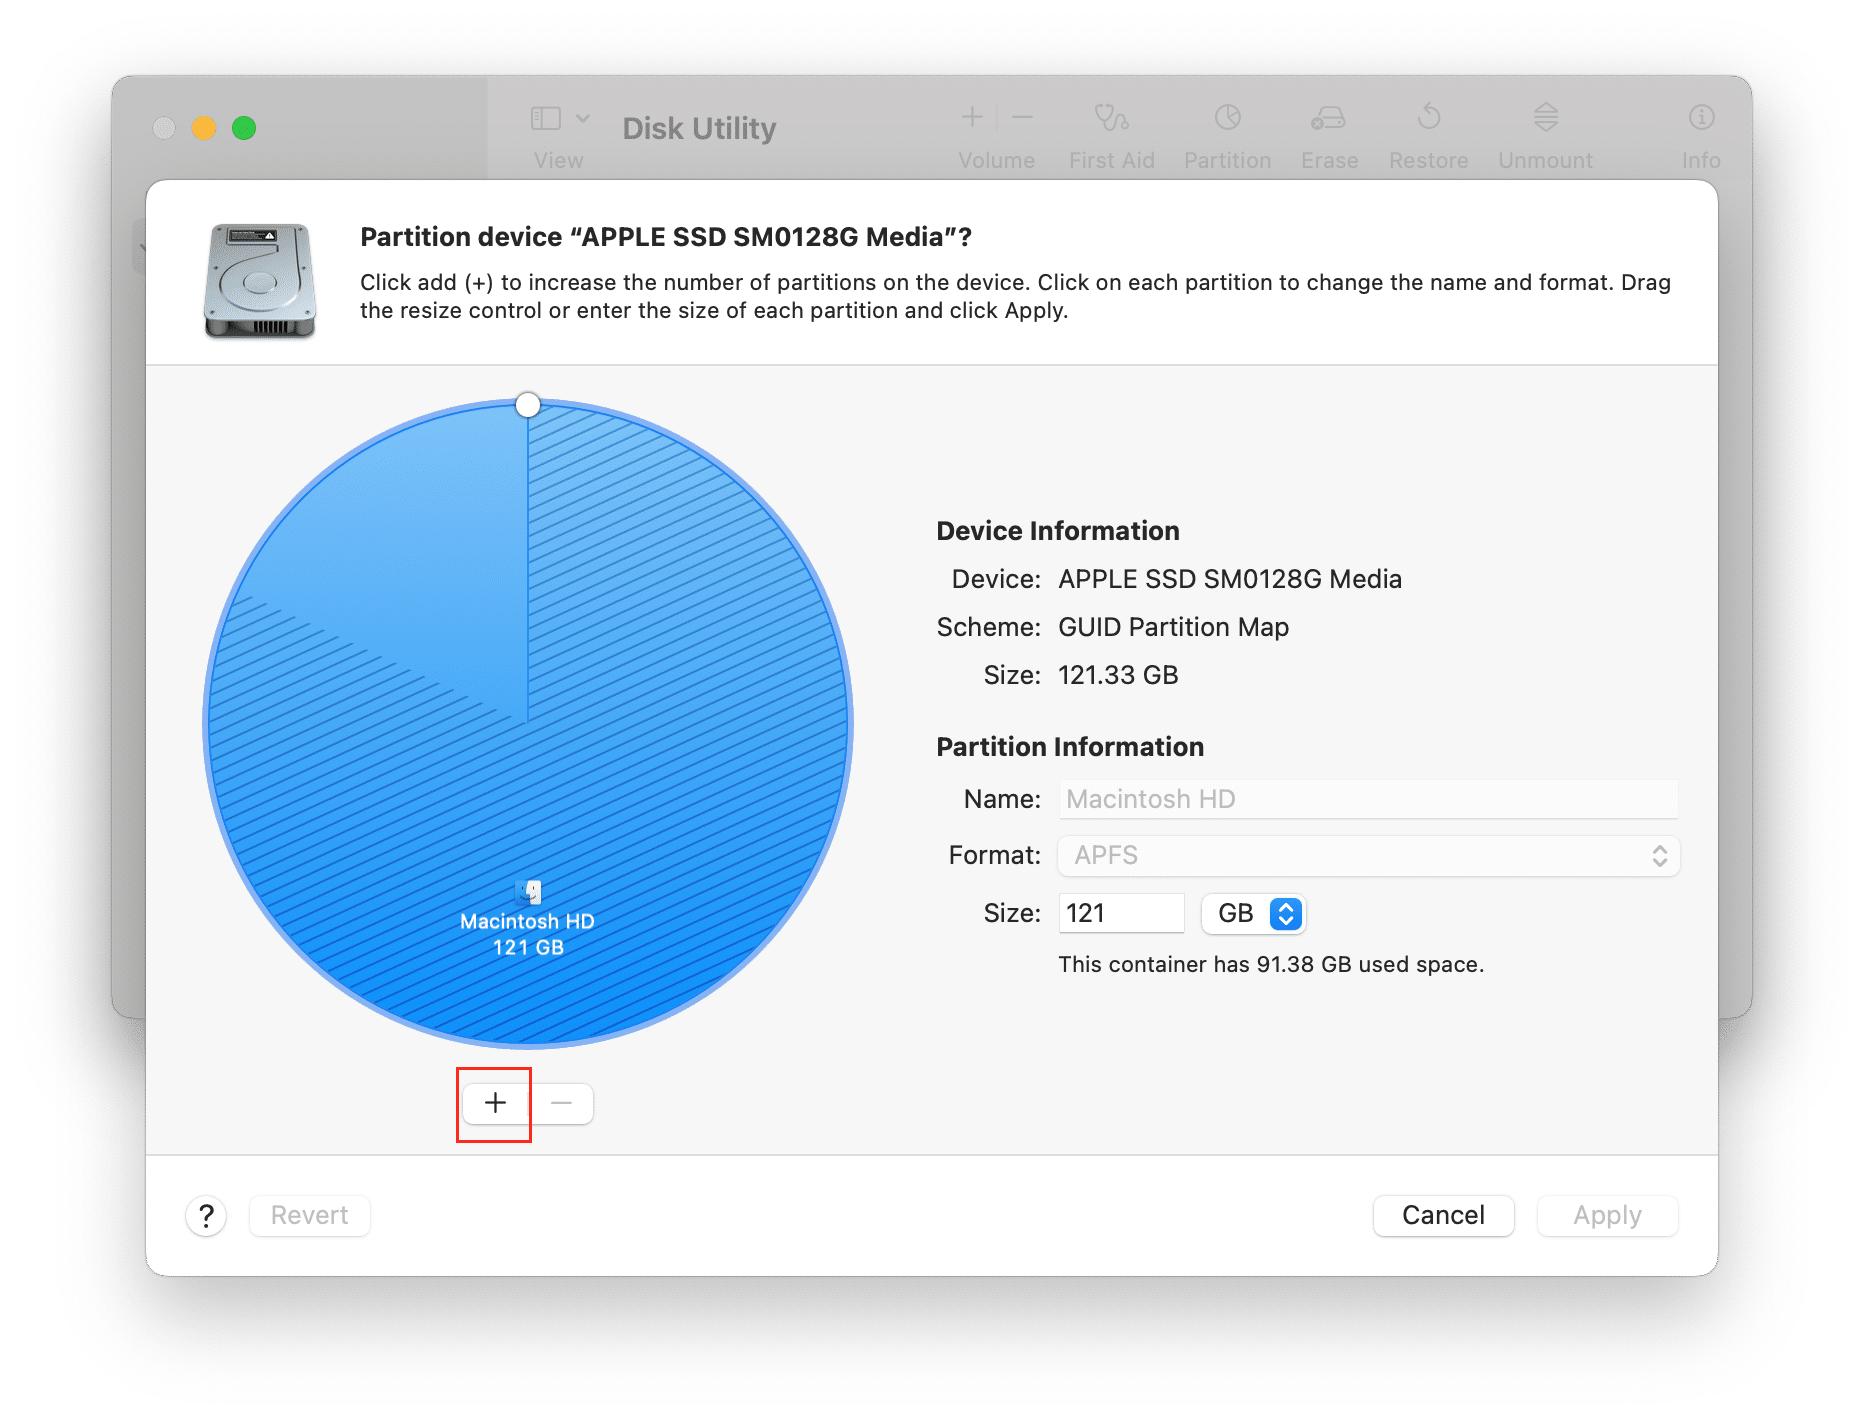
- Click the Plus (+) icon under the diagram and select Add Partition.
- Give a name and specify a file system format for it.
- Click Apply.
- It may take several minutes for Disk Utility to check the drive and apply the changes.
How to partition an external drive?
If you want to partition an external drive, the steps are almost the same, but first, you need to format the external drive. Follow these steps:
- Connect your external drive to your Mac.
- Open Disk Utility.
- Select the external drive from the left-side panel.
- Click Erase to format it.
- Type the name and select the exFAT format for this drive.
- Click Erase.
- Switch to the Partition tab and partition your external drive using the guide above.
After this, you can switch between partitions and install Windows or store some data there.
How to switch between partitions on a Mac
Once you have finished partitioning your Mac’s hard drive, you need to know how to switch between them. Here is how:
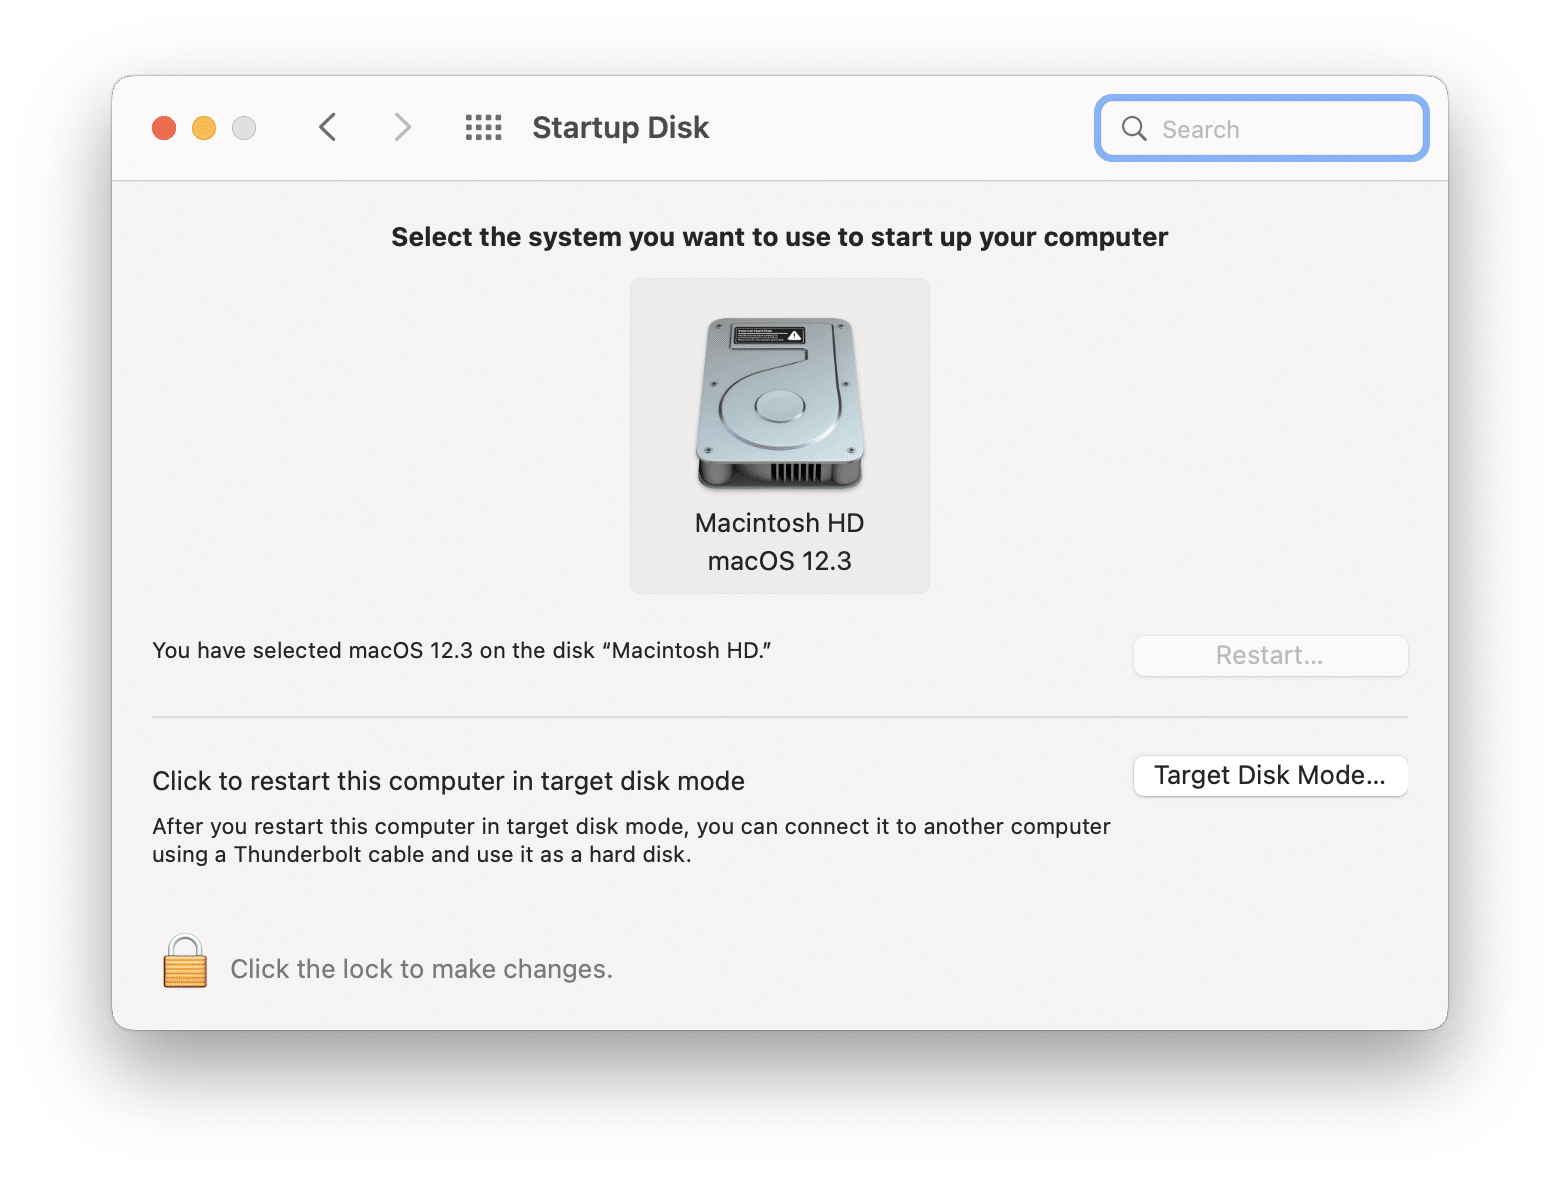
- Open System Preferences.
- Go to the Startup Disk section.
- Click the Lock icon and allow making changes.
- Select another partition and click Restart.
How to repartition a hard drive on a Mac?
You can repartition your hard drive very quickly using Disk Utility:
- Launch Disk Utility.
- Select your drive which has been partitioned.
- Switch to the Partition tab.
- On the pie chart, select the partition you want to remove.
- Click the minus (-) button and apply changes.
Conclusion
As you can see, partitioning and repartitioning a hard drive is an easy process that takes a few minutes. The important thing you should remember beforehand is to clean up your disk and back up your data. You can complete the first task with MacCleaner Pro. MacCleaner Pro removes all junk and optimizes your computer’s performance. It provides a free trial with unlimited features.
