
Data loss is something virtually all Mac users have to deal with at some point. One moment of carelessness can result in hundreds of hours of work or thousands of precious family pictures turning into digital dust and seemingly disappearing into oblivion. Fortunately, data loss is often not nearly as permanent as it initially appears to be.
As a Mac user, you can attempt to recover deleted files using several different data recovery methods, none of which require advanced technical skills or knowledge to use. All you need to do is follow our detailed step-by-step instructions. Hopefully, at least one of the methods described in this article will be effective and save you from permanent data loss.

Tip 1 – Prevent losing important files on your Mac
Also, to prevent any errors with your Mac, you should regularly clean up your disk from all digital junk that you might have: broken service files, old caches, unused applications, duplicates, and so on. You can easily find and remove junk files with the help of MacCleaner Pro from Nektony. With MacCleaner Pro, you can also fix the issues that lead to the system’s slow performance. Download a free trial of MacCleaner Pro and see how it’s easy to use.
MacCleaner Pro
Recovering recently deleted files
Let’s start with something easy: the recovery of recently deleted files.
Why easy? Because macOS features more than one safety net designed to protect you against your own mistakes and the resulting data loss. As long as you realize that you’ve deleted the wrong file soon enough, you should be able to recover it with a single keyboard shortcut or a couple of clicks.
Method 1: Undo command
Your Mac computer keeps a history of your actions, allowing you to undo the last action with the CMD + Z keyboard shortcut.
For example, imagine you’ve recently deleted an important work document from the Downloads folder. To recover it using the Undo command, you need to open Finder, navigate to the Downloads folder, and press CMD + Z. Alternatively, you can click the Edit menu and choose Undo.

Method 2: Trash folder
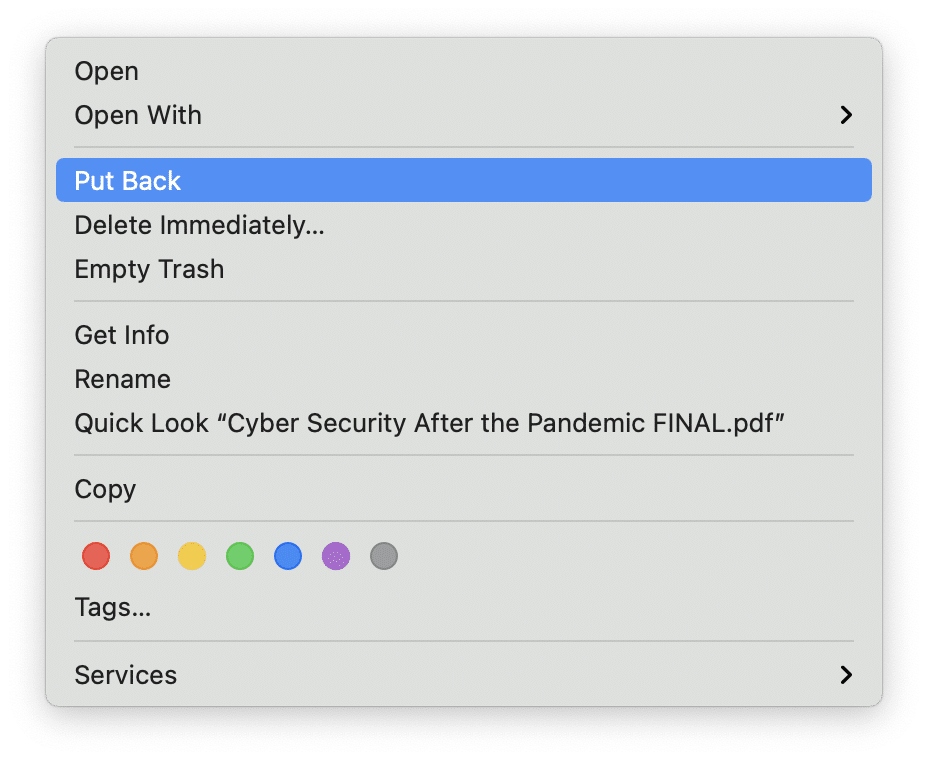
When you delete a file on your Mac, the file first goes to the Trash folder, where it stays until the folder is emptied. Before that happens, the deleted file is completely safe and recoverable with a simple click:
- Click the Trash icon located on the right side of the Dock.
- Select the file you want to recover. You can also select multiple files at the same time.
- Right-click on the selected file and choose the Put Back option.
The file will move back to its original location. If you’d rather move the file to a different location, you can use the drag and drop operation to move it to any location you want.
Recovering permanently deleted files
What if the file you want to recover isn’t in the Trash folder because the folder was emptied or because the file was deleted in a non-standard manner, such as by formatting the entire storage device on which it was located?
Well, a situation like that is called permanent data loss, and experiencing it can be scary, to say the least. But despite what this type of data loss is called, effective solutions that let you bounce back from it do exist.
Method 1: Time Machine
One solution for recovering permanently deleted files has been included with every version of Apple’s operating system since Mac OS X Leopard. The name of this solution is Time Machine.
Time Machine is an incremental backup software application that makes it easy to recover files from earlier backups stored on a local storage device or a network-attached disk.
If Time Machine had been activated before your files were deleted, then you’re in luck because you will most likely be able to retrieve them:
- Make sure your Time Machine backup drive is connected to your Mac.
- Using Finder, navigate to the folder where your deleted files were located.
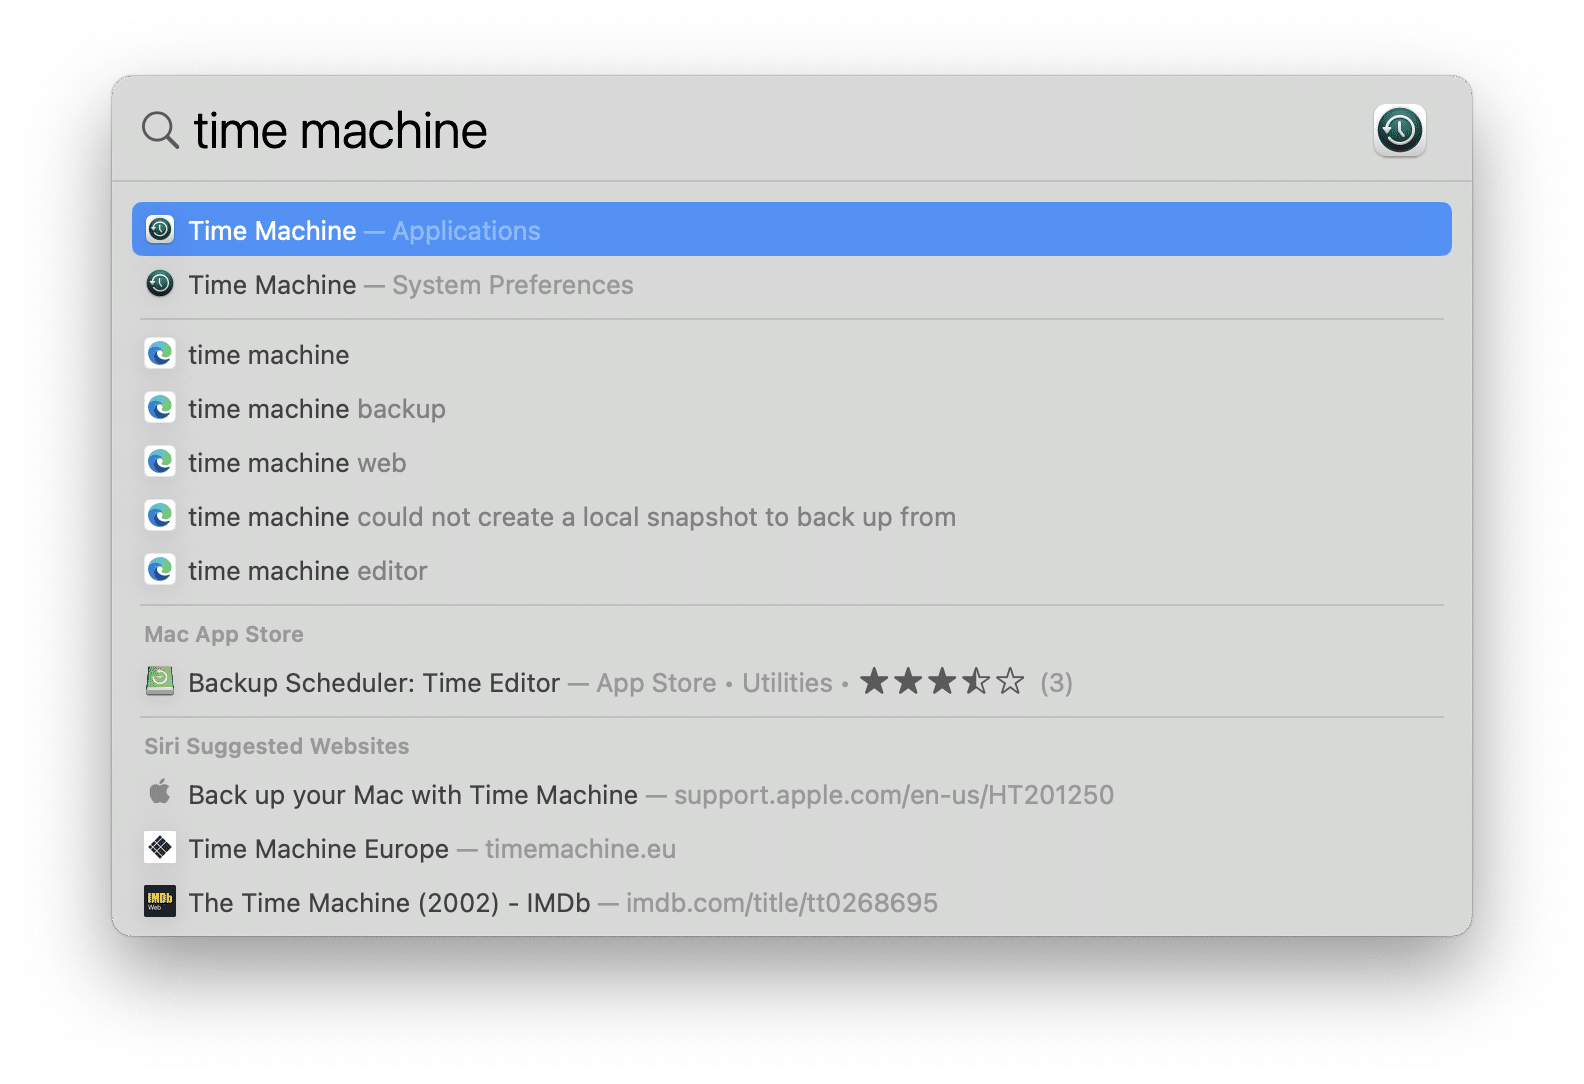
- Press CMD + Space to launch Spotlight, type in “time machine,” and press the Return key to confirm.

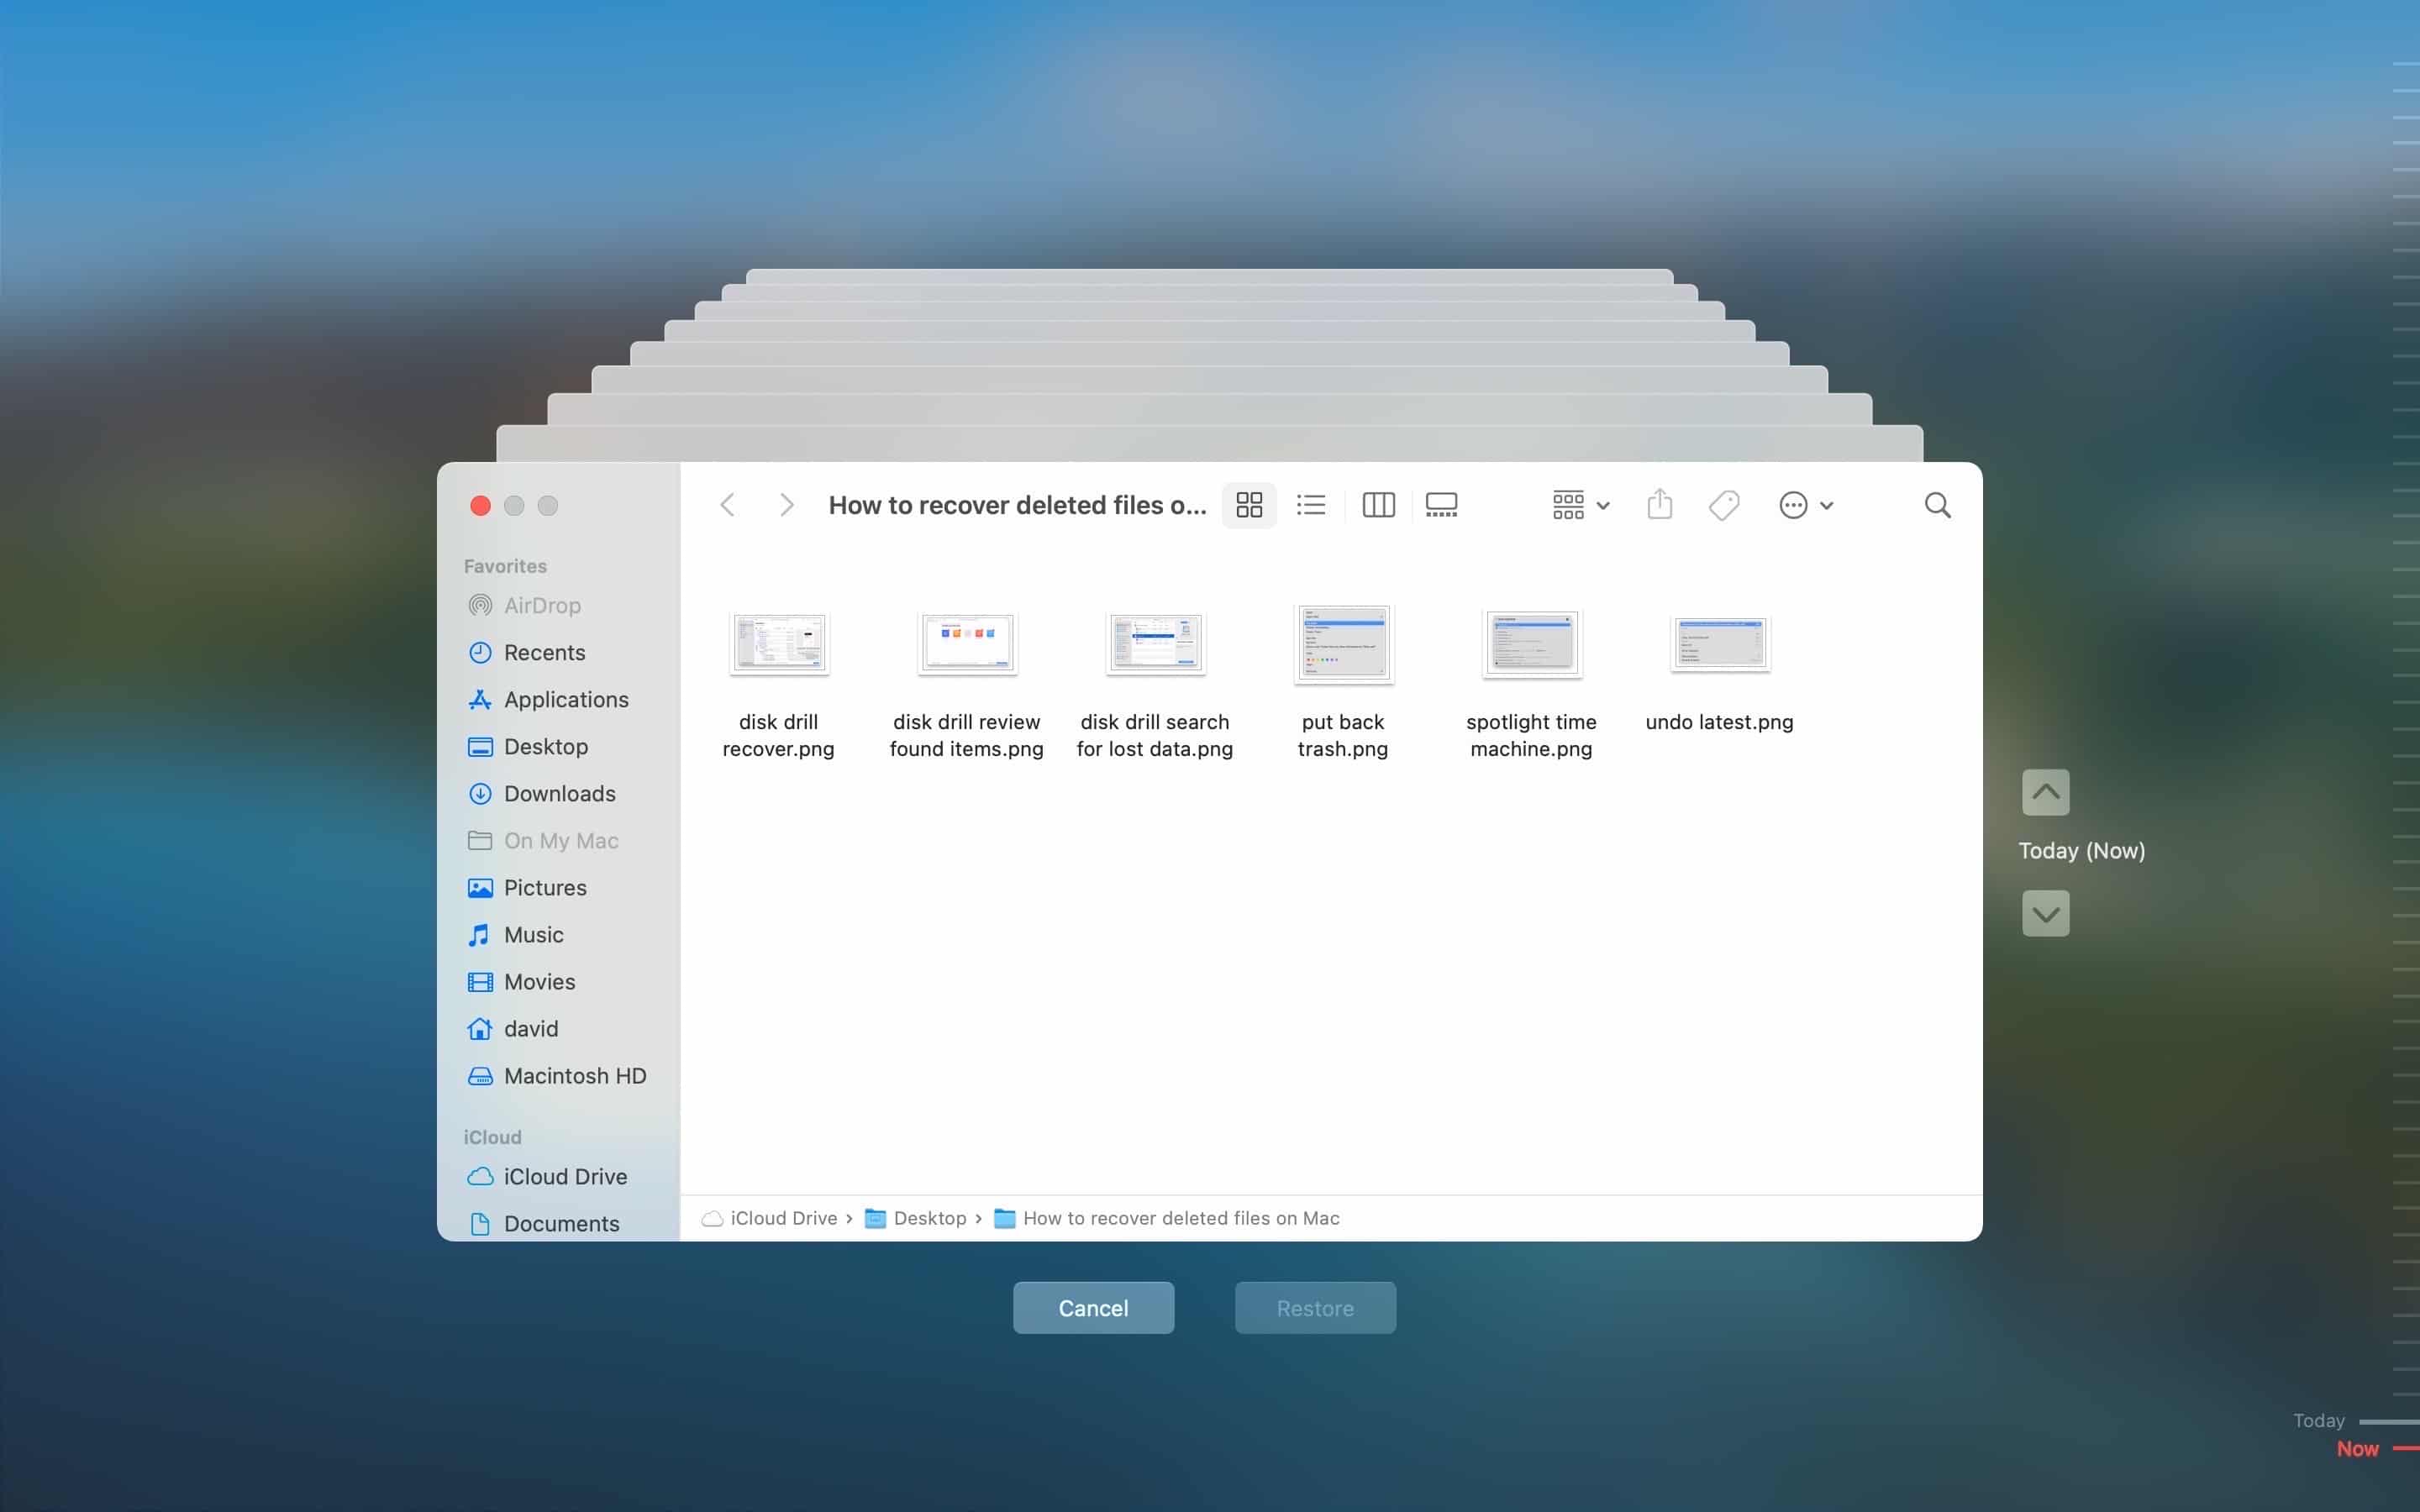
- Using the navigational arrows on the right, go back in time until you find a backup copy of the folder that still contains the deleted files.

- Select the files you want to recover and click the Restore button.
Are you unable to recover deleted files using Time Machine because the backup software isn’t enabled on your system? Then waste no time and try the next method instead. After you do that, create your first Time Machine backup so that you don’t end up in the same situation ever again.
Method 2: Data recovery software
Even though files that can’t be recovered from the Trash folder are commonly referred to as permanently deleted, that label is only partially fitting.
While it’s true that permanently deleted files can’t be accessed by macOS, they often remain physically present on the storage device where they were located until new data is written in their place. A capable data recovery software application can scan the storage device, find the permanently deleted files, and recover them so that macOS can see them again.
One data recovery software application that does this exceptionally well is Disk Drill Data Recovery for Mac. Unlike many other similar applications, Disk Drill is not just capable but also highly intuitive.
Over the years, Disk Drill has been steadily improved to quickly and easily recover hundreds of file formats, including photos, movies, audio files, documents, file archives, and more. The application runs just as well on Intel-based Mac as it does on Macs with Apple Silicon, and it supports Mac OS X Snow Leopard (version 10.6) and newer, including macOS Monterey (version 12).
To recover permanently deleted files on Mac with Disk Drill:
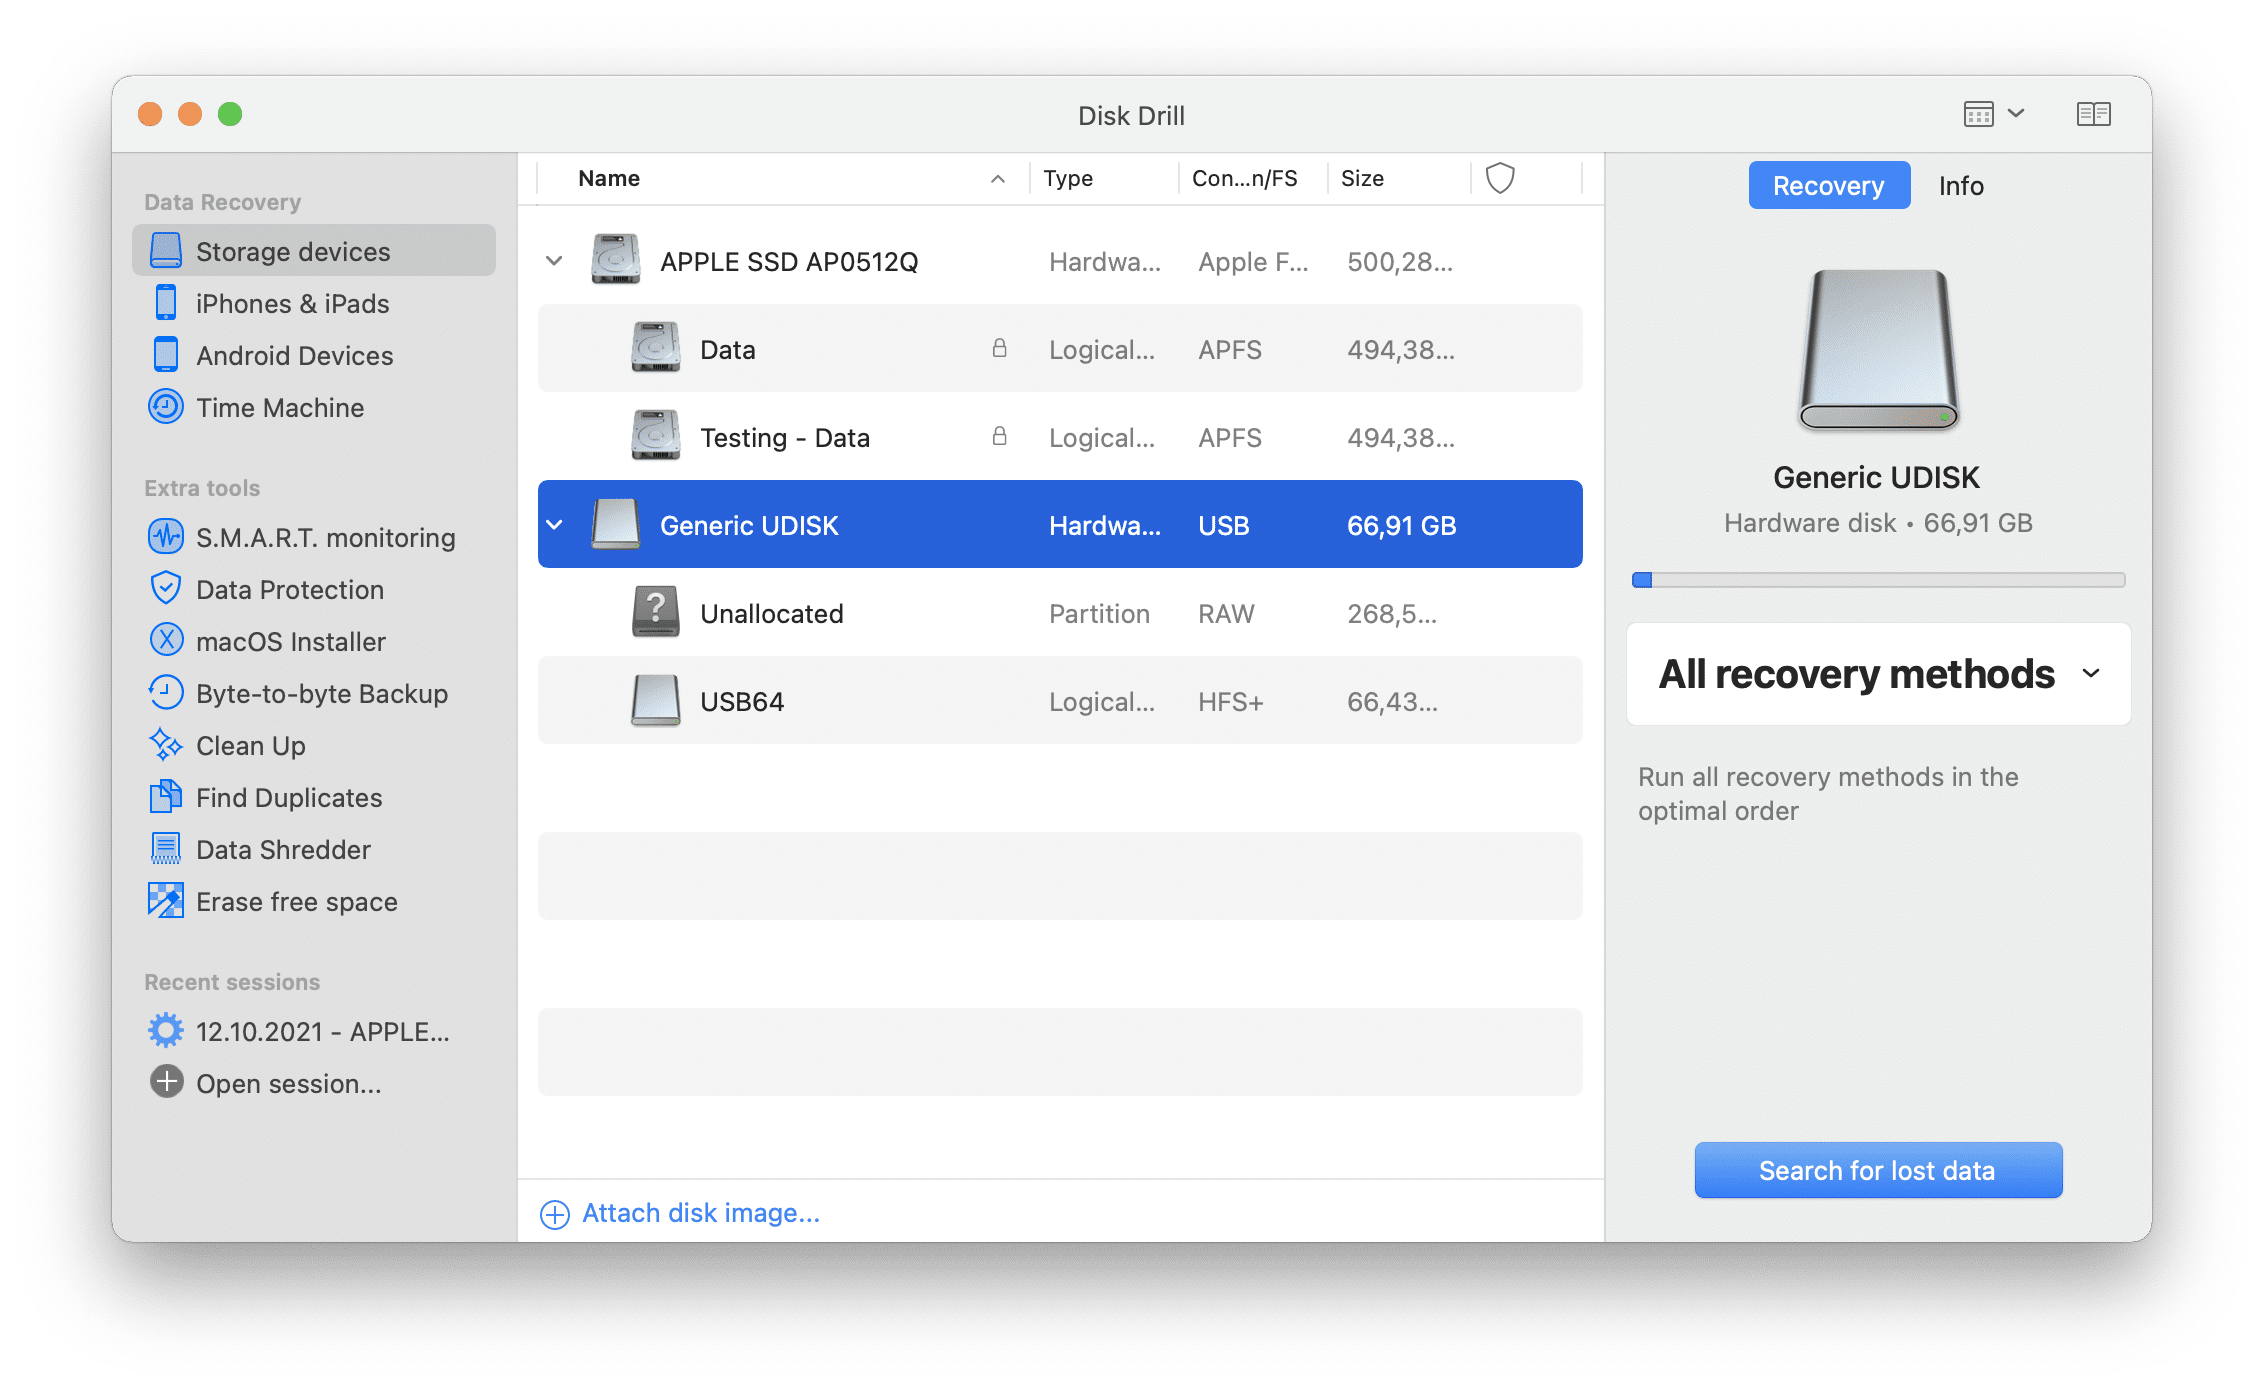
- Launch Disk Drill and go through the initial setup to give it all the permissions it needs to do its job.
- Select the storage device where your files were located and click the Search for lost data button.

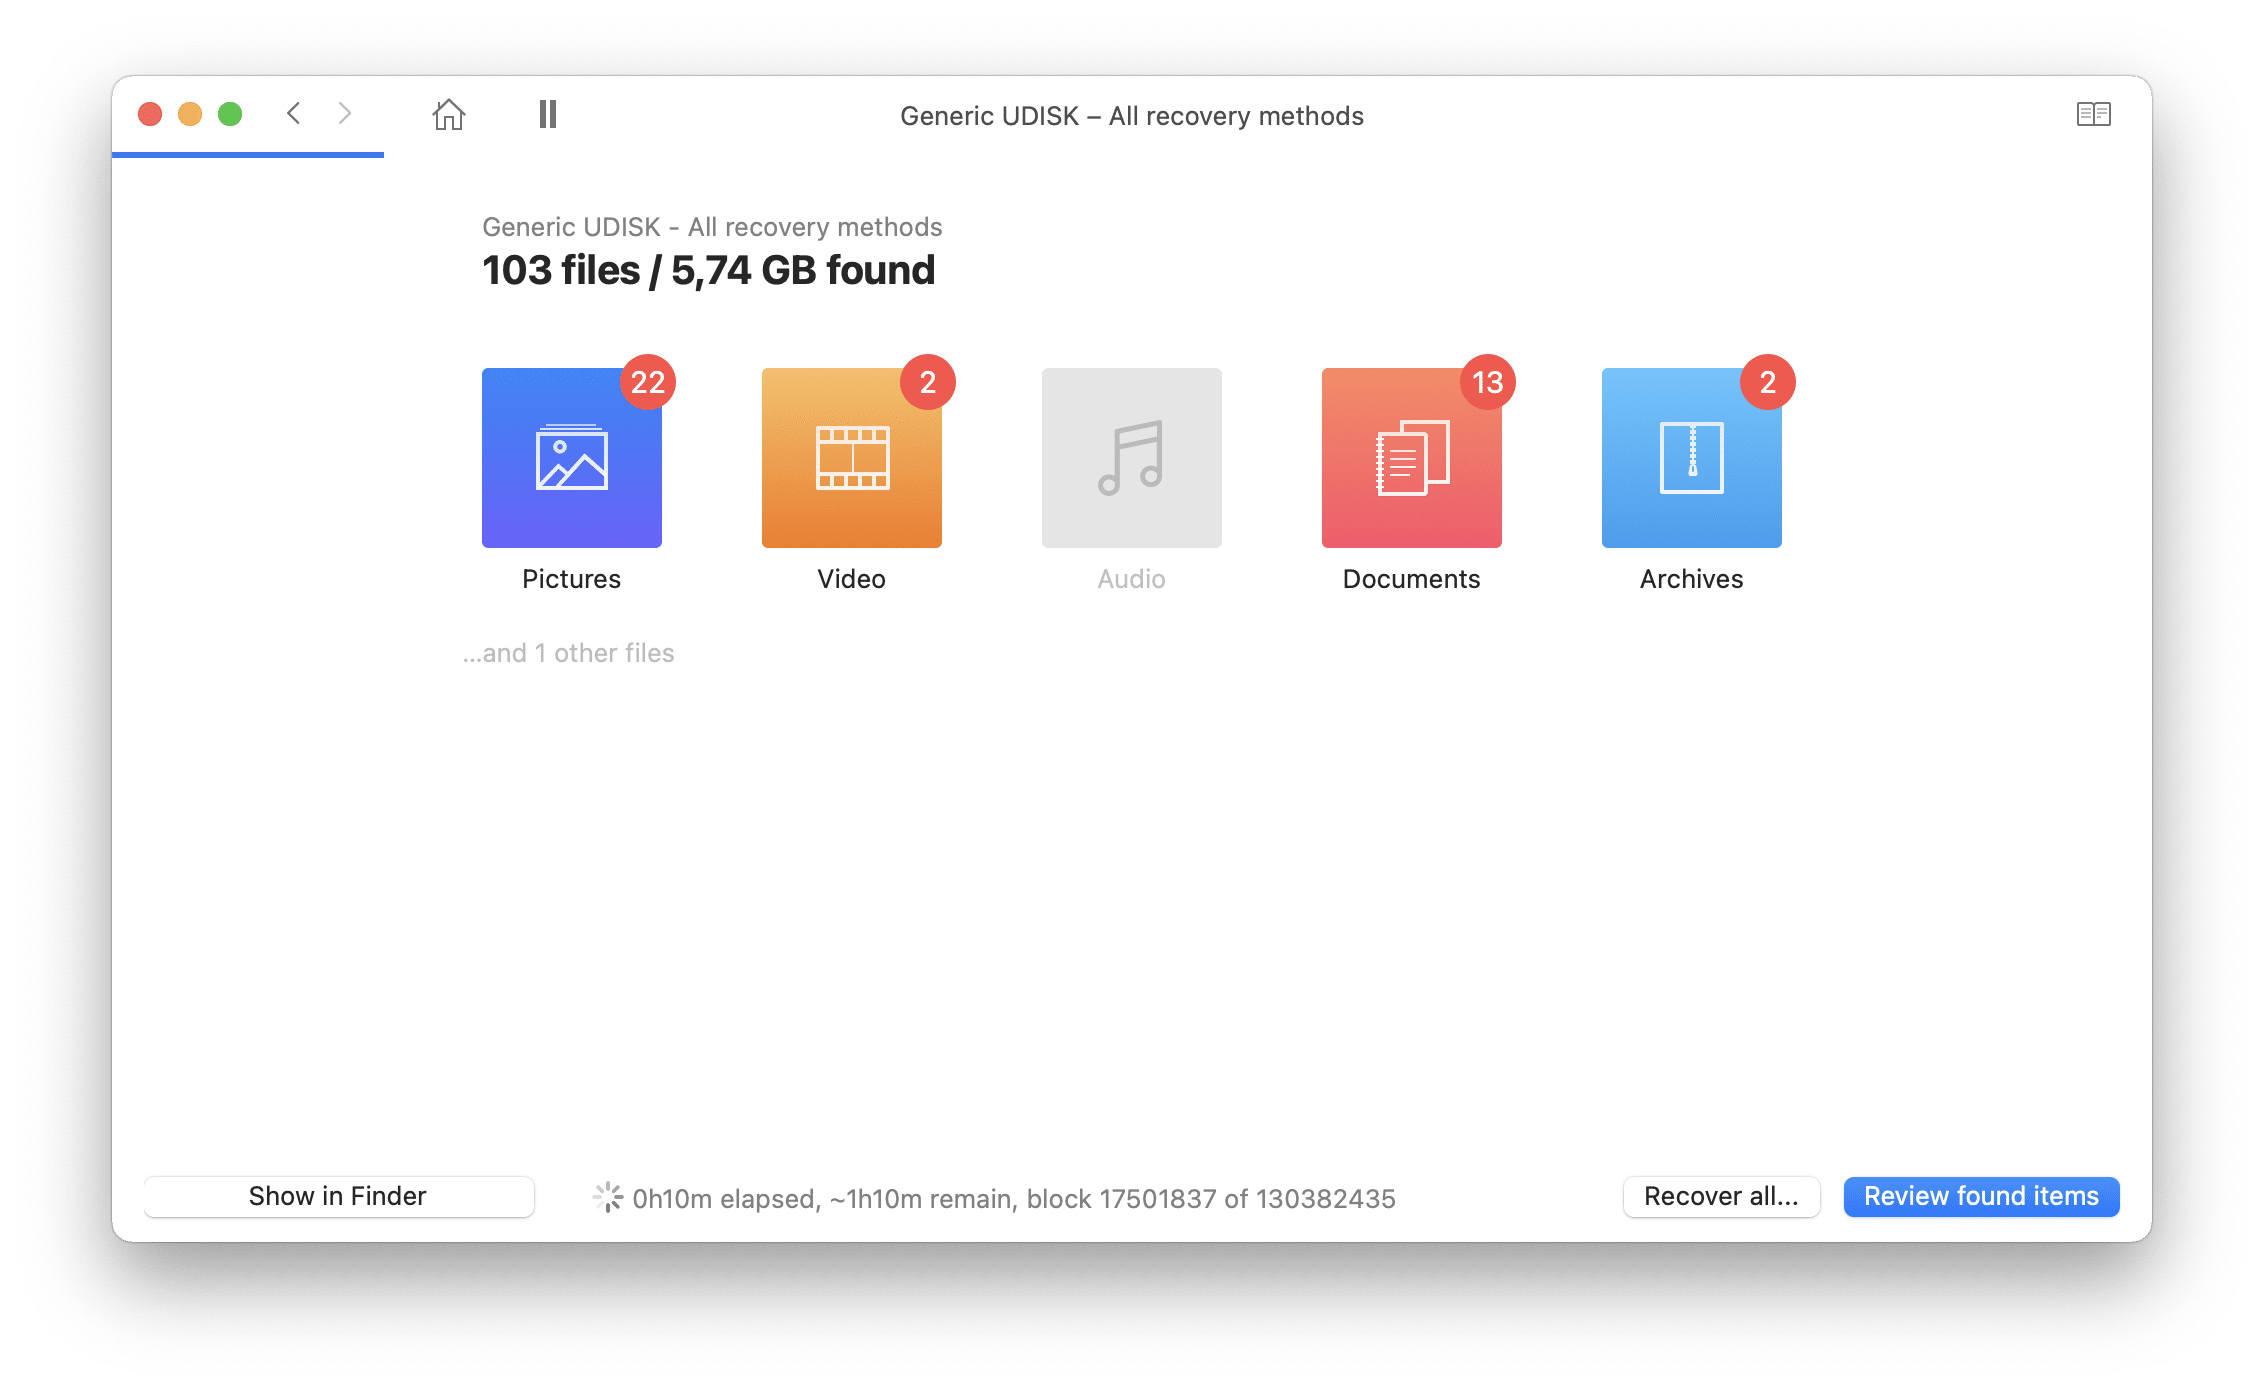
- Give Disk Drill some time to finish scanning the device or click the Review found items button right away to go through the scan results without any waiting.
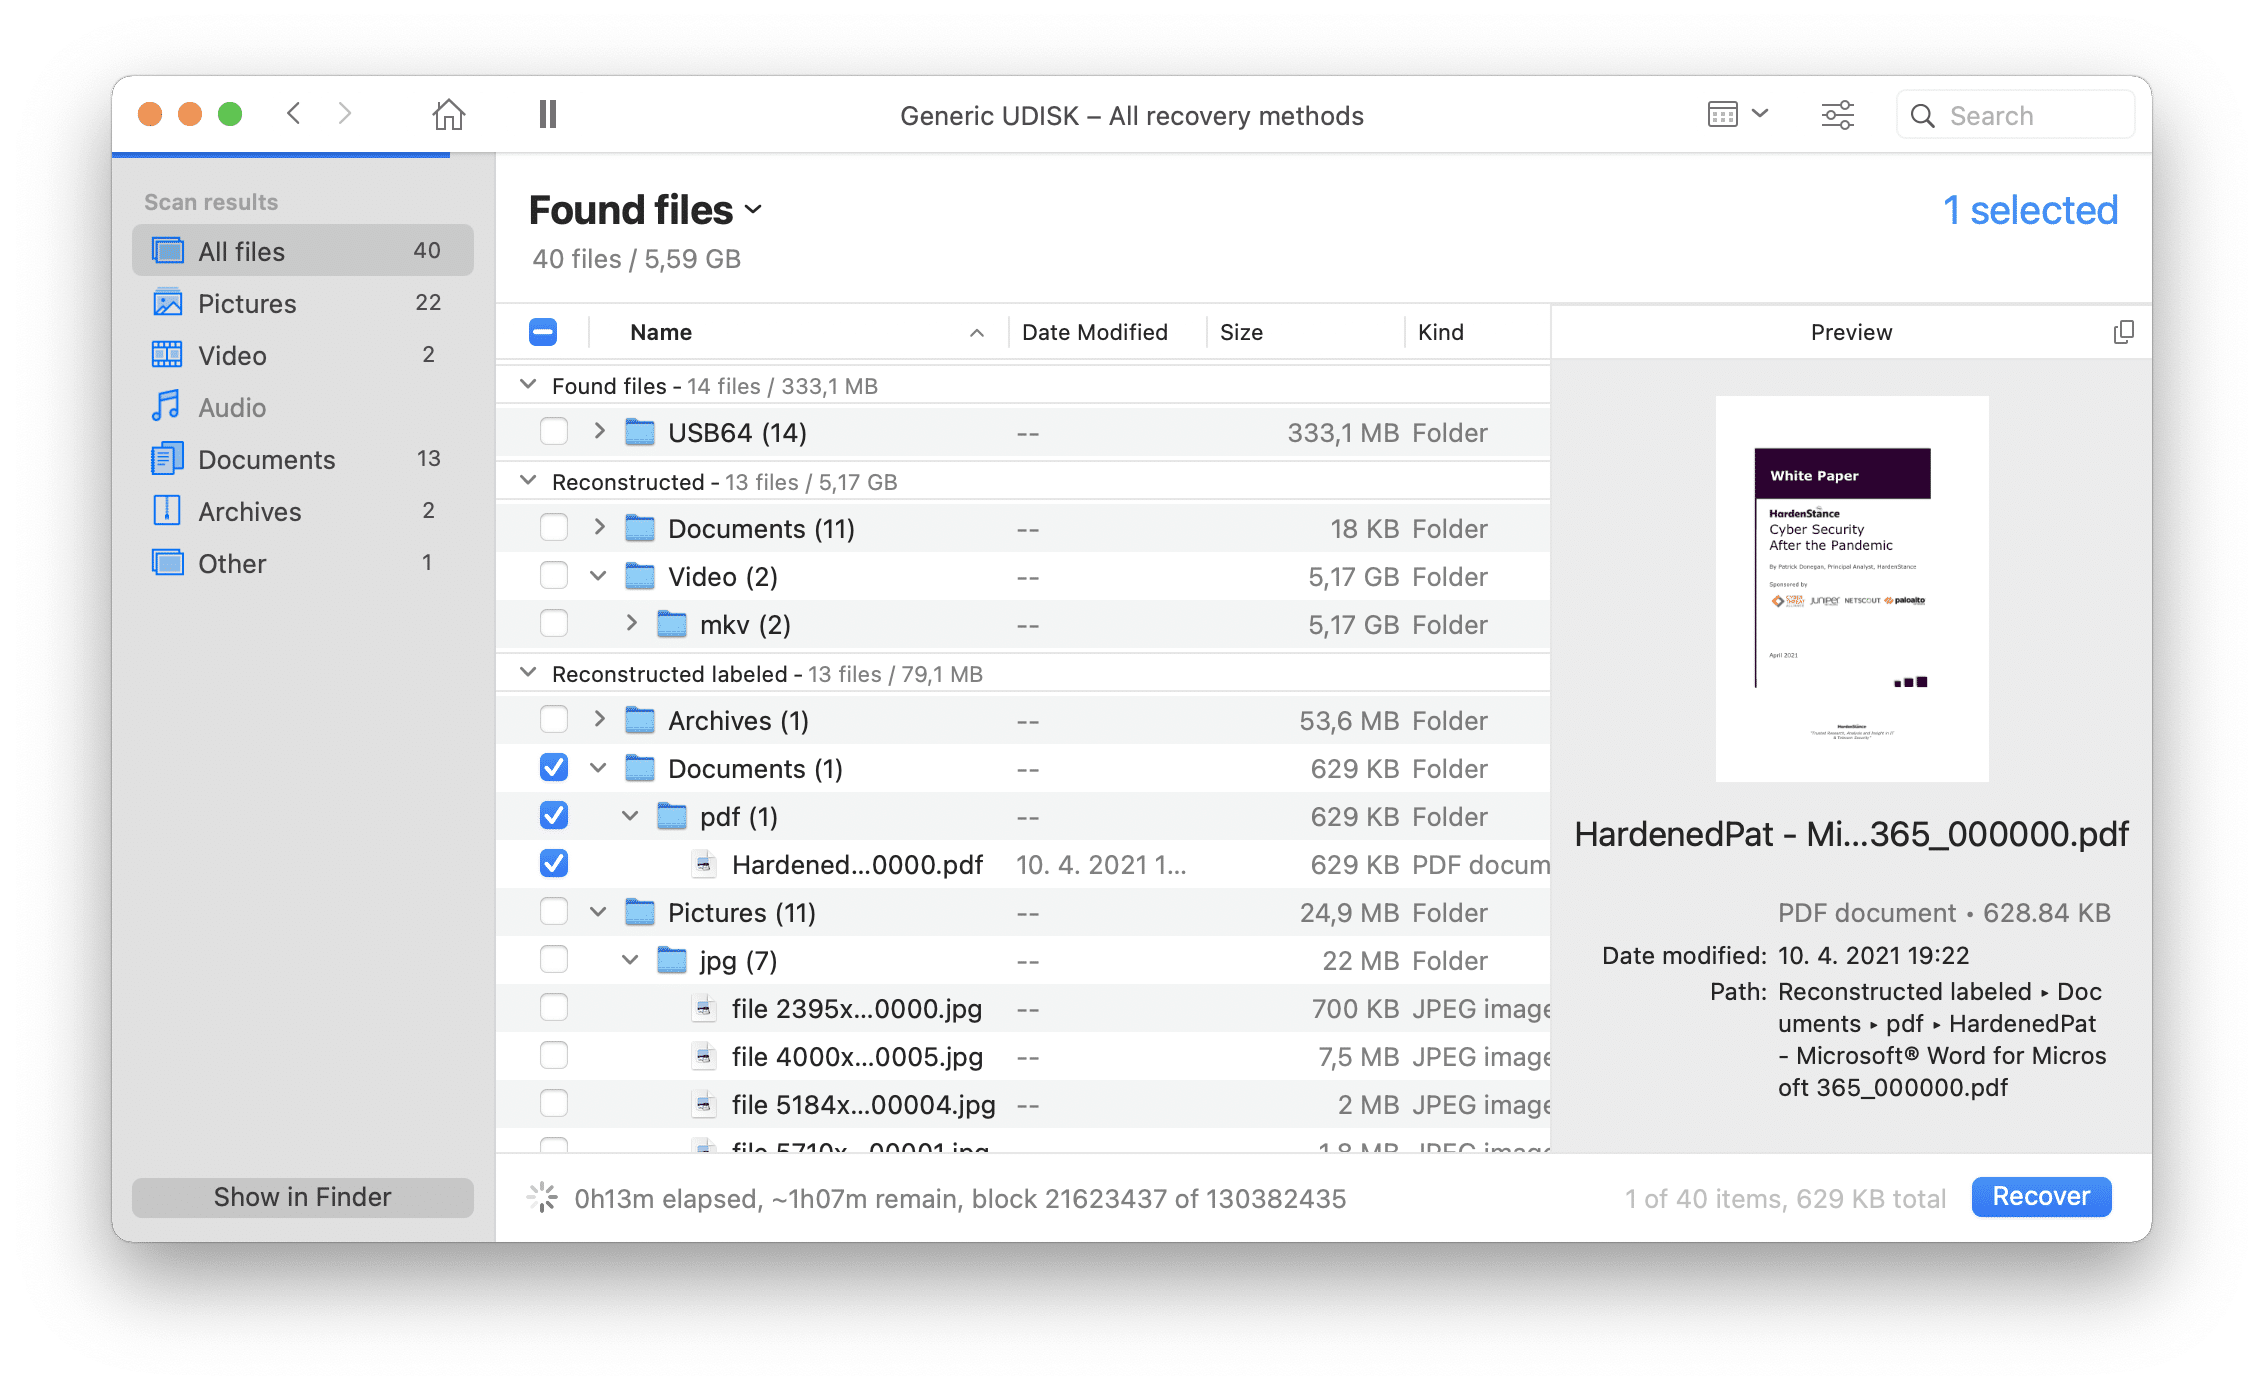
- Preview and select the files you want to recover. Files that can be successfully previewed can also be recovered.
- Click the Recover button and specify the recovery destination. You should never recover to the same storage device because you could overwrite the very same files you’re trying to recover.
As you can see, recovering permanently deleted files with Disk Drill is something anyone can do, and the entire process doesn’t take much time unless your storage device is extremely slow or large or both. But even then, you can always pause a scan and resume it later.
Conclusion
I hope this article has empowered you with enough information and practical tips so that you can successfully recover all deleted files. To avoid experiencing data loss again in the future, we recommend you regularly back up all important data and keep your Mac well maintained.
Frequently asked questions about Mac data recovery
Is it possible to recover deleted files on Mac?
Yes, there are several methods that can be used to recover deleted files on Mac:
- You can use the Undo command,
- retrieve the files from the Trash folder,
- recover them from an existing backup,
- or use data recovery software like Disk Drill.
Can permanently deleted files be recovered without third-party software?
If you use a backup software application like Time Machine, then you should be able to recover permanently deleted files from an existing backup.
What are permanently deleted files?
The term permanently deleted files is used to refer to deleted files that are no longer present in the Trash folder, which is a special location where deleted data are temporarily moved to give users a chance to undelete them.
How do I recover permanently deleted files without a backup?
Without a backup to recover from, your best option on how to recover files that are no longer in Trash is data recovery software, which is available at a variety of price points, ranging from completely free tools to expensive professional solutions.
Can I recover files after emptying the Trash folder on Mac?
You can recover files after emptying the Trash folder on Mac using Disk Drill:
- Install Disk Drill on your Mac.
- Launch the application and scan your drive.
- Select and recover deleted files.


