January 6, 2026
The ultimate guide to removing the Bing redirect virus from Mac
If you’re reading this, most probably your Mac has fallen victim to the infamous Bing redirect virus. You might notice that every browser search gets forced through Bing, even if you’ve set Google or another engine by default. On top of that, annoying pop-ups or ads may keep appearing, and strange extensions or even unknown configuration profiles might have sneaked into your system.
In this guide, I’ll walk you through how to track down the culprit and remove it step by step. By the end, you’ll restore control over your browser and get your Mac back to its clean, safe state.
What’s really hiding behind the Bing redirect virus
The Bing redirect virus is not a classic virus but a type of browser hijacker. Instead of infecting your whole system, it quietly changes your browser’s behavior: searches get rerouted through Bing, ads and popups appear more often, and your chosen settings no longer stick.
On macOS, these hijackers usually sneak in through free apps from unverified sites or come bundled with seemingly useful extensions. Starting with macOS 15, Apple’s security makes it harder for suspicious apps to launch at all.
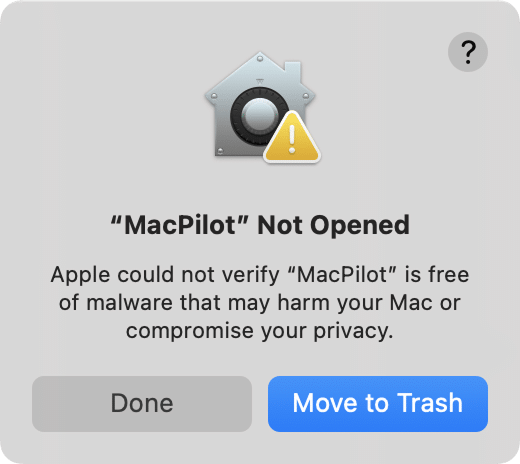
Still, hijackers can disguise themselves as ordinary browser add-ons. That means the problem hasn’t gone away; it has just shifted to hiding in places that look harmless.
And once users notice it, the way to get rid of them is often far from obvious, as you can see from various Reddit threads and Apple discussions.
How to remove the Bing redirect virus from Mac
Getting rid of the Bing redirect virus requires you to inspect different areas of your Mac: system settings, browser extensions, and installed applications. Once that’s done, it’s a good idea to run a virus scan to make sure nothing is left hiding in the background.
Let’s start with the system-level settings where hijackers often leave their traces.
Check System Settings
Hijackers may install configuration profiles or background agents that let them reset your browser settings even after you’ve changed them. Here’s what to check:
1. Delete unknown configuration profiles
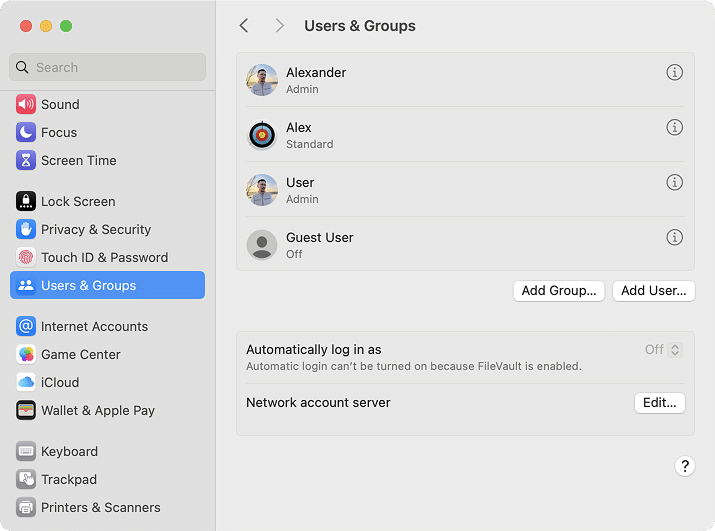
Go to System Settings → Users & Groups. If you see profiles you didn’t create yourself, often with names like AdminPrefs, ChromeSettings, or SafariSettings, delete them.
2. Inspect LaunchAgents and LaunchDaemons
Hijackers sometimes add background files to your system that relaunch their settings after each restart. Check these folders:
/Library/LaunchAgents/Copy
/Library/LaunchDaemons/Copy
~/Library/LaunchAgents/Copy
The easiest way to open these folders is to open Finder and press Command+Shift+G. This opens the Go to folder dialog, where you can paste the wanted path and hit Enter to open it.
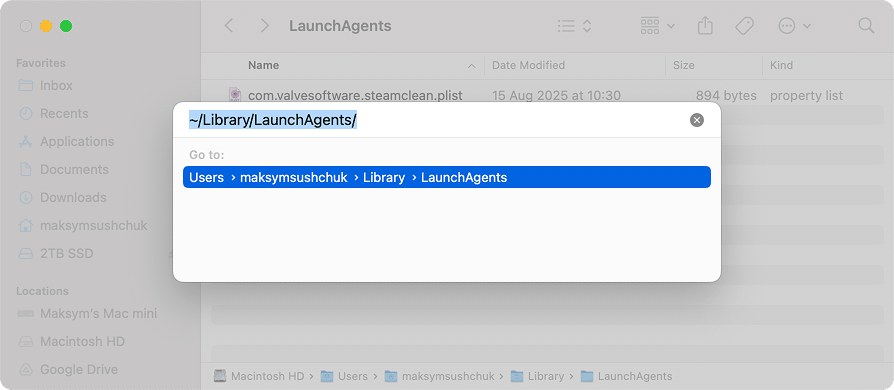
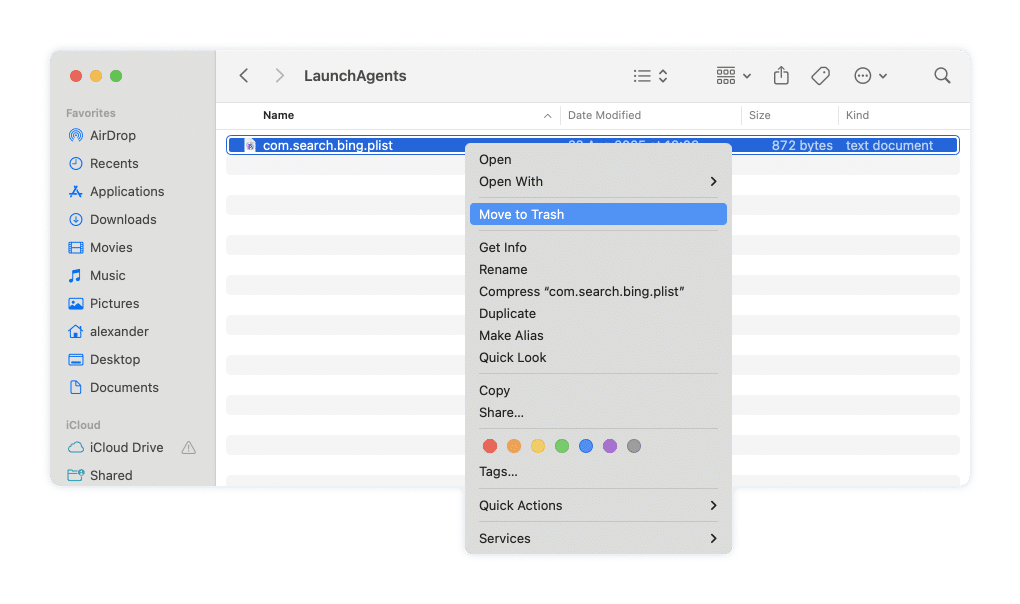
Once you open the mentioned folder, look for suspicious files with names containing words like search, bing, hlpr, update, or agent.
If you find them and are sure they don’t belong to trusted apps, move them to the Trash.
Clean up your browsers
Once you’ve checked system settings, move on to your browsers. This is where the Bing redirect hijacker does most of its damage.
Safari
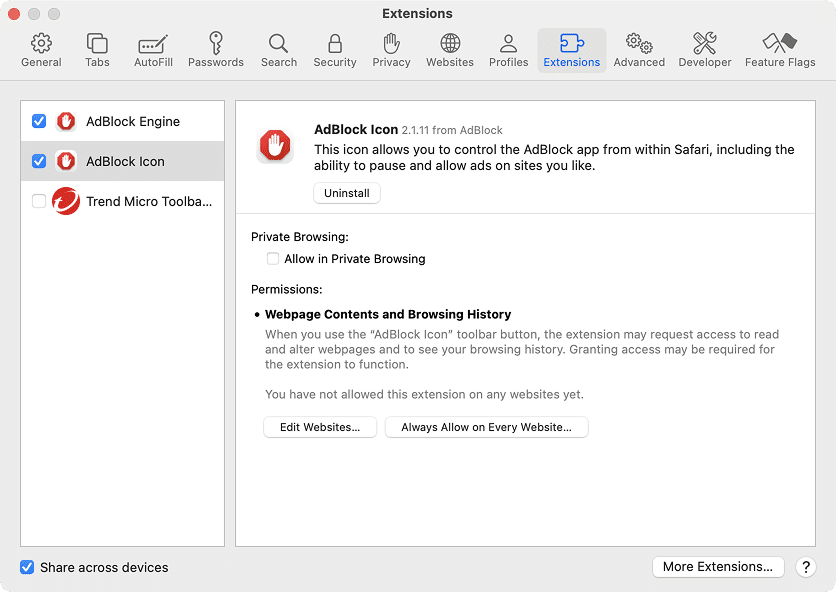
- Open Safari → Settings and go to the Extensions tab. Remove anything you don’t recognize.
Note:
If an extension refuses to uninstall and shows an error, click Show in Finder, delete the related file manually, then empty the Trash and restart your Mac.
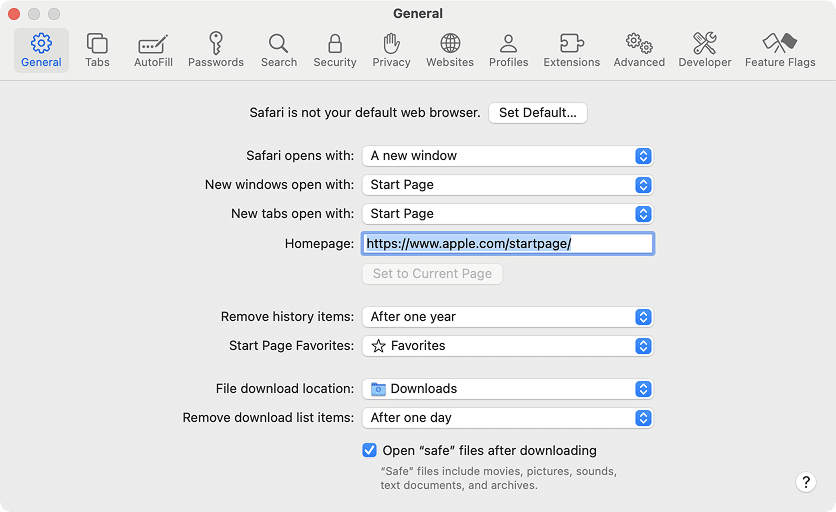
- In the General tab, check the homepage and set it to the site you prefer.
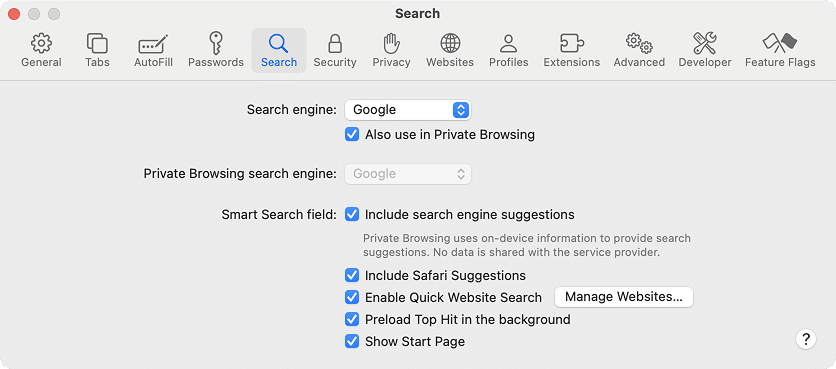
- In the Search tab, choose Google or another search engine you trust.
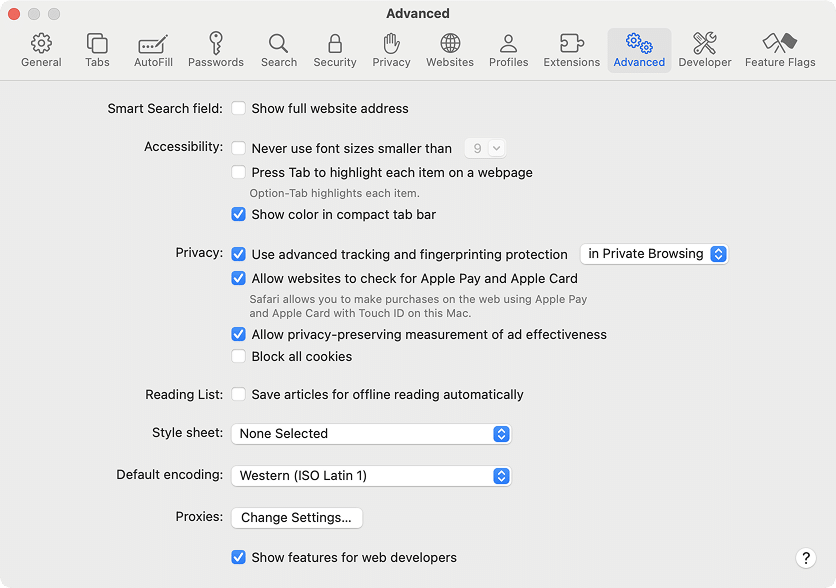
- Enable Show features for web developers in Settings → Advanced.
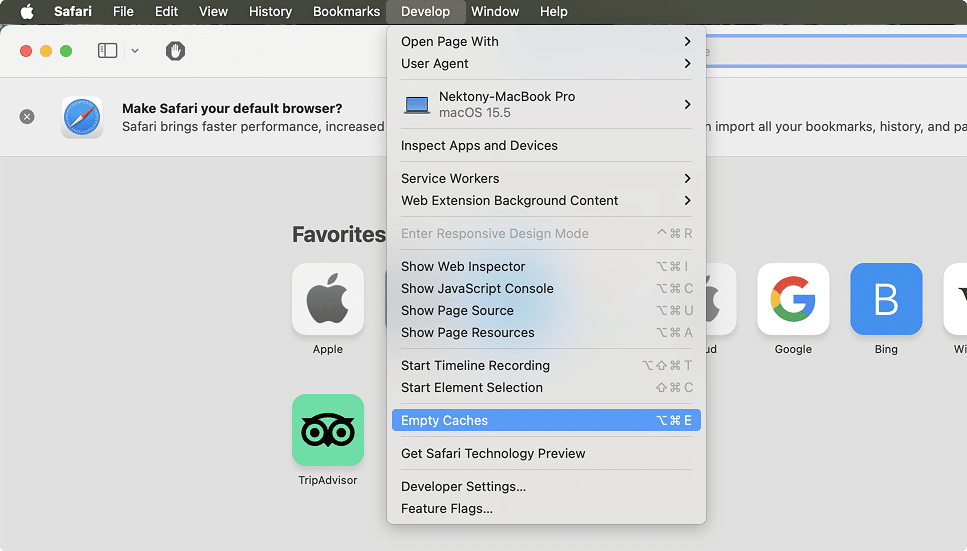
- Then in the Develop menu, select Empty Caches.
Chrome and Chromium-based browsers (Brave, Vivaldi, Edge, etc)
- Open Menu → Settings.
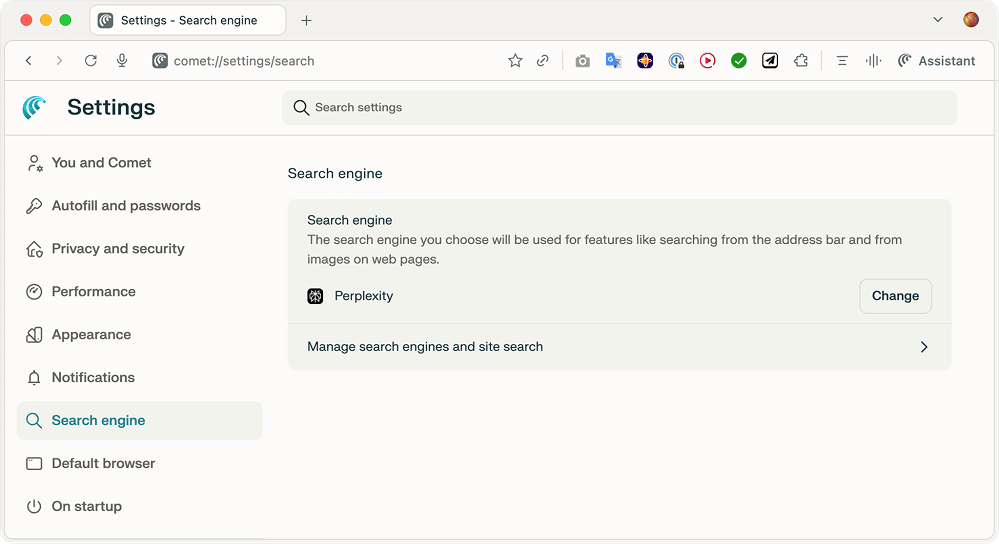
- Under Search engine, click Change and select your preferred engine.
- Go to Extensions and remove anything suspicious.
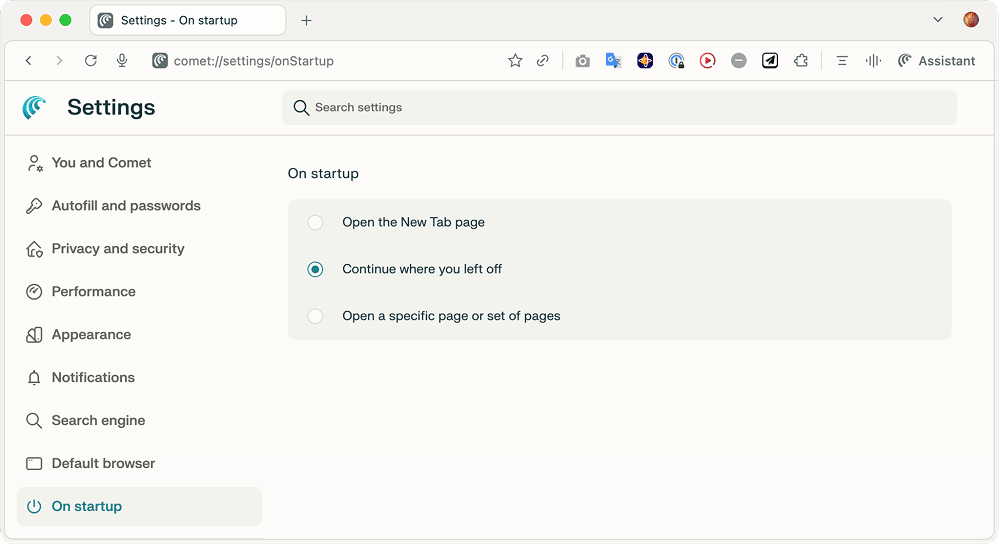
- In the On startup section, make sure Chrome opens either a blank page or a site you’ve set yourself.
Now, let’s delete browsing data.
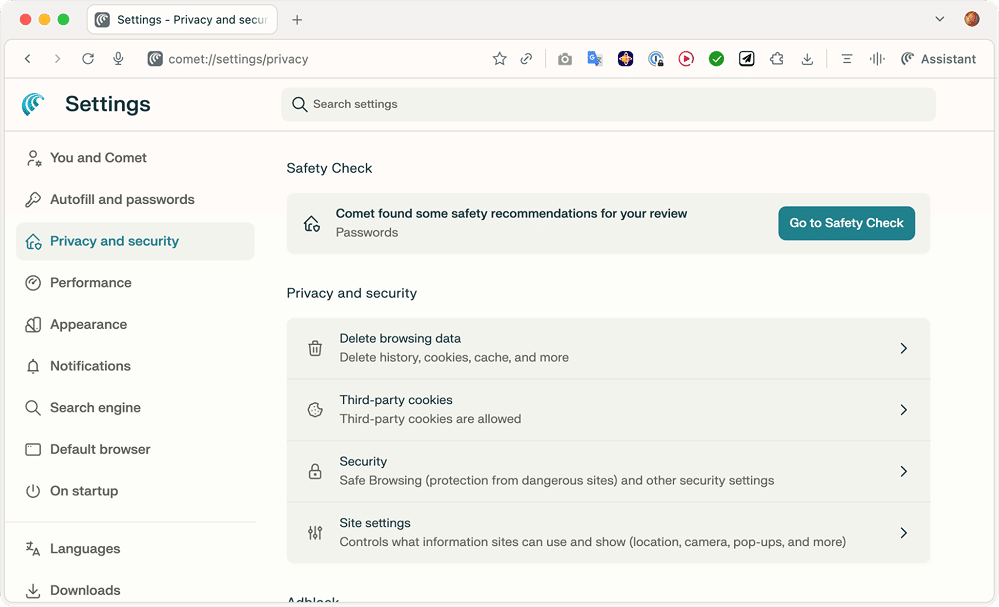
- In Settings, select Privacy and security.
- Click Delete browsing data.
- Delete Cookies and other site data, as well as Cached images and files with the time range of All time.
Now your browser should be clean of Bing redirect virus.
Firefox
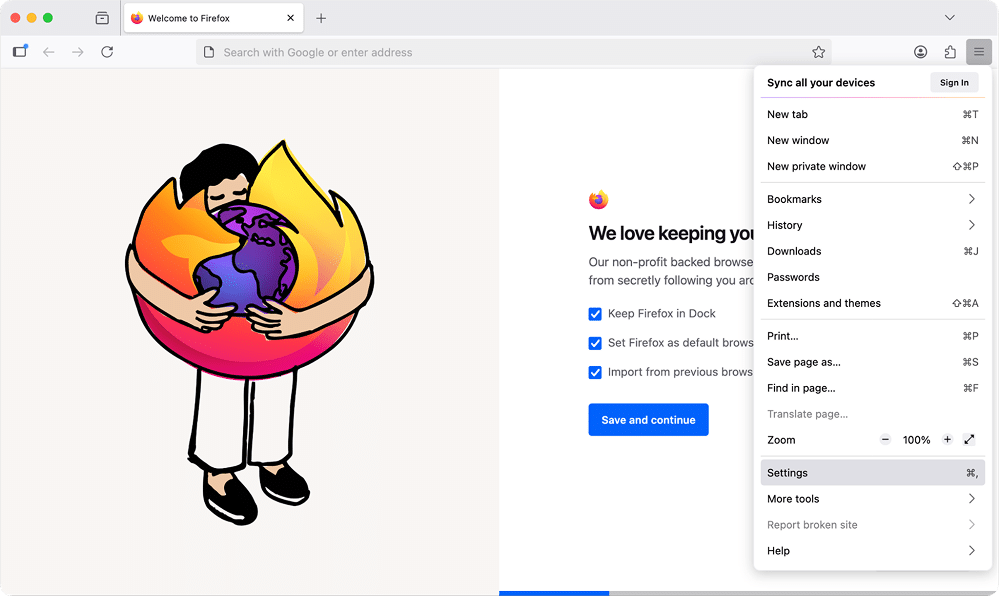
- Open Settings via the application menu or by pressing ⌘,.
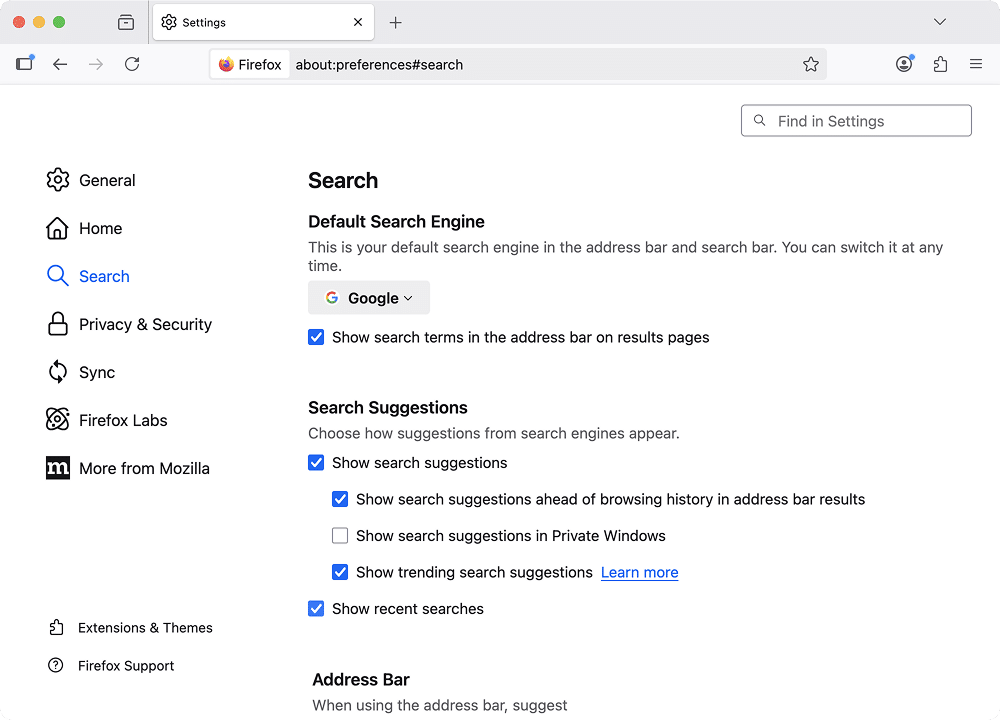
- In the Search section, set the search engine you want.
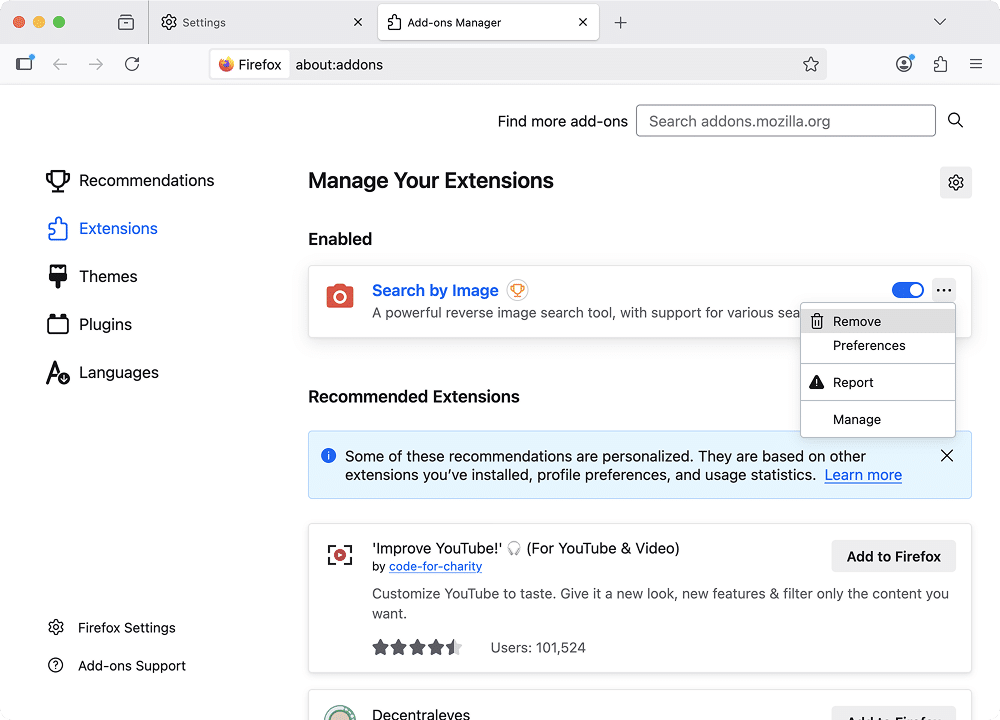
- In Extensions, delete anything you don’t recognize.
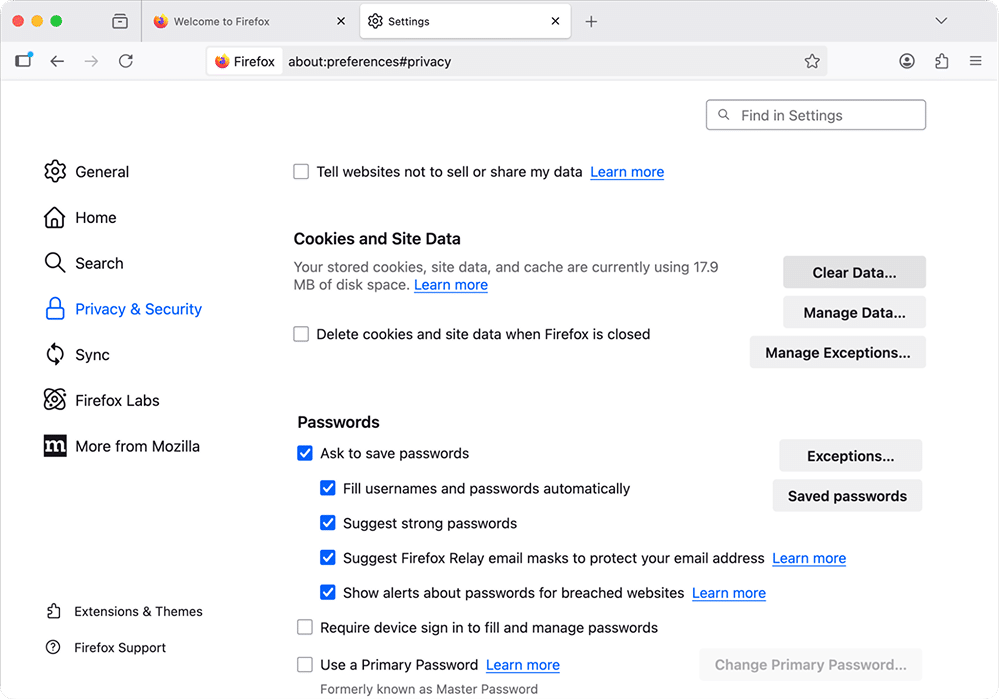
- In Settings, select Privacy and security.
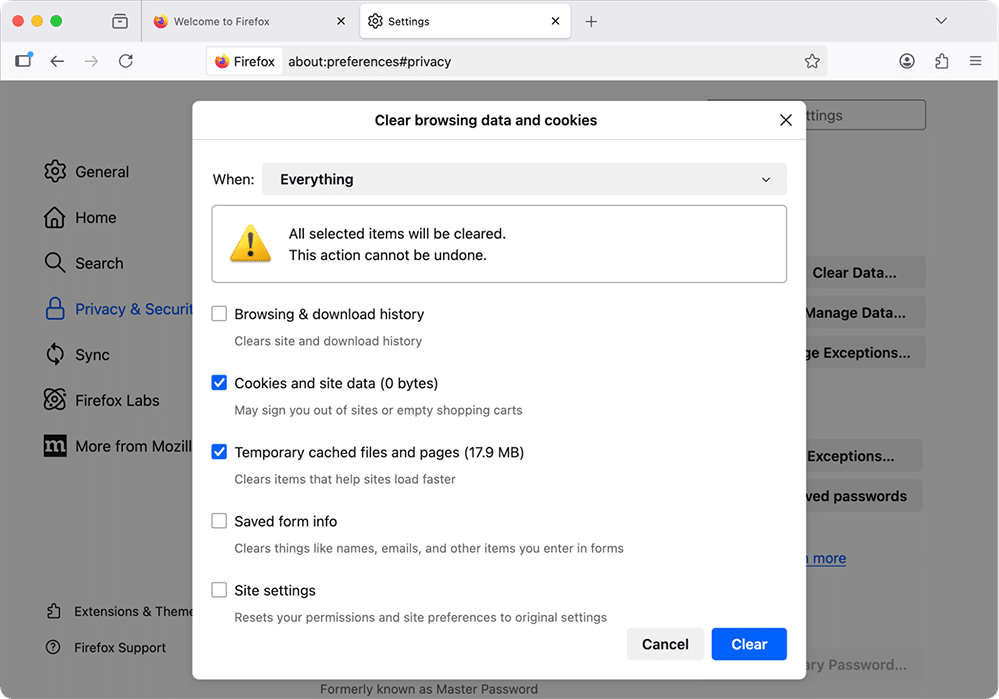
- Now scroll down to the Cookies and Site data and click Clear data…
- Select When: Everything, and tick Cookies and other site data, as well as Temporary cached files and pages, with the time range of All time.
Restart your Mac afterwards.
Remove suspicious applications
Another common hiding place for hijackers is in applications you don’t remember installing. Starting with macOS 15, apps flagged as unsafe (such as unsigned software or malware) will not even launch. Instead, the system shows a warning and recommends deleting them right away.
Open your Applications folder and look for anything unfamiliar. Pay extra attention to so-called “optimizers,” “cleaners,” or fake Flash Player updaters, which are a classic disguise for adware. If you didn’t install an app yourself, it’s safer to remove it.
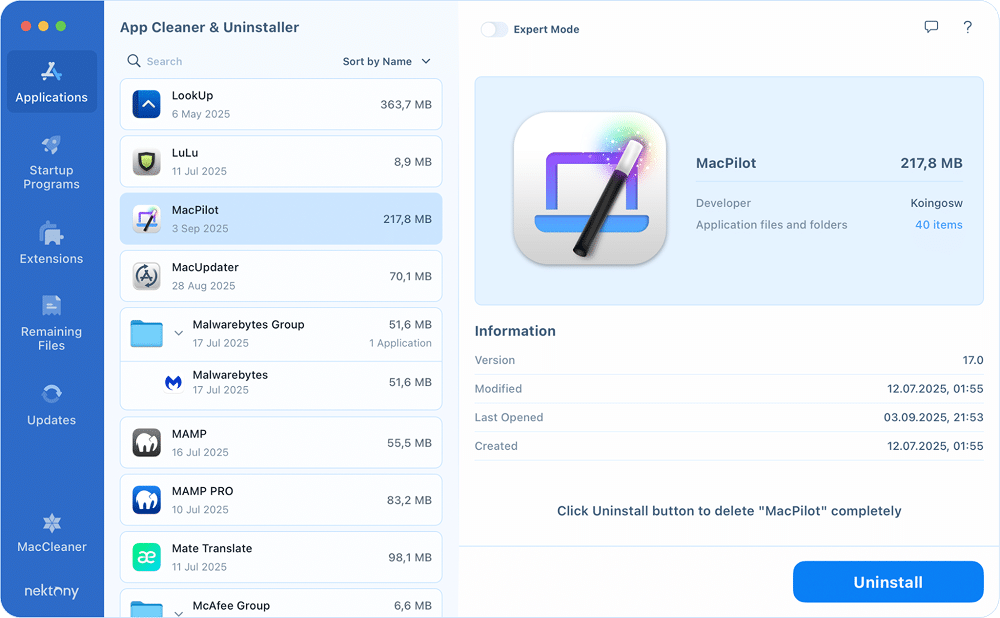
You can delete suspicious apps manually by dragging them to the Trash. To make sure every single related file is gone, use App Cleaner & Uninstaller by Nektony:
- Download and launch App Cleaner & Uninstaller to let it scan your system.
- Find the suspicious app or the one that triggered a macOS warning.
- Select it and click Uninstall.
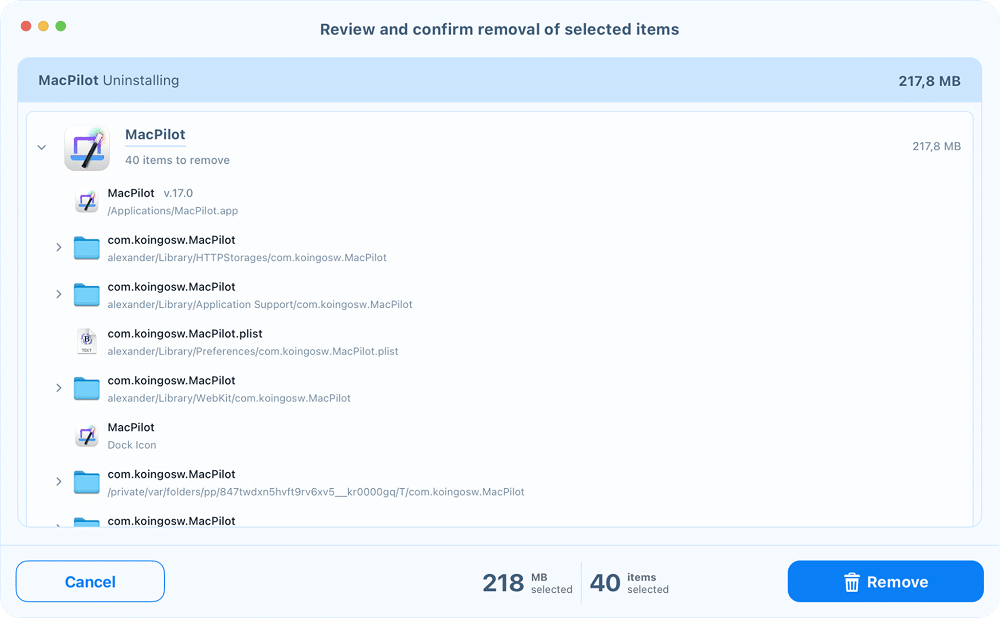
- In the Review and Remove window, confirm removal and enter your admin password if required.
- Empty the Trash and restart your Mac.
This ensures not just the app itself but also its hidden support files are removed for good.
Run an Antivirus Scan (Optional)
Once you’ve removed suspicious apps, profiles, and extensions, the Bing redirect virus shouldn’t bother you anymore. Still, for an extra layer of reassurance, you might want to run a quick antivirus or diagnostic scan and confirm that nothing malicious is left behind.
For example, the screenshot below shows a report generated by the EtreCheck app, which I used to check for potential issues on my Mac.
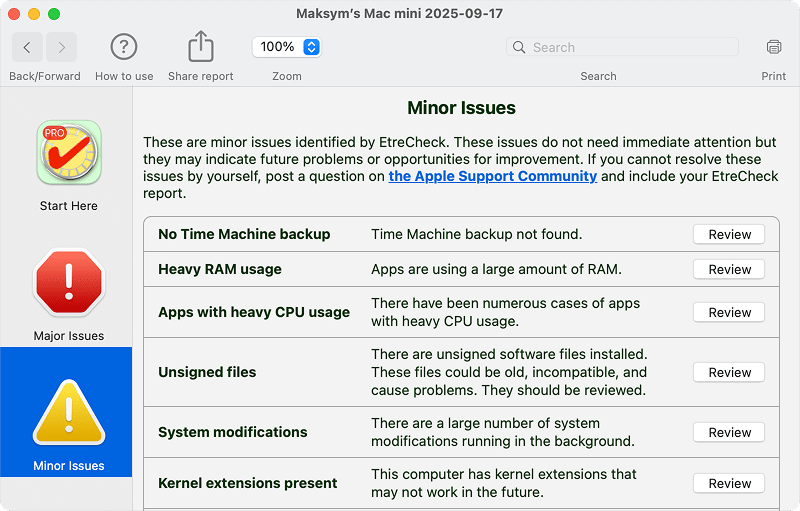
Running such a scan gives some users peace of mind that the Bing redirect virus is fully gone, and their Mac is back under your control.
How to stay safe after removal
In this article, I showed how to get rid of the hijacker often called the Bing Redirect Virus. But one more question remains: how did it end up on your Mac in the first place? Most likely, it slipped in through a shady browser extension with permission to change your search engine, a free or cracked app bundled with unwanted components, or even a malicious file that was opened without caution.
To avoid running into the same problem again, consider limiting access to your Mac for other users, disabling extension sync in your browser if you use multiple Macs, and always double-checking what you install.
A few extra seconds of attention can save you hours of cleanup later.
A personal closing note
Hijackers like “Bing redirect virus” are frustrating because they often linger quietly. They don’t crash your Mac or lock your files, so they can sit unnoticed while making money from ads, redirects, or by selling browsing data.
What had been puzzling me for ages is why Bing is almost always the landing spot, not Google. The reason turned out to be more practical than mysterious. Bing’s search results can be accessed and repackaged more easily, and its partner ad networks are simpler for shady operators to monetize. That combination makes Bing the preferred disguise, even though Google would look much more credible to most users.


