


August 22, 2025
Uninstall Visual Studio on Mac
Share

When Microsoft retired Visual Studio for Mac in August 2024, I took the hint and switched to Visual Studio Code. But I didn’t rush to remove the old integrated development environment … until now.
If you’re also cleaning house and are finally ready to uninstall Visual Studio for Mac, this guide will walk you through three effective, step-by-step methods.
This Article Contains
Save time and avoid hidden leftovers
Visual Studio for Mac installs more than just an app. It brings along SDKs, extensions, and support files scattered across your system. App Cleaner & Uninstaller by Nektony finds and removes all related components in just a few clicks, so you can fully uninstall Visual Studio without digging through system folders.
Uninstalling Visual Studio for Mac: Method comparison
Below is a quick comparison of the three main removal options, helping you decide which one suits your situation best:
| Method | Ease of use | Completeness | Control | Ideal for |
|---|---|---|---|---|
| Official script (Microsoft) | ★★☆ Run a script from Microsoft’s guide |
★★★ Removes app and key components (Mono/Xamarin) |
★★☆ Script does its work |
Users comfortable with Terminal, less familiar with the filesystem |
| Manual via Finder | ★☆☆ Requires opening multiple locations |
★★☆ Only if you hit all paths |
★★★ Full transparency |
Users who want fine control |
| With App Cleaner & Uninstaller | ★★★ Just a couple of clicks |
★★★ The tool finds all app leftovers |
★★★ You can review the files found |
Users wanting a fast, safe cleanup without Terminal |
- Microsoft’s official uninstall procedure (last updated for Visual Studio for Mac 2022) provides a shell script to remove the app bundle and related Cocoa frameworks. It also sweeps away Mono, Xamarin, and .NET components.
- For hands‑on users, manually removing Visual Studio and all artifacts is possible. This approach involves accessing various folders via Finder and gives you full control if you don’t skip any paths. Otherwise, you might leave leftovers.
- With App Cleaner & Uninstaller by Nektony, you can find and remove the Visual Studio bundle and all its service files automatically with a couple of clicks. If you’re tech-savvy, you can review the list or confirm leftover removal straight away.
Before you uninstall Visual Studio for Mac
1. Sign out of your accounts
If you’re signed in to Microsoft services or GitHub through Visual Studio, sign out first. This can help avoid annoying sync or permission errors during the removal process.
2. Remove extensions and language packs
Visual Studio often has additional components like C#, .NET runtimes, or mobile SDKs installed. Open the IDE and remove any extensions, workloads, or language packs you no longer need. This increases the chances of cleaning up all related service files.
3. Back up your projects
Don’t assume your code is safely stored in the cloud. If you haven’t synced your projects to GitHub or another repository, back them up manually. Visual Studio may store them locally, and once the app is gone, so might be your work.
Uninstall Visual Studio for Mac via Microsoft’s official script
Microsoft provides an official shell script to help remove Visual Studio for Mac and its supporting components. It’s a clean, supported approach, especially if you want to uninstall everything the IDE brought in (including Mono and Xamarin SDKs).
Note:
This method follows Microsoft’s official uninstallation guide and requires using Terminal and admin permissions.
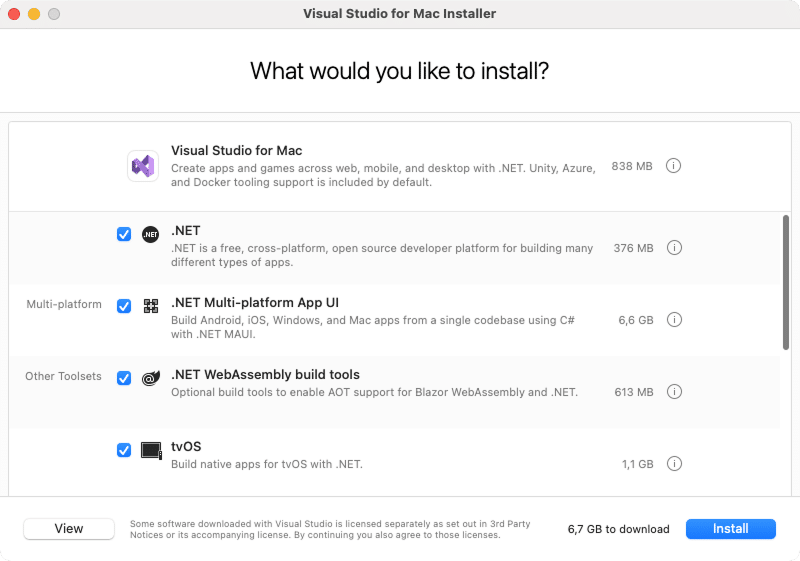
Step 1: Download the official uninstallation script
Click the link to download the Visual Studio uninstallation script.
uninstall-vsmac.sh
Copy
Step 2: Run the script in Terminal
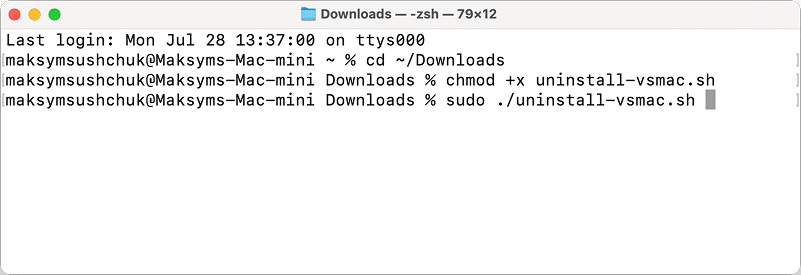
- Open Terminal.
- Type the command below and hit Return to navigate to the folder where the script was downloaded:
cd ~/DownloadsCopy
- Use this command to make the script executable:
chmod +x uninstall-vsmac.shCopy
- Then run the script:
sudo ./uninstall-vsmac.shCopy

- Enter your Mac password when prompted. (If you don’t see it as you type, this is expected behavior in Terminal.)
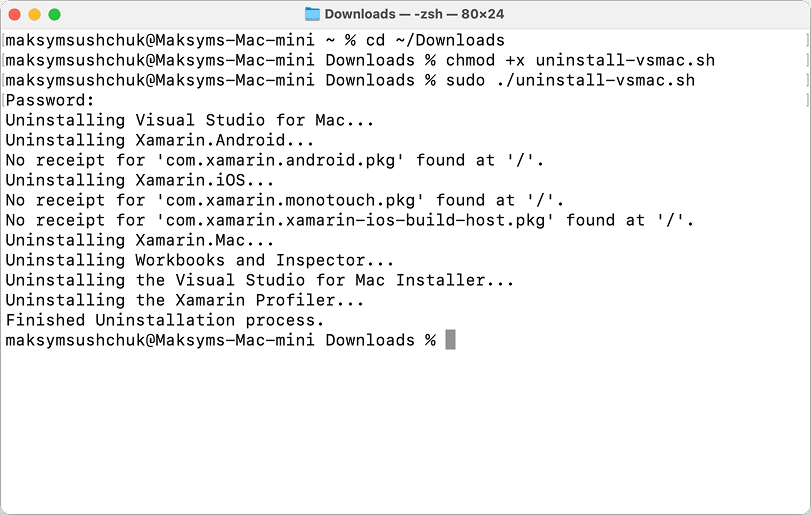
The script will remove:
- Visual Studio for Mac app
- Mono Framework
- Xamarin.iOS and Xamarin.Mac SDKs
- Android SDK and NDK components (if installed via Visual Studio)
- Related receipts and preferences
Once complete, the Terminal will return to your prompt without errors.
(Optional) Step 3: Remove .NET Core SDKs
Note:
The following guide will remove all versions of the .NET SDK and runtime from your Mac. Before proceeding, be sure you don’t need them for other development environments.
If you’ve been working with .NET Core or ASP.NET Core, you likely have .NET SDKs installed outside the Visual Studio app bundle. These won’t be removed by the default uninstall script.
To clean them up:
- Download the official script from Microsoft.
-
Save it as
dotnet_uninstall-pkgs.shCopy
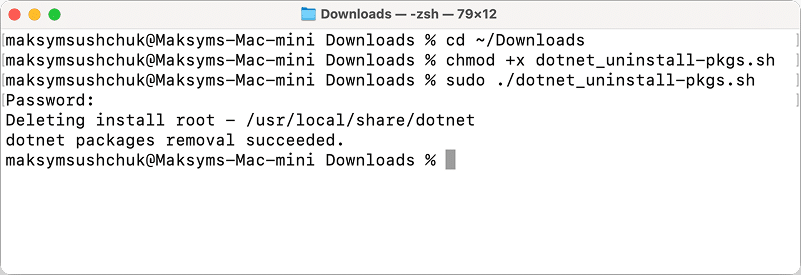
- Open Terminal.
- Type the following command and hit Return to navigate to your Downloads folder.
cd ~/DownloadsCopy
- Use this command to make the script executable:
chmod +x dotnet_uninstall-pkgs.shCopy
- Run it with admin rights:
sudo ./dotnet_uninstall-pkgs.shCopy
Once the Terminal returns to your prompt without errors, you have successfully uninstalled Visual Studio for Mac along with related .NET components.
Note:
Manually remove Visual Studio for Mac using Finder
Prefer not to run scripts or third-party tools? You can uninstall Visual Studio for Mac manually by locating and deleting its files via Finder. This method gives you full control; just make sure to follow the steps carefully to avoid leaving behind service files.
Note:
This instruction was tested on macOS 15 for Visual Studio 2022. The list might differ if you have different versions of the OS and the app.
Step 1: Remove the application itself
In Finder, go to your Applications folder and move Visual Studio.app to the Trash.

You can also remove the following apps if you have them installed – those are parts of Visual Studio:
- Visual Studio (Preview).app (if installed)
- Xamarin Profiler.app (if used)
Step 2: Delete user-level support files from ~/Library
- Proceed to
~/LibraryCopy
How to find this folder
- In Finder, press Command + Shift + G to open the Go to Folder window.
- Copy the path ~/Library, paste it into the field, and press Enter to open it.

- Then check each of the following paths. If the folder or the file exists, move it to the Trash:
Application Support:
~/Library/Application Support/VisualStudioCopy
~/Library/Application Support/Microsoft Visual StudioCopy
~/Library/Application Support/VisualStudio/7.0/LocalInstall/Addins/Copy
Preferences:
~/Library/Preferences/VisualStudioCopy
~/Library/Preferences/com.microsoft.visual-studio.plistCopy
~/Library/Preferences/Xamarin/Copy
Caches:
~/Library/Caches/VisualStudioCopy
~/Library/Caches/VisualStudioInstallerCopy
~/Library/Caches/com.microsoft.visual-studioCopy
~/Library/Caches/XamarinInstallerCopy
~/Library/Saved Application State/com.microsoft.visual-studio.savedStateCopy
Logs:
~/Library/Logs/VisualStudioCopy
~/Library/Logs/VisualStudioInstallerCopy
~/Library/Logs/XamarinInstallerCopy
Others:
~/Library/VisualStudioCopy
~/Library/Xamarin.MacCopy
~/Library/MonoAndroidCopy
~/Library/MonoTouchCopy
~/.templateengine/Visual StudioCopy
~/.mono/registry/CurrentUser/software/microsoft/visualstudioCopy
~/.config/xbuildCopy


Step 3: Delete system-level components from /Library and /Developer
Some Visual Studio components, especially Xamarin SDKs, are installed system-wide. You’ll need admin rights to remove these.
- First, get to
/LibraryCopy
How to open this folder
- Launch Finder, then go to the Go menu and select Go to Folder.
- Type the /Library path and press Return to view the folder.
- In this folder, remove the following files and subfolders:
Frameworks and Add-ons:
/Library/Frameworks/Xamarin.Android.frameworkCopy
/Library/Frameworks/Xamarin.iOS.frameworkCopy
/Library/Frameworks/Xamarin.Mac.frameworkCopy
/Library/Frameworks/Xamarin.Interactive.frameworkCopy

- Proceed to and remove the following files:
/DeveloperCopy
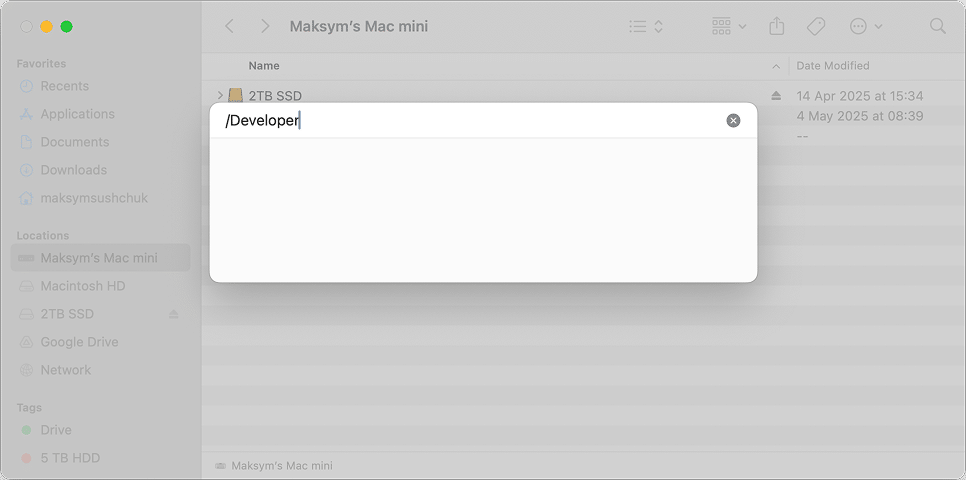
How to access this folder
- In Finder, use the shortcut Command + Shift + G to bring up the Go to Folder dialog.
- Copy the path /Developer, paste it.
- Hit Enter to go directly to the folder.

/Developer/MonoDroidCopy
/Developer/MonoTouchCopy


Step 4: Clean up receipts and .NET tools
- Go to
/private/var/db/receiptsCopy
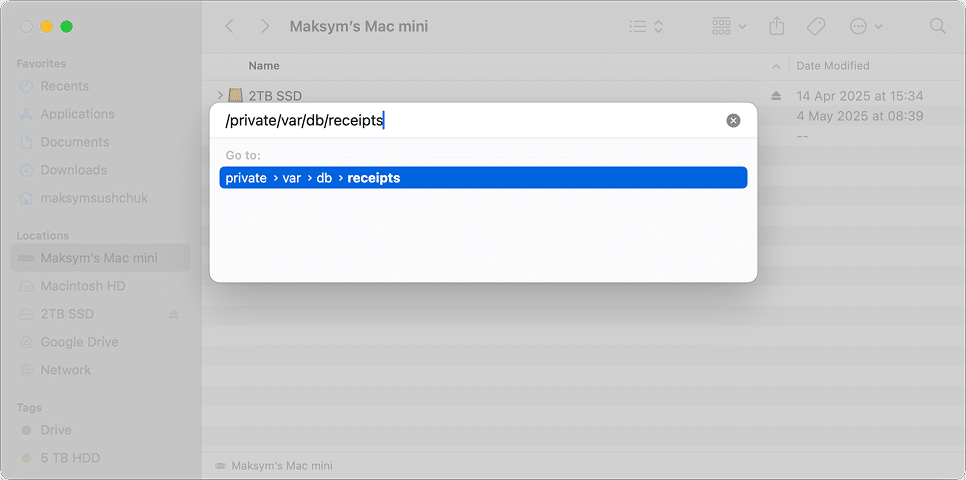
How to open this specific folder
- Copy the path /private/var/db/receipts.
- Open Finder, then select Go > Go to Folder from the top menu.
- Paste the path and press Return to access the folder.
- In this folder, search for dotnet and remove the files you find. Here’s a list of files you will most probably find:
Package Receipts
com.microsoft.dotnet.dev.2.1.302.component.osx.x64.bomCopy
com.microsoft.dotnet.dev.2.1.302.component.osx.x64.plistCopy
com.microsoft.dotnet.hostfxr.2.1.2.component.osx.x64.bomCopy
com.microsoft.dotnet.sharedframework.Microsoft.NETCore.App.2.1.2.component.osx.x64.bomCopy
com.microsoft.dotnet.sharedhost.component.osx.x64.bomCopy
- Go to
/private/etc/paths.d/Copy
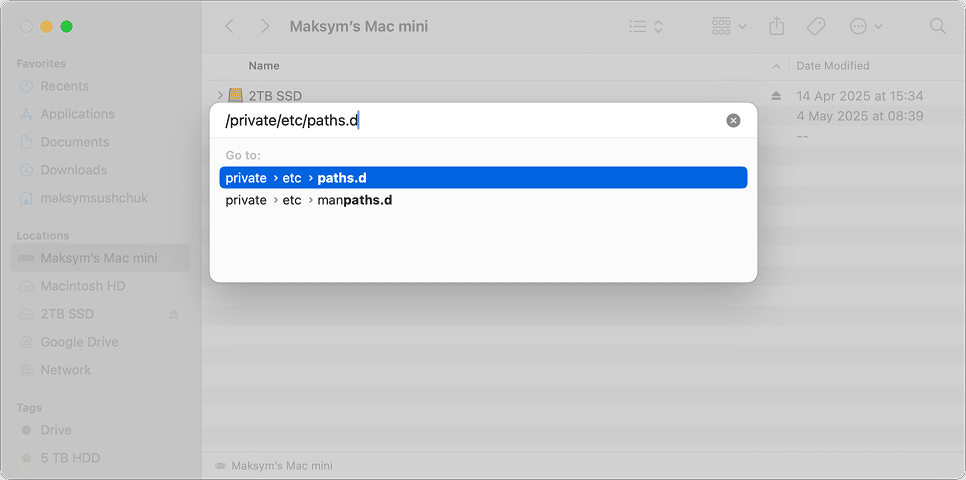
How to find this folder
- In Finder, press Command + Shift + G to open the Go to Folder window.
- Copy the path /private/etc/paths.d, paste it into the field, and press Enter to open it.
- Remove the following files:
dotnetCopy
dotnet-cli-toolsCopy

- Finally, go to and search for dotnet there. Trash the folder you’ll find:
/usr/local/shareCopy
How to find this folder
- In Finder, press Cmd + Shift + G to open the Go to Folder popup.
- Copy the path /usr/local/share, paste it into the field, and press Return to view the folder.
/usr/local/share/dotnetCopy


Congratulations! At this point, you have removed all Visual Studio leftovers from your Mac.
Remove Visual Studio for Mac with App Cleaner & Uninstaller
The easiest and safest way to completely get rid of Visual Studio for Mac is by using App Cleaner & Uninstaller from Nektony. This tool automatically detects and deletes all related files, including those hidden deep in system folders that are easy to miss during manual cleanup.
If Visual Studio is still in your Applications folder:
- Download and launch App Cleaner & Uninstaller
- In the left-hand panel, scroll through your apps and locate Visual Studio.
If you’d like to see exactly which files will be removed, switch on Expert Mode at the top of the window. - Click Remove (or Uninstall if not in Expert Mode).
- Confirm deletion.
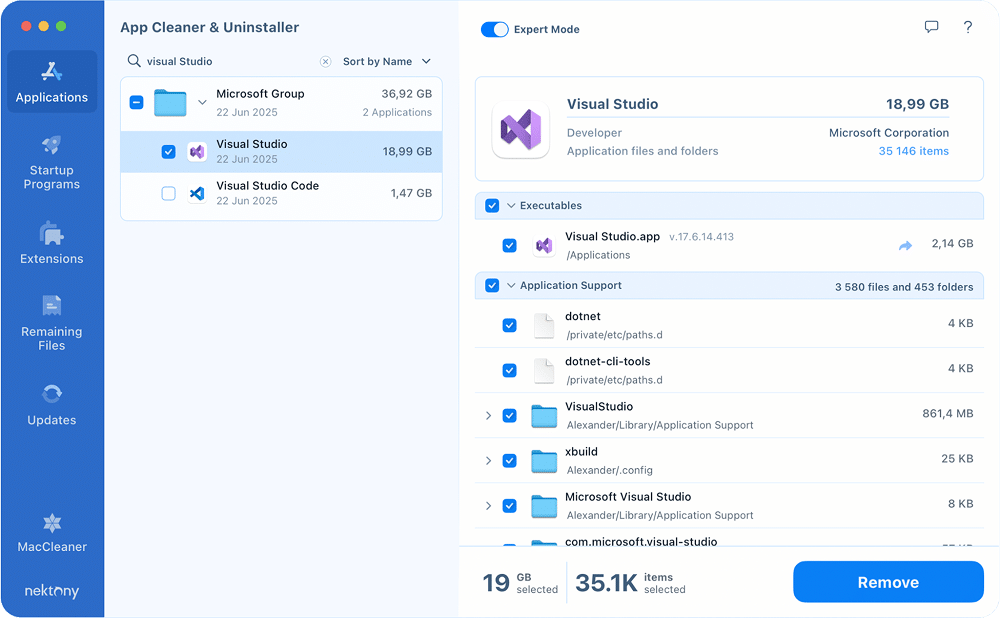
This will erase the main app, support files, settings, logs, and more in one go.
If you have already deleted Visual Studio manually:
Even if you’ve moved Visual Studio to Trash, App Cleaner & Uninstaller can still locate and remove its leftovers remaining on your Mac. To clean them up:
- Open App Cleaner & Uninstaller.
- Navigate to the Remaining Files section.
- Look for Visual Studio in the list of leftovers.
- Select them and click Remove.
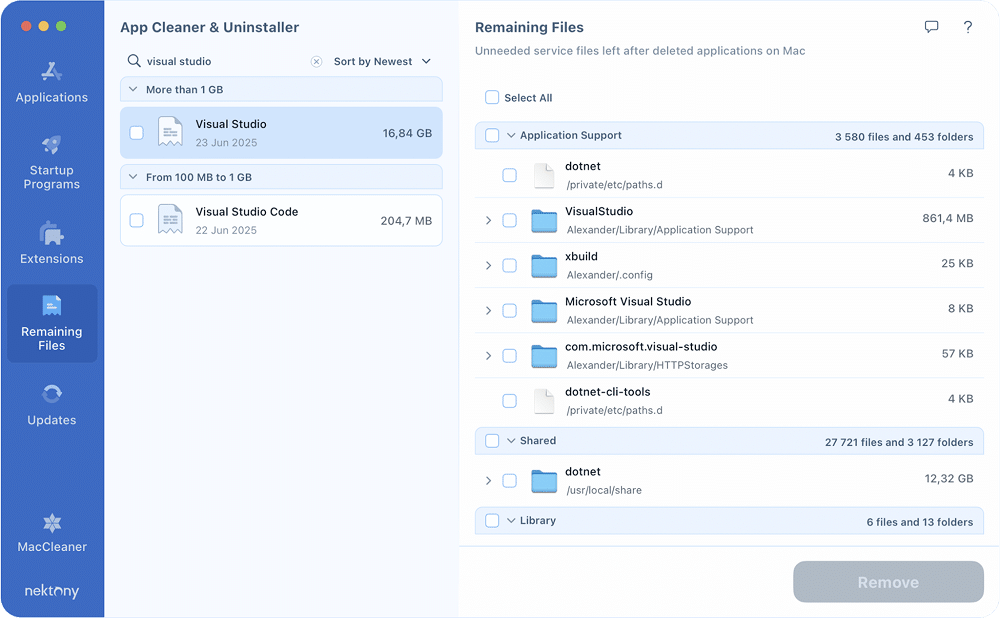
This ensures your system is free from orphaned files, and no traces of Visual Studio are left behind.
Final Thoughts
Removing Visual Studio for Mac isn’t particularly complex, but it can get tricky once you factor in SDKs, extensions, and programming languages that came along for the ride. Tools like Mono, Xamarin, or even Python may have been installed through Visual Studio, but could also be used by other development environments.
So, before you start trashing folders, take a moment to double-check whether something is shared across your workflow. A cautious approach here goes a long way.
If you want a safer and faster route, App Cleaner & Uninstaller by Nektony offers a smart balance.
It scans your system for all associated files and lets you preview everything before deletion, so you can untick anything you want to keep. Whether you’re switching IDEs or simply freeing up space, it’s a solid companion for a clean uninstall.