November 7, 2025
How to remove Little Snitch on Mac: Step-by-step guide
Little Snitch has earned a loyal following for its flexibility, transparency, and the way it gives you near-paranoid control over network connections. Still, for some users, it becomes too much when it starts causing conflicts with VPNs, clashing with corporate security rules, or simply no longer fitting their needs.
That’s when uninstalling it becomes the next step. Unlike most apps, however, you can’t just drag Little Snitch to the Trash. In this guide, I’ll show you how to remove it completely, both manually and with an automatic tool.
Why uninstall Little Snitch
Unlike many other apps, Little Snitch enjoys an excellent reputation among tech enthusiasts, system administrators, and privacy-focused Mac users. It’s not an app people uninstall because it’s “bad.” Instead, the reasons usually come down to performance, compatibility, or personal preference.
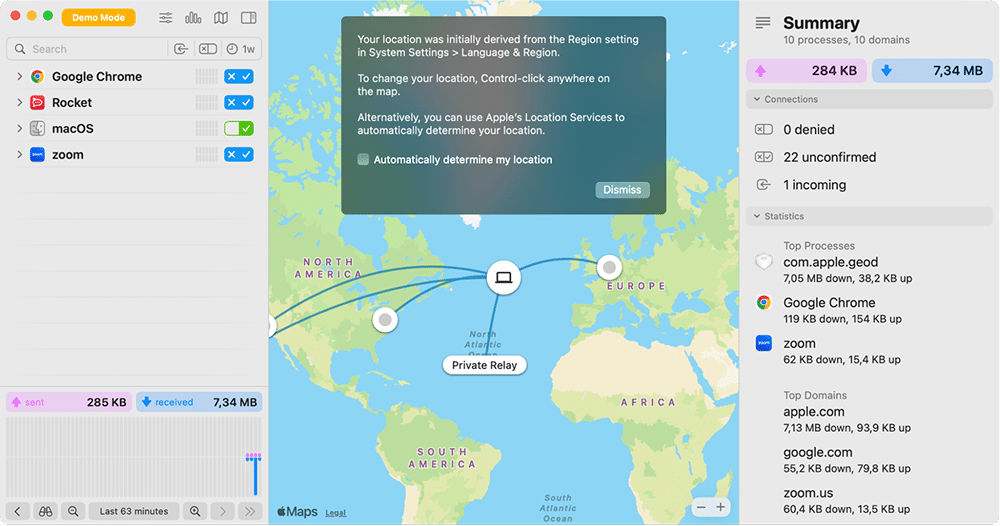
One common issue is resource usage. On older Macs, Little Snitch can consume significant memory (sometimes more than 600 MB of RAM), leading to slower performance. Major macOS updates can also cause unexpected problems. For example, one Reddit user reported losing internet access after installing the developer beta of macOS 26 Tahoe.
Another reason is workplace requirements. If your employer asks you to use a specific VPN client, corporate firewall, or antivirus solution, it often won’t play nicely alongside Little Snitch. Running both is a bit like trying to drive two cars at the same time.
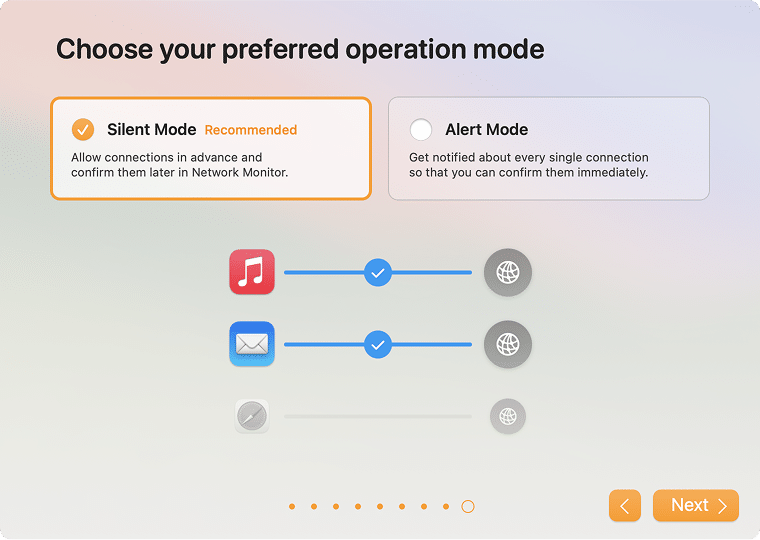
Finally, there’s the user experience itself. Some people install Little Snitch to boost their privacy but quickly feel overwhelmed by its constant alerts. The flood of notifications is normal at first, as you’re training the app, but it can still feel intrusive. Silent Mode reduces interruptions, but it doesn’t eliminate them entirely, as new apps will still trigger alerts.
Things to know before deleting Little Snitch
There are a couple of points worth understanding before you uninstall Little Snitch.
- If the removal is incomplete, parts of its network filter may stay active and continue influencing connections. Normally, dragging the app to the Trash is enough to stop Little Snitch, but if any of its processes are still running for some reason, you may see alerts or traces until you restart your Mac.
- Make sure you back up anything related to Little Snitch that you might need later. Your license key remains valid, but you’ll need it if you reinstall. Make sure to save it somewhere, such as in your mailbox or iCloud.
If you’ve created custom rules or profiles, you can export them from the Little Snitch app so you don’t lose the work you put into fine-tuning connections.
- You should know the difference between disabling and uninstalling. Disabling Little Snitch turns off its filter but keeps the app and your rules in place. Uninstalling wipes it off your system, so you’ll need to set it up again from scratch if you return to it.
- There’s also Little Snitch Mini. This lightweight version offers simpler monitoring and can be removed just by moving it to the Trash. In this article, however, we’re focusing on the full version of Little Snitch, which requires a more thorough process.
How to get rid of Little Snitch: manually or automatically?
You can uninstall Little Snitch either by following the manual route involving Finder or by using an automatic third-party tool. Both get the job done, but they differ in effort and completeness.
Note:
Both methods were tested with Little Snitch 6 and macOS 15.
| Method | What it involves | Pros | Cons |
|---|---|---|---|
| Manual (Finder) | Quit processes, move the app to Trash, then track down and delete leftover folders in Finder. | No extra software needed | Slightly more time-consuming Easy to miss hidden files |
| Automatic (App Cleaner & Uninstaller) | The tool finds the app and all related files, removes extensions, and cleans leftovers automatically. | Fast, thorough, beginner-friendly | Requires installing a third-party app |
In short, the manual way works if you know where to look, but it leaves room for leftovers. The automatic method is quicker and more reliable, especially if you want a clean uninstall without extra hassle.
Proceed to the one that is more to your liking.
How to remove Little Snitch manually
If you prefer not to use extra tools, you can uninstall Little Snitch manually through Finder. The process takes a few minutes but requires careful checking for leftovers.
Step 1. Quit Little Snitch processes
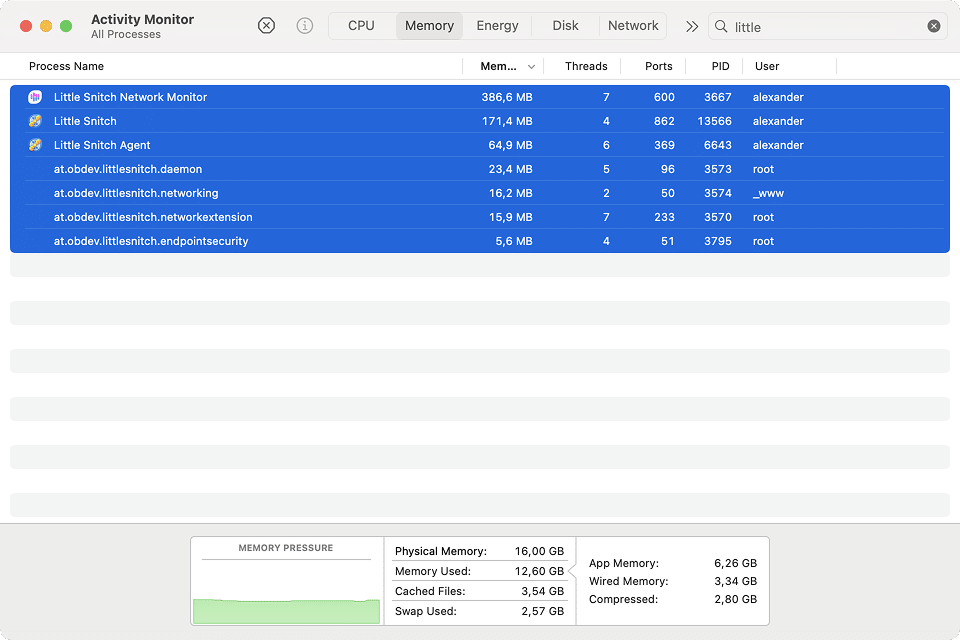
- Open Activity Monitor and type in the search field.
littleCopy
- Select all Little Snitch processes and click the Stop (✕) button in the toolbar to quit them.
Step 2. Move the app to Trash
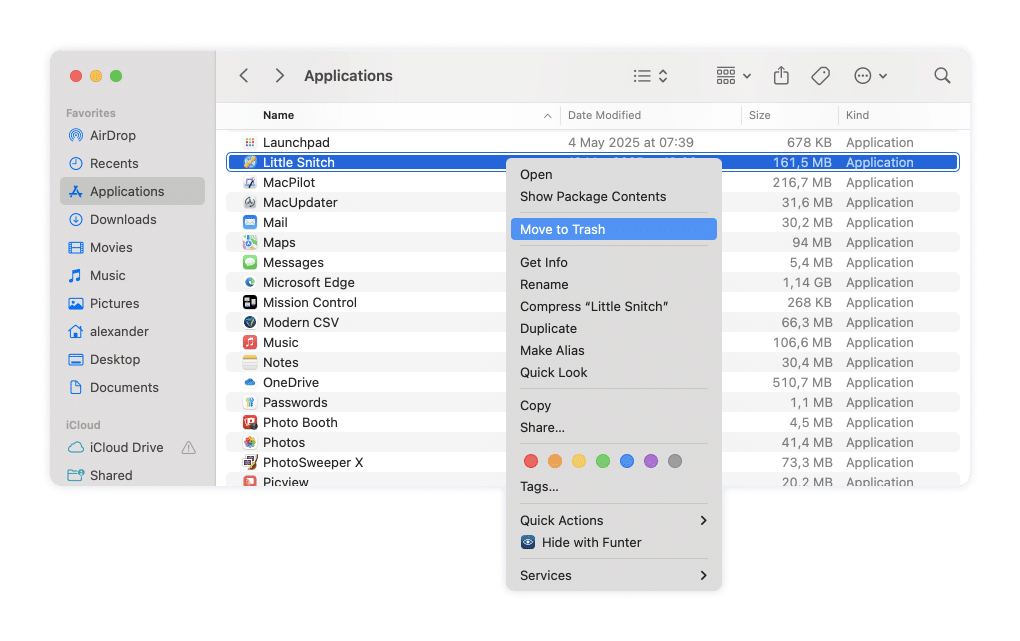
- Open Finder and go to the Applications folder.
- Right-click Little Snitch and choose Move to Trash.
- If macOS displays a system alert asking to close running processes, confirm it.
Step 3. Remove leftover files
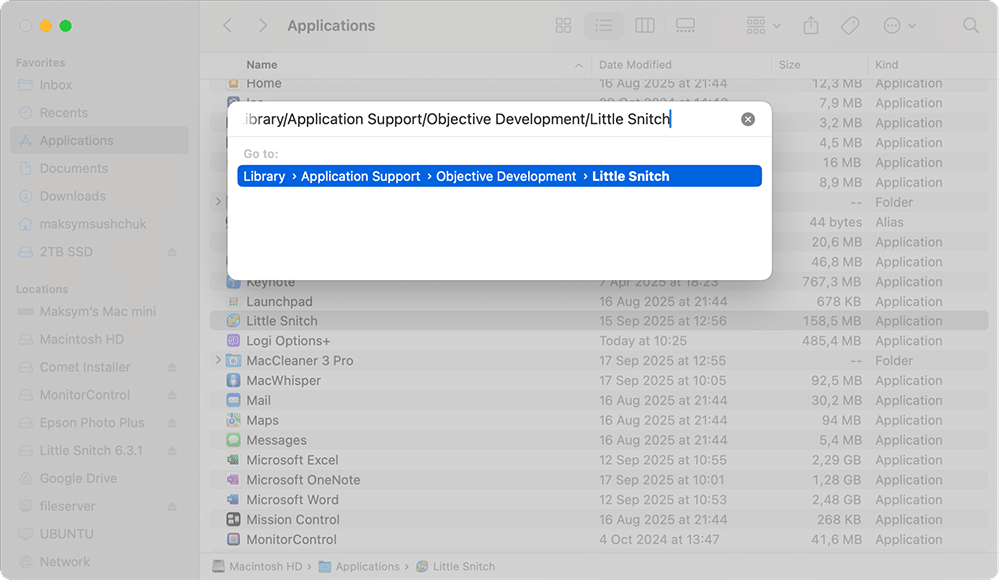
- In Finder, press Shift + Command + G. This will launch the Go to folder dialog.
- Paste the folder location below and press Return.
/Library/Application Support/Objective Development/Little SnitchCopy
- That will bring you to this folder so that you can move it to Trash via the right-click menu.
Also, according to Objective Development (the creator of Little Snitch), some Mac settings files might still remain. To remove them:
- In Finder, press Shift + Command + . to see the hidden folder and reveal those leftovers in the folder.
~/LibraryCopy
- Navigate to via the Go to folder dialog as described above.
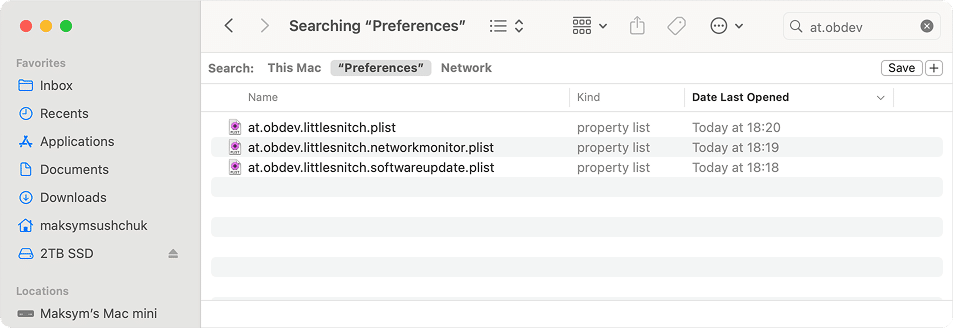
~/Library/Preferences/Copy
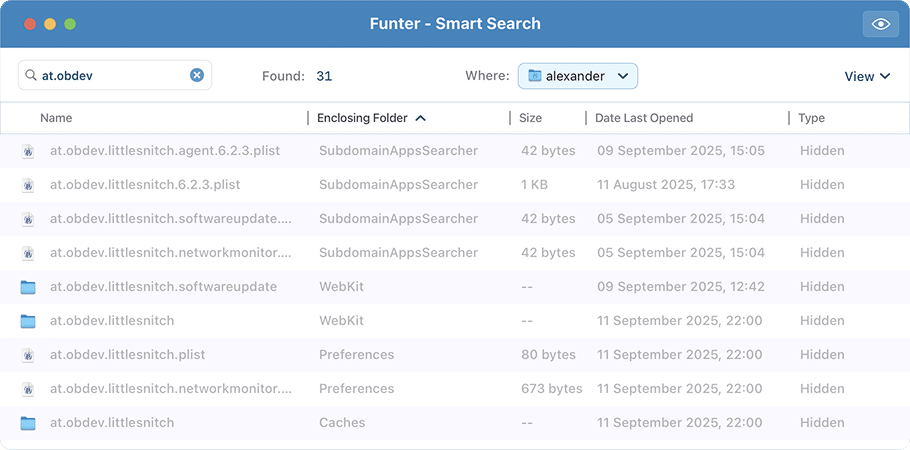
- Use the search box in Finder and type a keyword like or
at.obdevCopy
to see, select, and remove them all at once.littlesnitchCopy
at.obdev
Copy
littlesnitch
Copy
Step 4. Finishing touch
- Empty the Trash.
- Restart your Mac to complete the removal.
Manual removal usually takes 2-3 minutes but it can leave behind hidden files if you don’t check carefully.
How to remove Little Snitch automatically
The quicker option is to use App Cleaner & Uninstaller by Nektony, which finds all Little Snitch components and deletes them in one go.
But first, you need to get rid of the Little Snitch system extension.
Step 1. Delete the system extension
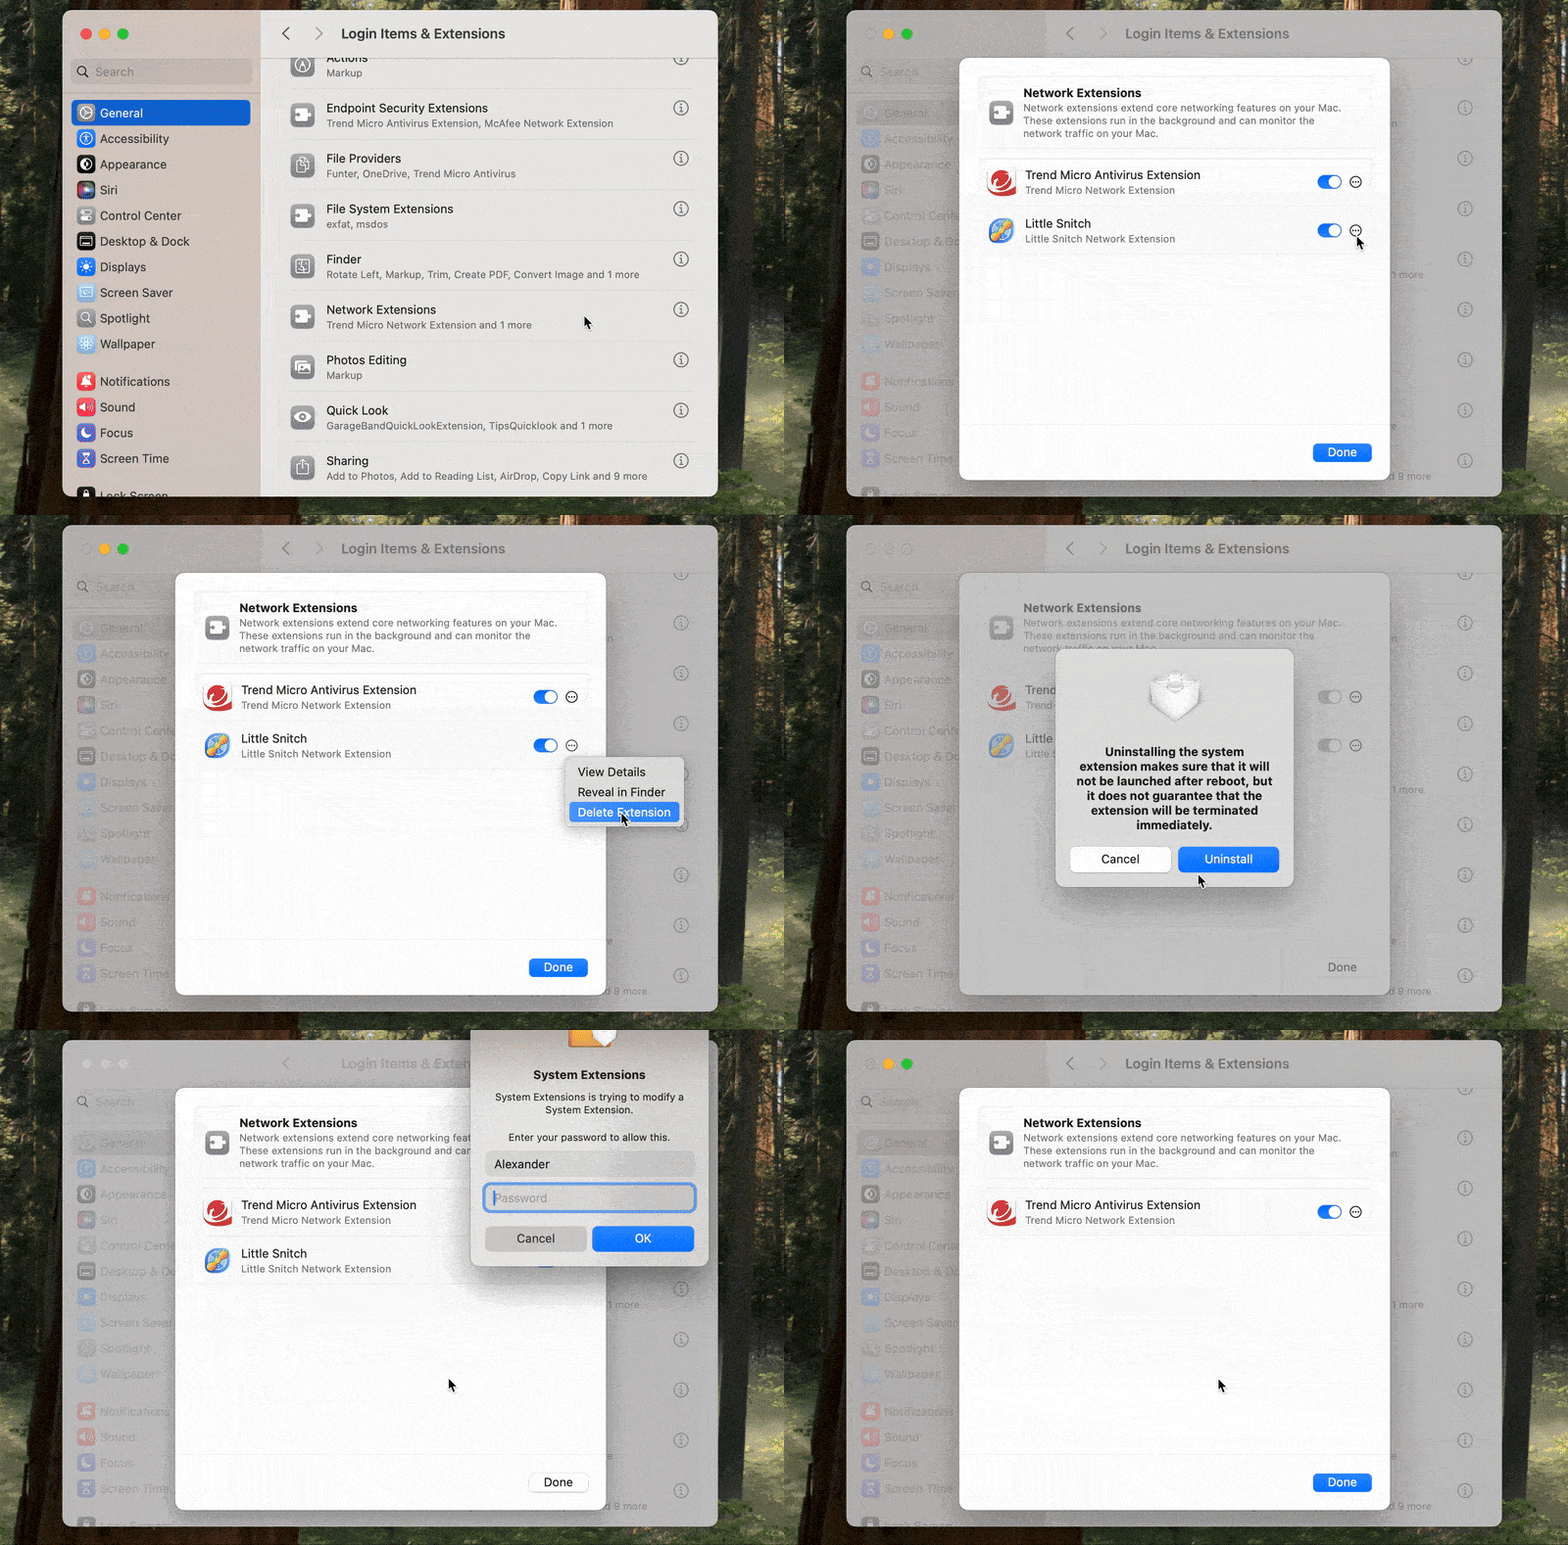
- Go to your Mac’s System Settings → General → Login Items & Extensions.
- Under Network Extensions, click the i button.
- Find Little Snitch, click the three dots, and choose Delete Extension.
- Click Uninstall to confirm.
Step 2. Launch App Cleaner & Uninstaller
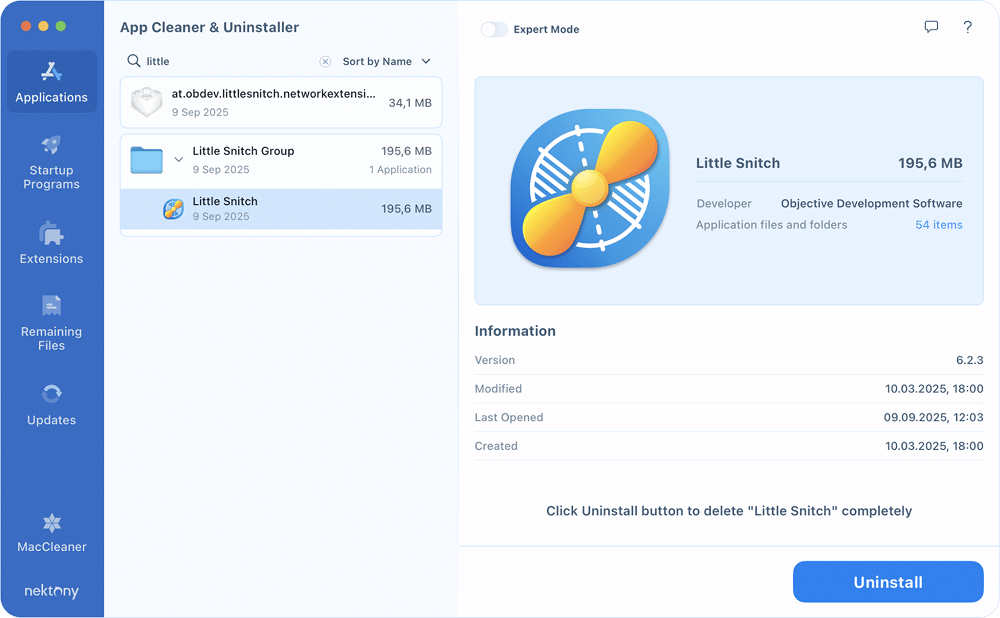
- Download and open the app and wait until it scans your system.
- Locate Little Snitch in the list of apps. To narrow down the list, you can type or
littleCopy
In the search field.snitchCopy
Step 3. Remove Little Snitch
- Select Little Snitch from the list.
- Click Uninstall.
- In the Review and Remove window, click Remove again to confirm.
After that, App Cleaner & Uninstaller may report that a system extension or two were not removed because they are protected by SIP (System Integrity Protection).
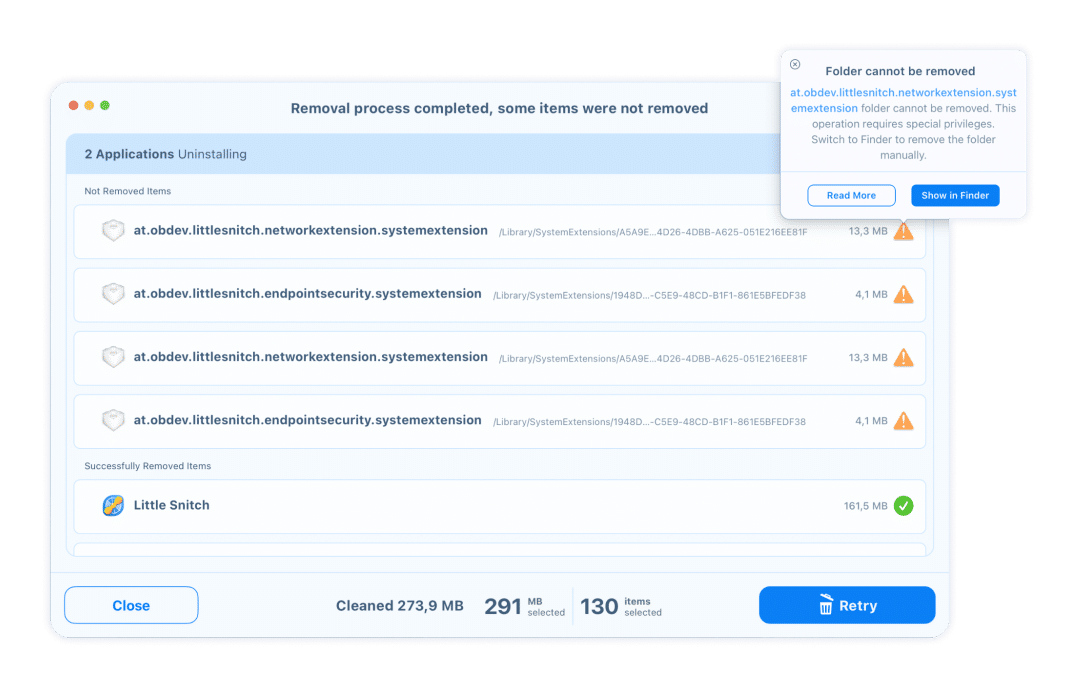
Since the system extension was already deleted in Step 1, these files will disappear automatically after a restart, so you can safely click Close.
Then, empty the Trash and restart your Mac.
Such automatic removal usually takes 1–2 minutes, is beginner-friendly, and ensures no leftovers remain on your system.
Closing note
After writing many uninstallation guides, I’ve noticed that most apps scatter leftover files all across macOS. Some are messy enough that you really need a dedicated uninstaller to track them down.
Little Snitch is different. Despite being a deep system-level network utility, it leaves behind only a couple of files in well-documented locations in addition to its app package. That makes it one of the cleanest apps to remove.
That said, if you still prefer a one-click solution or want to tidy up other apps along the way, App Cleaner & Uninstaller by Nektony gives you the fastest, simplest option.
