December 19, 2025
Uninstall NVIDIA CUDA drivers on Mac: The right way
The bad news is, Apple discontinued official support for Nvidia drivers. This means CUDA no longer works properly on modern macOS versions or Apple Silicon (M1-M4) Macs. So, if you still have CUDA installed, it’s 100% outdated, unsupported, and potentially causing system conflicts or unnecessary background processes.
As uninstalling is unavoidable, the key is to do it the right way, not just removing the main app, but removing CUDA at its root, including every leftover, preference pane, and service file. In this post, you’ll see two tried-and-true ways to delete the NVIDIA CUDA driver, manually and automatically, and how to make sure you uninstalled CUDA for good.
What is CUDA?
CUDA (Compute Unified Device Architecture) is a driver and software platform developed by NVIDIA that allows the GPU to perform general-purpose computations, not just graphics rendering.
In simple terms, it lets compatible apps, such as those for AI, rendering, or processing video, offload heavy work from the CPU to the GPU, dramatically speeding things up.
On macOS, the CUDA driver once enabled this acceleration for NVIDIA GPUs. However, with Apple’s shift to its own chips and Metal graphics framework, CUDA is not compatible with recent macOS versions anymore. As a result, starting from macOS 10.14 (Mojave), Apple stopped supporting CUDA.
Naturally, this leads to only one outcome – uninstalling the NVIDIA CUDA driver from Mac.
Why might you need to uninstall Nvidia Drivers?
While the loss of official NVIDIA support is the root cause for uninstalling its drivers, it brings along consequences and is not the only one:
- Outdated certificates and blocked extensions
macOS treats old unsigned NVIDIA components as unsafe, preventing them from loading at startup. Removing them helps avoid boot errors and clutter. - Errors and update alerts
You might notice constant popups about outdated drivers or apps failing to launch CUDA-accelerated functions. Consequently, the driver becomes dead weight. - Hardware compatibility issues
Older GPUs might lack modern compute capability, making them invisible to CUDA or running with limitations. So, it’s better to abandon it than waste time on its configurations. - Switching to other technologies
If your workflow no longer depends on CUDA, for example, you’ve moved to Metal, OpenCL, or CPU-only computation, keeping the CUDA driver installed feels redundant.
2 ways to uninstall CUDA drivers from Mac
I tested two methods to remove NVIDIA CUDA Driver v418.163 on macOS 15.0. Here’s what I found:
| Method | Difficulty | Time | Leftovers | Best for |
|---|---|---|---|---|
| Manual removal (Finder) | Advanced | ~7 mins | ⚠️ Possible leftovers | Experienced users |
| App Cleaner & Uninstaller | ✅ Easiest | ✅ 30 sec | ✅ None | ✅ Who wants a quick, full cleanup |
Note:
Before uninstalling anything driver-related, back up your data. Deleting system extensions may affect dependent apps or scripts. For this purpose, you can use Time Machine.
Uninstall the NVIDIA CUDA Driver manually
- Open Activity Monitor → select and stop (x) all the Nvidia processes.
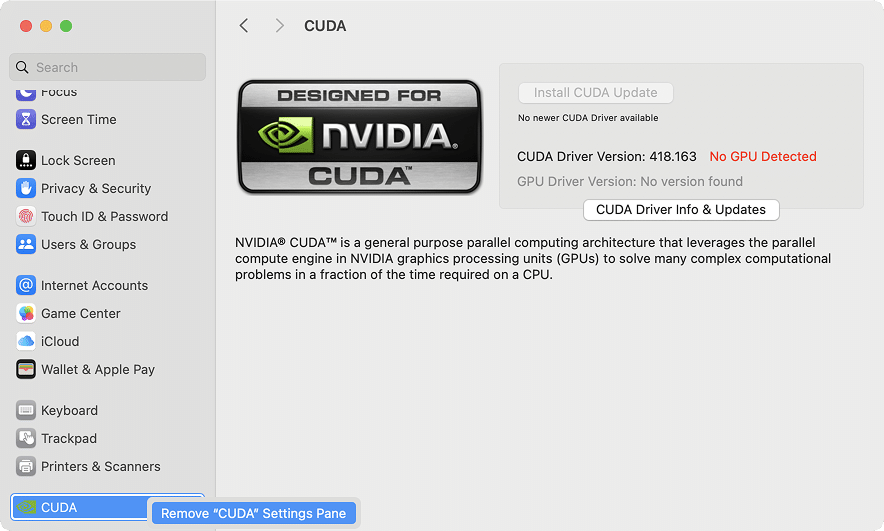
- Open System Settings and scroll to the bottom.
- In the left sidebar, find CUDA, right-click it.
- Select Remove ‘CUDA’ Settings Pane.
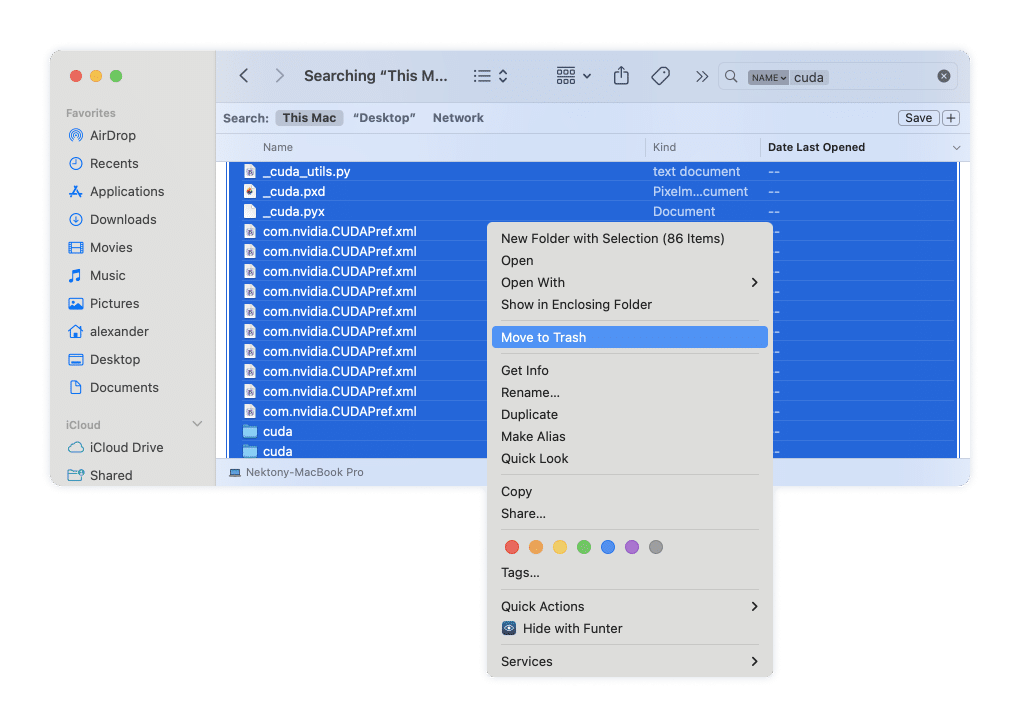
- Open Finder → search for cuda using the Name Contains filter.
- Select all CUDA-related files → Move to Trash.
Note:
Alternatively, you can use Funter by Nektony, a free tool that helps locate hidden driver files by keyword, for example, cuda. The most convenient thing about it is, you can delete those files from the result output.
Manually delete the remaining CUDA paths. Given the Finder doesn’t show all the routes in the standard search, and if you haven’t tried Funter to reveal them, you need to detect hidden files by taking an extra effort:
- In Finder, press Shift + Cmd + G.
- Using the Go to Folder window, check these directories for CUDA files and delete all the driver files you see:
/Library/Extensions/CUDA.kextCopy
/usr/local/cudaCopy
/Library/Frameworks/CUDA.frameworkCopy
/Library/Preferences/com.nvidia.CUDAPref.plistCopy
/Library/LaunchAgents/com.nvidia.CUDASoftwareUpdate.plistCopy
/Library/LaunchDaemons/com.nvidia.cuda.launcher.plistCopy
/Library/LaunchDaemons/com.nvidia.cudad.plistCopy
- → find, select, and move to trash all CUDA folders or files that begin with com.nvidia.cuda
/private/var/db/receipts/Copy
- Empty Trash and restart your Mac to bring the CUDA driver deletion to an end.
That’s all. Keep in mind, it’s essential to remove each of the CUDA components, because missing even one file may cause excessive processes or even issues.
Uninstall the NVIDIA CUDA driver easily
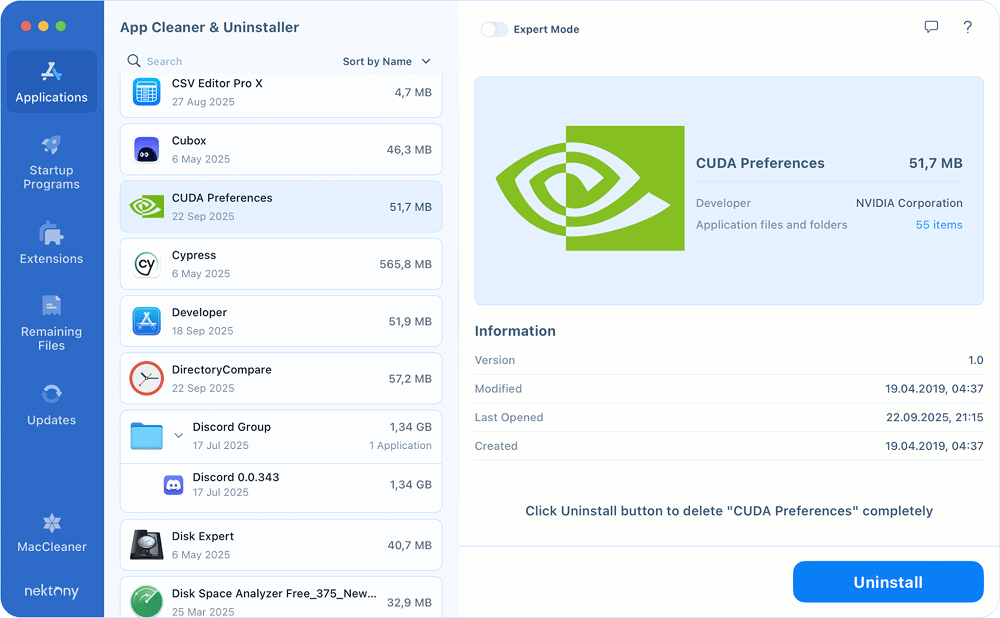
App Cleaner & Uninstaller does its job to prevent you from missing a thing when it comes to uninstalling apps on Mac. And it is in charge even in complicated cases, like with CUDA. The uninstallation flow is pretty simple and takes you a couple of clicks:
- Get the tool (for starters, a 2-day free trial) → open it.
- In the search bar, type CUDA or find CUDA Preferences in the list.
- Click Uninstall → review the CUDA files planned for removal → click Remove.

That’s it. CUDA and all its background components disappear permanently. In the end, this matters: no leftovers, no risks, no mess.
And even if you deleted CUDA yourself, App Cleaner & Uninstaller can track down the rest. Open the Remaining Files tab to locate any leftover CUDA fragments and clear them out effortlessly.
How to check if CUDA is installed on your Mac
Before calling it done, make sure CUDA is really gone. Here’s a quick way to confirm:
- System Settings: Open System Settings → scroll down the left sidebar to the bottom. If CUDA is not there, it’s a good sign you deleted the driver successfully.
- Finder search: Open Finder → hit Shift + Cmd + G → type → see if there’s no cuda folder left.
/usr/local/Copy
- Terminal check: Open Terminal → run the following command:
nvcc –versionCopy
If Terminal answers with zsh: command not found: nvcc, I can congratulate you on uninstalling Nvidia CUDA totally.
Done – you can be confident your Mac is clean of NVIDIA CUDA traces.
Final click
CUDA has made history, but on modern Macs, it’s history itself. Apple’s move toward Metal and ARM chips means NVIDIA’s CUDA drivers are relics of the Intel era, taking up space and simply doing nothing. So, freeing up space by deleting CUDA is obvious.
If you’re good with Finder searches and terminal checks, manual removal works fine.
But if you want a guaranteed clean uninstall without tracking down 15+ file locations, App Cleaner & Uninstaller saves time and makes CUDA disappear completely in a click.


