
In our previous article, we shared what Apple announced at WWDC22<. In this article, we will focus on the new macOS v.13 called Ventura. Learn how to prepare your Mac for a software update properly and how to upgrade to macOS Ventura.

Contents:
- What’s new in macOS Ventura
- Which Macs support macOS Ventura
- Should I install macOS Ventura?
- How to prepare a Mac for a macOS Ventura upgrade
- How to upgrade your Mac to macOS Ventura
#1 Tip – Clean up Mac from junk and free up space before macOS Ventura update
MacCleaner Pro
Video Guide: How to prepare a Mac for a macOS Ventura upgrade
What’s new in macOS Ventura
The public beta of macOS Ventura will be released in July; everyone can download it at beta.apple.com. And as usual, the full release of the new macOS comes a couple of months later. While waiting for it, let’s see what’s new in macOS Ventura.
Stage Manager
The first feature that will catch your eye on the new macOS is the Stage Manager. This is especially convenient for small MacBook users, and it allows you to arrange all opened windows in a convenient way. You can start working with this option from the “Control Center.”
With the Stage Manager, your current application moves to the center of your screen, and all other applications are displayed in a column on the left. As a result, the clutter on your computer screen turns into neat stacks at the touch of a button. To switch to another application, you just need to click on the desired window in the column on the left and the current application will be replaced by the selected one.

Improved Spotlight search
In macOS Ventura, Spotlight supports previews by pressing the space bar on your keyboard. You can view the content of files directly in Spotlight and search for files and photos stored on your Mac and the web. Also, Spotlight can now detect Live Text inside images. You can use it to create tasks like timers.
Automatic subtitles
The option is also available on iOS 16. The voice in any application can be translated into subtitles. For example, this can be especially helpful during video conferencing for people with a hearing impairment. With the first release, this option is available only for English. However, Apple promises to add more languages in the future.
Unsending emails
If you use Apple built-in Mail app, you’ll find the new Unsend feature useful. It means that you can unsend emails that haven’t been opened by the receiver.
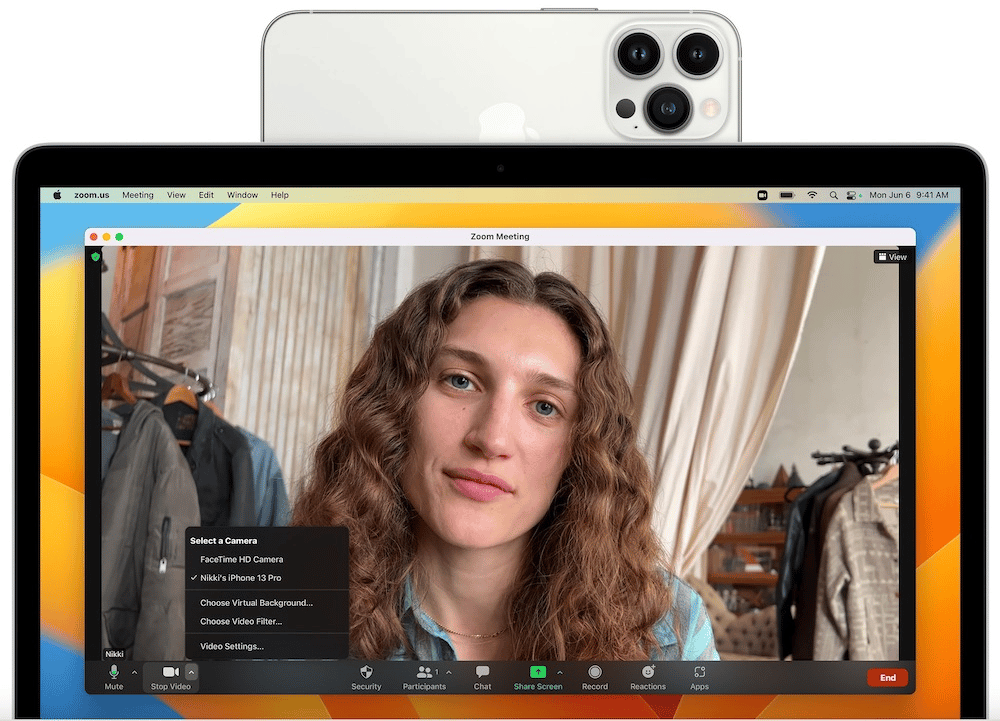
Using iPhone instead of webcam
If you want a better web camera quality on your Mac, you can use your iPhone instead. You will need a special holder for this. You can turn on several modes to improve the quality of your video calls. Using your iPhone instead of the web camera will also be available for other applications like Zoom, Teams, WebEx, and more.
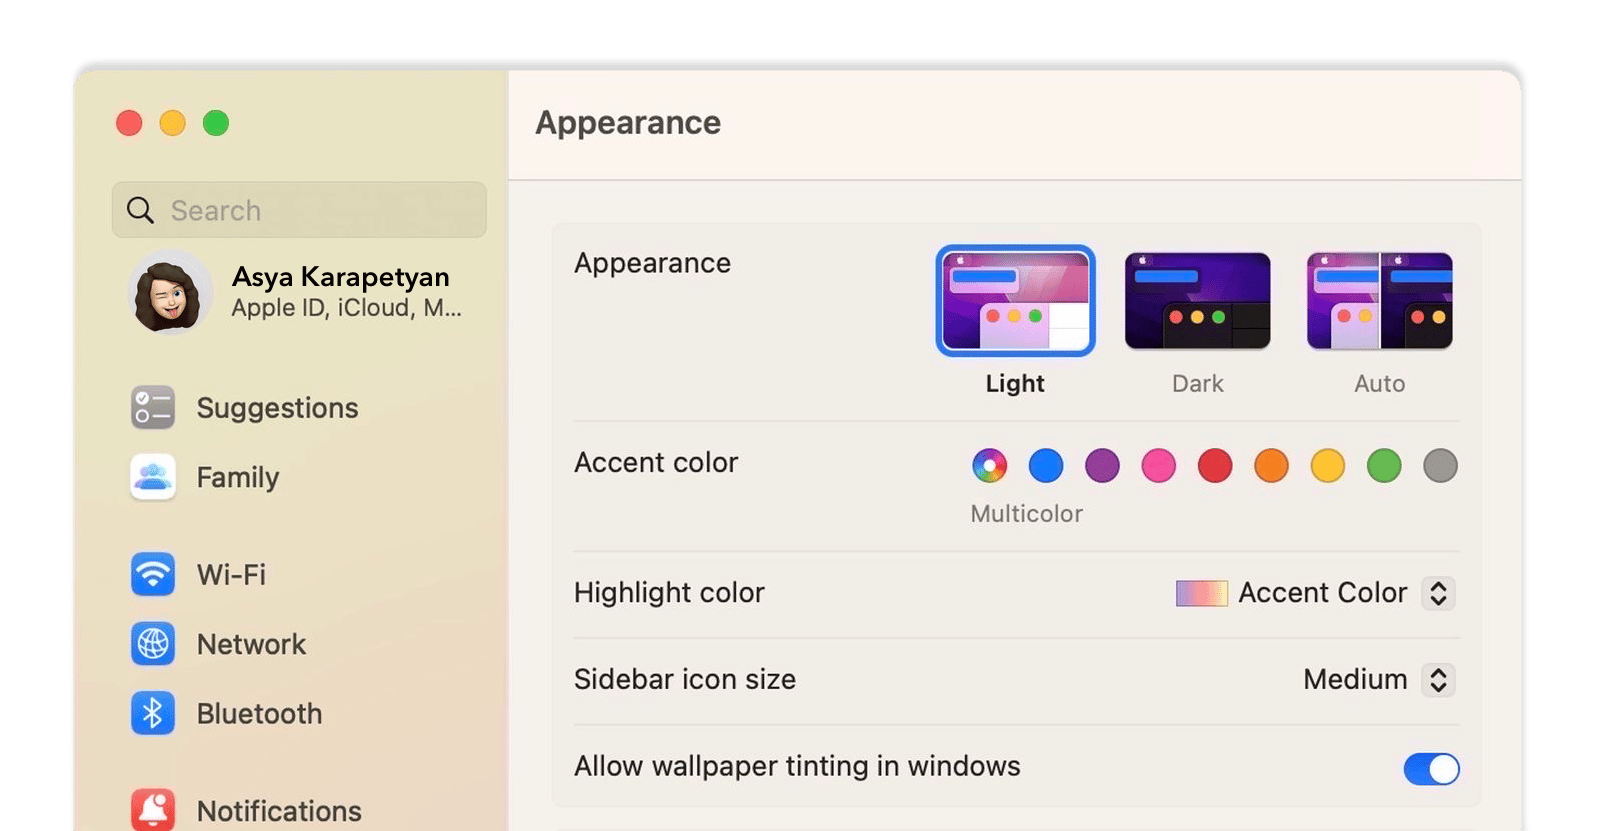
System Preferences’ new design
In macOS Ventura, the System Preferences window design has received a new interface. Instead of an icon-based interface, there is now a sidebar with various tabs.
Shared Photos in iCloud
Like in iOS 16, Apple added the support for iCloud Shared Library in macOS Ventura. Family Sharing creates a separate album that all family members can access. At the same time, it is possible to automatically add photos with a specific person or taken from a selected date.
New applications
Apple added default applications from iOS/iPadOS to macOS Ventura. For example, the Clock app appeared on a Mac, which completely repeats the functionality of a similar program on other devices. Despite Clocks, the Forecast application is also available now on a Mac.
Which Macs support macOS Ventura
The macOS Ventura system requirements are more strict than the previous two operating systems. As a result, the Mac computer models released before2014 will not work with macOS Ventura.
The good news is that macOS Ventura supports both M1 Macs and Macs based on Intel chips. Nothing changed since macOS Monterey and Big Sur.
Here is the list of Mac models that support macOS Ventura:
- MacBook (2017 and newer)
- MacBook Air (2018 and newer)
- MacBook Pro (2017 and newer)
- Mac mini (2018 and newer)
- Mac Studio (2022)
- iMac (2017 and newer)
- iMac Pro (2017)
- Mac Pro (2019 and newer)
Should I install macOS Ventura?
Like with any new macOS, we don’t recommend installing the public beta of macOS Ventura. New systems always come with bugs, even macOS, which is considered to be a safe operating system. If you are not a developer, putting your Mac at risk is no point.
Moreover, even after the official public version comes out, we recommend that you wait a couple of months or two revision updates before upgrading to macOS Ventura.
You should check whether there are no “hidden” new features in the new macOS and Apple applications that can unexpectedly appear and harm your security and privacy. Using your Mac for business communications and money transactions is especially important.
How to prepare a Mac for a macOS Ventura upgrade
Before you update your Mac to macOS Ventura, we recommend that you clean up your system and back up your data. Follow the tips below to prepare your Mac for a safe macOS Ventura upgrade.
- Uninstall unused apps on your Mac. You might have many apps that you don’t use. All of them take up useless space on your disk. Remove them to recover valuable space on your disk.
- Delete duplicate files. Identical files, like duplicate photos, take gigabytes of storage space on your Mac. There is no point in saving them. Preparing your Mac for a new update might be a convenient time to get rid of all duplicate files and folders on your disk.
- Clear cache and other junk files. You should delete all junk, like caches, logs, and remaining files of already removed applications. Broken service files and leftovers of harmful applications may cause issues during the installation of a macOS Ventura.
- Delete unneeded large items on your disk. Generally, the largest portion of them is media files. You should analyze what takes up most space on your Mac and remove or transfer unused files to external storage.
- Back up your Mac. Please, don’t miss this step as it’s the only way to recover your data if something goes wrong. You can back up your data with Time Machine. Launch Time Machine and follow the onscreen instructions to save your data to an external drive.
Note that you can easily do the first four steps of cleaning up a Mac with the help of a special software tool called MacCleaner Pro.

MacCleaner Pro is an all-in-one software solution to clean up junk files, uninstall apps, remove duplicates, analyze disk space usage, and more. It helps you optimize your Mac and keep it always clean and working smoothly.
How to upgrade your Mac to macOS Ventura
Follow the steps below to install macOS Ventura on your Mac:
- If you have a MacBook, plug it into AC power and make sure that you have a stable internet connection.
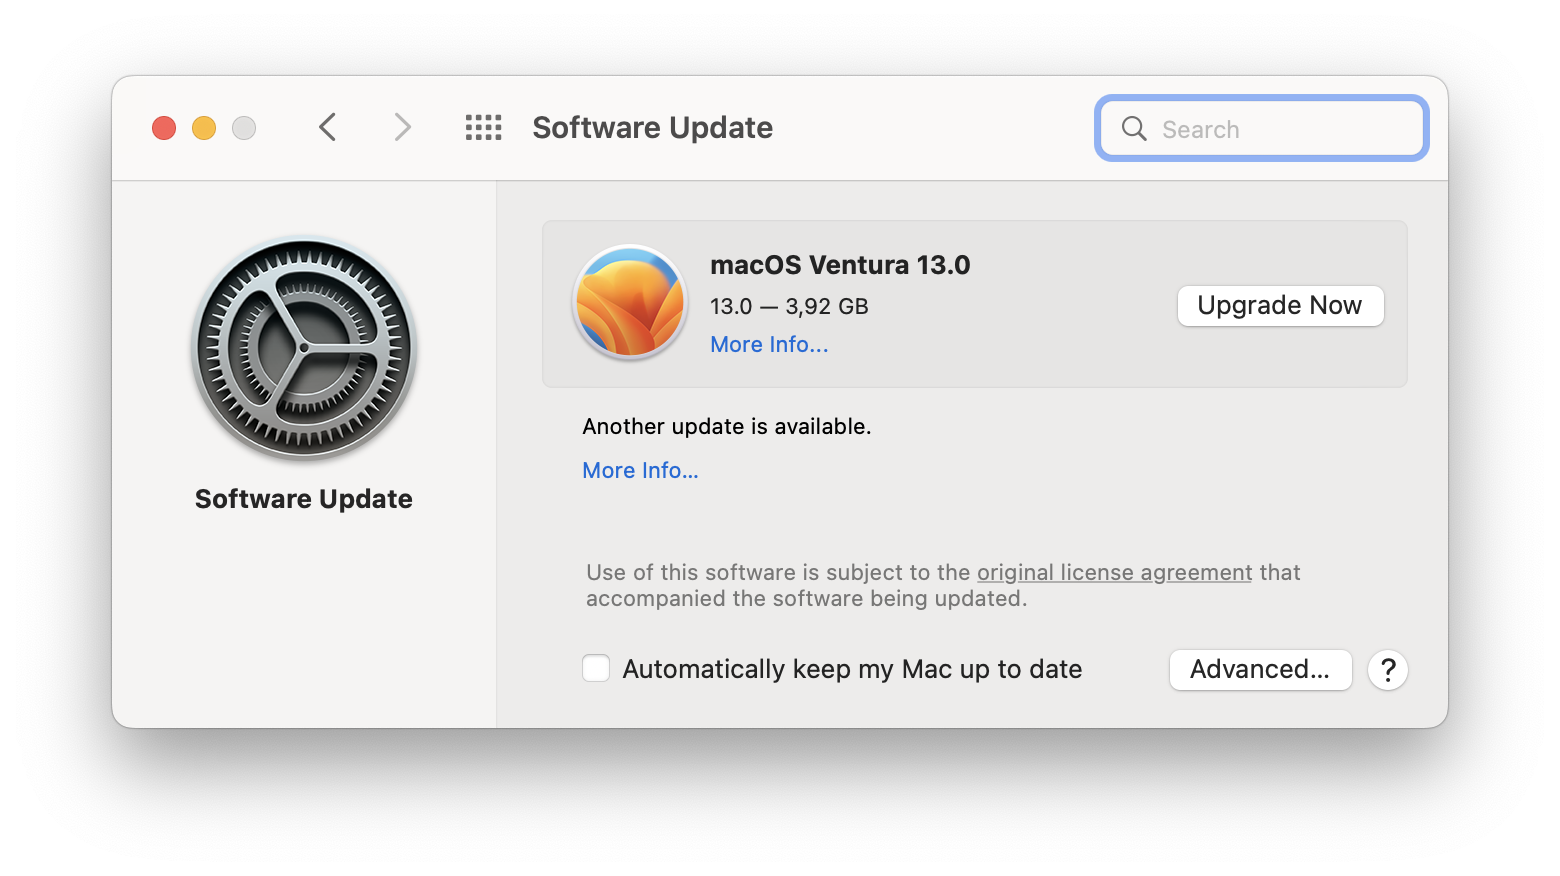
- Open System Preferences and click Software Update.

- Click to download macOS Ventura. If you have already downloaded it, you will see the Upgrade Now button. Click on it.
- Then click Continue.
- It will require your administartor password to allow installing the new system.
- Note, you will have to close all of your apps and running processes before the installation starts.
- Follow the onscreen instructions to complete the Ventura installation. It might take some time to finish the installation.
- Once the installation is finished, your Mac will restart and open your system with Ventura installed on it.


Note, do not put your Mac to sleep or close until the upgrading is completed.
Once again, before you upgrade your Mac to macOS Ventura, don’t forget first to clean up your Mac and prepare it properly for the update. Use for this a special software tool called MacCleaner Pro.


