July 24, 2025
How to take a picture on a Mac
Mac computers have built-in web cameras. A web camera on a Mac is usually used for video conferencing, but many users also wonder how to take a picture with the webcam. This article will explain how to do this and tell you how to record a video of yourself on your Mac.
Contents:
Before we start
Before we dive into how to take a photo on a Mac, we want to share with you a free application from Nektony called Duplicate File Finder.
Duplicate File Finder finds duplicate photos (and any other type of duplicate file) and similar photos and allows you to organize your photos by merging similar folders. We recommend periodically scanning your Mac or any external drive for duplicates and recovering valuable space on your disk.
Where is the camera on a Mac?
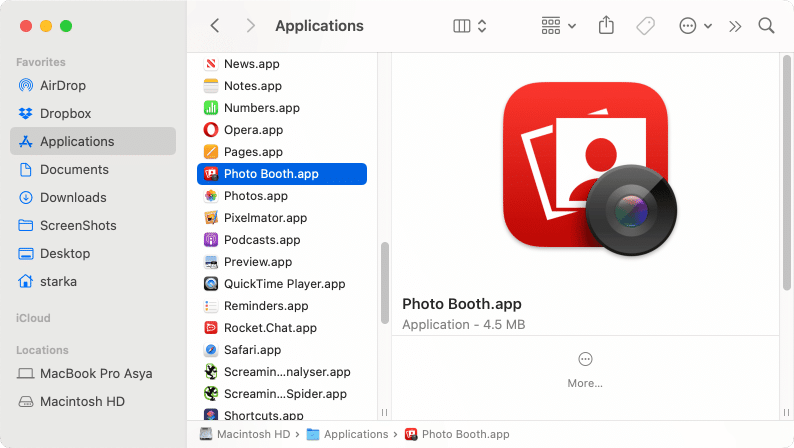
The camera on a MacBook or iMac allows you to take high-quality photos. To take a photo or video with your Mac’s built-in webcam, you can use third-party applications or Apple’s native application, Photo Booth. However, not everyone knows where to find the Photo Booth app on Mac. Let us explain.
- Open Finder.
- Go to the Applications folder.
- Scroll down and find Photo Booth.
- Double-click on Photo Booth to open it and see the webcam picture.
Alternatively, you can open the Photo Booth app from the Launchpad or use Spotlight search.
How to take a picture on a Mac?
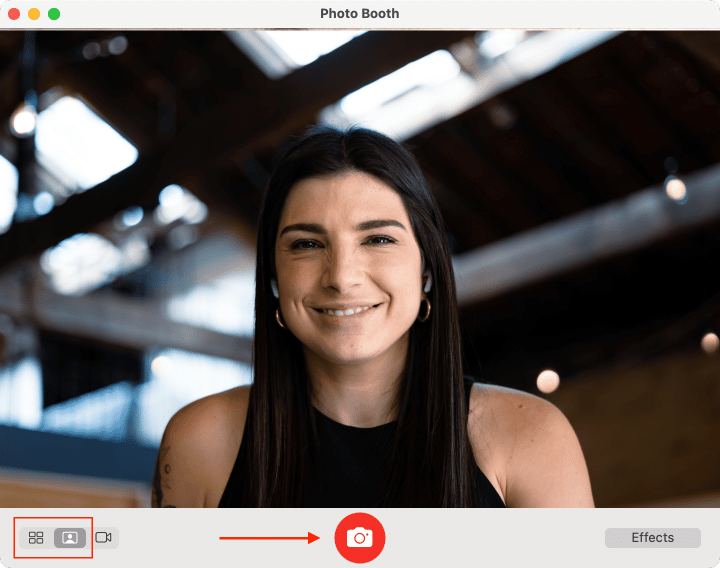
You can use Photo Booth to take a photo on your Mac. Besides basic photos, it also has many photo effects for fun. To take a pic on your Mac, do the following:
- Open Photo Booth. Your Mac’s camera will activate automatically. You’ll see a green indicator light near the webcam.
- If you want to add a special effect to your photo, click Effects and choose the one you like.
- You can take a single photo or four consecutive pictures. Click the appropriate button in the bottom left corner.
- Once you’re ready, click the Camera button.
- After three seconds, it will take a picture.
How to save the pictures you take on your Mac
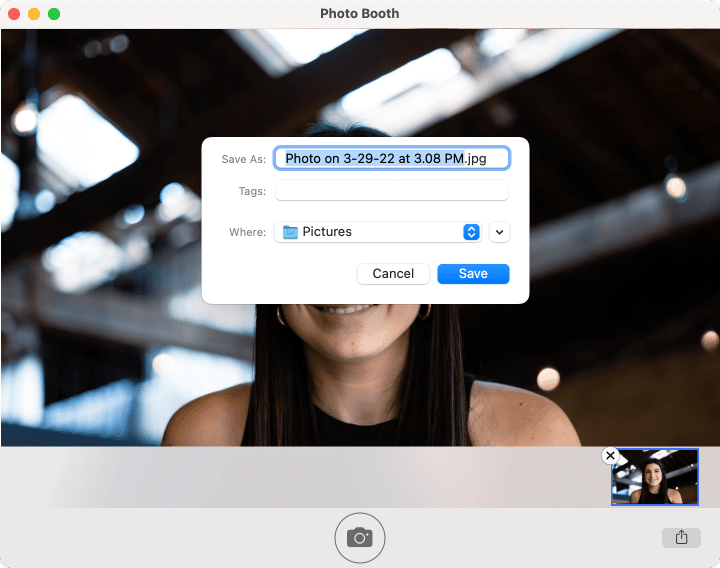
Once you’ve taken a photo with the Photo Booth app, it will appear at the bottom of the application’s screen. Follow these steps to save the photos:
- Right-click on the photo you want.
- Click Export.
- Provide a name and location for your photo
- Click Save.
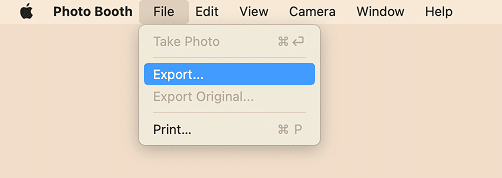
Another way to save the pictures is to go to the Photo Booth menu → click File → Export.
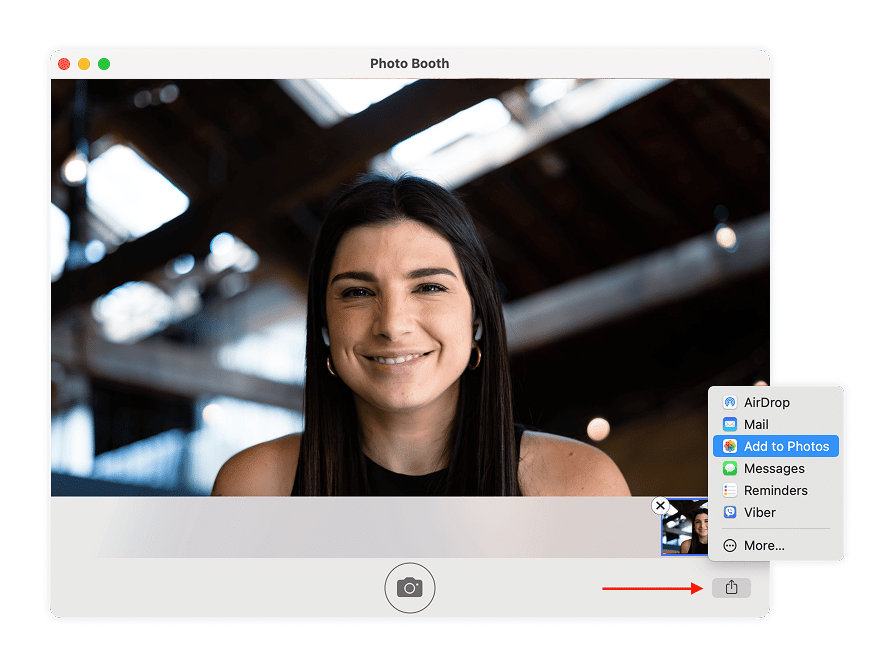
You can take as many photos as you wish and choose the best picture. If you want to save several pictures or even all of them, do the following:
- Press the Command key and select all photos you want to save.
- Click the Share icon in the bottom right corner.
- Select Add to Photos.
- The pictures will be saved to your Photo Library.
How to record a video on a Mac?
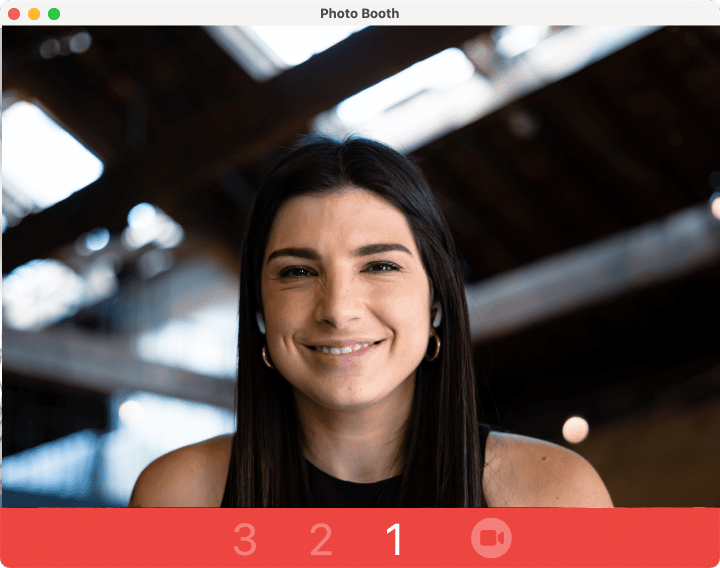
In addition to taking photos, you can record a video on your Mac with the Photo Booth app. Here is how:
- Launch Photo Booth.
- Click the Video Camera icon at the bottom.
- The application will start recording a video with the webcam in three seconds.
- To stop recording, click the same button again.
- Once you finish, select the video → click File in the menu bar → select Export.
- Choose the folder to save your video to and click Save.
To sum up
Taking a photo or a video on your Mac with the web camera is easy. You can use the standard Apple application, called Photo Booth, or choose from a variety of third-party applications for this task. You can also find online services that allow you to take a selfie with your Mac camera.
If you still have questions, feel free to ask in the comments below. We also want to remind you that you can download and use a free application called Duplicate File Finder to quickly find and remove duplicate and similar photos on your Mac.


