Your Mac’s camera is usually reliable and has no problem working great for several years. But in some cases, you may face an error in which your Mac camera is not working. In this article, we will dive into the reasons why your camera may not be working, how to test the camera on Mac, and how to fix the issue.
Contents:
- Why is my Mac’s camera not working?
- How to test the camera on a Mac?
- How to fix the camera when it isn’t working?
- FAQ
Tip – How to prevent issues on Mac, including issues with the camera.
MacCleaner Pro
Why is my Mac’s camera not working?
There are several reasons Mac’s camera may not be working. Specifically, these may be related to software issues and hardware damage.
Among hardware problems, a Mac camera can stop working after the following:
- The Mac’s display crashed, including the camera.
- The MacBook cover was hit hard, especially in the area where the webcam is located.
- The iSight loop of the camera is damaged.
- The MacBook was flooded with water or other liquid, causing the elements on the motherboard to be burned out.
- Moisture has entered the camera (through the gaps at the top of the display).
Software issues that cause problems with the Mac camera may be related to third-party applications that are using the camera; old software that is not updated; old system caches and broken service files; issues in the camera-related system processes; incorrect camera setting, among other reasons. But don’t worry! If you haven’t damaged your Mac camera, and the problem is indeed associated with the software, you can fix it. Keep on reading, and we will tell you how to do this and get your Mac’s camera back up and running.
How to test the camera on a Mac?
If you attempt to find the Camera app on your Mac or camera settings in System Preferences, you know that, by default, there is no option to test the camera on your Mac. However, there is one trick you can use to check whether your camera is working.
Steps to test the camera on Mac:
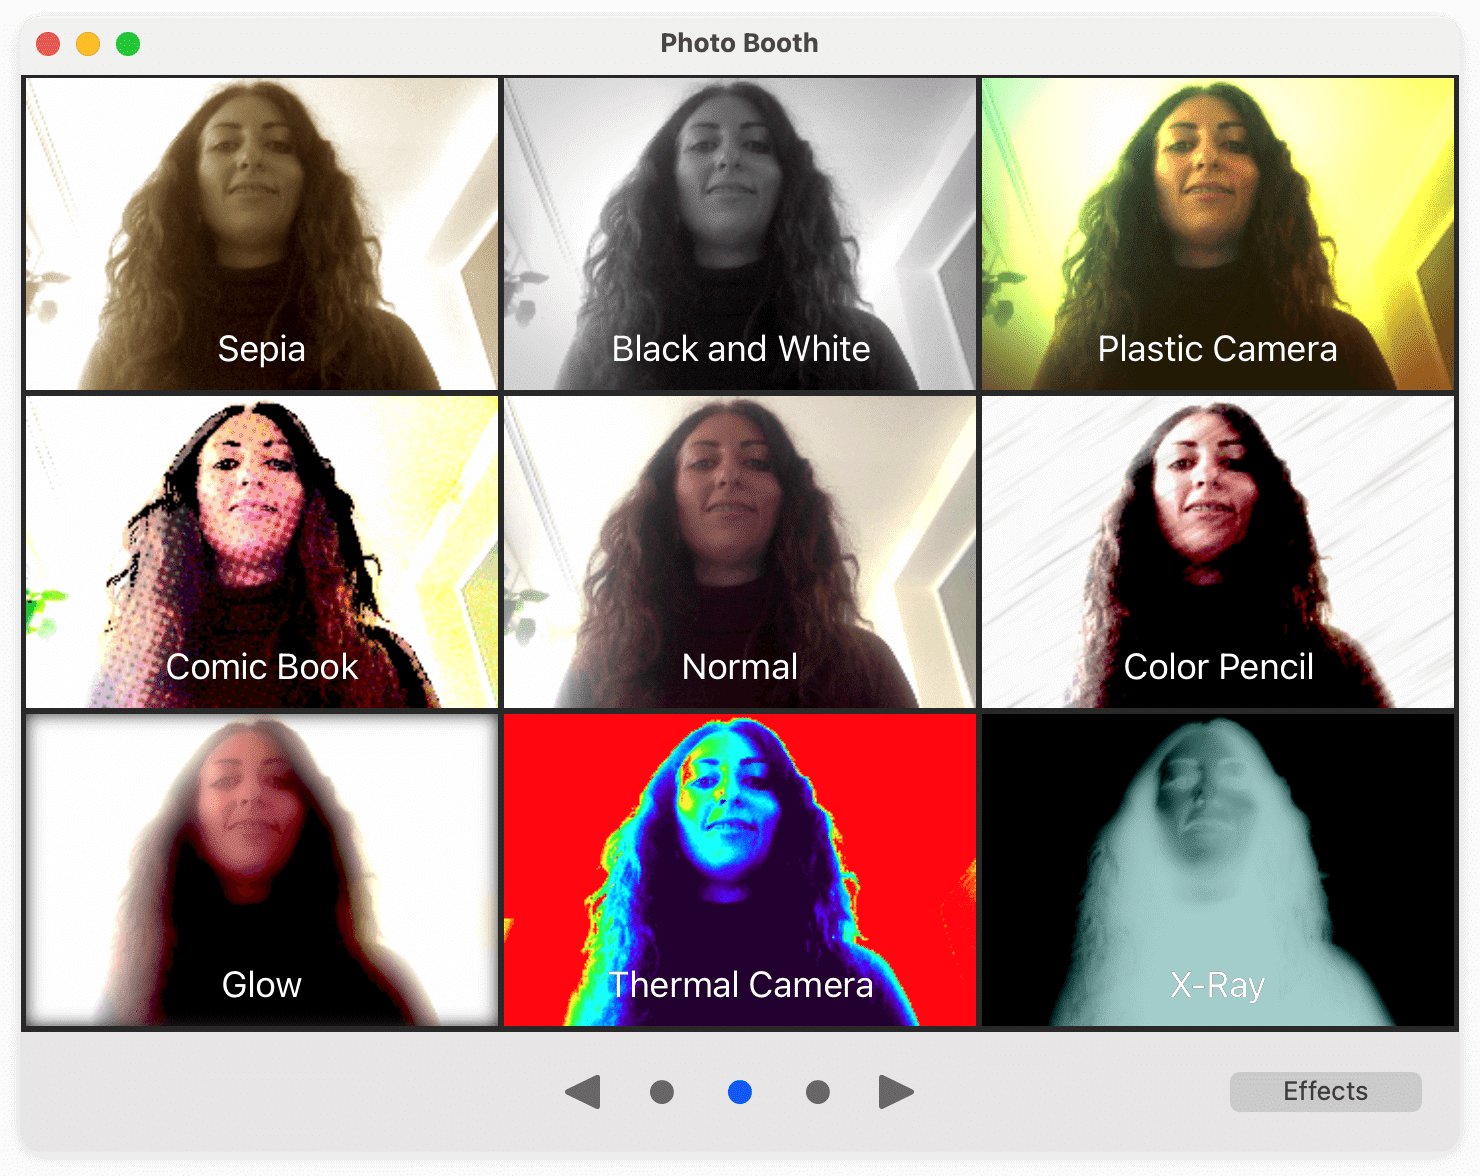
- Go to the Applications folder (or Launchpad) and locate the Photo Booth app.
- Click to open Photo Booth. This app will automatically open your Mac camera.
- If you can see yourself in the camera’s picture, then the camera is working.
How to fix Mac’s camera if it isn’t working?
If your Mac camera wasn’t damaged, but you still have trouble with it, there are most likely some system issues on your Mac. The tips below will help you fix your Mac camera and use Skype, Zoom, Facetime, or any other application that uses the camera, without any problems.
Check the apps’ permissions for using the Mac camera
The first time you open an application on Mac that wants to access your webcam, macOS displays a message and asks for your permission. If you don’t give permission to use the camera, then you will not be able to use the camera for any video calls or recordings. You can check which apps have access to your Mac camera and give access to specific applications in the Mac System settings.
- Open System Settings.
- Click Privacy & Security in the sidebar.
- Select Camera in the right section.
- Change settings to allow applications access camera on your Mac.
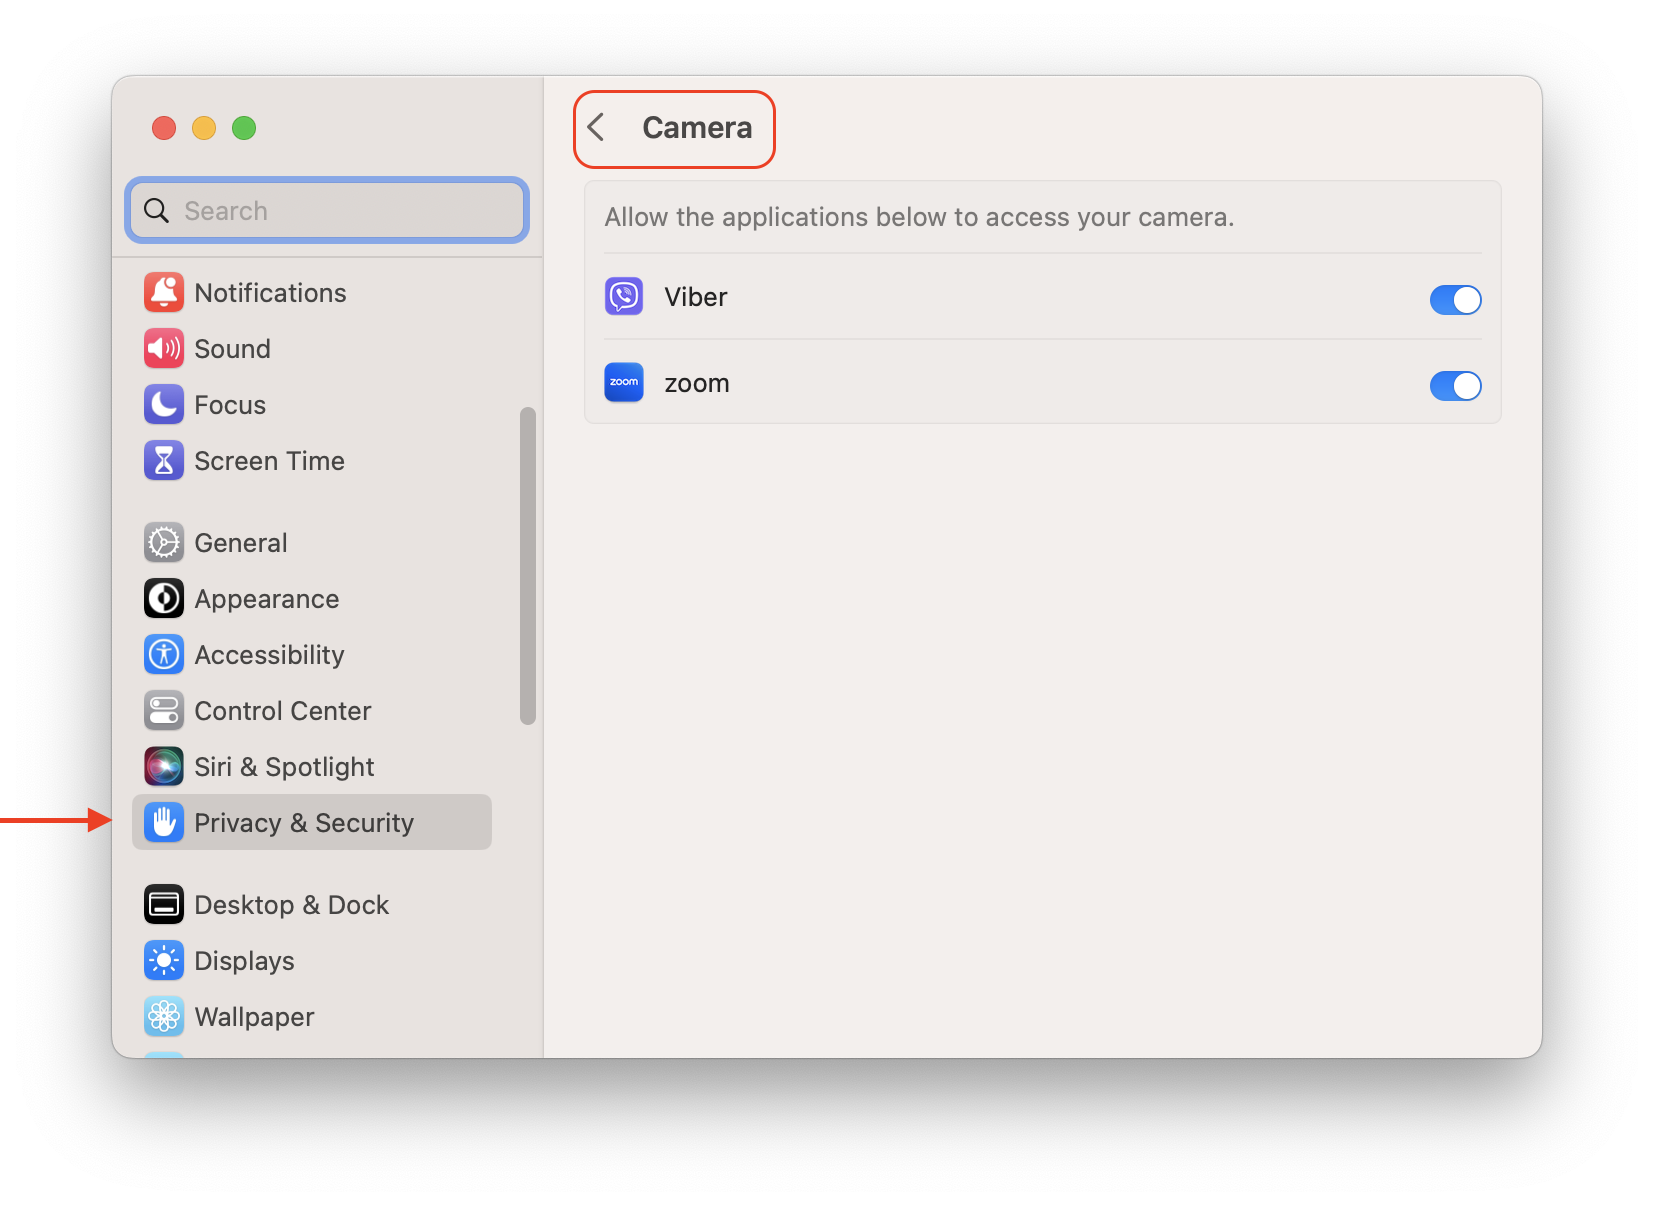
On earlier versions of macOS, use the following steps:
- Open System Preferences.
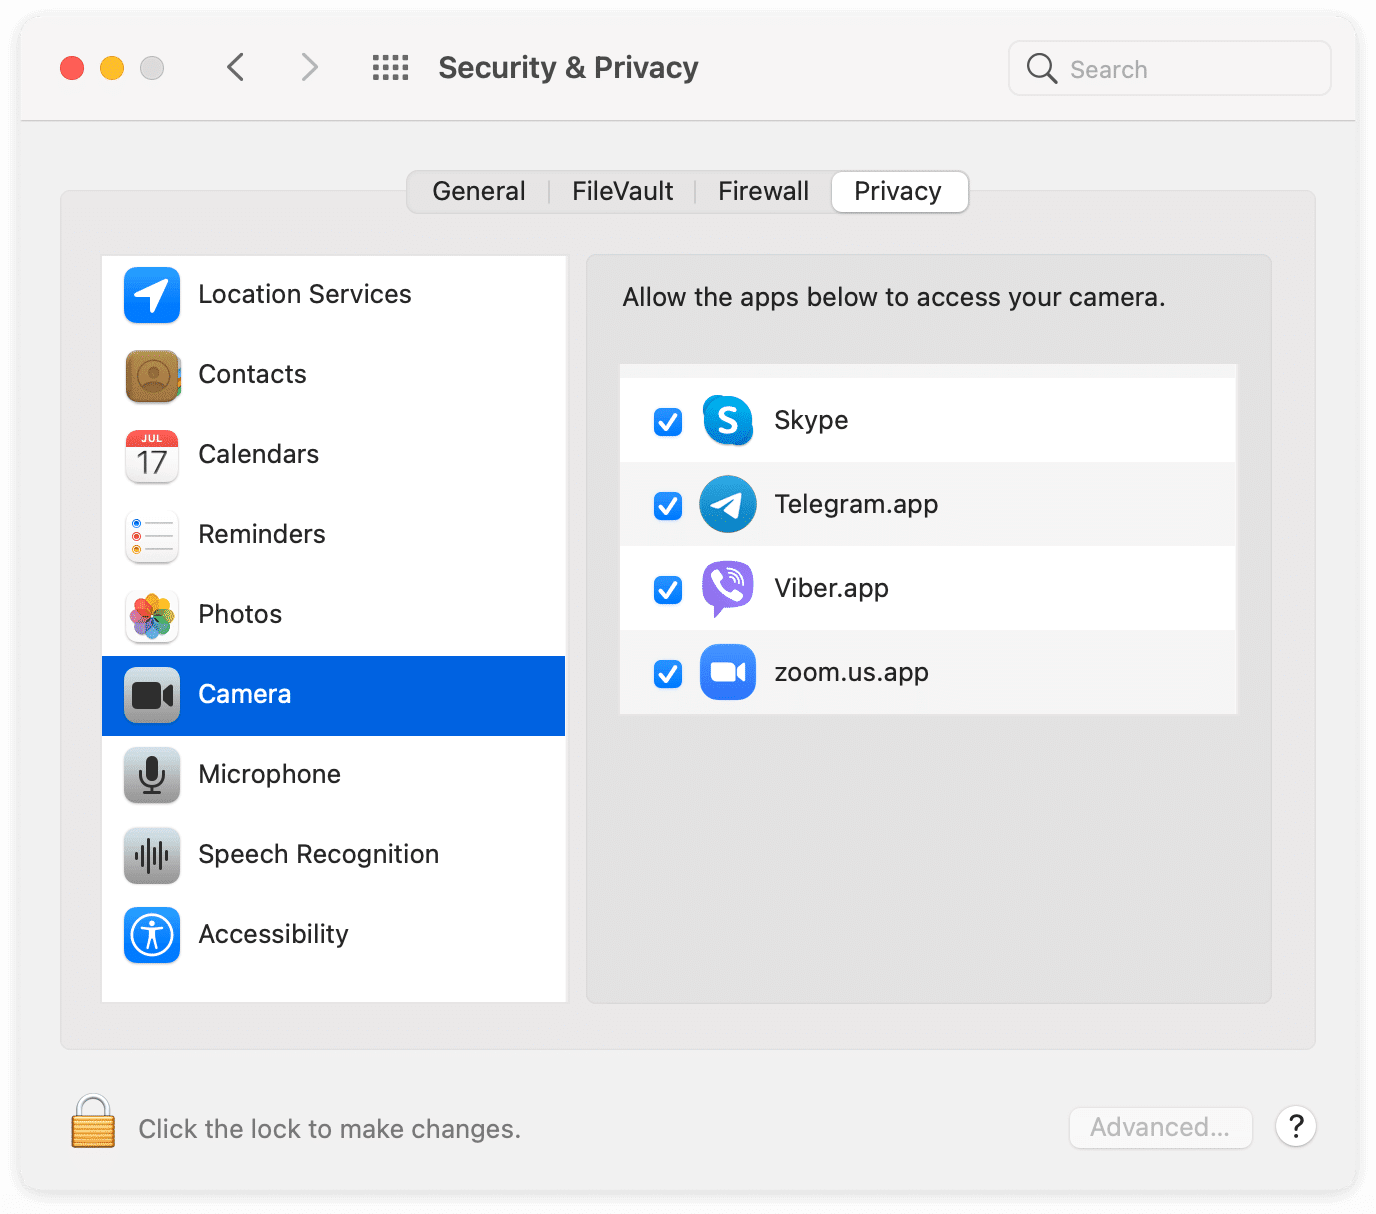
- Go to the Security & Privacy section → Privacy tab.
- Click on Camera in the sidebar. Here you will see the list of applications that have requested access to your webcam. If they have a checkbox next to them, they have been given access to your webcam. If the field is empty, the app will not be permitted to use the camera.
If you want to make changes to this list, click the Lock icon and sign in with your administrator password. Then check or uncheck the access for the applications. Once you give permission to the webcam, try again to use the app video calling or recording.
Check the running apps that are using the Mac camera
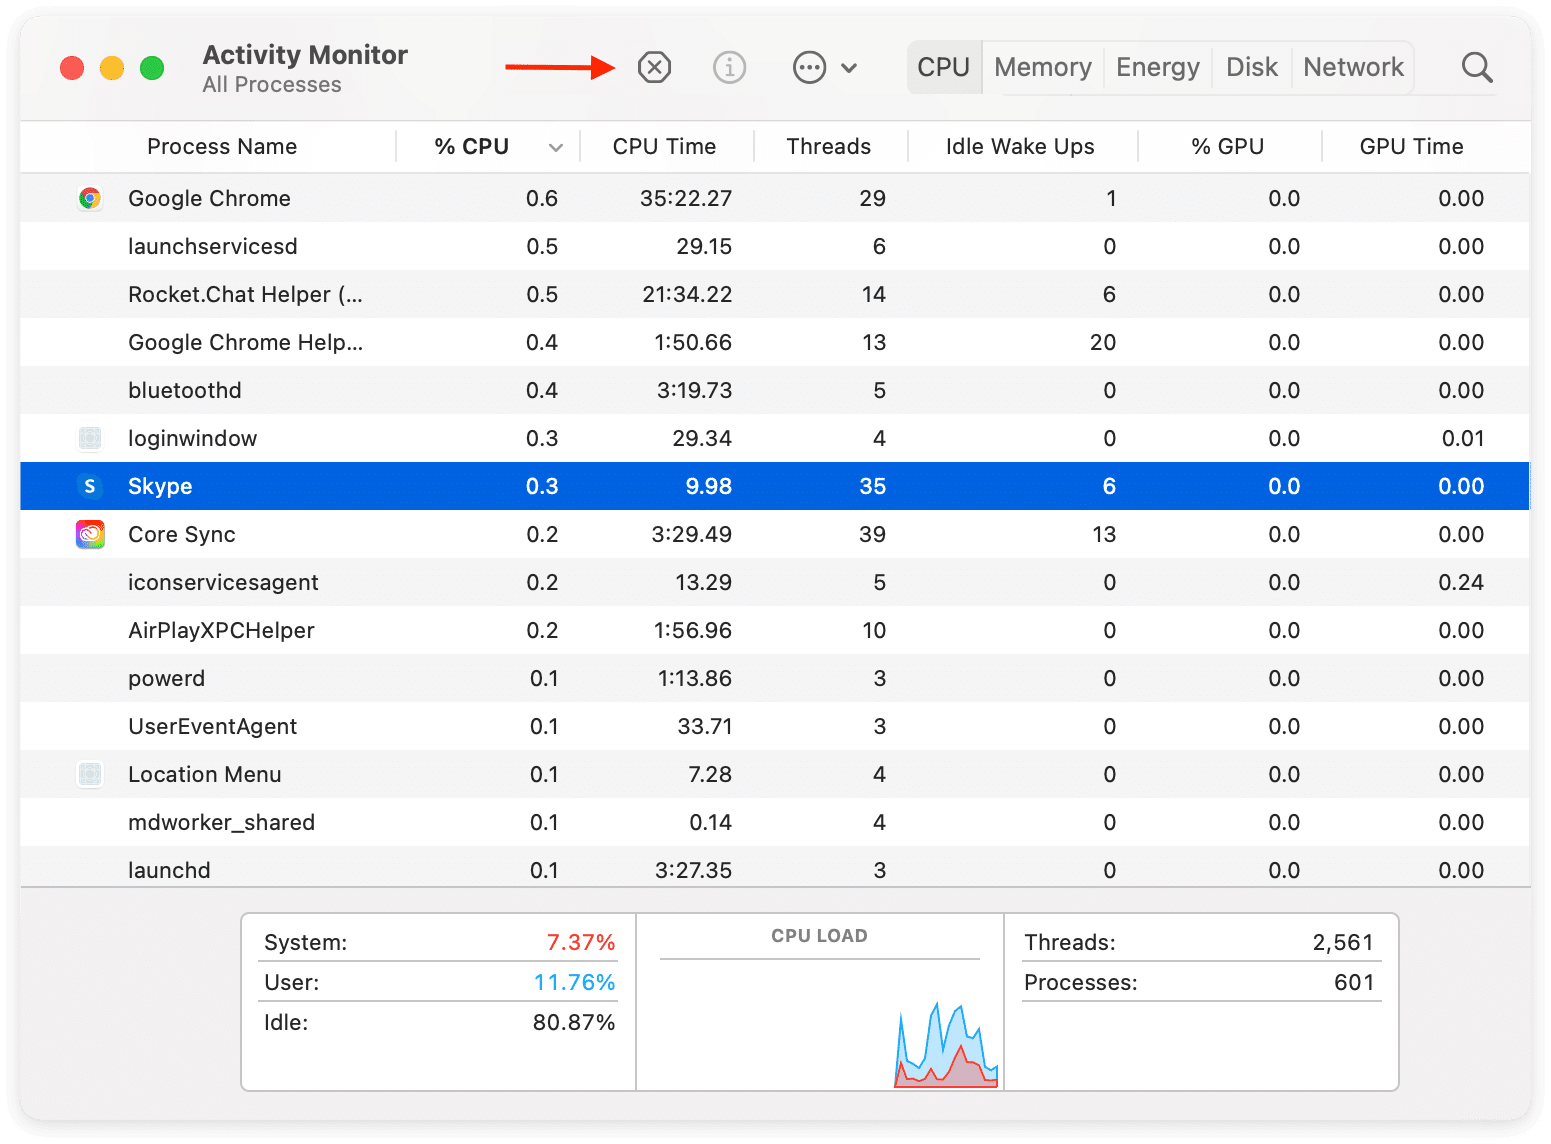
Note that your Mac’s camera can’t be used by several applications at the same time. Close all camera-based applications like Skype, Zoom, Photo Booth, etc. and check whether there are any camera-related running processes working in the background. You can do this with the default Apple application called Activity Monitor:
- Launch Activity Monitor.
- Find and select all apps that have access to your Mac’s camera.
- Click the “X” button to close them.
- Confirm the action.
Reboot your Mac
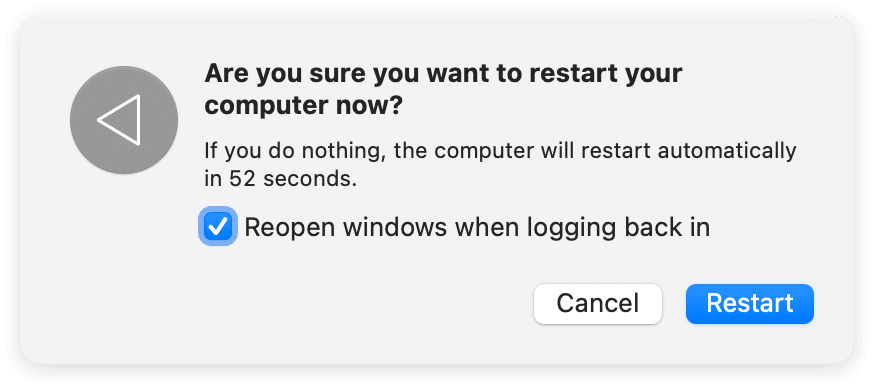
Another way to make sure that all apps using a camera are closed is to restart your Mac. Be sure to uncheck the option to open the running windows and apps after the reboot.
- Go to the Apple menu and select Restart…
- Untick the checkbox for “Reopen windows when logging back in”
- Click Restart.
Check whether your Mac detects the webcam
You can check your Mac’s system information and see if your computer is detecting the webcam correctly. To do this, follow these steps:
- Go to the Apple menu and select About this Mac.
- Click on System Report.
- Find and click on Camera in the window’s sidebar.
Here you can see the system information about your Mac camera, the model, and the ID.
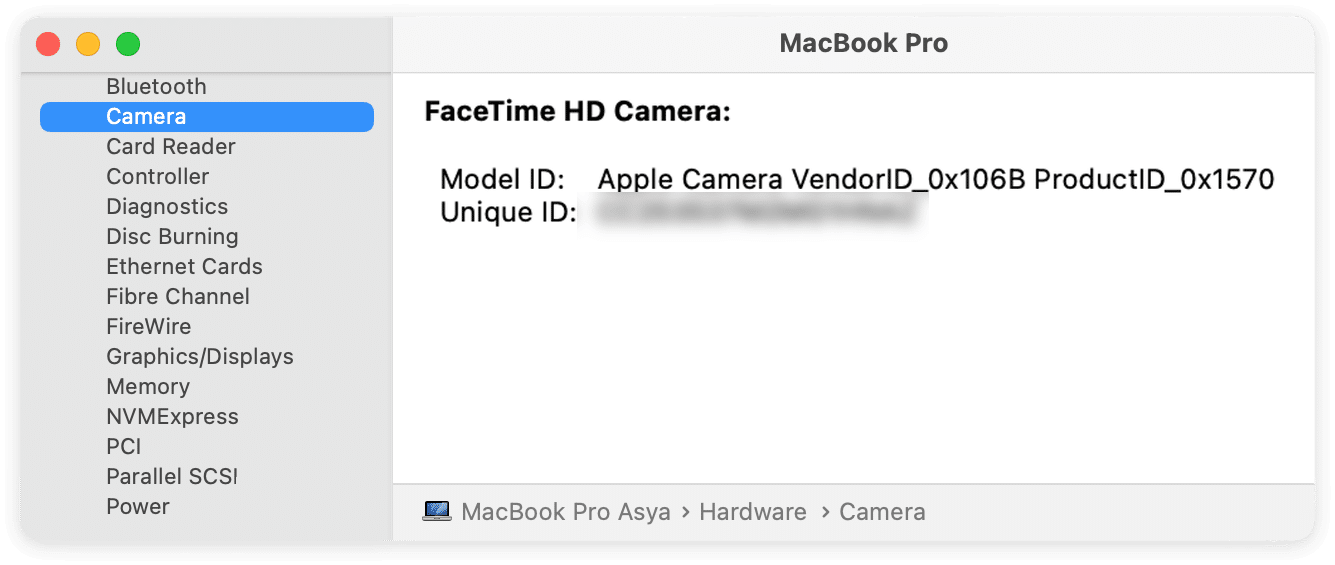
If your built-in Mac webcam is not listed in the System Information window, there is most likely a hardware failure or physical damage that has caused it to stop working. In this case, the only thing you can do is to contact the Apple service center or to buy a new external webcam for your Mac.
Restart Mac camera-related processes
The VCDAssistant and AppleCameraAssistant are two processes that run webcam tasks in the background on your Mac. If something goes wrong with the camera processes and the camera stops working, your Mac will automatically restart the system to enable the camera once again. If for some reason, the camera processes couldn’t be restarted, you can manually do this with the help of the Terminal command line:
- Open Terminal.
- Type the following commands and press Return:
sudo killall VDCAssistant; sudo killall AppleCameraAssistant
- Enter your administrator password and press Return to confirm running the task.
After this, the problem should be solved and you should now be able to use your Mac camera.
Reboot Mac in Safe mode
The Safe mode on Mac restarts the system without running any startup programs, software programs, or other processes and allows the system to detect problematic apps that can cause issues. If while in Safe mode, your Mac camera is working, then the problem is likely associated with a third-party application.
How to reboot an Intel-based Mac in Safe mode:
- Shut down your Mac and wait 10 seconds.
- Press the Power button and then immediately press and hold the Shift key.
- Once you see the login screen, release Shift and log to your Mac.
How to reboot M1 Mac in Safe mode:
- Shut down your Mac and wait 10 seconds.
- Press and hold the Power (Touch ID) button.
- Once you see the “Loading startup options” window, release the Power button.
- Press the Shift key and click on the Startup Disk.
- Select Continue in Safe Mode.
Then restart your Mac again and check whether your webcam is working.
Adjust Mac camera settings
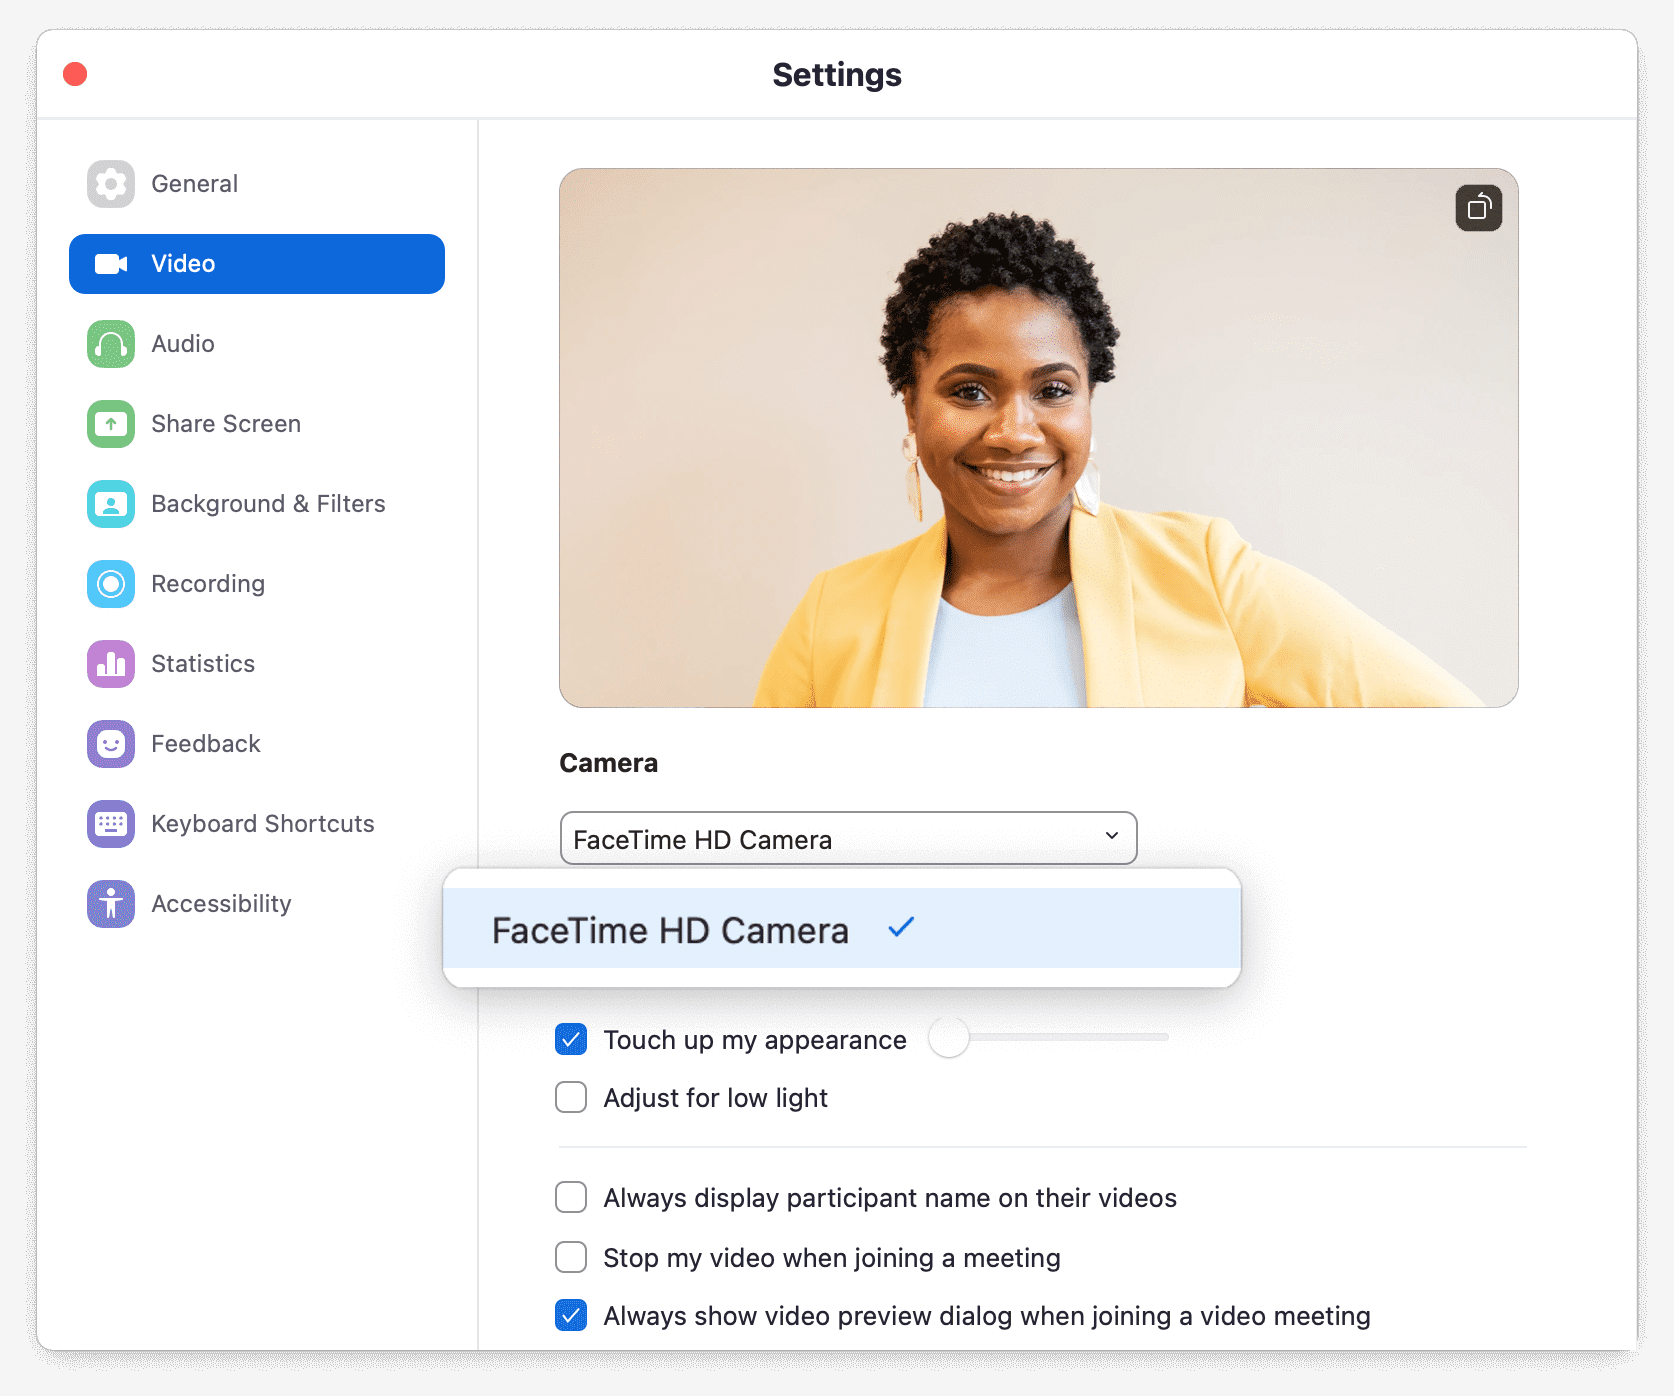
The macOS system doesn’t provide any direct option to change camera settings. Usually, the applications that use the webcam have their own camera settings and an option to test the camera. For example, in Zoom, you can test your camera and adjust its settings in the Zoom Preferences.
How to test the camera and adjust settings in Zoom:
- Open the Zoom application on your Mac.
- Go to the Zoom menu and select Preferences.
- Switch to the Video section from the sidebar.
- Here you can see whether the app has access to your camera. If you have an external web camera, you will be able to select which camera to use.
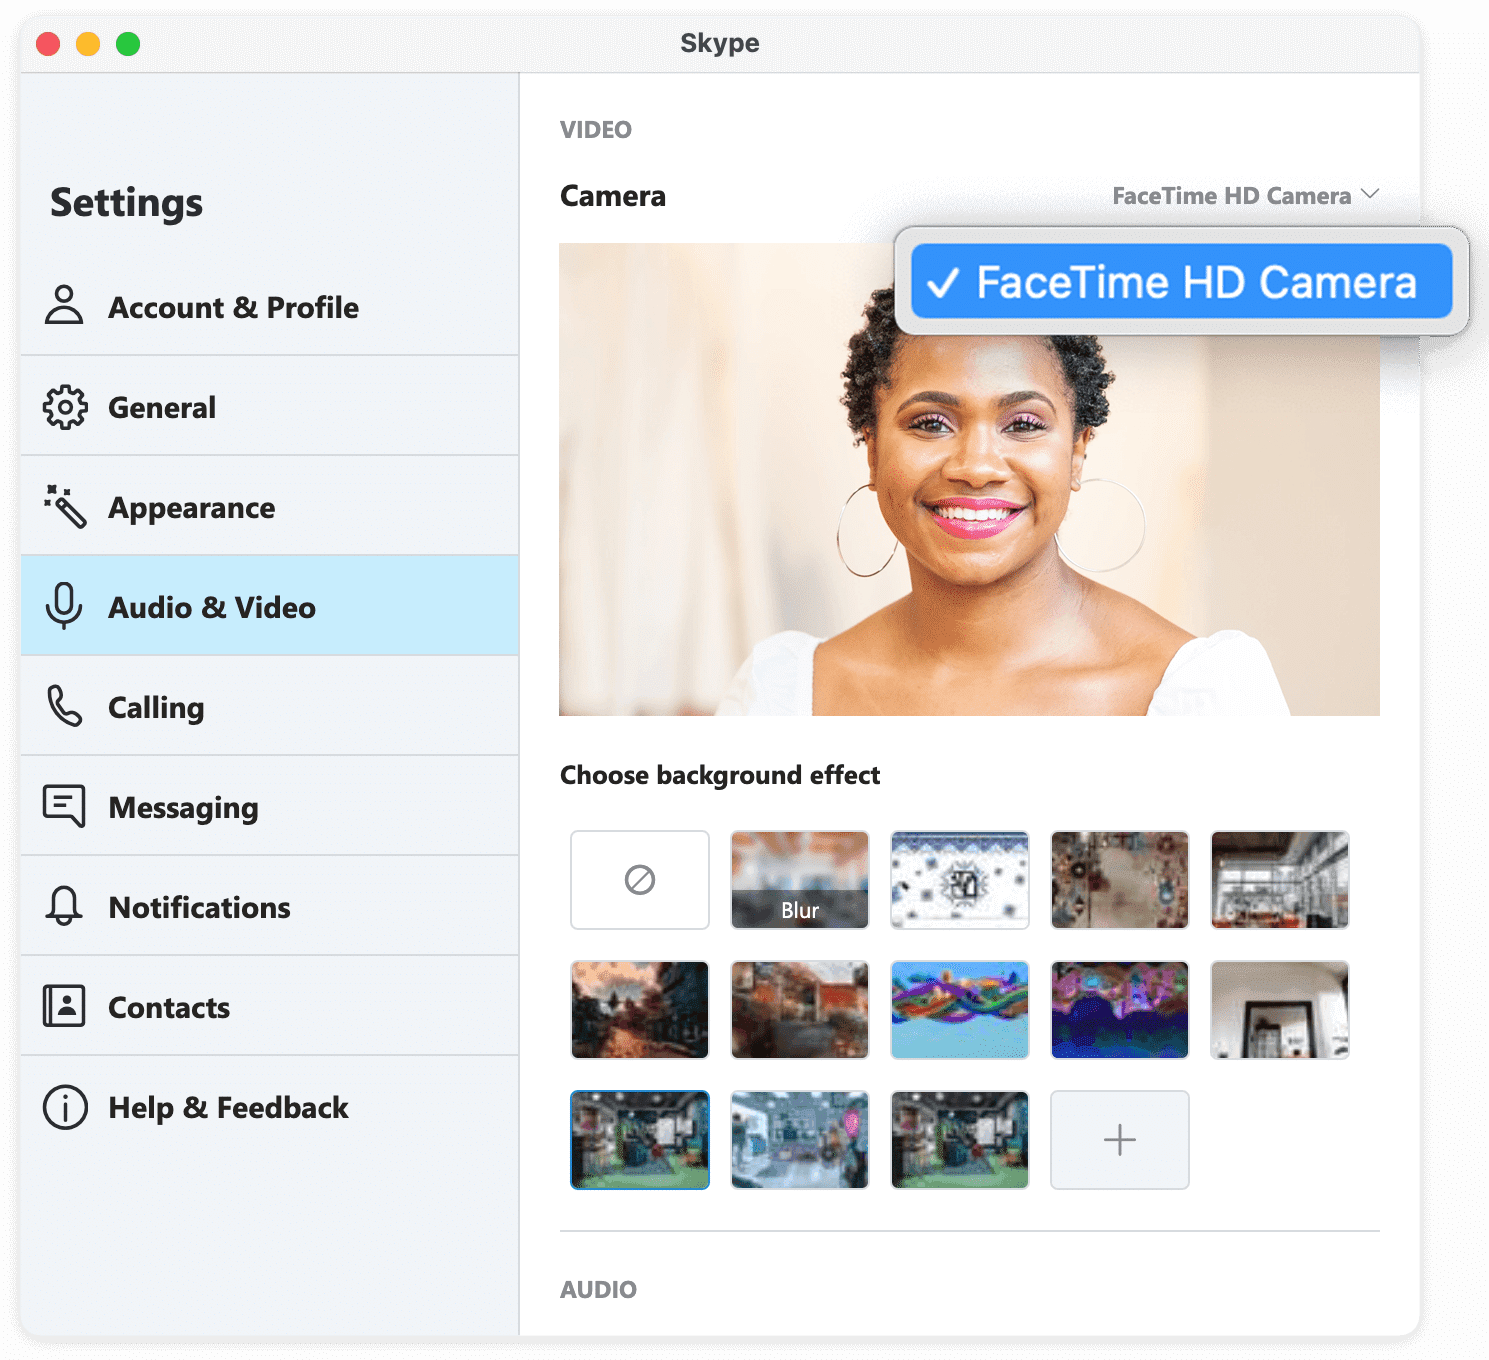
How to test the camera and adjust its settings in Skype:
- Launch Skype.
- Go to the Skype menu and select Audio & Video settings.
- Here you can choose the built-in or external webcam.
You can follow similar steps for testing the camera with other video calling applications on your Mac.
Reset SMC on Mac
SMC is a system management controller that is responsible for many operations on macOS, including the correct operation of a built-in camera for both iMac and MacBook. If none of these tips were able to fix your camera, try to force reset SMC on your Mac.
Steps to reset SMC on a MacBook:
- Shut down your MacBook
- Disconnect your MacBook from everything but the power.
- Press and hold Shift+Control+Option and the “Power” button.
- Your computer will immediately turn on and then turn off. Then turn your MacBook on again.
Steps to reset the SMC on an iMac:
- Shut down your iMac.
- Press and hold the power button for 10 seconds, then release it.
- Wait a few seconds and restart your iMac.
Once you reset SMC, test the camera on your Mac.
If none of this solved the issue and your Mac camera still isn’t working, then most likely the problem is connected with the hardware. In this case, you should contact an authorized Apple service center to investigate and fix your problem.
FAQ about the Mac camera
How do I open the camera on Mac?
You can use a default Apple application called Photo Booth to open your Mac camera and check whether it works. You can find this in the Applications folder in Finder or right in the Launchpad.
How do I turn on the camera on Mac?
To enable the camera on your Mac for a specific application, do the following:
- Open System Preferences.
- Go to the Security & Privacy section → Privacy tab → Camera.
- Click the Lock icon to make changes.
- Tick the checkbox next to the app that needs access to your camera.
How do I reset the Mac camera?
You can restart your Mac camera processes with the help of Terminal. Use the following commands for this:
- sudo killall VDCAssistant
- sudo killall AppleCameraAssistan
