
Today, taking photos on a smartphone is easier than ever. However, everything changes when it comes to storing and organizing photos on a computer. In this article, we are going to consider Photos Library on a Mac and help you to organize your Apple photos. Read on to learn how to use Mac photo libraries, how to create a new Photos Library, how to empty the Photos Library on Mac and even how to delete duplicate photos from Mac.

Contents:
- Where are photos stored on Mac?
- What is Photos Library on Mac?
- How to create a new Photos Library on Mac
- How to delete Photos Library on Mac
- How to delete photos from the Library on Mac
- How to merge Photos Libraries on Mac
- How to create a photo album or folder in the Photos app
- How to remove duplicate photos on Mac
Where are photos stored on Mac?
By default, Mac stores photos in the Photos Library. You can find the Photos Library in Finder → Pictures folder.
In short, here is the Mac Photos library location:
- /Macintosh HD/
/Pictures/PhotosLibrray.photoslibrary


But note, the Photos Library is not a simple photos folder. All the files inside it are packaged. If you click on the Photos Library, it will open the Mac Photos app where you can preview your Library photos.
What is Photos Library on Mac
Photos Library is the place where Mac collects and stores all photos transferred or copied from the iPhone or a memory card. The Photos Library is stored in the Pictures folder on Mac. These photos then can be previewed with the Photos app.

How to create a new Photos Library on Mac
Mac Photos App allows the creation of multiple photo libraries, helping users to differentiate different types of photos they work with. Thus, it is possible to create separate libraries for private and work photos or put together a particular group of images.
To create a new Photos Library on Mac, follow these steps:
- Quit the Photos app if it is running.
- Then holding the Option key in your keyboard and start the Photos app once again.
- You will see the Choose Library window. Click on Create New…
- Choose the name, location and, if needed, tags. Click on OK.
- Right after the previous step, the Photos app with a new library will open. Now you can start importing your photos in this library.


How to delete Photos Library on Mac
Here are the steps to delete unneeded Photos Libraries you created on your Mac:
- First quit the Apple Photos app.
- Then we recommend that you make a backup copy of your Photos Library so as not to lose important photo memories.
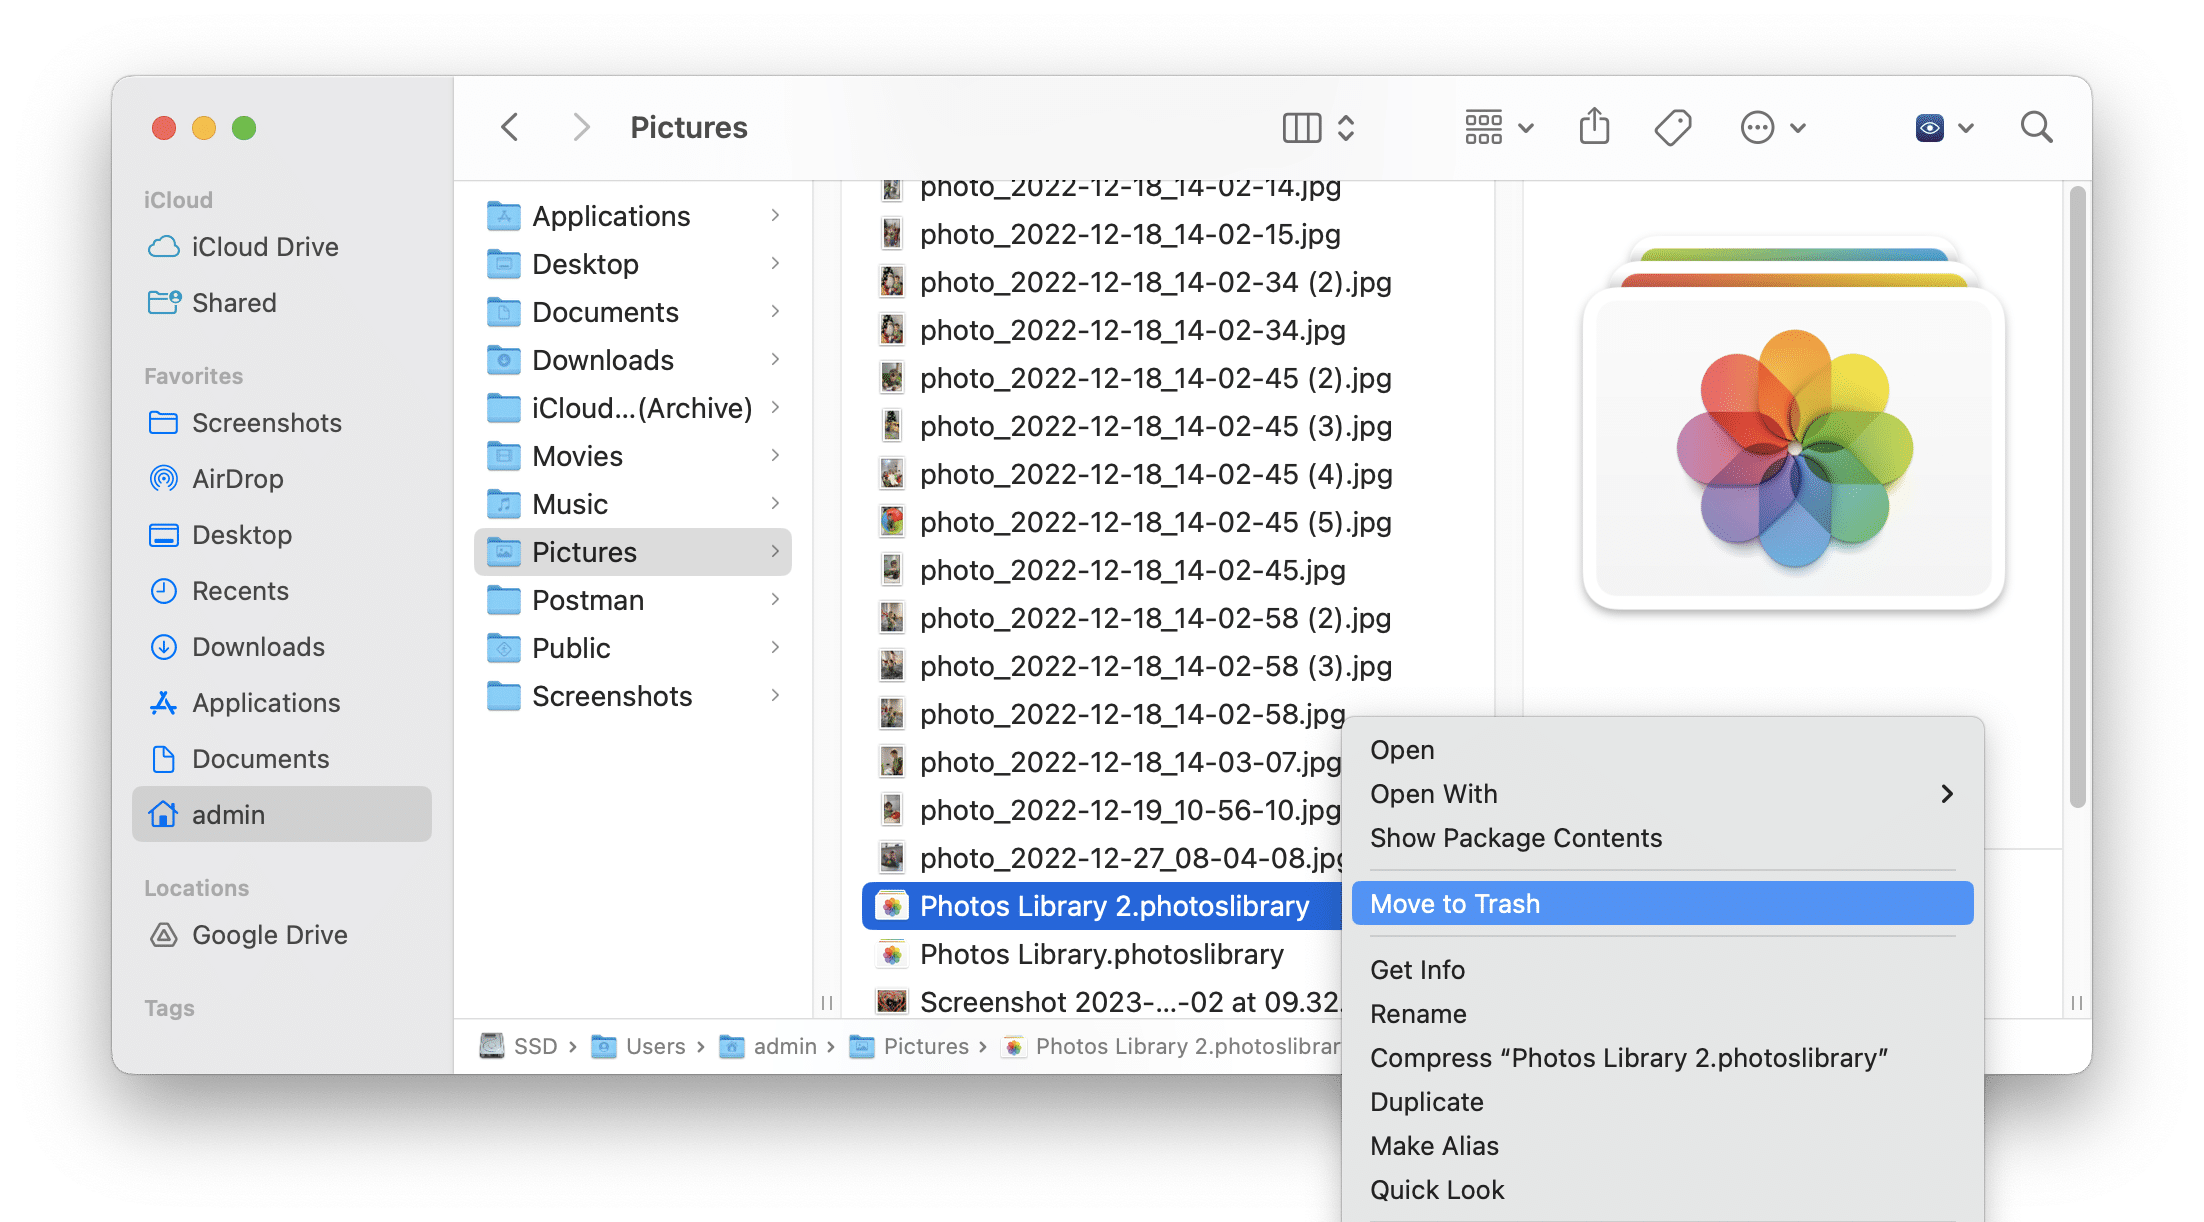
- Then find the Library.photoslibrary in Finder and move it to Trash. By default Mac stores the Photos Library in the Pictures folder. If you had chosen another location for your Library, then go to the appropriate location and remove the Photos Library from there.
- The last step is to empty Trash to delete the Photos Library from Mac completely.
How to delete photos from the Library on Mac
If you want to delete photos from the Library, do the following:
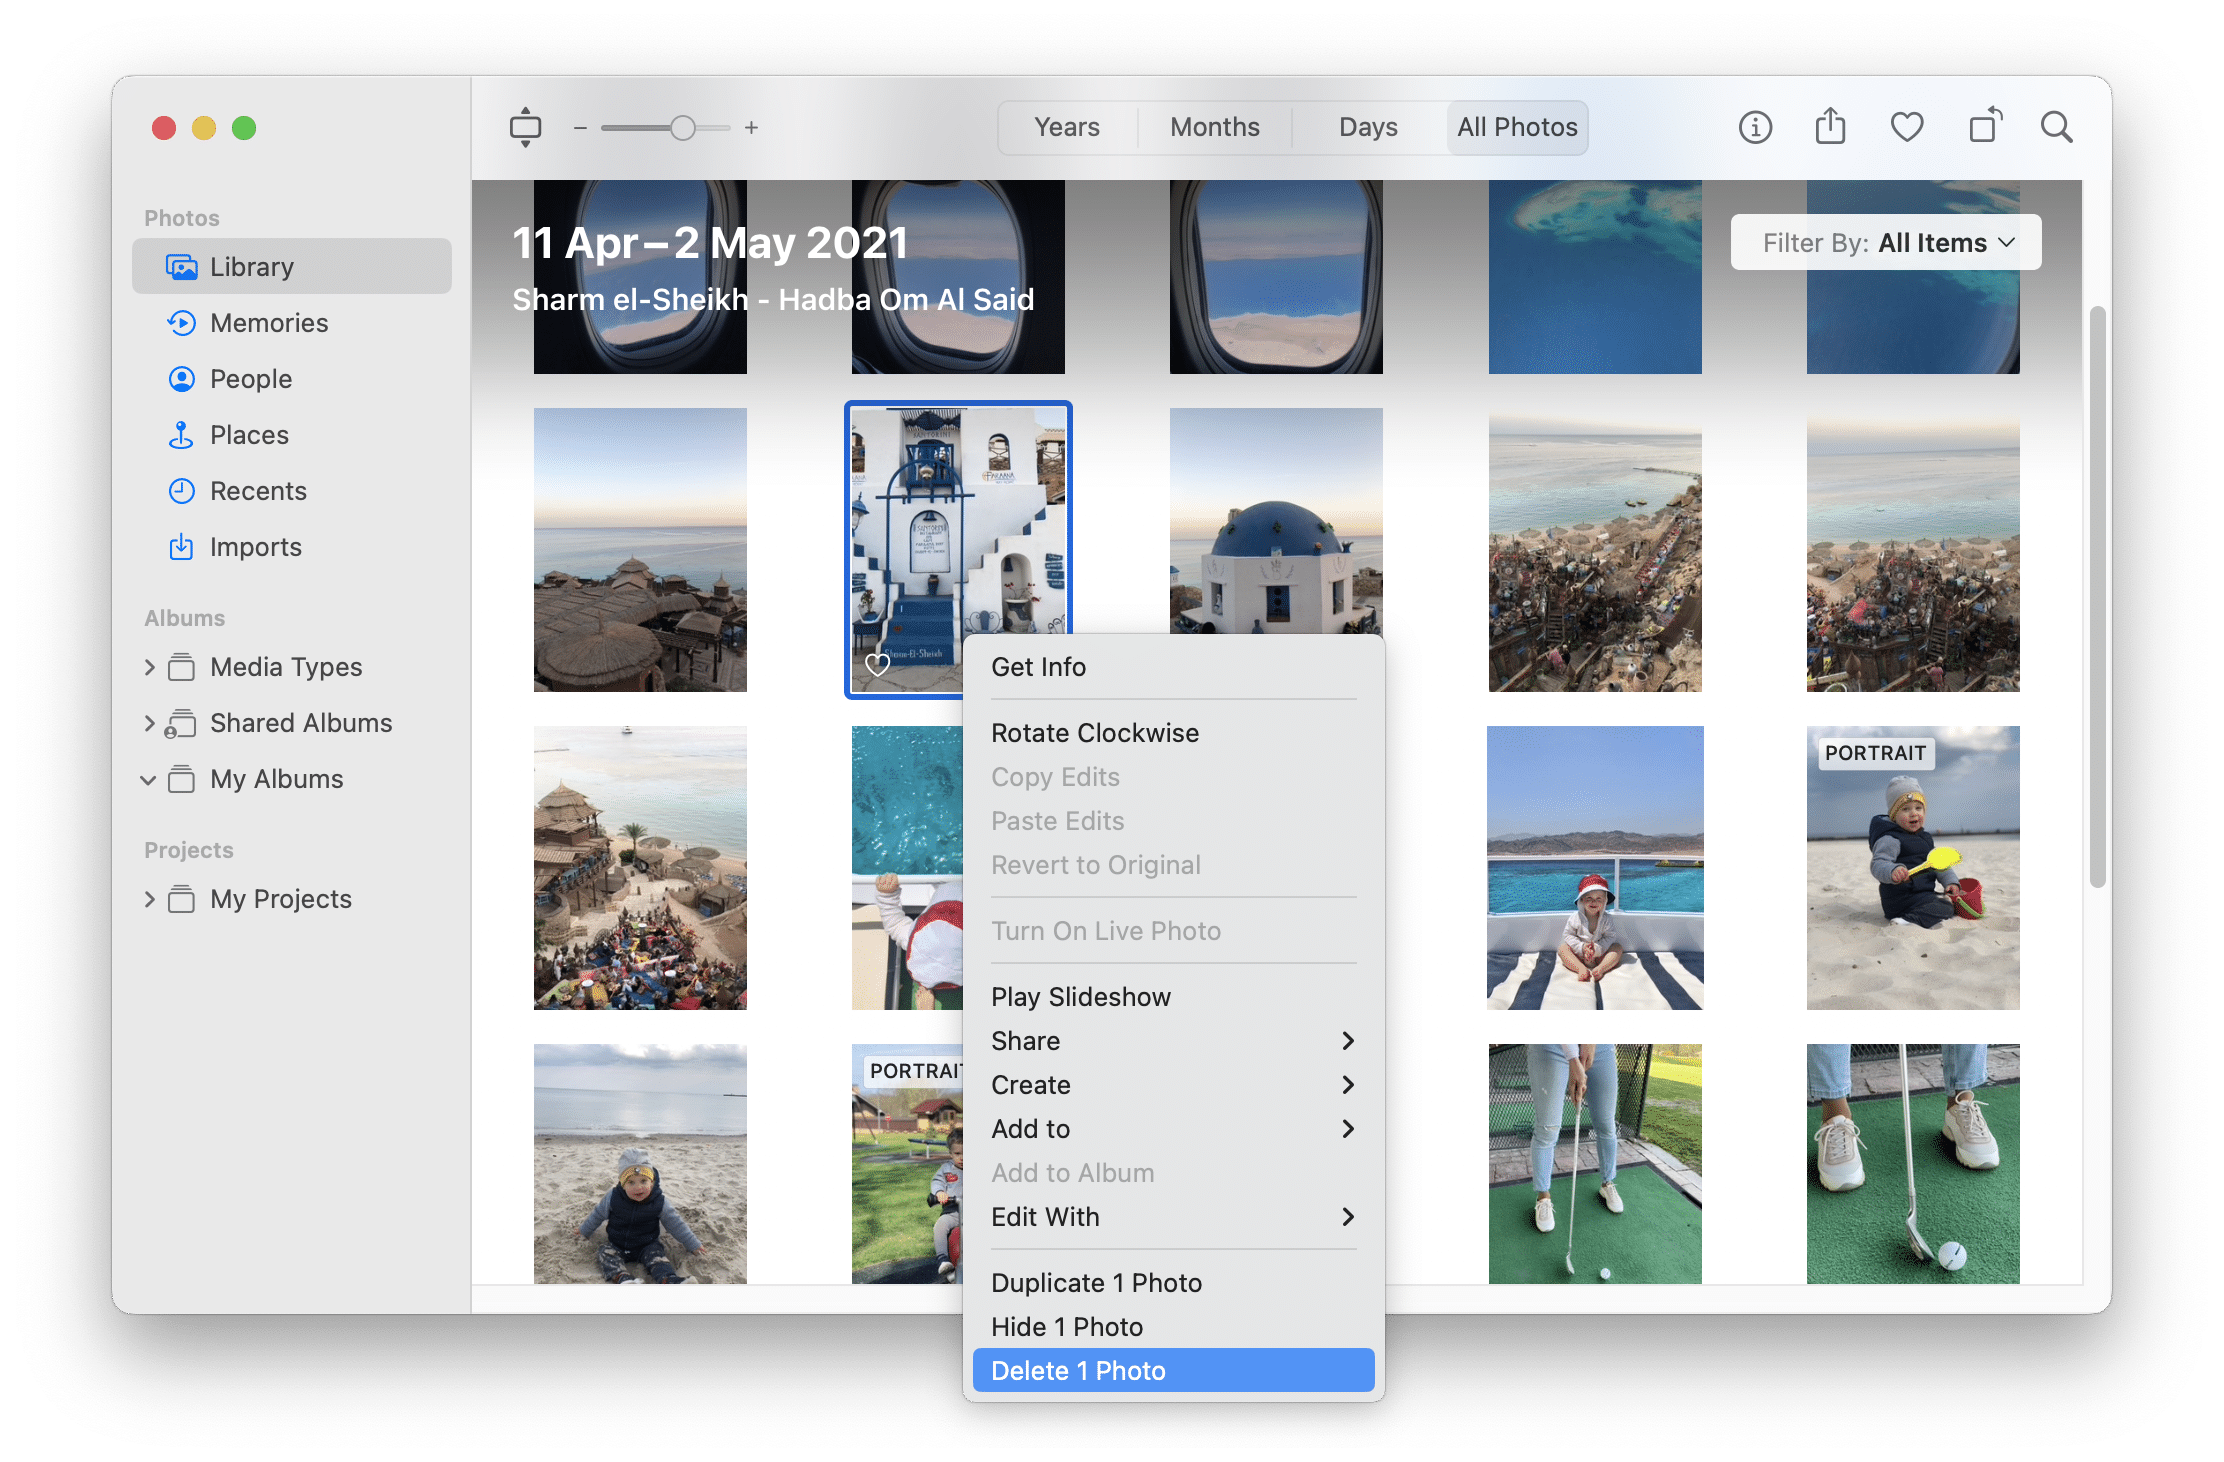
- Run the Photos app.
- Select a photo or multiple photos.
- Make a right click on the selected photos and choose Delete Photo.
- The photo will be moved to the Trash folder. So don’t forget then to empty Trash to free up space on your Mac.
How to merge Photos Libraries on Mac
We will explain how to merge Photos Libraries on Mac without using iCloud. All you need to do is to first export your photos from one of the libraries and then import photos to another library.
Here are the steps to combine two Photo Libraries:
- Hold the Option key on your keyboard and click to launch the Photos app. You will see the window with the list of all your Photos Libraries on your Mac.
- Select one of the libraries you want to merge.
- Select all the photos in this library. You can use the Command+A key combination for this or in the menu bar click Edit→ Select All.
- Quit the Photos app and then open another Photos Library you choose for merging. For this again, press the Option key and run the Photos app.
- In the menu bar click File → Import. You can also use the Command+Shift+I shortcut.
- Select the photos to be imported and click to Review for Import.
- Confirm the merger by clicking Import All New Photos in the top right corner.


Then in the menu bar click File → Export → select the way for exporting.

Set up an extension and name for the exported photos, select in Finder a folder and click to export the photos from the Library.


How to create a new photo album or folder in Photos on Mac
There are albums in the Photos app for easy organizing all your pics. Mac can create some photo albums automatically, or you can create them yourself, grouping photos in albums as required. It is possible to add a photo to several albums at once or create a Smart Album that can collect and group photos based on your choice criteria – particular dates, locations, people, or keywords. To organize albums and be able to quickly find and manage them, you can put them in particular folders.
Here are the steps to create a new photo album in the Photos app on Mac:
- Open the Photos app.
- In the sidebar find the Albums section.
- Press the plus sign and choose the type of the album or folder you want to create:
- All created photo albums and folders will appear in the left-hand sidebar of the Photos app. You can rename them as you wish.


When you have organized your photos in albums, you may find there are too many albums you have to work with, or it would take more time to find the required album or put similar albums together. To differentiate albums and group similar ones, you can organize them in folders.
To add photo albums to the folder, first click on My Albums. You will see your folder in the list next to the albums you have already created. Drag and drop the albums to any of the folders you want.

In case you have a lot of different photos on Mac and want to save time looking for the ones you want to put into the album, you can choose to create a Smart Album. Smart Albums can collect various photos on Mac, following the chosen parameters by quickly reviewing the whole gallery of photos. They have lots of parameters to choose from, such as photo format, day captured, day added, person and so on.
How to remove duplicate photos on Mac
In the previous paragraphs we showed how to create Photos Libraries, new photo albums and how to merge the libraries. If you have many libraries and albums, or you regularly work with photos or wish to import new collections of photo memories to your Mac, then there is a high probability that you will have many duplicate photos. We recommend that you check your Mac for duplicates so as to not let useless copies take up valuable space on your drive.
To find duplicate photos in your Photos Library on Mac, you can use a special application Duplicate File Finder.
Duplicate File Finder allows you to find and remove any type of duplicate files, similar photos, duplicate folders, and even to merge similar photos in order to organize photos on your Mac.
Here is how to find duplicates in Photos Library on a Mac:
- Launch Duplicate File Finder.
- Add Photos Library for scanning.
- Click Find duplicates.
- In a short while you will get the results and see your duplicate and similar photos in Photos Library.
- Select the unneeded photos and click to remove them.
- Confirm removal of photos from Mac Photos Library.


Once again, with Duplicate File Finder you can find not only duplicate photos, but any other type of duplicate files on your Mac: videos, music, documents, archives, folders and so on. So we would say that it’s a must-have tool for anyone who faces a lack of free space on a Mac hard drive. With the help of this duplicate cleaner, you can detect all useless duplicate content and get rid of it to recover free disk space on a Mac.


