Help

Disk Space Analyzer
Overview
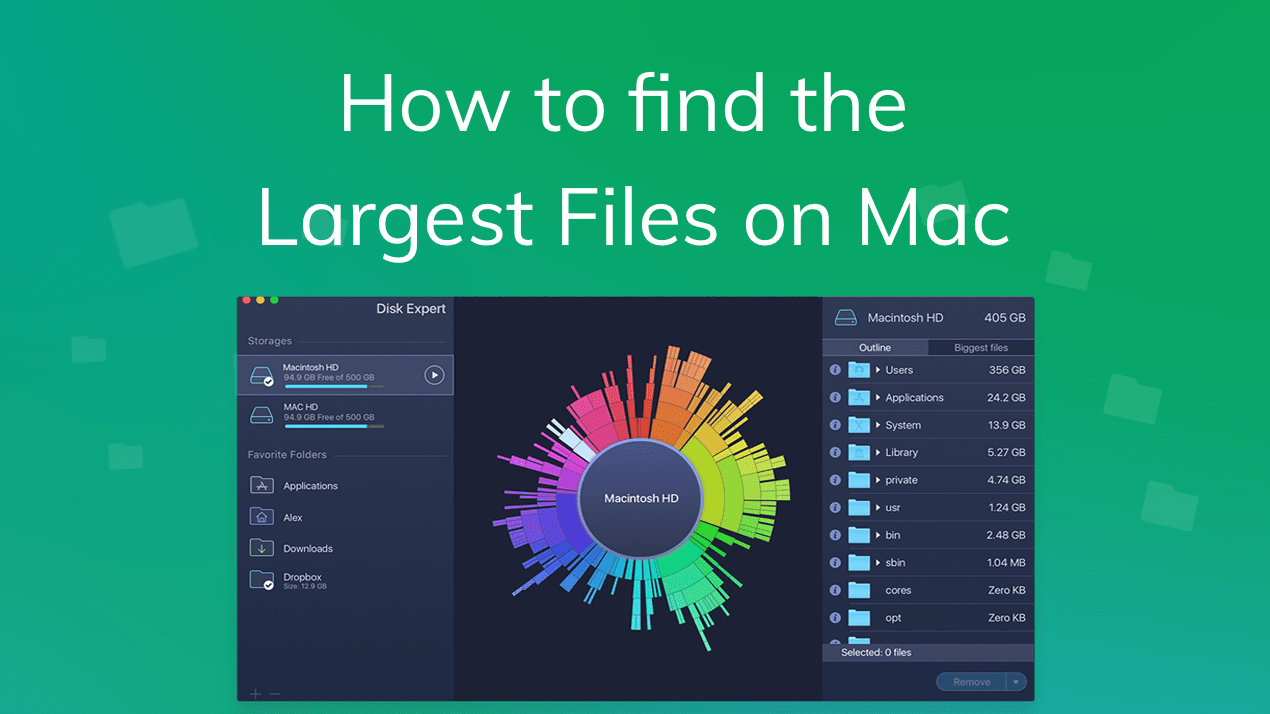
Disk Space Analyzer is a special Mac disk space analyzer that allows you to easily check the drive size, find large files, and free up disk space on a Mac from unneeded “space eaters.” The application is a convenient hard drive visualizer which displays local volumes and allows you to scan any type of external disk:
- Hard Drive volumes
- Flash Drive Volumes
- CD & DVD disks
- External storage disks
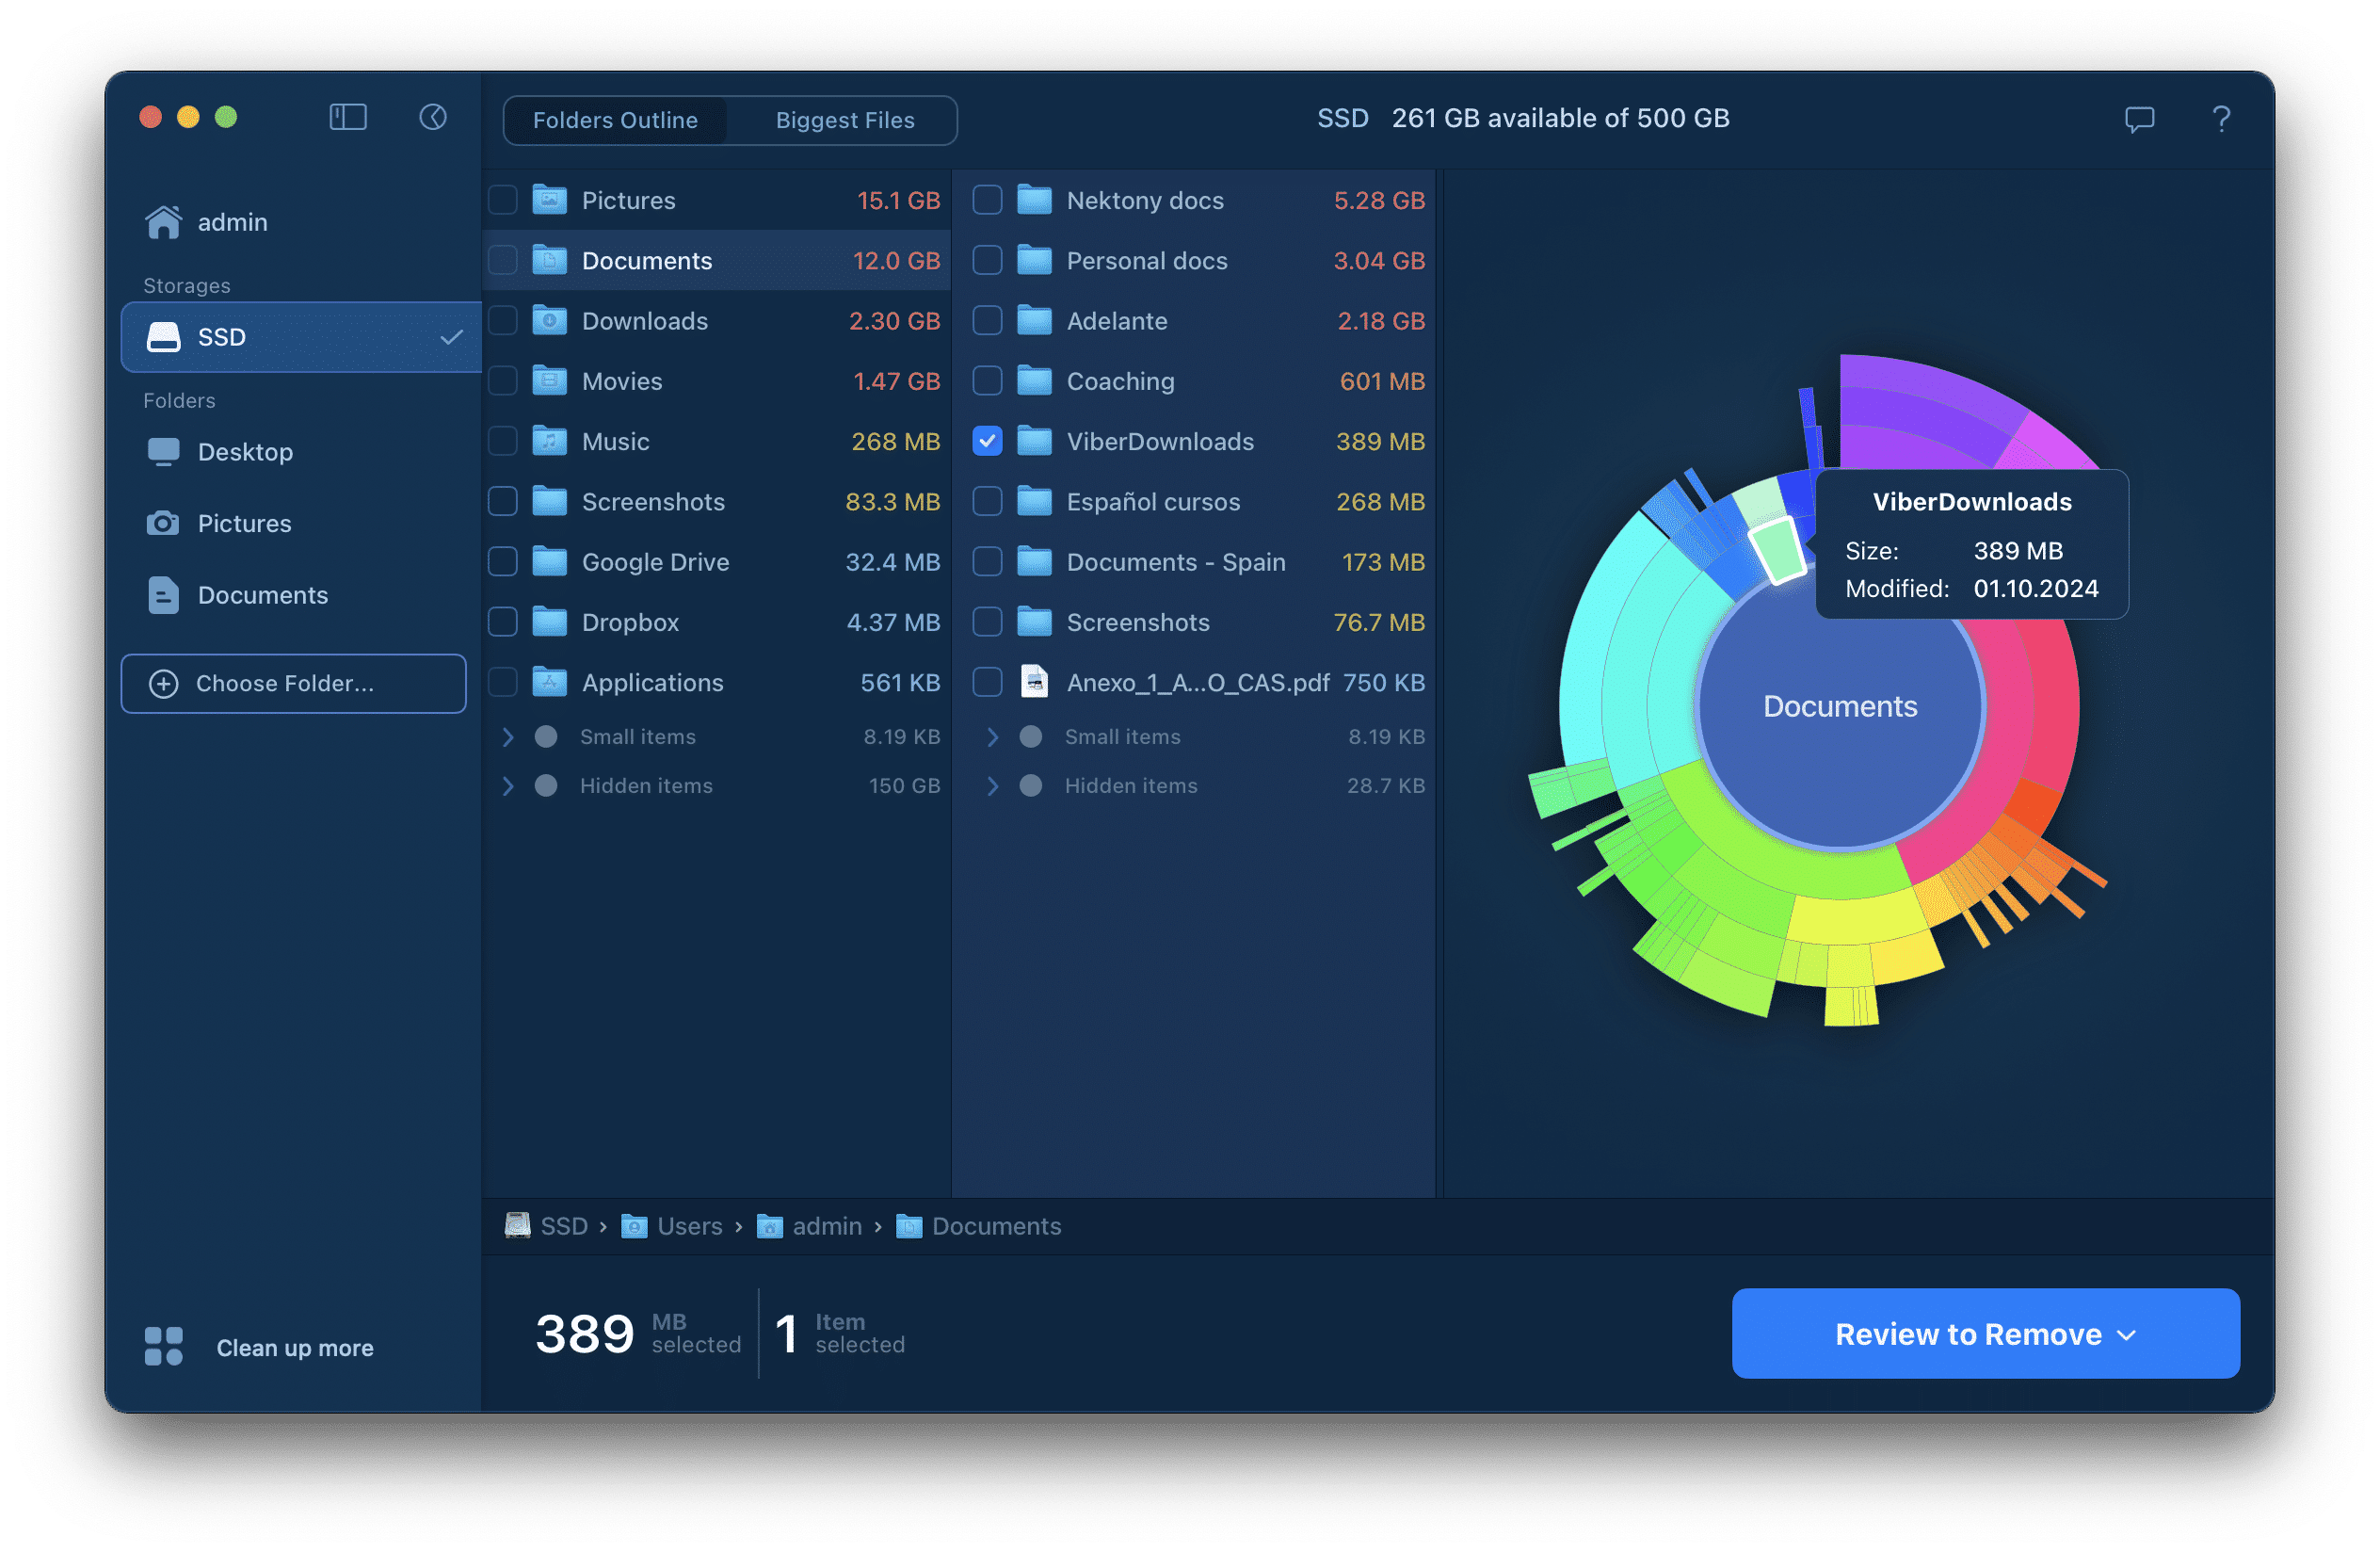
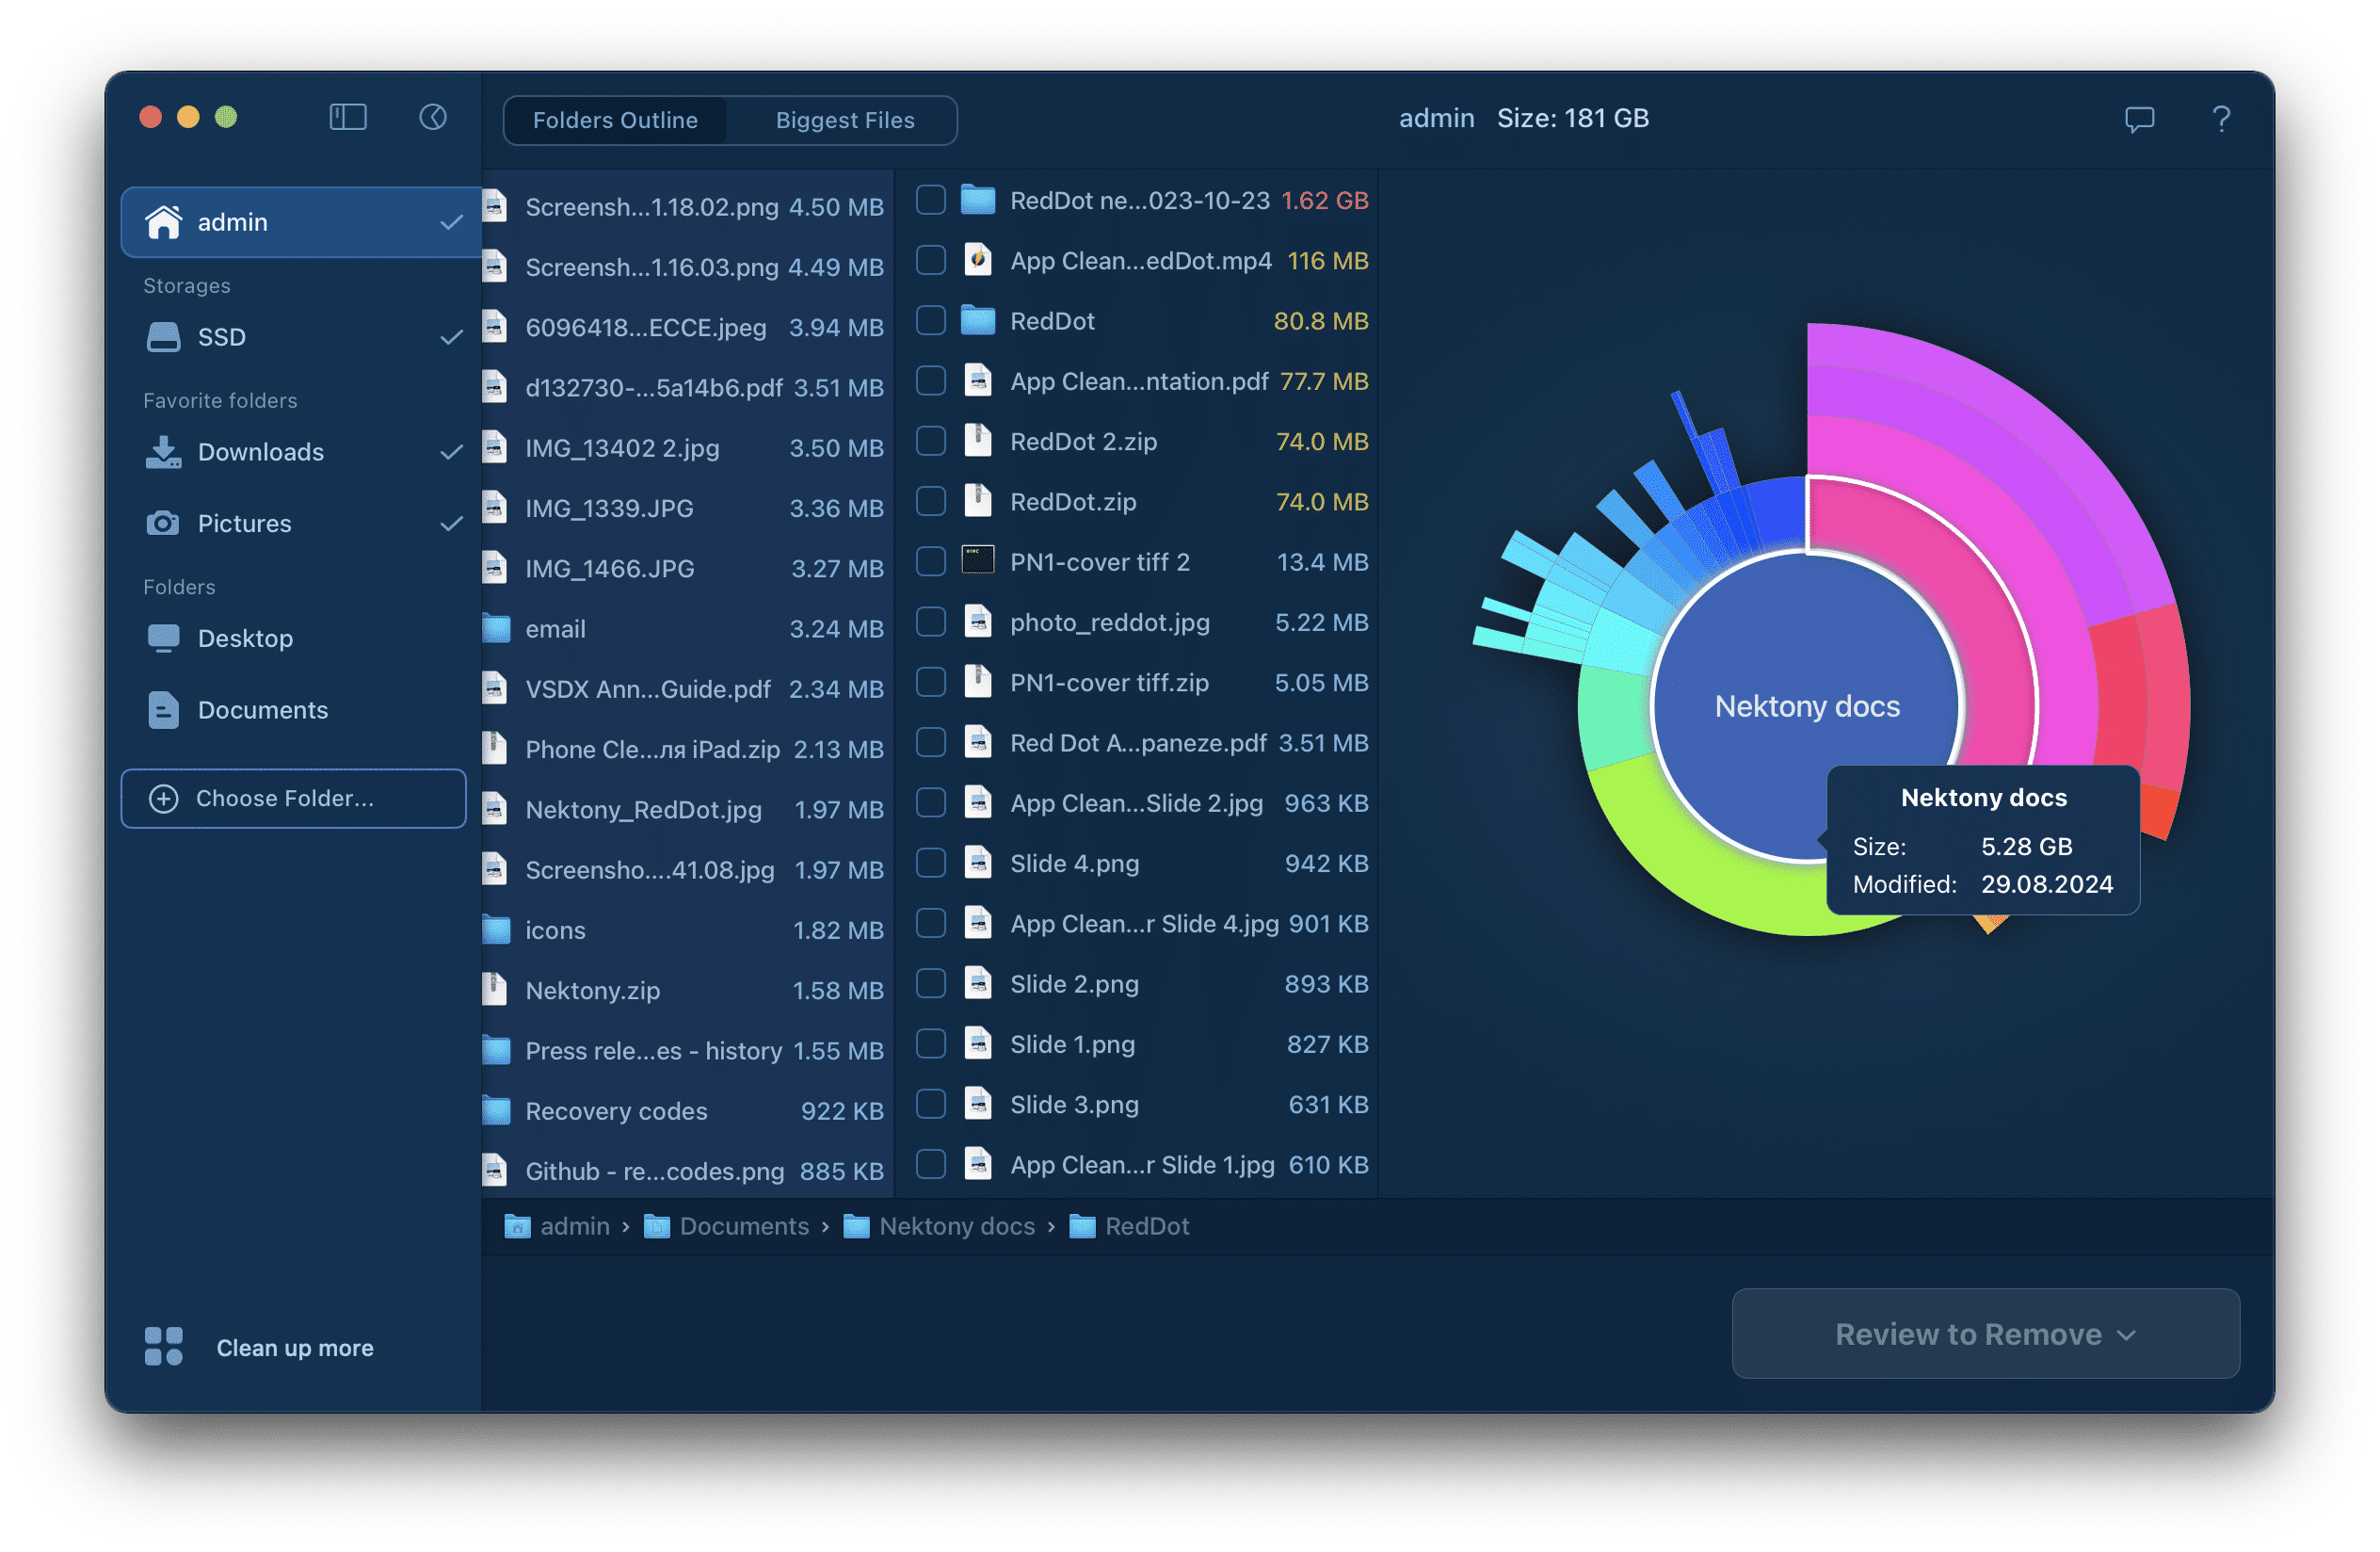
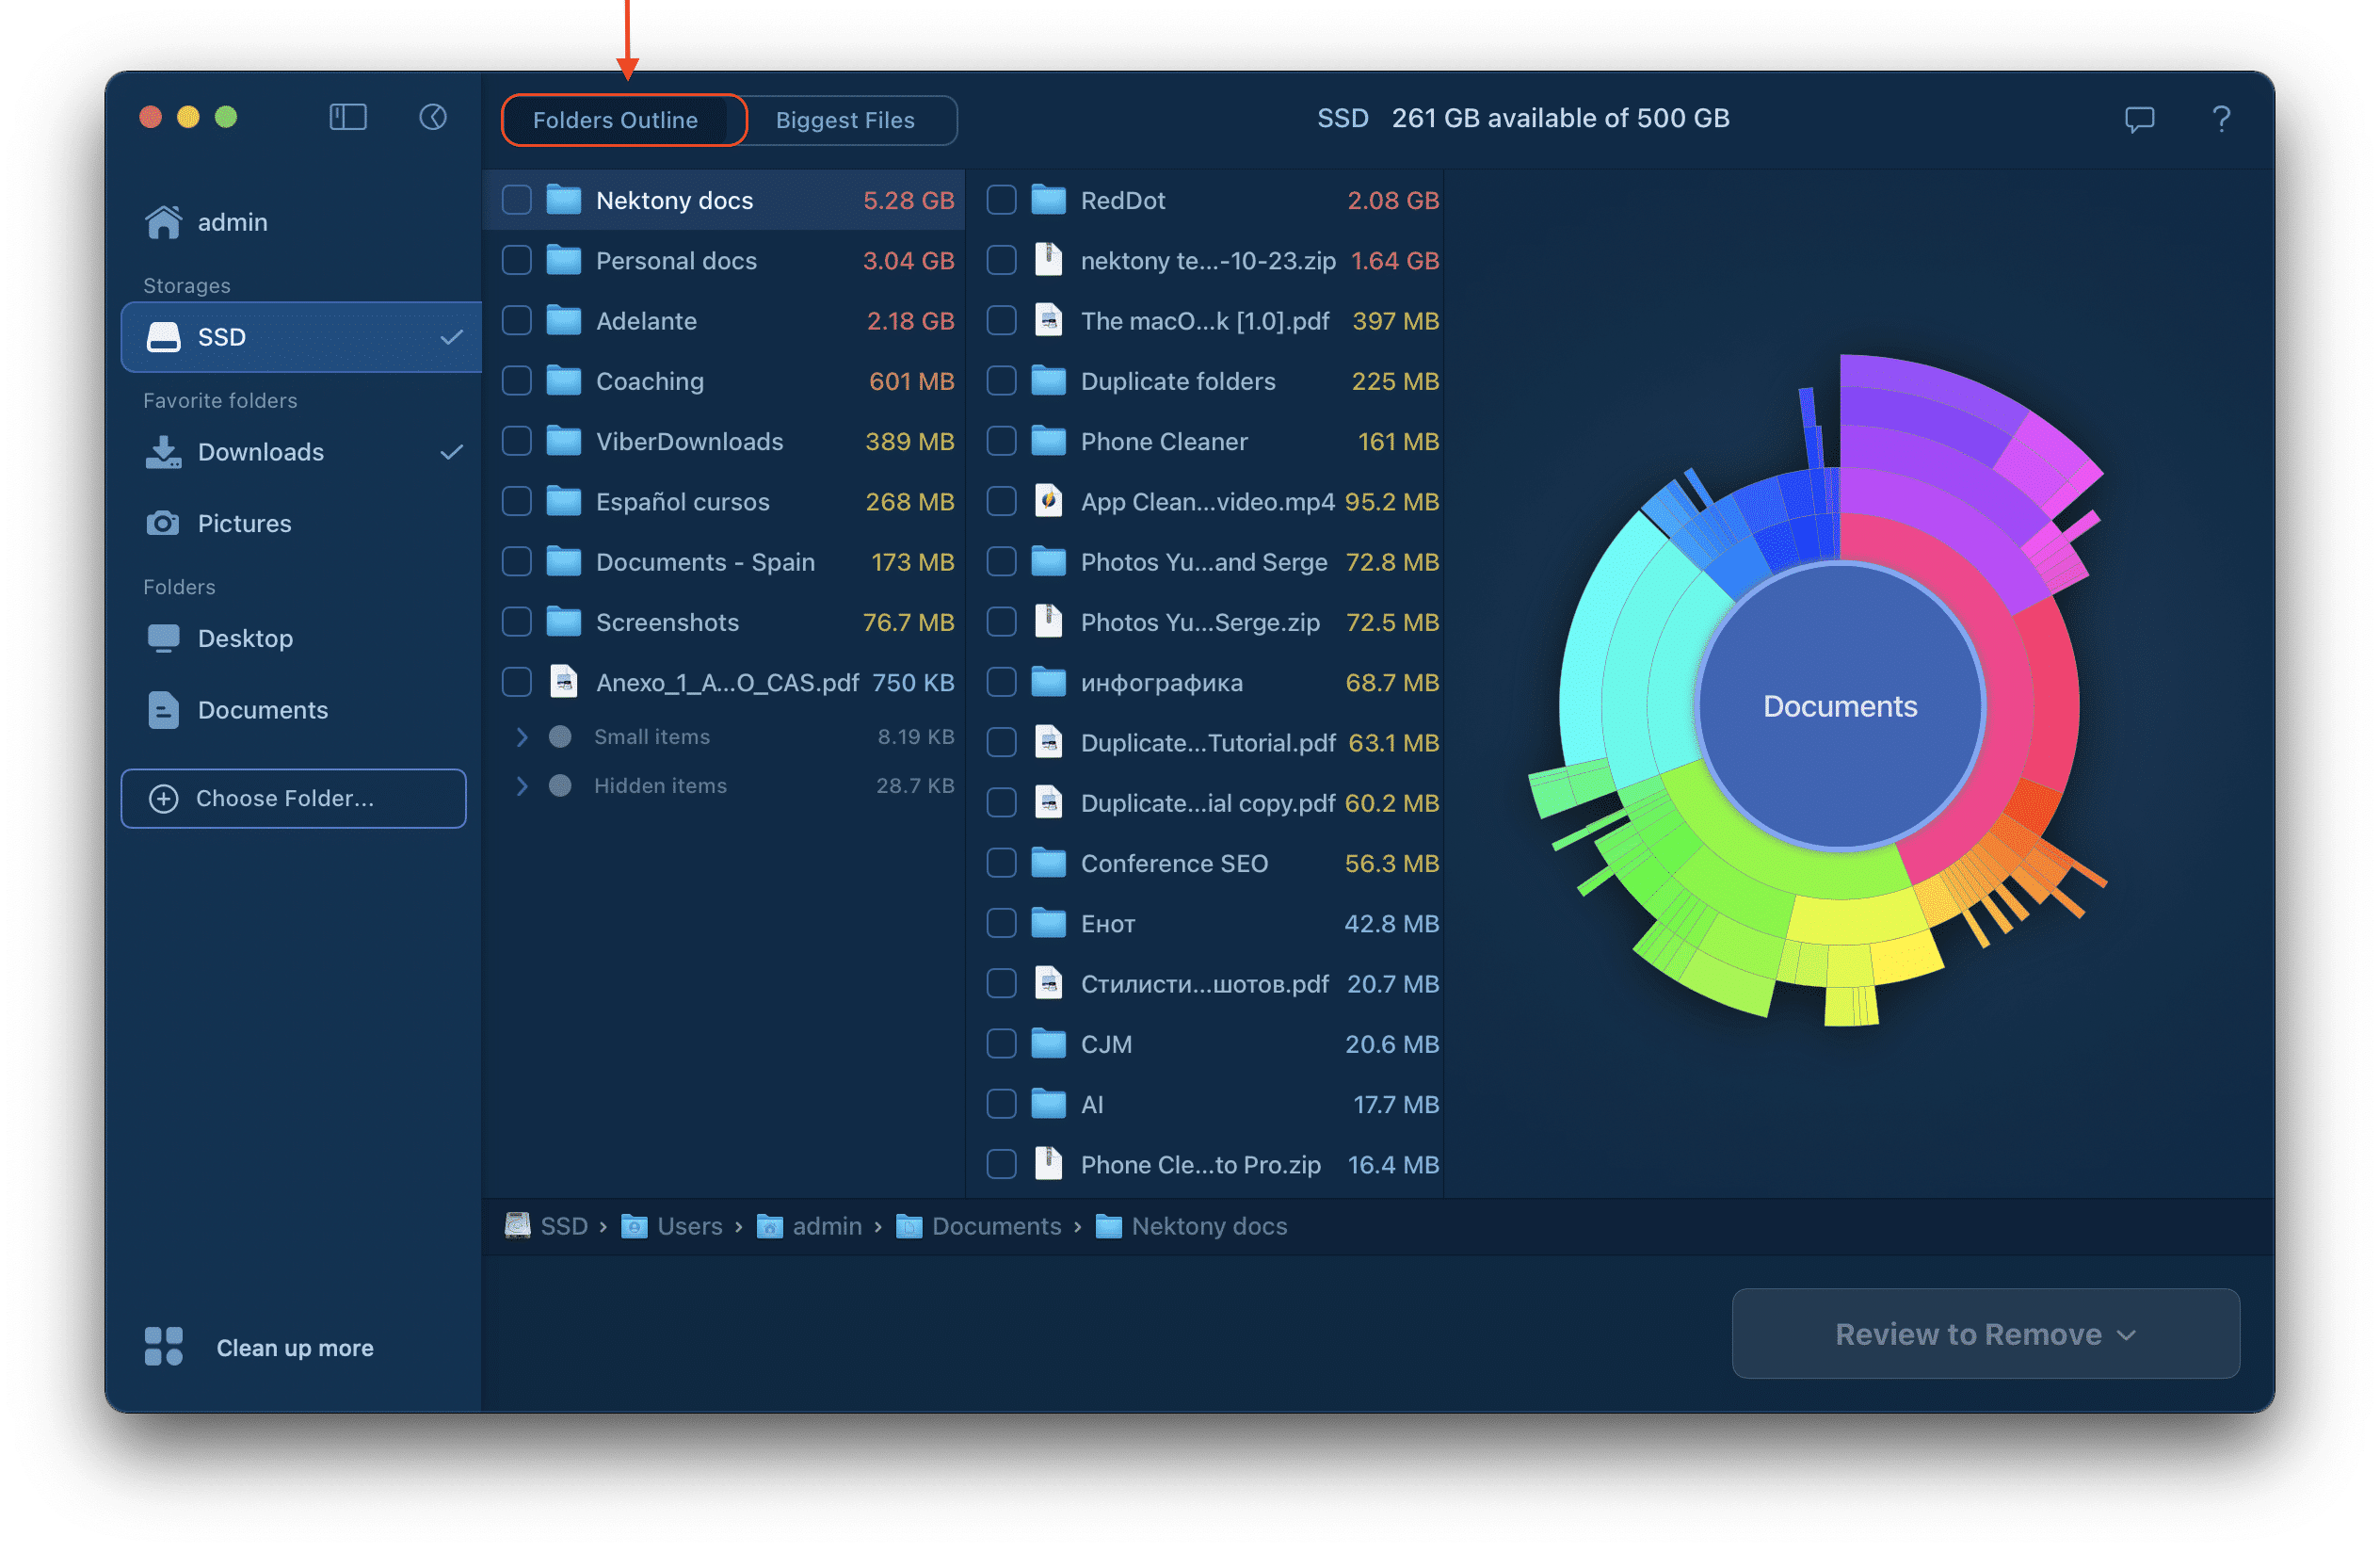
Each colored section on the diagram is a particular folder. By clicking on the section, you can see its content in detail. Click on the center element to switch one level up. Hover the mouse cursor on the diagram sections to see the folders’ names, sizes, and various other details.
Also, Disk Space Analyzer is not just a file size visualizer. Besides providing you with detailed information about what is taking up space on your hard drive, it allows you to manage disk space on your Mac. You can select items in the Folders Outline and then remove, move or copy files to other locations. You can also find and remove old unused files or transfer bulky content to external storage.
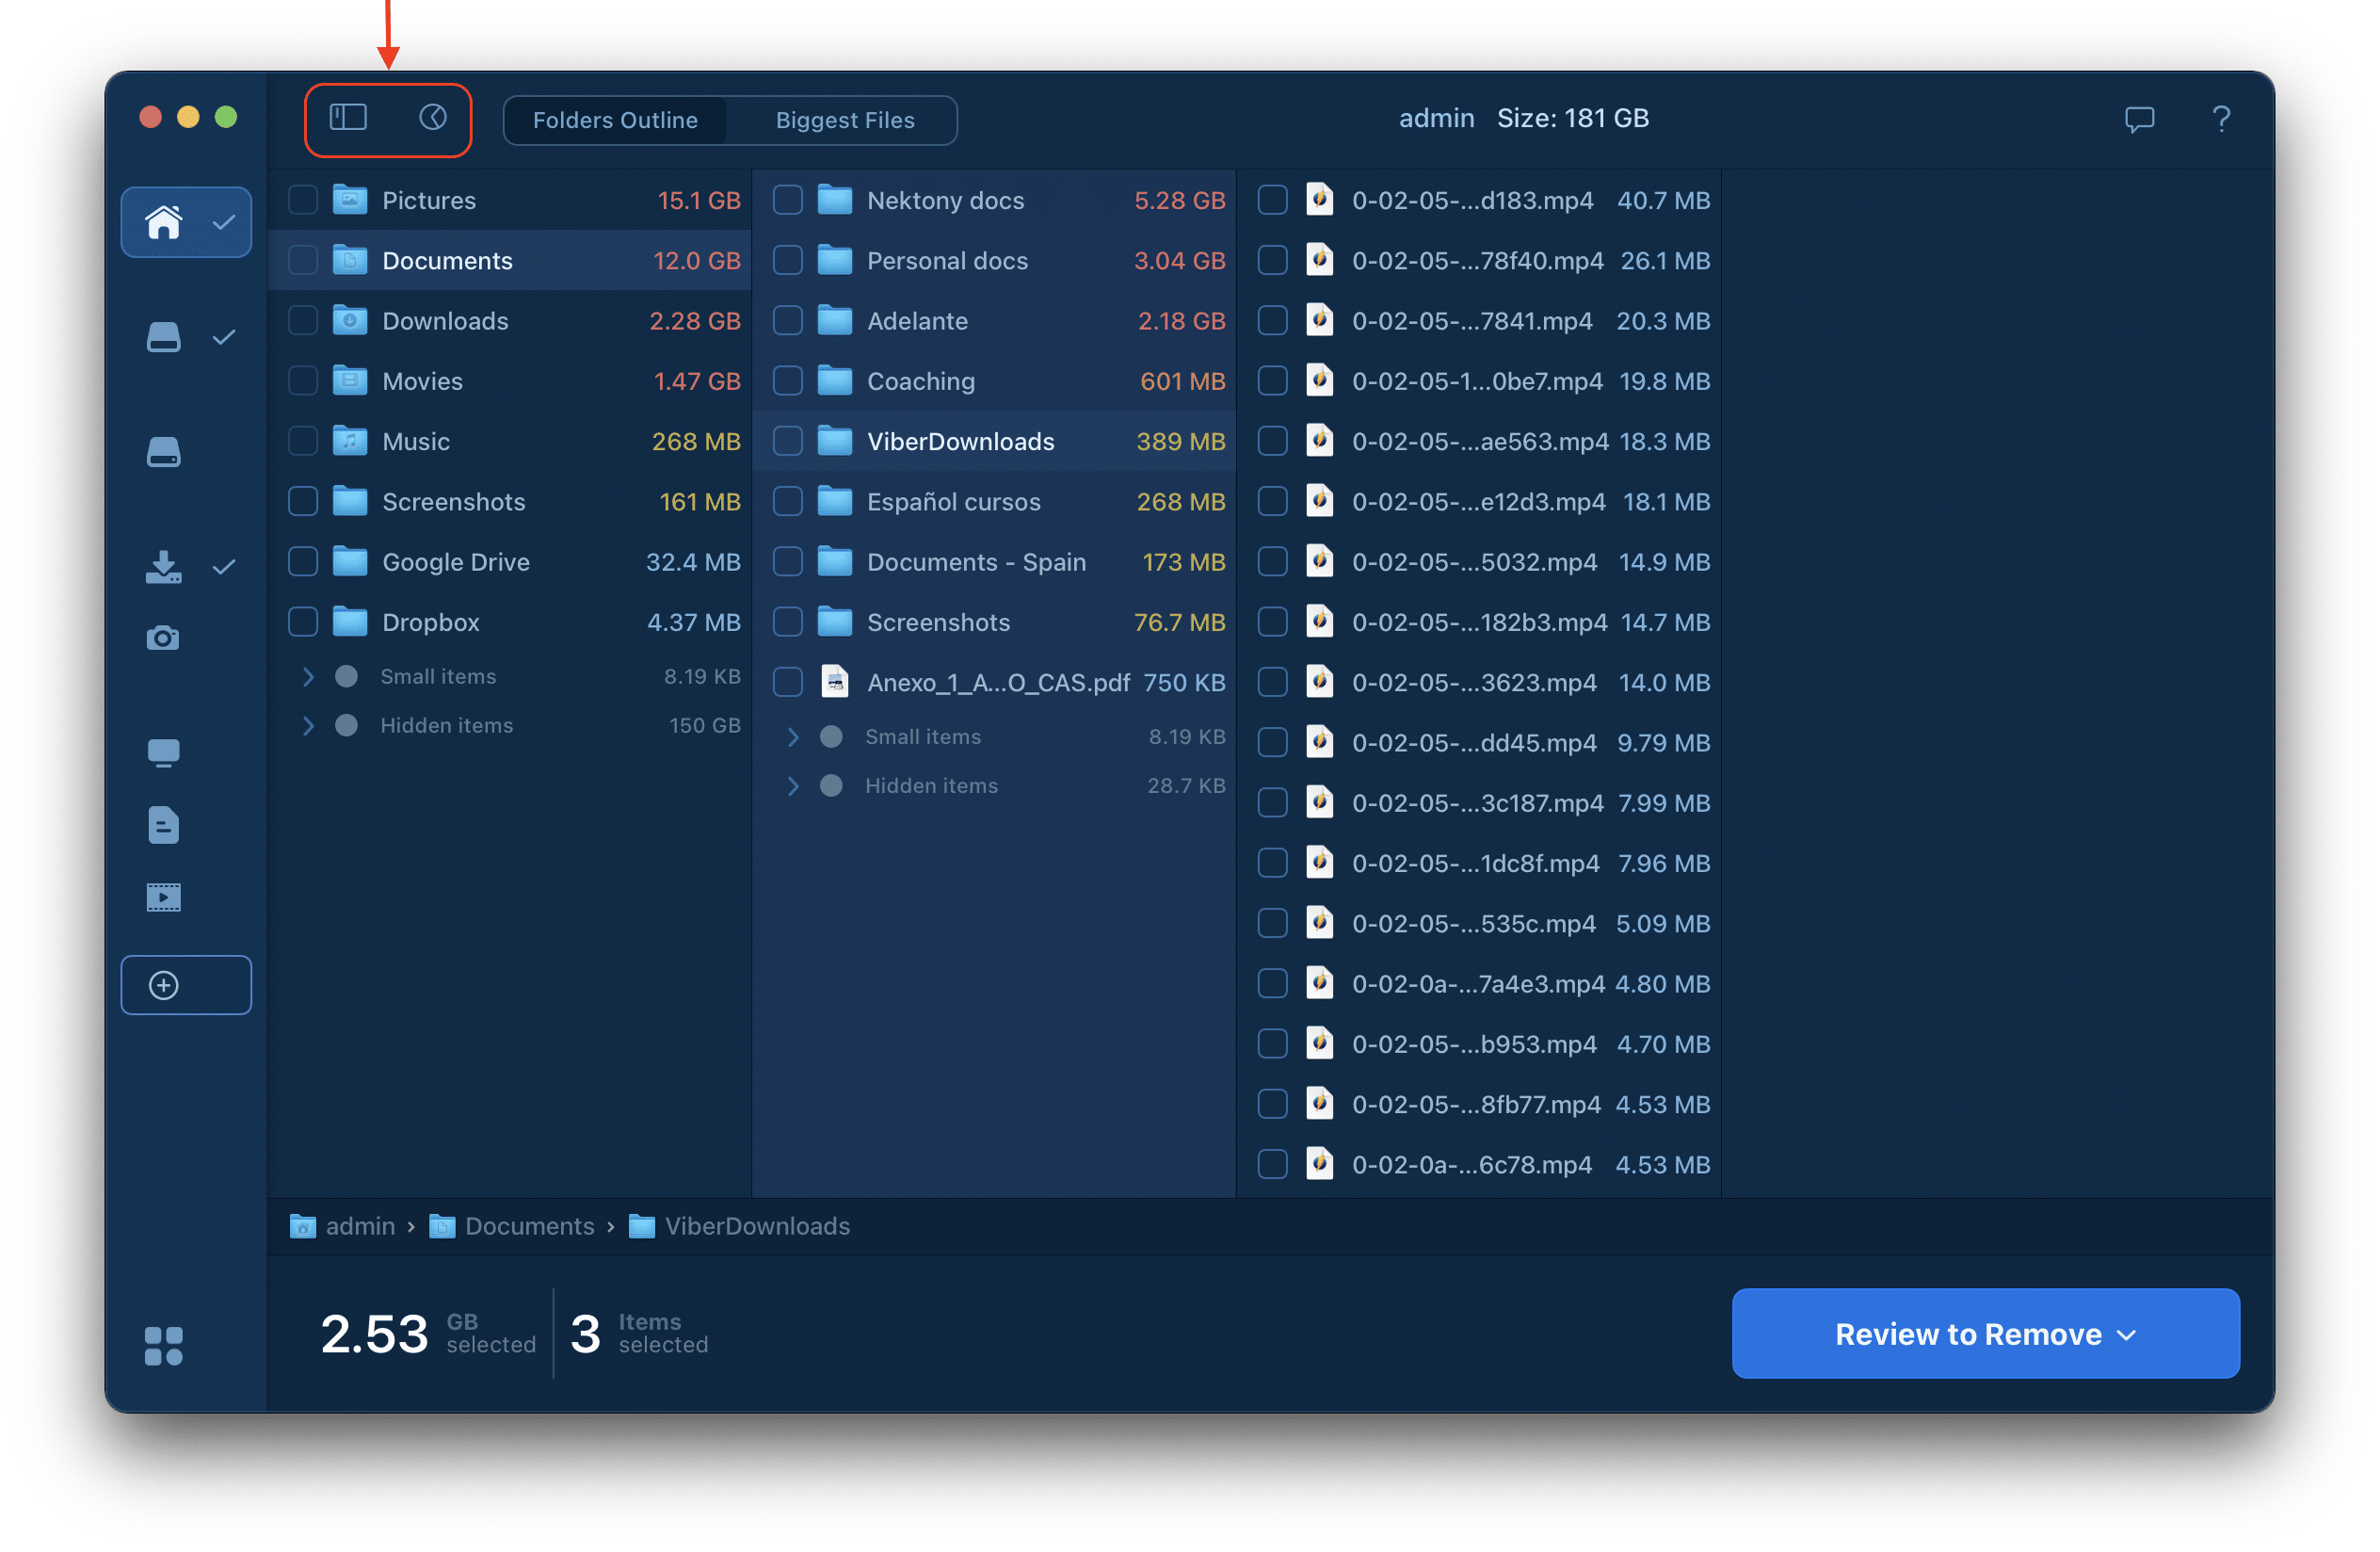
For a more convenient experience in navigating your folders, you can hide and unhide the left panel and the diagram. For this, use the appropriate buttons at the top of the app’s window.
Features
Disk Space Analyzer is a disk space visualizer with a wide set of features to manage disk usage and free up disk space. See the list of features on Disk Space Analyzer:
- Scan any type of volumes: hard disk volumes, flash drive volumes, CD and DVD disks, mounted DMG volumes, network disks, cloud-based storage.
- Scan protected folders with FileVault or other protected systems.
- Navigate through the folders of scanned volumes, displaying files and folders.
- Get information about file and folder sizes, and dates when they were last modified.
- Use Quick Look to preview folders and files.
- Get information about files or folders, and preview them right in the application.
- Find your hidden files and folders.
- Create a list of files and folders for future organizing.
- Remove unneeded files to Trash.
- Move or copy big files and folders to other locations and volumes.
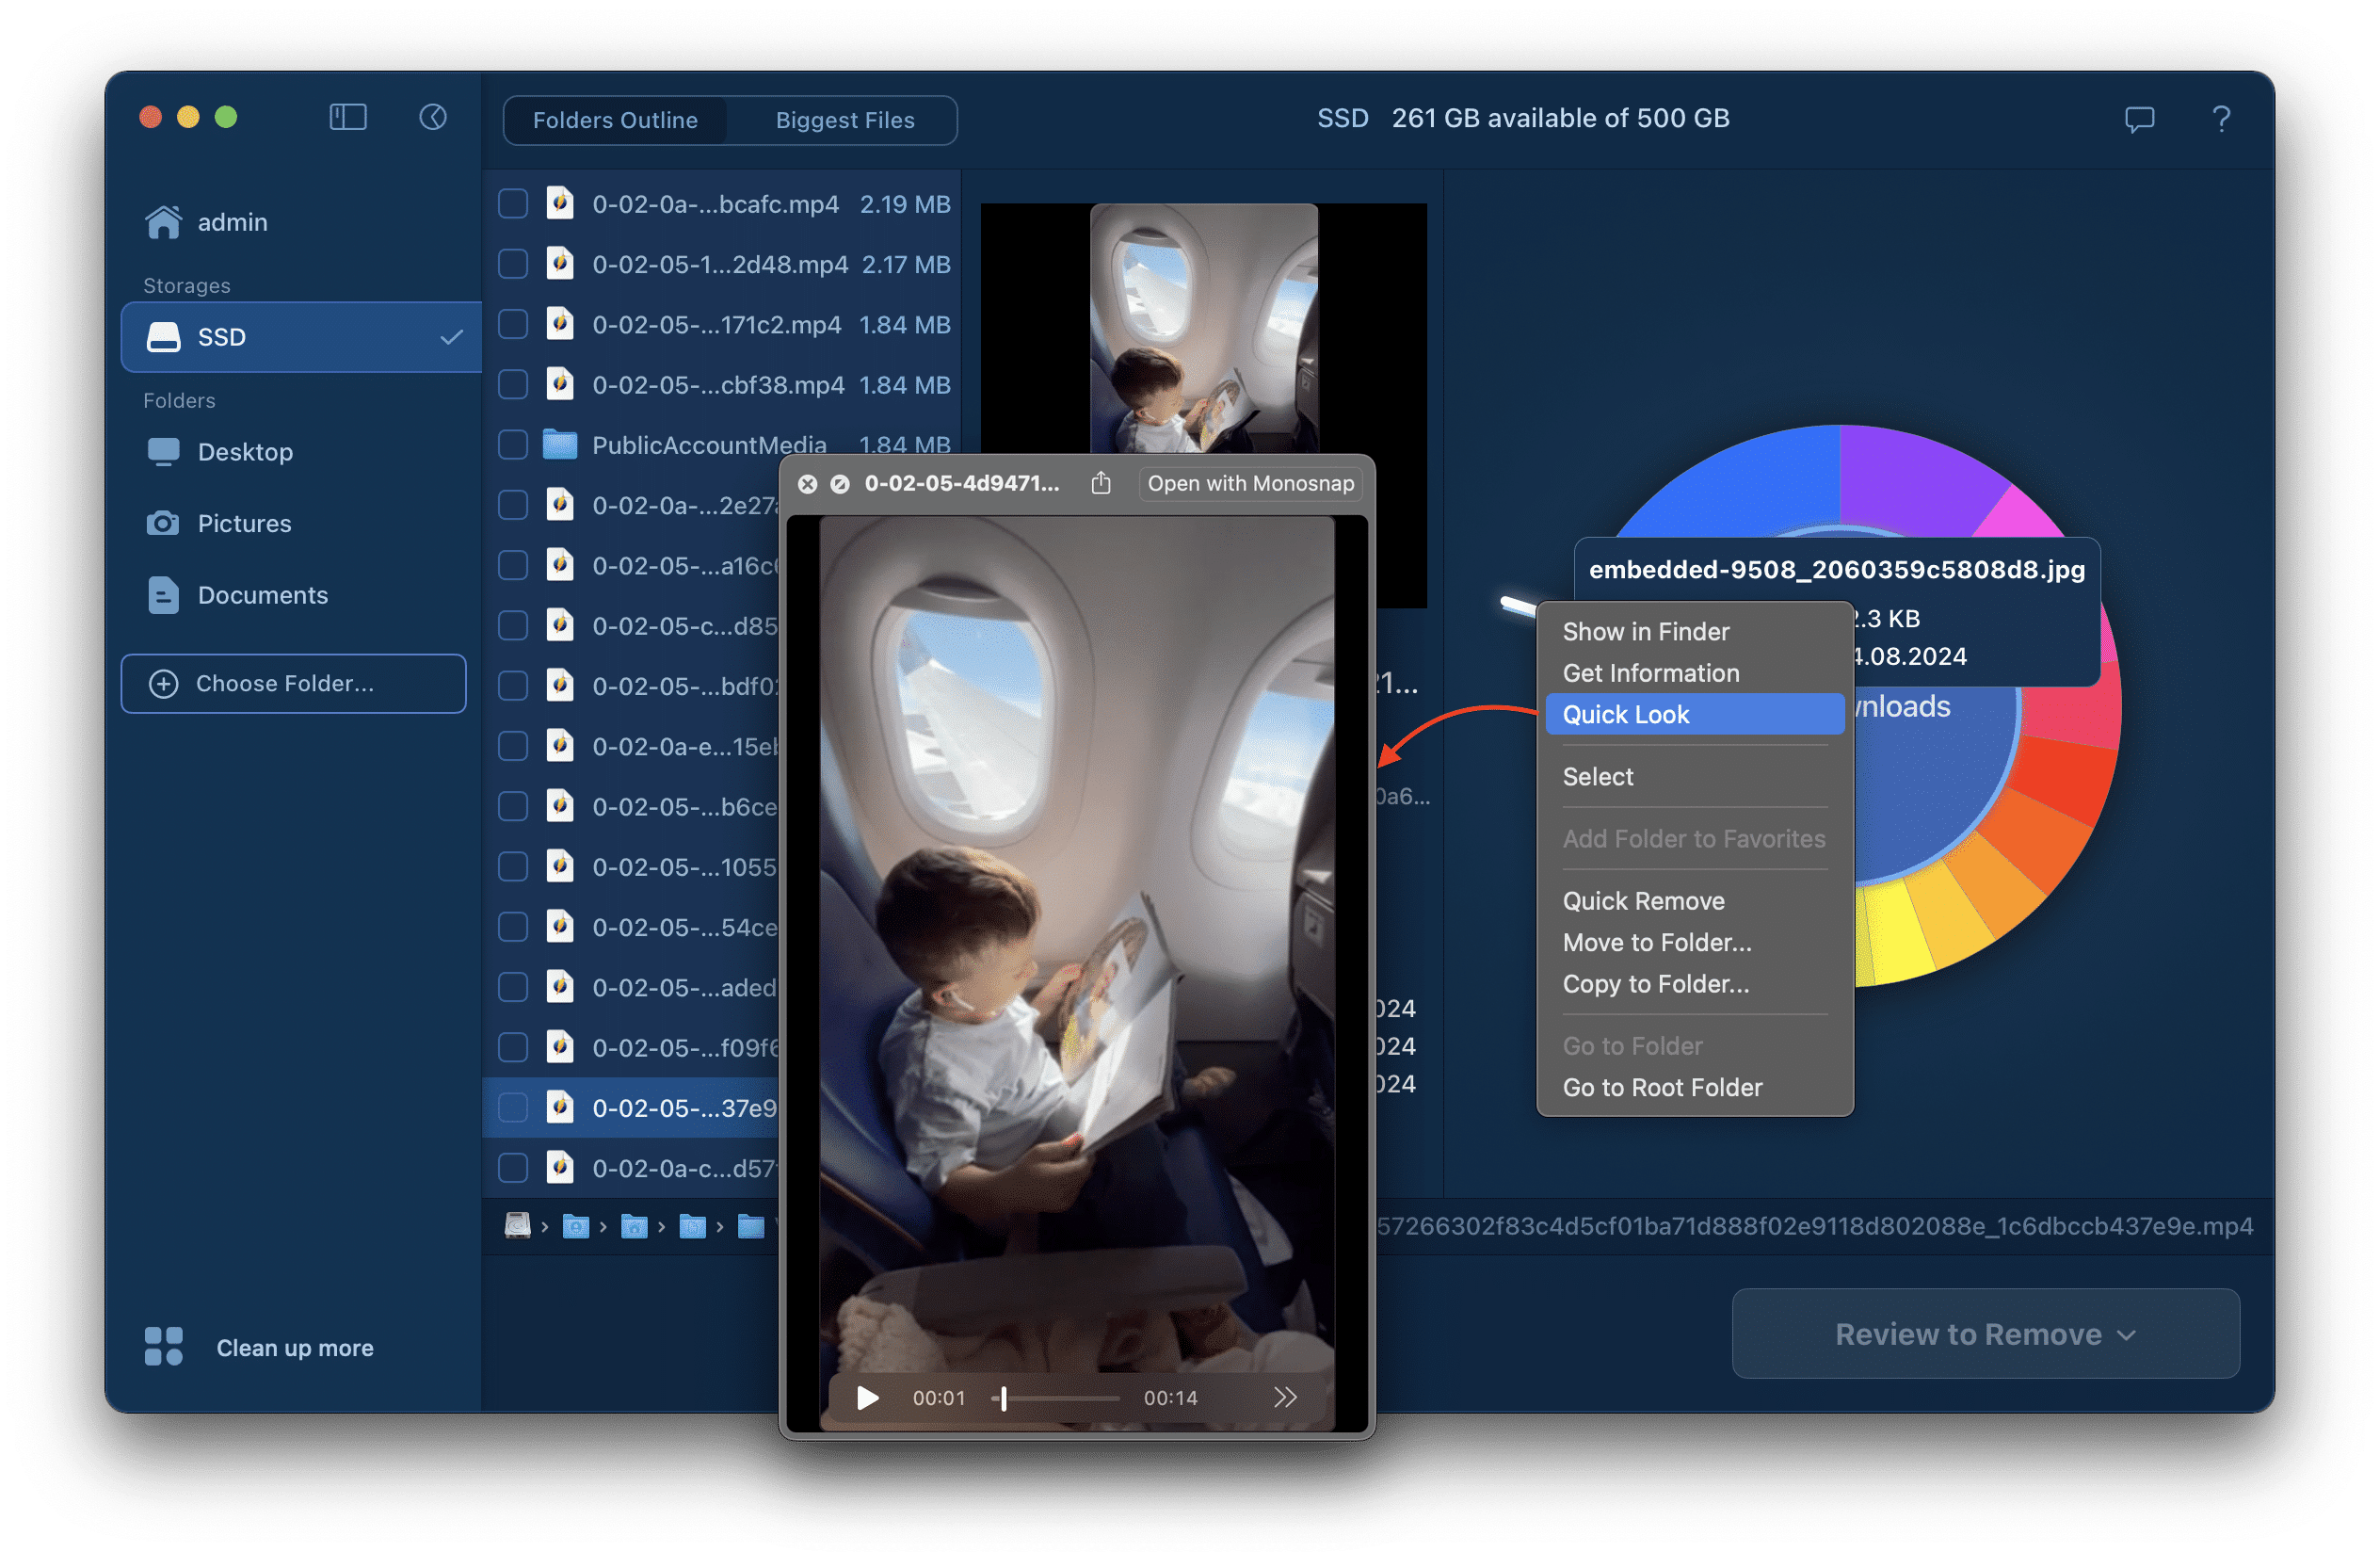
Context Menu
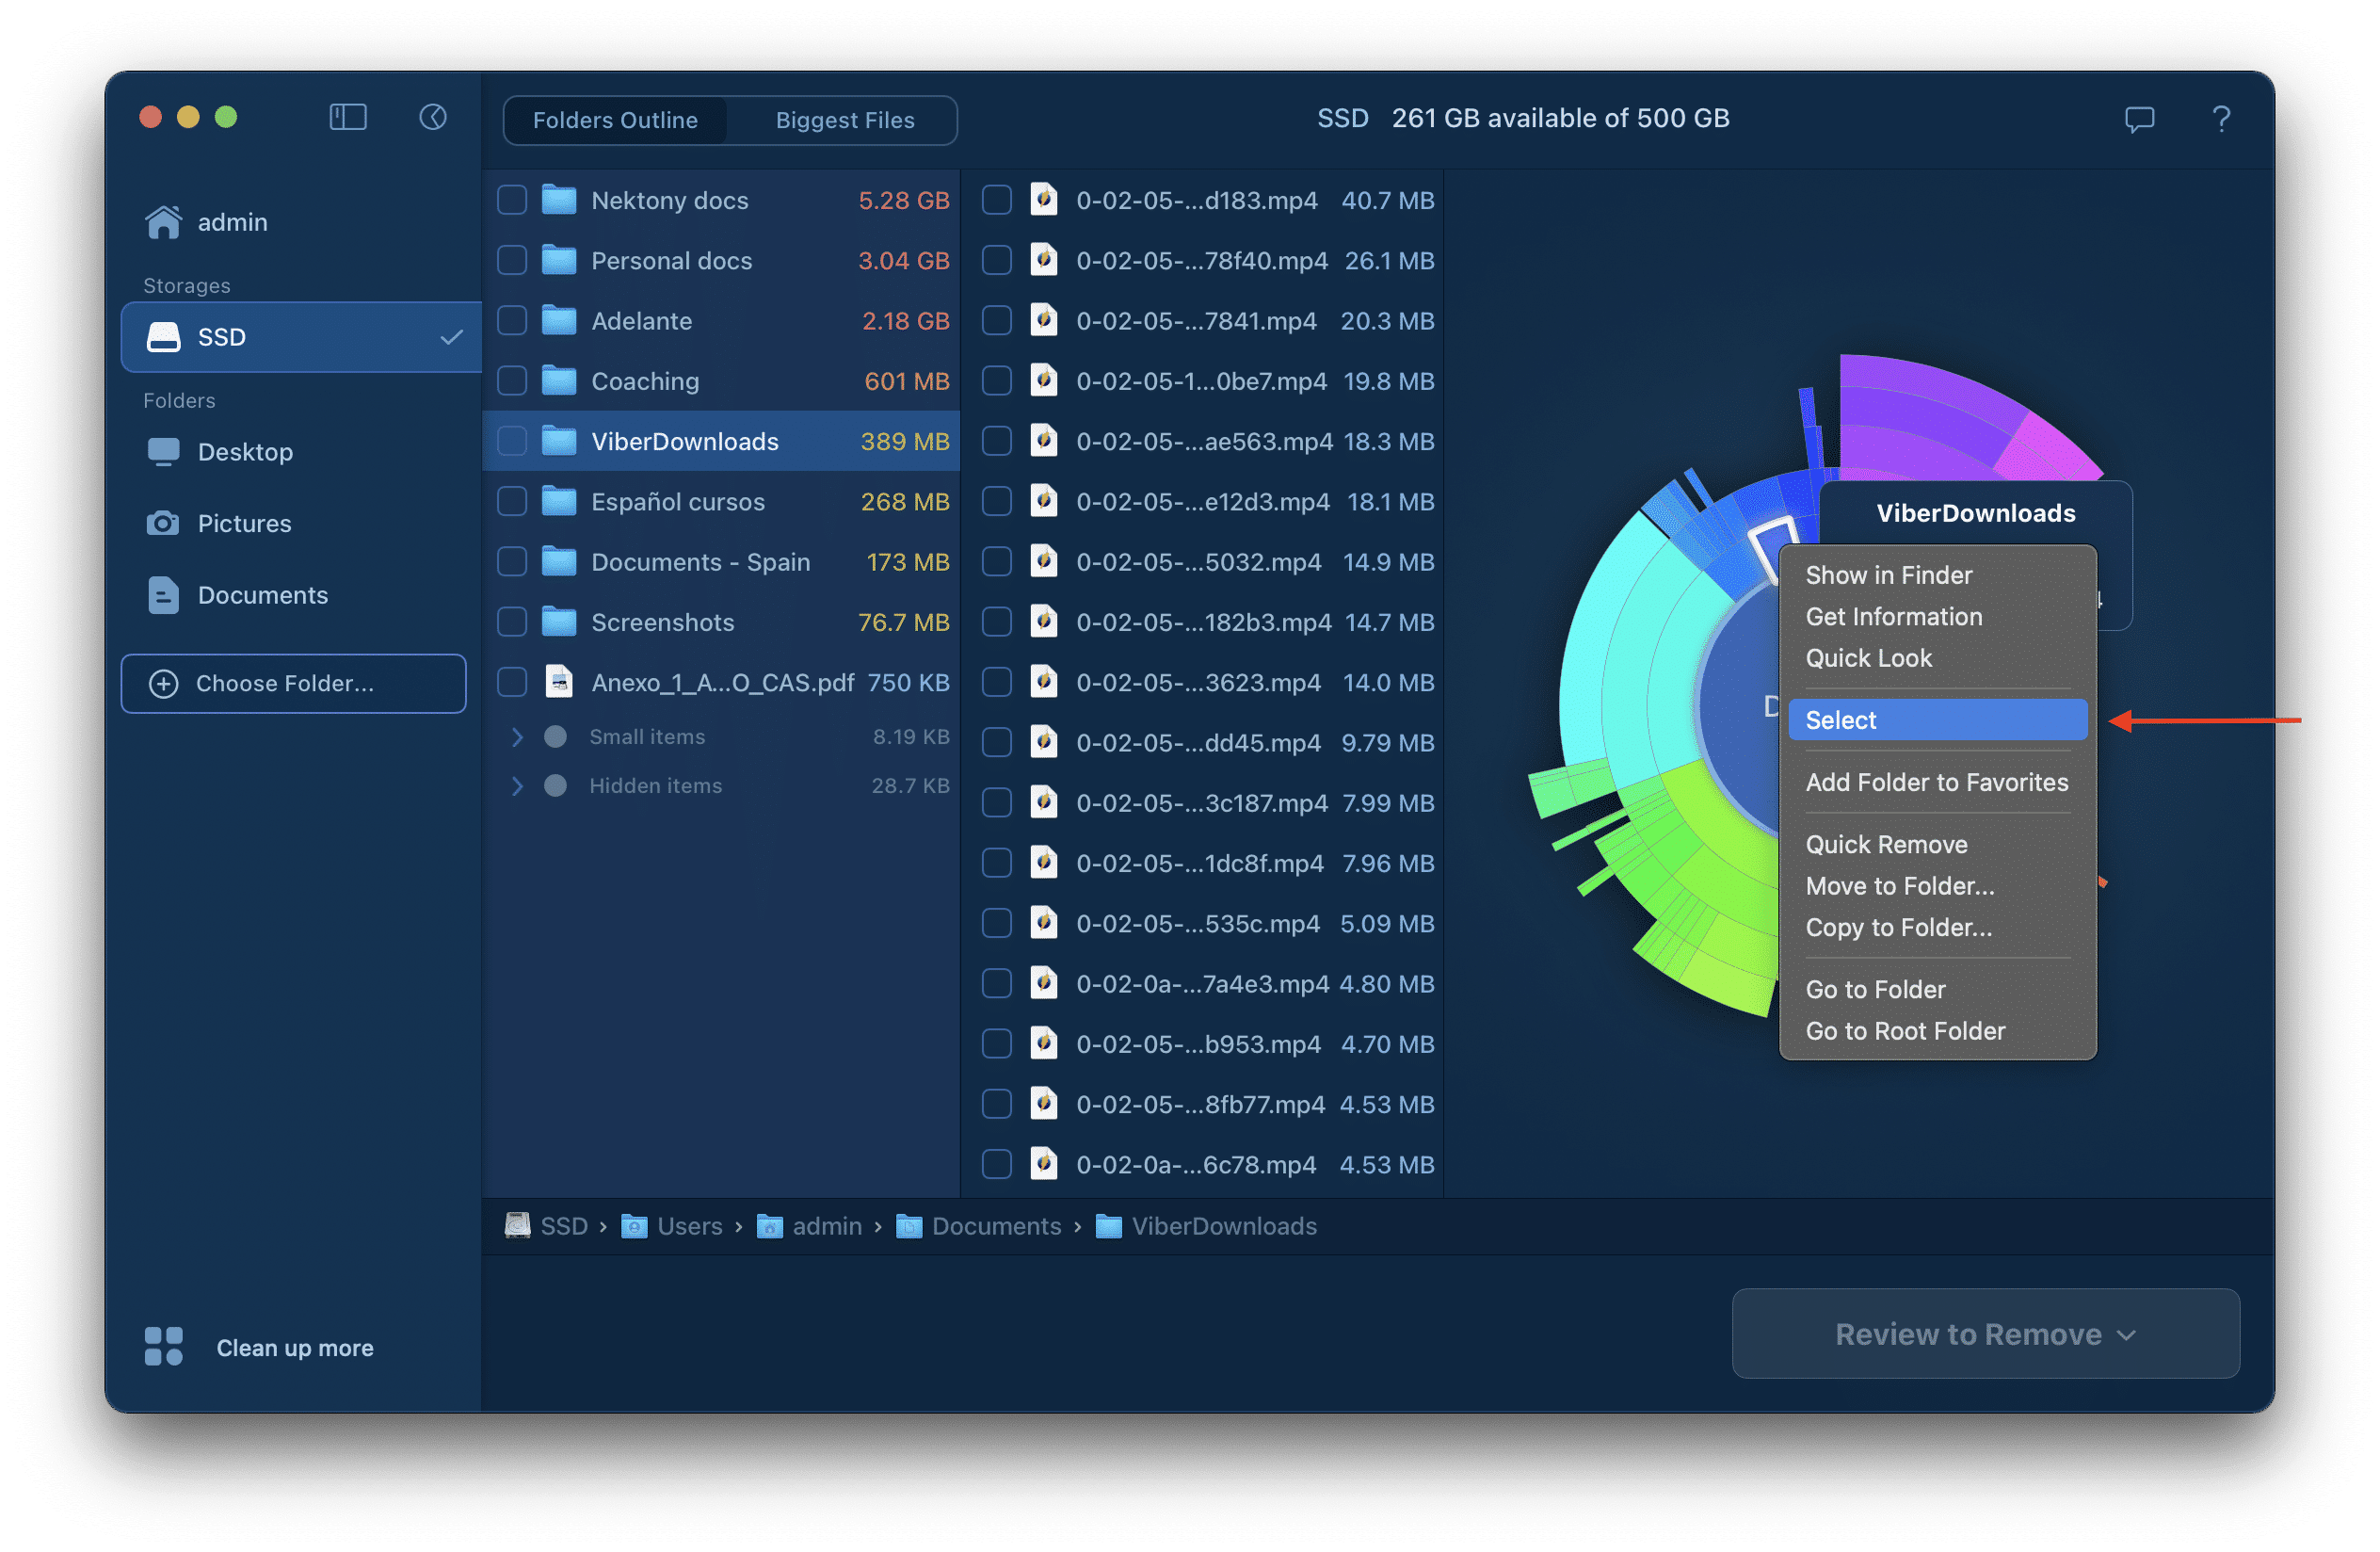
You can use the context menu for the following features:
- Select the file or folder for future operations.
- Show the file or folder in Finder.
- Get information about the selected file or folder.
- Quick Look at the file or folder.
- Add a folder to the list of Favorites.
- Remove a folder from the list of Favorites.
- Quickly remove the selected file or folder.
- Move the file or folder to another folder.
- Copy the file or folder to another folder.
- Get insight into the folder in the diagram.
- Go to the root folder.
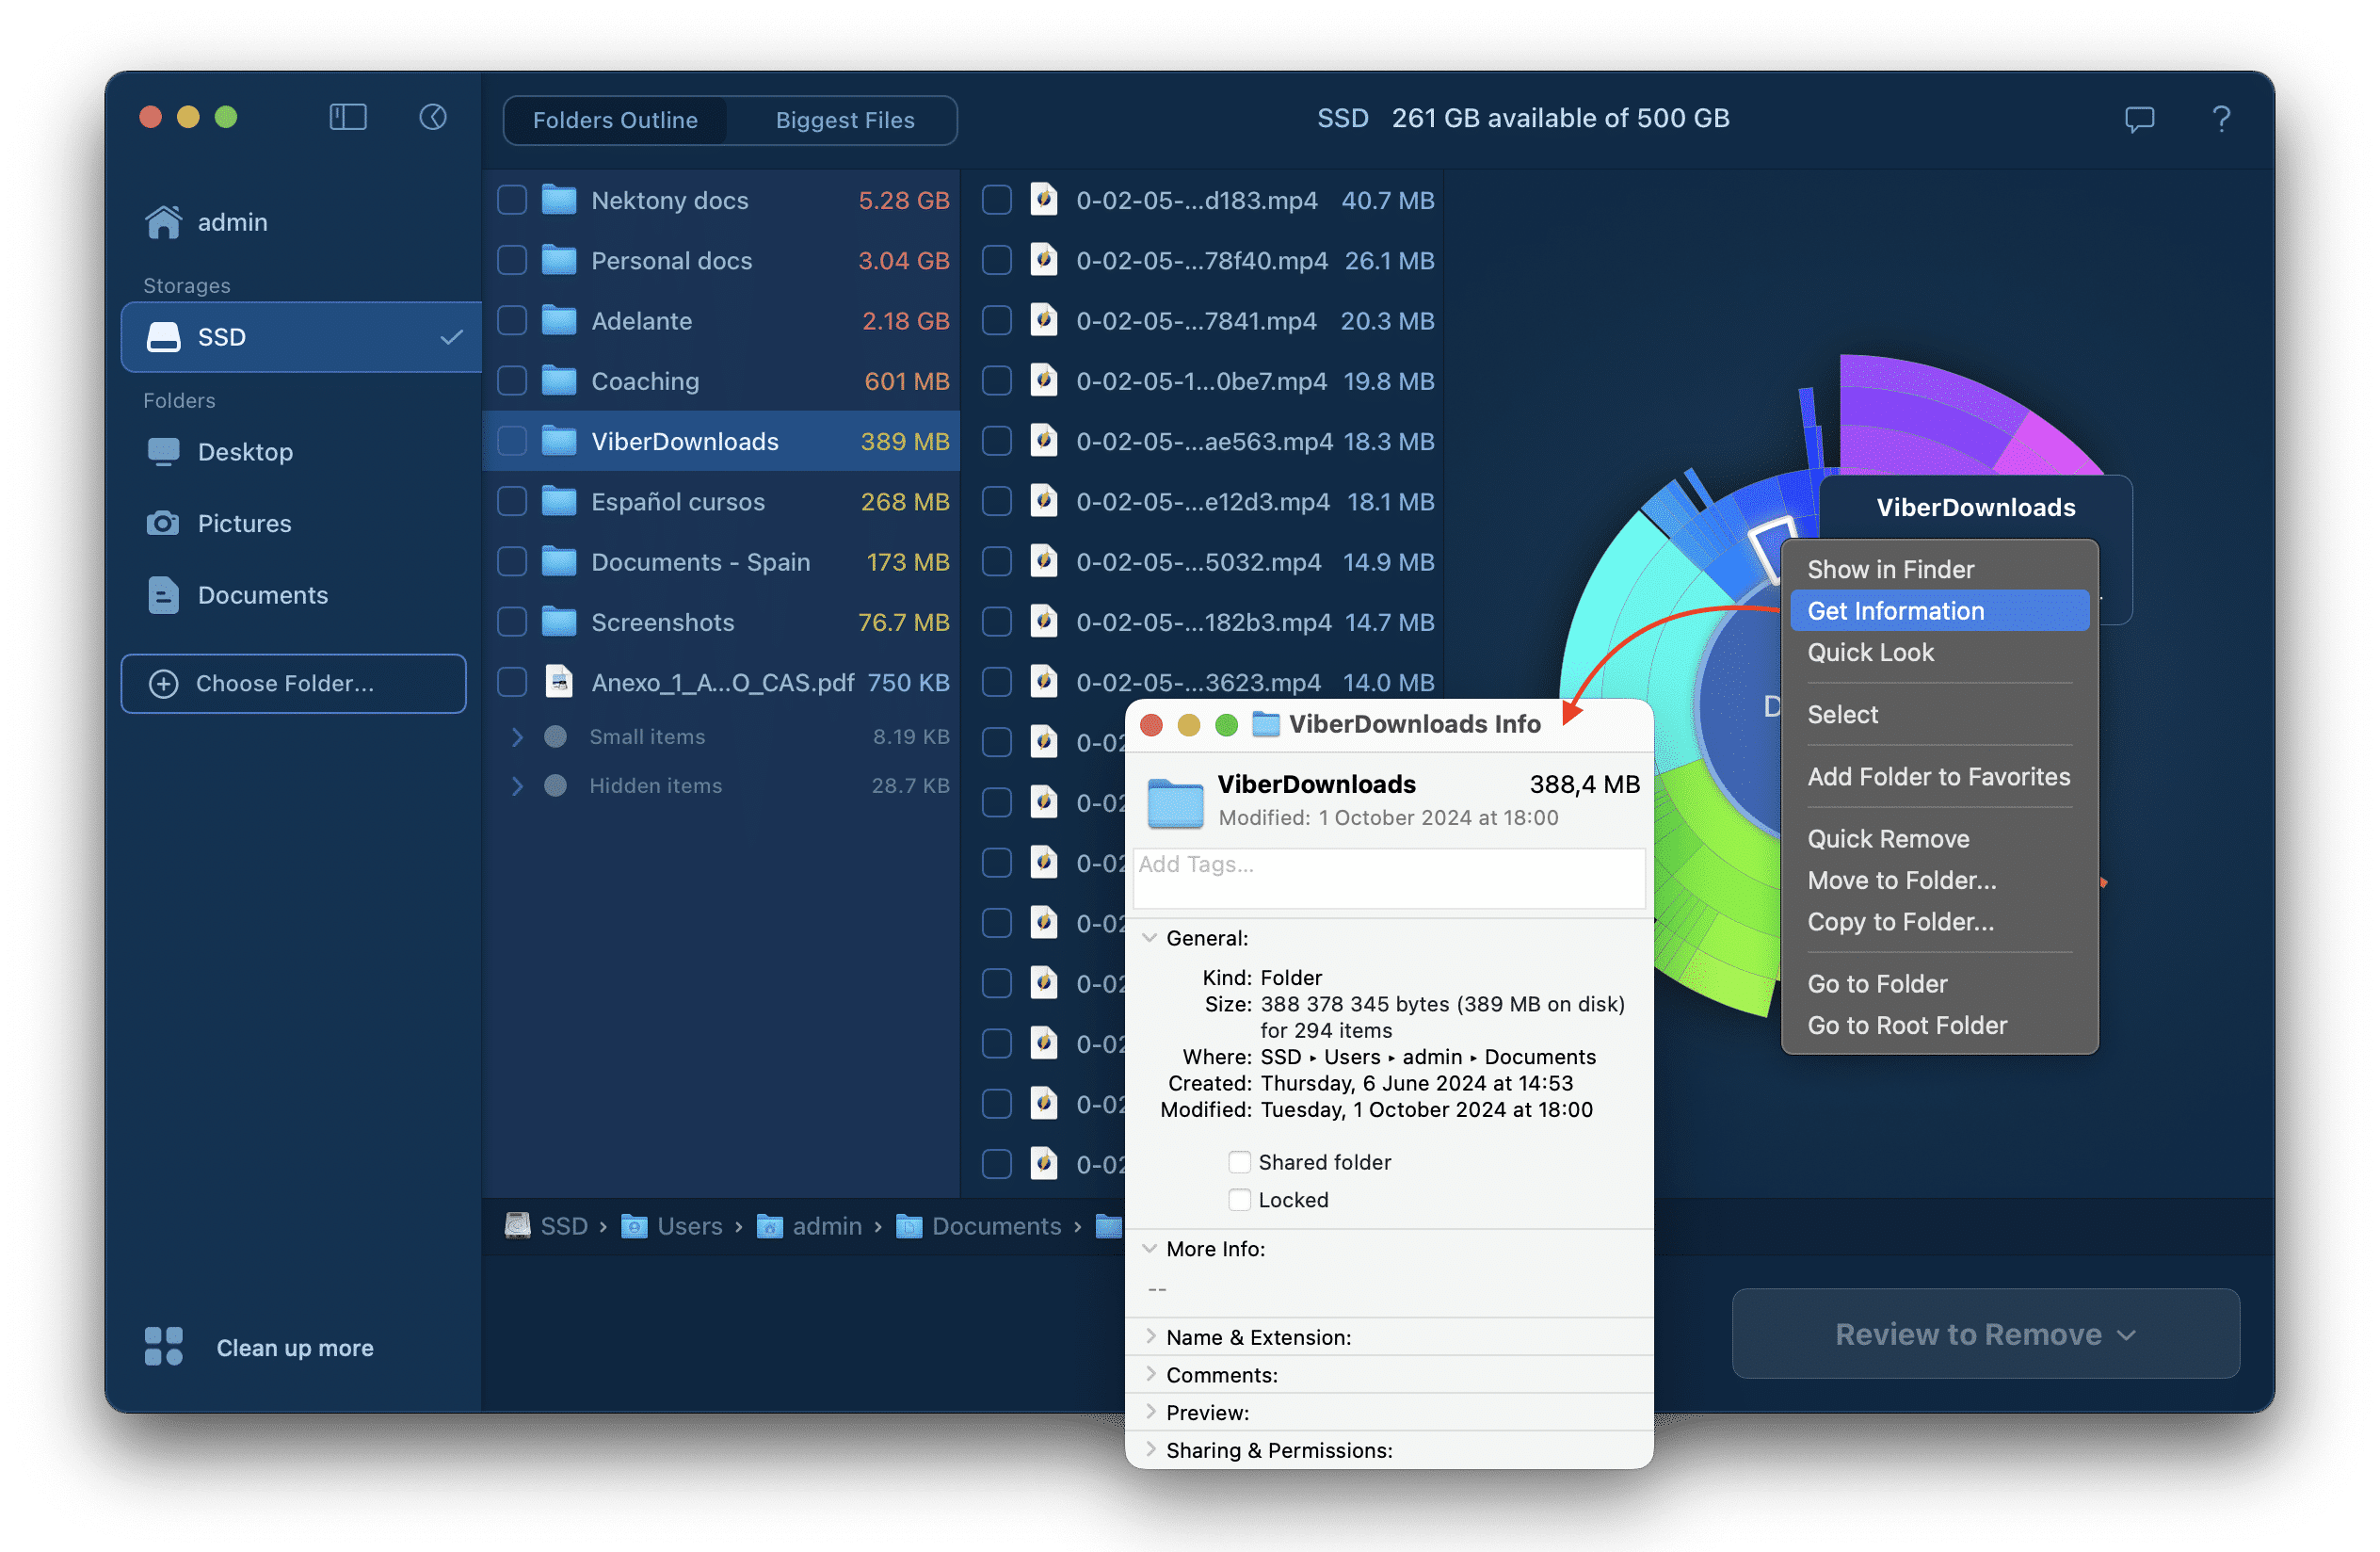
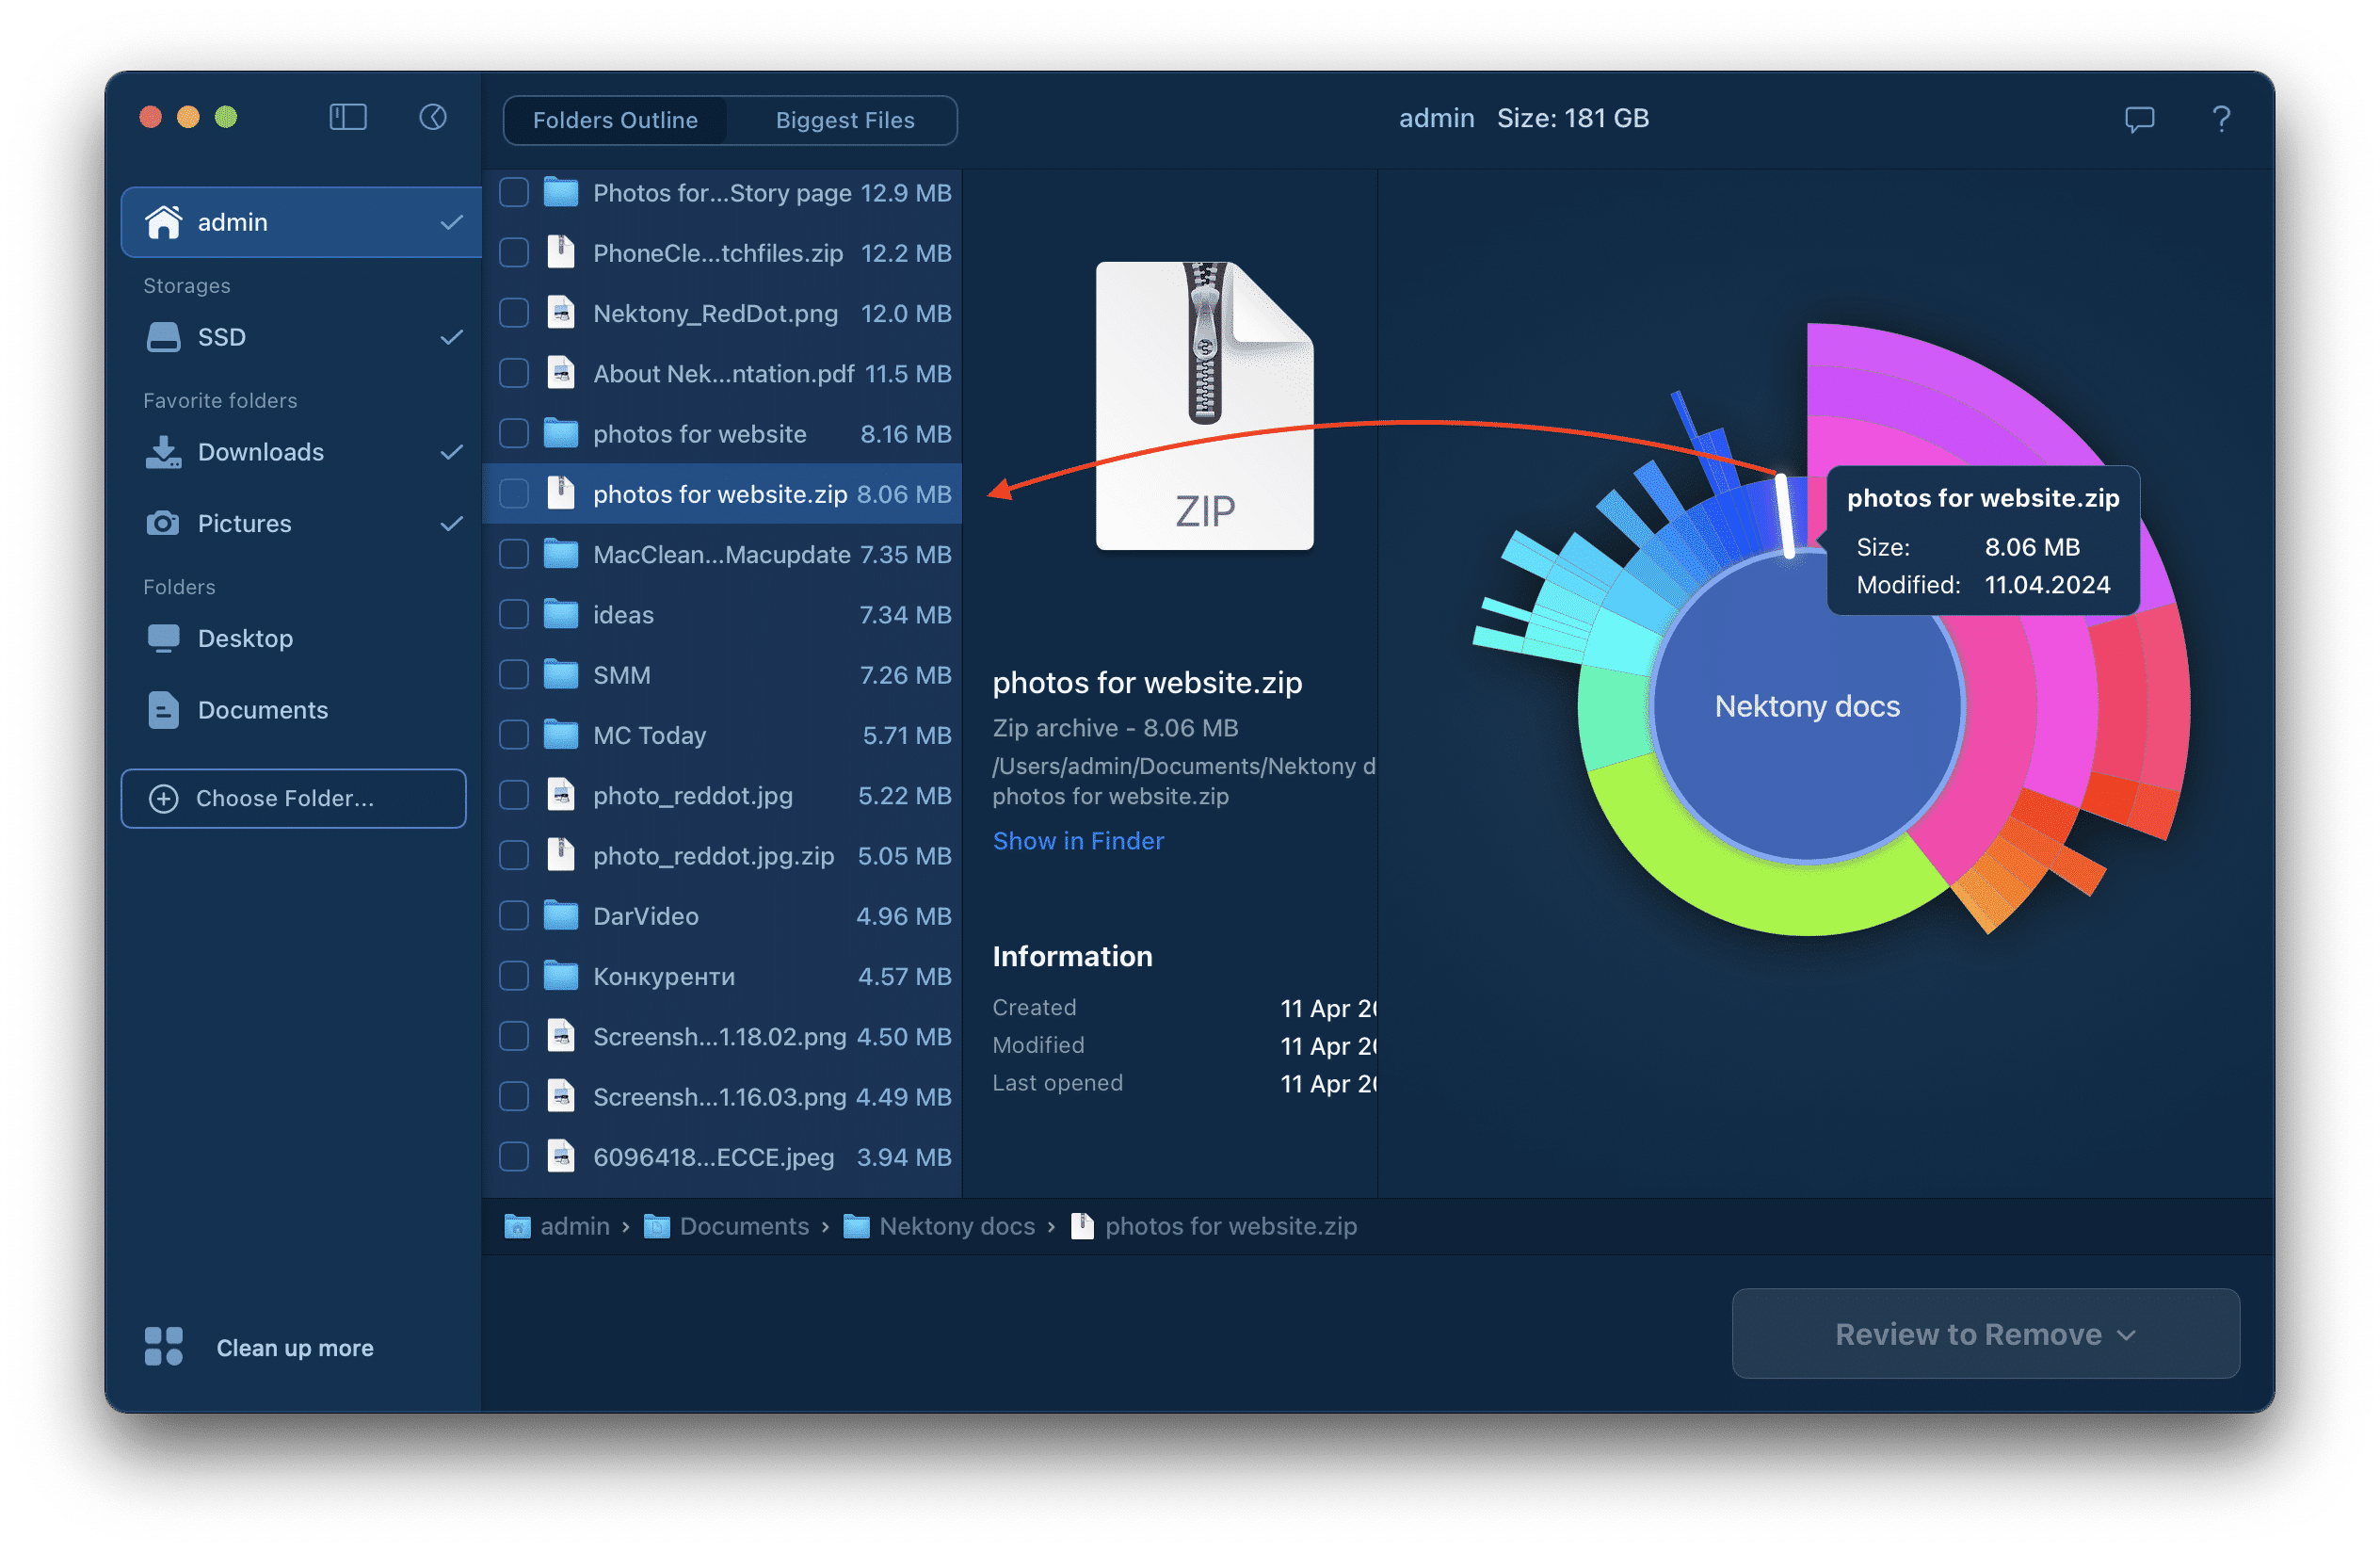
Get information
You can use the context menu to open the information window for each selected item on the diagram or press the Command+I key shortcut for items on the diagram or in the Outline section.
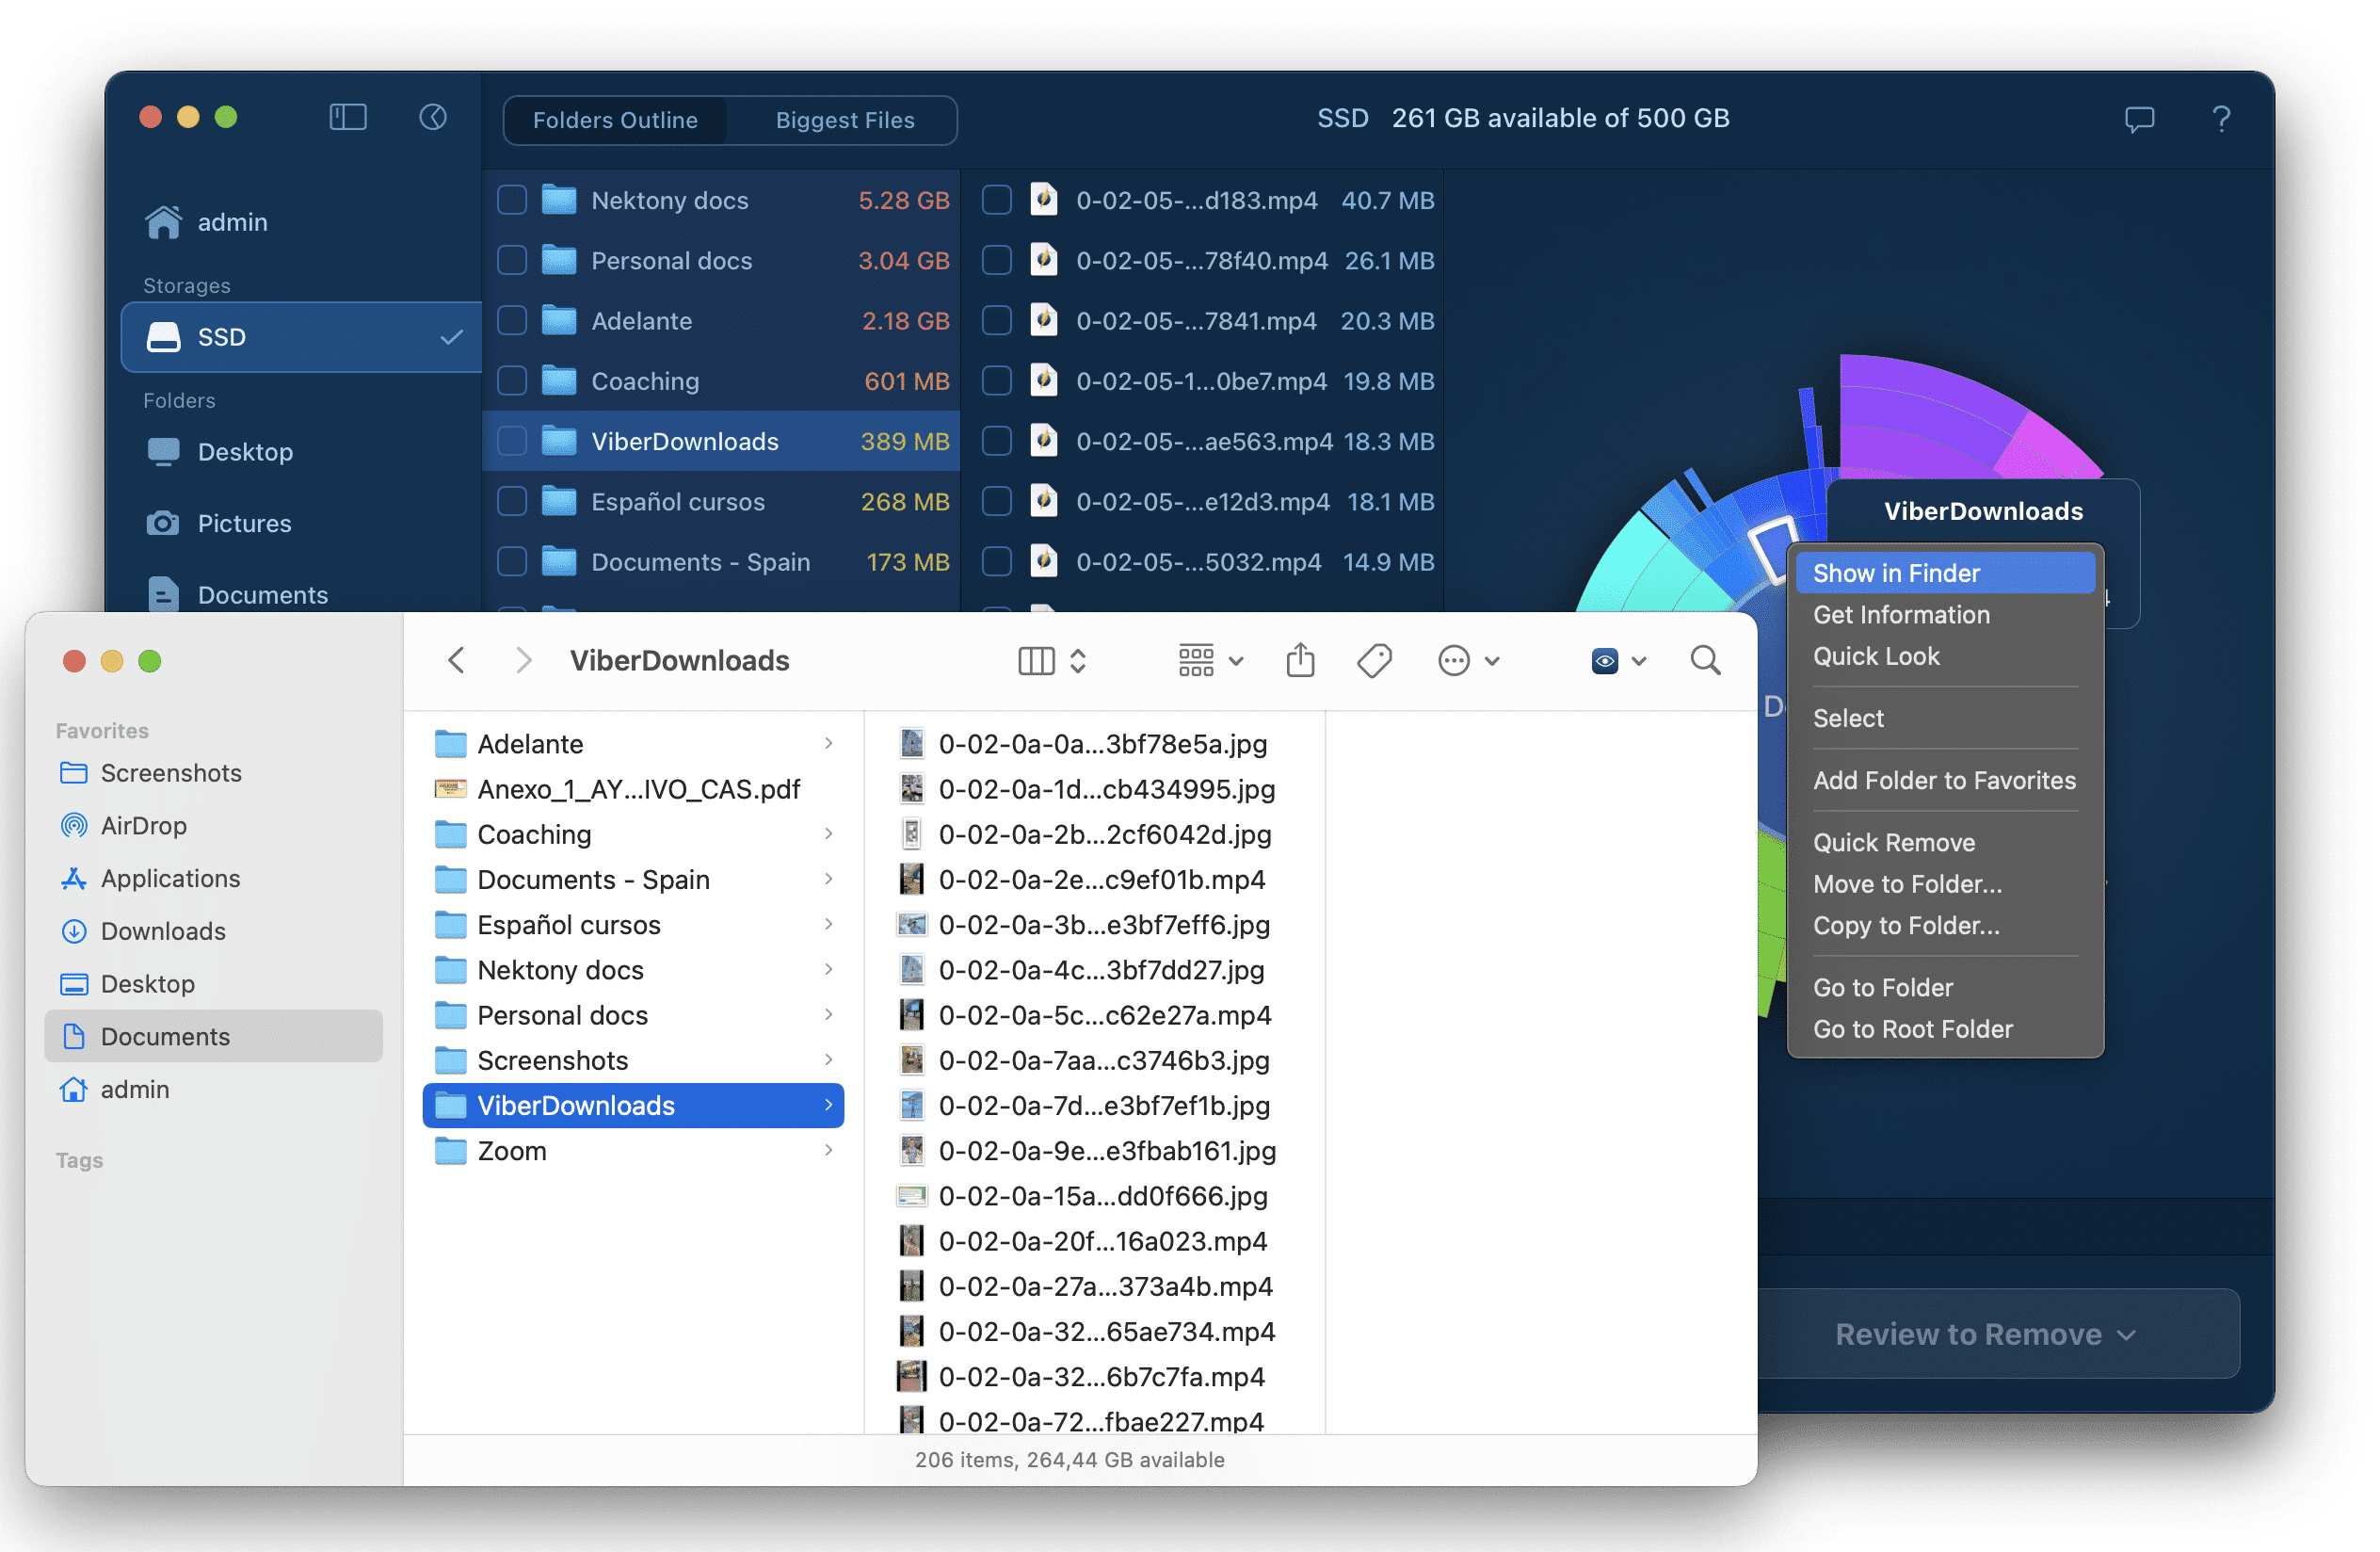
Show in Finder
To show a file or folder in Finder, you can use the context menu or use the Command+O key shortcut for a selected section on the diagram or in the outline.
Quick Look
To open the Quick Look for a folder or file, use the Space key on your keyboard or select this option in the context menu.
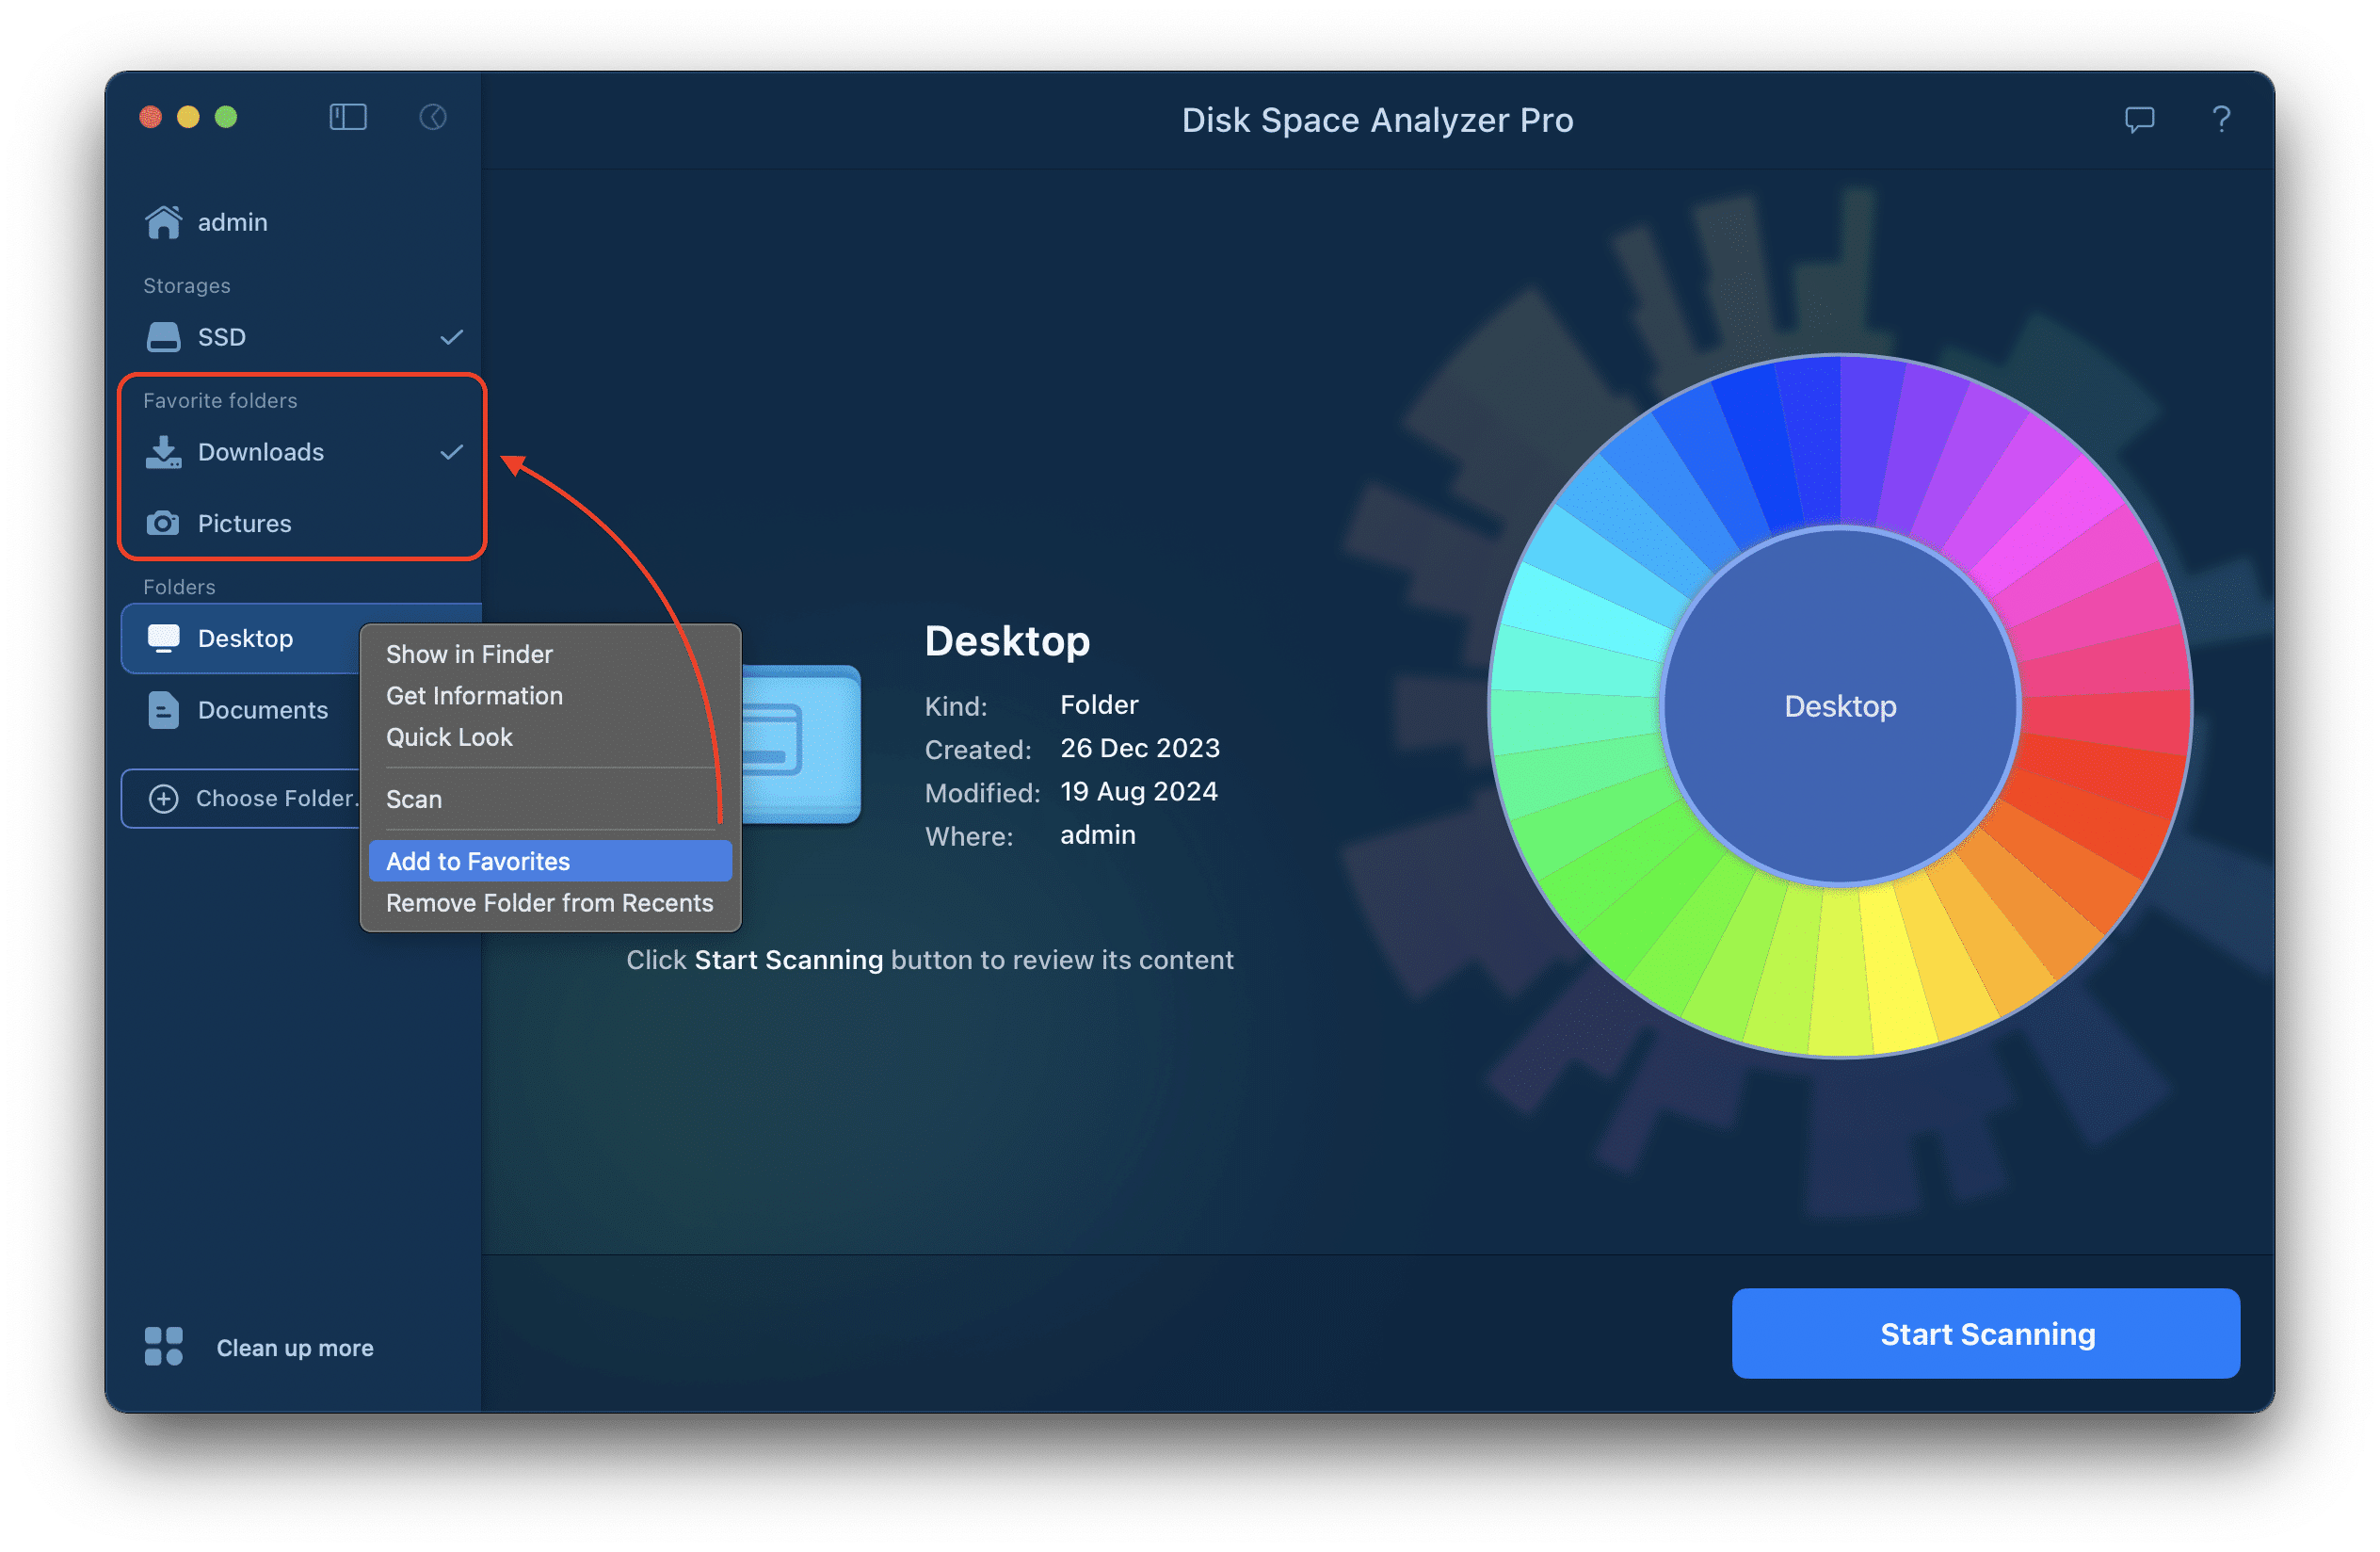
Add to Favorite Folders
For quick accessing, scanning, and analyzing of often-used folders, you can add them to the Favorite Folders list. Use the context menu for this option.
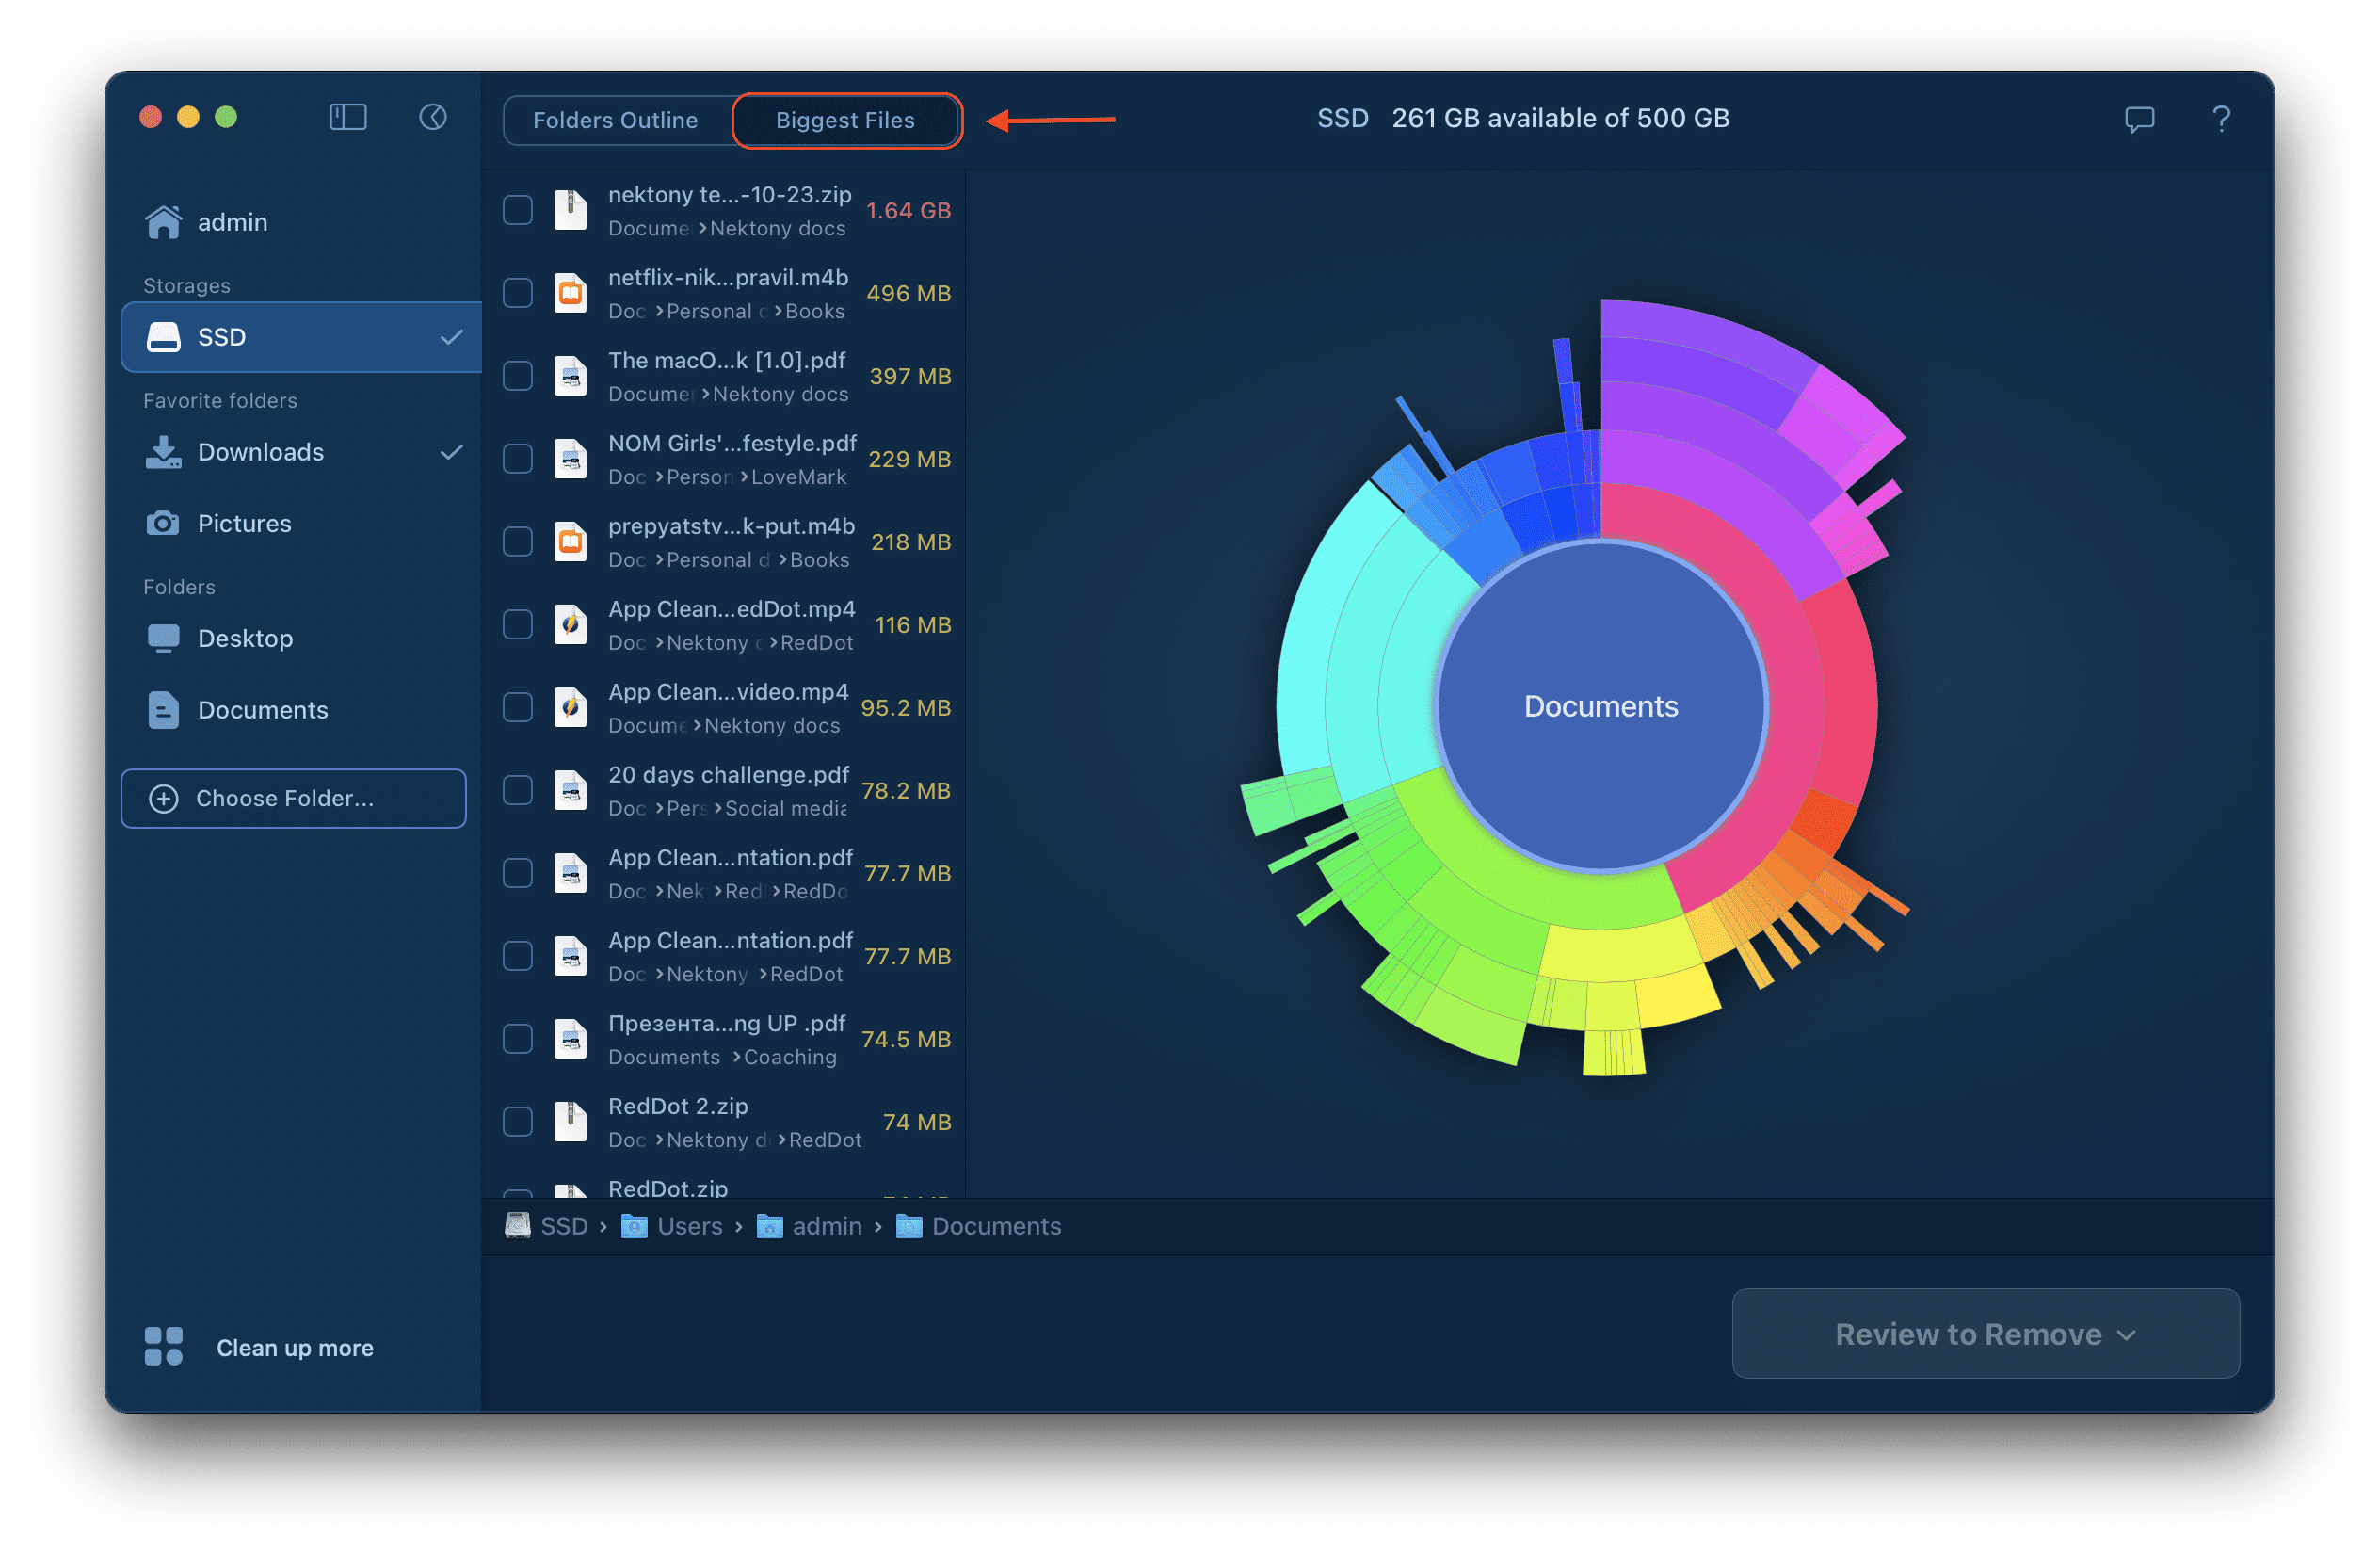
Find the biggest files and folders
The bigger a folder or file, the bigger its related section on the diagram. So you can find your large files right on the diagram.
Also, there is a special Biggest files panel on the right where you can see the list of the largest files and folders, arranged in descending order of size.
Navigate files and folders
You can easily navigate your folders and see what is inside each of them. Just click on the appropriate section on the diagram, and a new space usage diagram will show up the content inside the clicked folder. Alternatively, you can navigate your files using the Folders Outline panel.
Scanning Volumes
Disk Space Analyzer allows you to check any storage and scan any volume.
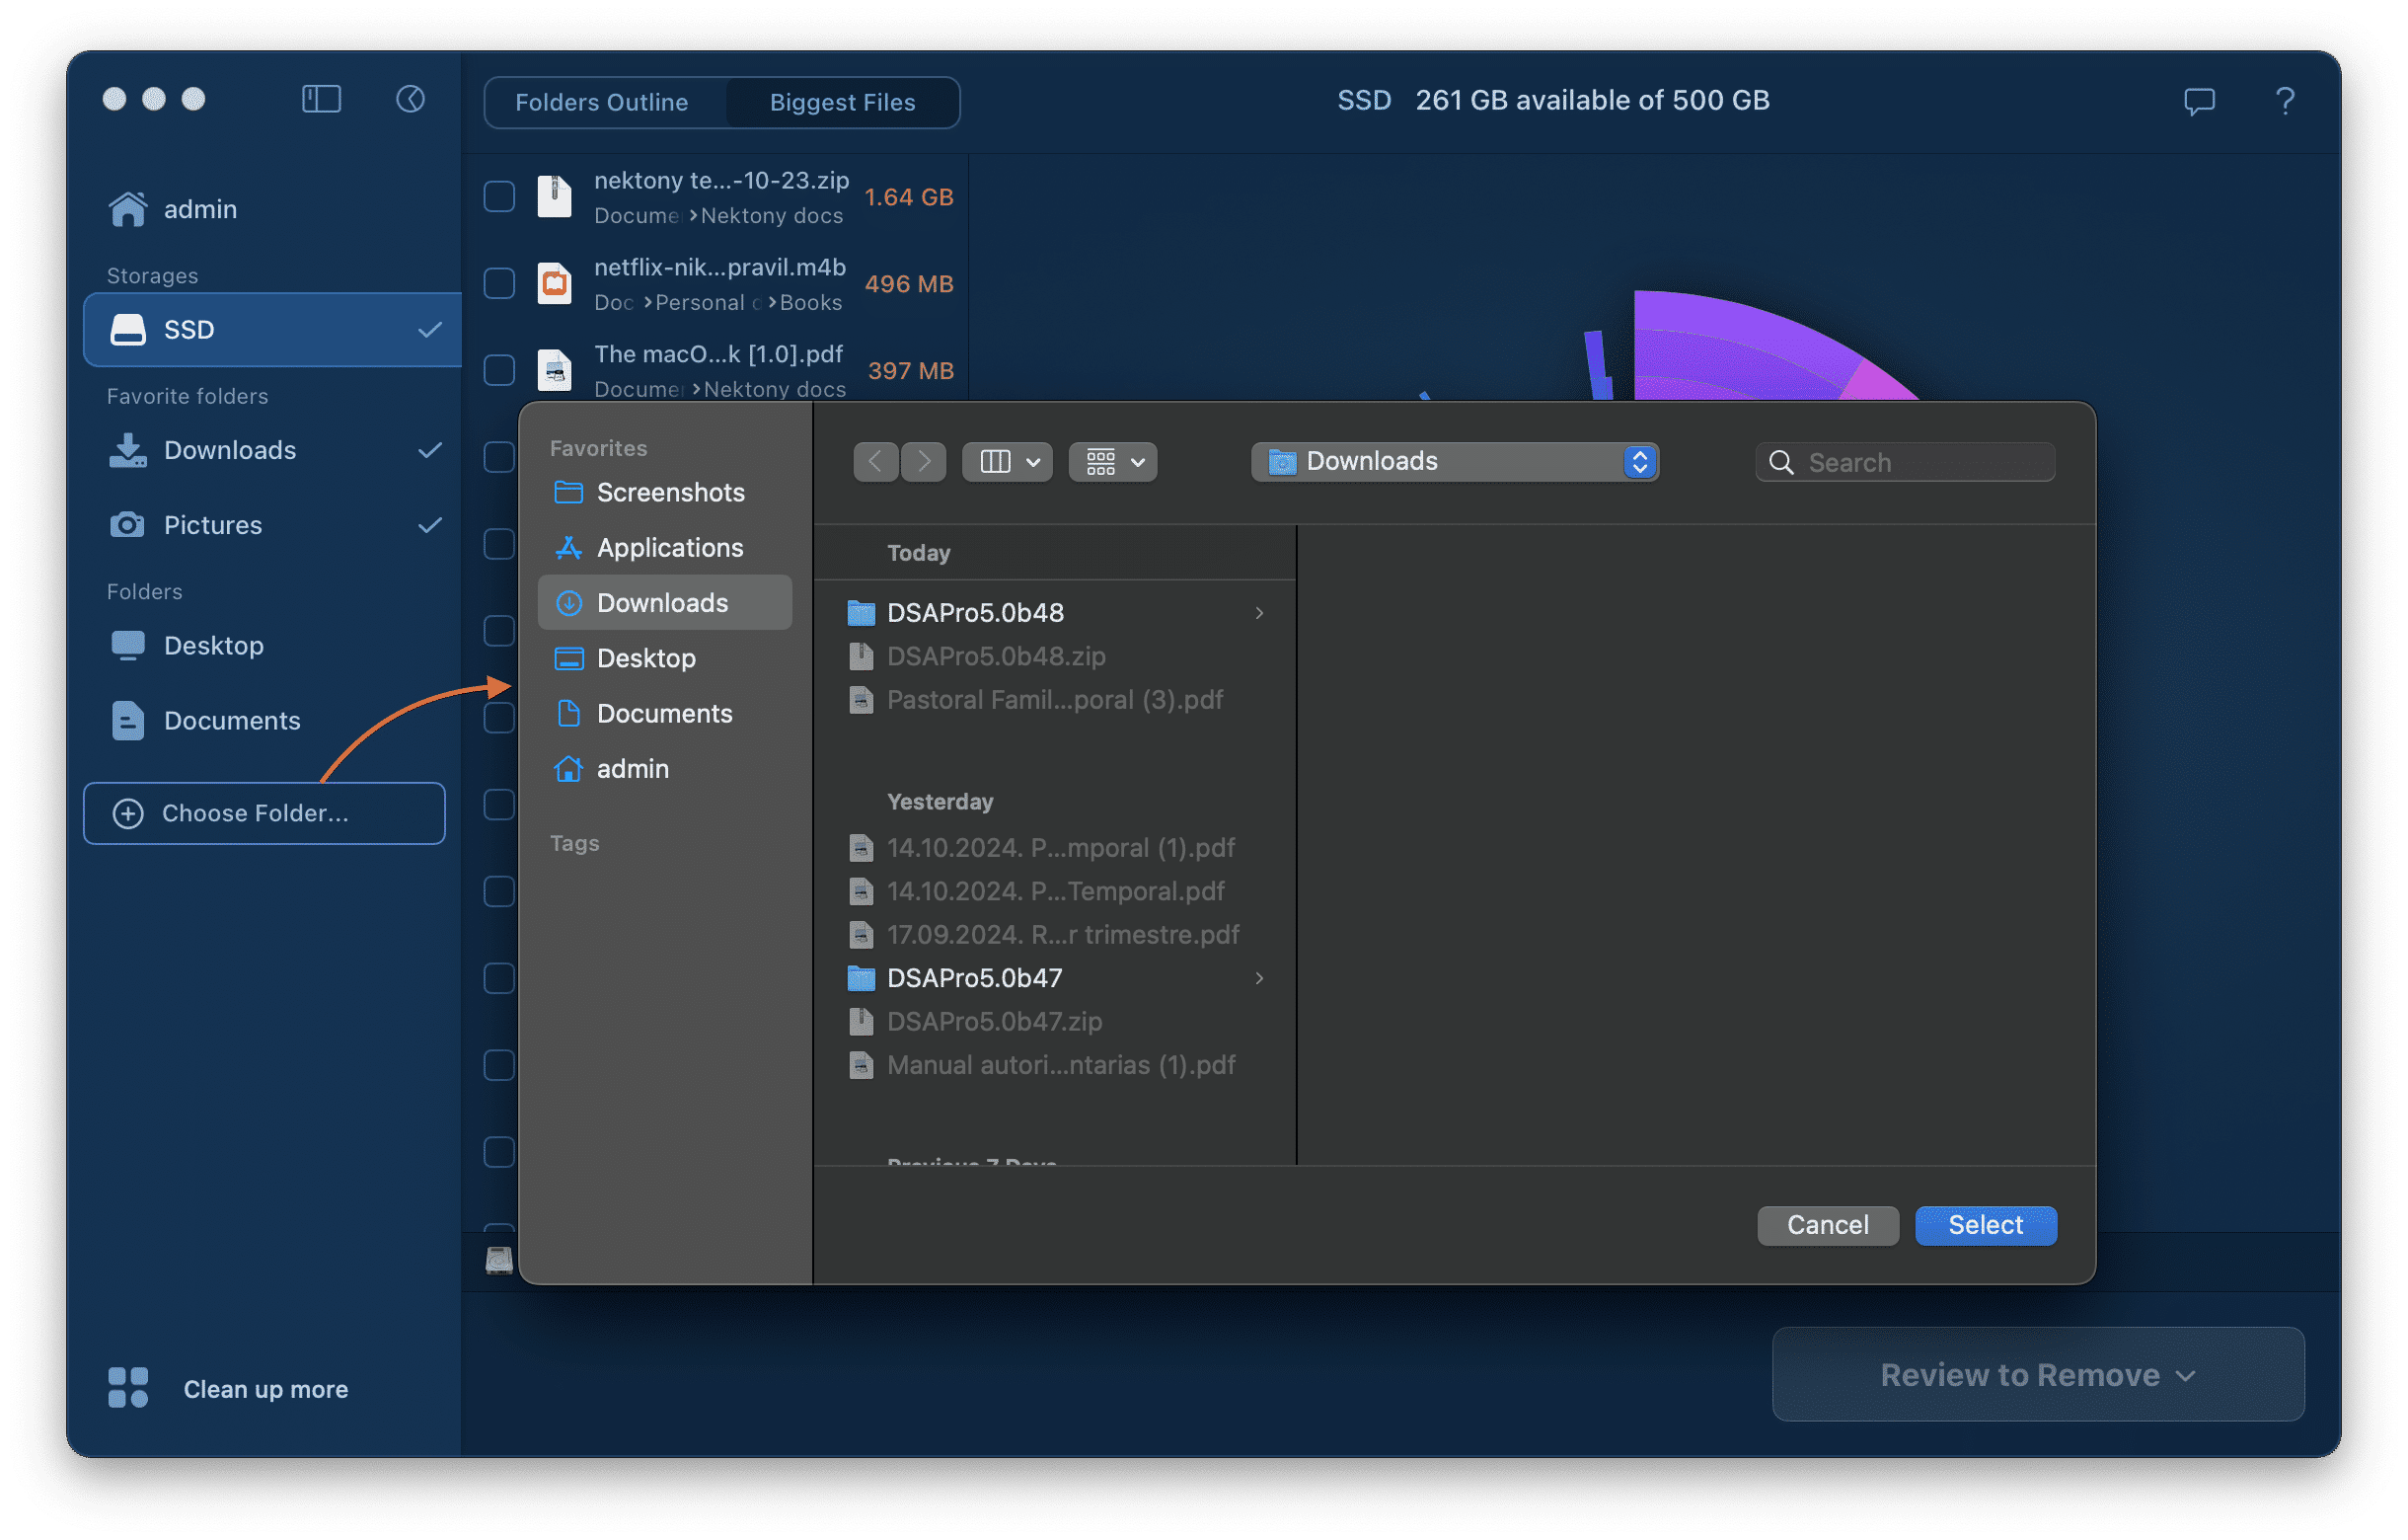
To add a new folder or disk for scanning, do the following:
- Click Choose Folder.
- Choose a folder or external disk you want to scan.
- Click the Select button.

- You will see the selected item in the list of volumes on the left.
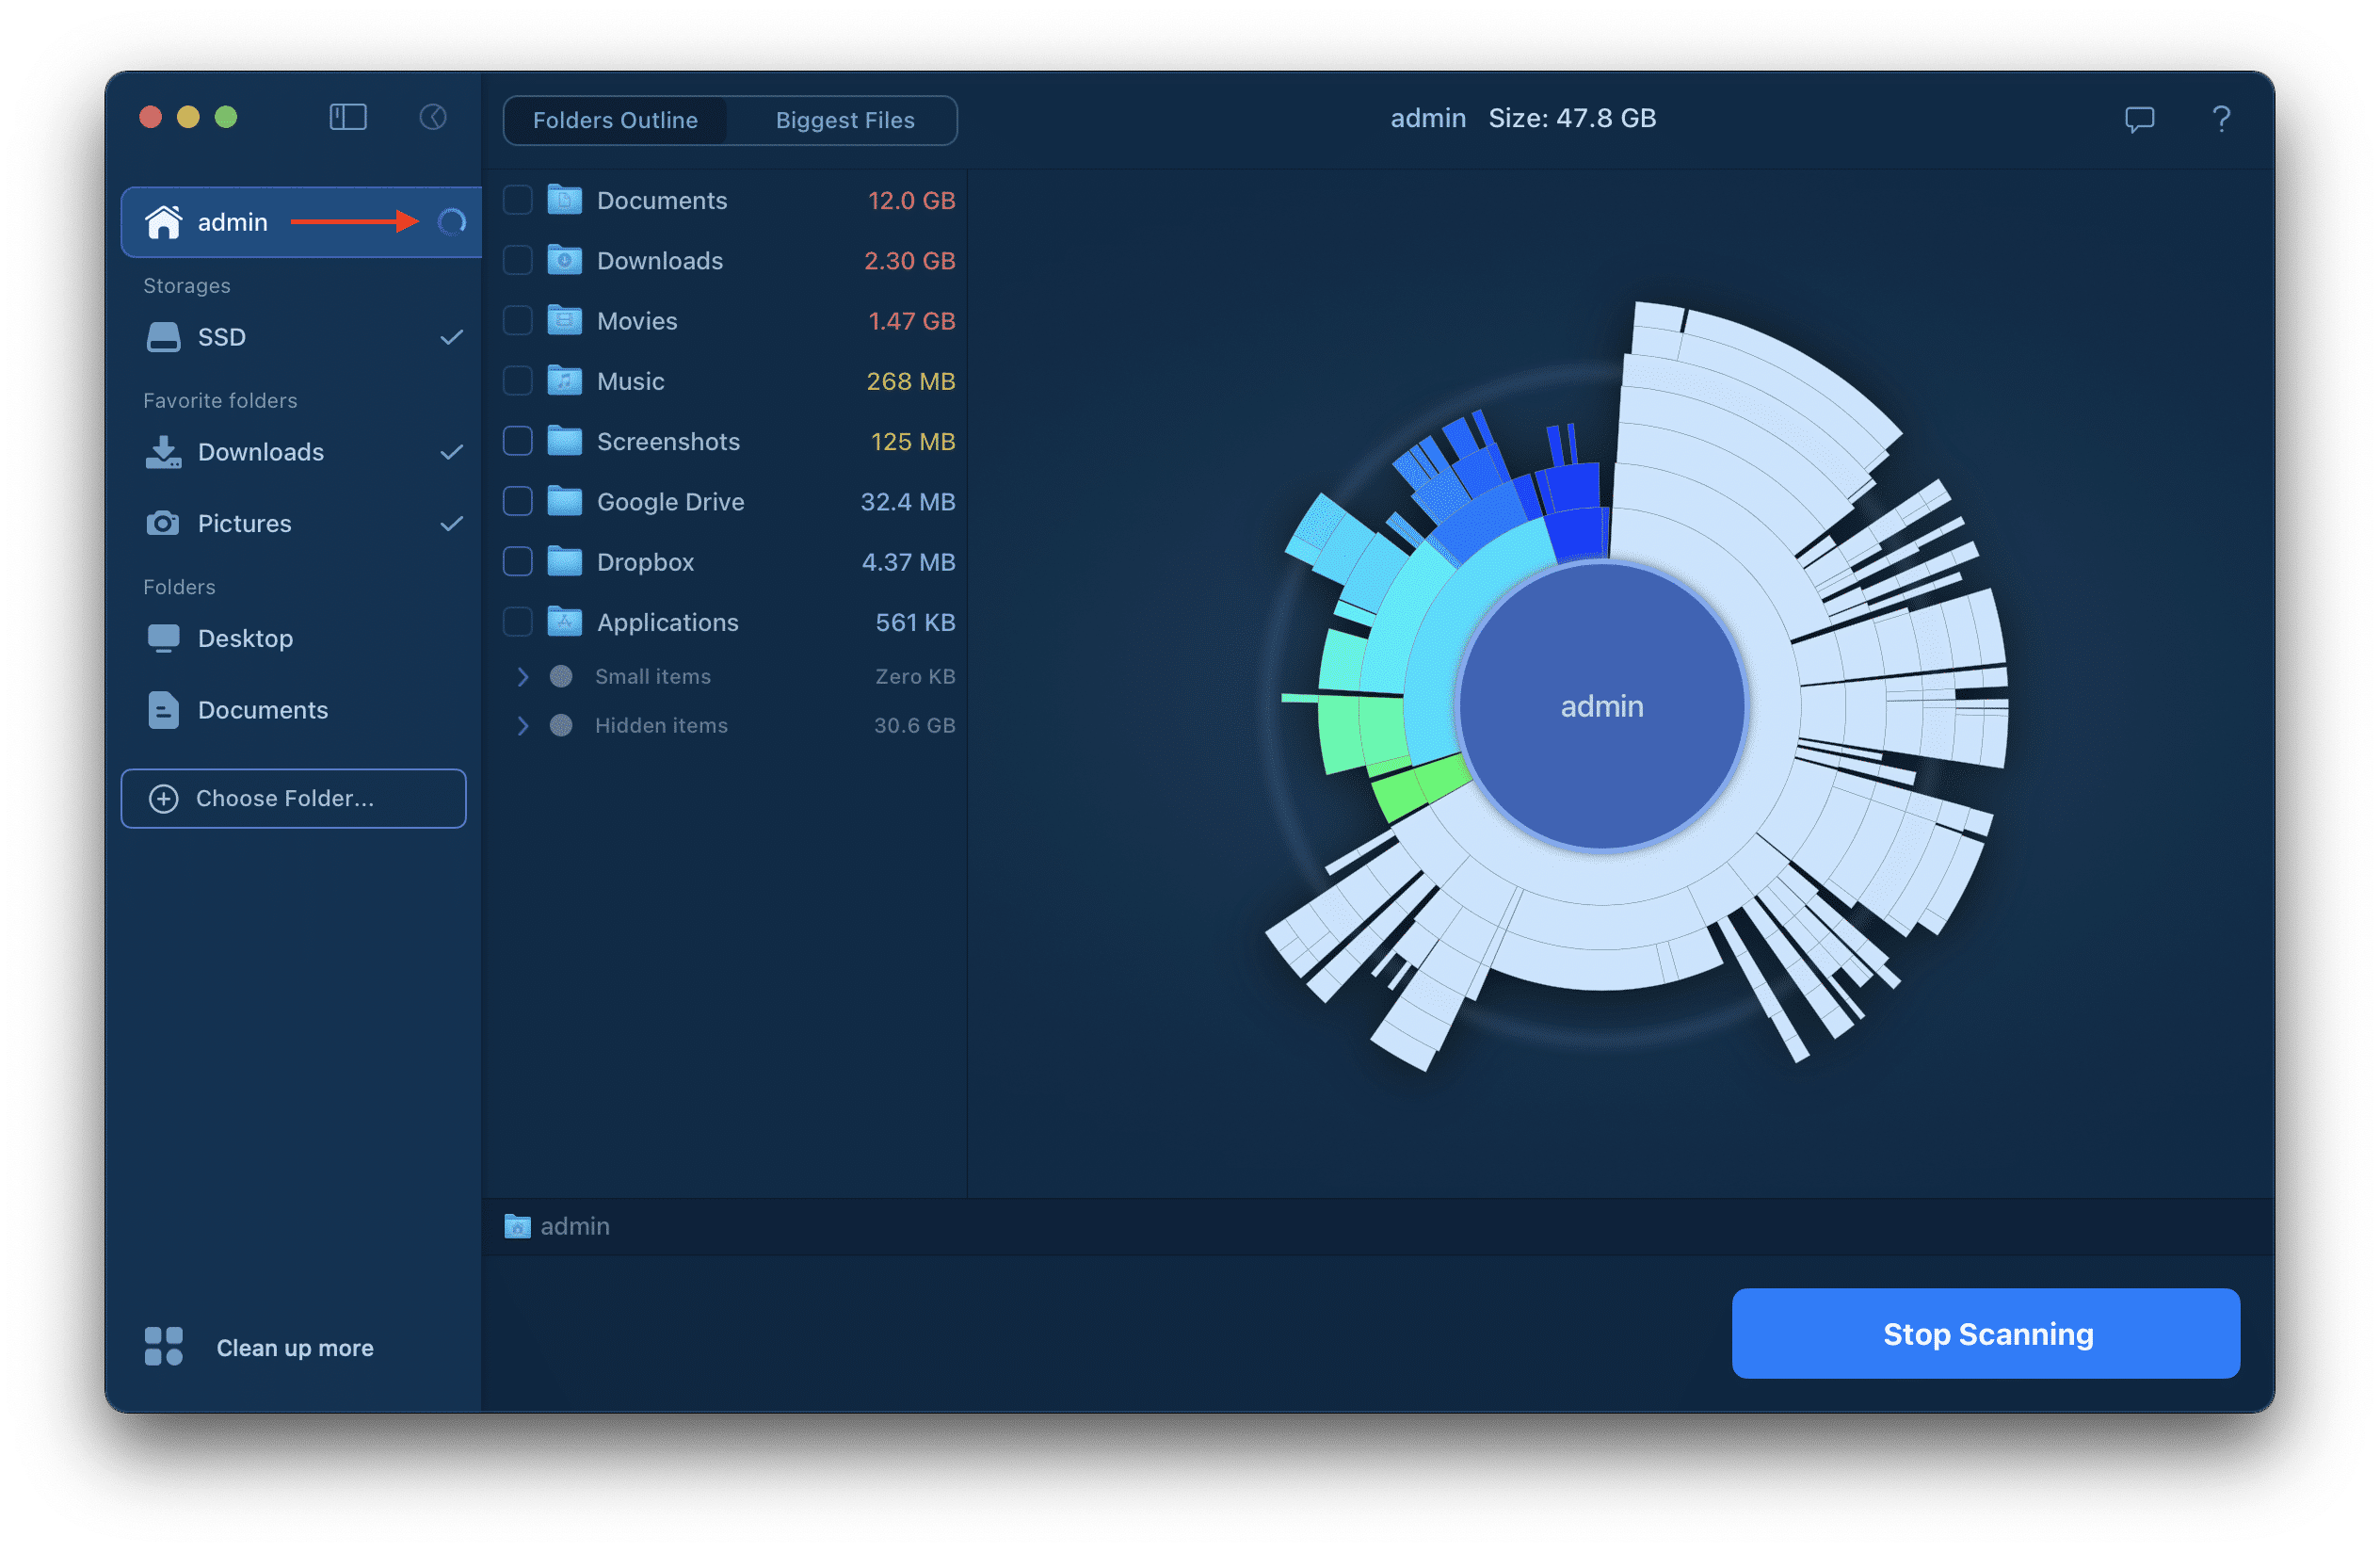
- Click the Scan button. You can also use the Cmd+S shortcut to start scanning. During the scanning process, you can see an animated “ray,” which means scanning is in progress.
- Wait until the scanning is completed. Located files will be displayed in sunburst diagram mode. The scanning process can take from several seconds to ten minutes, depending on the number and volume of files and folders.
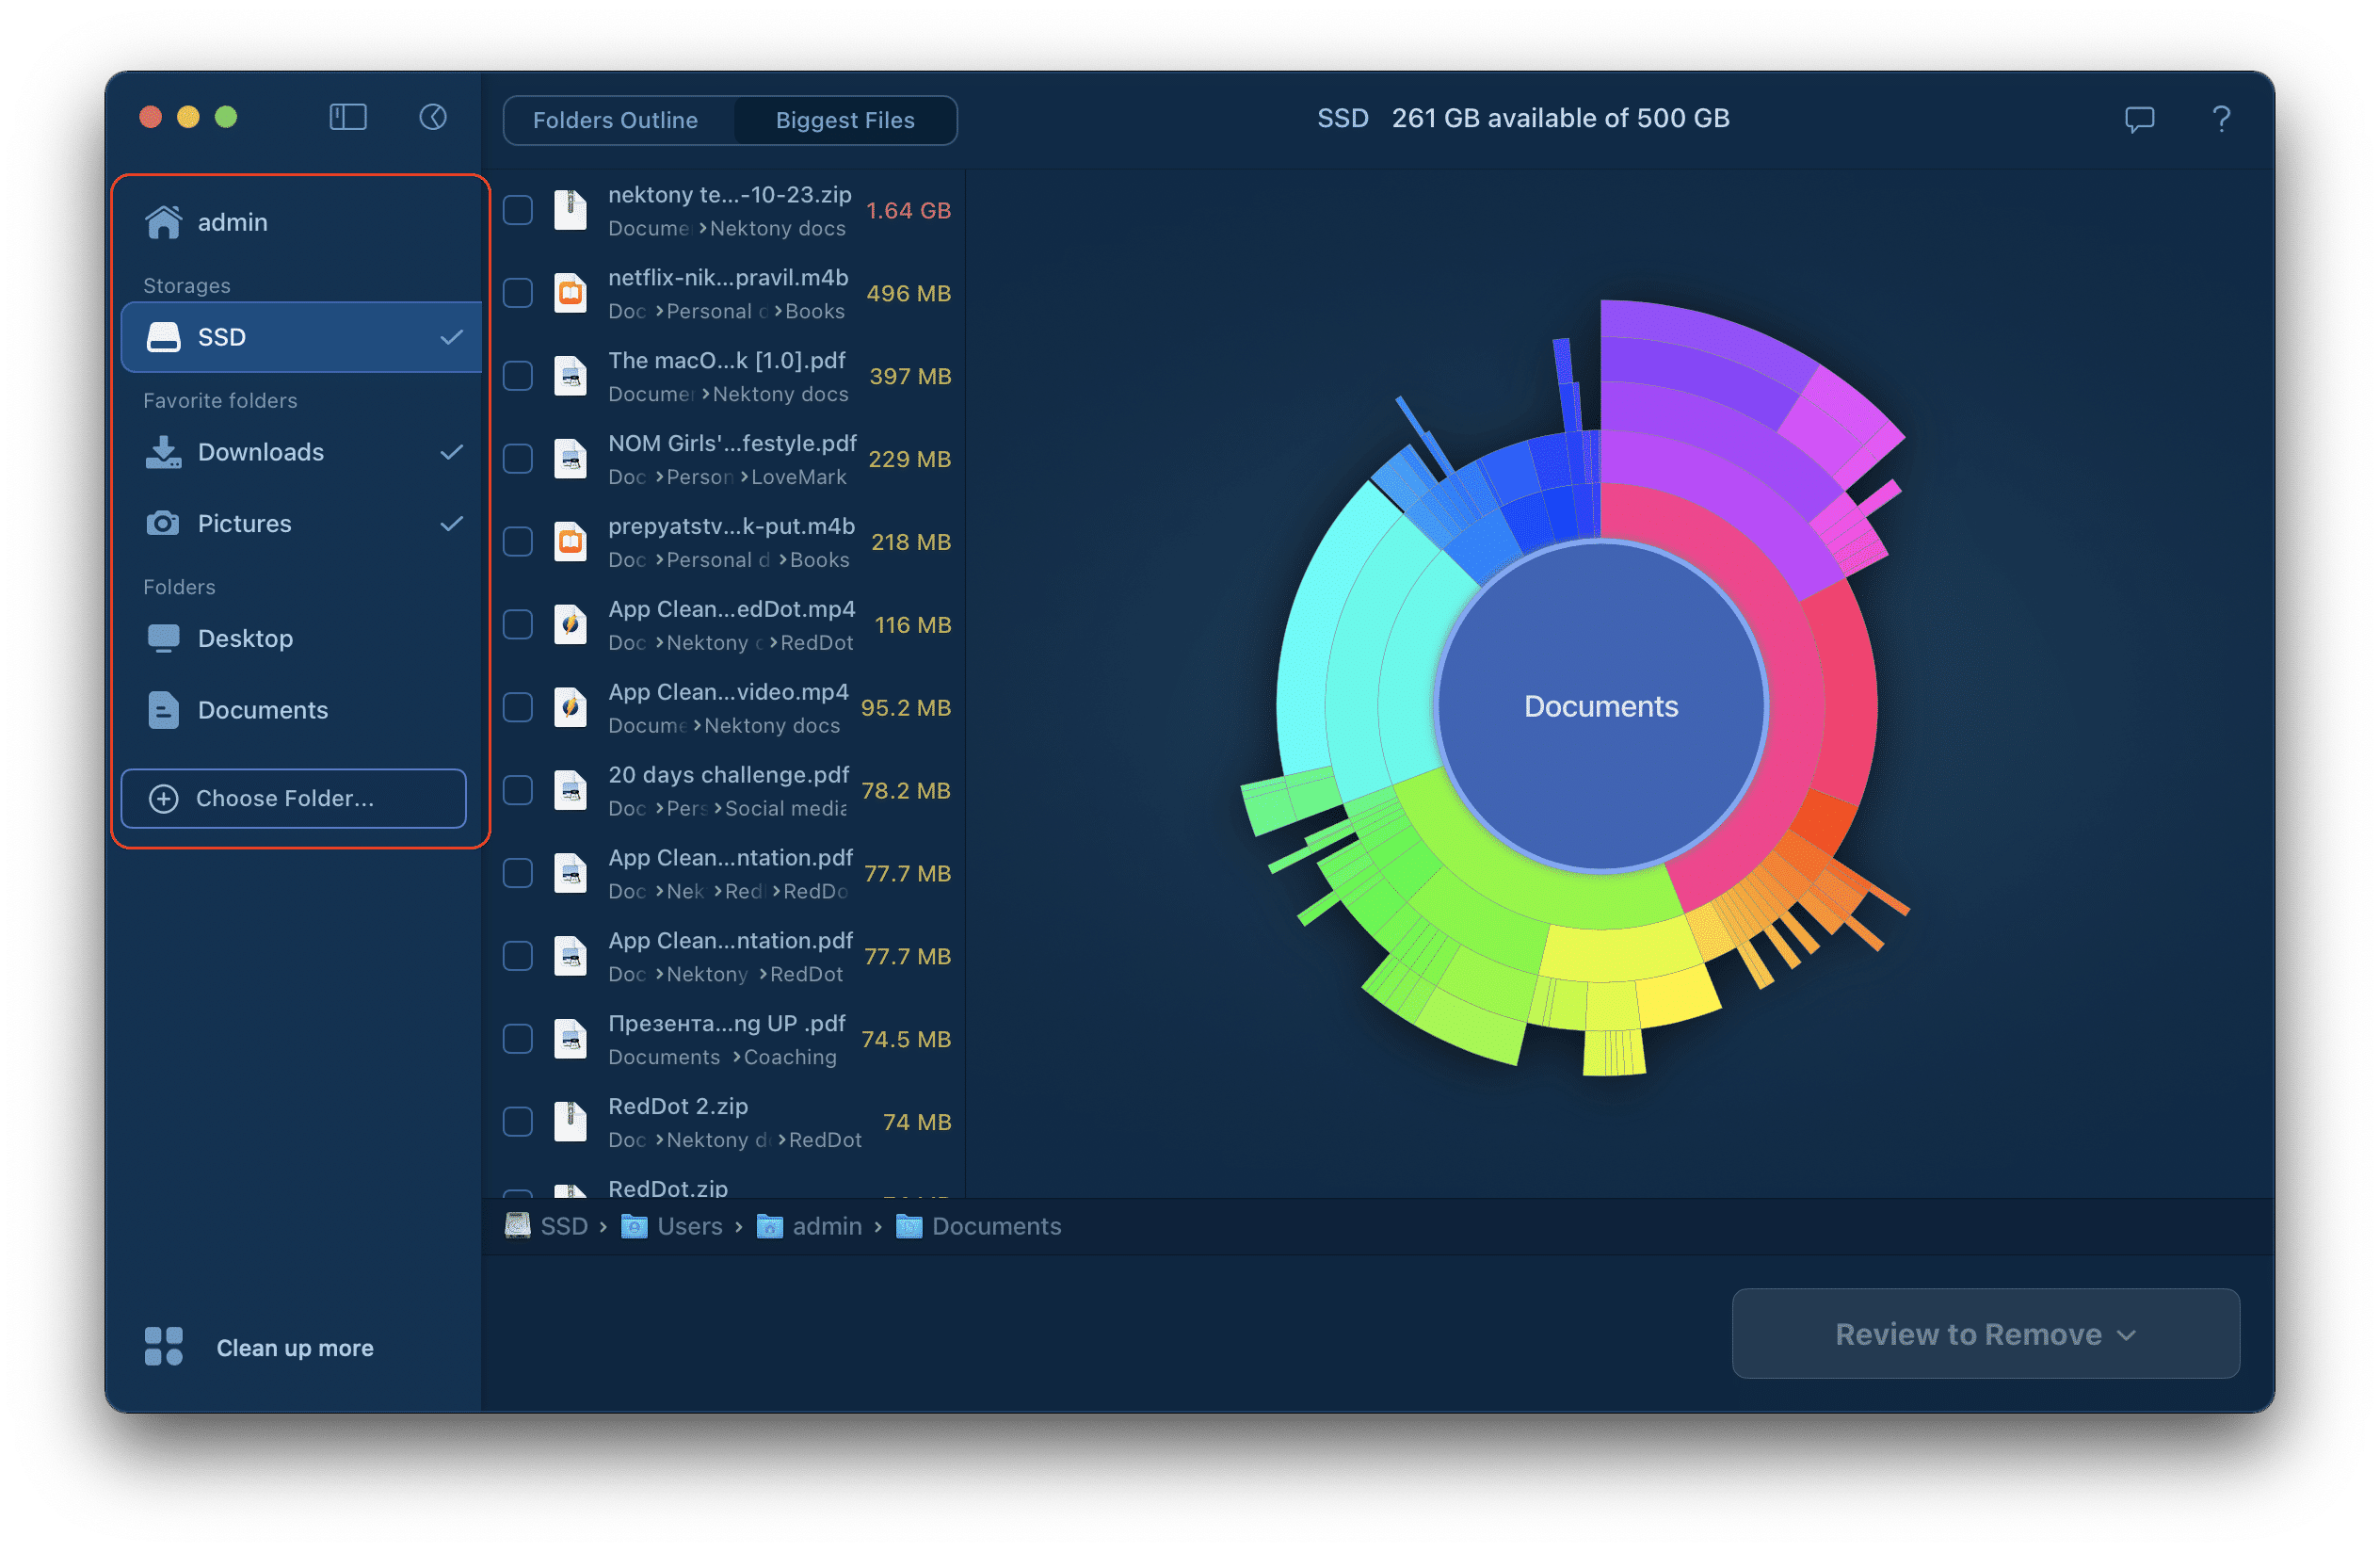
The app displays the list of scanned volumes in the left panel. All volumes displayed are grouped by type:
- Storage
- External disks
- Network disks
- Favorite folders
- Folders
Analyze disk usage
Disk Space Analyzer’s purpose is to help you to analyze disk usage on your Mac, find large files and remove unneeded “space eaters” – old unused files and folders that occupy significant space on your Mac disk. There can be several big unused folders or tons of small unused files on a disk.
To find large files and folders, do the following:
- Scan your disk or a particular folder and wait until the app finishes the process.
- Once the scanning is complete, Disk Space Analyzer will show the file structure as a sunburst diagram based on the scanned volume.
- Start navigating through the file structure by clicking on each section of the diagram.

Also, you can use the Outline tab to see the sizes of the folders as diagram sections.
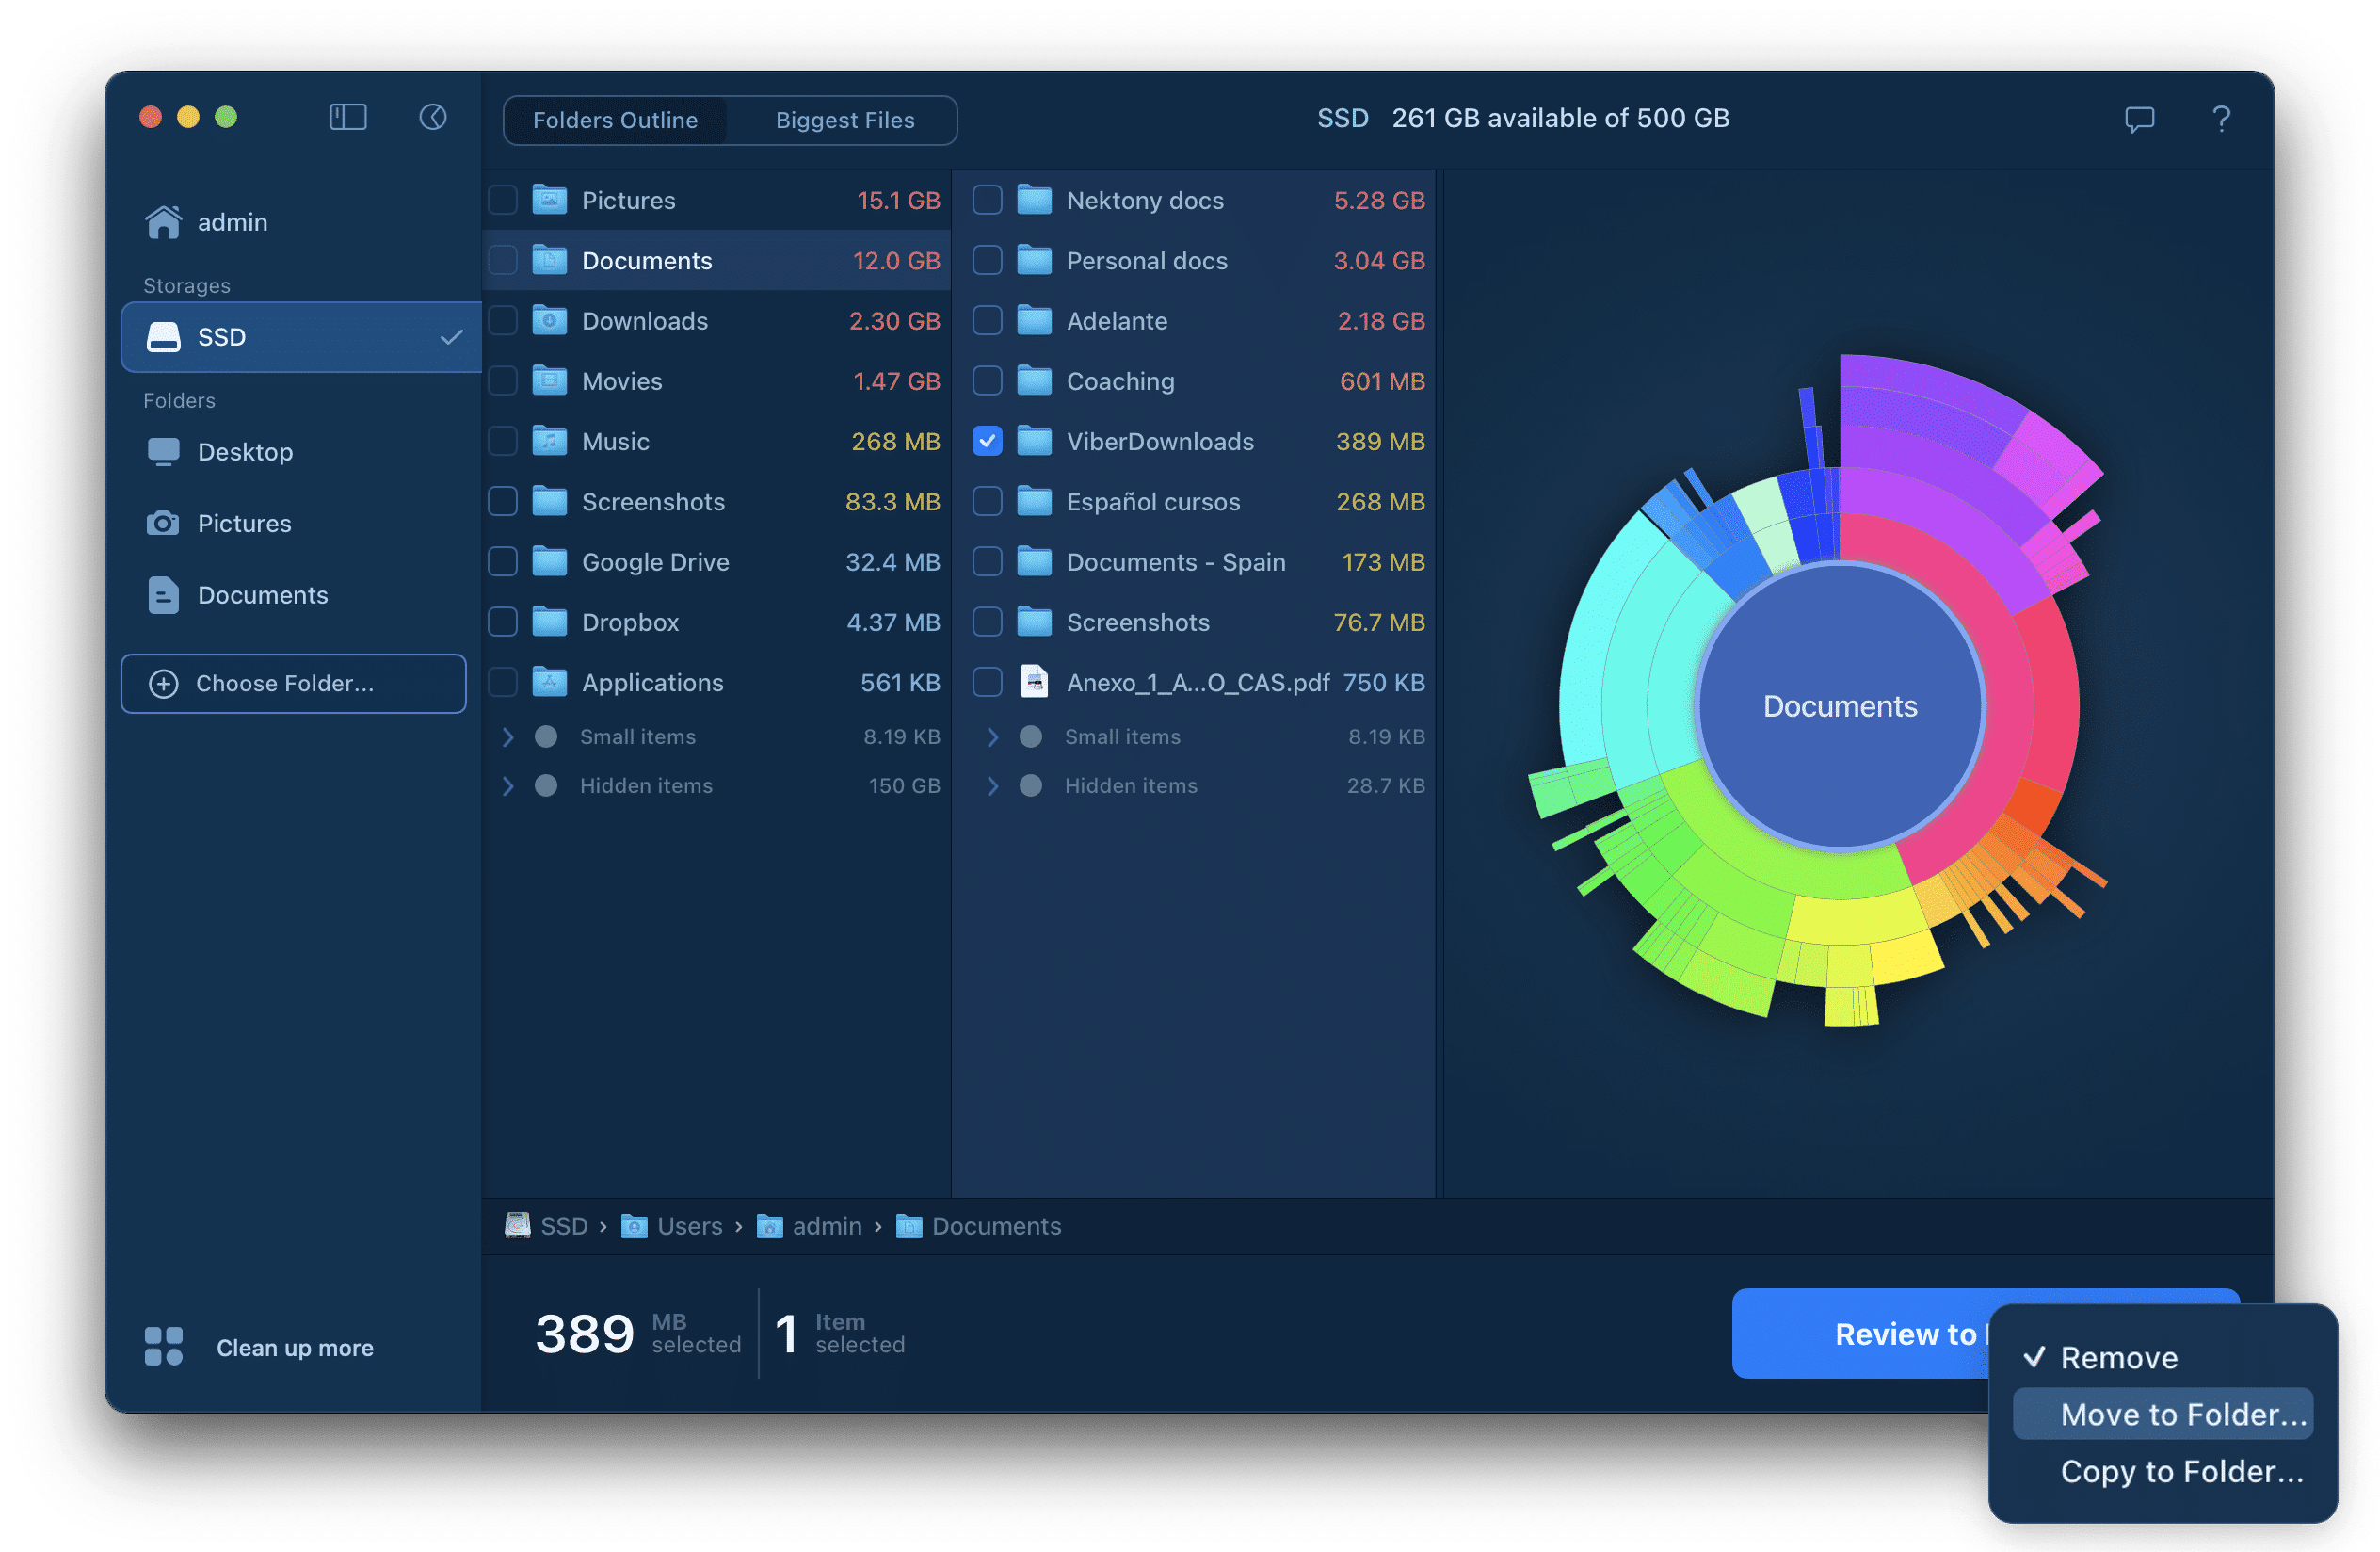
Operating files and folders
Disk Space Analyzer allows you to operate files and folders. You can copy, move or remove selected items.
To select items, simply select mark the checkbox in the item’s line Folders Outline or Biggest Files panel. Then you can manage the selected items by clicking to remove them or copying or moving them to any desired folder.
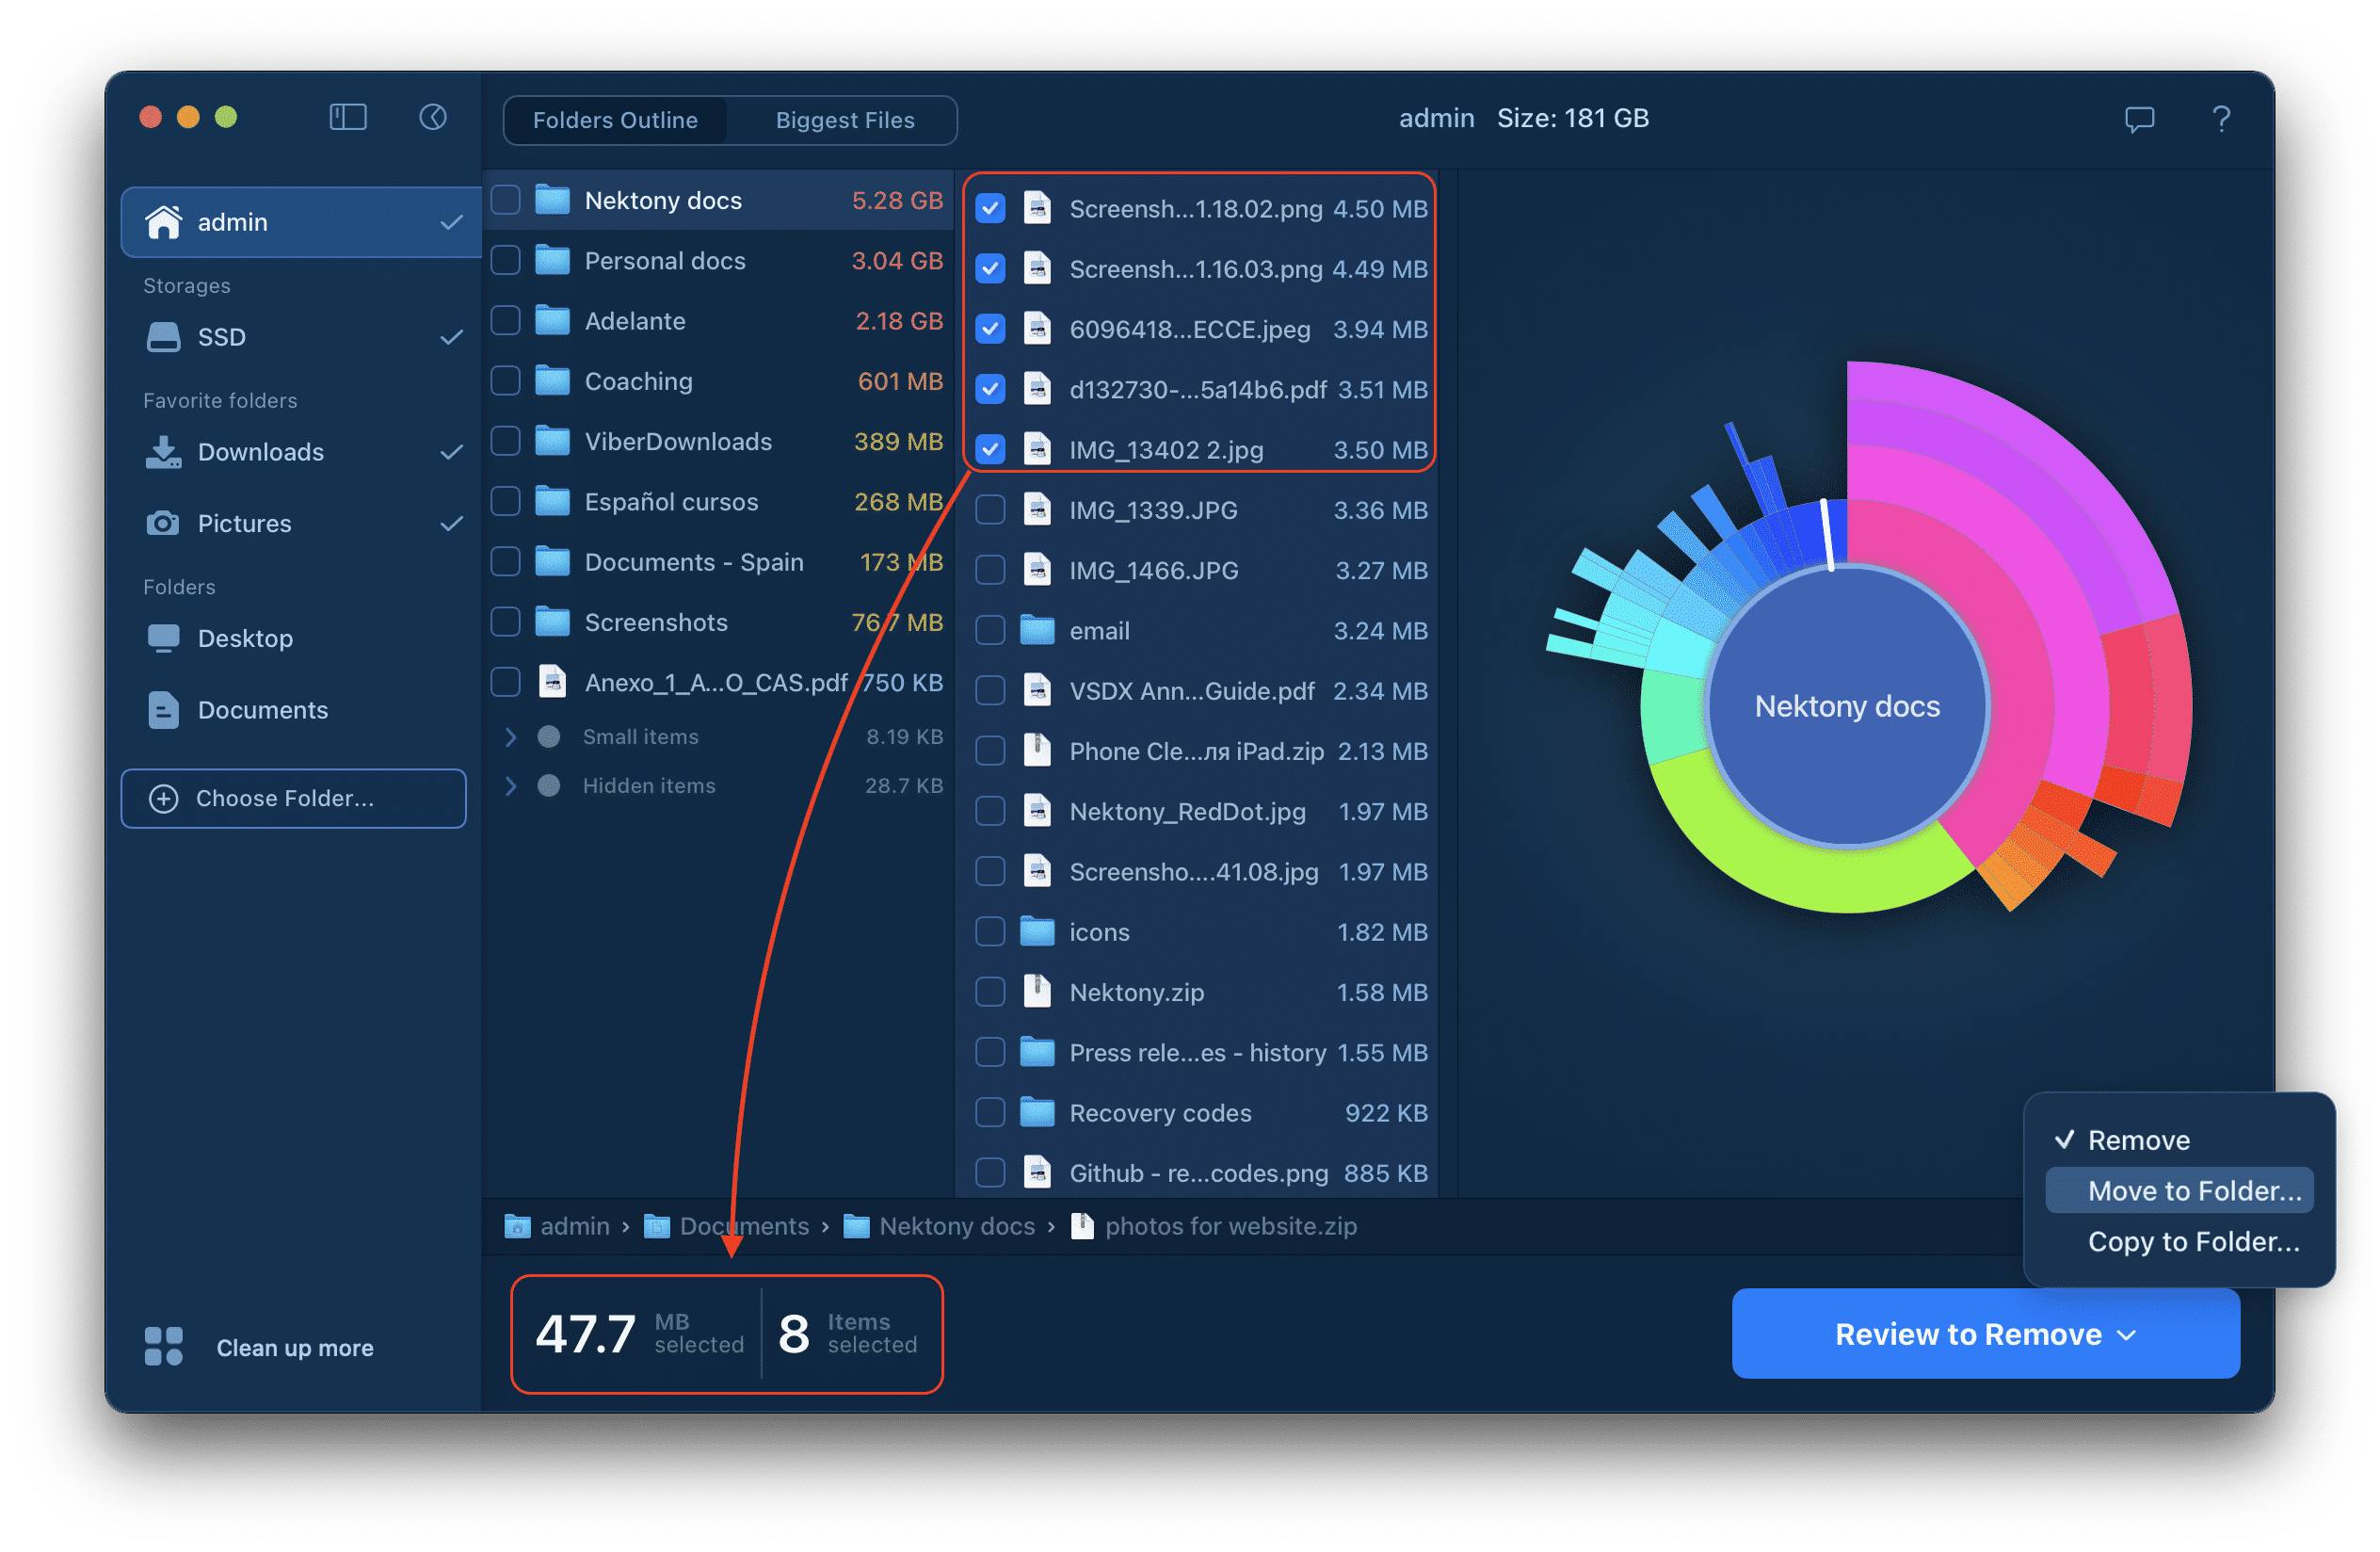
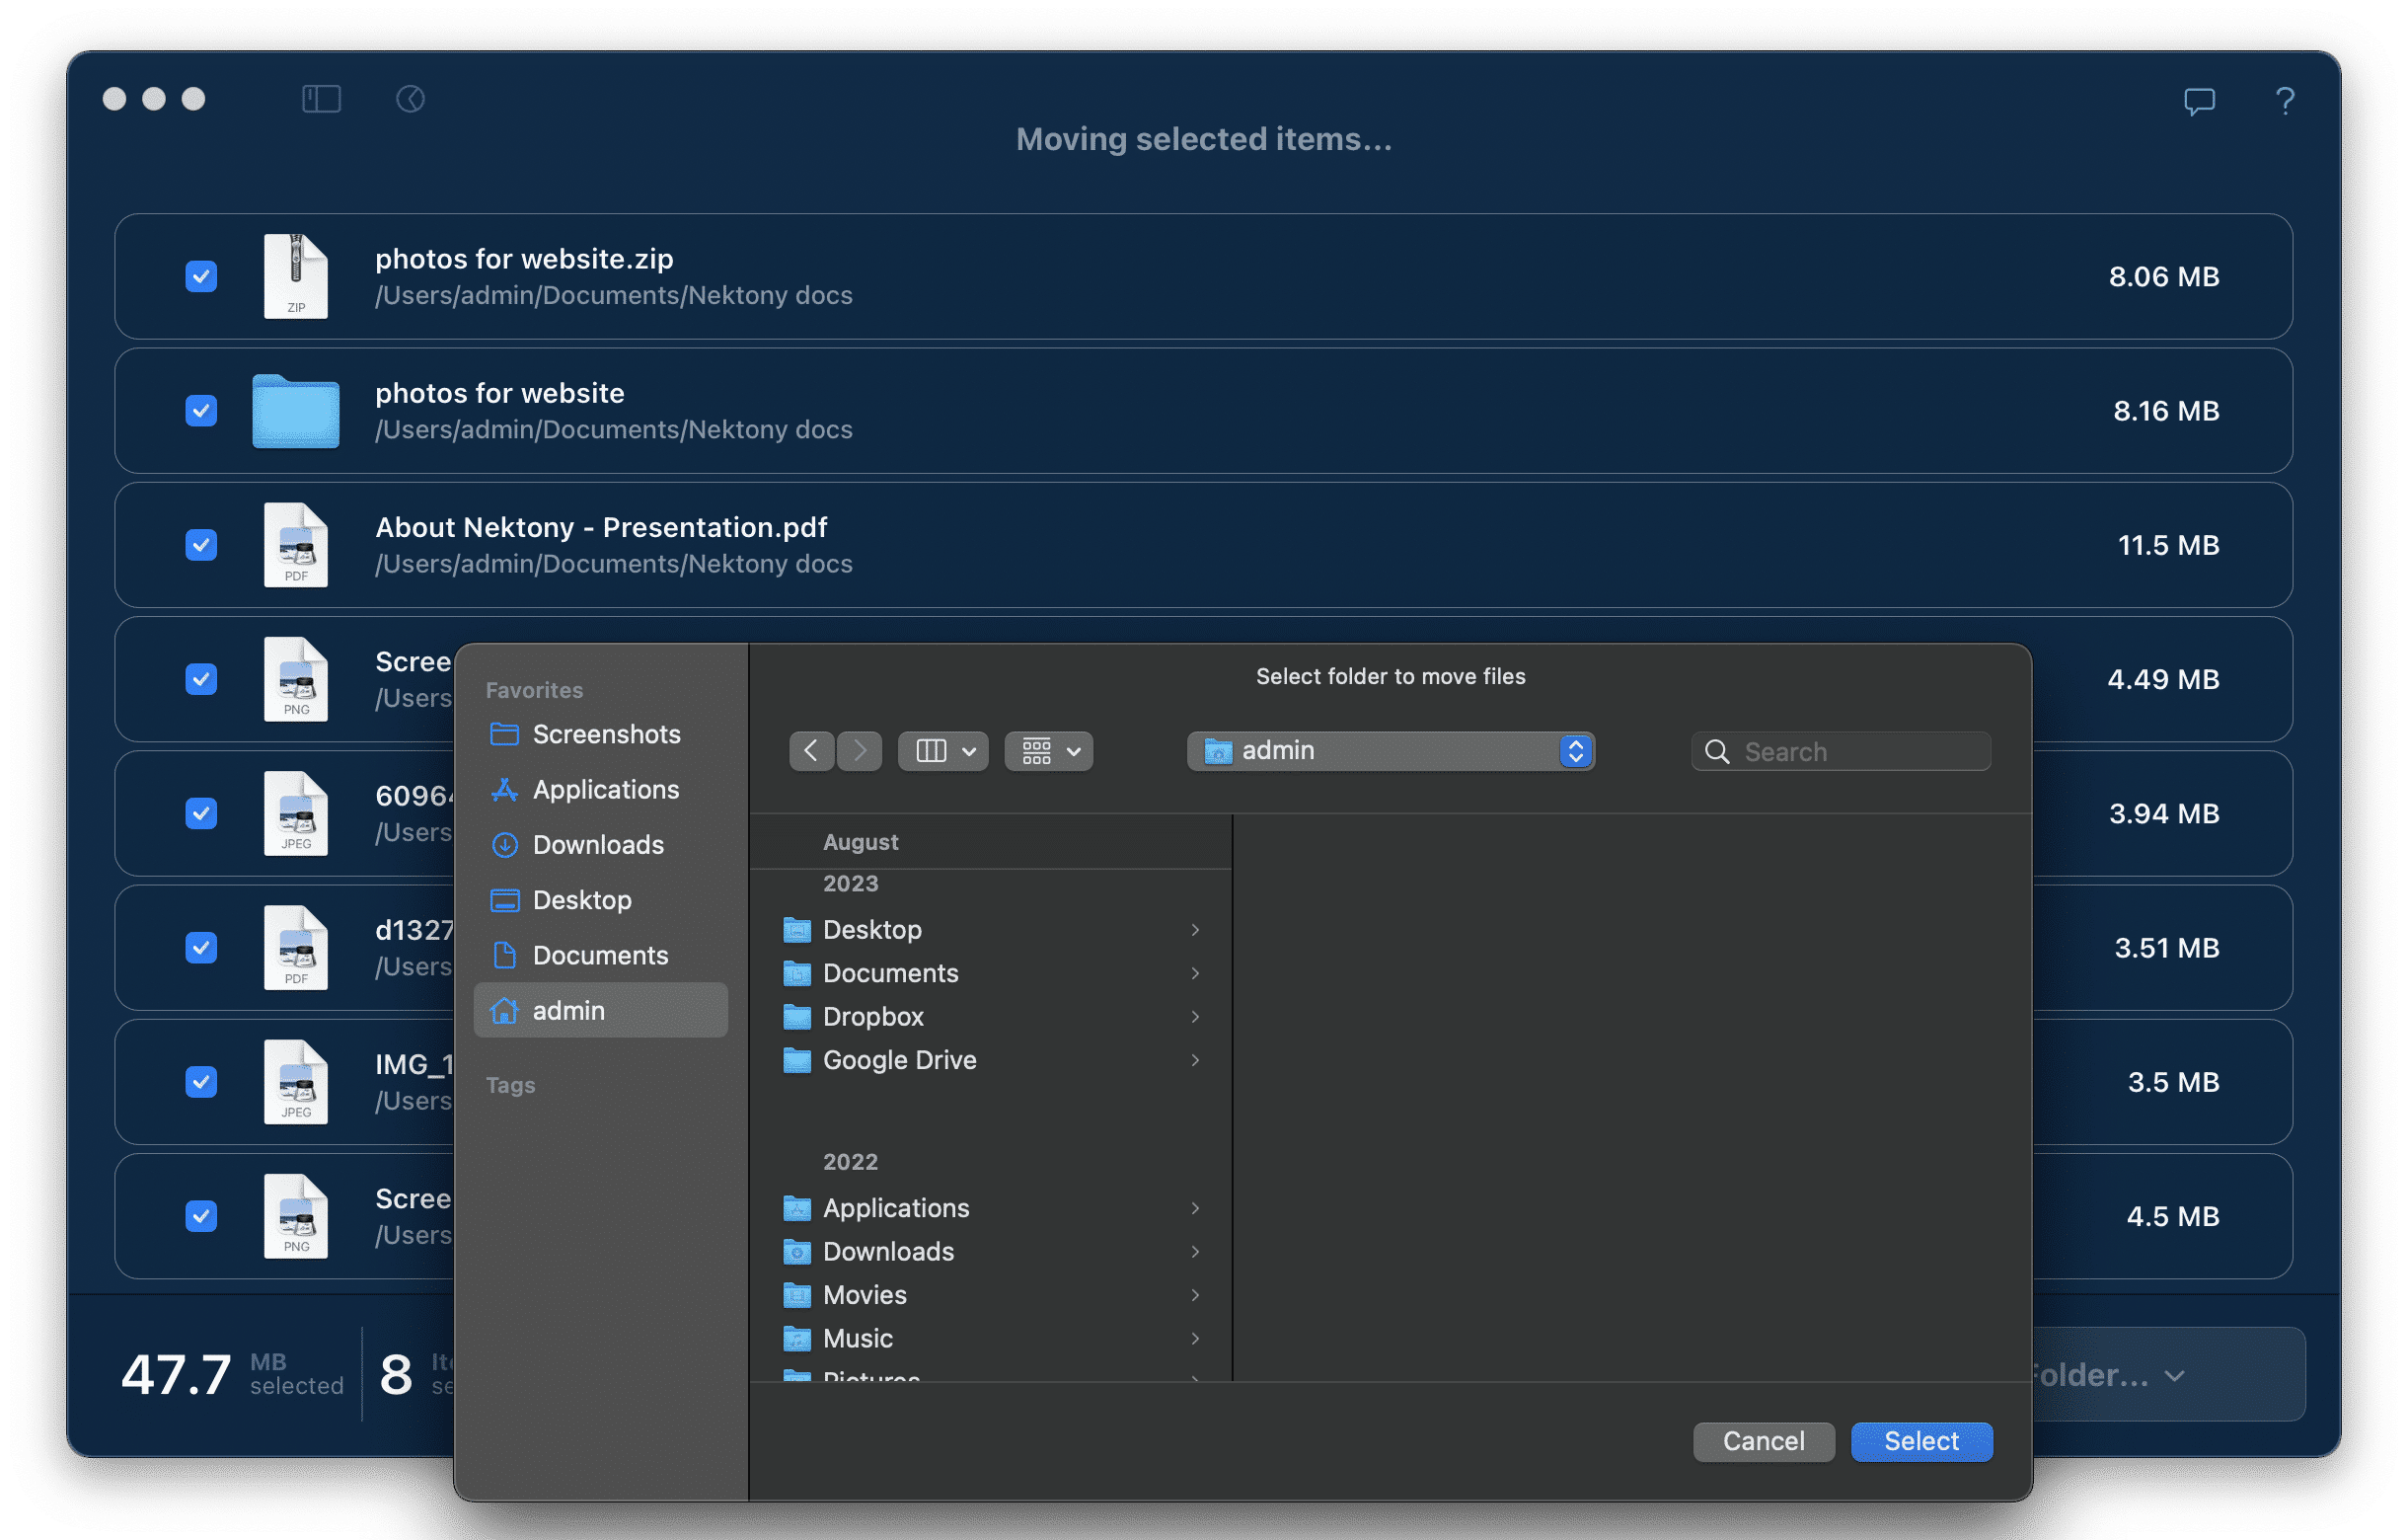
When you click to move or copy files, the app will display the Finder window where you can select the new location. Choose a new folder and click the Select button.
If you click to remove selected items, they will be physically moved to Trash.
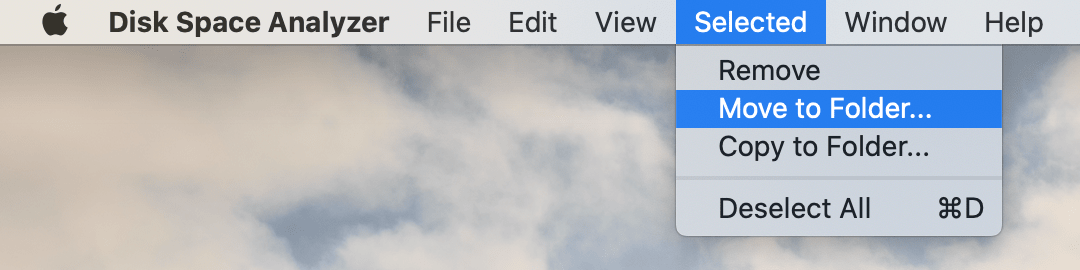
Also, you can use the Menu Bar to operate selected items.
Settings
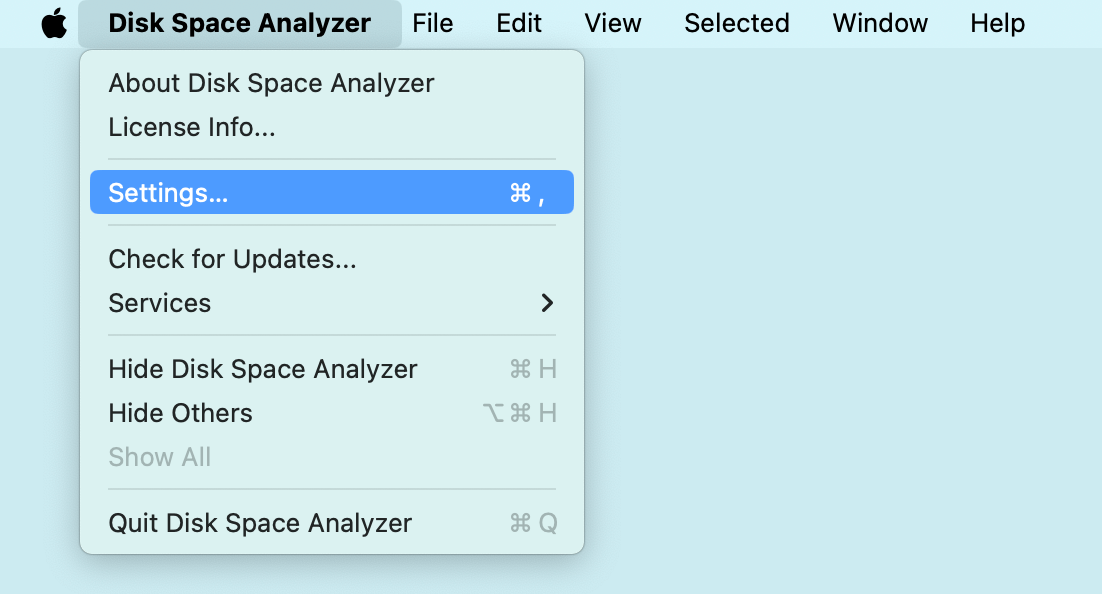
You can change Disk Space Analyzer`s settings to customize some options. To open the app’s settings, go to its menu and select Settings.
General Tab
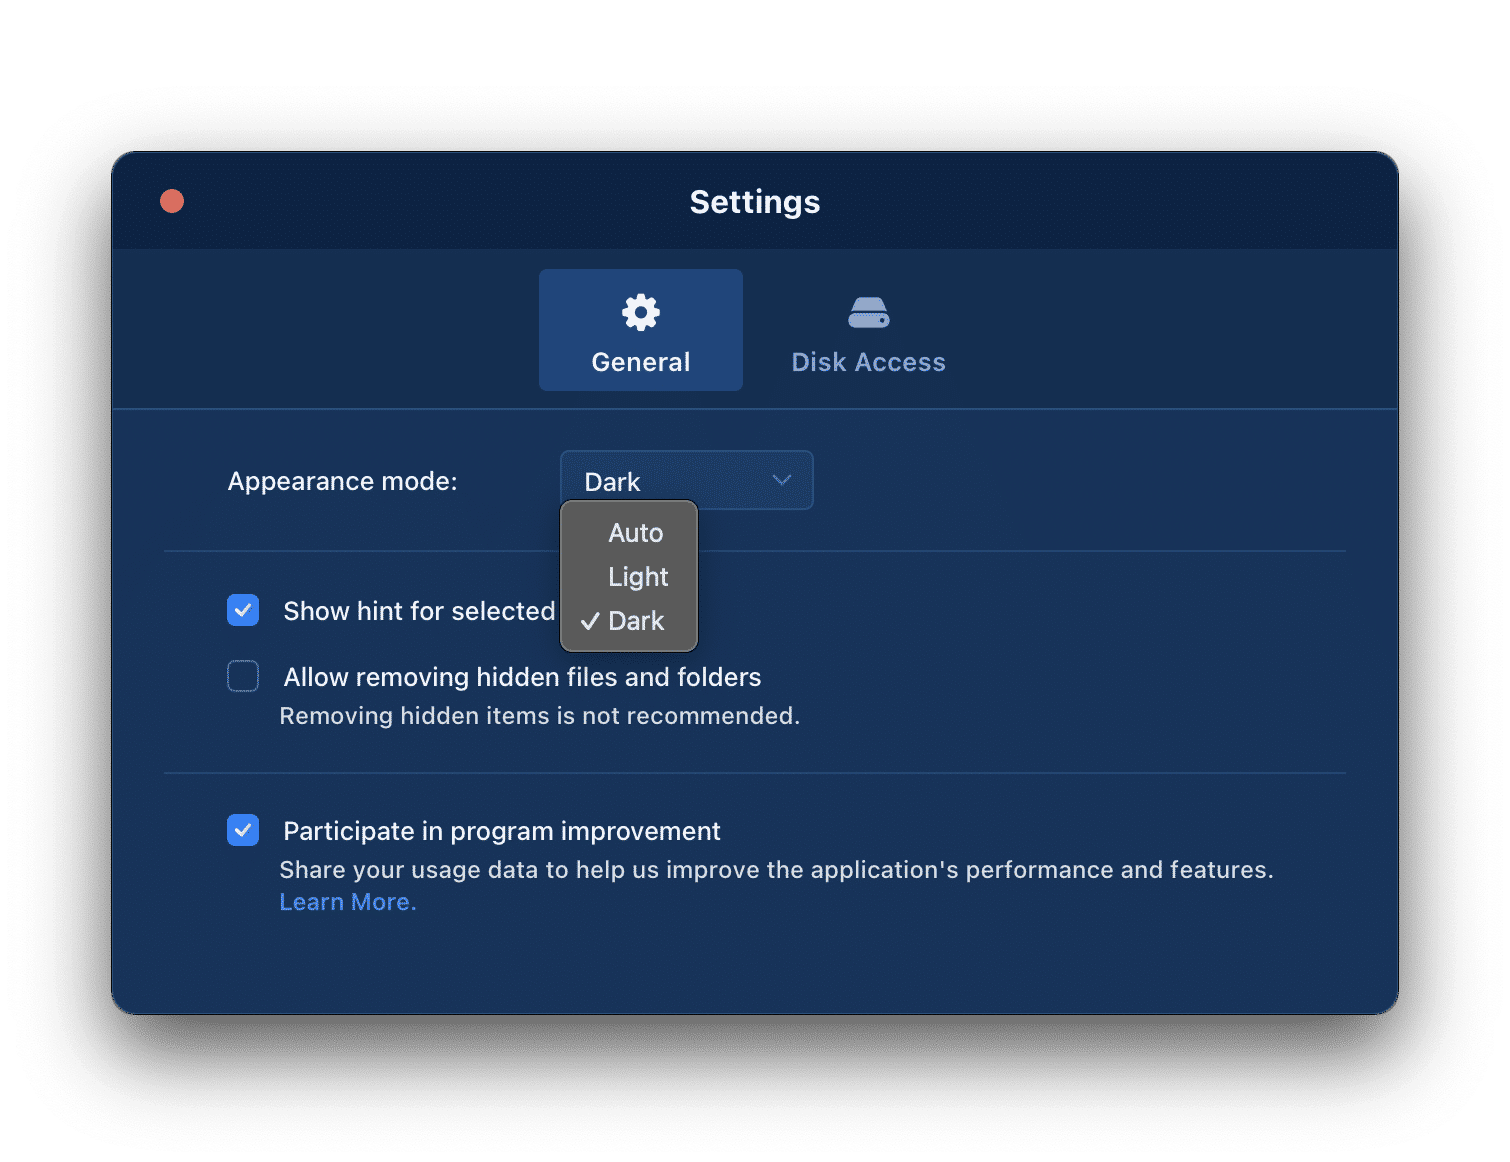
In the General tab in Disk Space Analyzer’s settings, you can turn on and turn off the following options:
- Appearance mode
- Show hint for selected items
- Allow removing hidden files and folders
- Participate in program improvement
When you enable the option “Participate in program improvement”, no sensitive data is collected, and no identity information is shared with Nektony and any third party. Your privacy is important to us and we collect only the following information to improve the user experience:
- type of OS of the user’s device (subject to receipt of the separate user’s consent);
- the user’s device identifier;
- the user’s license check for administration purposes;
- the information about crash logs and other issues;
- the periods in which the user uses Disk Space Analyzer;
- the events within Disk Space Analyzer recorded with analytics;
- start date of the trial version of Disk Space Analyzer;
- the user’s evaluation of the trial version of the app, and how the user’s way of the Disk Space Analyzer use.
Disk Access
When you run Disk Space Analyzer for the first time, you need to grant access to your folders to let the program access your data and analyze it. In this tab, you can check whether the app has access to your data or not and enable the access if needed.

Shortcuts
For your convenience, you can use special shortcuts in the Disk Space Analyzer app.
List of all available shortcuts
| Cmd+R | scan, rescan or stop the scanning |
| Cmd+N | scan a custom folder |
| Cmd+O | show in Finder the current root item of the diagram or the selected item in the Outline panel |
| Cmd+I | open information window for the current root item on the diagram or for selected item in the Outline panel |
| Space key | Quick Look the current root item on the diagram or the selected item in the Outline panel |
| Cmd+↑ | go to parent folder |
| Shift+Cmd+↓ | go to root folder |
| Shift + click on Go to Parent folder in the context menu | go to root folder |
| Cmd+D | deselect all selected items |
| Control+Cmd+F | enter the Full-Screen mode |
| Enter (Return) | mark the checkbox in the Biggest files or Outline panels |
| ↑ and ↓ | switch between items in the Storage, Outline or Biggest files panels |
List of controls for the Sunburst diagram
| Scan Volume | click on the diagram center (for not scanned volume) |
| Switch on/off displaying free space | click on the diagram center (for scanned volume) |
| Open sunburst diagram for parent folder | click on the diagram center |
| Open sunburst diagram for child folder | click on folder sector |
| Show the item in Finder | Press Command (⌘) and click on folder or file sector |
Full disk access
For security reasons, Apple requires that you manually grant access to your apps to operate the user`s files. Since Disk Space Analyzer analyzes your whole Mac hard drive, you will need to grant Full Disk Access to allow the app to find all service files. After scanning your Macintosh HD you will see the following message:

Now, we will explain how to grant access to Disk Space Analyzer to your data scan all your folders.
Before we start, note that you can click the Grant Access button and follow the link right in the next pop-up window in the app to open Privacy settings. In this case, skip the first three steps from our guide.
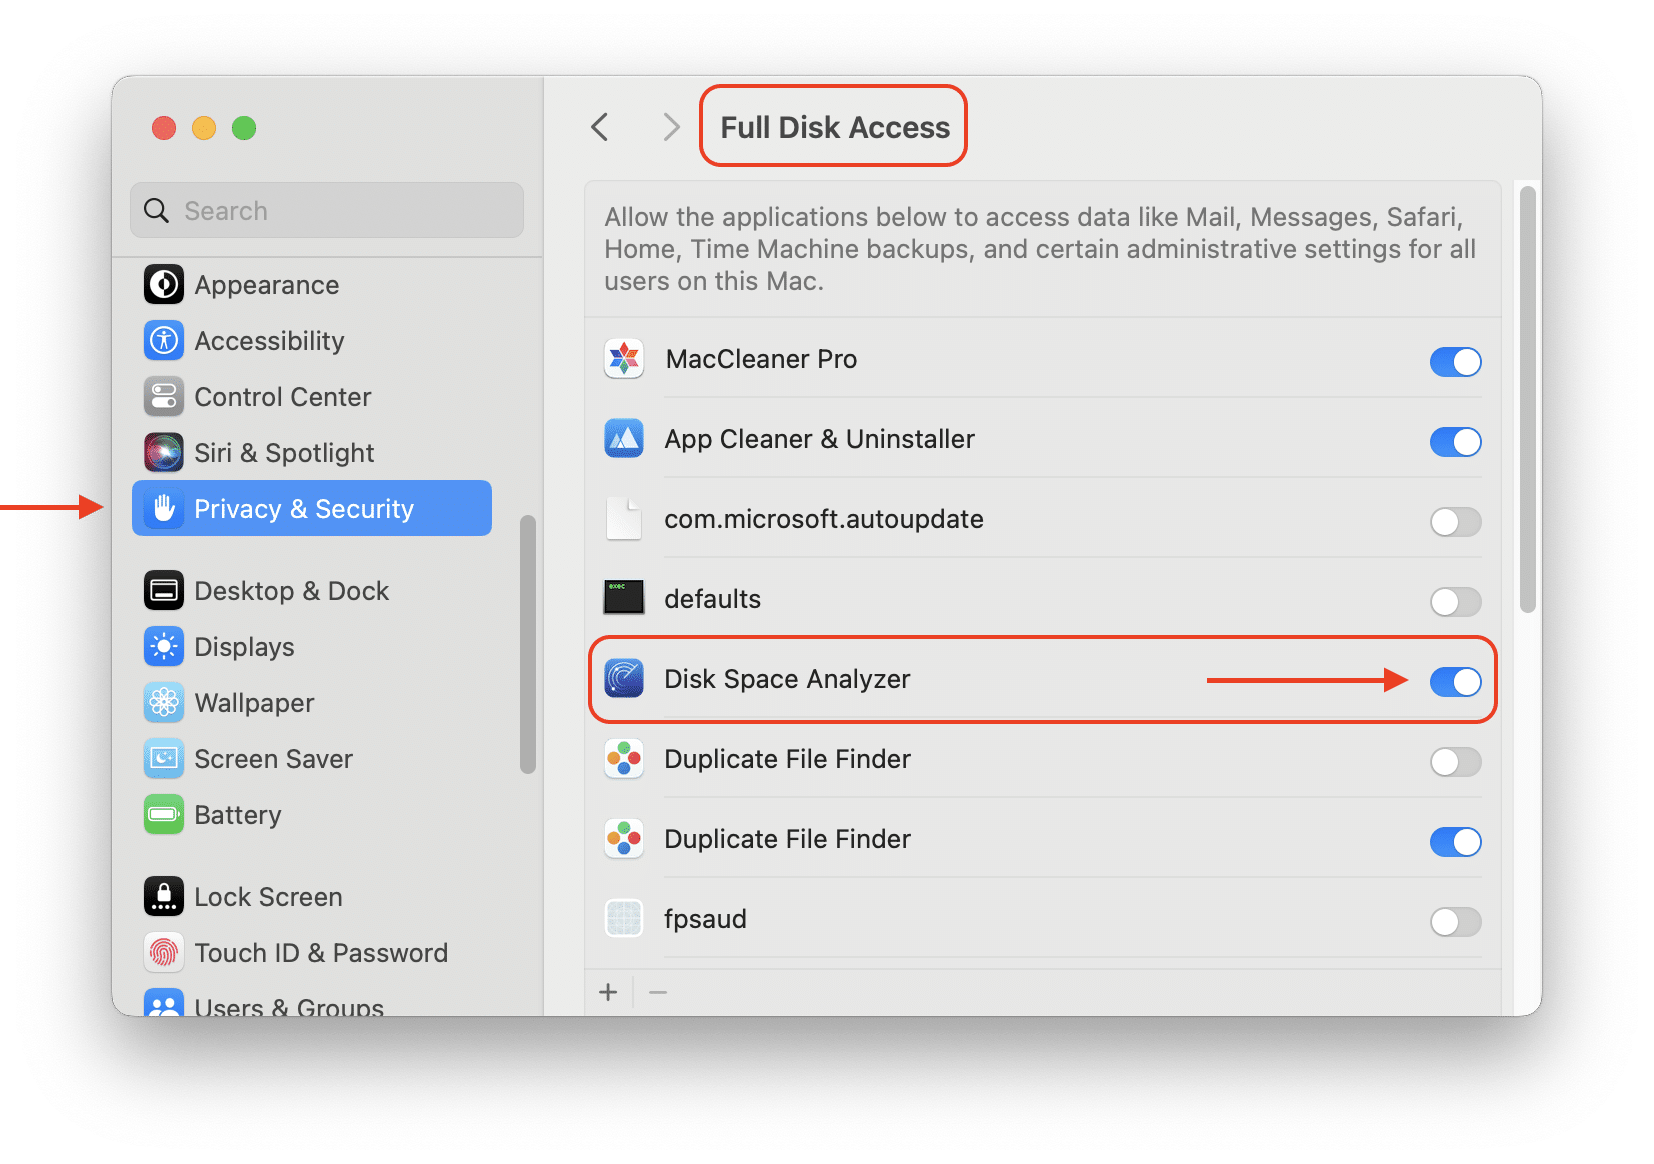
Here is how to grant Full Disk Access to the app:
- Open System Settings.
- Click Privacy & Security in the left panel.
- Scroll down the right panel and select Full Disk Access.
- Swith on Full disk access for Disk Space Analyzer. If you don’t see Disk Space Analyzer in the list of apps, click the Plus(+) button and add it.
Then launch Disk Space Analyzer and scan your Mac hard drive with Full Disk Access on your computer.
If you have any questions about Disk Space Analyzer, contact our support team. We will be happy to assist you.
Inaccessible space
In the storage map of Disk Space Analyzer, you can see a gray sector called Inaccessible Disk Space. On a Mac, it refers to disk space that cannot be analyzed due to some Apple system restrictions.
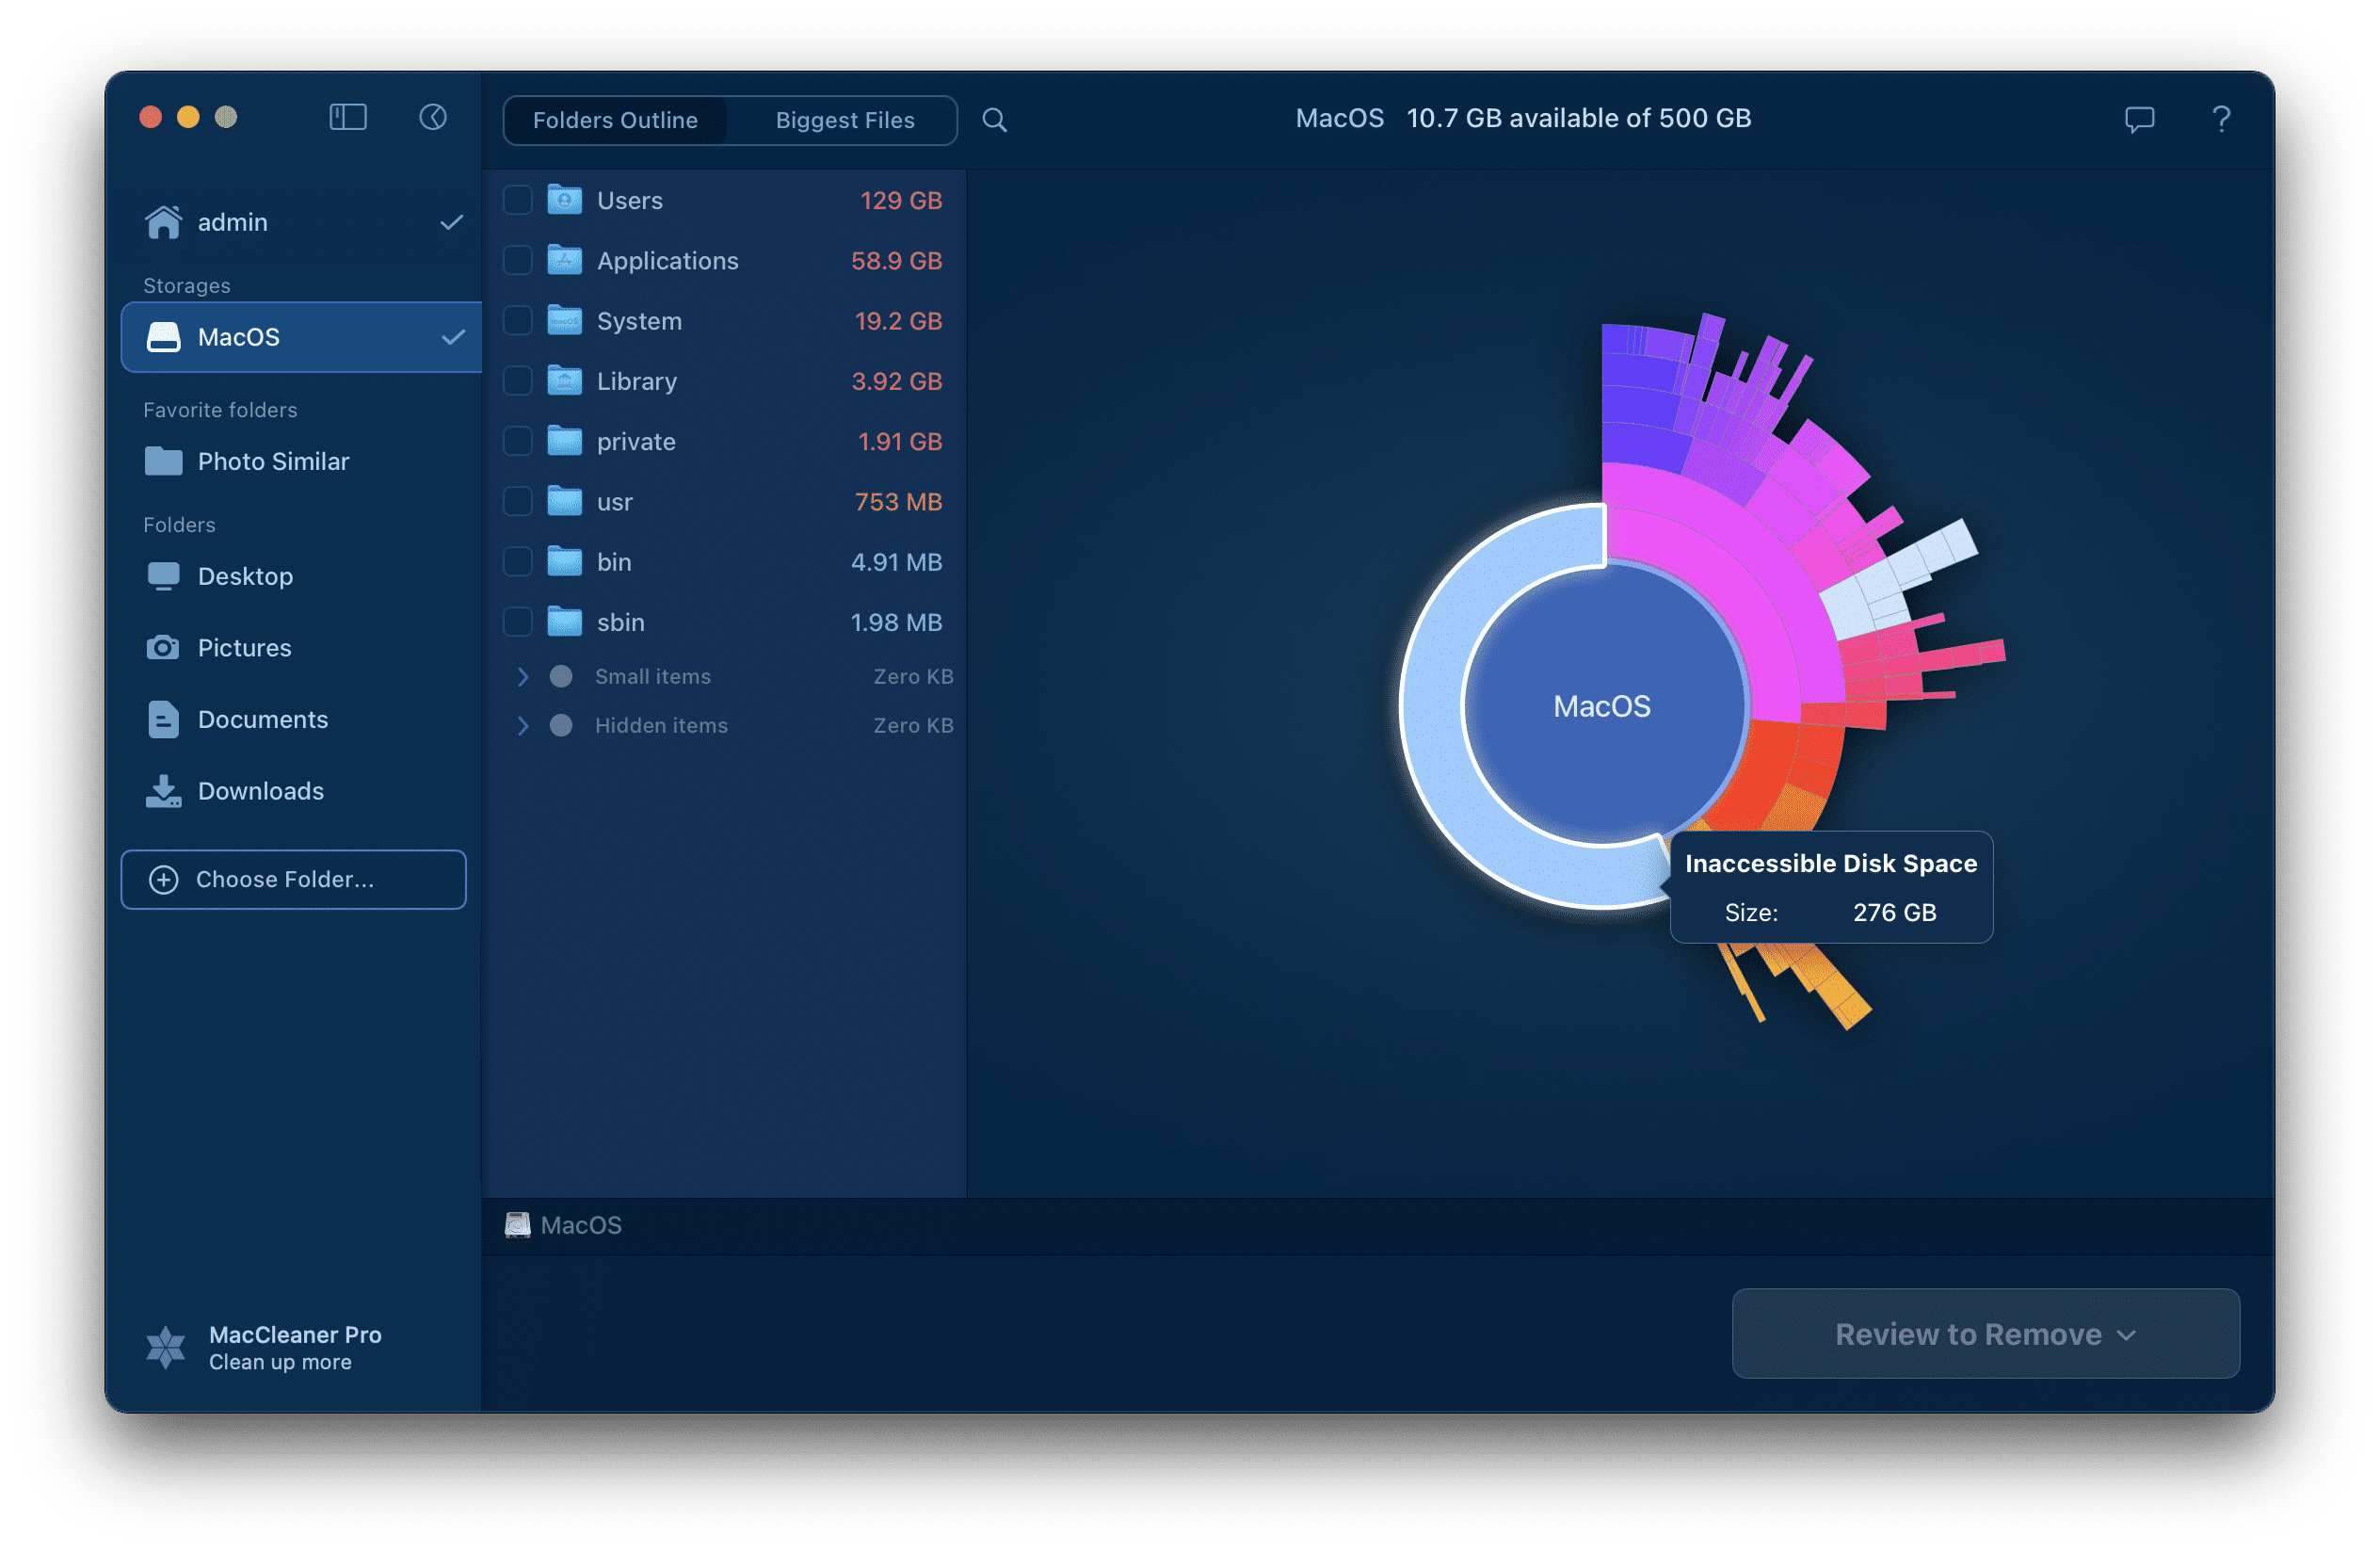
Inaccessible space is the difference between the occupied space on your disk and the total size of all files the app can detect.
Common reasons for inaccessible space:
- Lack of Full Disk Access. The app cannot scan certain system or user files without Full Disk Access permissions. To resolve this, go to System Settings → Privacy & Security → grant Full Disk Access for Disk Space Analyzer.
- Other user accounts. If there are multiple user accounts on your Mac, you cannot access or calculate the size of folders belonging to other users unless logged into their accounts.
- Time Machine snapshots. macOS may create local backup snapshots in a system folder when no external backup drive is connected. These snapshots are inaccessible to apps. Connecting your Time Machine drive allows the system to transfer backups and free up disk space.
In the Disk Space Analyzer downloaded from the App Store, inaccessible space also includes the purgeable space – the storage that your system keeps in case you want to re-download the files you removed to make some free space.
Uninstall Disk Space Analyzer
If for some reason you need to uninstall Disk Space Analyzer, follow these steps:
- Close Disk Space Analyzer.
- Remove Disk Space Analyzer from the Applications folder.
- In Finder, press the Cmd+Shift+G shortcut and navigate the ~/Library folder.
- Go to the Application Support folder and remove the Disk Space Analyzer folder from there.
- Empty your Trash.
License key
Disk Space Analyzer provides a free trial, which allows you to scan any folder or disk and use all the features of the app without any limitation. After the trial period ends, the features of removing selected items and showing them in the Finder will be locked.
To be able to use all the features of Disk Space Analyzer you need to activate the license.
Here is how to purchase and activate the license for Disk Space Analyzer:
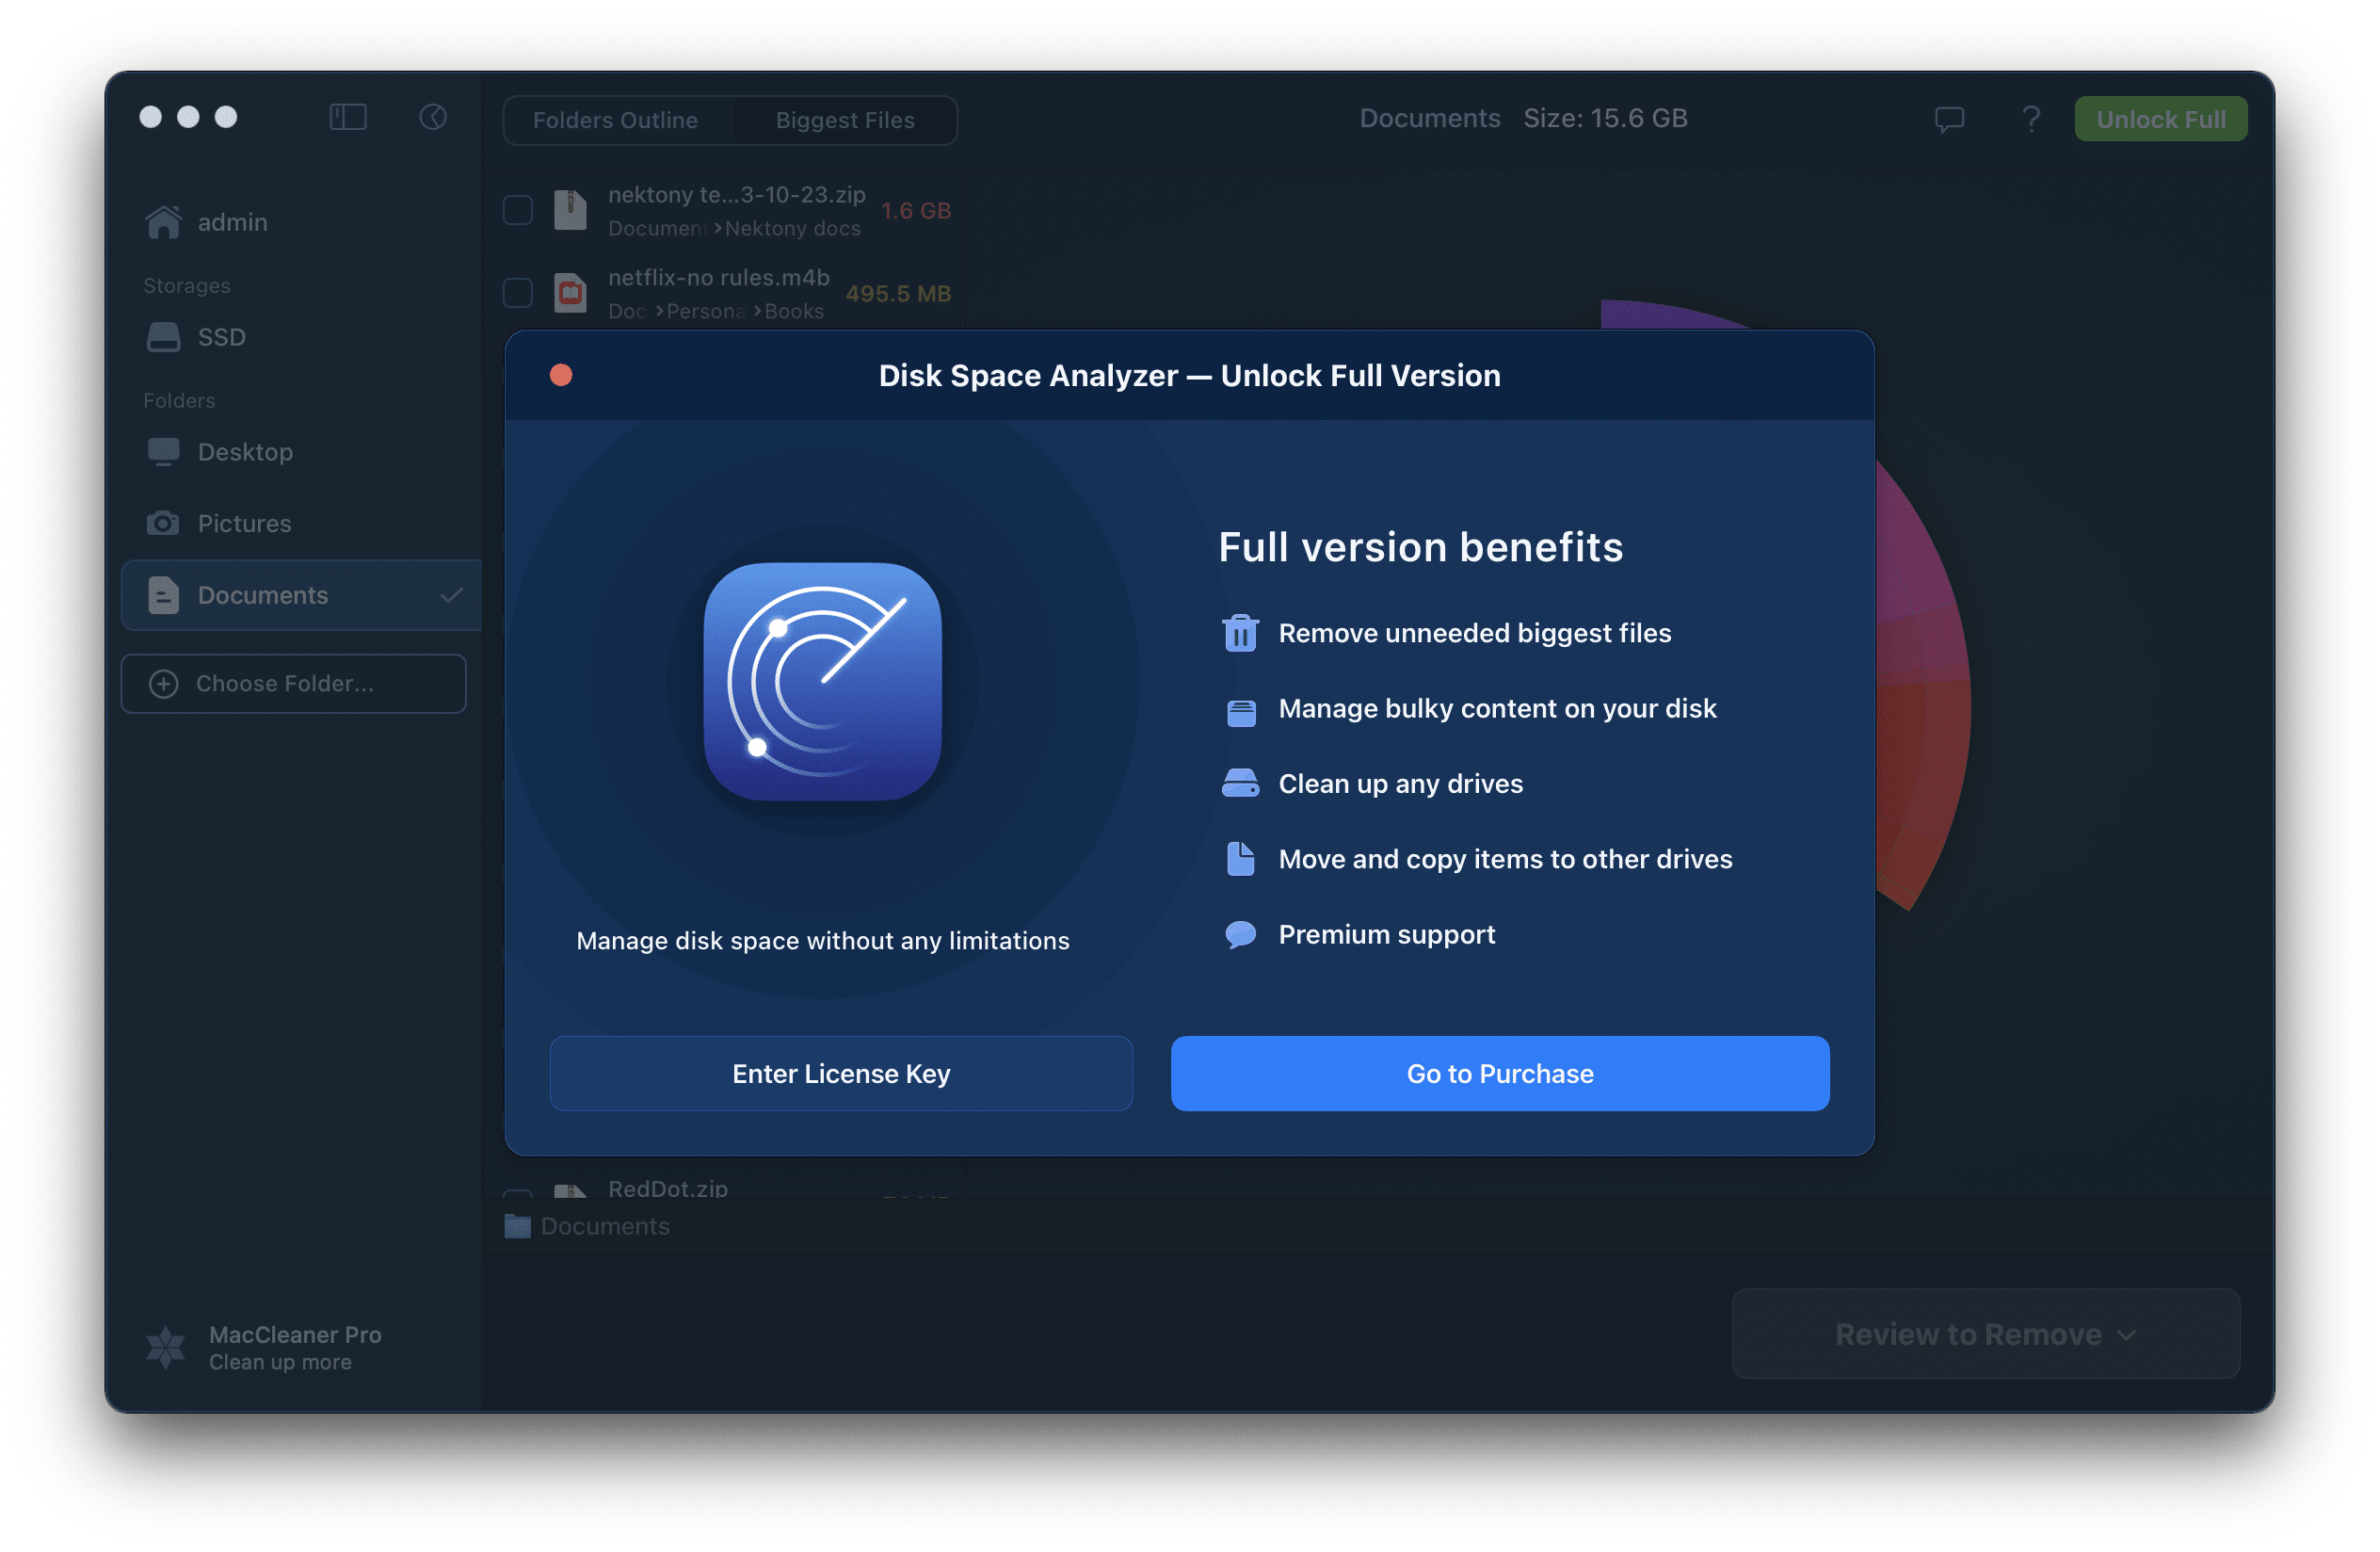
- Launch Disk Space Analyzer.
- Click Unlock Full Version.

- Click the Go to Purchase button.

- It will open a window where you can purchase Disk Space Analyzer. Also, you can use this link to open the purchase window. Choose your plan and follow the payment instruction.
- Once you have made the purchase, you will receive an email containing the license key.
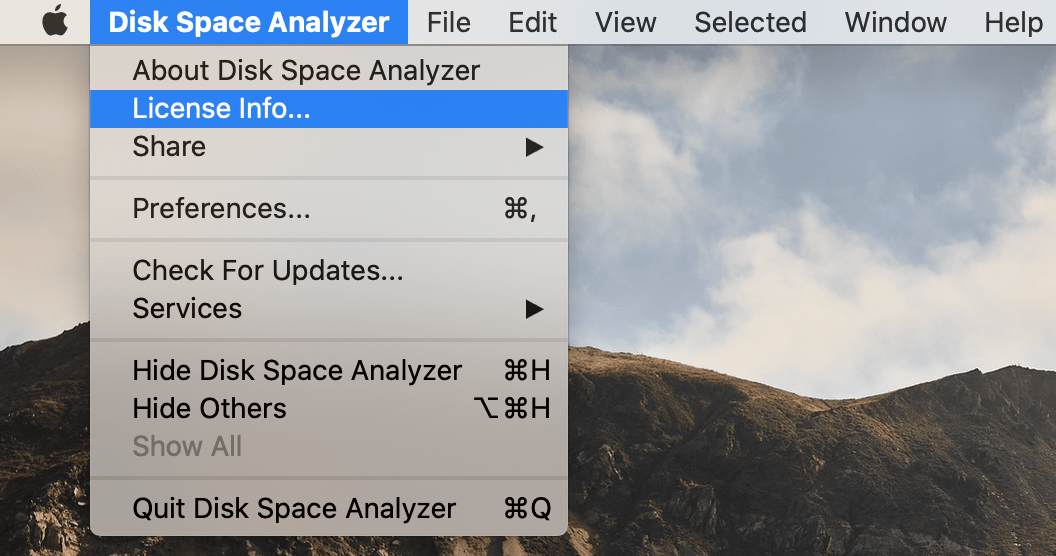
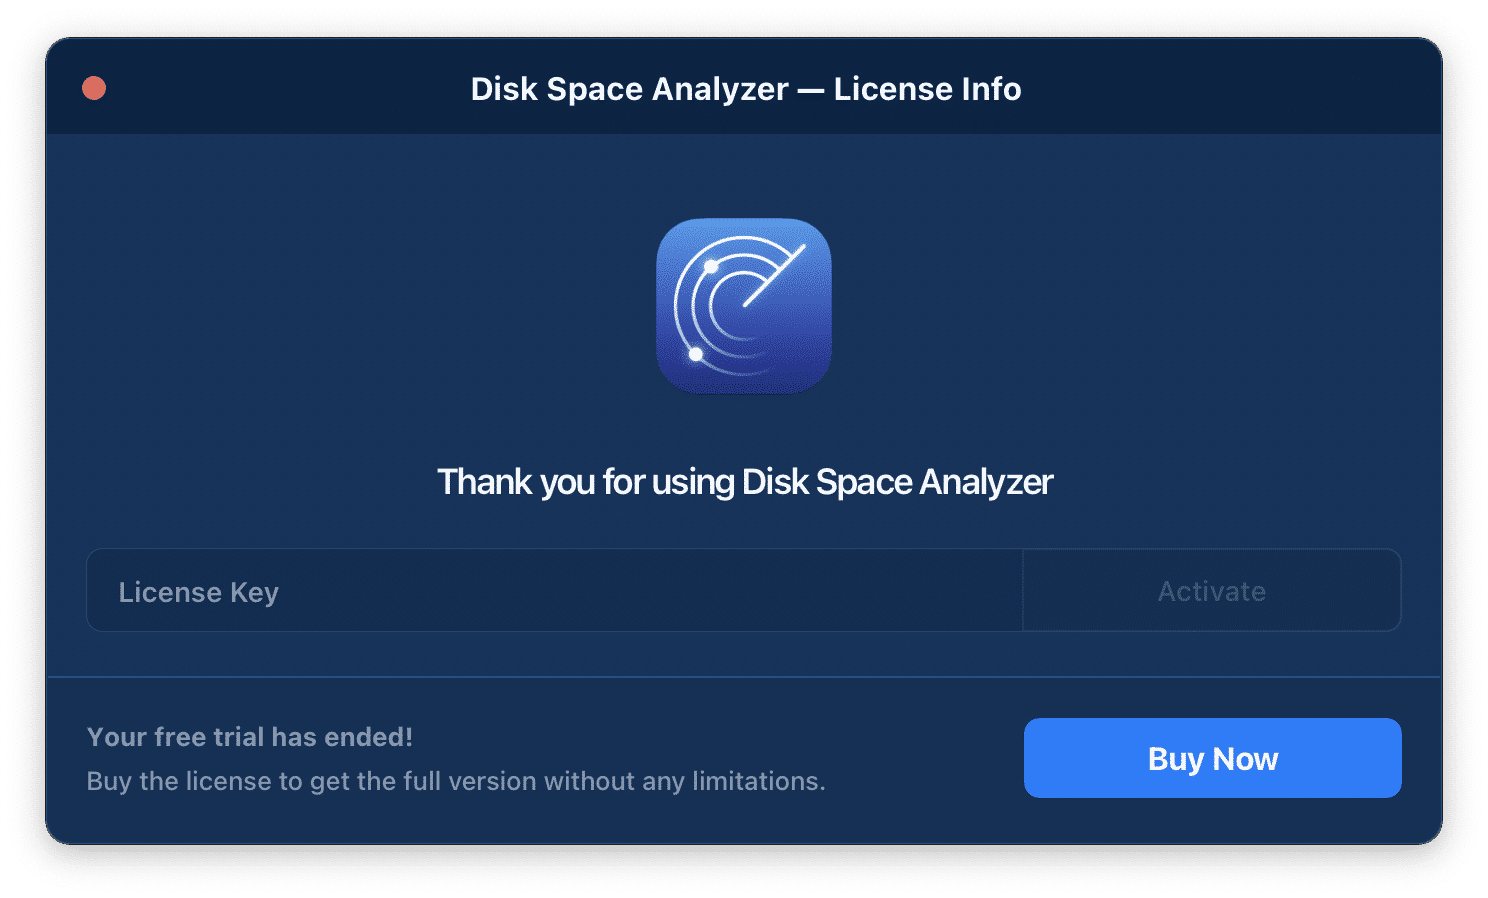
- To activate the license, click Disk Space Analyzer in the menu bar and select License info.

- Then copy and paste your activation key in the appropriate field. Click the Activate button.

Now you can use Disk Space Analyzer to analyze any disk space usage and all the additional options for operating files and folders without any limitation.
If for some reason you lose your key, contact our support team and provide the email address you used to make the purchase. We will send you your activation key.
Video Guides