November 3, 2025
Mac Startup Disk is Full? Steps to clean up it and fix the issue.
If you’ve ever seen the message “Your disk is almost Full”ma on your Mac, you know how annoying it can be. When your disk runs out of space, your Mac can slow down, or worse, stop working properly.
In this article, we’ll explain what the startup disk is, why it fills up, and share some easy ways to free up space on your Mac.
This Article Contains
Before we start
Below, we’ll explain how to manually clean a startup disk on Mac in 15 steps. If you do not have time to manually clean up your Mac’s startup disk, we recommend using MacCleaner Pro to both analyze storage space usage and free up disk space.
Use MacCleaner Pro to remove unneeded support files, duplicates, and unused applications and identify the largest files. It also can help you free up RAM and speed up your system.
What is Mac startup disk?
Startup disk is the primary storage drive on a Mac computer that holds the operating system (macOS) and is responsible for booting up the system. It also holds critical files such as your system applications, user settings, and files for macOS utilities like Time Machine backups.
By default, the Startup Disk is the disk named Macintosh HD. You can change that name, but it would still be the startup disk of your Mac.
According to data from Apple discussion communities, users face boot-up issues or slowdowns due to a low disk space. Over 80% of users report better system performance after freeing up disk space by deleting old or unused files.
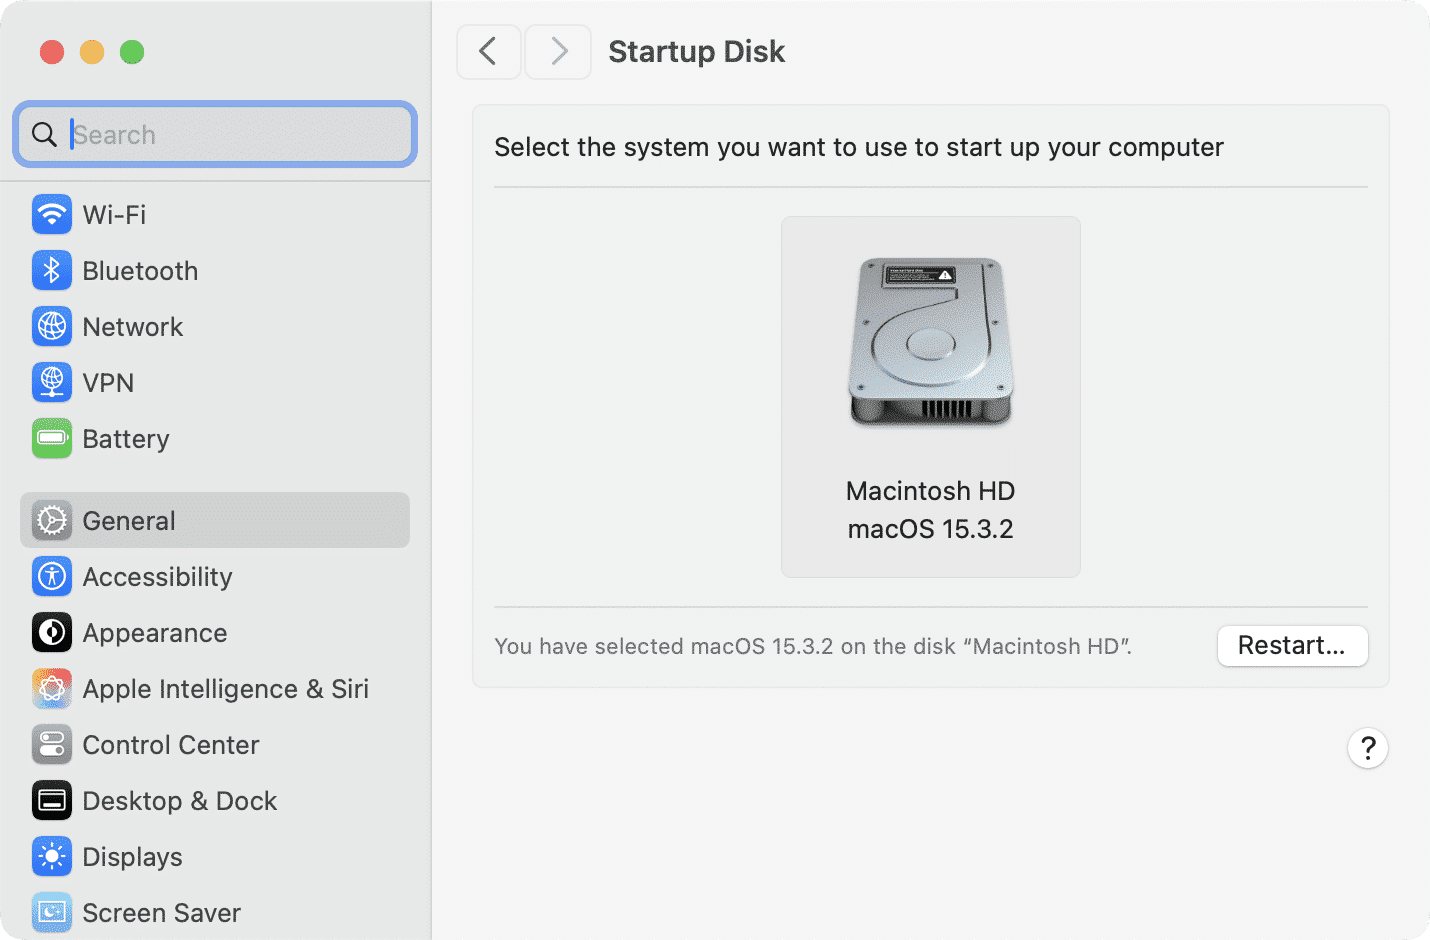
The reason you see the ‘Your disk is almost full’ message
The warning message indicating that your startup disk is almost full appears when there is no longer enough free space on it. This is often due to having too many files occupying your Mac’s hard drive, bringing free space to a dangerously low level.
Here is the message the users get on a Mac about Startup Disk Full problem. It says that your Mac is running low on disk space:
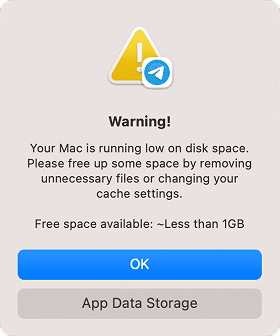
To resolve this issue, you need to free up some disk space.
How does a full Startup Disk affect your Mac?
Lack of free space on the startup disk leads to both unstable and slow performance of the Mac operating system. It can also prevent applications from being able to launch or work properly, including suddenly crashing or simply ceasing to work.
What to do if your disk is full?
In general, when your Mac startup disk is full, you need to clean up your Mac and recover some space. For the macOS system to work properly, you will need to save space from 10 to 30 GB by removing unused files.
You can clear caches, unneeded language packs, uninstall unused apps, remove duplicates, and delete other system junk on your Mac. This would free up much space on your hard disk.
Also, you should analyze your storage usage and remove all unneeded digital stuff. For example, you can upload some large files to the cloud or offload them to a backup disk, however, this approach requires you to have additional storage on Mac.
How to see what’s taking space on your disk
- Open System Settings.
- Click General in the sidebar.
- Click Storage in the right panel.
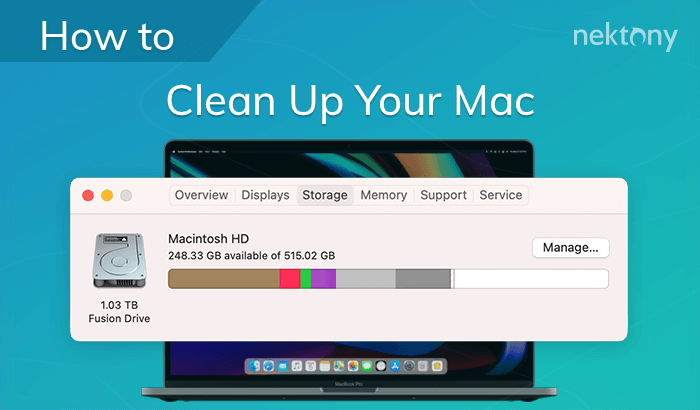
- You will see the barchart of what’s taking space on your disk.
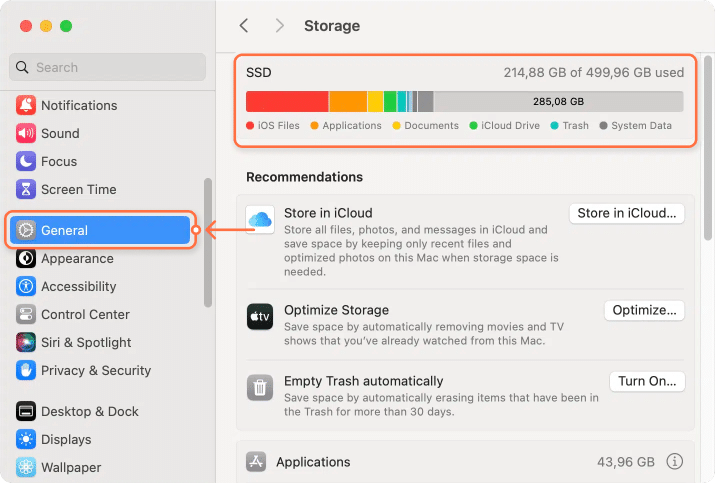
Note:
There are seven general categories of data stored on your Startup Disk. The larger the bar, the larger the space taken up by those types of files: Photos, Apps, Movies, Audios, Backups, Documents, and Other.
How to manage storage on Mac
On the storage usage panel, if you scroll down, you will see the recommendations on what you can do to optimize your storage on Mac:
- Store your files in iCloud.
- Enable the Optimize Storage option which means that the system will automatically remove movies and TV shows that you have already watched from your Mac.
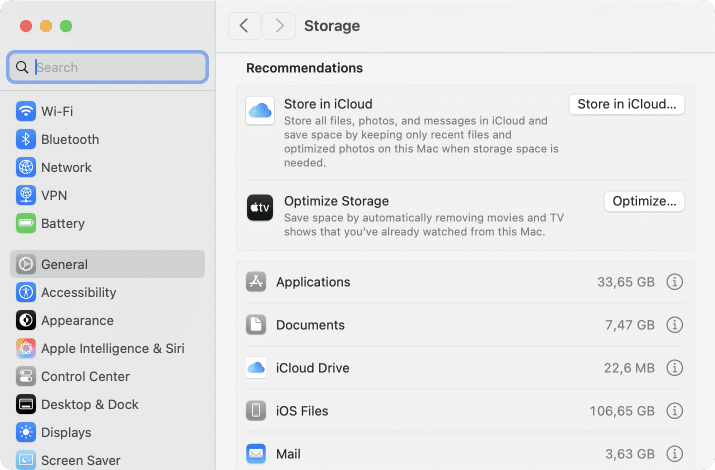
Also, in this window, you can see what types of files and items take up large space on your Mac: applications, iOS backups, music, photos, Mail, or documents. Usually, movies, pictures, or backups take up the most space.
It often happens that the biggest space eaters are the “Other” files, including caches, logs, cookies, archives, disk images, plugins, extensions and so on.
You can remove temporary files manually or use special software tools for quick and easy disk cleanup. Watch the video to see how easy it is to check disk space and fix full startup disk error with MacCleaner Pro.
Video Guide: Disk cleanup on Mac
2:37

How to clear Mac Startup Disk
1. Clear cache
A cache file is a temporary data file created by apps, browsers, and many other programs to help your Mac run faster. Note that when you remove app cache files, they will be recreated the next time you run the application. Even so, it’s a good idea to delete browser cache and apps cache from time to time.
Some apps installed on your Mac you may no longer be using, as well as their leftovers, still remain in the Cache folder and occupy tens of gigabytes of your disk memory.
Cache files are stored in the Library folders, which you can find in the following locations:
/Library/Caches
Copy
~/Library/Caches
Copy
In /Library/Caches you will find temporary files created by the system. Usually, these files don’t occupy too much space. However, in the
By default, the Library folder is hidden on macOS, as Apple keeps their system files and protects the files from accidental removal.
Here is how to manually remove caches on Mac:
- Open Finder.
- Go to the menu bar and click Go → choose Go to Folder….
- Type in the dialog box and press Return.
~/Library/CachesCopy
- You will see the Caches folder where all applications store their cache files. Keep the Caches folder but delete the subfolders with applications’ cache files.
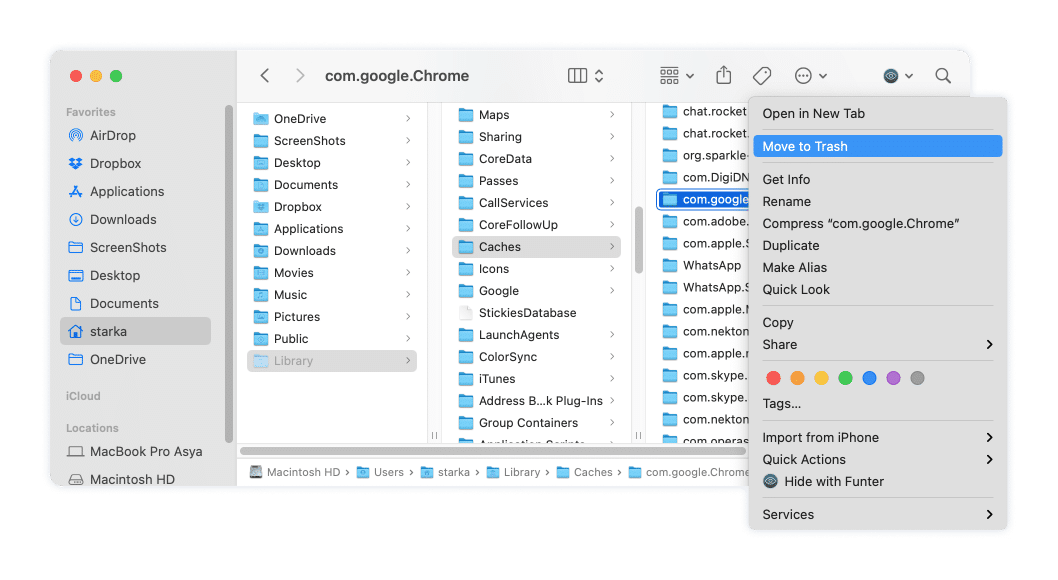
Important!
Cache files with an “apple” in the name cannot be deleted. Deleting such files may cause a system crash..
2. Remove logs
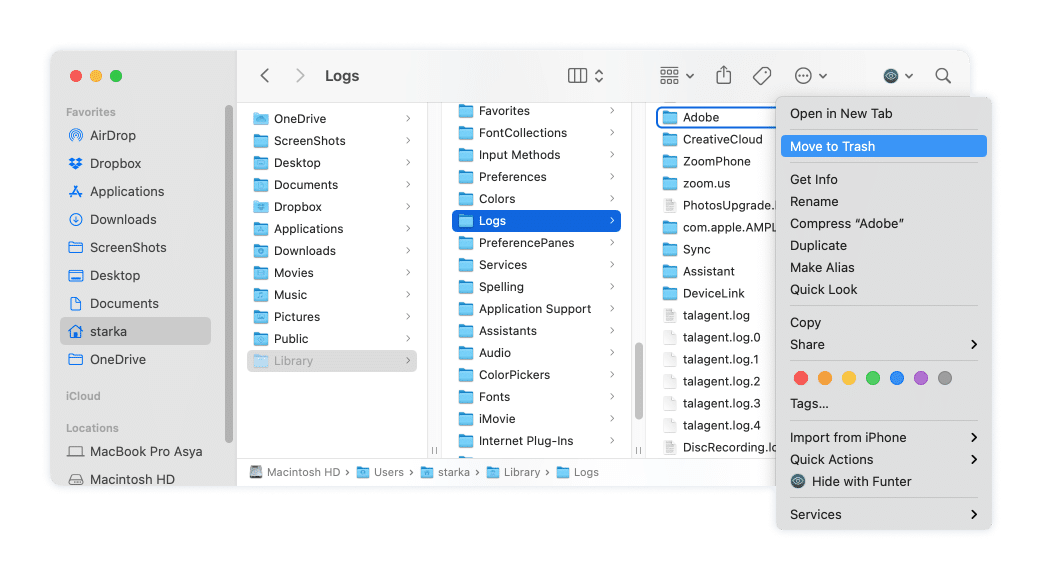
While the Library folder is open, you can also find another type of temporary files – logs. They are stored in the Logs folder. Please make sure that before you remove system logs, apps, and mobile devices, you no longer need them.
3. Remove localization files
Language Resources is the data stored by apps for different languages. Apart from English, lots of apps include languages such as German, Chinese, French, Portuguese, Italian, Korean, Russian, Hindi, and others.
For instance, Spotify has 54 languages. If you don’t need all of these translations, you can get rid of unneeded ones from within the Spotify Contents folder.
Here is how to find and remove unneeded language files of apps:
- Open the Applications folder.
- Select an app and right-click on it.
- Choose Show Package Contents.
- In the window that appears, select Resources and delete useless language files.
Generally these files have the first two letters of a particular language and an .lproj extension.
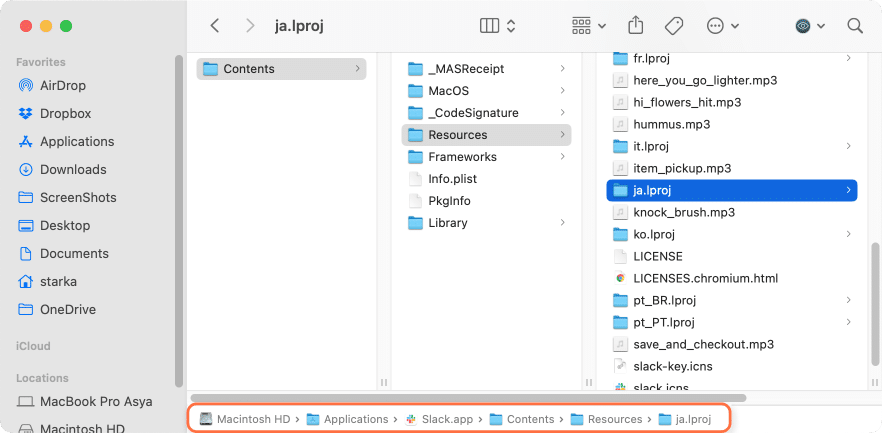
Using this method, you can remove all unused languages in your applications. Be careful to only delete certain language files, since deleting important application files can affect the app’s performance or even lead to a crash.
Note:
English is the base language, so you should never delete it.
4. Delete downloads
How many times have you downloaded files from web browsers, messengers, torrents, and mail? When you download files from the Internet, by default they are saved in the Downloads folder, which can easily be found at this location:
/Macintosh HD/Users/Current User/Downloads
Copy
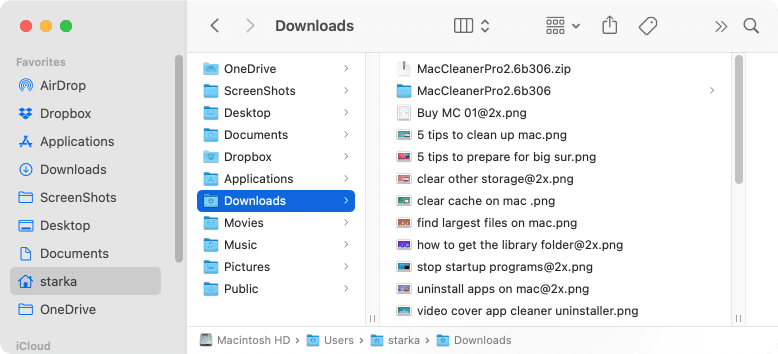
According to statistics, the average user accumulates 0.5 GB per week in the Downloads.
All the files in the Downloads folder usually remain unorganized and may take up several Gigabytes of space on your startup disk. While you may have needed to retrieve files very rarely, for example, installation files (disk images), more than half the files in Downloads are not needed and should be deleted.
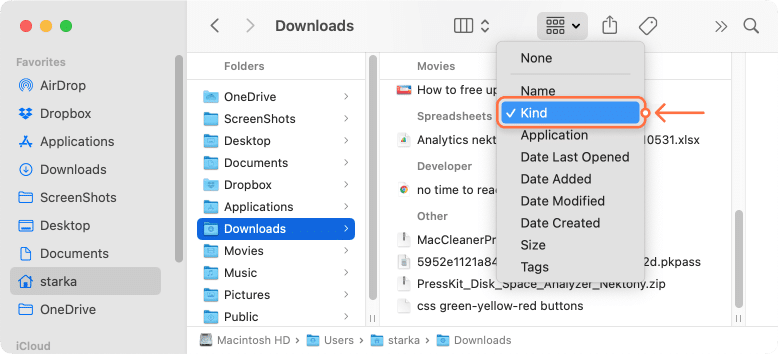
Sorting the list of files by size, kind, or date will help you to quickly find out which useless files you have and remove them.
5. Delete Mail downloads
If you use the standard macOS Mail application, the system saves them to a separate folder on your hard drive. After several months of using the mail client, the folder’s size can grow up to several GB.
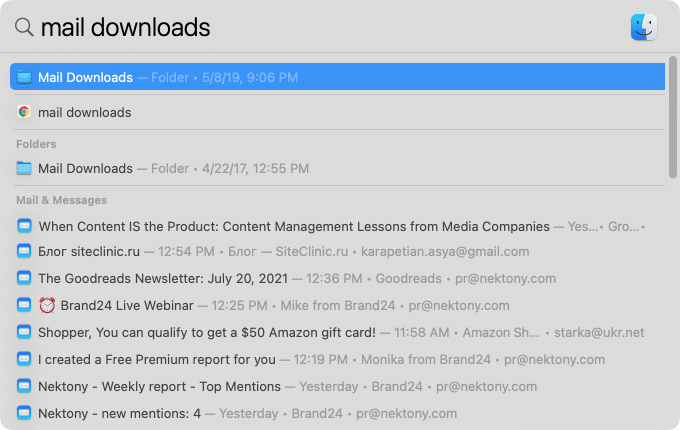
The easiest way to find this folder is to use the Spotlight search. Just type Mail Downloads in the search field.
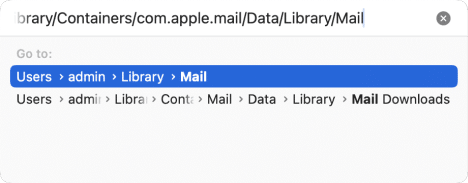
If this method didn’t work, then open the Finder → press Shift+Cmd+G key shortcut and in a search field enter:
~/Library/Containers/com.apple.mail/Data/Library/Mail
Copy
Preview the files and save those that you need, or delete all the files at once.
6. Check and empty Trash
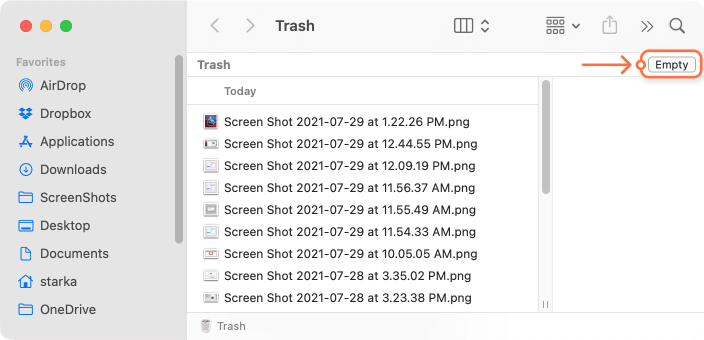
It may sound elementary, but we frequently delete files and forget to empty Trash. The files in the Trash still occupy your disk, so it is recommended that you empty the Trash folder at least once a week.
To delete files from the Trash folder permanently, right-click on the in the dock panel and select . Another way to complete this task is to open the Trash and click the button in the top right corner.
How to easily remove all junk files
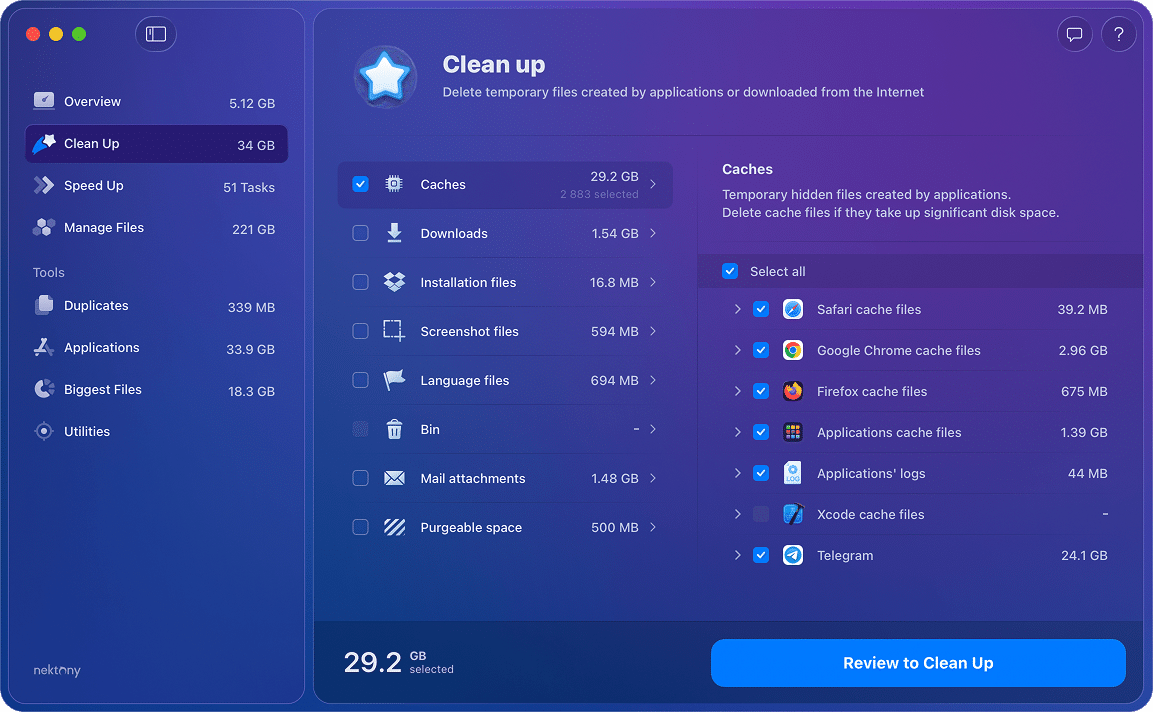
All previous steps can be easily done by MacCleaner Pro. MacCleaner Pro will automatically find all system junk and allow you to remove them in just a few clicks. The software tool will find all unneeded files in just a few seconds: Downloads, Trash, Cache, Logs, and Language Resources.
- Download and launch MacCleaner Pro.
- Go to the Clean Up section.
- Take a look at the junk files and select unneeded types.
- Then click on Review to Clean Up and confirm removal.
7. Delete old iPhone backups
If you regularly back up your iPhone to your Mac, check whether you don’t store old unneeded backup files on your disk. Backups consume a significant amount of storage space, as they include movies, music, and other large files.
Here is how to find and remove iPhone backups from your Mac:
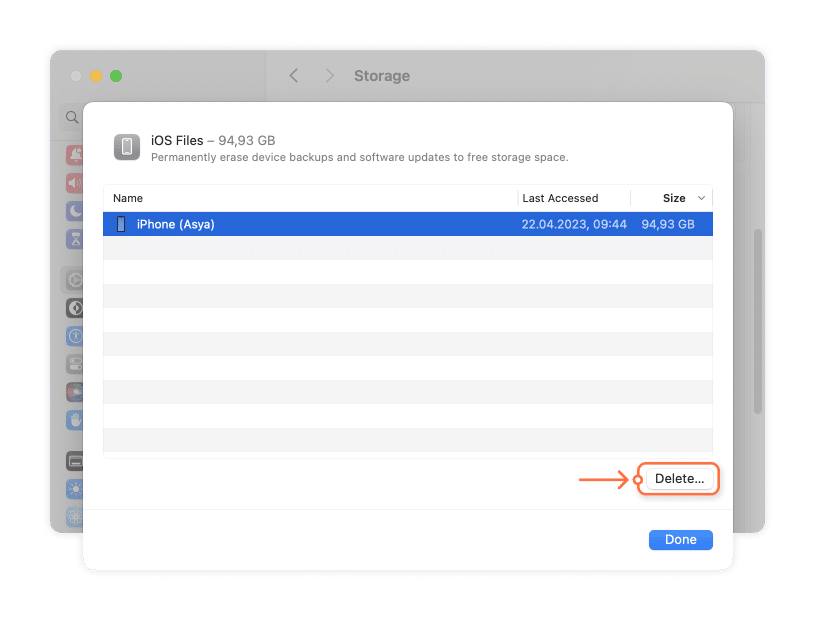
- Open System Settings.
- Click General in the sidebar and select Storage in the right panel.
- Scroll down and locate iOS Files in the list of types of items taking space on your Mac. Click the “i” icon in this line.
- Here you will find the list of all backup files you have made.
- To remove unneeded backups, select them and click on Delete.
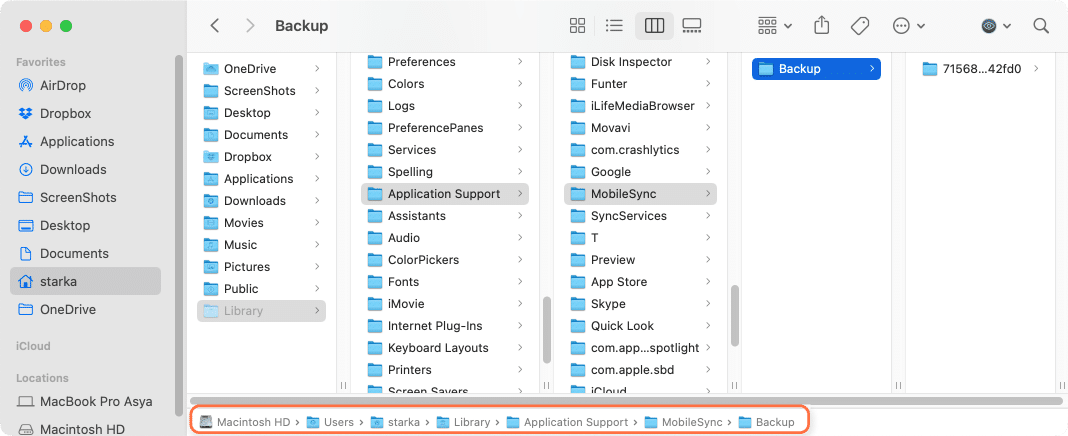
Another way to find and remove iOS backups is to go to the following location in Finder:
~/Library/Application Support/MobileSync/Backup
Copy
8. Uninstall unused apps
Check your Applications folder. The number of all the installed applications may sometimes exceed 100; in fact, some may not be used regularly or even at all. These apps take up a lot of space on your Mac’s hard drive. So it’s time to uninstall such unused programs.
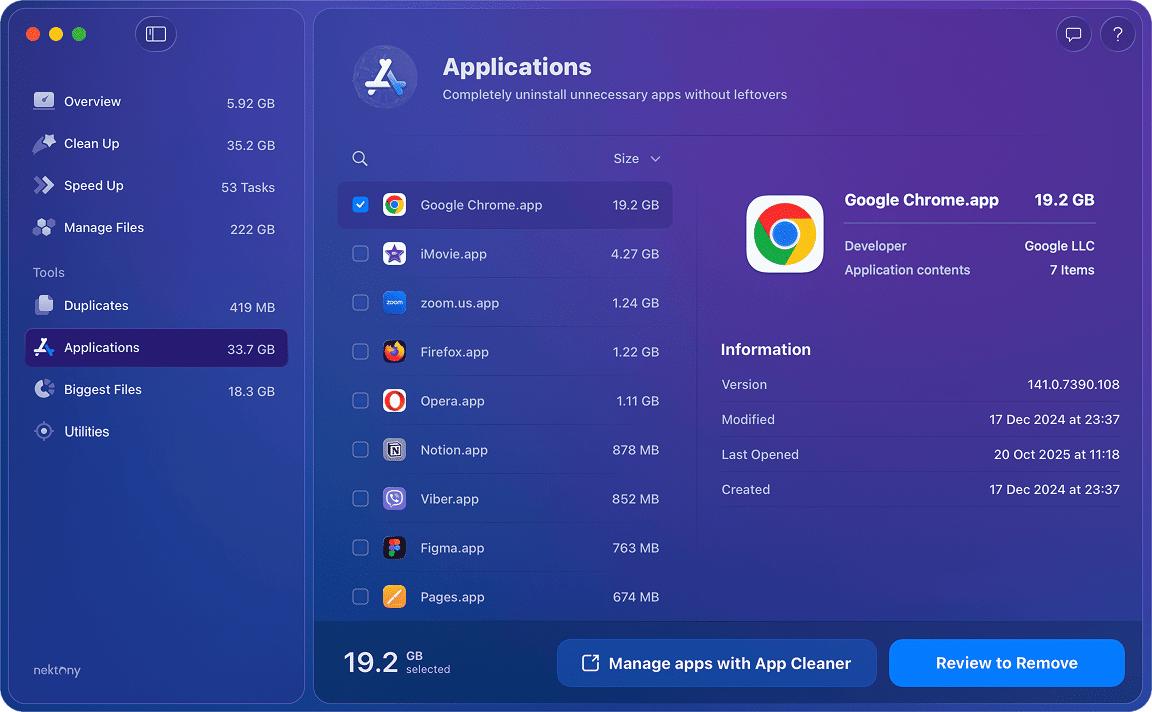
But please note, moving an app to the Trash just by dragging and dropping it is not enough. You need to remove the app’s cache and other service files, which are stored in the Library folder. We recommend that you read the instructions on how to uninstall unnecessary apps completely or use MacCleaner Pro. It will help you remove apps both correctly and completely.
- Go to the Applications section from the left panel.
- Choose unneeded apps.
- Click the Review to Remove button.
- Confirm the removal.
9. Remove leftovers
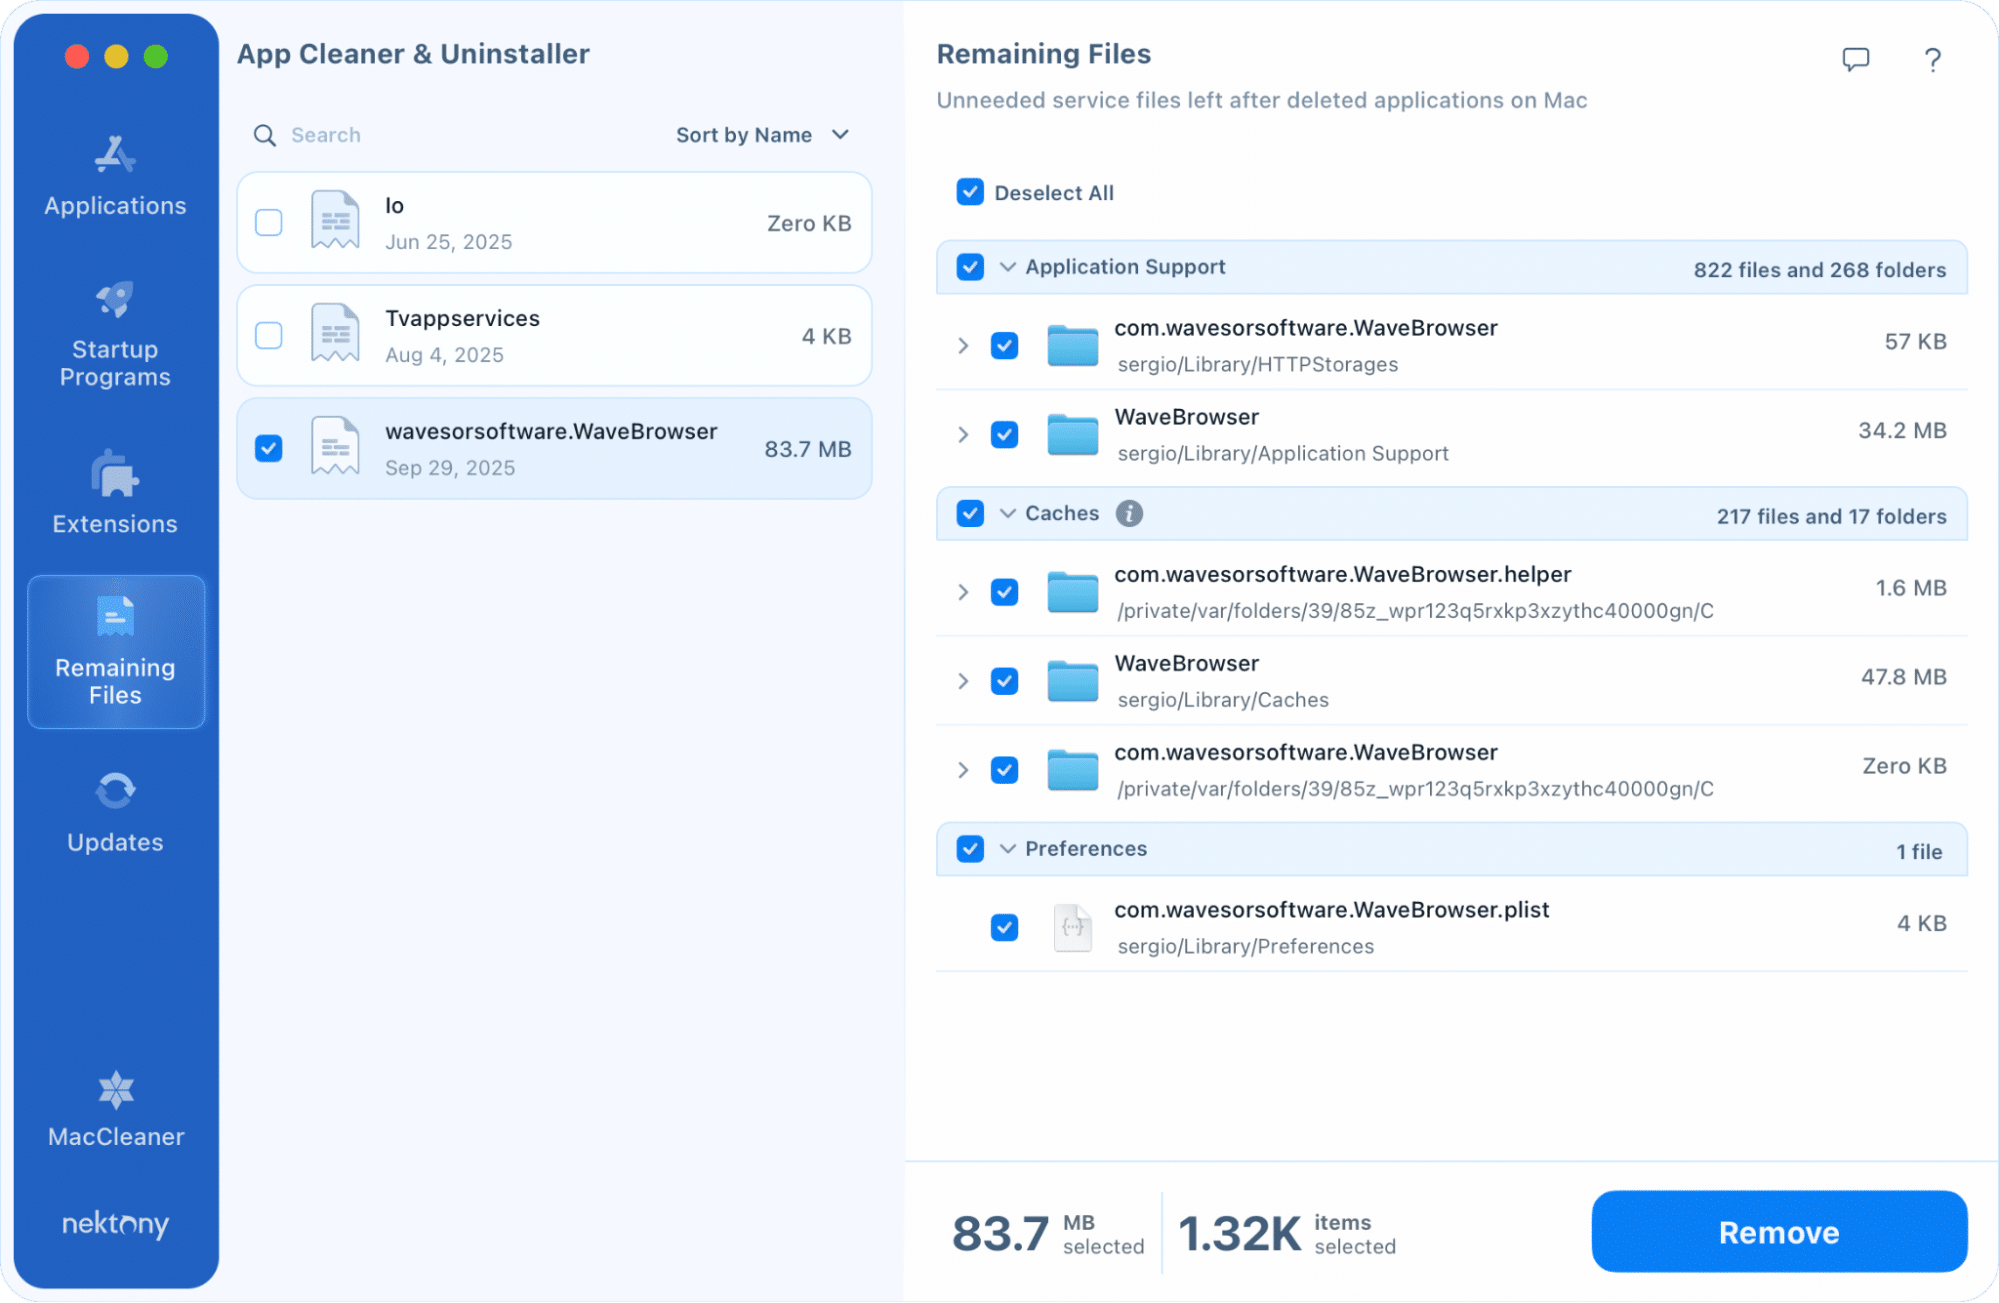
Leftovers are the broken service files left after deleting the apps. Such broken service files are unnecessary, and they just take up your disk memory, so you should find and remove them.
The apps’ leftovers are usually stored in the Library folder; however, they sometimes can be scattered in different locations all over your drive, littering your Mac. Searching for them manually seems to be an impractical task. You can use a Pro tool from the MacCleaner Pro’s bundle – App Cleaner & Uninstaller – that automatically finds leftovers and displays them in the Remaining Files section.
10. Move large and rarely used files to external storage
If you need to free up gigabytes of data, the best way to do it as quickly as possible is to check out your Movies folder. Video content is the biggest space-eater, as well as audio and photo files in the Music and Pictures folders.
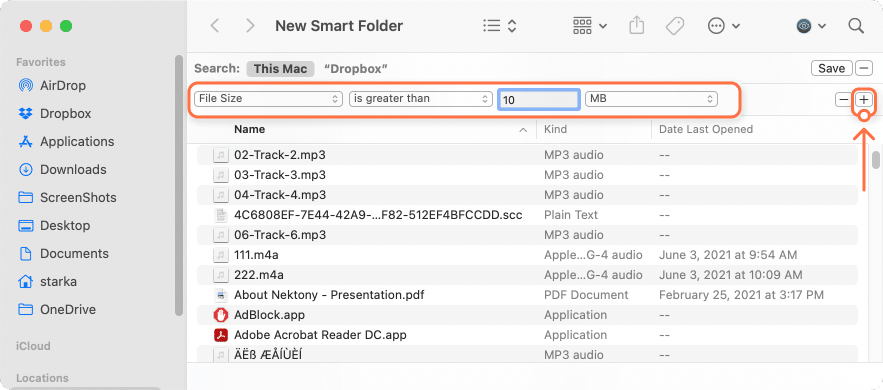
Also, check disk space for other large files with Finder’s Smart Folder. For this, go to File in the menu bar and select .
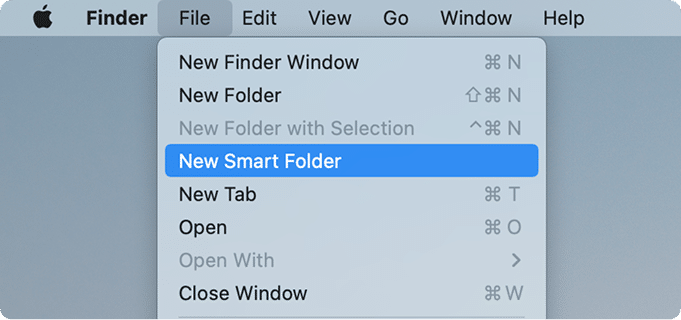
In the top right corner click the button and, in the parameter fields, select and set the needed file size, for example, 1GB or 500MB. Preview the largest files and remove or move unused ones.
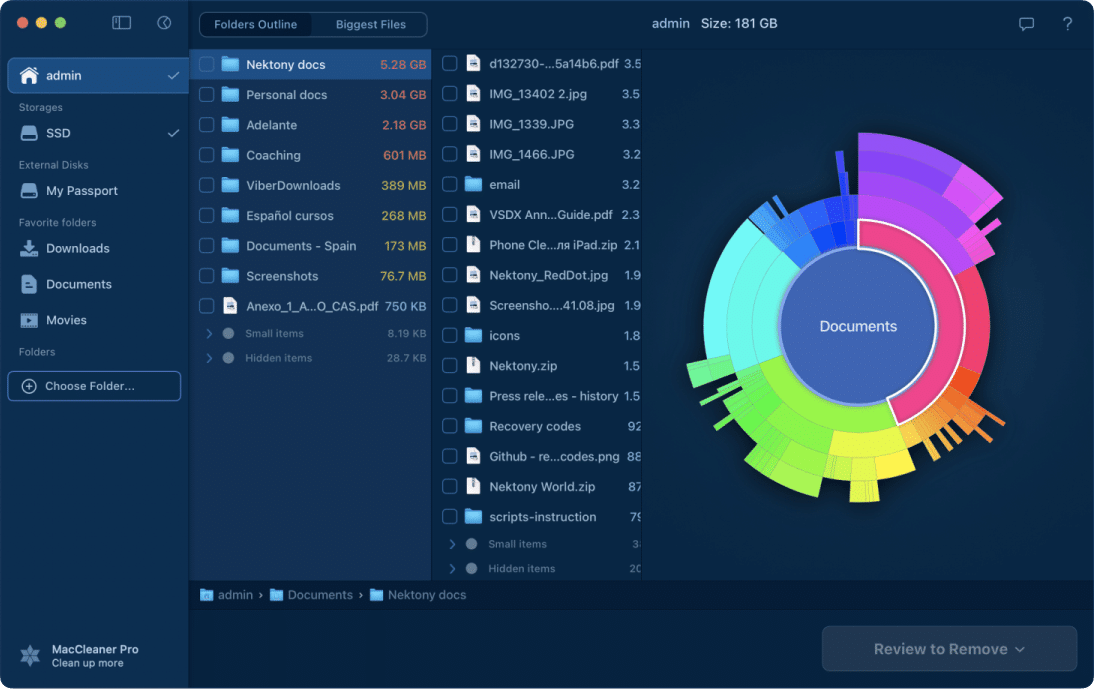
Even if you have removed the largest files, like videos or music, you may still have lots of other huge files you don’t suspect. We recommend that you analyze your disk space usage deeper and find out what’s taking up the most space on your disk. For this, you can use another tool from MacCleaner Pro – Disk Space Analyzer.
Disk Space Analyzer shows you the disk space usage in a sunburst diagram and allows you to easily manage the biggest files and folders and transfer old unused files to an external device for having more free storage space.
11. Use cloud-based data storage services
Keep your big files on cloud-based storage. You can use iCloud, Dropbox, Google Drive or any other online storage. Usually all cloud storage services provide some space for free.
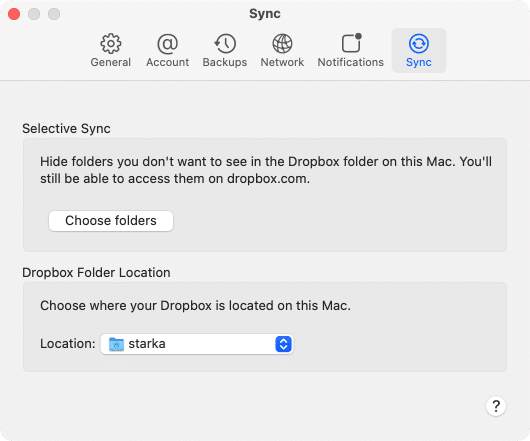
For example, Dropbox provides two complimentary gigabytes of free space. Recommendation: use the Selective synchronization option, which allows you to delete content sent to the cloud from the hard drive. To enable this option in Dropbox, go to the Preferences → Sync section and specify the desired folders to sync.
Recommendation
Use the Selective synchronization option, which allows you to delete content sent to the cloud from the hard drive. To enable this option in Dropbox, go to the Preferences → Sync section and specify the desired folders to sync.
12. Delete unnecessary desktop pictures and screensavers
Most Mac users like good screensavers and do not limit themselves to the default collection. If you are a screensaver fan and have a collection of them, don’t forget that they may take up sizable memory space on your disk. It is recommended that you remove unneeded screensavers. For this purpose, you can again use App Cleaner & Uninstaller, which finds all the screen savers and shows them in the Extensions section.

To find the desktop wallpapers, go to the following directory:
/Macintosh HD/Library/Desktop Pictures
Copy
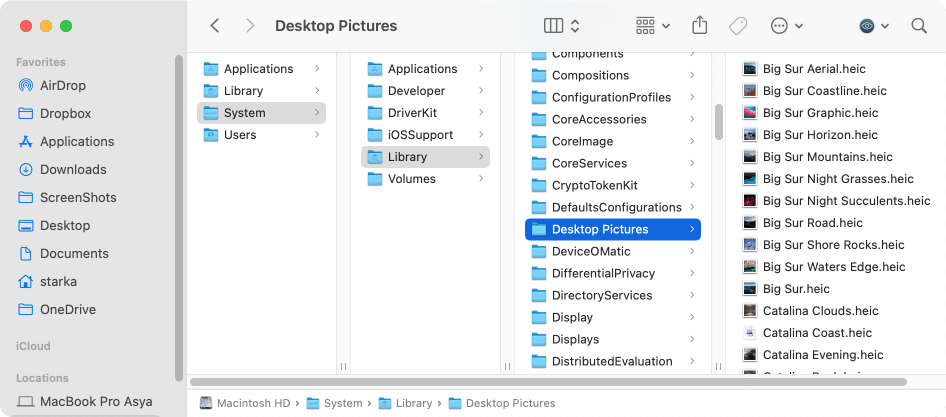
It contains 41 images of 1.14 GB. You are free to delete all redundant pictures.
13. Find and delete duplicate files
You may have created copies of documents or downloaded some files twice, and later forgotten about them. Duplicate files take up useless space on your Mac. Searching for dupes manually seems to be a long and hard process. The only thing you can do very quickly is to find the duplicate music files in the Music Library.
To find duplicate music and video files on Mac, follow these steps:
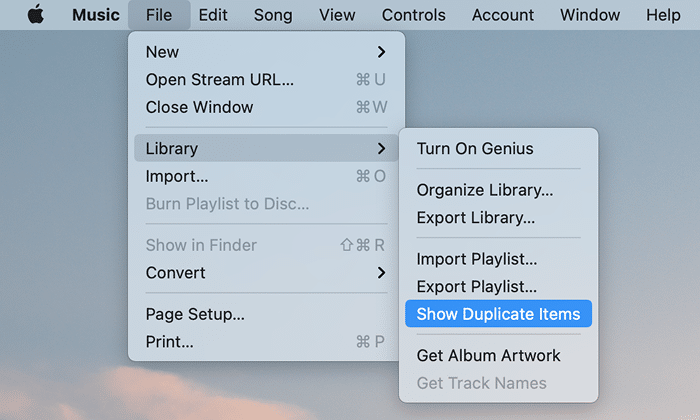
- Open the Music application.
- Go to its menu and click on File.
- Select Library → press Option (Alt) → Show Exact Duplicate Items.
The Music app will show you a list of duplicate songs. Examine the list and remove the duplicates.
Unfortunately, for all other types of duplicate files, you will have to look through each folder individually. This could take hours. But don’t panic; there is a solution.
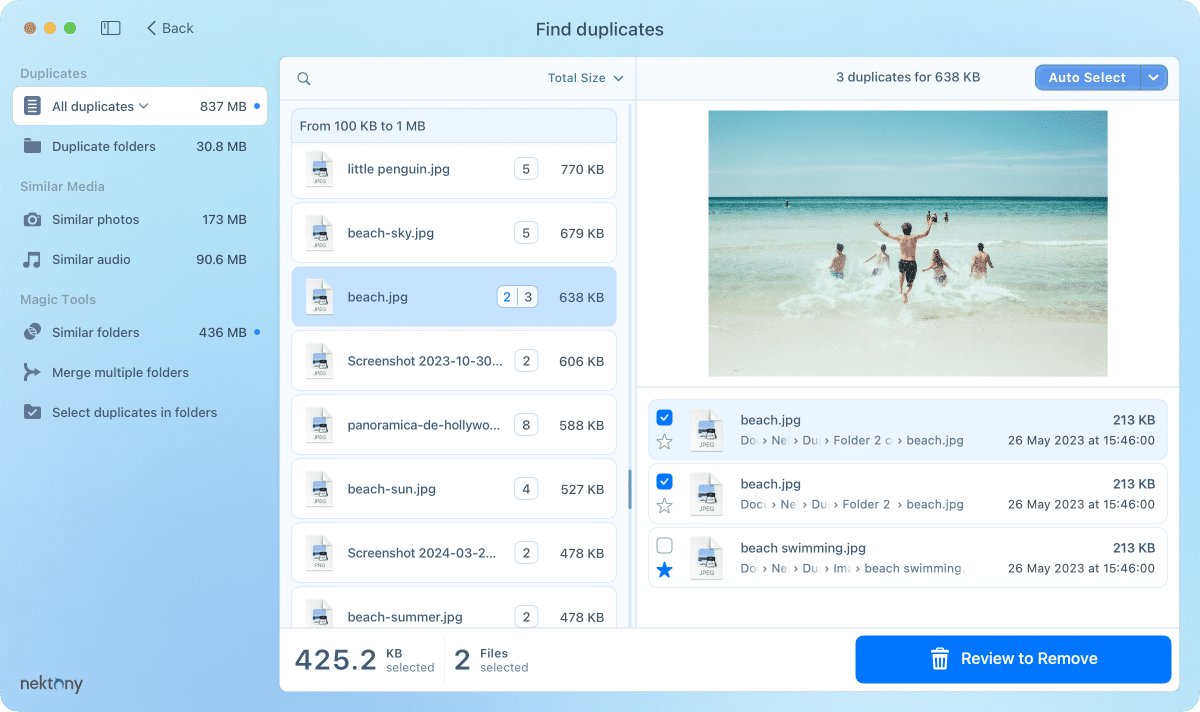
Use the appropriate tool from MacCleaner Pro – Duplicate File Finder, which will help you find and delete duplicates in less than five minutes.
Duplicate File Finder allows you to scan any folders and drives and find all duplicate items, including videos, music, pictures, documents, archives, and others. The application finds even similar folders and can merge them, making it easy to organize your files and folders.
14. Clear RAM
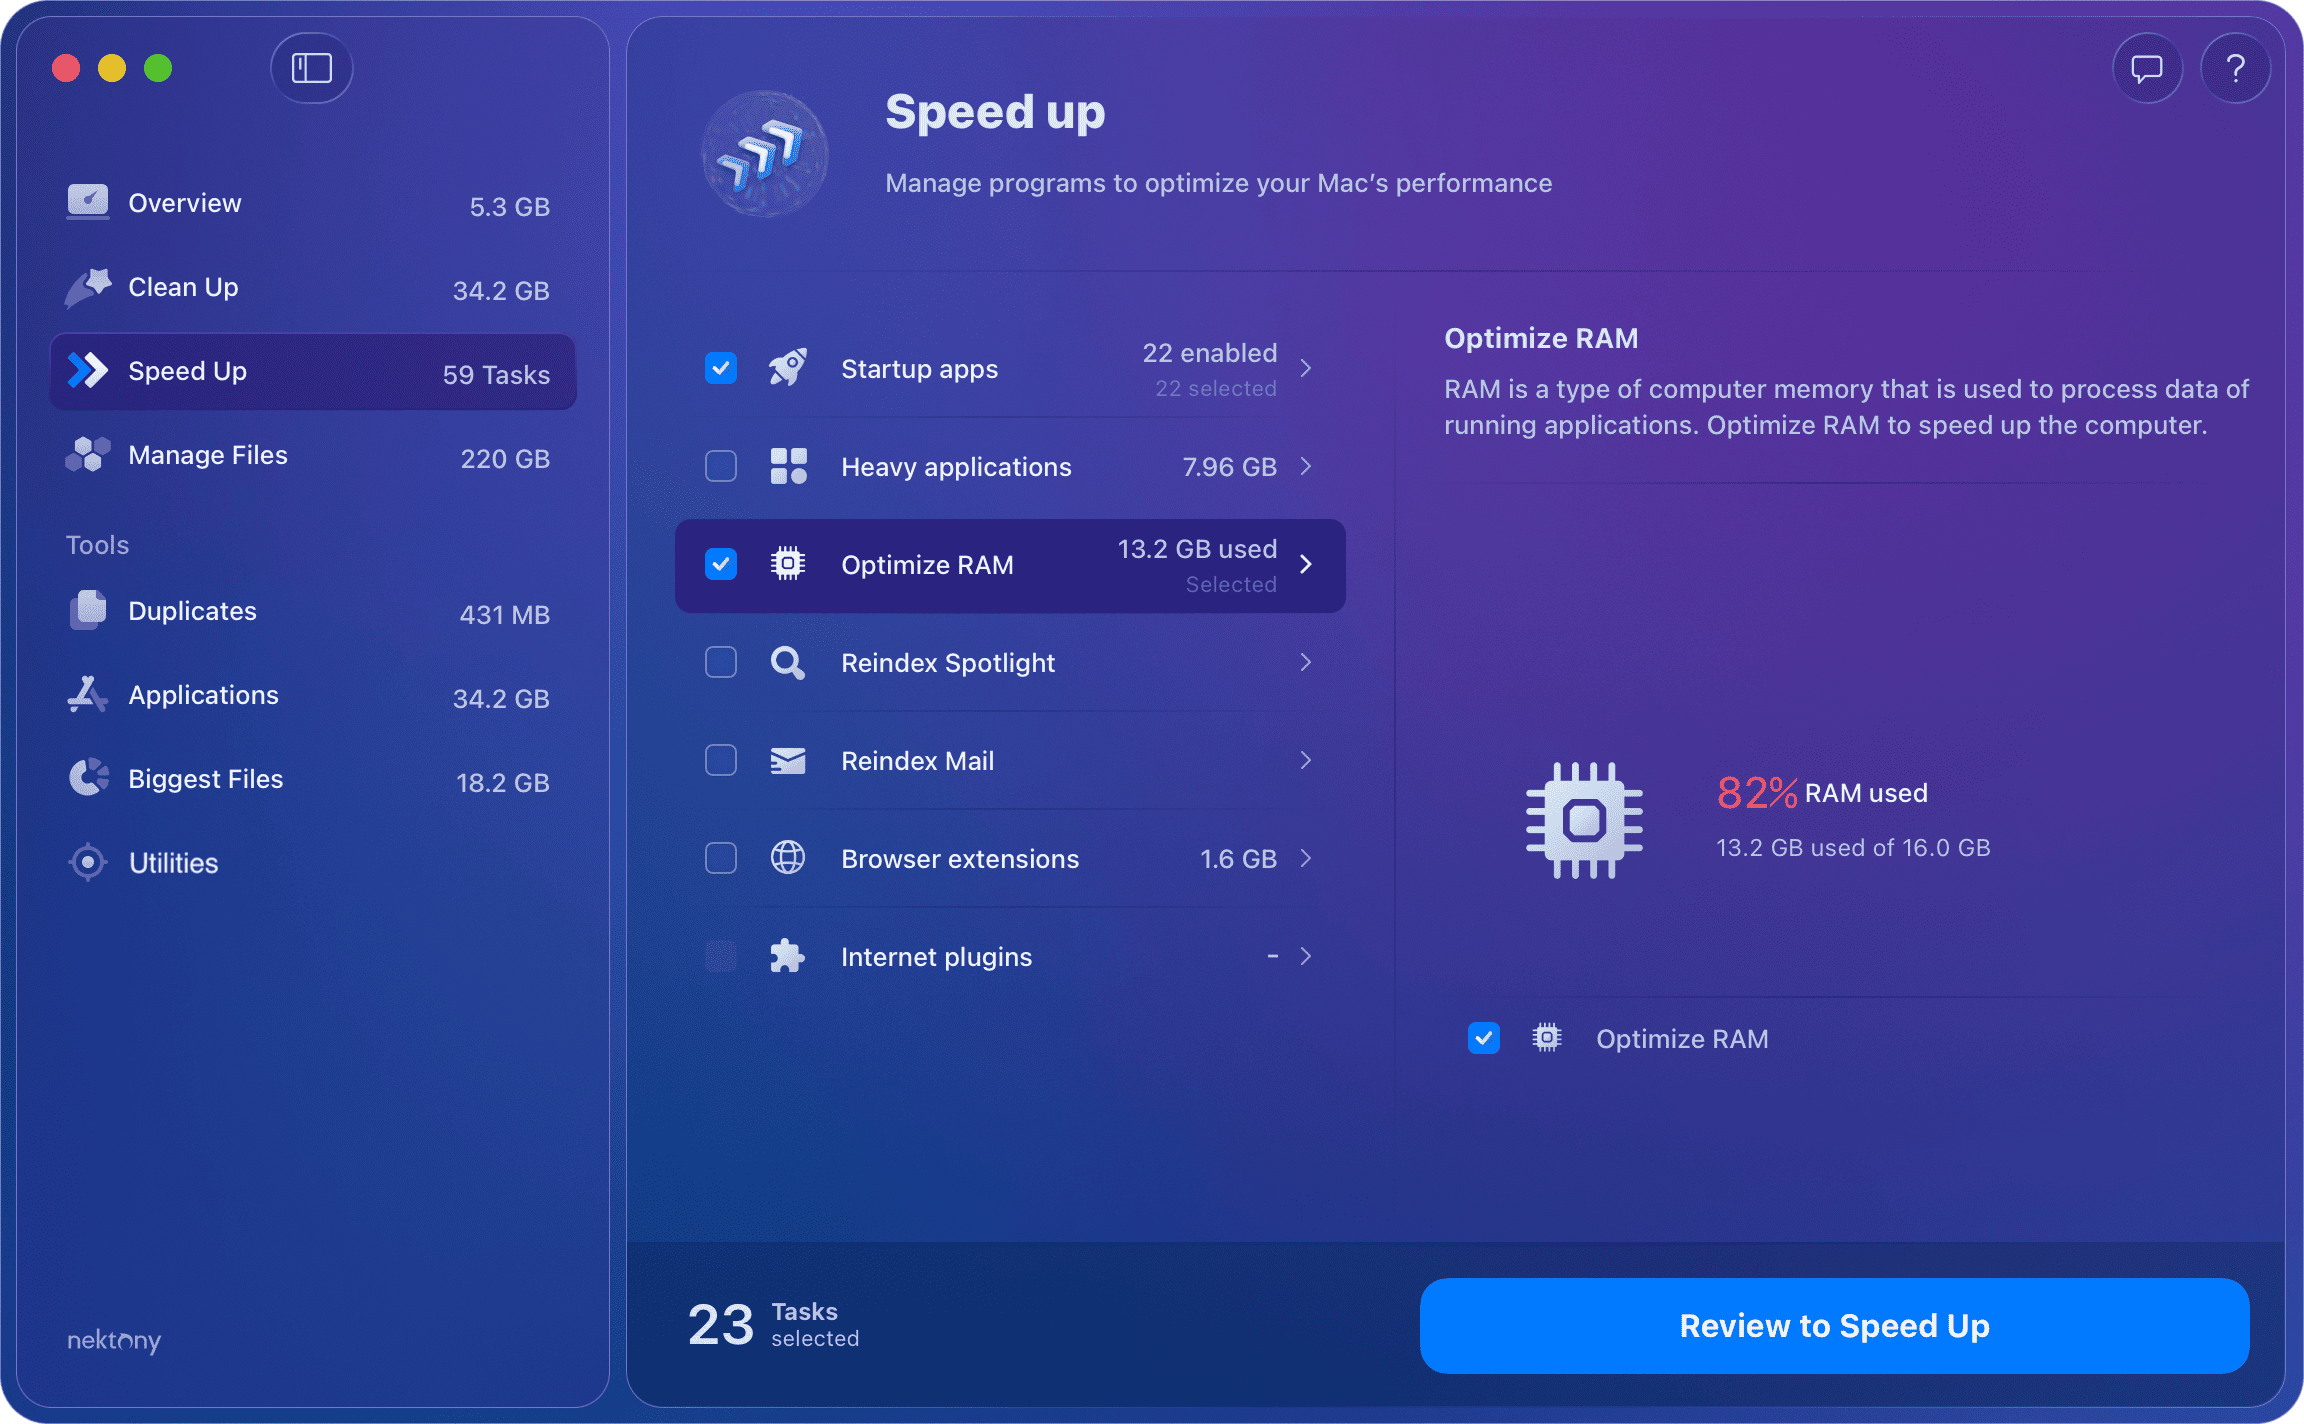
Finally, it’s time to think about your RAM memory as well. This will not only create more space on your Mac, but will also help speed it up. This is especially important when your startup disk is almost full and your Mac’s speed is starting to lag. Use MacCleaner Pro when it comes to speeding up your Mac.
- Go to the Speed Up section in the sidebar.
- Select Optimize RAM and click the Review to Speed Up button.
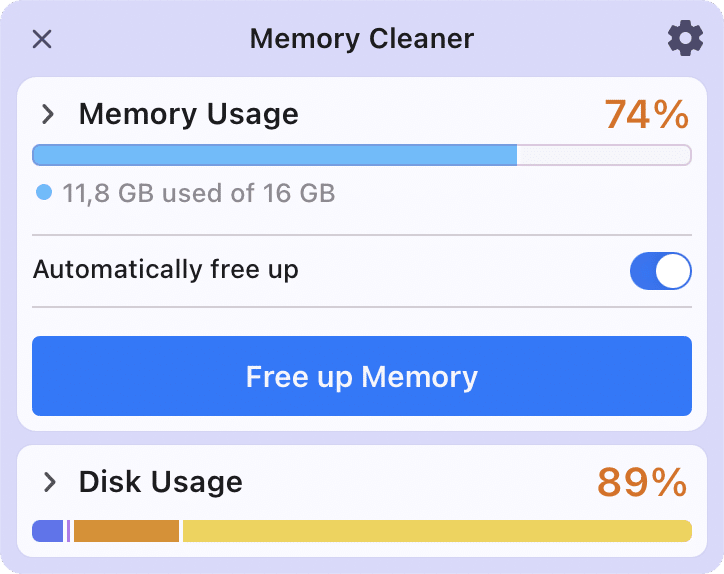
If your Mac is still slow, you can use additional speedup options in MacCleaner Pro to make your Mac run faster. Also, launch the special tool, Memory Cleaner, that works in the background and automatically clears inactive RAM.
15. Restart your Mac
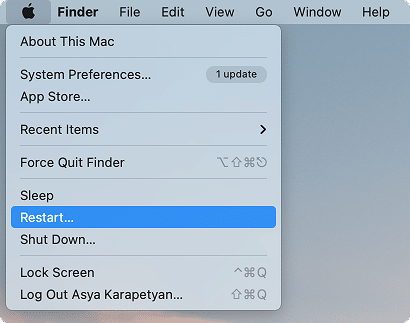
Once you’ve cleaned up your hard drive, you should restart your Mac. A simple rebooting of the system can help to free up enough disk space cluttered by temporary items and cache folders. It will also clear the virtual memory and sleep image files.
To sum up
We hope these tips help you to free up disk space on your Mac, fix the “Startup Disk Full” error message and optimize storage when needed. Just note that you can clean up your Mac manually, but this may take too much time. Also, you can use professional tools, which save time and perform a quick, efficient cleanup of your hard drive.
