As a Mac user, you may want to customize your desktop to suit your preferences and needs. One of the ways to do that is to resize icons or remove things from the screen without deleting them. This article will show you how to change the size of icons on your desktop or hide them if you want a clean and clutter-free workspace.
Contents:
- How to change desktop icon size
- How to remove icons from the desktop
- How to hide desktop icons on Mac
Funter allows you to find any files on Mac, that Spotlight never shows. You can search for hidden files and even for those in packages.
Funter
How to change desktop icon size
One way to personalize your Mac desktop is to change the desktop icon size. Whether you want them to be smaller for a cleaner look or make desktop icons huge for better visibility, it’s easy to customize them. Follow the steps below to increase icons or decrease them.
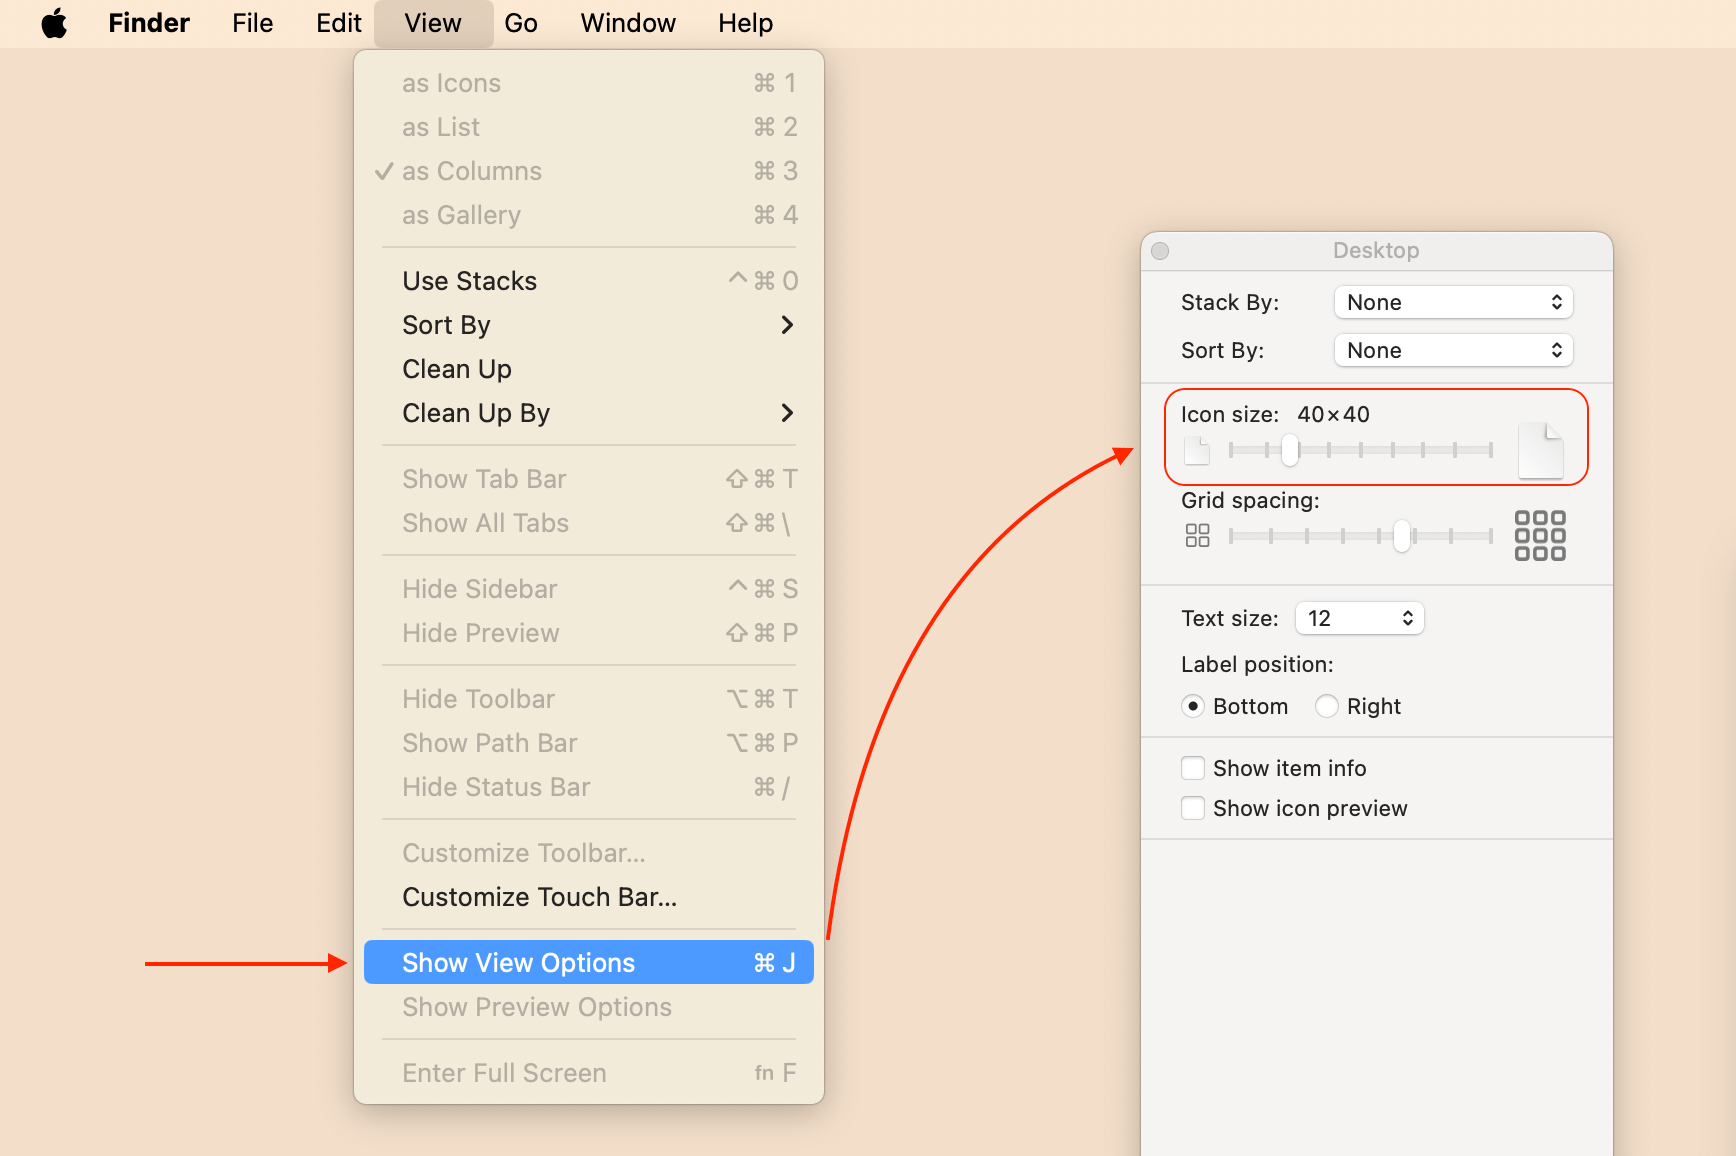
- Click View in the menu bar.
- Choose View options from the drop-down menu.
- A pop-up window will appear with various settings for your screen appearance.
- Under the Icon Size slider, drag the handle left or right to adjust the icon size.
- You can also change the grid spacing, text size, and label position of the icons.
- Close the window when you are done. The changes will be applied immediately.
How to remove icons from the desktop
Some people like to have quick access to their frequently used files and folders on the desktop. However note, that too many icons on the desktop may make your Mac run slowly. This happens because macOS treats each icon as a separate window. Thus, to speed up your Mac, remove files from or move them to another folder in Finder.
Here are some tips on how to remove icons from your desktop and better organize your files and folders.
To remove an icon from the desktop, use one of the following methods:
- Simply drag an icon to the Trash in the Dock.
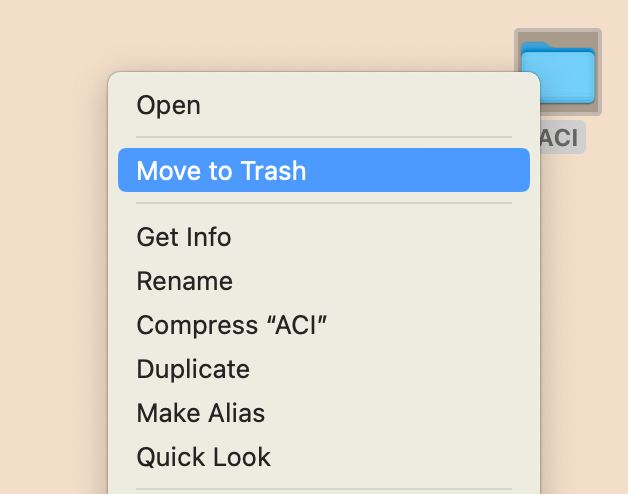
- Right-click on the icon and choose Move to Trash from the menu.
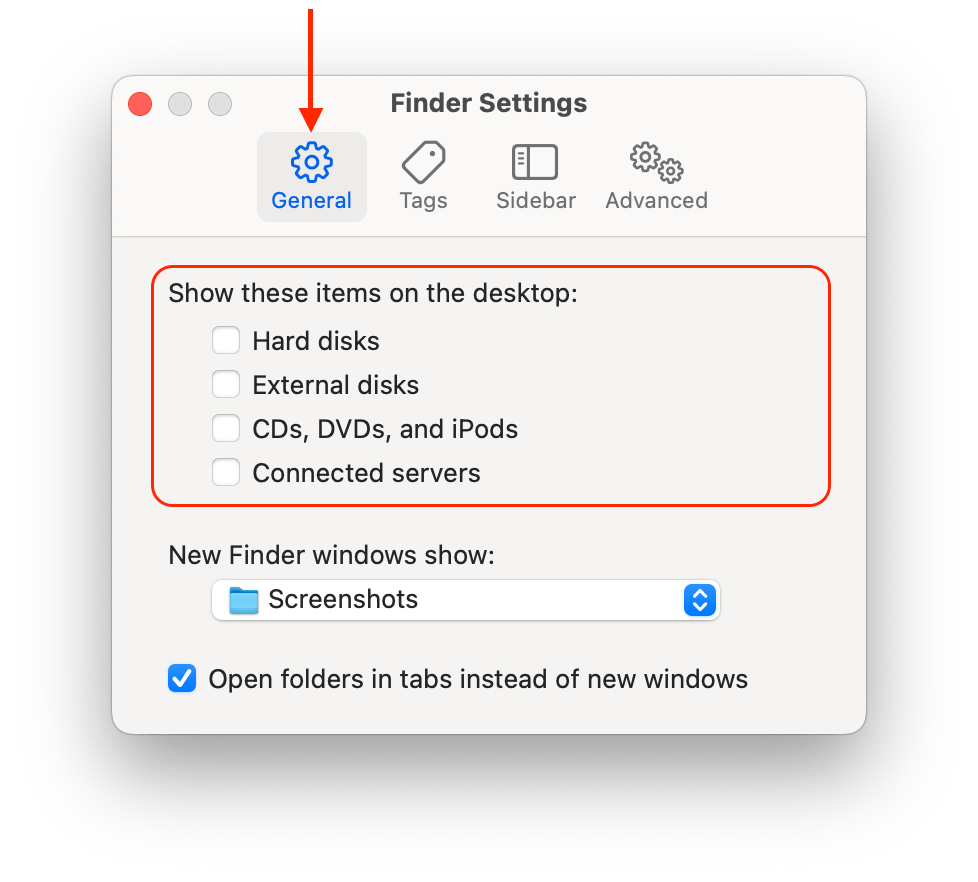
To prevent some icons from appearing on the desktop by default, such as hard disks, external drives, CDs, DVDs, or servers, do the following:
- From the menu bar, click on Finder and select Settings. Alternatively, you can use the keyboard shortcut “Cmd + ,”
- In the General tab, check the box next to “Show hard disks,” and uncheck the boxes next to “Show connected servers” and “Show CDs, DVDs, and iPods.”
- Close the Settings window.
To organize your files and folders better, you can use Finder’s built-in features, such as:
- Tags that let you assign colors and labels to your files and folders, which you can then use to filter and sort them.
- Smart folders. They let you create dynamic folders based on certain criteria, such as file type, date modified, or tag.
- Stacks that let you group your files by kind, date, or tag on the desktop.
- Groups – they will let you arrange your files by name, kind, date, size, or tags in any Finder window.
How to hide desktop icons on Mac
To hide items on your Mac screen and achieve an uncluttered look, you have a few options.
Use Terminal
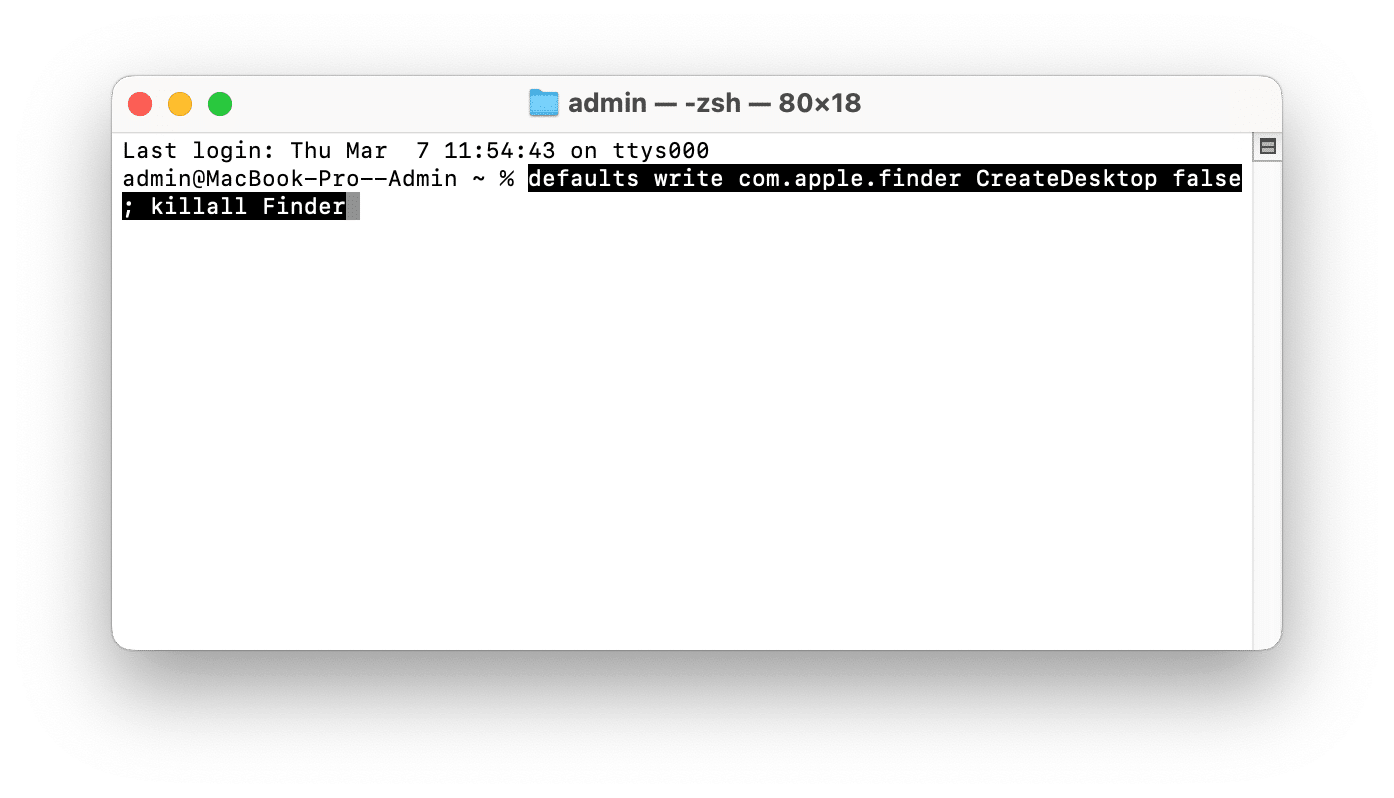
- Open the Terminal app from the Applications folder → Utilities.
-
Type the following command in its window and press Enter:
defaults write com.apple.finder CreateDesktop false; killall Finder
-
To show the icons again, use this command:
defaults write com.apple.finder CreateDesktop true; killall Finder
Use Funter
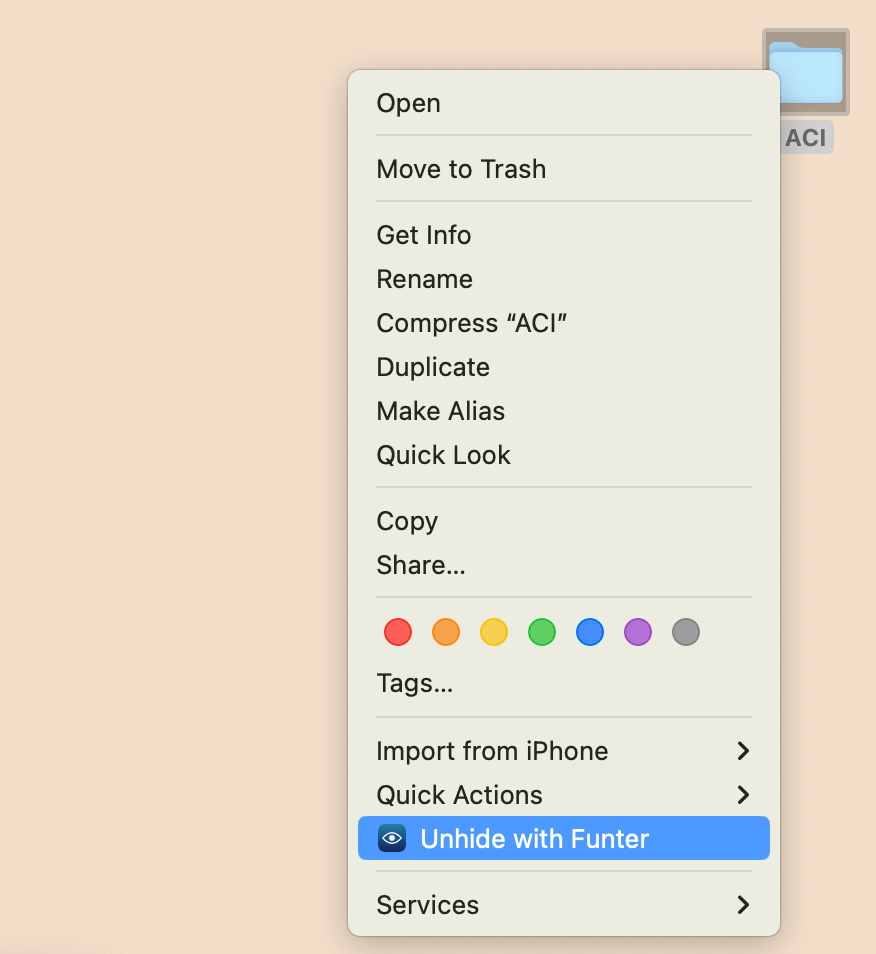
Another way to hide desktop icons on your Mac is to use the Funter app from Nektony. Funter is a free tool that allows you to show or hide hidden files and folders on your Mac. It also lets you hide any files or folders with one click. Here’s how to use it:
- Download and install Funter. It will integrate with your Finder.
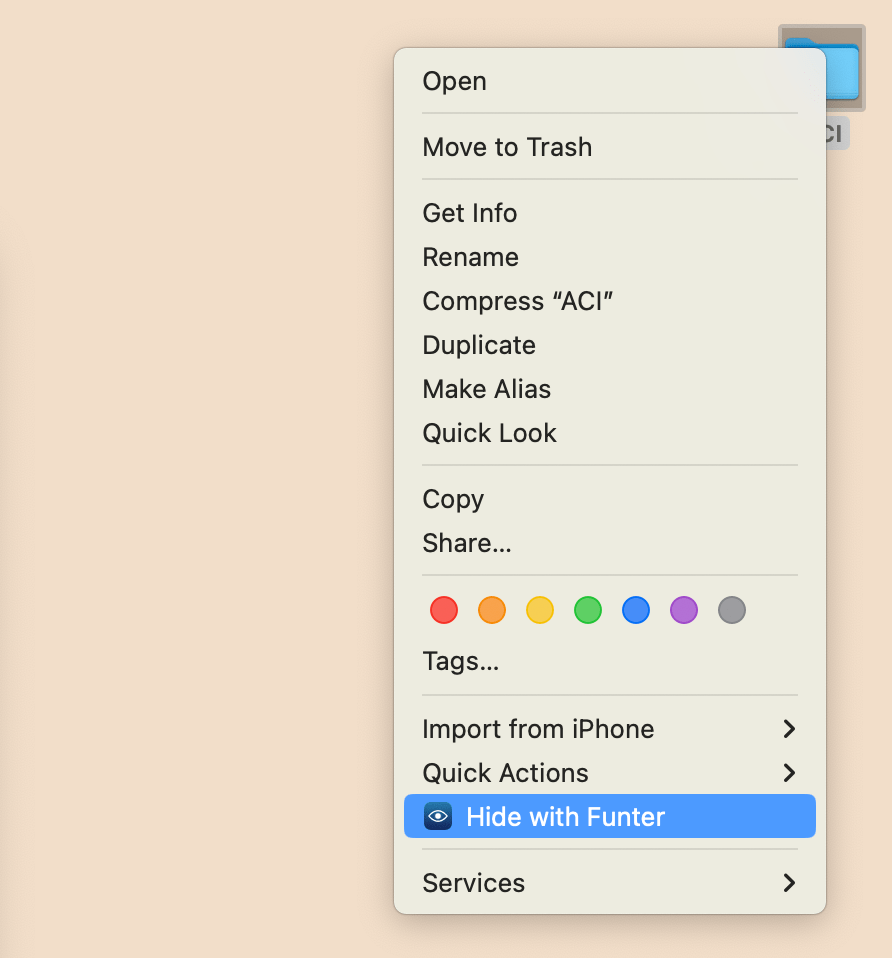
- Right-click on the file on your desktop.
- Select Hide with Funter from the context menu.
- Your desktop icons will disappear, leaving you with a clean and clutter-free workspace.
- To show the icons again, switch on showing hidden files on your Mac. For this, Use the toggle button in Funter.
- Then just repeat the same steps and select Show with Funter in the context menu.
Funter is a simple and effective way to hide desktop icons on your Mac. You can also use it to access hidden files and folders, change their visibility settings, and search for them using the built-in search feature.
Conclusion
Customizing your Mac desktop is a great way to personalize your workspace. Whether you prefer to make your icons smaller for a cleaner look, remove icons altogether, or hide them for a minimalistic approach, Mac provides the flexibility to cater to your preferences. With the steps outlined in this article, you can easily change the size of desktop icons, remove unwanted icons, and hide them when necessary.
